No edit summary |
|||
| Line 266: | Line 266: | ||
|- | |- | ||
! qcf+[[image:snka.gif]] | ! qcf+[[image:snka.gif]] | ||
| | |align="center"| 13/5/16 | ||
| | |align="center"| KD/-3 | ||
| | |align="center"| Fi,Fo | ||
|align="center"| HL | |align="center"| HL | ||
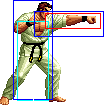
|colspan="2" | [[image:Takuma02_qcfA.png|center]] | |colspan="2" | [[image:Takuma02_qcfA.png|center]] | ||
| Line 274: | Line 274: | ||
*Takuma extends his palm, and an invisible force travels instantly across the screen. qcf+A travels a very short distance in front of Takuma, while qcf+C goes about 3/4 screen | *Takuma extends his palm, and an invisible force travels instantly across the screen. qcf+A travels a very short distance in front of Takuma, while qcf+C goes about 3/4 screen | ||
*can negates normal projectiles. qcf+C can also negates DM projectiles | *can negates normal projectiles. qcf+C can also negates DM projectiles | ||
*qcf+C has autoguard | *qcf+A continues to negate fireballs 11 frames after the active period. | ||
*qcf+C has autoguard (Frame 9-12). | |||
*qcf+C causes guardcrush | *qcf+C causes guardcrush | ||
*free cancellable into | *free cancellable into | ||
| Line 280: | Line 281: | ||
|- | |- | ||
! qcf+[[image:snkc.gif]] | ! qcf+[[image:snkc.gif]] | ||
| | |align="center"| 20/5/24 | ||
| | |align="center"| KD/-2 | ||
| | |align="center"| Fi,Fo | ||
|align="center"| | |align="center"| Guard Crush | ||
|valign="bottom" style="border-right:0px;"| [[image:Takuma02_qcfC1.png|center]] | |valign="bottom" style="border-right:0px;"| [[image:Takuma02_qcfC1.png|center]] | ||
|valign="bottom" style="border-left:0px;"| [[image:Takuma02_qcfC2.png|center]] | |valign="bottom" style="border-left:0px;"| [[image:Takuma02_qcfC2.png|center]] | ||
|- | |- | ||
! hcb+[[image:snkb.gif]] | ! hcb+[[image:snkb.gif]] | ||
| | |align="center"| 5/4(8)4/18 | ||
| | |align="center"| KD/-4 | ||
| | |align="center"| Fo | ||
|align="center"| HL | |align="center"| HL | ||
|valign="bottom" style="border-right:0px;"| [[image:Takuma02_hcbB1.png|center]] | |valign="bottom" style="border-right:0px;"| [[image:Takuma02_hcbB1.png|center]] | ||
| Line 297: | Line 298: | ||
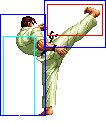
*Takuma does two kicks. hcb+B makes him kick on the spot, while hcb+D makes him move forward | *Takuma does two kicks. hcb+B makes him kick on the spot, while hcb+D makes him move forward | ||
*hcb+B is a counterwire if only the second hit connects | *hcb+B is a counterwire if only the second hit connects | ||
*hcb+B is free cancellable out | *hcb+B is free cancellable out of on the second hit, hcb+D is free cancellable out of on both hits | ||
*hard knockdown on the second hit | *hard knockdown on the second hit | ||
|- | |- | ||
! hcb+[[image:snkd.gif]] | ! hcb+[[image:snkd.gif]] | ||
| | |align="center"| 12/4(8)4/20 | ||
| | |align="center"| KD/-6 | ||
| | |align="center"| Fo | ||
|align="center"| HL | |align="center"| HL | ||
|valign="bottom" style="border-right:0px;"| [[image:Takuma02_hcbD1.png|center]] | |valign="bottom" style="border-right:0px;"| [[image:Takuma02_hcbD1.png|center]] | ||
| Line 309: | Line 310: | ||
|- | |- | ||
! <br>qcb+[[image:snka.gif]]<br><br> | ! <br>qcb+[[image:snka.gif]]<br><br> | ||
| | |align="center"| 14/5/27 | ||
| | |align="center"| KD/-14 | ||
| | |align="center"| Su,Fi,Fo | ||
|align="center"| HL | |align="center"| HL | ||
|rowspan="2" valign="bottom" style="border-right:0px;"| [[image:Takuma02_qcbP1.png|center]] | |rowspan="2" valign="bottom" style="border-right:0px;"| [[image:Takuma02_qcbP1.png|center]] | ||
|rowspan="2" valign="bottom" style="border-left:0px;"| [[image:Takuma02_qcbP2.png|center]] | |rowspan="2" valign="bottom" style="border-left:0px;"| [[image:Takuma02_qcbP2.png|center]] | ||
|rowspan="2"| '''Mouko Burai Gan - qcb+P''' | |rowspan="2"| '''Mouko Burai Gan - qcb+P''' | ||
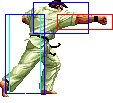
*Takuma extends his fist outward. Has autoguard | *Takuma extends his fist outward. Has autoguard (A: Frame 2-13, C: Frame 4-5). | ||
*supercancellable but even if it counterhits, DMs still don't connect after the supercancel | *supercancellable but even if it counterhits, DMs still don't connect after the supercancel | ||
*free cancellable into | *free cancellable into | ||
| Line 322: | Line 323: | ||
|- | |- | ||
! qcb+[[image:snkc.gif]] | ! qcb+[[image:snkc.gif]] | ||
| | |align="center"| 20/5/29 | ||
| | |align="center"| KD/-16 | ||
| | |align="center"| Su,Fi,Fo | ||
|align="center"| HL | |align="center"| HL | ||
|- | |- | ||
! f,hcf+[[image:snka.gif]] | ! f,hcf+[[image:snka.gif]] | ||
| | |align="center"| 15/4/30 | ||
| | |align="center"| KD/-16 | ||
| | |align="center"| Fo | ||
|align="center"| HL | |align="center"| HL | ||
|colspan="2" | [[image:Takuma02_fhcfA.png|center]] | |colspan="2" | [[image:Takuma02_fhcfA.png|center]] | ||
| Line 344: | Line 345: | ||
|- | |- | ||
! f,hcf+[[image:snkc.gif]] | ! f,hcf+[[image:snkc.gif]] | ||
| | |align="center"| 37/4/13 | ||
| | |align="center"| KD/+10 | ||
| | |align="center"| Su,Fo | ||
|align="center"| | |align="center"| Guard Crush | ||
|colspan="2" | [[image:Takuma02_fhcfC.png|center]] | |colspan="2" | [[image:Takuma02_fhcfC.png|center]] | ||
|- | |- | ||
| Line 353: | Line 354: | ||
|- | |- | ||
! <br>qcfx2+[[image:snka.gif]]<br><br> | ! <br>qcfx2+[[image:snka.gif]]<br><br> | ||
| | |align="center"| 7/5(13)4(14)5/41 | ||
| | |align="center"| KD | ||
| | | | ||
|align="center"| Grab | |align="center"| Grab | ||
| Line 360: | Line 361: | ||
|rowspan="2"| '''Shin Kishin Geki - qcfx2+P''' | |rowspan="2"| '''Shin Kishin Geki - qcfx2+P''' | ||
*Takuma does three strong punches, but this move can only be done when you are right beside the opponent | *Takuma does three strong punches, but this move can only be done when you are right beside the opponent | ||
* | *First hit is unblockable, the second and third hits cause guardcrush if blocked | ||
* | *Does more damage than his other DM, so this is preferable in combos | ||
* | *This move can be rolled out of the way on reaction to the flash of the DM and punished badly. Thus, it is not useful in high level play, besides in combos. | ||
*Invincible on first frame. | |||
|- | |- | ||
! qcfx2+[[image:snkc.gif]] | ! qcfx2+[[image:snkc.gif]] | ||
| Line 371: | Line 373: | ||
|- | |- | ||
! qcf,hcb+[[image:snka.gif]] | ! qcf,hcb+[[image:snka.gif]] | ||
| | |align="center"| 5/13/48 | ||
| | |align="center"| KD/-20 | ||
| | | | ||
|align="center"| HL | |align="center"| HL | ||
| Line 379: | Line 381: | ||
*Takuma runs forward. If he connects, he does a combo on the opponent. Otherwise, he stops in front of them and is open to attack | *Takuma runs forward. If he connects, he does a combo on the opponent. Otherwise, he stops in front of them and is open to attack | ||
*qcf hcb+A comes out much faster than qcf hcb+C. Takuma has invincibility during the delay of his qcf hcb+C | *qcf hcb+A comes out much faster than qcf hcb+C. Takuma has invincibility during the delay of his qcf hcb+C | ||
*Invincible: A: Complete startup, Feet invincible: Complete active period; C: Complete startup, Frame 1-3 of active period, Feet invincible: remaning active period. | |||
*28 frames of blockstun. | |||
*hard knockdown on the last hit | *hard knockdown on the last hit | ||
|- | |- | ||
! qcf,hcb+[[image:snkc.gif]] | ! qcf,hcb+[[image:snkc.gif]] | ||
| | |align="center"| 14/26/48 | ||
| | |align="center"| KD/-20 | ||
| | | | ||
|align="center"| HL | |align="center"| HL | ||
| Line 392: | Line 396: | ||
|- | |- | ||
! qcf,hcb+[[image:snka.gif]]+[[image:snkc.gif]] | ! qcf,hcb+[[image:snka.gif]]+[[image:snkc.gif]] | ||
| | |align="center"| 5/13/50 | ||
| | |align="center"| KD/-33 | ||
| | | | ||
|align="center"| HL | |align="center"| HL | ||
| Line 401: | Line 405: | ||
*works the same as his qcf hcb+A DM (as in, it has no startup delay), but does more damage | *works the same as his qcf hcb+A DM (as in, it has no startup delay), but does more damage | ||
*hard knockdown on the last hit | *hard knockdown on the last hit | ||
*Invincible: Complete startup and Frame 1-4 of active period. Feet invincible: Remaining active period. | |||
|- | |- | ||
|colspan="8" align="center"| '''HSDM''' | |colspan="8" align="center"| '''HSDM''' | ||
|- | |- | ||
! b,dp+[[image:snka.gif]]+[[image:snkc.gif]] | ! b,dp+[[image:snka.gif]]+[[image:snkc.gif]] | ||
| | |align="center"| 3/34/5 | ||
| | |align="center"| KD | ||
| | | | ||
|align="center"| - | |align="center"| - | ||
| Line 413: | Line 418: | ||
*Takuma goes into a counter stance. He will reverse air, high, medium, low moves, as well as DMs/SDMs | *Takuma goes into a counter stance. He will reverse air, high, medium, low moves, as well as DMs/SDMs | ||
*hard knockdown | *hard knockdown | ||
*Invincible: Complete startup and active. | |||
|} | |} | ||
===Notes=== | ===Notes=== | ||
Revision as of 09:08, 9 September 2013
General Info
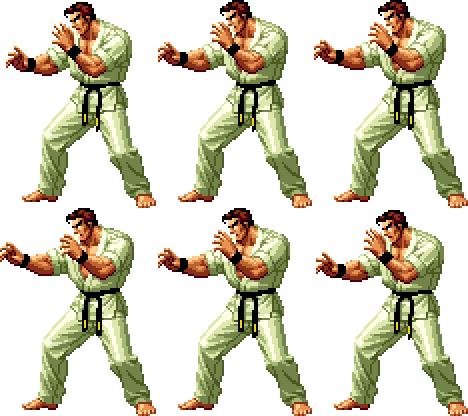
Crouch height: Medium
Colors

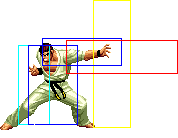
|

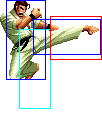
|

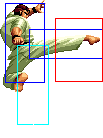
|

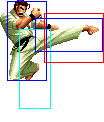
|
Movelist
Notes
-cancellable normals are cl.A, cr.A, cl.B, cr.B, cl.C, cr.C, cr.D
-CD is cancellable into specials and DMs
-free cancellable into moves are qcf+P and qcb+P
-free cancellable out-of moves are f+B, hcb+B on the second hit, hcb+D, qcf+P, f hcf+P and qcb+P
-f hcf+P and hcb+B(if only the second hit counterhits) are counterwires
-qcf+C and f hcf+C cause guardcrush
-qcb+P has autoguard
-f+B is an overhead
-first hit of qcfx2+P is unblockable, the second and third hit cause guard crush
-qcb+P and f hcf+C are supercancellable
-hcb+K on the second hit, qcf hcb+P and b dp+AC(if it counters) are hard knockdowns
Combos
Anywhere
1. cr.B, cl.B, f+B, qcf hcb+A - 43%
2. cr.B, f+B, hcb+K - 33%
3. cr.B, cl.B(Buffer:qcf+B), qcfx2+P(Buffer:qcf+P) - 45%
Maxmode
1. cl.C/f+B, BC, run cr.B, f+B, hcb+D(1), (C)qcf+C - 35%
Counterhit
1. CD(counterhit), qcf+C/hcb+D - 31%/32% (if CD hits from far away, qcf+C does more damage than hcb+D)
2. qcf+A(counterhit), hcb+B - 25% (Corner)
Attack Strings
1. cl.C/cr.B, f+B, qcf+A/hcb+D
2. CD, qcf+C/hcb+D
3. cr.B, cl.B, hcb+B
Strategies
-qcb+P has autoguard frames during the early stages of the move. Thus, it is best used on reaction, to counter moves you see coming that are difficult to punish on block (such as Terry burn knuckle, May Lee hero mode qcf+B, etc). It also works great against very high priority attack such as Andy's hcf+K. The trick to using this move is to do it very close to when the opponent's move is going to hit, as the beginning of the move has many autoguard frames. Do not try to time the move such that only the punching animation connects, as the punching animation of the move does not contain many autoguard frames.
-it is possible to land any combo after the opponent blocks f hcf+C, which causes guard crush. However, the move takes a while to come out, and is thus easy to counter on reaction. You can try doing the move immediately after an hcb+D knockdown, since the f hcf+C will connect about the same time as the opponent gets up. Even then, it is possible to do a wakeup dp to counter it on reaction, so only attempt this rarely. You can also try doing f hcf+C after a jump D, although after doing it once, it is not a good idea to try it again on the same opponent.
-while it may seem like a good idea to use his unblockable qcfx2+P DM when near, not many know that it is possible to roll behind Takuma on reaction, after the flash of the DM. Takuma is left wide open, punching the air, allowing the opponent more than enough time to do any combo. Of course, if the opponent does not know this, then the qcfx2+P DM is quite good. To land it effectively, you should do the qcf motion before running up, then do a quick run up qcf+P, which will result in the DM coming up. This is great if mixed up with lots of crouch B's since his weak attacks are good and can lead to fairly damaging combos.
