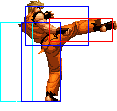
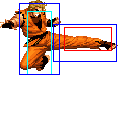
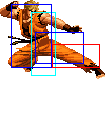
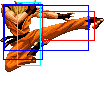
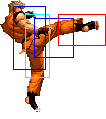
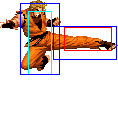
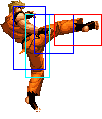
| Line 282: | Line 282: | ||
|colspan="2" | [[image:Ryo02_dfB.png|center]] | |colspan="2" | [[image:Ryo02_dfB.png|center]] | ||
|align="center"|Guard point: Active period. Is not an attack. | |align="center"|Guard point: Active period. Is not an attack. | ||
|} | |||
{| | |||
|align="center" style="border-top:1px solid #000000" colspan="7"| '''Special Moves''' | |||
|- | |||
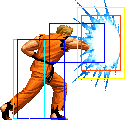
|style="border-top:1px solid #000000"|1. Ko'ou Ken - qcf+P | |||
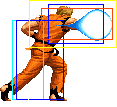
*Ryo releases a blast of energy from his hand. qcf+C travels a bit further than qcf+A, where qcf+A goes almost half screen<br> | |||
*qcf+C does a very slight amount of damage more than qcf+A, but has greater recovery time | |||
|style="border-top:1px solid #000000" | | |||
|style="border-top:1px solid #000000" valign="bottom" colspan="2"| [[image:Ryo02_QcfP1.png]] | |||
|style="border-top:1px solid #000000" valign="bottom" colspan="2"| [[image:Ryo02_QcfP2.png]] | |||
|- | |||
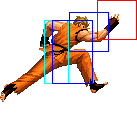
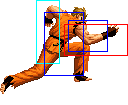
|style="border-top:1px solid #000000"|2. Mouko Rajin Setsu - qcf+K | |||
*Ryo jumps into the air, landing with an overhead chop. qcf+D goes higher and further (almost full screen) than qcf+B | |||
*Has very good priority and is almost always safe on block | |||
*Overhead | |||
*Sometimes hits as a hard knockdown, but not always | |||
*Free cancellable into | |||
|style="border-top:1px solid #000000"| | |||
|style="border-top:1px solid #000000" valign="bottom" colspan="2"| [[image:Ryo02_QcfK1.png]] | |||
|style="border-top:1px solid #000000" valign="bottom" colspan="2"| [[image:Ryo02_QcfK2.png]] | |||
|- | |||
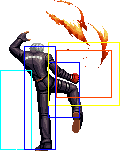
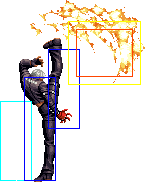
|style="border-top:1px solid #000000"|1b. Second Shell - f + D (after The Trigger) | |||
*Vertical anti-air that knocks opponent into the air for juggles | |||
|style="border-top:1px solid #000000"| | |||
|style="border-top:1px solid #000000" valign="bottom"| [[File:K02_QcfPfD1.png]] | |||
|style="border-top:1px solid #000000" valign="bottom" colspan="2"| [[File:K02_QcfPfD2.png]] | |||
|- | |||
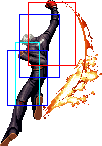
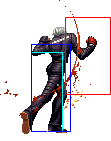
|style="border-top:1px solid #000000" rowspan="3" |2. Crow Bites - dp+P | |||
*dp+A is supercancellable on both hits, dp+C is supercancellable on the first two hits on the ground | |||
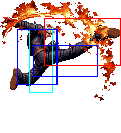
*dp+C can be followed up by f+D, which is an overhead hard knockdown. The f+D followup is free cancellable out of | |||
*dp+C has some startup invincibility | |||
*Free cancellable into | |||
*Free cancellable out of on all hits | |||
|style="border-top:1px solid #000000" width="40px" | [[File:Snka.gif|center]] | |||
|style="border-top:1px solid #000000" valign="bottom"| [[File:K02_DpA1.png]] | |||
|style="border-top:1px solid #000000" valign="bottom"| [[File:K02_DpA2.png]] | |||
|style="border-top:1px solid #000000" valign="bottom"| [[File:K02_DpA3.png]] | |||
|- | |||
|width="40px" | [[File:Snkc.gif|center]] | |||
|valign="bottom"| [[File:K02_DpC1.png]] | |||
|valign="bottom"| [[File:K02_DpC2.png]] | |||
|valign="bottom"| [[File:K02_DpC3.png]] | |||
|- | |||
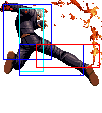
|f+[[File:Snkd.gif]] | |||
| | |||
|valign="bottom"| [[File:K02_DpCfD1.png]] | |||
|valign="bottom"| [[File:K02_DpCfD2.png]] | |||
|- | |||
|style="border-top:1px solid #000000"|3. Blackout - qcf+K | |||
*Teleport's K' forward. qcf+B goes half screen length and qcf+D goes full screen length | |||
*Can be hit out of it fairly easily | |||
|style="border-top:1px solid #000000" colspan="4"| | |||
|- | |||
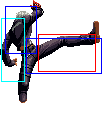
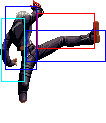
|style="border-top:1px solid #000000" rowspan="3"|4. Minute Spike - qcb+K | |||
*Can be done in the air as well | |||
*Can be followed up by Narrow Spike (qcb+K), on the ground only | |||
*Free cancellable into | |||
*Free cancellable out of | |||
|style="border-top:1px solid #000000"|Ground | |||
|style="border-top:1px solid #000000"| | |||
|style="border-top:1px solid #000000" colspan="2"| [[File:K02_QcbK.png]] | |||
|- | |||
|Air [[File:snkb.gif]] | |||
| | |||
|colspan="2"| [[File:K02_JqcbB.png]] | |||
|- | |||
|Air [[File:snkd.gif]] | |||
| | |||
|colspan="2"| [[File:K02_JqcbD.png]] | |||
|- | |||
|style="border-top:1px solid #000000"|4a. Narrow Spike - (during Minute Spike) qcb+K | |||
*Low attack | |||
*Supercancellable | |||
*Free cancellable out of | |||
|style="border-top:1px solid #000000"| | |||
|style="border-top:1px solid #000000"| | |||
|style="border-top:1px solid #000000" colspan="2"| [[File:K02_2xqcbK.png]] | |||
|- | |||
|style="border-top:1px solid #000000" colspan="5"| '''DMs''' | |||
|- | |||
|style="border-top:1px solid #000000"|1. Heat Drive - qcfx2+P | |||
*A version comes out faster, but C version will hit if the opponent is right in front of you | |||
*Can be held to make unblockable (takes a long time though) | |||
*Hard knockdown | |||
|style="border-top:1px solid #000000"| | |||
|style="border-top:1px solid #000000" valign="bottom"| [[File:K02_2xqcfP1.png]] | |||
|style="border-top:1px solid #000000" valign="bottom"| [[File:K02_2xqcfP2.png]] | |||
|style="border-top:1px solid #000000"| | |||
|- | |||
|style="border-top:1px solid #000000"|2. Chain Drive - qcf hcb+P | |||
*K' throws his sunglasses. If he whiffs, he will stand there for a long time, otherwise he will dash forward | |||
*Hard knockdown | |||
*qcf hcb+C is more likely to juggle than qcf hcb+A (mainly if used after his qcf+C, f+D) | |||
|style="border-top:1px solid #000000" colspan="2"| | |||
|style="border-top:1px solid #000000"| [[File:K02_QcfhcbP.png]] | |||
|style="border-top:1px solid #000000"| | |||
|- | |||
|style="border-top:1px solid #000000" colspan="5"| '''SDMs''' | |||
|- | |||
|style="border-top:1px solid #000000"|1. Chain Drive - qcf hcb+AC | |||
*Same properties as qcf hcb+P, except it is not a hard knockdown | |||
|style="border-top:1px solid #000000"| | |||
|style="border-top:1px solid #000000"| | |||
|style="border-top:1px solid #000000"| [[File:K02_QcfhcbAC.png]] | |||
|style="border-top:1px solid #000000"| | |||
|- | |||
|style="border-top:1px solid #000000" colspan="5"| '''HSDMs''' | |||
|- | |||
|style="border-top:1px solid #000000; border-bottom:1px solid #000000"|1. Crimson Star Road - qcb+C~A | |||
*A must be pressed immediately after C | |||
*K' travels forward a distance slighty more than his roll | |||
*Unblockable | |||
|style="border-top:1px solid #000000; border-bottom:1px solid #000000"| | |||
|style="border-top:1px solid #000000; border-bottom:1px solid #000000"| | |||
|style="border-top:1px solid #000000; border-bottom:1px solid #000000"| [[File:QcbCA.png]] | |||
|style="border-top:1px solid #000000; border-bottom:1px solid #000000"| | |||
|} | |} | ||
===Special Moves=== | ===Special Moves=== | ||
3. Zanretsu Ken - f b f+P<br> | 3. Zanretsu Ken - f b f+P<br> | ||
Revision as of 17:46, 7 July 2013
General Info
Crouch height: Medium
Colors:

|

|

|

|
Movelist
Normals
| Special Moves | ||||||
1. Ko'ou Ken - qcf+P
|
|
| ||||
2. Mouko Rajin Setsu - qcf+K
|
|
| ||||
1b. Second Shell - f + D (after The Trigger)
|
|
| ||||
2. Crow Bites - dp+P
|

|

|
| |||

|
|

| ||||
| f+ |
|
| ||||
3. Blackout - qcf+K
|
||||||
4. Minute Spike - qcb+K
|
Ground | 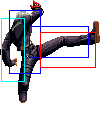
| ||||
| Air |
| |||||
| Air |
| |||||
4a. Narrow Spike - (during Minute Spike) qcb+K
|

| |||||
| DMs | ||||||
1. Heat Drive - qcfx2+P
|

|

|
||||
2. Chain Drive - qcf hcb+P
|

|
|||||
| SDMs | ||||||
1. Chain Drive - qcf hcb+AC
|

|
|||||
| HSDMs | ||||||
1. Crimson Star Road - qcb+C~A
|
File:QcbCA.png | |||||
Special Moves
3. Zanretsu Ken - f b f+P
- Ryo repeatedly punches in front of him. This move has a "sucking" effect, in the sense that it can pull the opponent in if they are close. If the opponent gets sucked in, Ryo does a 13 hit combo punching them away
- has autoguard before Ryo begins punching rapidly
- f b f+A is a hard knockdown
- free cancellable out of on the last hit. It is only possible to juggle the opponent after f b f+C
4. Kohou - dp+P
- Ryo performs a rising uppercut that has great speed and priority. dp+A
- dp+A does one hit, knocking down, while dp+C does two hits, where only the second hit knocks down. Usually, the second hit whiffs an opponent on the ground
- free cancellable into
- free cancellable out of on the first hit
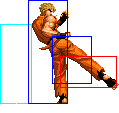
5. Hien Shippuu Kyaku - hcb+K
- Ryo jumps forward, kicking multiple times. hcb+B does two hits, going about 1/3 of the screen, while hcb+D does three hits, and goes full screen
- both moves are severely punishable on block, especially hcb+D
- free cancellable into
- even if comboed into, his hcb+D will whiff on the third (and sometimes second) hits against a crouching opponent, giving them more than enough time to punish him
DMs
1. Haou Shoukou Ken - f hcf+P
- Ryo releases a large fireball that does good damage
- f hcf+A comes out faster but moves much slower than f hcf+C
2. Ryuuko Ranbu - qcf hcb+P
- Ryo dashes across the screen. If he connects, he does a combo on the opponent. Otherwise, he stops and is open to attack
- qcf hcb+A comes out slightly slower than qcf hcb+C. qcf hcb+A goes almost full screen, while qcf hcb+C goes full screen
SDMs
1. Ryuuko Ranbu - qcf+C, A(immediately after C)
- Ryo dashes forward. If he connects, he does a strong combo on the opponent
- the range on this move is less than his qcf hcb+P DM version
- unblockable
HSDM
Tenchi Haou Ken - qcfx2+AC
- Ryo does a fast punch forward. If it connects, the opponent is knocked down and dizzied, allowing you to followup with any combo
- doesn't do much damage but makes up for it with the ability to followup with combos that would end up doing more damage than an HSDM can normally do
Notes
- Cancellable normals are close A, far A, crouch A, close B, close C, crouch C, close D, crouch D
- Whiff cancellable normals are clsoe B, close C, close D, crouch D, CD
- CD is cancellable into command moves, specials and DMs
- Doing Ryo's SDM is nearly impossible, due to a glitch. The motion of the Ko'ou Ken qcf+C overlaps with this move. Thus, attempting to do it results in qcf+C coming out. The only reliable way to do it is to do the qcf+C part of the motion during a state where he is not able to do his Ko'ou Ken qcf+C. Such states are:
- right before waking up
- just as you land from a jump
- just as you recover from a roll
- recovering from a move that is not cancellable into qcf+C
- supercancelling from his Kohou dp+C(1)
- cancelling a CD attack(this is an exception)
- activating maxmode
- possibly some other ways
- right before waking up
Combos
Anywhere
1. cr.B, ~cr.C, qcf+C/qcf hcb+A - 30%/45%
2. cr.BBB, Far A, hcb+B - 28%
3. cl.C, dp+C, (S)qcf hcb+A(Buffer:qcb+A) - 55%
4. f+A(early on opponent's wakeup), A, hcb+B - 22%
Maxmode
1. cl.C, f+A, BC, qcfx2+AC(quickly), (j.C, cl.C, hcb+D)/(j.C, ~cr.B, cr.C, qcf hcb+A) - 75%/88%
2. (Already in maxmode) f+A, (C)dp+C(1), (S)f hcf+A(Buffer:hcf+A)/(S)qcf hcb+A - 42%/48%
Normal Links
1. cr.B, cl.C/cr.C
2. f+A(very early on the opponent's wakeup), A
Attack Strings
1. cr.D/CD, qcf+B/qcf+A
2. cr.B, ~cr.C, qcf+B/qcf+A
3. cr.B, ~cl.C/cl.D, f+A (delayed)
Strategies
- Since Ryo's f+A is an overhead and is not cancellable even if cancelled into, you should exploit the "glitch" which allows the command normals to not lose their properties if you cancel into them a bit late. Thus, you can do close C or close D, then late cancel the move into f+A if they blocked, making it hit as an overhead. The main disadvantage to doing this is that the opponent could do a very fast attack in between the cancel, such as Kim's _d u+B. Note that Ryo's crouch C cannot be cancelled late in it's animation, so doing crouch B, crouch C, delayed f+A will not work. Using crouch D instead of close C or close D also works, as his crouch D is late cancellable as well. This gives you an effective low into overhead attack string which is far less punishable than doing crouch D into qcf+B.
- His f+A overhead is very meaty compared to most moves. If done very early on a waking up opponent, Ryo will recover fast enough to be able to land a far A, hcb+B/HSDM combo. Thus, Ryo has a good high/low game with his f+A, qcf+B, crouch B and crouch D. It is especially good to cancel his crouch D into a qcf+B overhead and mix this up with f+A and crouch B, crouch C mixups
- The f+B parry is a great move for countering predictable yet high priority and unpunishable moves, such as Robert's air qcb+K, May Lee's qcf+B in Hero Mode, Terry's qcb+P, etc. After parrying the move, cancel to dp+C (if the opponent was airborne) or dp+A or qcf hcb+P if the opponent was parried on the ground.
