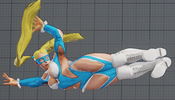
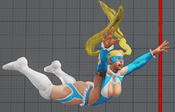
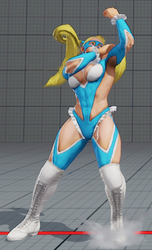
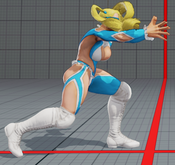
No edit summary |
|||
| Line 5: | Line 5: | ||
|hp=950 | |hp=950 | ||
|stun=1000 | |stun=1000 | ||
|vt1= | |vt1=2 Bars | ||
|vt2= | |vt2=3 Bars | ||
|movef=0.042 | |movef=0.042 | ||
|moveb=0.03 | |moveb=0.03 | ||
| Line 31: | Line 31: | ||
|name=Stand LP | |name=Stand LP | ||
|input=5LP | |input=5LP | ||
|data= | |data= | ||
{{AttackData-SFV | {{AttackData-SFV | ||
|startup=<nowiki>4</nowiki> | |startup=<nowiki>4</nowiki> | ||
| Line 45: | Line 45: | ||
|cancel=<nowiki>su sp vt1 vt2</nowiki> | |cancel=<nowiki>su sp vt1 vt2</nowiki> | ||
|confirm=<nowiki>- / - / -</nowiki> | |confirm=<nowiki>- / - / -</nowiki> | ||
|description= | |description= | ||
Cancels and combos into lp, ex peach and super. Key normal for Mika's pressure. On block, linking into itself can be a frame-trap that beats 3f normals, and can mixup with tick throws (note that command grabs not recommended due to their startup). on hit, you can convert for decent damage anyway. | |||
{{SFV Button FAT|link=https://fullmeter.com/fatonline/#/framedata/movedetail/SFV/R.Mika/normal/Stand%20LP}} | |||
Key normal for Mika's pressure. On block, linking into itself can be a frame-trap that beats 3f normals, and can mixup with tick throws (note that command grabs not recommended due to their startup). on hit, you can convert for decent damage anyway. | |||
}} | }} | ||
}} | }} | ||
| Line 71: | Line 70: | ||
|cancel=<nowiki>su sp vt1 vt2</nowiki> | |cancel=<nowiki>su sp vt1 vt2</nowiki> | ||
|confirm=<nowiki>13 / 14 / -</nowiki> | |confirm=<nowiki>13 / 14 / -</nowiki> | ||
|description= | |description= | ||
Key normal for combos/punishes. Luckily its safe on block, so you don't get punished for using it after pressure. You can actually cancel it into mk wingless airplane oB to reset to neutral and potentially avoid punishes, although it may not always be a favorable position. oH you can link into st.hp. | |||
{{SFV Button FAT|link=https://fullmeter.com/fatonline/#/framedata/movedetail/SFV/R.Mika/normal/Stand%20MP}} | |||
}} | }} | ||
}} | }} | ||
| Line 99: | Line 98: | ||
* Crouch sized hurtboxes on startup frames 2-6 (can dodge some high hitting attacks if timed properly) | * Crouch sized hurtboxes on startup frames 2-6 (can dodge some high hitting attacks if timed properly) | ||
* Last active frame has decent anti-air hitboxes | * Last active frame has decent anti-air hitboxes | ||
{{SFV Button FAT|link=https://fullmeter.com/fatonline/#/framedata/movedetail/SFV/R.Mika/normal/Stand%20HP}} | |||
}} | }} | ||
}} | }} | ||
| Line 122: | Line 122: | ||
|confirm=<nowiki>- / 10 / 16</nowiki> | |confirm=<nowiki>- / 10 / 16</nowiki> | ||
|description= | |description= | ||
{{SFV Button FAT|link=https://fullmeter.com/fatonline/#/framedata/movedetail/SFV/R.Mika/normal/Stand%20LK}} | |||
}} | }} | ||
}} | }} | ||
| Line 149: | Line 150: | ||
* Can move forward on frames 4-17 | * Can move forward on frames 4-17 | ||
One of your better pokes that, unfortunally, don't convert. moving your forward and evading lows makes it a key normal in neutral, especially since its only -2 oB. oG you are +2, so you get a mixup at best. | One of your better pokes that, unfortunally, don't convert. moving your forward and evading lows makes it a key normal in neutral, especially since its only -2 oB. oG you are +2, so you get a mixup at best. | ||
{{SFV Button FAT|link=https://fullmeter.com/fatonline/#/framedata/movedetail/SFV/R.Mika/normal/Stand%20MK}} | |||
}} | }} | ||
}} | }} | ||
| Line 175: | Line 177: | ||
* Crushes lows on frames 3-17 | * Crushes lows on frames 3-17 | ||
* Can have 1F faster start-up (12F) if buffered into during the 5F buffer window of SFV (and having already released the HK buttonn before the move starts) | * Can have 1F faster start-up (12F) if buffered into during the 5F buffer window of SFV (and having already released the HK buttonn before the move starts) | ||
{{SFV Button FAT|link=https://fullmeter.com/fatonline/#/framedata/movedetail/SFV/R.Mika/normal/Stand%20HK}} | |||
}} | }} | ||
}} | }} | ||
| Line 200: | Line 203: | ||
* Airborne on frames 23-40 | * Airborne on frames 23-40 | ||
* Lower Body Projectile invincible on frames 26-40 | * Lower Body Projectile invincible on frames 26-40 | ||
{{SFV Button FAT|link=https://fullmeter.com/fatonline/#/framedata/movedetail/SFV/R.Mika/normal/Stand%20HK%20(hold)}} | |||
}} | }} | ||
}} | }} | ||
| Line 223: | Line 227: | ||
|confirm=<nowiki>- / - / -</nowiki> | |confirm=<nowiki>- / - / -</nowiki> | ||
|description= | |description= | ||
{{SFV Button FAT|link=https://fullmeter.com/fatonline/#/framedata/movedetail/SFV/R.Mika/normal/Crouch%20LP}} | |||
}} | }} | ||
}} | }} | ||
| Line 247: | Line 252: | ||
|description= | |description= | ||
* Cannot hit crouching opponents | * Cannot hit crouching opponents | ||
{{SFV Button FAT|link=https://fullmeter.com/fatonline/#/framedata/movedetail/SFV/R.Mika/normal/Crouch%20MP}} | |||
}} | }} | ||
}} | }} | ||
| Line 271: | Line 277: | ||
|description= | |description= | ||
* Hit Confirm notes: *CA only | * Hit Confirm notes: *CA only | ||
* | * Can be spaced to be +3 oH / -1 oB due to a lot of active frames | ||
Your | Your V-Trigger button. At any distance, you can cancel this by activating VT to either get a solid conversion oH or a great mixup oB. It has a great range, so you can basically threaten at midscreen once you have your VT full. Useful button. | ||
{{SFV Button FAT|link=https://fullmeter.com/fatonline/#/framedata/movedetail/SFV/R.Mika/normal/Crouch%20HP}} | |||
}} | }} | ||
}} | }} | ||
| Line 297: | Line 303: | ||
|confirm=<nowiki>- / - / -</nowiki> | |confirm=<nowiki>- / - / -</nowiki> | ||
|description= | |description= | ||
Your fastest low, and actually has a lot of range for a light attack, although doesn't convert at the furthest ranges. Maybe can be used as a safe gut check poke | Your fastest low, and actually has a lot of range for a light attack, although doesn't convert at the furthest ranges. Maybe can be used as a safe gut check poke. | ||
{{SFV Button FAT|link=https://fullmeter.com/fatonline/#/framedata/movedetail/SFV/R.Mika/normal/Crouch%20LK}} | |||
}} | }} | ||
}} | }} | ||
| Line 323: | Line 330: | ||
* Slight low profile on frames 3-18 | * Slight low profile on frames 3-18 | ||
* Not a low attack like most cr.MK are | * Not a low attack like most cr.MK are | ||
{{SFV Button FAT|link=https://fullmeter.com/fatonline/#/framedata/movedetail/SFV/R.Mika/normal/Crouch%20MK}} | |||
}} | }} | ||
}} | }} | ||
| Line 351: | Line 359: | ||
* VT2 initial activation KDA: +89/40/45 (release) or +85/36/41 (hold) | * VT2 initial activation KDA: +89/40/45 (release) or +85/36/41 (hold) | ||
* VT2 2nd activation KDA: +50/1/6 (release) or +38/-11/-6 (hold) | * VT2 2nd activation KDA: +50/1/6 (release) or +38/-11/-6 (hold) | ||
{{SFV Button FAT|link=https://fullmeter.com/fatonline/#/framedata/movedetail/SFV/R.Mika/normal/Crouch%20HK}} | |||
}} | }} | ||
}} | }} | ||
| Line 356: | Line 365: | ||
=====<font style="visibility:hidden; float:right">Jump LP</font>===== | =====<font style="visibility:hidden; float:right">Jump LP</font>===== | ||
{{MoveData | {{MoveData | ||
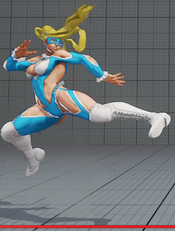
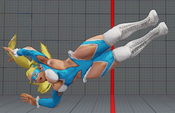
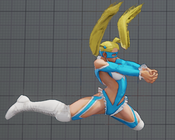
|image=SFV_R. | |image=SFV_R.Mika_8LP.png | ||
|name=Jump LP | |name=Jump LP | ||
|input= | |input=8LP | ||
|data= | |data= | ||
{{AttackData-SFV | {{AttackData-SFV | ||
| Line 374: | Line 383: | ||
|confirm=<nowiki>- / - / -</nowiki> | |confirm=<nowiki>- / - / -</nowiki> | ||
|description= | |description= | ||
{{SFV Button FAT|link=https://fullmeter.com/fatonline/#/framedata/movedetail/SFV/R.Mika/normal/Jump%20LP}} | |||
}} | }} | ||
}} | }} | ||
| Line 379: | Line 389: | ||
=====<font style="visibility:hidden; float:right">Jump MP</font>===== | =====<font style="visibility:hidden; float:right">Jump MP</font>===== | ||
{{MoveData | {{MoveData | ||
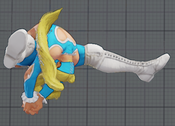
|image=SFV_R. | |image=SFV_R.Mika_8MP.png | ||
|name=Jump MP | |name=Jump MP | ||
|input= | |input=8MP | ||
|data= | |data= | ||
{{AttackData-SFV | {{AttackData-SFV | ||
| Line 399: | Line 409: | ||
* Puts airborne opponents into a free juggle state | * Puts airborne opponents into a free juggle state | ||
* Juggle Limit / Increase / Start: 0 / 1 / 0 | * Juggle Limit / Increase / Start: 0 / 1 / 0 | ||
{{SFV Button FAT|link=https://fullmeter.com/fatonline/#/framedata/movedetail/SFV/R.Mika/normal/Jump%20MP}} | |||
}} | }} | ||
}} | }} | ||
| Line 404: | Line 415: | ||
=====<font style="visibility:hidden; float:right">Jump HP</font>===== | =====<font style="visibility:hidden; float:right">Jump HP</font>===== | ||
{{MoveData | {{MoveData | ||
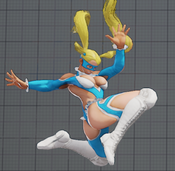
|image=SFV_R. | |image=SFV_R.Mika_8HP.png | ||
|name=Jump HP | |name=Jump HP | ||
|input= | |input=8HP | ||
|data= | |data= | ||
{{AttackData-SFV | {{AttackData-SFV | ||
| Line 422: | Line 433: | ||
|confirm=<nowiki>- / - / -</nowiki> | |confirm=<nowiki>- / - / -</nowiki> | ||
|description= | |description= | ||
{{SFV Button FAT|link=https://fullmeter.com/fatonline/#/framedata/movedetail/SFV/R.Mika/normal/Jump%20HP}} | |||
}} | }} | ||
}} | }} | ||
| Line 427: | Line 439: | ||
=====<font style="visibility:hidden; float:right">Jump LK</font>===== | =====<font style="visibility:hidden; float:right">Jump LK</font>===== | ||
{{MoveData | {{MoveData | ||
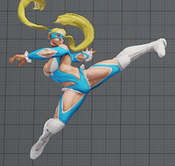
|image=SFV_R. | |image=SFV_R.Mika_8LK.png | ||
|name=Jump LK | |name=Jump LK | ||
|input= | |input=8LK | ||
|data= | |data= | ||
{{AttackData-SFV | {{AttackData-SFV | ||
| Line 446: | Line 458: | ||
|description= | |description= | ||
* Can cross-up | * Can cross-up | ||
{{SFV Button FAT|link=https://fullmeter.com/fatonline/#/framedata/movedetail/SFV/R.Mika/normal/Jump%20LK}} | |||
}} | }} | ||
}} | }} | ||
| Line 451: | Line 464: | ||
=====<font style="visibility:hidden; float:right">Jump MK</font>===== | =====<font style="visibility:hidden; float:right">Jump MK</font>===== | ||
{{MoveData | {{MoveData | ||
|image=SFV_R. | |image=SFV_R.Mika_8MK.png | ||
|name=Jump MK | |name=Jump MK | ||
|input= | |input=8MK | ||
|data= | |data= | ||
{{AttackData-SFV | {{AttackData-SFV | ||
| Line 469: | Line 482: | ||
|confirm=<nowiki>- / - / -</nowiki> | |confirm=<nowiki>- / - / -</nowiki> | ||
|description= | |description= | ||
{{SFV Button FAT|link=https://fullmeter.com/fatonline/#/framedata/movedetail/SFV/R.Mika/normal/Jump%20MK}} | |||
}} | }} | ||
}} | }} | ||
| Line 474: | Line 488: | ||
=====<font style="visibility:hidden; float:right">Jump HK</font>===== | =====<font style="visibility:hidden; float:right">Jump HK</font>===== | ||
{{MoveData | {{MoveData | ||
|image=SFV_R. | |image=SFV_R.Mika_8HK.png | ||
|name=Jump HK | |name=Jump HK | ||
|input= | |input=8HK | ||
|data= | |data= | ||
{{AttackData-SFV | {{AttackData-SFV | ||
| Line 492: | Line 506: | ||
|confirm=<nowiki>- / - / -</nowiki> | |confirm=<nowiki>- / - / -</nowiki> | ||
|description= | |description= | ||
{{SFV Button FAT|link=https://fullmeter.com/fatonline/#/framedata/movedetail/SFV/R.Mika/normal/Jump%20HK}} | |||
}} | }} | ||
}} | }} | ||
| Line 520: | Line 535: | ||
* Only possible during a forward jump | * Only possible during a forward jump | ||
* Considered standing during entire landing recovery | * Considered standing during entire landing recovery | ||
* Can be -10 on Tall characters but usually -9 | |||
{{SFV Button FAT|link=https://fullmeter.com/fatonline/#/framedata/movedetail/SFV/R.Mika/normal/Divebomb}} | |||
}} | }} | ||
}} | }} | ||
| Line 546: | Line 563: | ||
* Launches opponent into a limited juggle state on hit (free juggle state on Crush Counter) | * Launches opponent into a limited juggle state on hit (free juggle state on Crush Counter) | ||
* Cancelable into Specials / Super / V-Trigger / V-Skill | * Cancelable into Specials / Super / V-Trigger / V-Skill | ||
* VT2 initial activation KDA: +122/63/68 (release) or +118/59/64 (hold) | |||
* VT2 2nd activation KDA: +83/24/9 (release) or +71/12/17 (hold) | |||
* +10 KDA on Crush Counter VT2 Activations | |||
* Juggle Limit / Increase / Start: 0 / 2 / 1 | * Juggle Limit / Increase / Start: 0 / 2 / 1 | ||
{{SFV Button FAT|link=https://fullmeter.com/fatonline/#/framedata/movedetail/SFV/R.Mika/normal/Divebomb}} | |||
}} | }} | ||
}} | }} | ||
| Line 571: | Line 592: | ||
|description= | |description= | ||
* Clap! | * Clap! | ||
{{SFV Button FAT|link=https://fullmeter.com/fatonline/#/framedata/movedetail/SFV/R.Mika/normal/Divebomb}} | |||
}} | }} | ||
}} | }} | ||
| Line 599: | Line 620: | ||
* The wall bounce puts the opponent into an airborne free juggle state (even though it looks like they're grounded) | * The wall bounce puts the opponent into an airborne free juggle state (even though it looks like they're grounded) | ||
* KDA varies wildly depending on how far / close to a corner the opponent is and whether or not they wall bounce | * KDA varies wildly depending on how far / close to a corner the opponent is and whether or not they wall bounce | ||
{{SFV Button FAT|link=https://fullmeter.com/fatonline/#/framedata/movedetail/SFV/R.Mika/normal/Divebomb}} | |||
}} | }} | ||
}} | }} | ||
| Line 626: | Line 648: | ||
* The wall bounce puts the opponent into an airborne free juggle state (even though it looks like they're grounded) | * The wall bounce puts the opponent into an airborne free juggle state (even though it looks like they're grounded) | ||
* KDA varies wildly depending on how far / close to a corner the opponent is and whether or not they wall bounce | * KDA varies wildly depending on how far / close to a corner the opponent is and whether or not they wall bounce | ||
{{SFV Button FAT|link=https://fullmeter.com/fatonline/#/framedata/movedetail/SFV/R.Mika/normal/Divebomb}} | |||
}} | }} | ||
}} | }} | ||
| Line 633: | Line 656: | ||
=====<font style="visibility:hidden; float:right">Shooting Star Combo</font>===== | =====<font style="visibility:hidden; float:right">Shooting Star Combo</font>===== | ||
{{MoveData | {{MoveData | ||
|image=SFV_R. | |image=SFV_R.Mika_8MP 8HP.png | ||
|name=Shooting Star Combo | |name=Shooting Star Combo | ||
|input= | |input=8MP > 8HP | ||
|data= | |data= | ||
{{AttackData-SFV | {{AttackData-SFV | ||
| Line 652: | Line 675: | ||
|description= | |description= | ||
* KDA varies depending on height on opponent when TC is used, the higher up when knocked down, the better amount of KDA R.Mika has | * KDA varies depending on height on opponent when TC is used, the higher up when knocked down, the better amount of KDA R.Mika has | ||
{{SFV Button FAT|link=https://fullmeter.com/fatonline/#/framedata/movedetail/SFV/R.Mika/normal/Shooting%20Star%20Combo}} | |||
}} | }} | ||
}} | }} | ||
| Line 676: | Line 700: | ||
|description= | |description= | ||
* Combos into HP Shooting Peach (HP Shooting Peach is 4F faster startup if canceled into from his Target Combo) | * Combos into HP Shooting Peach (HP Shooting Peach is 4F faster startup if canceled into from his Target Combo) | ||
{{SFV Button FAT|link=https://fullmeter.com/fatonline/#/framedata/movedetail/SFV/R.Mika/normal/Stomp%20Chomp}} | |||
}} | }} | ||
}} | }} | ||
| Line 702: | Line 727: | ||
|confirm=<nowiki>- / - / -</nowiki> | |confirm=<nowiki>- / - / -</nowiki> | ||
|description= | |description= | ||
{{SFV Button FAT|link=https://fullmeter.com/fatonline/#/framedata/movedetail/SFV/R.Mika/normal/Daydream%20Headlock}} | |||
}} | }} | ||
}} | }} | ||
| Line 726: | Line 752: | ||
|confirm=<nowiki>- / - / -</nowiki> | |confirm=<nowiki>- / - / -</nowiki> | ||
|description= | |description= | ||
{{SFV Button FAT|link=https://fullmeter.com/fatonline/#/framedata/movedetail/SFV/R.Mika/normal/Sell%20Down}} | |||
}} | }} | ||
}} | }} | ||
| Line 755: | Line 782: | ||
* Crouch state on frames 2-7 | * Crouch state on frames 2-7 | ||
* Juggle Limit / Increase / Start: 0 / 1 /1 | * Juggle Limit / Increase / Start: 0 / 1 /1 | ||
{{SFV Button FAT|link=https://fullmeter.com/fatonline/#/framedata/movedetail/SFV/R.Mika/normal/LP%20Shooting%20Peach}} | |||
}} | }} | ||
}} | }} | ||
| Line 782: | Line 810: | ||
* Crouch state on frames 3-10 | * Crouch state on frames 3-10 | ||
* Juggle Limit / Increase / Start: 0 / 1 / 5 | * Juggle Limit / Increase / Start: 0 / 1 / 5 | ||
{{SFV Button FAT|link=https://fullmeter.com/fatonline/#/framedata/movedetail/SFV/R.Mika/normal/MP%20Shooting%20Peach}} | |||
}} | }} | ||
}} | }} | ||
| Line 812: | Line 841: | ||
* Gains increased juggle limit (0 -> 5) when canceled into from f+HP (Lady Mika) | * Gains increased juggle limit (0 -> 5) when canceled into from f+HP (Lady Mika) | ||
* Juggle Limit / Increase / Start: 0(5) / 1 / 5 | * Juggle Limit / Increase / Start: 0(5) / 1 / 5 | ||
{{SFV Button FAT|link=https://fullmeter.com/fatonline/#/framedata/movedetail/SFV/R.Mika/normal/HP%20Shooting%20Peach}} | |||
}} | }} | ||
}} | }} | ||
| Line 840: | Line 870: | ||
* Framedata listed refers to the whiffed version (has 5 extra recovery frames on block) | * Framedata listed refers to the whiffed version (has 5 extra recovery frames on block) | ||
* Juggle Limit / Increase / Start: 7*8*9 / 1*1*3 / 1*1*0 | * Juggle Limit / Increase / Start: 7*8*9 / 1*1*3 / 1*1*0 | ||
{{SFV Button FAT|link=https://fullmeter.com/fatonline/#/framedata/movedetail/SFV/R.Mika/normal/EX%20Shooting%20Peach}} | |||
}} | }} | ||
}} | }} | ||
| Line 868: | Line 899: | ||
* Crouch state on frames 1-3 | * Crouch state on frames 1-3 | ||
* Juggle Limit: 1 | * Juggle Limit: 1 | ||
{{SFV Button FAT|link=https://fullmeter.com/fatonline/#/framedata/movedetail/SFV/R.Mika/normal/LK%20Wingless%20Airplane}} | |||
}} | }} | ||
}} | }} | ||
| Line 896: | Line 928: | ||
* Crouch state on frames 1-3 | * Crouch state on frames 1-3 | ||
* Juggle Limit: 1 | * Juggle Limit: 1 | ||
{{SFV Button FAT|link=https://fullmeter.com/fatonline/#/framedata/movedetail/SFV/R.Mika/normal/MK%20Wingless%20Airplane}} | |||
}} | }} | ||
}} | }} | ||
| Line 924: | Line 957: | ||
* Crouch state on frames 1-3 | * Crouch state on frames 1-3 | ||
* Juggle Limit: 1 | * Juggle Limit: 1 | ||
{{SFV Button FAT|link=https://fullmeter.com/fatonline/#/framedata/movedetail/SFV/R.Mika/normal/HK%20Wingless%20Airplane}} | |||
}} | }} | ||
}} | }} | ||
| Line 954: | Line 988: | ||
* Crouch state on frames 1-3 | * Crouch state on frames 1-3 | ||
* Juggle Limit: 7 | * Juggle Limit: 7 | ||
{{SFV Button FAT|link=https://fullmeter.com/fatonline/#/framedata/movedetail/SFV/R.Mika/normal/EX%20Wingless%20Airplane}} | |||
}} | }} | ||
}} | }} | ||
| Line 980: | Line 1,015: | ||
* Can be canceled into from normals if empowered by V-Skill 1 Mic or V-Skill 2 Parry Attack | * Can be canceled into from normals if empowered by V-Skill 1 Mic or V-Skill 2 Parry Attack | ||
* Deals 50 less damage (130) if combod into from a normal | * Deals 50 less damage (130) if combod into from a normal | ||
{{SFV Button FAT|link=https://fullmeter.com/fatonline/#/framedata/movedetail/SFV/R.Mika/normal/LP%20Rainbow%20Typhoon}} | |||
}} | }} | ||
}} | }} | ||
| Line 1,006: | Line 1,042: | ||
* Can be canceled into from normals if empowered by V-Skill 1 Mic or V-Skill 2 Parry Attack | * Can be canceled into from normals if empowered by V-Skill 1 Mic or V-Skill 2 Parry Attack | ||
* Deals 50 less damage (140) if combod into from a normal | * Deals 50 less damage (140) if combod into from a normal | ||
{{SFV Button FAT|link=https://fullmeter.com/fatonline/#/framedata/movedetail/SFV/R.Mika/normal/MP%20Rainbow%20Typhoon}} | |||
}} | }} | ||
}} | }} | ||
| Line 1,023: | Line 1,060: | ||
|block=<nowiki>KD</nowiki> | |block=<nowiki>KD</nowiki> | ||
|knockdown=<nowiki>70 / 11 / 11</nowiki> | |knockdown=<nowiki>70 / 11 / 11</nowiki> | ||
|damage=<nowiki>200</nowiki> | |damage=<nowiki>200(150)</nowiki> | ||
|stun=<nowiki>200</nowiki> | |stun=<nowiki>200</nowiki> | ||
|attack=<nowiki>T</nowiki> | |attack=<nowiki>T</nowiki> | ||
| Line 1,032: | Line 1,069: | ||
* Can be canceled into from normals if empowered by V-Skill 1 Mic or V-Skill 2 Parry Attack | * Can be canceled into from normals if empowered by V-Skill 1 Mic or V-Skill 2 Parry Attack | ||
* Deals 50 less damage (150) if combod into from a normal | * Deals 50 less damage (150) if combod into from a normal | ||
{{SFV Button FAT|link=https://fullmeter.com/fatonline/#/framedata/movedetail/SFV/R.Mika/normal/HP%20Rainbow%20Typhoon}} | |||
}} | }} | ||
}} | }} | ||
| Line 1,049: | Line 1,087: | ||
|block=<nowiki>KD</nowiki> | |block=<nowiki>KD</nowiki> | ||
|knockdown=<nowiki>15 / 15 / 15</nowiki> | |knockdown=<nowiki>15 / 15 / 15</nowiki> | ||
|damage=<nowiki>240</nowiki> | |damage=<nowiki>240(190)</nowiki> | ||
|stun=<nowiki>250</nowiki> | |stun=<nowiki>250</nowiki> | ||
|attack=<nowiki>T</nowiki> | |attack=<nowiki>T</nowiki> | ||
| Line 1,059: | Line 1,097: | ||
* Can be canceled into from normals if empowered by V-Skill 1 Mic or V-Skill 2 Parry Attack | * Can be canceled into from normals if empowered by V-Skill 1 Mic or V-Skill 2 Parry Attack | ||
* Deals 50 less damage (190) if combod into from a normal | * Deals 50 less damage (190) if combod into from a normal | ||
{{SFV Button FAT|link=https://fullmeter.com/fatonline/#/framedata/movedetail/SFV/R.Mika/normal/EX%20Rainbow%20Typhoon}} | |||
}} | }} | ||
}} | }} | ||
| Line 1,076: | Line 1,115: | ||
|block=<nowiki>KD</nowiki> | |block=<nowiki>KD</nowiki> | ||
|knockdown=<nowiki>69 / 20 / 20</nowiki> | |knockdown=<nowiki>69 / 20 / 20</nowiki> | ||
|damage=<nowiki>120</nowiki> | |damage=<nowiki>120(90)</nowiki> | ||
|stun=<nowiki>150</nowiki> | |stun=<nowiki>150</nowiki> | ||
|attack=<nowiki>T</nowiki> | |attack=<nowiki>T</nowiki> | ||
| Line 1,084: | Line 1,123: | ||
* Can be canceled into from normals if empowered by V-Skill 1 Mic or V-Skill 2 Parry Attack | * Can be canceled into from normals if empowered by V-Skill 1 Mic or V-Skill 2 Parry Attack | ||
* Deals 30 less damage (90) if combod into from a normal | * Deals 30 less damage (90) if combod into from a normal | ||
{{SFV Button FAT|link=https://fullmeter.com/fatonline/#/framedata/movedetail/SFV/R.Mika/normal/LK%20Brimstone}} | |||
}} | }} | ||
}} | }} | ||
| Line 1,101: | Line 1,141: | ||
|block=<nowiki>KD</nowiki> | |block=<nowiki>KD</nowiki> | ||
|knockdown=<nowiki>69 / 20 / 20</nowiki> | |knockdown=<nowiki>69 / 20 / 20</nowiki> | ||
|damage=<nowiki>130</nowiki> | |damage=<nowiki>130(100)</nowiki> | ||
|stun=<nowiki>150</nowiki> | |stun=<nowiki>150</nowiki> | ||
|attack=<nowiki>T</nowiki> | |attack=<nowiki>T</nowiki> | ||
| Line 1,109: | Line 1,149: | ||
* Can be canceled into from normals if empowered by V-Skill 1 Mic or V-Skill 2 Parry Attack | * Can be canceled into from normals if empowered by V-Skill 1 Mic or V-Skill 2 Parry Attack | ||
* Deals 50 less damage (100) if combod into from a normal | * Deals 50 less damage (100) if combod into from a normal | ||
{{SFV Button FAT|link=https://fullmeter.com/fatonline/#/framedata/movedetail/SFV/R.Mika/normal/MK%20Brimstone}} | |||
}} | }} | ||
}} | }} | ||
| Line 1,126: | Line 1,167: | ||
|block=<nowiki>KD</nowiki> | |block=<nowiki>KD</nowiki> | ||
|knockdown=<nowiki>69 / 20 / 20</nowiki> | |knockdown=<nowiki>69 / 20 / 20</nowiki> | ||
|damage=<nowiki>140</nowiki> | |damage=<nowiki>140(110)</nowiki> | ||
|stun=<nowiki>150</nowiki> | |stun=<nowiki>150</nowiki> | ||
|attack=<nowiki>T</nowiki> | |attack=<nowiki>T</nowiki> | ||
| Line 1,134: | Line 1,175: | ||
* Can be canceled into from normals if empowered by V-Skill 1 Mic or V-Skill 2 Parry Attack | * Can be canceled into from normals if empowered by V-Skill 1 Mic or V-Skill 2 Parry Attack | ||
* Deals 50 less damage (110) if combod into from a normal | * Deals 50 less damage (110) if combod into from a normal | ||
{{SFV Button FAT|link=https://fullmeter.com/fatonline/#/framedata/movedetail/SFV/R.Mika/normal/HK%20Brimstone}} | |||
}} | }} | ||
}} | }} | ||
| Line 1,151: | Line 1,193: | ||
|block=<nowiki>KD</nowiki> | |block=<nowiki>KD</nowiki> | ||
|knockdown=<nowiki>21 / 21 / 21</nowiki> | |knockdown=<nowiki>21 / 21 / 21</nowiki> | ||
|damage=<nowiki>180</nowiki> | |damage=<nowiki>180(140)</nowiki> | ||
|stun=<nowiki>200</nowiki> | |stun=<nowiki>200</nowiki> | ||
|attack=<nowiki>T</nowiki> | |attack=<nowiki>T</nowiki> | ||
| Line 1,160: | Line 1,202: | ||
* Can be canceled into from normals if empowered by V-Skill 1 Mic or V-Skill 2 Parry Attack | * Can be canceled into from normals if empowered by V-Skill 1 Mic or V-Skill 2 Parry Attack | ||
* Deals 50 less damage (140) if combod into from a normal | * Deals 50 less damage (140) if combod into from a normal | ||
{{SFV Button FAT|link=https://fullmeter.com/fatonline/#/framedata/movedetail/SFV/R.Mika/normal/EX%20Brimstone}} | |||
}} | }} | ||
}} | }} | ||
== Critical | == Critical Art == | ||
=====<font style="visibility:hidden; float:right">Peach Assault</font>===== | =====<font style="visibility:hidden; float:right">Peach Assault</font>===== | ||
| Line 1,188: | Line 1,231: | ||
* Has more range if used while Mika is in the corner due to her not being able to move as far back during the start of the super cutscene | * Has more range if used while Mika is in the corner due to her not being able to move as far back during the start of the super cutscene | ||
* Kreygasm | * Kreygasm | ||
{{SFV Button FAT|link=https://fullmeter.com/fatonline/#/framedata/movedetail/SFV/R.Mika/normal/Peach%20Assault}} | |||
}} | }} | ||
}} | }} | ||
| Line 1,213: | Line 1,257: | ||
|confirm=<nowiki>- / - / -</nowiki> | |confirm=<nowiki>- / - / -</nowiki> | ||
|description= | |description= | ||
{{SFV Button FAT|link=https://fullmeter.com/fatonline/#/framedata/movedetail/SFV/R.Mika/normal/Taunt}} | |||
}} | }} | ||
}} | }} | ||
| Line 1,251: | Line 1,296: | ||
* Counter-Hit state until the mic is thrown and active | * Counter-Hit state until the mic is thrown and active | ||
* Juggle Limit / Increase / Start: 6 / 1 / 1 | * Juggle Limit / Increase / Start: 6 / 1 / 1 | ||
{{SFV Button FAT|link=https://fullmeter.com/fatonline/#/framedata/movedetail/SFV/R.Mika/normal/Heated%20Mic%20Performance%20lvl%201}} | |||
}} | }} | ||
}} | }} | ||
| Line 1,277: | Line 1,323: | ||
* Builds 100% V-Gauge if she does the entire mic performance | * Builds 100% V-Gauge if she does the entire mic performance | ||
* RKO mode activated | * RKO mode activated | ||
{{SFV Button FAT|link=https://fullmeter.com/fatonline/#/framedata/movedetail/SFV/R.Mika/normal/Heated%20Mic%20Performance%20max}} | |||
}} | }} | ||
}} | }} | ||
| Line 1,306: | Line 1,353: | ||
* Counter-Hit state for the entire duration | * Counter-Hit state for the entire duration | ||
* Builds 20 V-Gauge on a successful parry and another 80 on the follow-up counter (100 V-Gauge total) | * Builds 20 V-Gauge on a successful parry and another 80 on the follow-up counter (100 V-Gauge total) | ||
{{SFV Button FAT|link=https://fullmeter.com/fatonline/#/framedata/movedetail/SFV/R.Mika/normal/Pumped%20Up!}} | |||
}} | }} | ||
}} | }} | ||
| Line 1,331: | Line 1,379: | ||
* Powers up damage of the next command grab, airplane, throw or super by 20% | * Powers up damage of the next command grab, airplane, throw or super by 20% | ||
* Usually 53 recovery frames (on hit) but if the follow-up whiffs or is blocked (somehow) it has only 17 recovery frames | * Usually 53 recovery frames (on hit) but if the follow-up whiffs or is blocked (somehow) it has only 17 recovery frames | ||
{{SFV Button FAT|link=https://fullmeter.com/fatonline/#/framedata/movedetail/SFV/R.Mika/normal/Pumped%20Up!%20(attack)}} | |||
}} | }} | ||
}} | }} | ||
| Line 1,365: | Line 1,414: | ||
* Juggle Limit / Increase / Start: 10 / 1 / 1 | * Juggle Limit / Increase / Start: 10 / 1 / 1 | ||
* Free Juggle state (0 Juggle Start) if this is the first hit that starts the knockdown state | * Free Juggle state (0 Juggle Start) if this is the first hit that starts the knockdown state | ||
{{SFV Button FAT|link=https://fullmeter.com/fatonline/#/framedata/movedetail/SFV/R.Mika/normal/Nadeshiko%20(Above)}} | |||
}} | }} | ||
}} | }} | ||
| Line 1,395: | Line 1,445: | ||
* Juggle Limit / Increase / Start: 10 / 1 / 1 | * Juggle Limit / Increase / Start: 10 / 1 / 1 | ||
* Free Juggle state (0 Juggle Start) if this is the first hit that starts the knockdown state | * Free Juggle state (0 Juggle Start) if this is the first hit that starts the knockdown state | ||
{{SFV Button FAT|link=https://fullmeter.com/fatonline/#/framedata/movedetail/SFV/R.Mika/normal/Nadeshiko%20(Above)%20(hold)}} | |||
}} | }} | ||
}} | }} | ||
| Line 1,424: | Line 1,475: | ||
* Juggle Limit / Increase / Start: 10 / 1 / 0 | * Juggle Limit / Increase / Start: 10 / 1 / 0 | ||
* Free Juggle state (0 Juggle Start) if this is the first hit that starts the knockdown state | * Free Juggle state (0 Juggle Start) if this is the first hit that starts the knockdown state | ||
{{SFV Button FAT|link=https://fullmeter.com/fatonline/#/framedata/movedetail/SFV/R.Mika/normal/Nadeshiko%20(Front)}} | |||
}} | }} | ||
}} | }} | ||
| Line 1,453: | Line 1,505: | ||
* Juggle Limit / Increase / Start: 10 / 1 / 0 | * Juggle Limit / Increase / Start: 10 / 1 / 0 | ||
* Free Juggle state (0 Juggle Start) if this is the first hit that starts the knockdown state | * Free Juggle state (0 Juggle Start) if this is the first hit that starts the knockdown state | ||
{{SFV Button FAT|link=https://fullmeter.com/fatonline/#/framedata/movedetail/SFV/R.Mika/normal/Nadeshiko%20(Front)%20(hold)}} | |||
}} | }} | ||
}} | }} | ||
| Line 1,482: | Line 1,535: | ||
* Juggle Limit / Increase / Start: 10 / 1 / 0 | * Juggle Limit / Increase / Start: 10 / 1 / 0 | ||
* Free Juggle state (0 Juggle Start) if this is the first hit that starts the knockdown state | * Free Juggle state (0 Juggle Start) if this is the first hit that starts the knockdown state | ||
{{SFV Button FAT|link=https://fullmeter.com/fatonline/#/framedata/movedetail/SFV/R.Mika/normal/Nadeshiko%20(Behind)}} | |||
}} | }} | ||
}} | }} | ||
| Line 1,511: | Line 1,565: | ||
* Juggle Limit / Increase / Start: 10 / 1 / 0 | * Juggle Limit / Increase / Start: 10 / 1 / 0 | ||
* Free Juggle state (0 Juggle Start) if this is the first hit that starts the knockdown state | * Free Juggle state (0 Juggle Start) if this is the first hit that starts the knockdown state | ||
{{SFV Button FAT|link=https://fullmeter.com/fatonline/#/framedata/movedetail/SFV/R.Mika/normal/Nadeshiko%20(Behind)%20(hold)}} | |||
}} | }} | ||
}} | }} | ||
| Line 1,541: | Line 1,596: | ||
* Calls Nadeshiko in for help (can be held down for a different version of Nadeshiko's attack) | * Calls Nadeshiko in for help (can be held down for a different version of Nadeshiko's attack) | ||
* Can call for Nadeshiko one more time before V-Timer ends (doing so depletes the rest of the V-Timer) | * Can call for Nadeshiko one more time before V-Timer ends (doing so depletes the rest of the V-Timer) | ||
{{SFV Button FAT|link=https://fullmeter.com/fatonline/#/framedata/movedetail/SFV/R.Mika/normal/Steel%20Chair}} | |||
}} | }} | ||
}} | }} | ||
| Line 1,570: | Line 1,626: | ||
* Calls Nadeshiko in for help | * Calls Nadeshiko in for help | ||
* Can call for Nadeshiko one more time before V-Timer ends (doing so depletes the rest of the V-Timer) | * Can call for Nadeshiko one more time before V-Timer ends (doing so depletes the rest of the V-Timer) | ||
{{SFV Button FAT|link=https://fullmeter.com/fatonline/#/framedata/movedetail/SFV/R.Mika/normal/Fightin'%20Dirty}} | |||
}} | }} | ||
}} | }} | ||
| Line 1,596: | Line 1,653: | ||
* Calls Nadeshiko in for help (can be held down for a different version of Nadeshiko's attack) | * Calls Nadeshiko in for help (can be held down for a different version of Nadeshiko's attack) | ||
* This second activation spends the rest of the V-Timer | * This second activation spends the rest of the V-Timer | ||
{{SFV Button FAT|link=https://fullmeter.com/fatonline/#/framedata/movedetail/SFV/R.Mika/vtTwo/Steel%20Chair%20(secondary)}} | |||
}} | }} | ||
}} | }} | ||
| Line 1,622: | Line 1,680: | ||
* Calls Nadeshiko in for help | * Calls Nadeshiko in for help | ||
* This second activation spends the rest of the V-Timer | * This second activation spends the rest of the V-Timer | ||
{{SFV Button FAT|link=https://fullmeter.com/fatonline/#/framedata/movedetail/SFV/R.Mika/vtTwo/Fightin'%20Dirty%20(secondary)}} | |||
}} | }} | ||
}} | }} | ||
| Line 1,655: | Line 1,714: | ||
* Costs 300 V-Gauge (1 bar) to use and refunds 150 V-Gauge back (1/2 bar) on a successful V-Shift if the slow-mo is triggered | * Costs 300 V-Gauge (1 bar) to use and refunds 150 V-Gauge back (1/2 bar) on a successful V-Shift if the slow-mo is triggered | ||
* If the V-Shift is successful you can cancel it into a follow-up attack (see V-Shift Break) that's fully invincible and knocks the opponent down on hit | * If the V-Shift is successful you can cancel it into a follow-up attack (see V-Shift Break) that's fully invincible and knocks the opponent down on hit | ||
{{SFV Button FAT|link=https://fullmeter.com/fatonline/#/framedata/movedetail/SFV/R.Mika/normal/V-Shift}} | |||
}} | }} | ||
}} | }} | ||
| Line 1,673: | Line 1,733: | ||
|crush=<nowiki>- / - / -</nowiki> | |crush=<nowiki>- / - / -</nowiki> | ||
|block=<nowiki>-2</nowiki> | |block=<nowiki>-2</nowiki> | ||
|knockdown=<nowiki> | |knockdown=<nowiki>75 / 16 / 21</nowiki> | ||
|damage=<nowiki>60</nowiki> | |damage=<nowiki>60</nowiki> | ||
|stun=<nowiki>0</nowiki> | |stun=<nowiki>0</nowiki> | ||
| Line 1,681: | Line 1,741: | ||
|description= | |description= | ||
* Fully invincible during startup and active frames | * Fully invincible during startup and active frames | ||
{{SFV Button FAT|link=https://fullmeter.com/fatonline/#/framedata/movedetail/SFV/R.Mika/normal/Gutsy%20Lariat}} | |||
}} | }} | ||
}} | }} | ||
| Line 1,708: | Line 1,769: | ||
* Strike and Projectile invincible on frames 1-30 | * Strike and Projectile invincible on frames 1-30 | ||
* Denies opponent their back-roll option on wake-up | * Denies opponent their back-roll option on wake-up | ||
{{SFV Button FAT|link=https://fullmeter.com/fatonline/#/framedata/movedetail/SFV/R.Mika/normal/Peach%20Gator}} | |||
}} | }} | ||
}} | }} | ||
Revision as of 18:29, 13 April 2021
Introduction
About R. Mika
Hailing from Japan, Rainbow Mika is a trained professional women's wrestler, already on her path to stardom.
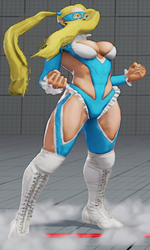
To put it simply. Mika is annoying. She loves harassing the opponent with her great normals, a command grab that loops into itself, and great mobility. Mika has a vast variety of tools to keep the opponent on their toes and make sure they aren't falling asleep. Although her damage output isn't remarkable, this is more than made up for by the fact that her moveset is designed to annoy your opponent with fast and long ranged normals. If you like frustrating your opponent, testing their patience, and overcoming their mentality, then Mika might be just for you.
Final Patch
Players to Watch
- Fuudo
- Luffy
- Nuckledu
| R.Mika | |
|---|---|
| Vitals | |
| Life Points | 950 |
| Stun Points | 1000 |
| V-Gauge Points | |
| V-Trigger 1 | 2 Bars |
| V-Trigger 2 | 3 Bars |
| Ground Movement | |
| Forward Walk Speed | 0.042 |
| Backward Walk Speed | 0.03 |
| Forward Dash Speed | 18 |
| Backward Dash Speed | 24 |
| Forward Dash Distance | 1.342 |
| Backward Dash Distance | 1.2 |
| Backdash CH Frames | 3-10 |
| Jumping | |
| Back Jump Speed | 46 (4+38+4) |
| Neutral Jump Speed | 46 (4+38+4) |
| Forward Jump Speed | 45 (3+38+4) |
| Forward Jump Distance | 2.128 |
| Backward Jump Distance | 1.824 |
| Throws | |
| Throw Hurtbox | 0.25 |
| Throw Range | 0.85 |
Frame Data & Descriptions are provided by FATOnline.
|
| SFV Frame Data Glossary | |
|---|---|
| Active |
How many frames a move remains active (can hurt opponents) for. |
| Attack |
Attack level is L for low attacks (must be blocked crouching), H is for High attacks (which can be blocked high or low) and M for overhead (must be blocked standing). T is for throw attacks (which cannot be blocked). |
| Cancel options |
Available cancel options.
|
| Confirm windows |
Hit confirm windows written as Specials & CAs/Target Combos/V-Trigger. Notation may denote V-Skill only cancel windows in Specials.
|
| Crush Counter |
Crush Counter hit advantage written as opponent state, frame advantage, and v-gauge gain on hit. |
| Damage |
Attack damage on hit. Notation may denote multi-hit or "sweet spot" damage values on certain frames. |
| Hit/Block |
These are frame advantage values when the attack hits or is blocked. If the number is positive, then the move will end before the defender can act again. If the number is negative, the defender will be able to act before the attacker and maybe even punish. KD refers to knockdown on hit.
|
| Knockdown |
Knockdown advantage against Normal, Quick Rise and Back Rise wake up options. |
| Recovery |
How many frames it takes for a move to finish after it's been active. |
| Startup |
How many frames it takes before the move becomes 'active' or have a hit box. The last startup frame and the first active frame are the same frame, meaning all values are written as Startup + 1. |
| Stun |
Amount of stun added to the opponent's stun bar on hit. |
Normals
Stand LP
Stand MP
Stand HP
Stand LK
Stand MK
Stand HK
Stand HK (hold)
Crouch LP
Crouch MP
Crouch HP
Crouch LK
Crouch MK
Crouch HK
Jump LP
Jump MP
Jump HP
Jump LK
Jump MK
Jump HK
Command Normals
Divebomb
Lady Mika
Passion Press
Passion Rope Throw Forward
Passion Rope Throw Backward
Target Combos
Shooting Star Combo
Stomp Chomp
Throws
Daydream Headlock
Sell Down
Special Moves
LP Shooting Peach
MP Shooting Peach
HP Shooting Peach
EX Shooting Peach
LK Wingless Airplane
MK Wingless Airplane
HK Wingless Airplane
EX Wingless Airplane
LP Rainbow Typhoon
MP Rainbow Typhoon
HP Rainbow Typhoon
EX Rainbow Typhoon
LK Brimstone
MK Brimstone
HK Brimstone
EX Brimstone
Critical Art
Peach Assault
Taunts
Taunt
V-System
V-Skill 1
Heated Mic Performance lvl 1
Heated Mic Performance max
V-Skill 2
Pumped Up!
Pumped Up! (attack)
V-Trigger 1
- R. Mika can hold HP and HK when using either V-Trigger to delay Nadeshiko's arrival. This is shown with R. Mika doing an additional animation after the V-Trigger activation.
Nadeshiko (Above)
Nadeshiko (Above) (hold)
Nadeshiko (Front)
Nadeshiko (Front) (hold)
Nadeshiko (Behind)
Nadeshiko (Behind) (hold)
V-Trigger 2
Steel Chair
Fightin' Dirty
Steel Chair (secondary)
Fightin' Dirty (secondary)
V-Shift
V-Shift
V-Shift Break
Gutsy Lariat
V-Reversal
Peach Gator

