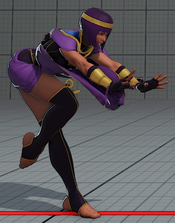
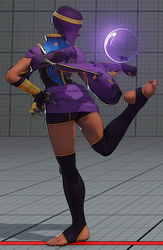
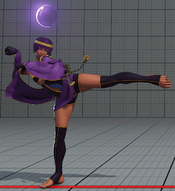
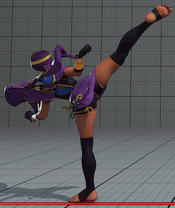
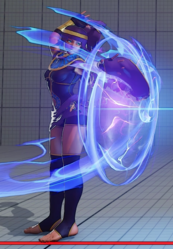
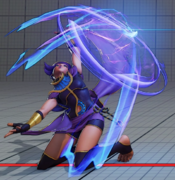
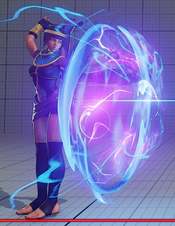
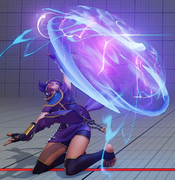
No edit summary |
No edit summary |
||
| Line 5: | Line 5: | ||
|hp=950 | |hp=950 | ||
|stun=950 | |stun=950 | ||
|vt1= | |vt1=3 Bars | ||
|vt2= | |vt2=2 Bars | ||
|movef=0.04 | |movef=0.04 | ||
|moveb=0.032 | |moveb=0.032 | ||
| Line 47: | Line 47: | ||
|description= | |description= | ||
* Chains into cr.LK | * Chains into cr.LK | ||
{{SFV Button FAT|link=https://fullmeter.com/fatonline/#/framedata/movedetail/SFV/Menat/normal/Stand%20LP}} | |||
}} | }} | ||
}} | }} | ||
| Line 52: | Line 53: | ||
=====<font style="visibility:hidden; float:right">Stand LP orb</font>===== | =====<font style="visibility:hidden; float:right">Stand LP orb</font>===== | ||
{{MoveData | {{MoveData | ||
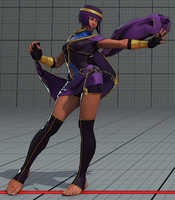
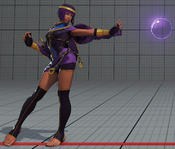
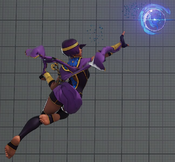
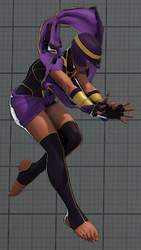
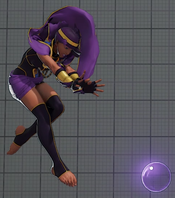
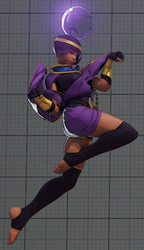
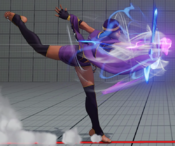
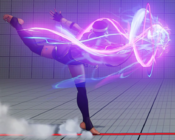
|image=SFV_Menat_5LP | |image=SFV_Menat_5LP (Orb).png | ||
|name=Stand LP orb | |name=Stand LP orb | ||
|input=5LP | |input=5LP (Orb) | ||
|data= | |data= | ||
{{AttackData-SFV | {{AttackData-SFV | ||
| Line 72: | Line 73: | ||
* Extra range, damage and active frames on orb version | * Extra range, damage and active frames on orb version | ||
* the (x) refers to best-case advantage with spacing | * the (x) refers to best-case advantage with spacing | ||
{{SFV Button FAT|link=https://fullmeter.com/fatonline/#/framedata/movedetail/SFV/Menat/normal/Stand%20LP%20orb}} | |||
}} | }} | ||
}} | }} | ||
| Line 96: | Line 98: | ||
|description= | |description= | ||
* 3 frames less recovery on whiff (13f) | * 3 frames less recovery on whiff (13f) | ||
{{SFV Button FAT|link=https://fullmeter.com/fatonline/#/framedata/movedetail/SFV/Menat/normal/Stand%20MP}} | |||
}} | }} | ||
}} | }} | ||
| Line 101: | Line 104: | ||
=====<font style="visibility:hidden; float:right">Stand MP orb</font>===== | =====<font style="visibility:hidden; float:right">Stand MP orb</font>===== | ||
{{MoveData | {{MoveData | ||
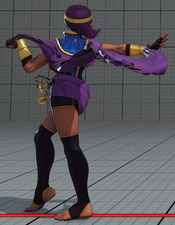
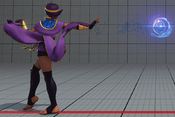
|image=SFV_Menat_5MP | |image=SFV_Menat_5MP (Orb).png | ||
|name=Stand MP orb | |name=Stand MP orb | ||
|input=5MP | |input=5MP (Orb) | ||
|data= | |data= | ||
{{AttackData-SFV | {{AttackData-SFV | ||
| Line 121: | Line 124: | ||
* Extra range, damage and active frames on orb version | * Extra range, damage and active frames on orb version | ||
* the (x) refers to best-case advantage with spacing | * the (x) refers to best-case advantage with spacing | ||
{{SFV Button FAT|link=https://fullmeter.com/fatonline/#/framedata/movedetail/SFV/Menat/normal/Stand%20MP%20orb}} | |||
}} | }} | ||
}} | }} | ||
| Line 144: | Line 148: | ||
|confirm=<nowiki>19 / 19 / -</nowiki> | |confirm=<nowiki>19 / 19 / -</nowiki> | ||
|description= | |description= | ||
{{SFV Button FAT|link=https://fullmeter.com/fatonline/#/framedata/movedetail/SFV/Menat/normal/Stand%20HP}} | |||
}} | }} | ||
}} | }} | ||
| Line 149: | Line 154: | ||
=====<font style="visibility:hidden; float:right">Stand HP orb</font>===== | =====<font style="visibility:hidden; float:right">Stand HP orb</font>===== | ||
{{MoveData | {{MoveData | ||
|image=SFV_Menat_5HP | |image=SFV_Menat_5HP (Orb).png | ||
|name=Stand HP orb | |name=Stand HP orb | ||
|input=5HP | |input=5HP (Orb) | ||
|data= | |data= | ||
{{AttackData-SFV | {{AttackData-SFV | ||
| Line 170: | Line 175: | ||
* the (x) refers to best-case advantage with spacing | * the (x) refers to best-case advantage with spacing | ||
* Only builds 100 V-Gauge (1/3rd of a bar) on a Crush Counter instead of the regular 150 | * Only builds 100 V-Gauge (1/3rd of a bar) on a Crush Counter instead of the regular 150 | ||
{{SFV Button FAT|link=https://fullmeter.com/fatonline/#/framedata/movedetail/SFV/Menat/normal/Stand%20HP%20orb}} | |||
}} | }} | ||
}} | }} | ||
| Line 193: | Line 199: | ||
|confirm=<nowiki>- / - / -</nowiki> | |confirm=<nowiki>- / - / -</nowiki> | ||
|description= | |description= | ||
{{SFV Button FAT|link=https://fullmeter.com/fatonline/#/framedata/movedetail/SFV/Menat/normal/Stand%20LK}} | |||
}} | }} | ||
}} | }} | ||
| Line 217: | Line 224: | ||
|description= | |description= | ||
* Hit Confirm notes: *Orb Recall/Explode only | * Hit Confirm notes: *Orb Recall/Explode only | ||
{{SFV Button FAT|link=https://fullmeter.com/fatonline/#/framedata/movedetail/SFV/Menat/normal/Stand%20MK}} | |||
}} | }} | ||
}} | }} | ||
| Line 243: | Line 251: | ||
* Hits crouching up close | * Hits crouching up close | ||
* Forces stand on hit | * Forces stand on hit | ||
{{SFV Button FAT|link=https://fullmeter.com/fatonline/#/framedata/movedetail/SFV/Menat/normal/Stand%20HK}} | |||
}} | }} | ||
}} | }} | ||
| Line 248: | Line 257: | ||
=====<font style="visibility:hidden; float:right">Stand HK orb</font>===== | =====<font style="visibility:hidden; float:right">Stand HK orb</font>===== | ||
{{MoveData | {{MoveData | ||
|image=SFV_Menat_5HK | |image=SFV_Menat_5HK (Orb).png | ||
|name=Stand HK orb | |name=Stand HK orb | ||
|input=5HK | |input=5HK (Orb) | ||
|data= | |data= | ||
{{AttackData-SFV | {{AttackData-SFV | ||
| Line 271: | Line 280: | ||
* the (x) refers to best-case advantage with spacing | * the (x) refers to best-case advantage with spacing | ||
* The ball can hit Abigail standing resulting in +3/-7 | * The ball can hit Abigail standing resulting in +3/-7 | ||
{{SFV Button FAT|link=https://fullmeter.com/fatonline/#/framedata/movedetail/SFV/Menat/normal/Stand%20HK%20orb}} | |||
}} | }} | ||
}} | }} | ||
| Line 294: | Line 304: | ||
|confirm=<nowiki>- / - / -</nowiki> | |confirm=<nowiki>- / - / -</nowiki> | ||
|description= | |description= | ||
{{SFV Button FAT|link=https://fullmeter.com/fatonline/#/framedata/movedetail/SFV/Menat/normal/Crouch%20LP}} | |||
}} | }} | ||
}} | }} | ||
| Line 299: | Line 310: | ||
=====<font style="visibility:hidden; float:right">Crouch LP orb</font>===== | =====<font style="visibility:hidden; float:right">Crouch LP orb</font>===== | ||
{{MoveData | {{MoveData | ||
|image=SFV_Menat_2LP | |image=SFV_Menat_2LP (Orb).png | ||
|name=Crouch LP orb | |name=Crouch LP orb | ||
|input=2LP | |input=2LP (Orb) | ||
|data= | |data= | ||
{{AttackData-SFV | {{AttackData-SFV | ||
| Line 319: | Line 330: | ||
* Extra range, damage and active frames on orb version | * Extra range, damage and active frames on orb version | ||
* the (x) refers to best-case advantage with spacing | * the (x) refers to best-case advantage with spacing | ||
{{SFV Button FAT|link=https://fullmeter.com/fatonline/#/framedata/movedetail/SFV/Menat/normal/Crouch%20LP%20orb}} | |||
}} | }} | ||
}} | }} | ||
| Line 342: | Line 354: | ||
|confirm=<nowiki>14 / 14 / -</nowiki> | |confirm=<nowiki>14 / 14 / -</nowiki> | ||
|description= | |description= | ||
{{SFV Button FAT|link=https://fullmeter.com/fatonline/#/framedata/movedetail/SFV/Menat/normal/Crouch%20MP}} | |||
}} | }} | ||
}} | }} | ||
| Line 347: | Line 360: | ||
=====<font style="visibility:hidden; float:right">Crouch MP orb</font>===== | =====<font style="visibility:hidden; float:right">Crouch MP orb</font>===== | ||
{{MoveData | {{MoveData | ||
|image=SFV_Menat_2MP | |image=SFV_Menat_2MP (Orb).png | ||
|name=Crouch MP orb | |name=Crouch MP orb | ||
|input=2MP | |input=2MP (Orb) | ||
|data= | |data= | ||
{{AttackData-SFV | {{AttackData-SFV | ||
| Line 367: | Line 380: | ||
* Extra range, damage and active frames on orb version | * Extra range, damage and active frames on orb version | ||
* the (x) refers to best-case advantage with spacing | * the (x) refers to best-case advantage with spacing | ||
{{SFV Button FAT|link=https://fullmeter.com/fatonline/#/framedata/movedetail/SFV/Menat/normal/Crouch%20MP%20orb}} | |||
}} | }} | ||
}} | }} | ||
| Line 393: | Line 407: | ||
* Crouching hurtbox on frames 1-8 | * Crouching hurtbox on frames 1-8 | ||
* Can only Crush Counter on the 1st active frame and does 10 less damage on subsequent frames | * Can only Crush Counter on the 1st active frame and does 10 less damage on subsequent frames | ||
{{SFV Button FAT|link=https://fullmeter.com/fatonline/#/framedata/movedetail/SFV/Menat/normal/Crouch%20HP}} | |||
}} | }} | ||
}} | }} | ||
| Line 398: | Line 413: | ||
=====<font style="visibility:hidden; float:right">Crouch HP orb</font>===== | =====<font style="visibility:hidden; float:right">Crouch HP orb</font>===== | ||
{{MoveData | {{MoveData | ||
|image=SFV_Menat_2HP | |image=SFV_Menat_2HP (Orb).png | ||
|name=Crouch HP orb | |name=Crouch HP orb | ||
|input=2HP | |input=2HP (Orb) | ||
|data= | |data= | ||
{{AttackData-SFV | {{AttackData-SFV | ||
| Line 422: | Line 437: | ||
* the (x) refers to best-case advantage with spacing | * the (x) refers to best-case advantage with spacing | ||
* If just the hitbox on the orb itself connects instead of Menat's hand (like on a standing Abigail) it results in +3/-3 advantage | * If just the hitbox on the orb itself connects instead of Menat's hand (like on a standing Abigail) it results in +3/-3 advantage | ||
{{SFV Button FAT|link=https://fullmeter.com/fatonline/#/framedata/movedetail/SFV/Menat/normal/Crouch%20HP%20orb}} | |||
}} | }} | ||
}} | }} | ||
| Line 446: | Line 462: | ||
|description= | |description= | ||
* Chains into st.LP or cr.LP (with or without orb) | * Chains into st.LP or cr.LP (with or without orb) | ||
{{SFV Button FAT|link=https://fullmeter.com/fatonline/#/framedata/movedetail/SFV/Menat/normal/Crouch%20LK}} | |||
}} | }} | ||
}} | }} | ||
| Line 469: | Line 486: | ||
|confirm=<nowiki>14 / 14 / -</nowiki> | |confirm=<nowiki>14 / 14 / -</nowiki> | ||
|description= | |description= | ||
{{SFV Button FAT|link=https://fullmeter.com/fatonline/#/framedata/movedetail/SFV/Menat/normal/Crouch%20MK}} | |||
}} | }} | ||
}} | }} | ||
| Line 493: | Line 511: | ||
|description= | |description= | ||
* Only builds 100 V-Gauge (1/3rd of a bar) on a Crush Counter instead of the regular 150 | * Only builds 100 V-Gauge (1/3rd of a bar) on a Crush Counter instead of the regular 150 | ||
{{SFV Button FAT|link=https://fullmeter.com/fatonline/#/framedata/movedetail/SFV/Menat/normal/Crouch%20HK}} | |||
}} | }} | ||
}} | }} | ||
| Line 498: | Line 517: | ||
=====<font style="visibility:hidden; float:right">Crouch HK orb</font>===== | =====<font style="visibility:hidden; float:right">Crouch HK orb</font>===== | ||
{{MoveData | {{MoveData | ||
|image=SFV_Menat_2HK | |image=SFV_Menat_2HK (Orb).png | ||
|name=Crouch HK orb | |name=Crouch HK orb | ||
|input=2HK | |input=2HK (Orb) | ||
|data= | |data= | ||
{{AttackData-SFV | {{AttackData-SFV | ||
| Line 519: | Line 538: | ||
* the (x) refers to best-case advantage with spacing | * the (x) refers to best-case advantage with spacing | ||
* Only builds 100 V-Gauge (1/3rd of a bar) on a Crush Counter instead of the regular 150 | * Only builds 100 V-Gauge (1/3rd of a bar) on a Crush Counter instead of the regular 150 | ||
{{SFV Button FAT|link=https://fullmeter.com/fatonline/#/framedata/movedetail/SFV/Menat/normal/Crouch%20HK%20orb}} | |||
}} | }} | ||
}} | }} | ||
| Line 524: | Line 544: | ||
=====<font style="visibility:hidden; float:right">Jump LP</font>===== | =====<font style="visibility:hidden; float:right">Jump LP</font>===== | ||
{{MoveData | {{MoveData | ||
|image= | |image=SFV_Menat_8LP.png | ||
|name=Jump LP | |name=Jump LP | ||
|input= | |input=8LP | ||
|data= | |data= | ||
{{AttackData-SFV | {{AttackData-SFV | ||
| Line 542: | Line 562: | ||
|confirm=<nowiki>- / - / -</nowiki> | |confirm=<nowiki>- / - / -</nowiki> | ||
|description= | |description= | ||
{{SFV Button FAT|link=https://fullmeter.com/fatonline/#/framedata/movedetail/SFV/Menat/normal/Jump%20LP}} | |||
}} | }} | ||
}} | }} | ||
| Line 547: | Line 568: | ||
=====<font style="visibility:hidden; float:right">Jump LP orb</font>===== | =====<font style="visibility:hidden; float:right">Jump LP orb</font>===== | ||
{{MoveData | {{MoveData | ||
|image= | |image=SFV_Menat_8LP (Orb).png | ||
|name=Jump LP orb | |name=Jump LP orb | ||
|input= | |input=8LP (Orb) | ||
|data= | |data= | ||
{{AttackData-SFV | {{AttackData-SFV | ||
| Line 566: | Line 587: | ||
|description= | |description= | ||
* Extra range and damage on orb version | * Extra range and damage on orb version | ||
{{SFV Button FAT|link=https://fullmeter.com/fatonline/#/framedata/movedetail/SFV/Menat/normal/Jump%20LP%20orb}} | |||
}} | }} | ||
}} | }} | ||
| Line 571: | Line 593: | ||
=====<font style="visibility:hidden; float:right">Jump MP</font>===== | =====<font style="visibility:hidden; float:right">Jump MP</font>===== | ||
{{MoveData | {{MoveData | ||
|image= | |image=SFV_Menat_8MP.png | ||
|name=Jump MP | |name=Jump MP | ||
|input= | |input=8MP | ||
|data= | |data= | ||
{{AttackData-SFV | {{AttackData-SFV | ||
| Line 589: | Line 611: | ||
|confirm=<nowiki>- / - / -</nowiki> | |confirm=<nowiki>- / - / -</nowiki> | ||
|description= | |description= | ||
{{SFV Button FAT|link=https://fullmeter.com/fatonline/#/framedata/movedetail/SFV/Menat/normal/Jump%20MP}} | |||
}} | }} | ||
}} | }} | ||
| Line 594: | Line 617: | ||
=====<font style="visibility:hidden; float:right">Jump MP orb</font>===== | =====<font style="visibility:hidden; float:right">Jump MP orb</font>===== | ||
{{MoveData | {{MoveData | ||
|image= | |image=SFV_Menat_8MP (Orb).png | ||
|name=Jump MP orb | |name=Jump MP orb | ||
|input= | |input=8MP (Orb) | ||
|data= | |data= | ||
{{AttackData-SFV | {{AttackData-SFV | ||
| Line 613: | Line 636: | ||
|description= | |description= | ||
* Extra range and damage on orb version | * Extra range and damage on orb version | ||
{{SFV Button FAT|link=https://fullmeter.com/fatonline/#/framedata/movedetail/SFV/Menat/normal/Jump%20MP%20orb}} | |||
}} | }} | ||
}} | }} | ||
| Line 618: | Line 642: | ||
=====<font style="visibility:hidden; float:right">Jump HP</font>===== | =====<font style="visibility:hidden; float:right">Jump HP</font>===== | ||
{{MoveData | {{MoveData | ||
|image= | |image=SFV_Menat_8HP.png | ||
|name=Jump HP | |name=Jump HP | ||
|input= | |input=8HP | ||
|data= | |data= | ||
{{AttackData-SFV | {{AttackData-SFV | ||
| Line 636: | Line 660: | ||
|confirm=<nowiki>- / - / -</nowiki> | |confirm=<nowiki>- / - / -</nowiki> | ||
|description= | |description= | ||
{{SFV Button FAT|link=https://fullmeter.com/fatonline/#/framedata/movedetail/SFV/Menat/normal/Jump%20HP}} | |||
}} | }} | ||
}} | }} | ||
| Line 641: | Line 666: | ||
=====<font style="visibility:hidden; float:right">Jump HP orb</font>===== | =====<font style="visibility:hidden; float:right">Jump HP orb</font>===== | ||
{{MoveData | {{MoveData | ||
|image= | |image=SFV_Menat_8HP (Orb).png | ||
|name=Jump HP orb | |name=Jump HP orb | ||
|input= | |input=8HP (Orb) | ||
|data= | |data= | ||
{{AttackData-SFV | {{AttackData-SFV | ||
| Line 662: | Line 687: | ||
* Extra range and damage on orb version | * Extra range and damage on orb version | ||
* Hitbox to hurtbox ratio the best jump-in in all of SFV if timed properly with the Orb | * Hitbox to hurtbox ratio the best jump-in in all of SFV if timed properly with the Orb | ||
{{SFV Button FAT|link=https://fullmeter.com/fatonline/#/framedata/movedetail/SFV/Menat/normal/Jump%20HP%20orb}} | |||
}} | }} | ||
}} | }} | ||
| Line 667: | Line 693: | ||
=====<font style="visibility:hidden; float:right">Jump LK</font>===== | =====<font style="visibility:hidden; float:right">Jump LK</font>===== | ||
{{MoveData | {{MoveData | ||
|image= | |image=SFV_Menat_8LK.png | ||
|name=Jump LK | |name=Jump LK | ||
|input= | |input=8LK | ||
|data= | |data= | ||
{{AttackData-SFV | {{AttackData-SFV | ||
| Line 686: | Line 712: | ||
|description= | |description= | ||
* Can Crossup | * Can Crossup | ||
{{SFV Button FAT|link=https://fullmeter.com/fatonline/#/framedata/movedetail/SFV/Menat/normal/Jump%20LK}} | |||
}} | }} | ||
}} | }} | ||
| Line 691: | Line 718: | ||
=====<font style="visibility:hidden; float:right">Jump MK</font>===== | =====<font style="visibility:hidden; float:right">Jump MK</font>===== | ||
{{MoveData | {{MoveData | ||
|image= | |image=SFV_Menat_8MK.png | ||
|name=Jump MK | |name=Jump MK | ||
|input= | |input=8MK | ||
|data= | |data= | ||
{{AttackData-SFV | {{AttackData-SFV | ||
| Line 710: | Line 737: | ||
|description= | |description= | ||
* Can Crossup | * Can Crossup | ||
{{SFV Button FAT|link=https://fullmeter.com/fatonline/#/framedata/movedetail/SFV/Menat/normal/Jump%20MK}} | |||
}} | }} | ||
}} | }} | ||
| Line 715: | Line 743: | ||
=====<font style="visibility:hidden; float:right">Jump HK</font>===== | =====<font style="visibility:hidden; float:right">Jump HK</font>===== | ||
{{MoveData | {{MoveData | ||
|image= | |image=SFV_Menat_8HK.png | ||
|name=Jump HK | |name=Jump HK | ||
|input= | |input=8HK | ||
|data= | |data= | ||
{{AttackData-SFV | {{AttackData-SFV | ||
| Line 733: | Line 761: | ||
|confirm=<nowiki>- / - / -</nowiki> | |confirm=<nowiki>- / - / -</nowiki> | ||
|description= | |description= | ||
{{SFV Button FAT|link=https://fullmeter.com/fatonline/#/framedata/movedetail/SFV/Menat/normal/Jump%20HK}} | |||
}} | }} | ||
}} | }} | ||
| Line 738: | Line 767: | ||
=====<font style="visibility:hidden; float:right">Jump HK orb</font>===== | =====<font style="visibility:hidden; float:right">Jump HK orb</font>===== | ||
{{MoveData | {{MoveData | ||
|image= | |image=SFV_Menat_8HK (Orb).png | ||
|name=Jump HK orb | |name=Jump HK orb | ||
|input= | |input=8HK (Orb) | ||
|data= | |data= | ||
{{AttackData-SFV | {{AttackData-SFV | ||
| Line 759: | Line 788: | ||
* Extra range and damage on ball version | * Extra range and damage on ball version | ||
* Insane horizontal hitbox range on orb compared to her hurtbox | * Insane horizontal hitbox range on orb compared to her hurtbox | ||
{{SFV Button FAT|link=https://fullmeter.com/fatonline/#/framedata/movedetail/SFV/Menat/normal/Jump%20HK%20orb}} | |||
}} | }} | ||
}} | }} | ||
| Line 787: | Line 817: | ||
* Not cancelable in any way | * Not cancelable in any way | ||
* +4 oH / +0 oB on last active frame (can be spaced) | * +4 oH / +0 oB on last active frame (can be spaced) | ||
{{SFV Button FAT|link=https://fullmeter.com/fatonline/#/framedata/movedetail/SFV/Menat/normal/Judgement%20of%20Anubis}} | |||
}} | }} | ||
}} | }} | ||
| Line 813: | Line 844: | ||
* Both hits are Overhead | * Both hits are Overhead | ||
* Cancelable into Soul Sphere: Ankh (orb recall) on 1st hit only | * Cancelable into Soul Sphere: Ankh (orb recall) on 1st hit only | ||
{{SFV Button FAT|link=https://fullmeter.com/fatonline/#/framedata/movedetail/SFV/Menat/normal/Judgement%20of%20Anubis}} | |||
}} | }} | ||
}} | }} | ||
| Line 818: | Line 850: | ||
=====<font style="visibility:hidden; float:right">LK Khamun Kick</font>===== | =====<font style="visibility:hidden; float:right">LK Khamun Kick</font>===== | ||
{{MoveData | {{MoveData | ||
|image= | |image=SFV_Menat_2 or 1 or 3LK (air).png | ||
|name=LK Khamun Kick | |name=LK Khamun Kick | ||
|input= | |input=2 or 1 or 3LK (air) | ||
|data= | |data= | ||
{{AttackData-SFV | {{AttackData-SFV | ||
| Line 841: | Line 873: | ||
* Frame advantage results here are when doing instant air divekicks (if divekick connects higher up, Menat is going to be more - on hit / block) | * Frame advantage results here are when doing instant air divekicks (if divekick connects higher up, Menat is going to be more - on hit / block) | ||
* The (x) refers to best-case advantage with spacing | * The (x) refers to best-case advantage with spacing | ||
{{SFV Button FAT|link=https://fullmeter.com/fatonline/#/framedata/movedetail/SFV/Menat/normal/Judgement%20of%20Anubis}} | |||
}} | }} | ||
}} | }} | ||
| Line 846: | Line 879: | ||
=====<font style="visibility:hidden; float:right">MK Khamun Kick</font>===== | =====<font style="visibility:hidden; float:right">MK Khamun Kick</font>===== | ||
{{MoveData | {{MoveData | ||
|image= | |image=SFV_Menat_3 or 1 or 3MK (air).png | ||
|name=MK Khamun Kick | |name=MK Khamun Kick | ||
|input= | |input=3 or 1 or 3MK (air) | ||
|data= | |data= | ||
{{AttackData-SFV | {{AttackData-SFV | ||
| Line 869: | Line 902: | ||
* Frame advantage results here are when doing instant air divekicks (if divekick connects higher up, Menat is going to be more - on hit / block) | * Frame advantage results here are when doing instant air divekicks (if divekick connects higher up, Menat is going to be more - on hit / block) | ||
* The (x) refers to best-case advantage with spacing | * The (x) refers to best-case advantage with spacing | ||
{{SFV Button FAT|link=https://fullmeter.com/fatonline/#/framedata/movedetail/SFV/Menat/normal/Judgement%20of%20Anubis}} | |||
}} | }} | ||
}} | }} | ||
| Line 874: | Line 908: | ||
=====<font style="visibility:hidden; float:right">HK Khamun Kick</font>===== | =====<font style="visibility:hidden; float:right">HK Khamun Kick</font>===== | ||
{{MoveData | {{MoveData | ||
|image= | |image=SFV_Menat_4 or 1 or 3HK (air).png | ||
|name=HK Khamun Kick | |name=HK Khamun Kick | ||
|input= | |input=4 or 1 or 3HK (air) | ||
|data= | |data= | ||
{{AttackData-SFV | {{AttackData-SFV | ||
| Line 897: | Line 931: | ||
* Frame advantage results here are when doing instant air divekicks (if divekick connects higher up, Menat is going to be more - on hit / block) | * Frame advantage results here are when doing instant air divekicks (if divekick connects higher up, Menat is going to be more - on hit / block) | ||
* The (x) refers to best-case advantage with spacing | * The (x) refers to best-case advantage with spacing | ||
{{SFV Button FAT|link=https://fullmeter.com/fatonline/#/framedata/movedetail/SFV/Menat/normal/Judgement%20of%20Anubis}} | |||
}} | }} | ||
}} | }} | ||
| Line 924: | Line 959: | ||
|description= | |description= | ||
* Can walk forward throw loop in the corner if they wake-up with a normal that pushes their grab-box forward (such as Akuma's 3-frame st.LP) | * Can walk forward throw loop in the corner if they wake-up with a normal that pushes their grab-box forward (such as Akuma's 3-frame st.LP) | ||
{{SFV Button FAT|link=https://fullmeter.com/fatonline/#/framedata/movedetail/SFV/Menat/normal/Overflowing%20Nile}} | |||
}} | }} | ||
}} | }} | ||
| Line 948: | Line 984: | ||
|confirm=<nowiki>- / - / -</nowiki> | |confirm=<nowiki>- / - / -</nowiki> | ||
|description= | |description= | ||
{{SFV Button FAT|link=https://fullmeter.com/fatonline/#/framedata/movedetail/SFV/Menat/normal/Pyramid%20Hopscotch}} | |||
}} | }} | ||
}} | }} | ||
| Line 979: | Line 1,016: | ||
* Denies backroll on wake-up | * Denies backroll on wake-up | ||
* Crouching hurtbox during startup | * Crouching hurtbox during startup | ||
{{SFV Button FAT|link=https://fullmeter.com/fatonline/#/framedata/movedetail/SFV/Menat/normal/LK%20Guardian%20of%20the%20Sun}} | |||
}} | }} | ||
}} | }} | ||
| Line 1,008: | Line 1,046: | ||
* Denies backroll on wake-up | * Denies backroll on wake-up | ||
* Crouching hurtbox during startup | * Crouching hurtbox during startup | ||
{{SFV Button FAT|link=https://fullmeter.com/fatonline/#/framedata/movedetail/SFV/Menat/normal/MK%20Guardian%20of%20the%20Sun}} | |||
}} | }} | ||
}} | }} | ||
| Line 1,037: | Line 1,076: | ||
* Denies backroll on wake-up | * Denies backroll on wake-up | ||
* Crouching hurtbox during startup | * Crouching hurtbox during startup | ||
{{SFV Button FAT|link=https://fullmeter.com/fatonline/#/framedata/movedetail/SFV/Menat/normal/HK%20Guardian%20of%20the%20Sun}} | |||
}} | }} | ||
}} | }} | ||
| Line 1,067: | Line 1,107: | ||
* Denies backroll on wake-up | * Denies backroll on wake-up | ||
* Crouching hurtbox during startup | * Crouching hurtbox during startup | ||
{{SFV Button FAT|link=https://fullmeter.com/fatonline/#/framedata/movedetail/SFV/Menat/normal/EX%20Guardian%20of%20the%20Sun}} | |||
}} | }} | ||
}} | }} | ||
| Line 1,096: | Line 1,137: | ||
* The same moves that cancel into the Orb Recall can also be canceled into this Soul Spark move | * The same moves that cancel into the Orb Recall can also be canceled into this Soul Spark move | ||
* Cancelable into V-Trigger 2 orb firing and reload | * Cancelable into V-Trigger 2 orb firing and reload | ||
{{SFV Button FAT|link=https://fullmeter.com/fatonline/#/framedata/movedetail/SFV/Menat/normal/Soul%20Spark}} | |||
}} | }} | ||
}} | }} | ||
| Line 1,123: | Line 1,165: | ||
* Places the ball down on the floor at 50% screen range | * Places the ball down on the floor at 50% screen range | ||
* Ball dissipates and goes back into Menat's hands if it collides with another projectile during its active frames | * Ball dissipates and goes back into Menat's hands if it collides with another projectile during its active frames | ||
{{SFV Button FAT|link=https://fullmeter.com/fatonline/#/framedata/movedetail/SFV/Menat/normal/LP%20Soul%20Sphere}} | |||
}} | }} | ||
}} | }} | ||
| Line 1,150: | Line 1,193: | ||
* Places the ball above floor at 75% screen range | * Places the ball above floor at 75% screen range | ||
* Ball dissipates and goes back into Menat's hands if it collides with another projectile during its active frames | * Ball dissipates and goes back into Menat's hands if it collides with another projectile during its active frames | ||
{{SFV Button FAT|link=https://fullmeter.com/fatonline/#/framedata/movedetail/SFV/Menat/normal/MP%20Soul%20Sphere}} | |||
}} | }} | ||
}} | }} | ||
| Line 1,179: | Line 1,223: | ||
* Ball dissipates and goes back into Menat's hands if it collides with another projectile during its active frames | * Ball dissipates and goes back into Menat's hands if it collides with another projectile during its active frames | ||
* Cannot hit crouching | * Cannot hit crouching | ||
{{SFV Button FAT|link=https://fullmeter.com/fatonline/#/framedata/movedetail/SFV/Menat/normal/HP%20Soul%20Sphere}} | |||
}} | }} | ||
}} | }} | ||
| Line 1,207: | Line 1,252: | ||
* On Whiff: Places the ball down on the floor at 50% screen range | * On Whiff: Places the ball down on the floor at 50% screen range | ||
* Ball does NOT dissipate back into Menat's hands if it collides with other fireballs | * Ball does NOT dissipate back into Menat's hands if it collides with other fireballs | ||
{{SFV Button FAT|link=https://fullmeter.com/fatonline/#/framedata/movedetail/SFV/Menat/normal/LPMP%20Soul%20Sphere}} | |||
}} | }} | ||
}} | }} | ||
| Line 1,235: | Line 1,281: | ||
* On Whiff: Places the ball above floor at 50% screen range | * On Whiff: Places the ball above floor at 50% screen range | ||
* Ball does NOT dissipate back into Menat's hands if it collides with other fireballs | * Ball does NOT dissipate back into Menat's hands if it collides with other fireballs | ||
{{SFV Button FAT|link=https://fullmeter.com/fatonline/#/framedata/movedetail/SFV/Menat/normal/LPHP%20Soul%20Sphere}} | |||
}} | }} | ||
}} | }} | ||
| Line 1,263: | Line 1,310: | ||
* Ball does NOT dissipate back into Menat's hands if it collides with other fireballs | * Ball does NOT dissipate back into Menat's hands if it collides with other fireballs | ||
* Cancelable into V-Trigger 2 orb firing and reload on hit and block | * Cancelable into V-Trigger 2 orb firing and reload on hit and block | ||
{{SFV Button FAT|link=https://fullmeter.com/fatonline/#/framedata/movedetail/SFV/Menat/normal/MPHP%20Soul%20Sphere}} | |||
}} | }} | ||
}} | }} | ||
| Line 1,291: | Line 1,339: | ||
* On whiff: Places the ball above the opponent at 60% screen range | * On whiff: Places the ball above the opponent at 60% screen range | ||
* Ball does NOT dissipate back into Menat's hands if it collides with other fireballs | * Ball does NOT dissipate back into Menat's hands if it collides with other fireballs | ||
{{SFV Button FAT|link=https://fullmeter.com/fatonline/#/framedata/movedetail/SFV/Menat/normal/MPHP%20Soul%20Sphere%20Air}} | |||
}} | }} | ||
}} | }} | ||
| Line 1,323: | Line 1,372: | ||
* Frame advantage varies greatly (but is always plus on hit / block) | * Frame advantage varies greatly (but is always plus on hit / block) | ||
* Frame advantage shown is the least amount of advantage possible (if Orb is used while inside their hurtbox) | * Frame advantage shown is the least amount of advantage possible (if Orb is used while inside their hurtbox) | ||
{{SFV Button FAT|link=https://fullmeter.com/fatonline/#/framedata/movedetail/SFV/Menat/normal/Soul%20Sphere%20Ankh}} | |||
}} | }} | ||
}} | }} | ||
== Critical | == Critical Art == | ||
=====<font style="visibility:hidden; float:right">The Nefertem</font>===== | =====<font style="visibility:hidden; float:right">The Nefertem</font>===== | ||
| Line 1,351: | Line 1,401: | ||
* Strike hitbox (not a projectile) | * Strike hitbox (not a projectile) | ||
* Hard Knockdown | * Hard Knockdown | ||
* Immediately recalls orb to Menat's hand when Super is initiated | |||
* Has different voice lines depending on what punch button is used to initiate Super | |||
* If Super is done with MP, Menat will wink at the end | |||
{{SFV Button FAT|link=https://fullmeter.com/fatonline/#/framedata/movedetail/SFV/Menat/normal/The%20Nefertem}} | |||
}} | }} | ||
}} | }} | ||
| Line 1,377: | Line 1,431: | ||
|description= | |description= | ||
* Upper-body Projectile invincible and Throw invincible on frames 44-216 | * Upper-body Projectile invincible and Throw invincible on frames 44-216 | ||
{{SFV Button FAT|link=https://fullmeter.com/fatonline/#/framedata/movedetail/SFV/Menat/normal/Taunt}} | |||
}} | }} | ||
}} | }} | ||
| Line 1,414: | Line 1,469: | ||
* Safer on block than the Orb version of this V-Skill | * Safer on block than the Orb version of this V-Skill | ||
* Faster recovery and better KDA than the Orb version of this V-Skill | * Faster recovery and better KDA than the Orb version of this V-Skill | ||
{{SFV Button FAT|link=https://fullmeter.com/fatonline/#/framedata/movedetail/SFV/Menat/normal/Soul%20Reflect:%20Kamal}} | |||
}} | }} | ||
}} | }} | ||
| Line 1,447: | Line 1,503: | ||
* Safer on block than the Orb version of this V-Skill | * Safer on block than the Orb version of this V-Skill | ||
* Faster recovery and better KDA than the Orb version of this V-Skill | * Faster recovery and better KDA than the Orb version of this V-Skill | ||
{{SFV Button FAT|link=https://fullmeter.com/fatonline/#/framedata/movedetail/SFV/Menat/normal/Soul%20Reflect:%20Stella}} | |||
}} | }} | ||
}} | }} | ||
| Line 1,452: | Line 1,509: | ||
=====<font style="visibility:hidden; float:right">Soul Reflect: Kamal (Orb)</font>===== | =====<font style="visibility:hidden; float:right">Soul Reflect: Kamal (Orb)</font>===== | ||
{{MoveData | {{MoveData | ||
|image=SFV_Menat_MPMK (VS1).png | |image=SFV_Menat_MPMK (VS1) (Orb).png | ||
|name=Soul Reflect: Kamal (Orb) | |name=Soul Reflect: Kamal (Orb) | ||
|input=MPMK (VS1) | |input=MPMK (VS1) (Orb) | ||
|data= | |data= | ||
{{AttackData-SFV | {{AttackData-SFV | ||
| Line 1,480: | Line 1,537: | ||
* Much more negative on block when using the Orb version of the V-Skills | * Much more negative on block when using the Orb version of the V-Skills | ||
* More recovery and worse KDA when using the Orb version of this V-Skill | * More recovery and worse KDA when using the Orb version of this V-Skill | ||
{{SFV Button FAT|link=https://fullmeter.com/fatonline/#/framedata/movedetail/SFV/Menat/normal/Soul%20Reflect:%20Kamal%20(Orb)}} | |||
}} | }} | ||
}} | }} | ||
| Line 1,512: | Line 1,570: | ||
* Much more negative on block when using the Orb version of the V-Skills | * Much more negative on block when using the Orb version of the V-Skills | ||
* More recovery and worse KDA when using the Orb version of this V-Skill | * More recovery and worse KDA when using the Orb version of this V-Skill | ||
{{SFV Button FAT|link=https://fullmeter.com/fatonline/#/framedata/movedetail/SFV/Menat/normal/Soul%20Reflect:%20Stella%20(Orb)}} | |||
}} | }} | ||
}} | }} | ||
| Line 1,541: | Line 1,600: | ||
* Can only special cancel into Soul Sphere Ankh (recall) and Soul Spark | * Can only special cancel into Soul Sphere Ankh (recall) and Soul Spark | ||
* Juggle Limit / Increase / Start: 1 / 1 / 1 | * Juggle Limit / Increase / Start: 1 / 1 / 1 | ||
{{SFV Button FAT|link=https://fullmeter.com/fatonline/#/framedata/movedetail/SFV/Menat/normal/Soul%20Spiral}} | |||
}} | }} | ||
}} | }} | ||
| Line 1,568: | Line 1,628: | ||
* Builds 60/30 V-gauge (hit/block) | * Builds 60/30 V-gauge (hit/block) | ||
* Juggle Limit / Increase / Start: 1 / 1 / 1 | * Juggle Limit / Increase / Start: 1 / 1 / 1 | ||
{{SFV Button FAT|link=https://fullmeter.com/fatonline/#/framedata/movedetail/SFV/Menat/normal/Soul%20Spiral%20(Orb)}} | |||
}} | }} | ||
}} | }} | ||
| Line 1,600: | Line 1,661: | ||
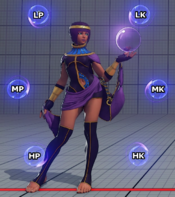
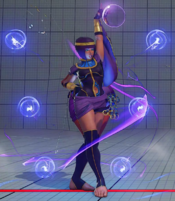
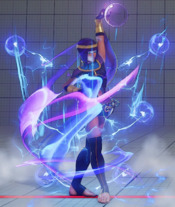
* Orbs do not shoot out unless a button is held & released or pressed at least 9 frames into the duration / animation of a NORMAL (does not apply to when inputting special moves, then the corresponding orb will shoot out immediately unless the button is held down) | * Orbs do not shoot out unless a button is held & released or pressed at least 9 frames into the duration / animation of a NORMAL (does not apply to when inputting special moves, then the corresponding orb will shoot out immediately unless the button is held down) | ||
* LP & LK (Highest 2 orbs) can only hit airborne opponents if used from standing position (but crouching and air versions of LP & LK can hit standing) | * LP & LK (Highest 2 orbs) can only hit airborne opponents if used from standing position (but crouching and air versions of LP & LK can hit standing) | ||
{{SFV Button FAT|link=https://fullmeter.com/fatonline/#/framedata/movedetail/SFV/Menat/normal/Wisdom%20of%20Thoth}} | |||
}} | }} | ||
}} | }} | ||
| Line 1,630: | Line 1,692: | ||
* Reload orbs after sending with HP+HK | * Reload orbs after sending with HP+HK | ||
* V-Trigger 2 orbs have a projectile hitbox | * V-Trigger 2 orbs have a projectile hitbox | ||
{{SFV Button FAT|link=https://fullmeter.com/fatonline/#/framedata/movedetail/SFV/Menat/normal/Prophecy%20of%20Thoth}} | |||
}} | }} | ||
}} | }} | ||
| Line 1,658: | Line 1,721: | ||
* Puts airborne opponents into a limited juggle state | * Puts airborne opponents into a limited juggle state | ||
* Spends 1000 V-Timer (50% V-Timer) when launching the first set of orbs (but does not cost anything to reload or fire the second set of orbs) | * Spends 1000 V-Timer (50% V-Timer) when launching the first set of orbs (but does not cost anything to reload or fire the second set of orbs) | ||
{{SFV Button FAT|link=https://fullmeter.com/fatonline/#/framedata/movedetail/SFV/Menat/vtTwo/LP%20Judgement%20of%20Thoth}} | |||
}} | }} | ||
}} | }} | ||
| Line 1,686: | Line 1,750: | ||
* This MP version puts airborne opponents into a free juggle state (LP and HP versions put them into a limited juggle state) | * This MP version puts airborne opponents into a free juggle state (LP and HP versions put them into a limited juggle state) | ||
* Spends 1000 V-Timer (50% V-Timer) when launching the first set of orbs (but does not cost anything to reload or fire the second set of orbs) | * Spends 1000 V-Timer (50% V-Timer) when launching the first set of orbs (but does not cost anything to reload or fire the second set of orbs) | ||
{{SFV Button FAT|link=https://fullmeter.com/fatonline/#/framedata/movedetail/SFV/Menat/vtTwo/MP%20Judgement%20of%20Thoth}} | |||
}} | }} | ||
}} | }} | ||
| Line 1,714: | Line 1,779: | ||
* Puts airborne opponents into a limited juggle state | * Puts airborne opponents into a limited juggle state | ||
* Spends 1000 V-Timer (50% V-Timer) when launching the first set of orbs (but does not cost anything to reload or fire the second set of orbs) | * Spends 1000 V-Timer (50% V-Timer) when launching the first set of orbs (but does not cost anything to reload or fire the second set of orbs) | ||
{{SFV Button FAT|link=https://fullmeter.com/fatonline/#/framedata/movedetail/SFV/Menat/vtTwo/HP%20Judgement%20of%20Thoth}} | |||
}} | }} | ||
}} | }} | ||
| Line 1,740: | Line 1,806: | ||
* Can only be done after firing off the initial 6 orbs she gains on V-Trigger 2 activation | * Can only be done after firing off the initial 6 orbs she gains on V-Trigger 2 activation | ||
* Takes a total of 42 frames of animation | * Takes a total of 42 frames of animation | ||
{{SFV Button FAT|link=https://fullmeter.com/fatonline/#/framedata/movedetail/SFV/Menat/vtTwo/Prophecy%20of%20Thoth%20}} | |||
}} | }} | ||
}} | }} | ||
| Line 1,747: | Line 1,814: | ||
=====<font style="visibility:hidden; float:right">V-Shift</font>===== | =====<font style="visibility:hidden; float:right">V-Shift</font>===== | ||
{{MoveData | {{MoveData | ||
|image= | |image=SFV_Menat_5MKHP.png | ||
|name=V-Shift | |name=V-Shift | ||
|input= | |input=5MKHP | ||
|data= | |data= | ||
{{AttackData-SFV | {{AttackData-SFV | ||
| Line 1,773: | Line 1,840: | ||
* Costs 300 V-Gauge (1 bar) to use and refunds 150 V-Gauge back (1/2 bar) on a successful V-Shift if the slow-mo is triggered | * Costs 300 V-Gauge (1 bar) to use and refunds 150 V-Gauge back (1/2 bar) on a successful V-Shift if the slow-mo is triggered | ||
* If the V-Shift is successful you can cancel it into a follow-up attack (see V-Shift Break) that's fully invincible and knocks the opponent down on hit | * If the V-Shift is successful you can cancel it into a follow-up attack (see V-Shift Break) that's fully invincible and knocks the opponent down on hit | ||
{{SFV Button FAT|link=https://fullmeter.com/fatonline/#/framedata/movedetail/SFV/Menat/normal/V-Shift}} | |||
}} | }} | ||
}} | }} | ||
| Line 1,780: | Line 1,848: | ||
=====<font style="visibility:hidden; float:right">Sistrum of Fortune</font>===== | =====<font style="visibility:hidden; float:right">Sistrum of Fortune</font>===== | ||
{{MoveData | {{MoveData | ||
|image= | |image=SFV_Menat_5MKHP_break.png | ||
|name=Sistrum of Fortune | |name=Sistrum of Fortune | ||
|input= | |input=5MKHP | ||
|data= | |data= | ||
{{AttackData-SFV | {{AttackData-SFV | ||
| Line 1,791: | Line 1,859: | ||
|crush=<nowiki>- / - / -</nowiki> | |crush=<nowiki>- / - / -</nowiki> | ||
|block=<nowiki>-2</nowiki> | |block=<nowiki>-2</nowiki> | ||
|knockdown=<nowiki> | |knockdown=<nowiki>77 / 18 / 23</nowiki> | ||
|damage=<nowiki>60</nowiki> | |damage=<nowiki>60</nowiki> | ||
|stun=<nowiki>0</nowiki> | |stun=<nowiki>0</nowiki> | ||
| Line 1,799: | Line 1,867: | ||
|description= | |description= | ||
* Fully invincible during startup and active frames | * Fully invincible during startup and active frames | ||
{{SFV Button FAT|link=https://fullmeter.com/fatonline/#/framedata/movedetail/SFV/Menat/normal/Sistrum%20of%20Fortune}} | |||
}} | }} | ||
}} | }} | ||
| Line 1,827: | Line 1,896: | ||
* Menat can be grabbed during the first 23 frames of startup before she teleports behind the opponent, after that she fully invincible on frames 24 to 40 | * Menat can be grabbed during the first 23 frames of startup before she teleports behind the opponent, after that she fully invincible on frames 24 to 40 | ||
* Vulnerable on the last 4 frames of recovery (frames 41-44) | * Vulnerable on the last 4 frames of recovery (frames 41-44) | ||
{{SFV Button FAT|link=https://fullmeter.com/fatonline/#/framedata/movedetail/SFV/Menat/normal/Left%20Eye%20of%20the%20Lion}} | |||
}} | }} | ||
}} | }} | ||
Revision as of 18:10, 13 April 2021
Introduction
About Menat
Unique Mechanics
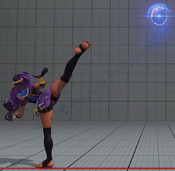
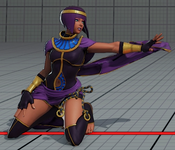
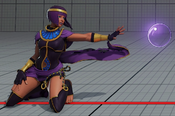
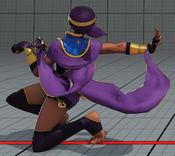
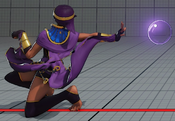
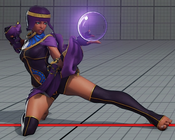
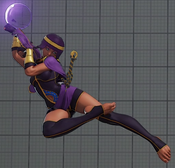
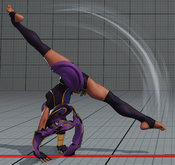
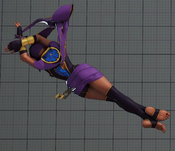
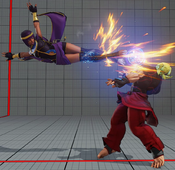
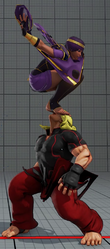
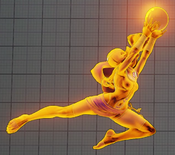
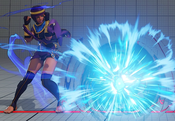
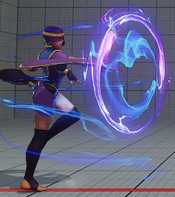
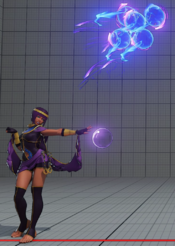
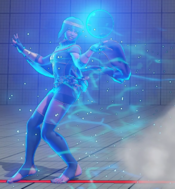
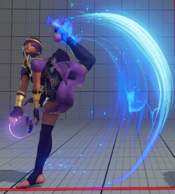
By using her Soul Sphere special, Menat throws her orb forward leaving it somewhere on the screen. LP throws it low, MP mid, HP higher up. After Menat places the orb on screen, all of her punch normals and HK normals will be changed with "orbless" versions, usually resulting in less range but better frame advantage for better combo opportunities. Certain normals with the orb will cause the next attack to be done as the orbless version as well if done immediately after; after a jump HK the orb will float slightly and a follow-up HK will be the no-orb version, letting her get a more damaging jump in combo than she normally would. She can recall the orb at any time, where it can hit opponents on the way back. If Menat is hit while the orb is returning, it loses its hitbox. The orb needs to physically move from its current position back to Menat, meaning it takes longer to get back if Menat is on the other side of the stage from the orb than it does if it's one a forward dash away. For the orb recall, she can also cancel into it from many normals such as 2HK and 6MK which are normally not special cancelable, allowing longer combos.
Final Patch
Players to Watch
- FluxWaveZ
- Justin Wong
- Sako
| Menat | |
|---|---|
| Vitals | |
| Life Points | 950 |
| Stun Points | 950 |
| V-Gauge Points | |
| V-Trigger 1 | 3 Bars |
| V-Trigger 2 | 2 Bars |
| Ground Movement | |
| Forward Walk Speed | 0.04 |
| Backward Walk Speed | 0.032 |
| Forward Dash Speed | 20 |
| Backward Dash Speed | 24 |
| Forward Dash Distance | 1.204 |
| Backward Dash Distance | 1.121 |
| Backdash CH Frames | 3-11 |
| Jumping | |
| Back Jump Speed | 49 (4+41+4) |
| Neutral Jump Speed | 49 (4+41+4) |
| Forward Jump Speed | 48 (3+41+4) |
| Forward Jump Distance | 2.05 |
| Backward Jump Distance | 1.845 |
| Throws | |
| Throw Hurtbox | 0.25 |
| Throw Range | 0.85 |
Frame Data & Descriptions are provided by FATOnline.
|
| SFV Frame Data Glossary | |
|---|---|
| Active |
How many frames a move remains active (can hurt opponents) for. |
| Attack |
Attack level is L for low attacks (must be blocked crouching), H is for High attacks (which can be blocked high or low) and M for overhead (must be blocked standing). T is for throw attacks (which cannot be blocked). |
| Cancel options |
Available cancel options.
|
| Confirm windows |
Hit confirm windows written as Specials & CAs/Target Combos/V-Trigger. Notation may denote V-Skill only cancel windows in Specials.
|
| Crush Counter |
Crush Counter hit advantage written as opponent state, frame advantage, and v-gauge gain on hit. |
| Damage |
Attack damage on hit. Notation may denote multi-hit or "sweet spot" damage values on certain frames. |
| Hit/Block |
These are frame advantage values when the attack hits or is blocked. If the number is positive, then the move will end before the defender can act again. If the number is negative, the defender will be able to act before the attacker and maybe even punish. KD refers to knockdown on hit.
|
| Knockdown |
Knockdown advantage against Normal, Quick Rise and Back Rise wake up options. |
| Recovery |
How many frames it takes for a move to finish after it's been active. |
| Startup |
How many frames it takes before the move becomes 'active' or have a hit box. The last startup frame and the first active frame are the same frame, meaning all values are written as Startup + 1. |
| Stun |
Amount of stun added to the opponent's stun bar on hit. |
Normals
Stand LP
Stand LP orb
Stand MP
Stand MP orb
Stand HP
Stand HP orb
Stand LK
Stand MK
Stand HK
Stand HK orb
Crouch LP
Crouch LP orb
Crouch MP
Crouch MP orb
Crouch HP
Crouch HP orb
Crouch LK
Crouch MK
Crouch HK
Crouch HK orb
Jump LP
Jump LP orb
Jump MP
Jump MP orb
Jump HP
Jump HP orb
Jump LK
Jump MK
Jump HK
Jump HK orb
Command Normals
Judgement of Anubis
Divine Retribution
LK Khamun Kick
MK Khamun Kick
HK Khamun Kick
Throws
Overflowing Nile
Pyramid Hopscotch
Special Moves
LK Guardian of the Sun
MK Guardian of the Sun
HK Guardian of the Sun
EX Guardian of the Sun
Soul Spark
LP Soul Sphere
MP Soul Sphere
HP Soul Sphere
LPMP Soul Sphere
LPHP Soul Sphere
MPHP Soul Sphere
MPHP Soul Sphere Air
Soul Sphere Ankh
Critical Art
The Nefertem
Taunts
Taunt
V-System
V-Skill 1
Soul Reflect: Kamal
Soul Reflect: Stella
Soul Reflect: Kamal (Orb)
Soul Reflect: Stella (Orb)
V-Skill 2
Soul Spiral
Soul Spiral (Orb)
V-Trigger 1
Wisdom of Thoth
V-Trigger 2
Prophecy of Thoth
LP Judgement of Thoth
MP Judgement of Thoth
HP Judgement of Thoth
Prophecy of Thoth
V-Shift
V-Shift
V-Shift Break
Sistrum of Fortune
V-Reversal
Left Eye of the Lion

