No edit summary |
No edit summary |
||
| Line 7: | Line 7: | ||
|vt1=900 | |vt1=900 | ||
|vt2=600 | |vt2=600 | ||
|movef= | |movef=0.031 | ||
|moveb= | |moveb=0.024 | ||
|dashf=23 | |dashf=23 | ||
|dashb=26 | |dashb=26 | ||
Revision as of 01:29, 14 March 2021
Introduction
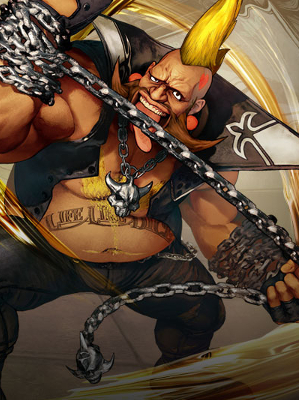
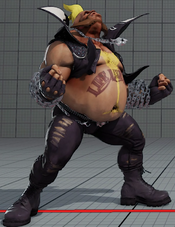
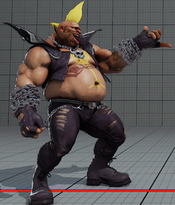
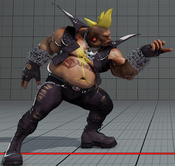
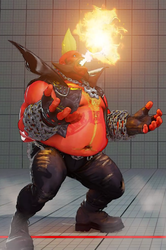
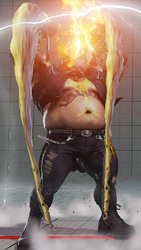
About Birdie
Birdie joined Shadaloo for money, however he left the organization after they forced him to wear a hat as part of the uniform. While on the run, he ends up at the Kanzuki Estate and meets Karin. Karin offers him a job working at her mansion, in exchange for infinite supply of food.
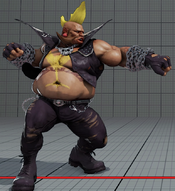
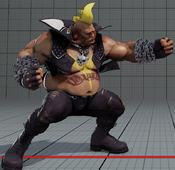
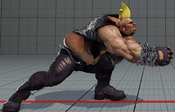
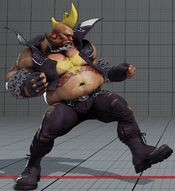
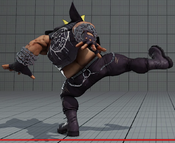
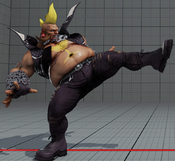
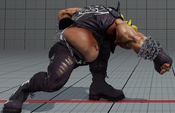
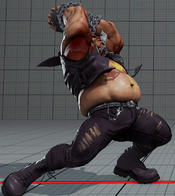
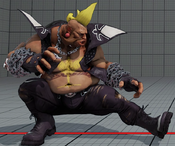
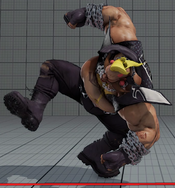
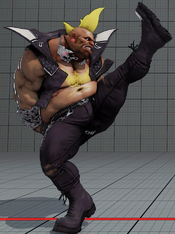
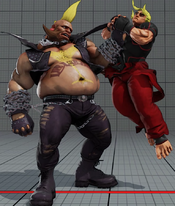
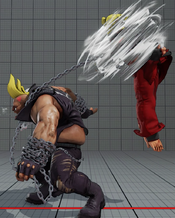
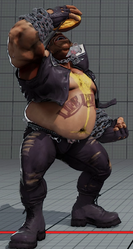
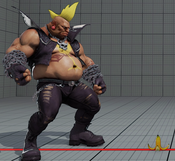
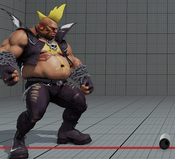
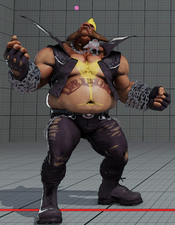
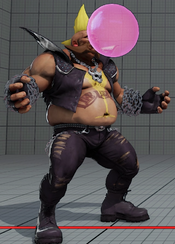
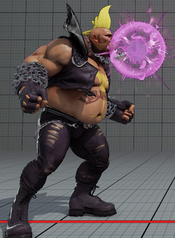
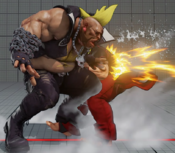
Birdie is considered the defensive grappler of the game. His stand MP is one of the longest ranged cancelable buttons, his stand HK has a fantastic hitbox that extends past his hurtbox and is a crush counter, stand HP is one of the longest ranged buttons in the game, and his chain can be used to grab people at a distance even through projectiles. His EX Bull Revenger can also be used to surprise people with a quick command grab. With his V-Skills, Birdie can also further enforce his defensive wall, force the opponent to come to him by building V-Meter, or setup his own approach. Outside of V-Trigger his walk speed is slow and he has no 3f button which can make him feel sluggish, however if you like command grabs and defensive play Birdie is a great choice.
Final Patch
Players to Watch
- MenaRD
- Magnegro
| Birdie | |
|---|---|
| Vitals | |
| Life Points | 1050 |
| Stun Points | 1000 |
| V-Gauge Points | |
| V-Trigger 1 | 900 |
| V-Trigger 2 | 600 |
| Ground Movement | |
| Forward Walk Speed | 0.031 |
| Backward Walk Speed | 0.024 |
| Forward Dash Speed | 23 |
| Backward Dash Speed | 26 |
| Forward Dash Distance | 132.5 |
| Backward Dash Distance | 134.6 |
| Backdash CH Frames | 3-20 |
| Jumping | |
| Back Jump Speed | 50(5+41+4) |
| Neutral Jump Speed | 50(5+41+4) |
| Forward Jump Speed | 49(4+41+4) |
| Forward Jump Distance | 143.5 |
| Backward Jump Distance | 131.2 |
| Throws | |
| Throw Hurtbox | 0.3 |
| Throw Range | 0.9 |
Frame Data & Descriptions are provided by FATOnline.
|
| SFV Frame Data Glossary | |
|---|---|
| Active |
How many frames a move remains active (can hurt opponents) for. |
| Attack |
Attack level is L for low attacks (must be blocked crouching), H is for High attacks (which can be blocked high or low) and M for overhead (must be blocked standing). T is for throw attacks (which cannot be blocked). |
| Cancel options |
Available cancel options.
|
| Confirm windows |
Hit confirm windows written as Specials & CAs/Target Combos/V-Trigger. Notation may denote V-Skill only cancel windows in Specials.
|
| Crush Counter |
Crush Counter hit advantage written as opponent state, frame advantage, and v-gauge gain on hit. |
| Damage |
Attack damage on hit. Notation may denote multi-hit or "sweet spot" damage values on certain frames. |
| Hit/Block |
These are frame advantage values when the attack hits or is blocked. If the number is positive, then the move will end before the defender can act again. If the number is negative, the defender will be able to act before the attacker and maybe even punish. KD refers to knockdown on hit.
|
| Knockdown |
Knockdown advantage against Normal, Quick Rise and Back Rise wake up options. |
| Recovery |
How many frames it takes for a move to finish after it's been active. |
| Startup |
How many frames it takes before the move becomes 'active' or have a hit box. The last startup frame and the first active frame are the same frame, meaning all values are written as Startup + 1. |
| Stun |
Amount of stun added to the opponent's stun bar on hit. |
Normals
Stand LP
| Normal | Startup | Active | Recovery | Hit |
|---|---|---|---|---|
| 5 | 2 | 10 | 4 | |
| Damage | Stun | Attack | Block | |
| 40 | 90 | H | 3 | |
| V-Trigger 1 | Startup | Active | Recovery | Hit |
| 5 | 2 | 10 | 4 | |
| Damage | Stun | Attack | Block | |
| 48 | 90 | H | 3 |
Stand MP
| Normal | Startup | Active | Recovery | Hit | ||
|---|---|---|---|---|---|---|
| 7 | 2 | 16(20) | 4 | |||
| Damage | Stun | Attack | Block | |||
| 60 | 120 | H | 1 | |||
| ||||||
| V-Trigger 1 | Startup | Active | Recovery | Hit | ||
| 7 | 2 | 16(20) | 4 | |||
| Damage | Stun | Attack | Block | |||
| 72 | 120 | H | 1 | |||
| ||||||
Stand HP
| Normal | Startup | Active | Recovery | Hit | ||
|---|---|---|---|---|---|---|
| 14 | 2 | 22 | 4 | |||
| Damage | Stun | Attack | Block | |||
| 90 | 150 | H | -6 | |||
| ||||||
| V-Trigger 1 | Startup | Active | Recovery | Hit | ||
| 14 | 2 | 22 | 4 | |||
| Damage | Stun | Attack | Block | |||
| 108 | 150 | H | -6 | |||
| ||||||
Stand LK
| Normal | Startup | Active | Recovery | Hit | ||
|---|---|---|---|---|---|---|
| 4 | 3 | 6 | 6 | |||
| Damage | Stun | Attack | Block | |||
| 30 | 90 | H | 3 | |||
| ||||||
| V-Trigger 1 | Startup | Active | Recovery | Hit | ||
| 4 | 3 | 6 | 6 | |||
| Damage | Stun | Attack | Block | |||
| 36 | 90 | H | 3 | |||
| ||||||
Stand MK
| Normal | Startup | Active | Recovery | Hit | ||
|---|---|---|---|---|---|---|
| 9 | 3 | 16 | 2 | |||
| Damage | Stun | Attack | Block | |||
| 60 | 120 | H | -2 | |||
| ||||||
| V-Trigger 1 | Startup | Active | Recovery | Hit | ||
| 9 | 3 | 16 | 2 | |||
| Damage | Stun | Attack | Block | |||
| 72 | 120 | H | -2 | |||
| ||||||
Stand HK
| Normal | Startup | Active | Recovery | Hit | ||
|---|---|---|---|---|---|---|
| 12 | 3 | 20 | 7 | |||
| Damage | Stun | Attack | Block | |||
| 100 | 150 | H | 0 | |||
| ||||||
| V-Trigger 1 | Startup | Active | Recovery | Hit | ||
| 12 | 3 | 20 | 7 | |||
| Damage | Stun | Attack | Block | |||
| 120 | 150 | H | 0 | |||
| ||||||
Crouch LP
| Normal | Startup | Active | Recovery | Hit | ||
|---|---|---|---|---|---|---|
| 5 | 3 | 10 | 4 | |||
| Damage | Stun | Attack | Block | |||
| 40 | 90 | H | 2 | |||
| ||||||
| V-Trigger 1 | Startup | Active | Recovery | Hit | ||
| 5 | 3 | 10 | 4 | |||
| Damage | Stun | Attack | Block | |||
| 48 | 90 | H | 2 | |||
| ||||||
Crouch MP
| Normal | Startup | Active | Recovery | Hit | ||
|---|---|---|---|---|---|---|
| 6 | 5 | 16 | 0 | |||
| Damage | Stun | Attack | Block | |||
| 70 | 120 | H | -5 | |||
| ||||||
| V-Trigger 1 | Startup | Active | Recovery | Hit | ||
| 6 | 6 | 15 | 0 | |||
| Damage | Stun | Attack | Block | |||
| 84 | 120 | H | -5 | |||
| ||||||
Crouch HP
| Normal | Startup | Active | Recovery | Hit | ||
|---|---|---|---|---|---|---|
| 11 | 4 | 26 | KD | |||
| Damage | Stun | Attack | Block | |||
| 80 | 120 | H | -9 | |||
| ||||||
| V-Trigger 1 | Startup | Active | Recovery | Hit | ||
| 11 | 4 | 26 | KD | |||
| Damage | Stun | Attack | Block | |||
| 96 | 120 | H | -9 | |||
| ||||||
Crouch LK
| Normal | Startup | Active | Recovery | Hit |
|---|---|---|---|---|
| 5 | 2 | 11 | 4 | |
| Damage | Stun | Attack | Block | |
| 30 | 90 | L | 2 | |
| V-Trigger 1 | Startup | Active | Recovery | Hit |
| 5 | 2 | 11 | 4 | |
| Damage | Stun | Attack | Block | |
| 36 | 90 | L | 2 |
Crouch MK
| Normal | Startup | Active | Recovery | Hit |
|---|---|---|---|---|
| 10 | 2 | 18 | -1 | |
| Damage | Stun | Attack | Block | |
| 60 | 120 | L | -4 | |
| V-Trigger 1 | Startup | Active | Recovery | Hit |
| 10 | 2 | 18 | -1 | |
| Damage | Stun | Attack | Block | |
| 72 | 120 | L | -4 |
Crouch HK
| Normal | Startup | Active | Recovery | Hit |
|---|---|---|---|---|
| 12 | 3 | 25 | KD | |
| Damage | Stun | Attack | Block | |
| 100 | 150 | L | -14 | |
| V-Trigger 1 | Startup | Active | Recovery | Hit |
| 12 | 3 | 25 | KD | |
| Damage | Stun | Attack | Block | |
| 120 | 150 | L | -11 |
Jump LP
| Normal | Startup | Active | Recovery | Hit |
|---|---|---|---|---|
| 4 | 5 | - | - | |
| Damage | Stun | Attack | Block | |
| 50 | 90 | M | - | |
| V-Trigger 1 | Startup | Active | Recovery | Hit |
| 4 | 5 | - | - | |
| Damage | Stun | Attack | Block | |
| 60 | 90 | M | - |
Jump MP
| Normal | Startup | Active | Recovery | Hit | ||
|---|---|---|---|---|---|---|
| 7 | 6 | - | - | |||
| Damage | Stun | Attack | Block | |||
| 70 | 120 | M | - | |||
| ||||||
| V-Trigger 1 | Startup | Active | Recovery | Hit | ||
| 7 | 6 | - | - | |||
| Damage | Stun | Attack | Block | |||
| 84 | 120 | M | - | |||
| ||||||
Jump HP
| Normal | Startup | Active | Recovery | Hit |
|---|---|---|---|---|
| 7 | 5 | - | - | |
| Damage | Stun | Attack | Block | |
| 100 | 150 | M | - | |
| V-Trigger 1 | Startup | Active | Recovery | Hit |
| 7 | 5 | - | - | |
| Damage | Stun | Attack | Block | |
| 120 | 150 | M | - |
Jump LK
| Normal | Startup | Active | Recovery | Hit |
|---|---|---|---|---|
| 5 | 5 | - | - | |
| Damage | Stun | Attack | Block | |
| 50 | 90 | M | - | |
| V-Trigger 1 | Startup | Active | Recovery | Hit |
| 5 | 5 | - | - | |
| Damage | Stun | Attack | Block | |
| 60 | 90 | M | - |
Jump MK
| Normal | Startup | Active | Recovery | Hit |
|---|---|---|---|---|
| 7 | 4 | - | - | |
| Damage | Stun | Attack | Block | |
| 70 | 120 | M | - | |
| V-Trigger 1 | Startup | Active | Recovery | Hit |
| 7 | 4 | - | - | |
| Damage | Stun | Attack | Block | |
| 84 | 120 | M | - |
Jump HK
| Normal | Startup | Active | Recovery | Hit |
|---|---|---|---|---|
| 9 | 5 | - | - | |
| Damage | Stun | Attack | Block | |
| 100 | 150 | M | - | |
| V-Trigger 1 | Startup | Active | Recovery | Hit |
| 9 | 5 | - | - | |
| Damage | Stun | Attack | Block | |
| 120 | 150 | M | - |
Command Normals
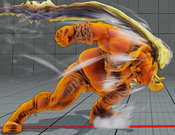
Bull Charge
| Normal | Startup | Active | Recovery | Hit | ||
|---|---|---|---|---|---|---|
| 25 | 4 | 18 | 3 | |||
| Damage | Stun | Attack | Block | |||
| 80 | 150 | H | -8 | |||
| ||||||
| V-Trigger 1 | Startup | Active | Recovery | Hit | ||
| 25 | 4 | 18 | 3 | |||
| Damage | Stun | Attack | Block | |||
| 96 | 150 | H | -8 | |||
| ||||||
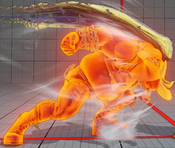
Bull Slider
| Normal | Startup | Active | Recovery | Hit | ||
|---|---|---|---|---|---|---|
| 19 | 6 | 21 | -1 | |||
| Damage | Stun | Attack | Block | |||
| 90 | 150 | L | -8 | |||
| ||||||
| V-Trigger 1 | Startup | Active | Recovery | Hit | ||
| 19 | 5 | 22 | -1 | |||
| Damage | Stun | Attack | Block | |||
| 108 | 150 | L | -8 | |||
| ||||||
Bull Drop
| Normal | Startup | Active | Recovery | Hit | ||
|---|---|---|---|---|---|---|
| 7 | 3(12)4 | 18 | 2 | |||
| Damage | Stun | Attack | Block | |||
| 40*80 (120) | 50*100 (150) | H*M | -7 | |||
| ||||||
| V-Trigger 1 | Startup | Active | Recovery | Hit | ||
| 7 | 3(12)4 | 18 | 2 | |||
| Damage | Stun | Attack | Block | |||
| 48*96 (144) | 50*100 (150) | H*M | -7 | |||
| ||||||
Bad Hammer
| Normal | Startup | Active | Recovery | Hit | ||
|---|---|---|---|---|---|---|
| 11+7 | 5 | 31 | KD | |||
| Damage | Stun | Attack | Block | |||
| 80*81 (161) | 150*135 (285) | H*H | -12 | |||
| ||||||
| V-Trigger 1 | Startup | Active | Recovery | Hit | ||
| 11+7 | 5 | 31 | KD | |||
| Damage | Stun | Attack | Block | |||
| 96*97 (193) | 150*135 (285) | H*H | -12 | |||
| ||||||
Throws
Bad Skull
| Normal | Startup | Active | Recovery | Hit |
|---|---|---|---|---|
| 5 | 3 | 17 | KD | |
| Damage | Stun | Attack | Block | |
| 120 | 150 | T | - | |
| V-Trigger 1 | Startup | Active | Recovery | Hit |
| 5 | 3 | 17 | KD | |
| Damage | Stun | Attack | Block | |
| 144 | 200 | T | - |
Bad Chain
| Normal | Startup | Active | Recovery | Hit |
|---|---|---|---|---|
| 5 | 3 | 17 | KD | |
| Damage | Stun | Attack | Block | |
| 140 | 200 | T | - | |
| V-Trigger 1 | Startup | Active | Recovery | Hit |
| 5 | 3 | 17 | KD | |
| Damage | Stun | Attack | Block | |
| 84*84 (168) | 100*100 | T | - |
Special Moves
Neutral Attack
| Startup | Active | Recovery | Hit | ||
|---|---|---|---|---|---|
| 478 | 40 | - | - | ||
| Damage | Stun | Attack | Block | ||
| 10 | 0 | H | - | ||
| |||||
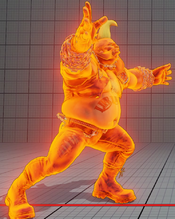
LP Bull Head
| Normal | Startup | Active | Recovery | Hit | ||
|---|---|---|---|---|---|---|
| 14 | 3 | 29 | KD | |||
| Damage | Stun | Attack | Block | |||
| 100 | 150 | H | -10 | |||
| ||||||
| V-Trigger 1 | Startup | Active | Recovery | Hit | ||
| 10 | 2(1)4 | 29 | KD | |||
| Damage | Stun | Attack | Block | |||
| 24*96 (120) | 10*140 (150) | H | -9 | |||
| ||||||
MP Bull Head
| Normal | Startup | Active | Recovery | Hit | ||
|---|---|---|---|---|---|---|
| 18 | 3 | 30 | KD | |||
| Damage | Stun | Attack | Block | |||
| 110 | 150 | H | -10 | |||
| ||||||
| V-Trigger 1 | Startup | Active | Recovery | Hit | ||
| 15 | 2(2)2(2)4 | 29 | KD | |||
| Damage | Stun | Attack | Block | |||
| 24x2*84 (132) | 10x2*130 (150) | H | -9 | |||
| ||||||
HP Bull Head
| Normal | Startup | Active | Recovery | Hit | ||
|---|---|---|---|---|---|---|
| 27 | 3 | 24 | KD | |||
| Damage | Stun | Attack | Block | |||
| 140 | 150 | H | -5 | |||
| ||||||
| V-Trigger 1 | Startup | Active | Recovery | Hit | ||
| 22 | 2(1)2(1)2(3)4 | 23 | KD | |||
| Damage | Stun | Attack | Block | |||
| 24x3*96 (168) | 10x3*120 (150) | H | -9 | |||
| ||||||
EX Bull Head
| Normal | Startup | Active | Recovery | Hit | ||
|---|---|---|---|---|---|---|
| 14 | 4(26)4 | 28 | KD | |||
| Damage | Stun | Attack | Block | |||
| 75*75 (150) | 100*100 (200) | H*H | -5 | |||
| ||||||
| V-Trigger 1 | Startup | Active | Recovery | Hit | ||
| 8 | 1(3)2(2)2(2)4(20)2(3)4 | 23 | KD | |||
| Damage | Stun | Attack | Block | |||
| 24x3*42*24*42 (180) | 10x3*90*10*70 (200) | H*H | -9 | |||
| ||||||
Bull Horn
| Normal | Startup | Active | Recovery | Hit | ||
|---|---|---|---|---|---|---|
| 15 | 6 | 15+14 | KD | |||
| Damage | Stun | Attack | Block | |||
| 120 | 200 | H | -18 | |||
| ||||||
| V-Trigger 1 | Startup | Active | Recovery | Hit | ||
| 15 | 12 | 31 | KD | |||
| Damage | Stun | Attack | Block | |||
| 72*72 (144) | 100*100 (200) | H | -18 | |||
| ||||||
EX Bull Horn
| Normal | Startup | Active | Recovery | Hit | ||
|---|---|---|---|---|---|---|
| 15 | 9(11)4 | 32 | KD | |||
| Damage | Stun | Attack | Block | |||
| 75*75 (150) | 50*200 (250) | H*H | -21 | |||
| ||||||
| V-Trigger 1 | Startup | Active | Recovery | Hit | ||
| 15 | 2(1)2(3)2(11)4 | 31 | KD | |||
| Damage | Stun | Attack | Block | |||
| 24*24*66*66 (180) | 10*10*80*150 (250) | H*H | -17 | |||
| ||||||
LP Killing Head
| Normal | Startup | Active | Recovery | Hit |
|---|---|---|---|---|
| 5 | 2 | 60 | KD | |
| Damage | Stun | Attack | Block | |
| 20*160 (180) | 40*160 (200) | T | - | |
| V-Trigger 1 | Startup | Active | Recovery | Hit |
| 5 | 2 | 52 | KD | |
| Damage | Stun | Attack | Block | |
| 24*192 (216) | 40*160 (200) | T | - |
MP Killing Head
| Normal | Startup | Active | Recovery | Hit |
|---|---|---|---|---|
| 5 | 2 | 60 | KD | |
| Damage | Stun | Attack | Block | |
| 20*20*150 (190) | 40x2*120 (200) | T | - | |
| V-Trigger 1 | Startup | Active | Recovery | Hit |
| 5 | 2 | 52 | KD | |
| Damage | Stun | Attack | Block | |
| 24x2*180 (228) | 40x2*120 (200) | T | - |
HP Killing Head
| Normal | Startup | Active | Recovery | Hit |
|---|---|---|---|---|
| 5 | 2 | 60 | KD | |
| Damage | Stun | Attack | Block | |
| 20x3*140 (200) | 40x3*80 (200) | T | - | |
| V-Trigger 1 | Startup | Active | Recovery | Hit |
| 5 | 2 | 52 | KD | |
| Damage | Stun | Attack | Block | |
| 24x3*168 (240) | 40x3*80 (200) | T | - |
EX Killing Head
| Normal | Startup | Active | Recovery | Hit |
|---|---|---|---|---|
| 5 | 2 | 60 | KD | |
| Damage | Stun | Attack | Block | |
| 10x6*160 (220) | 30x6*70 (250) | T | - | |
| V-Trigger 1 | Startup | Active | Recovery | Hit |
| 5 | 2 | 52 | KD | |
| Damage | Stun | Attack | Block | |
| 12x6*192 (264) | 30x6*70 (250) | T | - |
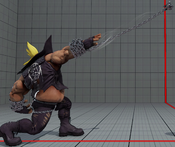
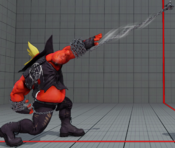
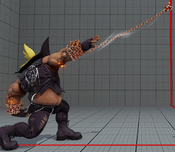
LK Hanging Chain
| Normal | Startup | Active | Recovery | Hit | ||
|---|---|---|---|---|---|---|
| 25 | 16 | 24 | KD | |||
| Damage | Stun | Attack | Block | |||
| 120 | 200 | H | -23 | |||
| ||||||
| V-Trigger 1 | Startup | Active | Recovery | Hit | ||
| 25 | 16 | 24 | KD | |||
| Damage | Stun | Attack | Block | |||
| 144 | 200 | H | -23 | |||
| ||||||
| V-Trigger 2 | Startup | Active | Recovery | Hit | ||
| 25 | 16 | 24 | KD | |||
| Damage | Stun | Attack | Block | |||
| 130 | 200 | H | -23 | |||
| ||||||
MK Hanging Chain
| Normal | Startup | Active | Recovery | Hit | ||
|---|---|---|---|---|---|---|
| 20(21) | 16 | 24 | KD | |||
| Damage | Stun | Attack | Block | |||
| 150 | 200 | H | -23 | |||
| ||||||
| V-Trigger 1 | Startup | Active | Recovery | Hit | ||
| 25(21) | 16 | 24 | KD | |||
| Damage | Stun | Attack | Block | |||
| 180 | 200 | H | -23 | |||
| ||||||
| V-Trigger 2 | Startup | Active | Recovery | Hit | ||
| 25(21) | 16 | 24 | KD | |||
| Damage | Stun | Attack | Block | |||
| 160 | 200 | H | -23 | |||
| ||||||
HK Hanging Chain
| Normal | Startup | Active | Recovery | Hit | ||
|---|---|---|---|---|---|---|
| 25 | 16 | 31 | KD | |||
| Damage | Stun | Attack | Block | |||
| 160 | 200 | H | - | |||
| ||||||
| V-Trigger 1 | Startup | Active | Recovery | Hit | ||
| 25 | 16 | 31 | KD | |||
| Damage | Stun | Attack | Block | |||
| 192 | 200 | H | - | |||
| ||||||
| V-Trigger 2 | Startup | Active | Recovery | Hit | ||
| 25 | 16 | 31 | KD | |||
| Damage | Stun | Attack | Block | |||
| 170 | 200 | H | - | |||
| ||||||
EX Hanging Chain
| Normal | Startup | Active | Recovery | Hit | ||
|---|---|---|---|---|---|---|
| 15 | 17 | 21 | KD | |||
| Damage | Stun | Attack | Block | |||
| 70*100 (170) | 100*120 (220) | H | -21 | |||
| ||||||
| V-Trigger 1 | Startup | Active | Recovery | Hit | ||
| 15 | 17 | 21 | KD | |||
| Damage | Stun | Attack | Block | |||
| 84*120 (204) | 100*120 (220) | H | -21 | |||
| ||||||
| V-Trigger 2 | Startup | Active | Recovery | Hit | ||
| 15 | 17 | 21 | KD | |||
| Damage | Stun | Attack | Block | |||
| 75*105 (180) | 100*120 (220) | H | -21 | |||
| ||||||
Hanging Chain Cancel
| Startup | Active | Recovery | Hit | ||
|---|---|---|---|---|---|
| - | - | 17 | - | ||
| Damage | Stun | Attack | Block | ||
| - | - | - | - | ||
| |||||
LK Bull Revenger
| Normal | Startup | Active | Recovery | Hit | ||
|---|---|---|---|---|---|---|
| 35 | 2 | 28 | KD | |||
| Damage | Stun | Attack | Block | |||
| 70*70*30 (170) | 100*100*30 (230) | T | - | |||
| ||||||
| V-Trigger 1 | Startup | Active | Recovery | Hit | ||
| 35 | 2 | 28 | KD | |||
| Damage | Stun | Attack | Block | |||
| 84*84*36 (204) | 100*100*30 (230) | T | - | |||
| ||||||
| V-Trigger 2 | Startup | Active | Recovery | Hit | ||
| 35 | 2 | 28 | KD | |||
| Damage | Stun | Attack | Block | |||
| 75*75*30 (180) | 100*100*30 (230) | T | - | |||
| ||||||
MK Bull Revenger
| Normal | Startup | Active | Recovery | Hit | ||
|---|---|---|---|---|---|---|
| 40 | 2 | 28 | KD | |||
| Damage | Stun | Attack | Block | |||
| 70*70*40 (180) | 100*100*30 (230) | T | - | |||
| ||||||
| V-Trigger 1 | Startup | Active | Recovery | Hit | ||
| 40 | 2 | 28 | KD | |||
| Damage | Stun | Attack | Block | |||
| 84*84*48 (216) | 100*100*30 (230) | T | - | |||
| ||||||
| V-Trigger 2 | Startup | Active | Recovery | Hit | ||
| 40 | 2 | 28 | KD | |||
| Damage | Stun | Attack | Block | |||
| 75*75*40 (190) | 100*100*30 (230) | T | - | |||
| ||||||
HK Bull Revenger
| Normal | Startup | Active | Recovery | Hit | ||
|---|---|---|---|---|---|---|
| 43 | 2 | 28 | KD | |||
| Damage | Stun | Attack | Block | |||
| 70*70*50 (190) | 100*100*30 (230) | T | - | |||
| ||||||
| V-Trigger 1 | Startup | Active | Recovery | Hit | ||
| 43 | 2 | 28 | KD | |||
| Damage | Stun | Attack | Block | |||
| 84*84*60 (228) | 100*100*30 (230) | T | - | |||
| ||||||
| V-Trigger 2 | Startup | Active | Recovery | Hit | ||
| 43 | 2 | 28 | KD | |||
| Damage | Stun | Attack | Block | |||
| 75*75*50 (200) | 100*100*30 (230) | T | - | |||
| ||||||
EX Bull Revenger
| Normal | Startup | Active | Recovery | Hit | ||
|---|---|---|---|---|---|---|
| 23(30) | 11 | 47 | KD | |||
| Damage | Stun | Attack | Block | |||
| 50*50*80 (180) | 50*50*130 (230) | T | - | |||
| ||||||
| V-Trigger 1 | Startup | Active | Recovery | Hit | ||
| 25 | 11 | 47 | KD | |||
| Damage | Stun | Attack | Block | |||
| 60*60*96 (216) | 50*50*130 (230) | T | - | |||
| ||||||
| V-Trigger 2 | Startup | Active | Recovery | Hit | ||
| 23 | 11 | 47 | KD | |||
| Damage | Stun | Attack | Block | |||
| 50*50*90 (190) | 50*50*130 (230) | T | - | |||
| ||||||
Critical Arts
Skip To My Chain
| Normal | Startup | Active | Recovery | Hit | ||
|---|---|---|---|---|---|---|
| 6 | 5 | 60 | KD | |||
| Damage | Stun | Attack | Block | |||
| 50x3*190 (340) | 0*0*0*0 | H | -30 | |||
| ||||||
| V-Trigger 1 | Startup | Active | Recovery | Hit | ||
| 6 | 5 | 60 | KD | |||
| Damage | Stun | Attack | Block | |||
| 60x3*228 (408) | 0*0*0*0 | H | -30 | |||
| ||||||
Taunts
Taunt
| Startup | Active | Recovery | Hit |
|---|---|---|---|
| - | - | 61 | - |
| Damage | Stun | Attack | Block |
| - | - | - | - |
V-System
V-Skill 1
Break Time
| Normal | Startup | Active | Recovery | Hit | ||
|---|---|---|---|---|---|---|
| 40 | - | 12 | - | |||
| Damage | Stun | Attack | Block | |||
| - | - | - | - | |||
| ||||||
| V-Trigger 1 | Startup | Active | Recovery | Hit | ||
| 40 | - | 12 | - | |||
| Damage | Stun | Attack | Block | |||
| - | - | - | - | |||
| ||||||
Banana Time
| Normal | Startup | Active | Recovery | Hit | ||
|---|---|---|---|---|---|---|
| 50 | 200 | 9 | 29 | |||
| Damage | Stun | Attack | Block | |||
| 10 | 0 | H | 2 | |||
| ||||||
| V-Trigger 1 | Startup | Active | Recovery | Hit | ||
| 50 | - | 9 | 29 | |||
| Damage | Stun | Attack | Block | |||
| 12 | 0 | H | 2 | |||
| ||||||
Drink Time
| Normal | Startup | Active | Recovery | Hit | ||
|---|---|---|---|---|---|---|
| 50 | - | 11 | 28 | |||
| Damage | Stun | Attack | Block | |||
| 10 | 0 | H | 10 | |||
| ||||||
| V-Trigger 1 | Startup | Active | Recovery | Hit | ||
| 50 | - | 11 | 28 | |||
| Damage | Stun | Attack | Block | |||
| 12 | 0 | H | 10 | |||
| ||||||
V-Skill 2
Chewing Time
| Normal | Startup | Active | Recovery | Hit | ||
|---|---|---|---|---|---|---|
| 60 | - | 1 | - | |||
| Damage | Stun | Attack | Block | |||
| - | - | - | - | |||
| ||||||
| V-Trigger 1 | Startup | Active | Recovery | Hit | ||
| 60 | - | 1 | - | |||
| Damage | Stun | Attack | Block | |||
| - | - | - | - | |||
| ||||||
Chewing Time (Hold)
| Normal | Startup | Active | Recovery | Hit | ||
|---|---|---|---|---|---|---|
| 37 | - | - | - | |||
| Damage | Stun | Attack | Block | |||
| - | - | - | - | |||
| ||||||
| V-Trigger 1 | Startup | Active | Recovery | Hit | ||
| 37 | - | - | - | |||
| Damage | Stun | Attack | Block | |||
| - | - | - | - | |||
| ||||||
Bubble Gum Pop
| Normal | Startup | Active | Recovery | Hit | ||
|---|---|---|---|---|---|---|
| 12 | 4 | 16(21) | 12(7) | |||
| Damage | Stun | Attack | Block | |||
| 40(60) | 50 | H | 9(4) | |||
| ||||||
| V-Trigger 1 | Startup | Active | Recovery | Hit | ||
| 16 | 4 | 17 | 12(7) | |||
| Damage | Stun | Attack | Block | |||
| 48(72) | 50 | H | 9(4) | |||
| ||||||
Bubble Gum Launch MP
| Normal | Startup | Active | Recovery | Hit | ||
|---|---|---|---|---|---|---|
| 16 | - | 20(25) | 12(7) | |||
| Damage | Stun | Attack | Block | |||
| 40(60) | 50 | H | 9(4) | |||
| ||||||
| V-Trigger 1 | Startup | Active | Recovery | Hit | ||
| 16 | - | 21(26) | 12(7) | |||
| Damage | Stun | Attack | Block | |||
| 48(72) | 50 | H | 9(4) | |||
| ||||||
Bubble Gum Launch HP
| Normal | Startup | Active | Recovery | Hit | ||
|---|---|---|---|---|---|---|
| 16 | - | 20(25) | 12(7) | |||
| Damage | Stun | Attack | Block | |||
| 40(60) | 50 | H | 9(4) | |||
| ||||||
| V-Trigger 1 | Startup | Active | Recovery | Hit | ||
| 16 | - | 21(26) | 12(7) | |||
| Damage | Stun | Attack | Block | |||
| 48(72) | 50 | H | 9(4) | |||
| ||||||
Blow Bubble
| Normal | Startup | Active | Recovery | Hit | ||
|---|---|---|---|---|---|---|
| 17 | - | - | - | |||
| Damage | Stun | Attack | Block | |||
| - | - | - | - | |||
| ||||||
| V-Trigger 1 | Startup | Active | Recovery | Hit | ||
| 17 | - | - | - | |||
| Damage | Stun | Attack | Block | |||
| - | - | - | - | |||
| ||||||
V-Trigger 1
Enjoy Time
| Startup | Active | Recovery | Hit | ||
|---|---|---|---|---|---|
| 12 | 16 | 3 | KD | ||
| Damage | Stun | Attack | Block | ||
| - | - | - | - | ||
| |||||
V-Trigger 2
Birdie Time
| Startup | Active | Recovery | Hit | ||
|---|---|---|---|---|---|
| 1+4 | 20 | 15 | KD | ||
| Damage | Stun | Attack | Block | ||
| 100 | 100 | - | - | ||
| |||||
Bull Swing
| Startup | Active | Recovery | Hit | ||
|---|---|---|---|---|---|
| 21 | 8(21)2 | 15(17) | KD | ||
| Damage | Stun | Attack | Block | ||
| 50*30 (80) | 120 | H | -2 | ||
| |||||
Bull Capture
| Startup | Active | Recovery | Hit | ||
|---|---|---|---|---|---|
| 19 | 8(21)2 | 18 | KD | ||
| Damage | Stun | Attack | Block | ||
| 50*50 (100) | 150 | L | -2 | ||
| |||||
V-Shift
V-Shift
| Startup | Active | Recovery | Hit | ||
|---|---|---|---|---|---|
| 1 | 9 | 22 | - | ||
| Damage | Stun | Attack | Block | ||
| - | - | - | - | ||
| |||||
V-Shift Break
Bull Crush
| Startup | Active | Recovery | Hit | ||
|---|---|---|---|---|---|
| ? | 3 | ? | KD | ||
| Damage | Stun | Attack | Block | ||
| 60 | 0 | H | -2 | ||
| |||||
V-Reversal
Pepper Pot
| Startup | Active | Recovery | Hit | ||
|---|---|---|---|---|---|
| 17 | 2 | 19(23) | KD | ||
| Damage | Stun | Attack | Block | ||
| 60 | 0 | H | -2 | ||
| |||||
