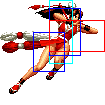
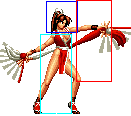
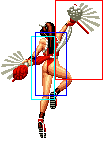
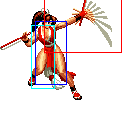
mNo edit summary |
|||
| Line 118: | Line 118: | ||
|align="left"| Goes over lows | |align="left"| Goes over lows | ||
|- | |- | ||
! [[image:snkc.gif]]+[[image:snkd.gif]] | ! [[image:snkc.gif]] + [[image:snkd.gif]] | ||
|align="center"| 20/6/42 | |align="center"| 20/6/42 | ||
|align="center"| KD/-26 | |align="center"| KD/-26 | ||
| Line 194: | Line 194: | ||
| | | | ||
|- | |- | ||
! [[image:snkc.gif]]+[[image:snkd.gif]] | ! [[image:snkc.gif]] + [[image:snkd.gif]] | ||
|align="center"| 12/6/- | |align="center"| 12/6/- | ||
|align="center"| KD/- | |align="center"| KD/- | ||
| Line 272: | Line 272: | ||
|colspan="10" align="center"| '''Command Normals''' | |colspan="10" align="center"| '''Command Normals''' | ||
|- | |- | ||
! <br>f+[[image:snkb.gif]]<br><br> | ! <br>f + [[image:snkb.gif]]<br><br> | ||
|align="center"| 28/5/9 | |align="center"| 28/5/9 | ||
|align="center"| +6/+4 | |align="center"| +6/+4 | ||
| Line 280: | Line 280: | ||
|align="left|Goes over lows | |align="left|Goes over lows | ||
|- | |- | ||
! f+[[image:snkb.gif]]<br> (cancel) | ! f + [[image:snkb.gif]]<br> (cancel) | ||
|align="center"| 27/6/9 | |align="center"| 27/6/9 | ||
|align="center"| +5/+3 | |align="center"| +5/+3 | ||
| Line 287: | Line 287: | ||
|align="left"| Cancel into air moves only | |align="left"| Cancel into air moves only | ||
|- | |- | ||
! <br>df+[[image:snkb.gif]]<br><br> | ! <br>df + [[image:snkb.gif]]<br><br> | ||
|align="center"| 7/9(7)4/32 | |align="center"| 7/9(7)4/32 | ||
|align="center"| -18/-20 | |align="center"| -18/-20 | ||
| Line 296: | Line 296: | ||
| | | | ||
|- | |- | ||
! df+[[image:snkb.gif]]<br>(cancel) | ! df + [[image:snkb.gif]]<br>(cancel) | ||
|align="center"| 7/9(7)4/32 | |align="center"| 7/9(7)4/32 | ||
|align="center"| -18/-20 | |align="center"| -18/-20 | ||
| Line 303: | Line 303: | ||
|align="left"| Only first hit is cancellable | |align="left"| Only first hit is cancellable | ||
|- | |- | ||
! j.d+[[image:snka.gif]] | ! j.d + [[image:snka.gif]] | ||
|align="center"| 9/3/- | |align="center"| 9/3/- | ||
|align="center"| -/- | |align="center"| -/- | ||
| Line 311: | Line 311: | ||
|align="left"| Hard knockdown on airborne opponent. Can't be cancelled into. | |align="left"| Hard knockdown on airborne opponent. Can't be cancelled into. | ||
|- | |- | ||
! j.d+[[image:snkb.gif]] | ! j.d + [[image:snkb.gif]] | ||
|align="center"| 24/ - /17 | |align="center"| 24/ - /17 | ||
|align="center"| KD/- | |align="center"| KD/- | ||
| Line 319: | Line 319: | ||
|align="left"| Hard knockdown. Active until landing. | |align="left"| Hard knockdown. Active until landing. | ||
|- | |- | ||
! j.d+[[image:snkd.gif]] | ! j.d + [[image:snkd.gif]] | ||
|align="center"| 6/ - /28 | |align="center"| 6/ - /28 | ||
|align="center"| KD/- | |align="center"| KD/- | ||
| Line 329: | Line 329: | ||
|colspan="10" align="center"| '''Special Moves''' | |colspan="10" align="center"| '''Special Moves''' | ||
|- | |- | ||
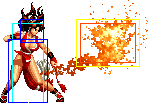
! <br>qcf+[[image:snka.gif]]<br><br> | ! <br>qcf + [[image:snka.gif]]<br><br> | ||
|align="center"| 12/ - /33 | |align="center"| 12/ - /33 | ||
|align="center"| -1/-3 | |align="center"| -1/-3 | ||
| Line 335: | Line 335: | ||
|align="center"| HL | |align="center"| HL | ||
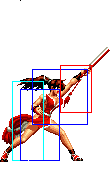
|rowspan="2" colspan="4"| [[image:Mai02_qcfP.png|center]] | |rowspan="2" colspan="4"| [[image:Mai02_qcfP.png|center]] | ||
|rowspan="2" align="left"|'''Kachou Sen - qcf+P''' | |rowspan="2" align="left"|'''Kachou Sen - qcf + P''' | ||
|- | |- | ||
! qcf+[[image:snkc.gif]] | ! qcf + [[image:snkc.gif]] | ||
|align="center"| 14/ - /44 | |align="center"| 14/ - /44 | ||
|align="center"| -12/-14 | |align="center"| -12/-14 | ||
| Line 343: | Line 343: | ||
|align="center"| HL | |align="center"| HL | ||
|- | |- | ||
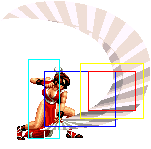
! <br>qcb+[[image:snka.gif]]<br><br> | ! <br>qcb + [[image:snka.gif]]<br><br> | ||
|align="center"| 14/3+3+4/19 | |align="center"| 14/3+3+4/19 | ||
|align="center"| +2/0 | |align="center"| +2/0 | ||
| Line 351: | Line 351: | ||
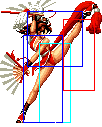
|valign="bottom" style="border-right:0px; border-left:0px;"| [[image:Mai02_qcbA2.png|center]] | |valign="bottom" style="border-right:0px; border-left:0px;"| [[image:Mai02_qcbA2.png|center]] | ||
|colspan="2" valign="bottom" style="border-left:0px;"| [[image:Mai02_qcbA3.png|center]] | |colspan="2" valign="bottom" style="border-left:0px;"| [[image:Mai02_qcbA3.png|center]] | ||
|rowspan="2"|'''Ryuu Enbu - qcb+P''' | |rowspan="2"|'''Ryuu Enbu - qcb + P''' | ||
*qcb+A: Below head Invincibility: F3-13 | *qcb + A: Below head Invincibility: F3-13 | ||
*qcb+C: Below head Invincibility: F9-17 | *qcb + C: Below head Invincibility: F9-17 | ||
|- | |- | ||
! qcb+[[image:snkc.gif]] | ! qcb + [[image:snkc.gif]] | ||
|align="center"| 5/3(6)3+3+4/19 | |align="center"| 5/3(6)3+3+4/19 | ||
|align="center"| +2/0 | |align="center"| +2/0 | ||
| Line 365: | Line 365: | ||
|valign="bottom" style="border-left:0px;"| [[image:Mai02_qcbC4.png|center]] | |valign="bottom" style="border-left:0px;"| [[image:Mai02_qcbC4.png|center]] | ||
|- | |- | ||
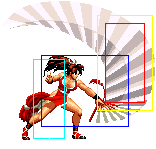
! <br>qcb+[[image:snkb.gif]]<br><br> | ! <br>qcb + [[image:snkb.gif]]<br><br> | ||
|align="center"| 15/2+2/31 | |align="center"| 15/2+2/31 | ||
|align="center"| -7/-9 | |align="center"| -7/-9 | ||
| Line 372: | Line 372: | ||
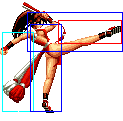
|colspan="2" valign="bottom" style="border-right:0px;"| [[image:Mai02_qcbB1.png|center]] | |colspan="2" valign="bottom" style="border-right:0px;"| [[image:Mai02_qcbB1.png|center]] | ||
|colspan="2" valign="bottom" style="border-left:0px;"| [[image:Mai02_qcbB2.png|center]] | |colspan="2" valign="bottom" style="border-left:0px;"| [[image:Mai02_qcbB2.png|center]] | ||
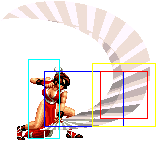
|rowspan="2"|'''Sayo Chidori - qcb+K''' | |rowspan="2"|'''Sayo Chidori - qcb + K''' | ||
|- | |- | ||
! qcb+[[image:snkd.gif]] | ! qcb + [[image:snkd.gif]] | ||
|align="center"| 19/2+5/26 | |align="center"| 19/2+5/26 | ||
|align="center"| -5/-7 | |align="center"| -5/-7 | ||
| Line 382: | Line 382: | ||
|colspan="2" valign="bottom" style="border-left:0px;"| [[image:Mai02_qcbD2.png|center]] | |colspan="2" valign="bottom" style="border-left:0px;"| [[image:Mai02_qcbD2.png|center]] | ||
|- | |- | ||
! <br>j.qcb+[[image:snka.gif]]<br><br> | ! <br>j.qcb + [[image:snka.gif]]<br><br> | ||
|align="center"| 16/-/16 | |align="center"| 16/-/16 | ||
|align="center"| KD/- | |align="center"| KD/- | ||
| Line 388: | Line 388: | ||
|align="center"| HL | |align="center"| HL | ||
|rowspan="2" colspan="4" valign="bottom" style="border-right:0px;"| [[image:Mai02_jqcbP.png|center]] | |rowspan="2" colspan="4" valign="bottom" style="border-right:0px;"| [[image:Mai02_jqcbP.png|center]] | ||
|rowspan="2"|'''Musasabi no Mai (Kuuchuu) - qcb+P in air''' | |rowspan="2"|'''Musasabi no Mai (Kuuchuu) - qcb + P in air''' | ||
|- | |- | ||
! j.qcb+[[image:snkc.gif]] | ! j.qcb + [[image:snkc.gif]] | ||
|align="center"| 16/-/18 | |align="center"| 16/-/18 | ||
|align="center"| KD/- | |align="center"| KD/- | ||
| Line 396: | Line 396: | ||
|align="center"| HL | |align="center"| HL | ||
|- | |- | ||
! hcf+[[image:snkb.gif]] | ! hcf + [[image:snkb.gif]] | ||
|align="center"| 5/2*2(7)28/16 | |align="center"| 5/2*2(7)28/16 | ||
|align="center"| KD/-26 | |align="center"| KD/-26 | ||
| Line 404: | Line 404: | ||
|valign="bottom" style="border-right:0px; border-left:0px;"| [[image:Mai02_hcfB2.png|center]] | |valign="bottom" style="border-right:0px; border-left:0px;"| [[image:Mai02_hcfB2.png|center]] | ||
|colspan="2" valign="bottom" style="border-left:0px;"| [[image:Mai02_hcfD3.png|center]] | |colspan="2" valign="bottom" style="border-left:0px;"| [[image:Mai02_hcfD3.png|center]] | ||
|rowspan="2"|'''Hissatsu Shinobi Bachi - hcf+K''' | |rowspan="2"|'''Hissatsu Shinobi Bachi - hcf + K''' | ||
|- | |- | ||
! hcf+[[image:snkd.gif]] | ! hcf + [[image:snkd.gif]] | ||
|align="center"| 8/6(6)28/20 | |align="center"| 8/6(6)28/20 | ||
|align="center"| KD/-30 | |align="center"| KD/-30 | ||
| Line 415: | Line 415: | ||
|valign="bottom" style="border-left:0px;"| [[image:Mai02_hcfD3.png|center]] | |valign="bottom" style="border-left:0px;"| [[image:Mai02_hcfD3.png|center]] | ||
|- | |- | ||
! _d,u+[[image:punch.gif]] | ! _d,u + [[image:punch.gif]] | ||
|align="center"| 0/26~48/3; On wall: 7; Recovery: 0/until land/3 | |align="center"| 0/26~48/3; On wall: 7; Recovery: 0/until land/3 | ||
|align="center"| | |align="center"| | ||
| Line 422: | Line 422: | ||
|colspan="2" valign="bottom" style="border-right:0px;"| [[image:Mai02_duP1.png|center]] | |colspan="2" valign="bottom" style="border-right:0px;"| [[image:Mai02_duP1.png|center]] | ||
|colspan="2" valign="bottom" style="border-left:0px;"| [[image:Mai02_duP2.png|center]] | |colspan="2" valign="bottom" style="border-left:0px;"| [[image:Mai02_duP2.png|center]] | ||
| '''Musasabi no Mai (Chijou) - charge d,u+P''' | | '''Musasabi no Mai (Chijou) - charge d,u + P''' | ||
* ub/u jumps to back wall, uf jumps to front wall | * ub/u jumps to back wall, uf jumps to front wall | ||
* Invincibility: 1-4f. | * Invincibility: 1-4f. | ||
| Line 432: | Line 432: | ||
|align="center"| HL | |align="center"| HL | ||
|rowspan="2" colspan="4" valign="bottom" style="border-right:0px;"| [[image:Mai02_duAA.png|center]] | |rowspan="2" colspan="4" valign="bottom" style="border-right:0px;"| [[image:Mai02_duAA.png|center]] | ||
|rowspan="2"|'''Musasabi no Mai (Kuuchuu) - hold P after _d,u+P''' | |rowspan="2"|'''Musasabi no Mai (Kuuchuu) - hold P after _d,u + P''' | ||
|- | |- | ||
! > hold [[image:snkc.gif]] | ! > hold [[image:snkc.gif]] | ||
| Line 440: | Line 440: | ||
|align="center"| HL | |align="center"| HL | ||
|- | |- | ||
! > d+[[image:punch.gif]] | ! > d + [[image:punch.gif]] | ||
|align="center"| 6/until land/28 (recovery on hit: until land+3) | |align="center"| 6/until land/28 (recovery on hit: until land+3) | ||
|align="center"| KD/- | |align="center"| KD/- | ||
| Line 446: | Line 446: | ||
|align="center"| H | |align="center"| H | ||
|colspan="4" valign="bottom" style="border-right:0px;"| [[image:Mai02_duAdA.png|center]] | |colspan="4" valign="bottom" style="border-right:0px;"| [[image:Mai02_duAdA.png|center]] | ||
| '''Yusura Ume - d+P after _d,u+P''' | | '''Yusura Ume - d + P after _d,u + P''' | ||
|- | |- | ||
! > d+[[image:kick.gif]] | ! > d + [[image:kick.gif]] | ||
|align="center"| 24/until land/17 | |align="center"| 24/until land/17 | ||
|align="center"| KD/- | |align="center"| KD/- | ||
| Line 454: | Line 454: | ||
|align="center"| H | |align="center"| H | ||
|colspan="4" valign="bottom" style="border-right:0px;"| [[image:Mai02_duAdB.png|center]] | |colspan="4" valign="bottom" style="border-right:0px;"| [[image:Mai02_duAdB.png|center]] | ||
| '''Ukihane - d+K after _d,u+P''' | | '''Ukihane - d + K after _d,u + P''' | ||
|- | |- | ||
! > d+[[image:snkd.gif]] | ! > d + [[image:snkd.gif]] | ||
|align="center"| 15/9+until land/17 | |align="center"| 15/9+until land/17 | ||
|align="center"| KD/- | |align="center"| KD/- | ||
| Line 462: | Line 462: | ||
|align="center"| H (Grab) | |align="center"| H (Grab) | ||
|colspan="4" valign="bottom" style="border-right:0px;"| [[image:Mai02_duAdD.png|center]] | |colspan="4" valign="bottom" style="border-right:0px;"| [[image:Mai02_duAdD.png|center]] | ||
| '''Toki Tsubute - d+D when close after _d,u+P''' | | '''Toki Tsubute - d + D when close after _d,u + P''' | ||
* An overhead move, unless the opponent is in range when executed, then it is an instance grab). | * An overhead move, unless the opponent is in range when executed, then it is an instance grab). | ||
|- | |- | ||
| Line 476: | Line 476: | ||
|valign="bottom" style="border-right:0px; border-left:0px;"| [[image:Mai02_2xqcfP3.png|center]] | |valign="bottom" style="border-right:0px; border-left:0px;"| [[image:Mai02_2xqcfP3.png|center]] | ||
|valign="bottom" style="border-left:0px;"| [[image:Mai02_2xqcfP4.png|center]] | |valign="bottom" style="border-left:0px;"| [[image:Mai02_2xqcfP4.png|center]] | ||
|'''Hana Arashi - qcf,qcf+P''' | |'''Hana Arashi - qcf,qcf + P''' | ||
|- | |- | ||
! qcb,hcf+[[image:snkb.gif]] | ! qcb,hcf + [[image:snkb.gif]] | ||
|align="center"| 1+4/<br>2*2(7)1(2)2(2)2(2)2(2)2/<br>6+30 | |align="center"| 1+4/<br>2*2(7)1(2)2(2)2(2)2(2)2/<br>6+30 | ||
|align="center"| KD/-20 | |align="center"| KD/-20 | ||
| Line 486: | Line 486: | ||
|rowspan="2" valign="bottom" style="border-right:0px; border-left:0px;"| [[image:Mai02_qcbhcfK2.png|center]] | |rowspan="2" valign="bottom" style="border-right:0px; border-left:0px;"| [[image:Mai02_qcbhcfK2.png|center]] | ||
|rowspan="2" colspan="2" valign="bottom" style="border-left:0px;"| [[image:Mai02_qcbhcfK3.png|center]] | |rowspan="2" colspan="2" valign="bottom" style="border-left:0px;"| [[image:Mai02_qcbhcfK3.png|center]] | ||
|rowspan="2"|'''Chou Hissatsu Shinobi Bachi - qcb,hcf+K''' | |rowspan="2"|'''Chou Hissatsu Shinobi Bachi - qcb,hcf + K''' | ||
|- | |- | ||
! qcb,hcf+[[image:snkd.gif]] | ! qcb,hcf + [[image:snkd.gif]] | ||
|align="center"| 1+6/<br>2*2(7)1(2)2(2)2(2)2(2)2/<br>6+34 | |align="center"| 1+6/<br>2*2(7)1(2)2(2)2(2)2(2)2/<br>6+34 | ||
|align="center"| KD/-24 | |align="center"| KD/-24 | ||
| Line 496: | Line 496: | ||
|colspan="10" align="center"| '''SDM''' | |colspan="10" align="center"| '''SDM''' | ||
|- | |- | ||
! qcb,hcf+[[image:snkb.gif]]+[[image:snkd.gif]] | ! qcb,hcf + [[image:snkb.gif]] + [[image:snkd.gif]] | ||
|align="center"| 1+5/<br>1*2*2*2*2*2*2*2*2*2*2*2/<br>7+26 | |align="center"| 1+5/<br>1*2*2*2*2*2*2*2*2*2*2*2/<br>7+26 | ||
|align="center"| KD/-17 | |align="center"| KD/-17 | ||
| Line 503: | Line 503: | ||
|colspan="2" valign="bottom" style="border-right:0px;"| [[image:Mai02_qcbhcfBD1.png|center]] | |colspan="2" valign="bottom" style="border-right:0px;"| [[image:Mai02_qcbhcfBD1.png|center]] | ||
|colspan="2" valign="bottom" style="border-left:0px;"| [[image:Mai02_qcbhcfBD2.png|center]] | |colspan="2" valign="bottom" style="border-left:0px;"| [[image:Mai02_qcbhcfBD2.png|center]] | ||
|'''Chou Hissatsu Shinobi Bachi - qcb,hcf+BD''' | |'''Chou Hissatsu Shinobi Bachi - qcb,hcf + BD''' | ||
|- | |- | ||
|colspan="10" align="center"| '''HSDM''' | |colspan="10" align="center"| '''HSDM''' | ||
| Line 518: | Line 518: | ||
===Notes=== | ===Notes=== | ||
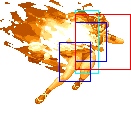
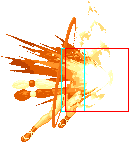
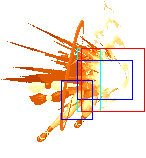
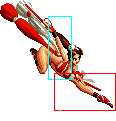
*free cancellable into moves are hcf+K, qcb+P and qcb+P(air) | *free cancellable into moves are hcf + K, qcb + P and qcb + P(air) | ||
*free cancellable out-of moves are f+B, df+B, qcb+K, hcf+K, qcb+C on the first hit, d+D(air), d+B(air) and d+P/K followups of _d u+P | *free cancellable out-of moves are f + B, df + B, qcb + K, hcf + K, qcb + C on the first hit, d + D(air), d + B(air) and d + P/K followups of _d u + P | ||
*f+B, d+B(air), d+D(air) and d+A/d+B followups of _d u+P, d+A and d+B, are overheads | *f + B, d + B(air), d + D(air) and d + A/d + B followups of _d u + P, d + A and d + B, are overheads | ||
*qcfx2+P on the last hit, d+B(air), d+B/d+D followups of _d u+P and d+A if it hits an opponent in the air, are all hard knockdowns | *qcfx2+P on the last hit, d + B(air), d + B/d + D followups of _d u + P and d + A if it hits an opponent in the air, are all hard knockdowns | ||
*qcb+C is supercancellable on the first hit | *qcb + C is supercancellable on the first hit | ||
*she has the ability to wall jump by pressing uf when she has jumped towards a wall | *she has the ability to wall jump by pressing uf when she has jumped towards a wall | ||
| Line 528: | Line 528: | ||
===Anywhere=== | ===Anywhere=== | ||
1. Crouch B,Close B,df+B,hcf+B - 25% <br> | 1. Crouch B,Close B,df + B,hcf + B - 25% <br> | ||
2.Close C, df+B(1), hcf+B/qcb+C- 30%/25%<br> | 2.Close C, df + B(1), hcf + B/qcb + C- 30%/25%<br> | ||
3. Close C, df+B(1), qcb hcf+K - 42%<br> | 3. Close C, df + B(1), qcb hcf + K - 42%<br> | ||
4. Close C, df+B(1), qcb+C(1), (S)qcb hcf+K(Buffer:hcf+K) - 50%<br> | 4. Close C, df + B(1), qcb + C(1), (S)qcb hcf + K(Buffer:hcf + K) - 50%<br> | ||
5. f+B, qcfx2+P - 33% | 5. f + B, qcfx2+P - 33% | ||
===Corner=== | ===Corner=== | ||
1. f+B, forward+Close C, then any combo that uses Close C | 1. f + B, forward + Close C, then any combo that uses Close C | ||
===Counterhit=== | ===Counterhit=== | ||
1. Jump CD(counterhit), hcf+B/qcfx2+P - 22-25%/33%<br> | 1. Jump CD(counterhit), hcf + B/qcfx2+P - 22-25%/33%<br> | ||
2. Jump CD(counterhit), qcb+C(1), (S)qcfx2+P - 45% (Corner) | 2. Jump CD(counterhit), qcb + C(1), (S)qcfx2+P - 45% (Corner) | ||
===Maxmode=== | ===Maxmode=== | ||
1. C, df+B(1), BC, Crouch C, df+B(1), qcb+B, (C)hcf+B(1), (C)qcb+C(1), | 1. C, df + B(1), BC, Crouch C, df + B(1), qcb + B, (C)hcf + B(1), (C)qcb + C(1), | ||
(S)qcb hcf+K/BD(Buffer:hcf+K/BD) - 70% | (S)qcb hcf + K/BD(Buffer:hcf + K/BD) - 70% | ||
===Attack Strings=== | ===Attack Strings=== | ||
1. Close C, ~df+B(1), qcb+C<br> | 1. Close C, ~df + B(1), qcb + C<br> | ||
2. qcb+P, Far A<br> | 2. qcb + P, Far A<br> | ||
3. Jump A/Jump C/Jump D/Jump CD/Jump d+A, d+B(air)<br> | 3. Jump A/Jump C/Jump D/Jump CD/Jump d + A, d + B(air)<br> | ||
4. Close C, f+B, qcb+P(air)/d+B(air) (Corner)<br> | 4. Close C, f + B, qcb + P(air)/d + B(air) (Corner)<br> | ||
5. (Already in maxmode) Close C, f+B, d+B(air), (C)qcb+A (Corner) | 5. (Already in maxmode) Close C, f + B, d + B(air), (C)qcb + A (Corner) | ||
==Strategies== | ==Strategies== | ||
-backdashing with d+A makes her backdash a bit further than usual, just like Iori. In addition, it can sometimes hit opponents out of their long range pokes, such as Billy's crouch A. The shortcut for doing this is b db+A. It is of importance to her for her keepaway game. | -backdashing with d + A makes her backdash a bit further than usual, just like Iori. In addition, it can sometimes hit opponents out of their long range pokes, such as Billy's crouch A. The shortcut for doing this is b db + A. It is of importance to her for her keepaway game. | ||
-Mai has a great keepaway game, due to her qcf+A projectile which has very good recovery, good enough that she can punish anyone that rolls or jumps them with a qcb+A. It is advisiable that you keep enough distance from the opponent such that if they were to do a high jump forward over the fireball, they would land in front of you, not above you. Otherwise, the qcb+A might miss the opponent and you will likely get counterhit by a jump CD. The reason qcb+A is used over qcb+C is that qcb+C pushes you forward a bit, and you don't want to get closer to the opponent when he is already jumping over the fireball. You can also intercept a jump attack after the qcf+A, with a quick forward jump C. | -Mai has a great keepaway game, due to her qcf + A projectile which has very good recovery, good enough that she can punish anyone that rolls or jumps them with a qcb + A. It is advisiable that you keep enough distance from the opponent such that if they were to do a high jump forward over the fireball, they would land in front of you, not above you. Otherwise, the qcb + A might miss the opponent and you will likely get counterhit by a jump CD. The reason qcb + A is used over qcb + C is that qcb + C pushes you forward a bit, and you don't want to get closer to the opponent when he is already jumping over the fireball. You can also intercept a jump attack after the qcf + A, with a quick forward jump C. | ||
If the opponent rolled instead of jumped, then it is better to use qcb+C, since the first hit of the move comes out very quickly. | If the opponent rolled instead of jumped, then it is better to use qcb + C, since the first hit of the move comes out very quickly. | ||
-when the opponent is waking up, throw a qcf+A fireball so that it hits them late as they get up. This gives Mai a frame advantage since her fireballs recover so quickly, allowing you to followup with pretty much anything, including: | -when the opponent is waking up, throw a qcf + A fireball so that it hits them late as they get up. This gives Mai a frame advantage since her fireballs recover so quickly, allowing you to followup with pretty much anything, including: | ||
-~Jump D, Close C, ~df+B(1), qcb+C, Far A/walk up throw/jump back | -~Jump D, Close C, ~df + B(1), qcb + C, Far A/walk up throw/jump back | ||
qcb+P(air)<br> | qcb + P(air)<br> | ||
-Jump D, d+B(air)<br> | -Jump D, d + B(air)<br> | ||
-Crouch D<br> | -Crouch D<br> | ||
-qcb+C, Far A/walk up throw/jump back qcb+P(air)<br> | -qcb + C, Far A/walk up throw/jump back qcb + P(air)<br> | ||
-f+B overhead (not totally safe since the f+B has a long startup) | -f + B overhead (not totally safe since the f + B has a long startup) | ||
One should be careful about using attack strings with df+B. They are safe on block, but the opponent can guard roll right before the df+B, make it whiff and do two hits, allowing the opponent more than enough time to punish you. | One should be careful about using attack strings with df + B. They are safe on block, but the opponent can guard roll right before the df + B, make it whiff and do two hits, allowing the opponent more than enough time to punish you. | ||
-qcb+P(air) is a high priority move that is safe on block if it doesn't hit too deep (although she can sometimes still be command thrown). After doing a safe ground attack string, you can try either poking with far A or doing a quick jump back qcb+P(air) which will usually hit anyone who tried to attack on the ground, or blindly jump. This move also trades hits with many dragon punch anti-airs, and will almost always beat anti-air normals. That said, anyone with a very fast jump anti-air (such as Clark/Iori jump D) that anticipates the move, can hit her out of the move before it starts up. Thus, it is recommended to sometimes use the backdash bug after the opponent blocks some attack, and see what the opponent did. If he jumped, you can throw a qcf+A or qcb+A to hit him as he lands. If he did nothing and you're far enough, it is probably safe to throw another qcf+A. | -qcb + P(air) is a high priority move that is safe on block if it doesn't hit too deep (although she can sometimes still be command thrown). After doing a safe ground attack string, you can try either poking with far A or doing a quick jump back qcb + P(air) which will usually hit anyone who tried to attack on the ground, or blindly jump. This move also trades hits with many dragon punch anti-airs, and will almost always beat anti-air normals. That said, anyone with a very fast jump anti-air (such as Clark/Iori jump D) that anticipates the move, can hit her out of the move before it starts up. Thus, it is recommended to sometimes use the backdash bug after the opponent blocks some attack, and see what the opponent did. If he jumped, you can throw a qcf + A or qcb + A to hit him as he lands. If he did nothing and you're far enough, it is probably safe to throw another qcf + A. | ||
-Mai has a huge amount of mixups in the air. When the opponent is waking up from some knockdown attack, hyper jump behind opponent and do d+D(air) or d+B(air) which will crossup sometimes. Opponent is forced to block the backwards (from the jump behind), then block the other way again if the move crosses up. d+D(air) can only be done from a high jump, while it is recommended to use d+B from a hop. Both of these moves have very good priority. The d+D(air) is able to cleanly beat many dragon punch anti-airs, as long as Mai doesn't end up flying right in front of the opponent. | -Mai has a huge amount of mixups in the air. When the opponent is waking up from some knockdown attack, hyper jump behind opponent and do d + D(air) or d + B(air) which will crossup sometimes. Opponent is forced to block the backwards (from the jump behind), then block the other way again if the move crosses up. d + D(air) can only be done from a high jump, while it is recommended to use d + B from a hop. Both of these moves have very good priority. The d + D(air) is able to cleanly beat many dragon punch anti-airs, as long as Mai doesn't end up flying right in front of the opponent. | ||
-if for some reason, you are in maxmode, you can try to toss out unexpected hcf+D (which is usually suicidal), and cancel it to qcb+P if blocked, which is safe. | -if for some reason, you are in maxmode, you can try to toss out unexpected hcf + D (which is usually suicidal), and cancel it to qcb + P if blocked, which is safe. | ||
{{Template:The King of Fighters 2002}} | {{Template:The King of Fighters 2002}} | ||
[[Category:The King of Fighters 2002]] | [[Category:The King of Fighters 2002]] | ||
Revision as of 13:30, 8 February 2020
General Info
Thanks to her massively buoyant hydrogen-filled orbs, Mai has mastery of both the skies and the flames.
Crouch height: Low
Jump: 4/37/1
Hop: 4/28/1
Dash: 3/10~∞/3
Backdash: 3/16/3
Wakeup: 21 frames
Recovery roll: 20 frames
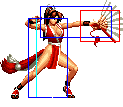
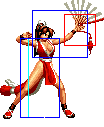
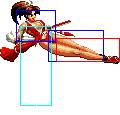
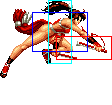
| Stand | Crouch | Jump | Grab | Air Throw | Run |
|---|---|---|---|---|---|

|

|

|

|

|
Colors

|

|

|

|
Movelist
Notes
- free cancellable into moves are hcf + K, qcb + P and qcb + P(air)
- free cancellable out-of moves are f + B, df + B, qcb + K, hcf + K, qcb + C on the first hit, d + D(air), d + B(air) and d + P/K followups of _d u + P
- f + B, d + B(air), d + D(air) and d + A/d + B followups of _d u + P, d + A and d + B, are overheads
- qcfx2+P on the last hit, d + B(air), d + B/d + D followups of _d u + P and d + A if it hits an opponent in the air, are all hard knockdowns
- qcb + C is supercancellable on the first hit
- she has the ability to wall jump by pressing uf when she has jumped towards a wall
Combos
Anywhere
1. Crouch B,Close B,df + B,hcf + B - 25%
2.Close C, df + B(1), hcf + B/qcb + C- 30%/25%
3. Close C, df + B(1), qcb hcf + K - 42%
4. Close C, df + B(1), qcb + C(1), (S)qcb hcf + K(Buffer:hcf + K) - 50%
5. f + B, qcfx2+P - 33%
Corner
1. f + B, forward + Close C, then any combo that uses Close C
Counterhit
1. Jump CD(counterhit), hcf + B/qcfx2+P - 22-25%/33%
2. Jump CD(counterhit), qcb + C(1), (S)qcfx2+P - 45% (Corner)
Maxmode
1. C, df + B(1), BC, Crouch C, df + B(1), qcb + B, (C)hcf + B(1), (C)qcb + C(1), (S)qcb hcf + K/BD(Buffer:hcf + K/BD) - 70%
Attack Strings
1. Close C, ~df + B(1), qcb + C
2. qcb + P, Far A
3. Jump A/Jump C/Jump D/Jump CD/Jump d + A, d + B(air)
4. Close C, f + B, qcb + P(air)/d + B(air) (Corner)
5. (Already in maxmode) Close C, f + B, d + B(air), (C)qcb + A (Corner)
Strategies
-backdashing with d + A makes her backdash a bit further than usual, just like Iori. In addition, it can sometimes hit opponents out of their long range pokes, such as Billy's crouch A. The shortcut for doing this is b db + A. It is of importance to her for her keepaway game.
-Mai has a great keepaway game, due to her qcf + A projectile which has very good recovery, good enough that she can punish anyone that rolls or jumps them with a qcb + A. It is advisiable that you keep enough distance from the opponent such that if they were to do a high jump forward over the fireball, they would land in front of you, not above you. Otherwise, the qcb + A might miss the opponent and you will likely get counterhit by a jump CD. The reason qcb + A is used over qcb + C is that qcb + C pushes you forward a bit, and you don't want to get closer to the opponent when he is already jumping over the fireball. You can also intercept a jump attack after the qcf + A, with a quick forward jump C.
If the opponent rolled instead of jumped, then it is better to use qcb + C, since the first hit of the move comes out very quickly.
-when the opponent is waking up, throw a qcf + A fireball so that it hits them late as they get up. This gives Mai a frame advantage since her fireballs recover so quickly, allowing you to followup with pretty much anything, including:
-~Jump D, Close C, ~df + B(1), qcb + C, Far A/walk up throw/jump back
qcb + P(air)
-Jump D, d + B(air)
-Crouch D
-qcb + C, Far A/walk up throw/jump back qcb + P(air)
-f + B overhead (not totally safe since the f + B has a long startup)
One should be careful about using attack strings with df + B. They are safe on block, but the opponent can guard roll right before the df + B, make it whiff and do two hits, allowing the opponent more than enough time to punish you.
-qcb + P(air) is a high priority move that is safe on block if it doesn't hit too deep (although she can sometimes still be command thrown). After doing a safe ground attack string, you can try either poking with far A or doing a quick jump back qcb + P(air) which will usually hit anyone who tried to attack on the ground, or blindly jump. This move also trades hits with many dragon punch anti-airs, and will almost always beat anti-air normals. That said, anyone with a very fast jump anti-air (such as Clark/Iori jump D) that anticipates the move, can hit her out of the move before it starts up. Thus, it is recommended to sometimes use the backdash bug after the opponent blocks some attack, and see what the opponent did. If he jumped, you can throw a qcf + A or qcb + A to hit him as he lands. If he did nothing and you're far enough, it is probably safe to throw another qcf + A.
-Mai has a huge amount of mixups in the air. When the opponent is waking up from some knockdown attack, hyper jump behind opponent and do d + D(air) or d + B(air) which will crossup sometimes. Opponent is forced to block the backwards (from the jump behind), then block the other way again if the move crosses up. d + D(air) can only be done from a high jump, while it is recommended to use d + B from a hop. Both of these moves have very good priority. The d + D(air) is able to cleanly beat many dragon punch anti-airs, as long as Mai doesn't end up flying right in front of the opponent.
-if for some reason, you are in maxmode, you can try to toss out unexpected hcf + D (which is usually suicidal), and cancel it to qcb + P if blocked, which is safe.
