mNo edit summary |
mNo edit summary |
||
| Line 48: | Line 48: | ||
! [[image:snka.gif]] | ! [[image:snka.gif]] | ||
|align="center"| 5/8/0 | |align="center"| 5/8/0 | ||
|align="center"| +4/ + 2 | |align="center"| +4/+2 | ||
|align="center"| R,C,S,Su | |align="center"| R,C,S,Su | ||
|align="center"| HL | |align="center"| HL | ||
| Line 72: | Line 72: | ||
! [[image:snkd.gif]] | ! [[image:snkd.gif]] | ||
|align="center"| 6/6/6 | |align="center"| 6/6/6 | ||
|align="center"| +8/ + 6 | |align="center"| +8/+6 | ||
|align="center"| C,S,Su | |align="center"| C,S,Su | ||
|align="center"| HL | |align="center"| HL | ||
| Line 269: | Line 269: | ||
! f + [[image:snkb.gif]] | ! f + [[image:snkb.gif]] | ||
|align="center"| 6/2(6)4/13 | |align="center"| 6/2(6)4/13 | ||
|align="center"| +3/ + 1 | |align="center"| +3/+1 | ||
|align="center"| S,Su | |align="center"| S,Su | ||
|align="center"| HL | |align="center"| HL | ||
| Line 416: | Line 416: | ||
! j.qcfx2+[[image:snkd.gif]] | ! j.qcfx2+[[image:snkd.gif]] | ||
|align="center"| 9/-(9+3+14)-(9+4+12)-(12) [2(2)x∞]*1/5 (Projectile: [2(2)]x∞/1) | |align="center"| 9/-(9+3+14)-(9+4+12)-(12) [2(2)x∞]*1/5 (Projectile: [2(2)]x∞/1) | ||
|align="center"| KD/ + 12 | |align="center"| KD/+12 | ||
|align="center"| | |align="center"| | ||
|align="center"| HL | |align="center"| HL | ||
Revision as of 13:27, 8 February 2020
General Info
Crouch height: Low
Jump: 4/43/1
Hop: 4/32/1
Dash: 3/10~∞/3
Backdash: 3/16/3
Wakeup: 15 frames
Recovery roll: 23 frames
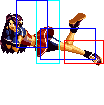
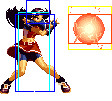
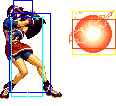
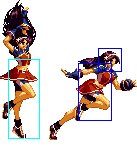
| Stand | Crouch | Jump | Grab | Run |
|---|---|---|---|---|

|

|

|

|

|
Colors

|

|

|

|
Movelist
Notes
- Cancellable normals are:
- Close: A, B, C, D
- Far: A, B
- Crouch: A, B, C
- Jump: A (not vertical high jump), C (only high)
- CD is cancellable into specials and DMs.
- f + B (2) is cancellable (on air attacks).
- air d + B is cancellable (on air attacks). But as it causes knockdown, you can only combo on a counterhit.
- she has the ability to wall jump by pressing uf when she has jumped towards a wall
- Air throw is a hard knockdown
Combos
0 stock
- cr.B x 2 > dp + C
- cl.C / cr.C >
- qcb + C {15%}
- dp + C {20%}
- cl.C / cr.B > f + B (2)
- air dp + A {25%/??%}
- air dp + C (Corner)
- air qcb + K (Corner)
- j.A > air qcb + B {15%}
1 stock
- j.A > DM air qcf qcf + D {30%}
- ... f + B (2) > DM air hcb hcb + P (Corner) {35+%}
- Point blank: cr.B > DM hcb hcb + P
2 stock
- ... dp + C (1-6) >> DM air hcb hcb + P{30-40%}
- ... air qcb + K >>
- DM air hcb hcb + P
- DM hcb hcb + P
- Already on Max Mode: cr.B x 2 >
- SDM hcb f + AC > [followup]
- HSDM qcf + ABCD > [followup]
3 stock
- st.D >> BC, run, st.D >>
- SDM hcb f + AC > [followup] {50+%}
- HSDM qcf + ABCD > [followup]
- cr.B, cr.A >> BC, cr.C >
- SDM hcb f + AC > [followup] {50+%}
- HSDM qcf + ABCD > [followup] {50-70%}
Notes
- ... SDM hcb f + AC >
- A B C A B C D >
- dp + P (Finisher that does more damage.)
- hcb + K
- qcf + P
- A B C A B C D >
- ... HSDM qcf + ABCD >
- D C B D C B A >
- qcf + AB
- qcf + BC (Does zero damage but heals Athena.)
- D C B D C B A >
- Weak attack > f + B will combo only if you are very close and the first hit of f + B connect.
- On hard attack > f + B, the first hit of f + B will almost always miss, but the second hit will combo (even if you are not very close).
Strategies
- Use your Psycho Ball (qcb + P) at far distance and your teleport (qcf + K) if your opponent if close
- Psycho Sword (dp + P) is an excellent anti air, also its an aereal optional move, you can make instant air move with uf dp + P
- B Phoenix Arrow (air qcb + B) is a great follow up after f + B (2). D version its riskful.
- Psycho Reflector (qcb + B) its useful for reflect projectiles.
- Psychic 9 (SDM hcb f + AC) and Psycho Medley (HSDM qcf + ABCD) are strictful timming DMs, don't use it if you don't dominate it, well, a good timming trick its to bring the sequence after the first hit of those DMs.
