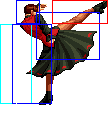
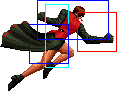
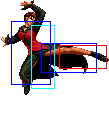
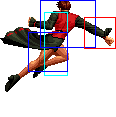
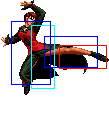
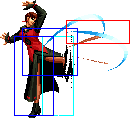
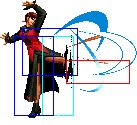
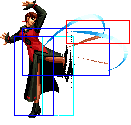
m (→Movelist) |
|||
| Line 280: | Line 280: | ||
|- | |- | ||
! qcb+[[image:snkb.gif]] | ! qcb+[[image:snkb.gif]] | ||
|align="center"| | |align="center"| 10/1(1)1(3)1(1)1(3)1(1)1(3)1(1)1/17 | ||
|align="center"| | |align="center"| -4/-14 | ||
|align="center"| | |align="center"| Fo | ||
|align="center"| HL | |align="center"| HL | ||
|valign="bottom" style="border-right:0px;"| [[image:Vice02_qcbB1.png|center]] | |valign="bottom" style="border-right:0px;"| [[image:Vice02_qcbB1.png|center]] | ||
| Line 294: | Line 294: | ||
|- | |- | ||
! qcb+[[image:snkd.gif]] | ! qcb+[[image:snkd.gif]] | ||
|align="center"| | |align="center"| 26/1(1)1(3)1(1)1(3)1(1)1(3)1(1)1/21 | ||
|align="center"| | |align="center"| -7/-17 | ||
|align="center"| | |align="center"| Fo | ||
|align="center"| HL | |align="center"| HL | ||
|valign="bottom" style="border-right:0px;"| [[image:Vice02_qcbD1.png|center]] | |valign="bottom" style="border-right:0px;"| [[image:Vice02_qcbD1.png|center]] | ||
| Line 302: | Line 302: | ||
|- | |- | ||
! <br>j.qcb+[[image:snkb.gif]]<br><br> | ! <br>j.qcb+[[image:snkb.gif]]<br><br> | ||
|align="center"| | |align="center"| 12/1(1)1(3)1(1)1(3)1(1)1/Till land+17 | ||
|align="center"| | |align="center"| -/- | ||
|align="center"| | |align="center"| Fi | ||
|align="center"| HL | |align="center"| HL | ||
|rowspan="2" valign="bottom" style="border-right:0px;"| [[image:Vice02_jqcbB1.png|center]] | |rowspan="2" valign="bottom" style="border-right:0px;"| [[image:Vice02_jqcbB1.png|center]] | ||
| Line 315: | Line 315: | ||
|- | |- | ||
! j.qcb+[[image:snkd.gif]] | ! j.qcb+[[image:snkd.gif]] | ||
|align="center"| | |align="center"| 13/1(1)1(3)1(1)1(3)1(1)1(3)1(1)1(3)1(1)1/Till land+19 | ||
|align="center"| | |align="center"| -/- | ||
|align="center"| | |align="center"| Fi | ||
|align="center"| HL | |align="center"| HL | ||
|- | |- | ||
! <br>hcf+[[image:snkb.gif]]<br><br> | ! <br>hcf+[[image:snkb.gif]]<br><br> | ||
|align="center"| | |align="center"| 15/1+2/25 | ||
|align="center"| | |align="center"| KD/-8 | ||
| | |align="center"| Fi | ||
|align="center"| HL | |align="center"| HL | ||
|valign="bottom" style="border-right:0px;"| [[image:Vice02_hcfB1.png|center]] | |valign="bottom" style="border-right:0px;"| [[image:Vice02_hcfB1.png|center]] | ||
|valign="bottom" style="border-left:0px;"| [[image:Vice02_hcfB2.png|center]] | |valign="bottom" style="border-left:0px;"| [[image:Vice02_hcfB2.png|center]] | ||
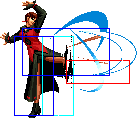
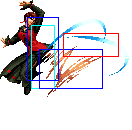
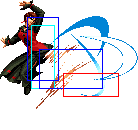
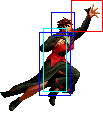
|rowspan="2"| ''' | |rowspan="2"| '''Deicide - hcf+K''' | ||
* Vice swings her arm, causing a shadow to extend outwards. If it connects, the opponent is thrown to the opposite side | * Vice swings her arm, causing a shadow to extend outwards. If it connects, the opponent is thrown to the opposite side | ||
* hcf+B travels shorter (about half screen length) and comes out faster than hcf+D. Not possible to combo into hcf+D | * hcf+B travels shorter (about half screen length) and comes out faster than hcf+D. Not possible to combo into hcf+D | ||
* hard knockdown and opponent will get up with their back turned | * hard knockdown and opponent will get up with their back turned | ||
* free cancellable into | * free cancellable into | ||
* Move cancels the active period immediately into the recovery on block. | |||
* this move has good range and recovery (if you use hcf+B and not hcf+D), as well as good meter buildup on whiff and good advantages if it hits (hard knockdown, back turned opponent and lots of time to setup a mixup) | * this move has good range and recovery (if you use hcf+B and not hcf+D), as well as good meter buildup on whiff and good advantages if it hits (hard knockdown, back turned opponent and lots of time to setup a mixup) | ||
|- | |- | ||
! hcf+[[image:snkd.gif]] | ! hcf+[[image:snkd.gif]] | ||
|align="center"| | |align="center"| 21/3/30 | ||
|align="center"| | |align="center"| KD/-13 | ||
| | |align="center"| Fi | ||
|align="center"| HL | |align="center"| HL | ||
|colspan="2" | [[image:Vice02_hcfD.png|center]] | |colspan="2" | [[image:Vice02_hcfD.png|center]] | ||
|- | |- | ||
! <br>qcb+[[image:snka.gif]]<br><br> | ! <br>qcb+[[image:snka.gif]]<br><br> | ||
|align="center"| | |align="center"| 8/4/27 | ||
|align="center"| | |align="center"| KD/-13 | ||
|align="center"| | |align="center"| Fi, Fo, qcf+P | ||
|align="center"| HL | |align="center"| HL | ||
|rowspan="2" colspan="2" | [[image:Vice02_qcbA.png|center]] | |rowspan="2" colspan="2" | [[image:Vice02_qcbA.png|center]] | ||
| Line 352: | Line 353: | ||
* qcb+A can be used as an anti-air against non-meaty jumpins that aren't going to land directly above her but other than that, it's risky to throw out this move since it is almost always punishable on block | * qcb+A can be used as an anti-air against non-meaty jumpins that aren't going to land directly above her but other than that, it's risky to throw out this move since it is almost always punishable on block | ||
* can be followed up with Mithan's Robe, qcf+P | * can be followed up with Mithan's Robe, qcf+P | ||
* Upper body invincible: A: Frame 5-8, C: Frame 7-13. | |||
* free cancellable into | * free cancellable into | ||
* free cancellable out of | * free cancellable out of | ||
|- | |- | ||
! qcb+[[image:snkc.gif]] | ! qcb+[[image:snkc.gif]] | ||
|align="center"| | |align="center"| 13/4/29 | ||
|align="center"| | |align="center"| KD/-15 | ||
|align="center"| | |align="center"| Fi, Fo, qcf+P | ||
|align="center"| HL | |align="center"| HL | ||
|- | |- | ||
! hcf+[[image:punch.gif]] | ! hcf+[[image:punch.gif]] | ||
|align="center"| | |align="center"| 6/1/27 | ||
|align="center"| | |align="center"| KD/- | ||
| | | | ||
|align="center"| Grab | |align="center"| Grab | ||
|colspan="2" | [[image:Vice02_hcfP.png|center]] | |colspan="2" | [[image:Vice02_hcfP.png|center]] | ||
| ''' | | '''Blackened - hcf+P''' | ||
* | * Invincibility: Complete startup | ||
* Vice will slam the opponent down doing some damage, then throws them upwards for more damage. She can followup with Mithan's Robe, qcf+P, for additional damage after that | * Vice will slam the opponent down doing some damage, then throws them upwards for more damage. She can followup with Mithan's Robe, qcf+P, for additional damage after that | ||
* When Vice throws the opponent into the air, they are thrown with their back turned | * When Vice throws the opponent into the air, they are thrown with their back turned | ||
|- | |- | ||
! hcb,f+[[image:punch.gif]] | ! hcb,f+[[image:punch.gif]] | ||
|align="center"| | |align="center"| 0/1/23 | ||
|align="center"| | |align="center"| KD/- | ||
| | | | ||
|align="center"| Grab | |align="center"| Grab | ||
| Line 386: | Line 388: | ||
|- | |- | ||
! qcf+[[image:punch.gif]] | ! qcf+[[image:punch.gif]] | ||
|align="center"| | |align="center"| 13/13/19+18 | ||
|align="center"| | |align="center"| KD/- | ||
| | | | ||
|align="center"| | |align="center"| - | ||
|colspan="2" | [[image:Vice02_qcfP.png|center]] | |colspan="2" | [[image:Vice02_qcfP.png|center]] | ||
| '''Mithan's Robe - qcf+P (after qcb+P or hcf+P)''' | | '''Mithan's Robe - qcf+P (after qcb+P or hcf+P)''' | ||
| Line 399: | Line 401: | ||
|- | |- | ||
! <br>qcfx2+[[image:snka.gif]]<br><br> | ! <br>qcfx2+[[image:snka.gif]]<br><br> | ||
|align="center"| | |align="center"| 32/1/31 | ||
|align="center"| | |align="center"| KD/- | ||
|align="center"| | |align="center"| | ||
|align="center"| Grab | |align="center"| Grab | ||
| Line 409: | Line 411: | ||
* qcfx2+C is useful for punishing ground projectiles on reaction such as Iori's qcf+P but difficult to get over air projectiles like Athena's qcb+P. qcfx2+A is too slow to use for punishing anything. | * qcfx2+C is useful for punishing ground projectiles on reaction such as Iori's qcf+P but difficult to get over air projectiles like Athena's qcb+P. qcfx2+A is too slow to use for punishing anything. | ||
* hard knockdown | * hard knockdown | ||
* Invincibility: A: Frame 1-19. C: Frame 1-13 | |||
|- | |- | ||
! qcfx2+[[image:snkc.gif]] | ! qcfx2+[[image:snkc.gif]] | ||
|align="center"| | |align="center"| 24/1/33 | ||
|align="center"| | |align="center"| KD/- | ||
|align="center"| | |align="center"| | ||
|align="center"| Grab | |align="center"| Grab | ||
|- | |- | ||
! hcbx2+[[image:kick.gif]] | ! hcbx2+[[image:kick.gif]] | ||
|align="center"| | |align="center"| 0/1/42 | ||
|align="center"| | |align="center"| KD/- | ||
| | | | ||
|align="center"| Grab | |align="center"| Grab | ||
| Line 430: | Line 433: | ||
|- | |- | ||
! qcfx2+[[image:snka.gif]]+[[image:snkc.gif]] | ! qcfx2+[[image:snka.gif]]+[[image:snkc.gif]] | ||
|align="center"| | |align="center"| 24/1/37 | ||
|align="center"| | |align="center"| KD/- | ||
| | | | ||
|align="center"| Grab | |align="center"| Grab | ||
| Line 437: | Line 440: | ||
| '''Withering Surface - qcfx2+AC | | '''Withering Surface - qcfx2+AC | ||
* same as the qcfx2+C version but does much more damage (over 50%) | * same as the qcfx2+C version but does much more damage (over 50%) | ||
* Invincibility: Frame 1-22. Invincibility above feet: Frame 23-24. | |||
|- | |- | ||
! hcbx2+[[image:snkb.gif]]+[[image:snkd.gif]] | ! hcbx2+[[image:snkb.gif]]+[[image:snkd.gif]] | ||
|align="center"| | |align="center"| 0/1/38 | ||
|align="center"| | |align="center"| KD/- | ||
| | | | ||
|align="center"| Grab | |align="center"| Grab | ||
| Line 450: | Line 454: | ||
|- | |- | ||
! db,qcf,uf,u,<br>d+[[image:snka.gif]]+[[image:snkc.gif]] | ! db,qcf,uf,u,<br>d+[[image:snka.gif]]+[[image:snkc.gif]] | ||
|align="center"| | |align="center"| 0/-/2+Till land+12 | ||
|align="center"| | |align="center"| KD/- | ||
| | | | ||
|align="center"| Grab | |align="center"| Grab | ||
| Line 459: | Line 463: | ||
* it is easier to perform most of the move's motion on the ground. Input back to up, making her jump into the air, then d+AC while in the air | * it is easier to perform most of the move's motion on the ground. Input back to up, making her jump into the air, then d+AC while in the air | ||
* hard knockdown | * hard knockdown | ||
* Invincibility Frame 1-2. Throw box only appears when the opponent is in range. | |||
|} | |} | ||
=== Notes === | === Notes === | ||
Revision as of 05:12, 30 September 2013
General Info
Crouch height: Low
| Stand | Crouch | Jump | Grab | Run |
|---|---|---|---|---|

|

|

|

|

|
Colors

|

|

|

|
Movelist
Notes
- cancellable normals are close A, crouch A, far A, close B, crouch B, close C, crouch C, close D(2), crouch D, jump A, jump C
- CD is cancellable into specials and DMs
- D throw is a backturned hard knockdown
Combos
Anywhere
1. Close D(2), f+A, hcf+B - 35%
Vice's most damaging B&B that doesn't use any meter. The close D must land very close to the opponent for this combo to work, otherwise the f+A will whiff. Because of this, it is nearly impossible to get this combo to land properly after a jump attack, though still possible if your jump attack lands early enough or a crossup jump B was used. If Vice is in the corner when she lands this combo, it will throw the opponent into the corner with their back turned, which is a huge advantage for her.
2. [Jump attack] Close D(2), qcb+C, qcf+P - 28%
Use this combo when your close D hits such that the f+A after it would be out of range to connect. Overall does less damage than the above and does not back turn the opponent or give Vice as much time to set anything up after.
3. Crouch B/Close D(2)/Crouch C, hcb f+P - 20-27%
Comboing into hcb f+P does less damage than the above combos but gives Vice a lot of time to setup her next mixup. The crouch B version isn't really hit confirmable but if blocked, hcb f+P recovers quick and keeps Vice in range of a close D. This is explained in the strategy section.
4. Jump attack/Crouch B, Crouch B, Crouch A, qcb+A, qcf+A - 29%
This is easily Vice's most useful combo off of low weak attacks.
5. [Jump attack] Close D(2), hcbx2+K - 40%
This combo does just a little bit more damage than her B&B(combo 1) and uses up one stock, but has the advantage of being able to hit from further out, including after a jump attack.
6. f+A, BC, run up close D(2), hcbx2+K/BD - 45%/65%
A very easy and damaging combo off of her overhead. This combo will prove to be very useful in matches, especially when mixed up with her damaging
7. [Jump attack] Close D(2), BC, run up close D(2), hcbx2+BD - 65%
This is Vice's most damaging practical combo. It is easy to hit confirm her close D and can be comboed after a jumping attack without having issues with spacing (a longer run is necessary).
8. qcb+A(CH), qcb+A, qcf+P - 25%
This is a useful anti-air combo that can be used against jumpins that aren't directly above Vice when coming down. The initial qcb+A won't always counterhit depending on what the opponent did but if it does, you can followup with another.
