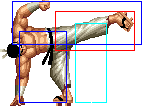
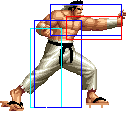
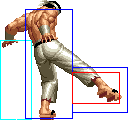
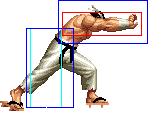
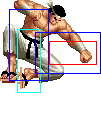
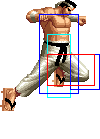
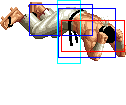
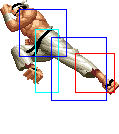
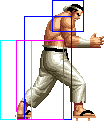
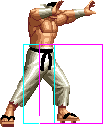
| Line 260: | Line 260: | ||
|- | |- | ||
! dp+[[image:snka.gif]] | ! dp+[[image:snka.gif]] | ||
|align="center"| | |align="center"| 26/-/46 | ||
|align="center"| | |align="center"| KD/- | ||
| | |align="center"| Fi | ||
|align="center"| L | |align="center"| L | ||
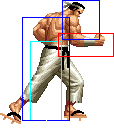
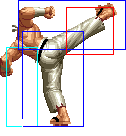
|colspan="2" | [[image:Daimon02_dpA.png|center]] | |colspan="2" | [[image:Daimon02_dpA.png|center]] | ||
| Line 271: | Line 271: | ||
* allows for some unblockable setups, as long as it hits on the first frame of the opponent getting up - this glitch is explained in it's own section | * allows for some unblockable setups, as long as it hits on the first frame of the opponent getting up - this glitch is explained in it's own section | ||
* can be recovery rolled | * can be recovery rolled | ||
* free cancellable | * free cancellable into | ||
|- | |- | ||
! dp+[[image:snkc.gif]] | ! dp+[[image:snkc.gif]] | ||
|align="center"| 26/-/9 | |||
|align="center"| | |align="center"| | ||
|align="center"| | |align="center"| Fi | ||
|align="center"| - | |align="center"| - | ||
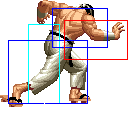
|colspan="2" | [[image:Daimon02_dpC.png|center]] | |colspan="2" | [[image:Daimon02_dpC.png|center]] | ||
| Line 282: | Line 282: | ||
* same startup animation as dp+A, but Daimon doesn't actually pound the ground, instead recovering pretty quickly | * same startup animation as dp+A, but Daimon doesn't actually pound the ground, instead recovering pretty quickly | ||
* the purpose is to trick players into jumping or crouching, so that you can either anti-air them or get in for a throw | * the purpose is to trick players into jumping or crouching, so that you can either anti-air them or get in for a throw | ||
* free cancellable into | |||
|- | |- | ||
! dp+[[image:kick.gif]] | ! dp+[[image:kick.gif]] | ||
|align="center"| | |align="center"| 8/1/28 | ||
|align="center"| | |align="center"| KD/- | ||
| | | | ||
|align="center"| Grab | |align="center"| Grab | ||
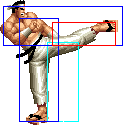
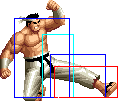
|colspan="2" | [[image:Daimon02_dpK.png|center]] | |colspan="2" | [[image:Daimon02_dpK.png|center]] | ||
| '''Chou Oosotogari - dp+K''' | | '''Chou Oosotogari - dp+K''' | ||
* | * Invincibility: Complete startup. | ||
* very useful when the opponent is waking up | * very useful when the opponent is waking up | ||
* hard knockdown and gives enough time to set up another mixup on wakeup | * hard knockdown and gives enough time to set up another mixup on wakeup | ||
|- | |- | ||
! <br>qcb+[[image:snkb.gif]]<br><br> | ! <br>qcb+[[image:snkb.gif]]<br><br> | ||
|align="center"| | |align="center"| 33 | ||
|align="center"| | |align="center"| | ||
| | | | ||
| Line 301: | Line 302: | ||
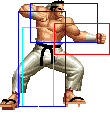
|rowspan="2" colspan="2" | [[image:Daimon02_qcbK.png|center]] | |rowspan="2" colspan="2" | [[image:Daimon02_qcbK.png|center]] | ||
|rowspan="2"| '''Chou Ukemi - qcb+K''' | |rowspan="2"| '''Chou Ukemi - qcb+K''' | ||
* | * Invincibility: A: Frame 1-16, C: Frame 1-23. Throw Invincibility: A Frame 1-18, C: Frame 1-26. | ||
* qcb+D makes him roll further than qcb+B, though overall it isn't very useful compared to a normal roll | * qcb+D makes him roll further than qcb+B, though overall it isn't very useful compared to a normal roll | ||
* does not go through the opponent, unlike normal rolls, unless the opponent is knocked down from really close(like a sweep or stand CD) and the knockdown attack is cancelled into a roll | * does not go through the opponent, unlike normal rolls, unless the opponent is knocked down from really close(like a sweep or stand CD) and the knockdown attack is cancelled into a roll | ||
|- | |- | ||
! qcb+[[image:snkd.gif]] | ! qcb+[[image:snkd.gif]] | ||
|align="center"| | |align="center"| 41 | ||
|align="center"| | |align="center"| | ||
| | | | ||
| Line 312: | Line 313: | ||
|- | |- | ||
! <br>qcf+[[image:snkb.gif]]<br><br> | ! <br>qcf+[[image:snkb.gif]]<br><br> | ||
|align="center"| | |align="center"| 2/12/15 | ||
|align="center"| | |align="center"| KD/- | ||
| | | | ||
|align="center"| - | |align="center"| - | ||
| Line 331: | Line 332: | ||
|- | |- | ||
! hcf+[[image:snka.gif]] | ! hcf+[[image:snka.gif]] | ||
|align="center"| | |align="center"| 12/7/32 | ||
|align="center"| | |align="center"| KD/-15 | ||
| | | | ||
|align="center"| HL | |align="center"| HL | ||
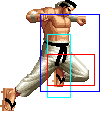
|colspan="2" | [[image:Daimon02_hcfA.png|center]] | |colspan="2" | [[image:Daimon02_hcfA.png|center]] | ||
| '''Kumo Tsukami Nage - hcf+A''' | | '''Kumo Tsukami Nage - hcf+A''' | ||
* an anti-air grab that has good | * an anti-air grab that has good upper body invincibility (Complete startup and active period). | ||
* it requires good reaction to be able to anti-air with this move as it does have some startup time | * it requires good reaction to be able to anti-air with this move as it does have some startup time | ||
* not feasible to use if the opponent is coming down with a meaty jump attack on your wakeup, but it works well if you can react to the starting points of a jumpin | * not feasible to use if the opponent is coming down with a meaty jump attack on your wakeup, but it works well if you can react to the starting points of a jumpin | ||
| Line 344: | Line 345: | ||
|- | |- | ||
! hcf+[[image:snkc.gif]] | ! hcf+[[image:snkc.gif]] | ||
|align="center"| | |align="center"| 12/4/37 | ||
|align="center"| | |align="center"| KD/-23 | ||
| | | | ||
|align="center"| | |align="center"| HL | ||
|colspan="2" | [[image:Daimon02_hcfC.png|center]] | |colspan="2" | [[image:Daimon02_hcfC.png|center]] | ||
| ''' | | '''Kirikabu Gaeshi - hcf+C''' | ||
* blockable "grab" move that is angled at the ground in front of him | * blockable "grab" move that is angled at the ground in front of him | ||
* | * Decent enough recovery that it is very difficult for most characters to be able to counter after blocking it | ||
* Lower body invincibility: Complete startup and active period. | |||
* opponent is thrown on the opposite side with their back turned and can't recovery roll | * opponent is thrown on the opposite side with their back turned and can't recovery roll | ||
* can also grab characters when they are already knocked down after certain moves, such as after a stand CD, jump CD, crouch D, dp+A and hcfx2+K | * can also grab characters when they are already knocked down after certain moves, such as after a stand CD, jump CD, crouch D, dp+A and hcfx2+K | ||
|- | |- | ||
! hcb,f+[[image:punch.gif]] | ! hcb,f+[[image:punch.gif]] | ||
|align="center"| | |align="center"| 0/1/35 | ||
|align="center"| | |align="center"| KD/- | ||
| | | | ||
|align="center"| Grab | |align="center"| Grab | ||
| Line 366: | Line 368: | ||
|- | |- | ||
! hcb,f+[[image:kick.gif]] | ! hcb,f+[[image:kick.gif]] | ||
|align="center"| | |align="center"| 3/31/3 | ||
|align="center"| | |align="center"| KD/- | ||
| | | | ||
|align="center"| Grab | |align="center"| Grab | ||
| Line 377: | Line 379: | ||
* you will probably never land it on anyone since it is so slow, so it's advisable to never use this move | * you will probably never land it on anyone since it is so slow, so it's advisable to never use this move | ||
* there is a glitch that lets Daimon do the running portion of the move but not grab (as long as he isn't in range to grab). It will also make him run about half screen as opposed to almost full screen. To do it, enter the move as hcb f+ABCD | * there is a glitch that lets Daimon do the running portion of the move but not grab (as long as he isn't in range to grab). It will also make him run about half screen as opposed to almost full screen. To do it, enter the move as hcb f+ABCD | ||
* The active period signifies the length of the run. If Daimon comes in range, he will go into the grab animation which has 19/1/37 as framedata. | |||
|- | |- | ||
|colspan="8" align="center"| '''DMs''' | |colspan="8" align="center"| '''DMs''' | ||
|- | |- | ||
! hcbx2+[[image:punch.gif]] | ! hcbx2+[[image:punch.gif]] | ||
|align="center"| | |align="center"| 0/1/36 | ||
|align="center"| | |align="center"| KD/- | ||
| | | | ||
|align="center"| Grab | |align="center"| Grab | ||
| Line 393: | Line 396: | ||
|- | |- | ||
! hcfx2+[[image:kick.gif]] | ! hcfx2+[[image:kick.gif]] | ||
|align="center"| | |align="center"| 14/1/11 | ||
|align="center"| | |align="center"| KD/- | ||
| | | | ||
|align="center"| Grab | |align="center"| Grab | ||
| Line 404: | Line 407: | ||
* then you can either do dp+K for the final finish of the move, or use hcf+C which will grab them off the ground. They do roughly the same damage, though doing hcf+C will build a little meter and set up a Daimon unblockable (depending on character). | * then you can either do dp+K for the final finish of the move, or use hcf+C which will grab them off the ground. They do roughly the same damage, though doing hcf+C will build a little meter and set up a Daimon unblockable (depending on character). | ||
* the hcfx2+K autoguard is very useful against certain moves that have too much pushback (if they hit or are blocked) to be punished normally, since autoguard makes moves connect with no pushback. An example would be Robert's f+A | * the hcfx2+K autoguard is very useful against certain moves that have too much pushback (if they hit or are blocked) to be punished normally, since autoguard makes moves connect with no pushback. An example would be Robert's f+A | ||
* Invincibility: Frame 1. Full body Guard point: frame 2-14. | |||
|- | |- | ||
|colspan="8" align="center"| '''SDMs''' | |colspan="8" align="center"| '''SDMs''' | ||
|- | |- | ||
! hcbx2+[[image:snka.gif]]+[[image:snkc.gif]] | ! hcbx2+[[image:snka.gif]]+[[image:snkc.gif]] | ||
|align="center"| | |align="center"| 0/1/36 | ||
|align="center"| | |align="center"| KD/- | ||
| | | | ||
|align="center"| Grab | |align="center"| Grab | ||
| Line 419: | Line 423: | ||
|- | |- | ||
! hcfx2+[[image:snkb.gif]]+[[image:snkd.gif]] | ! hcfx2+[[image:snkb.gif]]+[[image:snkd.gif]] | ||
|align="center"| | |align="center"| 12/1/11 | ||
|align="center"| | |align="center"| | ||
| | | | ||
| Line 428: | Line 432: | ||
* works the same as his DM version, though the final dp+K followup does a lot of damage in comparison to going for an hcf+C off the ground | * works the same as his DM version, though the final dp+K followup does a lot of damage in comparison to going for an hcf+C off the ground | ||
* the fact that you have to go into maxmode to use it and it isn't comboable makes it not that useful | * the fact that you have to go into maxmode to use it and it isn't comboable makes it not that useful | ||
* Invincibility: Frame 1, Full body Guard point: Frame 2-12. | |||
|- | |- | ||
|colspan="8" align="center"| '''SDMs''' | |colspan="8" align="center"| '''SDMs''' | ||
|- | |- | ||
! dp,rdp+[[image:snkb.gif]]+[[image:snkc.gif]] | ! dp,rdp+[[image:snkb.gif]]+[[image:snkc.gif]] | ||
|align="center"| | |align="center"| 38/-/47 | ||
|align="center"| | |align="center"| KD/- | ||
| | | | ||
|align="center"| L | |align="center"| L | ||
| Line 442: | Line 447: | ||
* Aside from using this in Damon unblockable setups, it's pretty unlikely you will hit anyone with it because of how slow it is and the fact that the HSDM sound and flash makes it even more obvious. The move has autoguard though, so it can have some very specialized applications which I'm still testing out | * Aside from using this in Damon unblockable setups, it's pretty unlikely you will hit anyone with it because of how slow it is and the fact that the HSDM sound and flash makes it even more obvious. The move has autoguard though, so it can have some very specialized applications which I'm still testing out | ||
* The motion for this move is pretty awkward, but can be executed with a shortcut(well, technically more inputs, but easier to input) hcbx3+BC | * The motion for this move is pretty awkward, but can be executed with a shortcut(well, technically more inputs, but easier to input) hcbx3+BC | ||
* Invincibility: Frame 1, Full body Guard point: Frame 2-12. | |||
|} | |} | ||
===Notes=== | ===Notes=== | ||
Revision as of 03:33, 29 September 2013
General Info
Crouch height: High
Colors

|

|

|

|
Movelist
Notes
- C throw is a mashable hard knockdown
- It is possible to set up unblockables off of C throw (see below)
- Unrolled D throw can lead to crossup setups
Combos
Anywhere
1. [Jump attack] cl.C/cl.D/cr.A, hcb f+C
This is one of Daimon's most important combos. It's easy to do and does decent damage, and many characters can be set up for an unblockable afterwards. hcb f+C is used instead of A, because there is a chance that hcb f+P can execute as hcf+P and you don't want to be whiffing an anti-air hcf+A.
Crouch A is used in the combo in case you couldn't get close enough to trigger the close C/D as opposed to the far C/D.
2. [Jump attack] cl.C/cl.D, hcf+C
The main reason you'd use this combo is if there is an unblockable setup after hcf+C and it doesn't exist for hcb f+P. Also, if Daimon is in the corner and does this combo, the opponent will go into the corner, with their back turned.
3. [Jump attack] cl.C/cl.D, df+C, hcbx2+P
Difficult combo, particularly going from df+C to hcbx2+P. Since Daimon doesn't have a qcb+P/hcb+P move, you can apply the shortcut hcb+C, df+C, hcb+P to perform this combo. It won't work after a jump attack (unless you are crossing up) and it will only work if you are really close to the opponent.
4. [Jump attack] cl.C/cl.D, BC, run up cl.C/cl.D, hcbx2+AC
Does good damage though takes 3 stocks which may or may not be worth it depending on the situation.
5. [Jump attack] cl.C, BC, run up cl.C/cr.A, hcb f+C, HSDM unblockable
If Daimon has an unblockable HSDM setup against the character he is fighting against and if they have a lot of health(preferably near full health), then this combo is advisable to do.
6. (Opponent in air) df+C(CH), run up far D/hcf+A
Depending on the distance, you may not be able to run forward and land hcf+A in time, but if the df+C hits fairly close, then the damage and other benefits(hard knockdown with back turned) are better than using far D.
7. (Already in maxmode) df+C, (C)qcf+K, dp+A/HSDM
Daimon has a glitch that allows him to combo his earthquake moves after cancelling his df+C into a special move/super.
8. (opponent in air) df+C(CH), BC, run forward df+C, (C)qcf+K, dp+A/HSDM
Just like the above combo, except the activation is during the combo, after the counterhit df+C. The problem is that if the initial df+C was not a counterhit, then the two stocks used for the max activation *may* have been for nothing.
9. (opponent in air) df+C, hcfx2+K/hcbx2+P, dp+A
This combo sets up the unblockable glitch without the initial maxmode activation. A shortcut can be used to make it easier - hcf df+C, hcf+K, dp+A.
Unblockable glitch with dp+A
Daimon has a glitch involving his earthquake moves (both his dp+A and his dp rdp+BC HSDM), which allows him to "combo" into it from any move that knocks down, as long as you time it on the exact frame that the opponent gets up off the ground.
Every move has it's own amount of frames after Daimon has recovered from that move, until the frame comes up where the earthquake would be unblockable. Since every move has a certain amount of frames it takes to execute and recover, it is possible to whiff a sequence of moves (normals, special moves, supers, jumps, rolls, backdashes, maxmode activation) with no frame gaps in between, such that when the earthquake is executed, it ends up coming out on the exact frame needed.
Unfortunately, each character also has their own speed which they get up from a knockdown, so in order to master this unblockable glitch, you must memorize the sequence of special moves to whiff, after every knockdown attack, against every character.
Let's use Whip as an example. After landing the hcb f+P grab, if you immediately do a dp+K(as a reversal from the recovery of the hcb f+P), then dp+A immediately after recovering from the dp+K, the dp+A will be unblockable. If you did qcf+K instead of dp+K, it won't work out because dp+K executes too quickly.
Kim/Ryo/Mary/Mai/K9999:
- hcb f+P, super jump attack(as coming down), dp+A
- (already in maxmode) hcb f+P, hcb f+ABCD, HSDM
Clark/Kensou/May Lee/Vanessa:
- hcb f+P, jump attack(as coming down), dp+A
- hcb f+P, hcfx2+K, CD -> dp+A(useless, use the one above)
Kyo/Kusanagi/Vice/Daimon/Choi/Seth/Chang:
- hcb f+P, jump attack(when going up), dp+A
Iori/Leona:
- hcb f+P, CD, dp+A
- hcb f+P, qcf+K, CD -> dp+A
- (already in maxmode) hcb f+P, qcb+B, HSDM
- f+C(throw), hcfx2+K, dp+A
Mature:
- hcb f+P, super jump attack(when going up), dp+A
- hcbx2+P, dp+A
Benimaru:
- hcb f+P, qcb+B, CD -> dp+A
- (already in maxmode) hcb f+P, dp+K, HSDM
- hcf+P, qcf+K, dp+A
- (already in maxmode) hcfx2+BD hcf+K dp+K, qcf+K, dp+A
Whip:
- hcb f+P, dp+K, dp+A
Robert/Angel/Joe:
- hcb f+P, dp+K, dp+A
- (already in maxmode) qcf+K, HSDM
Athena:
- (already in maxmode) hcf+P, HSDM
Maxima:
- hcb f+P, hcb f+P, CD -> dp+A
- hcb f+P, hcfx2+K, hcfx2+K, dp+A(useless, just use above)
- hcf+P, qcb+B, dp+A
- hcf+P, roll, dp+A(use the qcb+B one though, easier and builds meter)
- (already in maxmode) hcfx2+BD hcf+K dp+K, qcb+B(or roll), dp+A
- qcf+K, BC, dp+A
Chin:
- hcf+P, hcb f+ABCD, dp+A(outside corner)
- hcf+P, hcfx2+K, dp+A(in corner)
- (already in maxmode) hcbx2+AC, dp+A
- (already in maxmode) hcfx2+BD hcf+K dp+K, hcfx2+K, dp+A
Terry
- hcb f+P, qcb+D, dp+A
- (already in maxmode) hcb f+P, qcf+K, HSDM
- dp+K, CD -> dp+A
Yashiro:
- hcb f+P, qcb+D, dp+A
- (already in maxmode) hcb f+P, qcf+K, HSDM
Chris:
- hcf+P, hcb f+ABCD, dp+A(outside corner)
- hcf+P, hcfx2+K, dp+A(in corner)
- (already in max) hcfx2+BD hcf+K dp+K, hcfx2+K, dp+A
Andy:
- dp+K, CD -> dp+A
- (already in maxmode) hcb f+P, dp+C, HSDM
Ramon:
- (already in maxmode) hcb f+P, hcb f+P, HSDM
- hcf+P, qcf+K, dp+A
- (already in maxmode) dp+K, HSDM
- (already in maxmode) hcfx2+BD hcf+K dp+K, qcf+K, dp+A
Kula/Yamazaki:
- hcb f+P, hcb f+P, dp+A
- hcf+P, CD -> dp+A
- (already in maxmode) hcfx2+BD hcf+K dp+K, CD -> dp+A
K'/Takuma:
- hcb f+P, backdash, CD -> dp+A
- hcb f+P, BC, HSDM
- hcb f+K, dp+A
Shermie/Billy:
- f+C(throw), qcf+K, dp+A
- hcf+P, BC, dp+A
- (already in maxmode) hcb f+P, hcb f+P, HSDM
- (already in maxmode) hcfx2+BD hcf+K dp+K, BC, dp+A
Matchup Information
Kula
- random hcbx2+AC SDM
Enter maxmode the moment she enters maxmode - when she executes the move, roll the projectile, then do his HSDM right before the super freeze part hits. If timed right, the autoguard will eat all the hits, and the ground pound will punish her recovery.
- hit by dp+C while on the ground
If Daimon is hit with her dp+C while he is on the ground, he can recovery roll and punish her before she can recover, by using any instant grab (hcb f+P or hcbx2+P/AC)
- blocking qcb+B from relatively close
From many distances (though not all), you can do an instant grab (hcb f+P or hcbx2+P/AC) after blocking her qcb+B and it will grab her whether she decides to followup with f+B/f+D or do no followup at all
