|
|
| Line 437: |
Line 437: |
| |colspan="2" style="border-top:0px;"| [[image:Joe02_tkK3.png|center]] | | |colspan="2" style="border-top:0px;"| [[image:Joe02_tkK3.png|center]] |
| |- | | |- |
| ! qcf,hcb+[[image:snka.gif]] | | ! <br>qcf,hcb+[[image:snka.gif]]<br><br> |
| |align="center"| | | |align="center"| |
| |align="center"| | | |align="center"| |
| Line 455: |
Line 455: |
| |align="center"| HL | | |align="center"| HL |
| |- | | |- |
| ! qcfx2+[[image:snka.gif]] | | ! <br>qcfx2+[[image:snka.gif]]<br><br> |
| |align="center"| | | |align="center"| |
| |align="center"| | | |align="center"| |
| Line 474: |
Line 474: |
| |align="center"| | | |align="center"| |
| |align="center"| HL | | |align="center"| HL |
| |} | | |- |
| | | |colspan="8" align="center"| '''SDM''' |
| | | |- |
| ===DMs=== | | ! qcfx2+[[image:snka.gif]]+[[image:snkc.gif]] |
| | | |align="center"| |
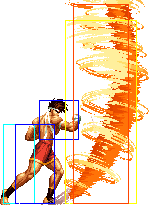
| 3. Screw Upper - qcfx2+P
| | |align="center"| |
| * Joe creates a vertical wall of tornados that moves forward a slight bit, maybe 1/3 screen
| | |align="center"| |
| * can be rolled easily and punished
| | |align="center"| HL |
| | | |valign="bottom" style="border-right:0px;"| [[image:Joe02_qcfx2AC1.png|center]] |
| ===SDMs=== | | |valign="bottom" style="border-left:0px;"| [[image:Joe02_qcfx2AC2.png|center]] |
| | | | '''Screw Upper - qcfx2+AC''' |
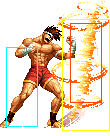
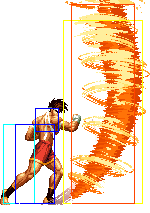
| 1. Screw Upper - qcfx2+AC
| |
| * Joe sends out a vertical wall of tornados similar to the DM version, except doing much more damage and traveling all the way across the screen | | * Joe sends out a vertical wall of tornados similar to the DM version, except doing much more damage and traveling all the way across the screen |
| | | |- |
| | | |colspan="8" align="center"| '''HSDM''' |
| ===HSDMs=== | | |- |
| | | ! qcfx2+[[image:snkb.gif]]+[[image:snkb.gif]] |
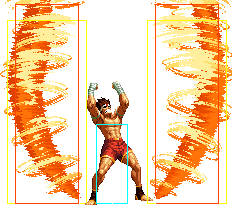
| 1. Cross Gigantes - qcfx2+BD
| | |align="center"| |
| | |align="center"| |
| | |align="center"| |
| | |align="center"| HL |
| | |colspan="2" | [[image:Joe02_HSDM.png|center]] |
| | | '''Cross Gigantes - qcfx2+BD''' |
| * Joe creates two tornados around him, one which travels left and the other travelling right | | * Joe creates two tornados around him, one which travels left and the other travelling right |
| * the move does a lot of chip damage, but can be rolled on reaction | | * the move does a lot of chip damage, but can be rolled on reaction |
| * Joe is invincible during the move | | * Joe is invincible during the move |
| | | |} |
| | |
| ===Notes=== | | ===Notes=== |
|
| |
|
General Info
|
|
Frames
|
Advantage
|
Cancel
|
Block
|
Hitbox
|
Notes
|
| Standing Close
|

|
3/3/11
|
-2/-4
|
R,C,S,Su
|
HL
|
|
|

|
5/3/7
|
+2/0
|
C,S,Su
|
HL
|
|
|

|
5/2/19
|
-1/-3
|
C,S,Su
|
HL
|
|
|

|
6/8/10
|
+2/0
|
C,S,Su
|
HL
|
|
|
| Standing Far
|

|
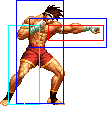
4/2/8
|
+2/0
|
|
HL
|
|
|

|
6/3/7
|
+2/0
|
C,S,Su
|
HL
|
|
|

|
8/2/16
|
+2/0
|
|
HL
|
|
|

|
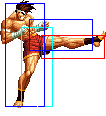
7/3/26
|
-9/-11
|
|
HL
|
|
|
 + +
|
20/2/22
|
KD/-2
|
S,Su
|
HL
|
|
|
| Crouching
|

|
3/4/4
|
+4/+2
|
R,C,S,Su
|
HL
|
|
|

|
2/3/8
|
+1/-1
|
R
|
L
|
|
|

|
5/3/19
|
-4/-6
|
C,S,Su
|
HL
|
|
Invincible for final 5 frames of recovery
|

|
7/8/19
|
KD/-9
|
S,Su
|
L
|
|
Recovery is cancellable. Recovery can also be cancelled into command normals
A vulnerable box of his sweeping leg remains even when he has visually retracted it
|
| Jump
|

|
5/8/-
|
-/-
|
|
H
|
|
|

|
6/6/-
|
-/-
|
|
H
|
|
|

|
4/7/-
|
-/-
|
|
H
|
|
|

|
7/6/-
|
-/-
|
|
H
|
|
|
 + +
|
10/6/-
|
KD/-
|
|
HL
|
|
|
| Neutral Jump
|

|
2/7/-
|
-/-
|
|
H
|
|
|

|
6/6/-
|
-/-
|
|
H
|
|
|

|
4/7/-
|
-/-
|
|
H
|
|
|

|
6/6/-
|
-/-
|
|
H
|
|
|
| Hop
|

|
5/8/-
|
-/-
|
|
H
|
|
|

|
6/6/-
|
-/-
|
|
H
|
|
|

|
3/9/-
|
-/-
|
|
H
|
|
|

|
3/6/-
|
-/-
|
|
H
|
|
|
 + +
|
7/4/-
|
KD/-
|
|
HL
|
|
|
| Command Normals
|
f+
|
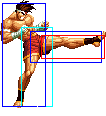
13/2/25
|
-7/-9
|
S,Su
|
HL
|
|
Does a good amount of guard crush, making it very useful in cancelling into, especially when opponent has no stock to guard roll/cd counter
|
df+
|
13/10/19
|
-9/-11
|
|
L
|
|
Can be cancelled into mash punch
|
| Special Moves
|
hcf+
|
|
|
|
HL
|
|
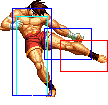
Hurricane Upper - hcf+P
- Joe releases one or two hurricane projectiles (depending on the button used)
- hcf+A sends out one projectile, while hcf+C sends out two
- the projectiles are tall and cannot be jumped by most characters. It's difficult to punish hcf+A but hcf+C is easy to punish by rolling the second projectile
|
hcf+
|
|
|
|
HL
|
|
|
hcf+
|
|
|
|
HL
|
|
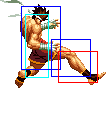
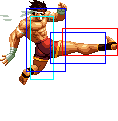
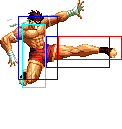
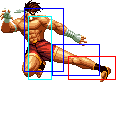
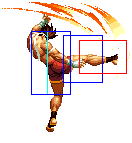
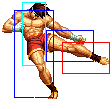
Slash Kick - hcf+K
- Joe performs a horizontal kick moving across the screen, which does good damage
- hcf+B version goes about 1/3 screen length while hcf+D goes 3/4 length
- has some recovery time if blocked, though if done from far away it's usually difficult to punish on block
- free cancellable into
|
hcf+
|
|
|
|
HL
|
|
dp+
|
|
|
|
HL
|
|
|
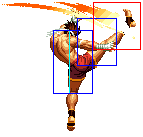
Tiger Kick - dp+K
- Joe does a very fast rising kick attack that does two hits
- dp+B does more damage than dp+D but has less priority
- supercancellable on the first hit
- free cancellable into
- free cancellable out of on the first hit
|
dp+
|
|
|
|
HL
|
|
|
qcb+
|
|
|
|
HL
|
|
|
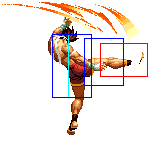
Ougon no Kakato - qcb+K
- Joe executes a jumping spinning kick that does two hits and has very good recovery, usually being unpunishable
- the move takes some time to come out but has a large hitbox that will almost always catch the opponent out of the air
- it's possible to juggle the opponent if this move hits them airborn
- free cancellable into
|
|
|
|
qcb+
|
|
|
|
HL
|
|
|
|
|
|
mash 
|
|
|
|
HL
|
|
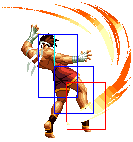
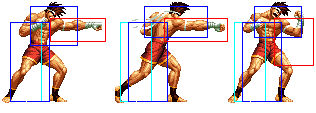
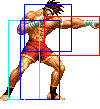
Bakuretsu Ken - mash P
- Joe performs a series of punches while moving forward slightly during the move
- he'll do about 10 punches, though after about 5 hits, Joe will be out of range and the next hits will not combo
- each of those punches have a large hitbox, making it difficult to counter, though can be easily guard rolled and punished from behind
- can be followed up by qcf+A or qcf+C after any punch, whether that punch connected or whiffed
- free cancellable out of
|
mash 
|
|
|
|
HL
|
|
> qcf+
|
|
|
|
H
|
|
Bakuretsu Finish - qcf+A
- Joe performs an overhead punch that deals good damage and is safe on block
- overhead
- supercancellable
- free cancellable out of
|
> qcf+
|
|
|
|
L
|
|
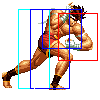
Shijou Saikyou no Low Kick - qcf+C
- Joe does a kick similar to his f+B, except that he slides forward a good distance (about 1/3 screen) while doing it
- the recovery on this move isn't good, it's riskier to do it as opposed to the qcf+A followup
- hits low
|
| DMs
|
qcf,uf+
|
|
|
|
|
|
|
Ougon no Tiger Kick - qcf uf+K
- Joe does a fast flying knee attack, going about half screen horizontally
- the first hit does much more damage than the other hits. If done too far away from the opponent, the other hits will still combo but the first hit which does the most damage, won't connect
|
qcf,uf+
|
|
|
|
|
|
qcf,hcb+
|
|
|
|
HL
|
etc.
|
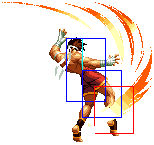
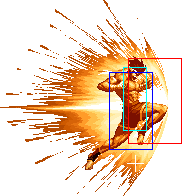
Bakuretsu Hurricane Tiger Kakato - qcf hcb+P
- Joe dashes forward with a series of punches and tornados, followed with a rising attack
- this DM comes out very fast, so it can be comboed into easily and used to punish things like blocked cd counters
- Joe will perform the entire move regardless of whether it hits, gets blocked or whiffs. This makes it extremely punishable if it doesn't hit
- the final hit does a hard knockdown
|
qcf,hcb+
|
|
|
|
HL
|
qcfx2+
|
|
|
|
HL
|
|
|
Tiger Kick - dp+K
- Joe does a very fast rising kick attack that does two hits
- dp+B does more damage than dp+D but has less priority
- supercancellable on the first hit
- free cancellable into
- free cancellable out of on the first hit
|
qcfx2+
|
|
|
|
HL
|
| SDM
|
qcfx2+ + +
|
|
|
|
HL
|
|
|
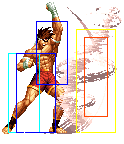
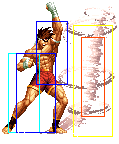
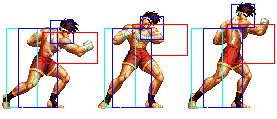
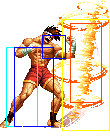
Screw Upper - qcfx2+AC
- Joe sends out a vertical wall of tornados similar to the DM version, except doing much more damage and traveling all the way across the screen
|
| HSDM
|
qcfx2+ + +
|
|
|
|
HL
|
|
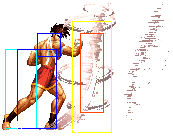
Cross Gigantes - qcfx2+BD
- Joe creates two tornados around him, one which travels left and the other travelling right
- the move does a lot of chip damage, but can be rolled on reaction
- Joe is invincible during the move
|
Notes
- CD counter is cancellable into the mashing punch special move
- C throw is mashable, D throw is a backturned hard knockdown
Combos
Anywhere
1. [Jump attack] cl.C/cr.C/cl.D, f+B, hcf+B/hcf+D
Easy and damaging combo that is generally used for punishing moves with bad recovery. Note that to land hcf+D, your character must be very close to the opponent when starting the combo. If you aren't (either because you couldn't run up all the way or you started the combo with a jump attack), then replace hcf+D with hcf+B.
2. [Jump attack] cl.C/cr.C/cl.D, f+B, qcf hcb+P
More damaging version of the above combo. At some distances (which is only really an issue if you are trying to hit with crouch C as opposed to close C or close D), the DM will not combo.
3. cr.AAA, qcf hcb+P
4. cr.AA, Mash P, qcf+C
5. cr.AA, Mash P, qcf+A, (S)qcf hcb+P -
6. [Jump attack] cr.C, df+B, Mash P, qcf+A, (S)qcf hcb+P - 72%
7. cr.C, df+B, BC, run cr.C, df+B, mash P, qcf+A, (S)qcfx2+AC
Corner
Strategies
Game Navigation
| General
|
|
|
|
|
| Characters
|
|
|
|
|
| Secret/Orochi Characters
|
|
|


