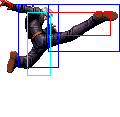
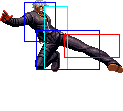
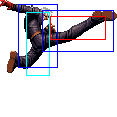
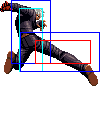
| Line 165: | Line 165: | ||
|align="center"| 8/3+3/- | |align="center"| 8/3+3/- | ||
|align="center"| -/- | |align="center"| -/- | ||
| | |align="center"| S | ||
|align="center"| H | |align="center"| H | ||
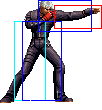
|valign="bottom" style="border-right:0px;"| [[image:K02_jD1.png|center]] | |valign="bottom" style="border-right:0px;"| [[image:K02_jD1.png|center]] | ||
| Line 200: | Line 200: | ||
|align="center"| 6/8/- | |align="center"| 6/8/- | ||
|align="center"| -/- | |align="center"| -/- | ||
| | |align="center"| S | ||
|align="center"| H | |align="center"| H | ||
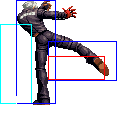
|colspan="3" | [[image:K02_jC.png|center]] | |colspan="3" | [[image:K02_jC.png|center]] | ||
| Line 208: | Line 208: | ||
|align="center"| 8/3+3/- | |align="center"| 8/3+3/- | ||
|align="center"| -/- | |align="center"| -/- | ||
| | |align="center"| S | ||
|align="center"| H | |align="center"| H | ||
|valign="bottom" style="border-right:0px;"| [[image:K02_jD1.png|center]] | |valign="bottom" style="border-right:0px;"| [[image:K02_jD1.png|center]] | ||
| Line 235: | Line 235: | ||
|align="center"| 6/5/- | |align="center"| 6/5/- | ||
|align="center"| -/- | |align="center"| -/- | ||
| | |align="center"| S | ||
|align="center"| H | |align="center"| H | ||
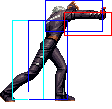
|colspan="3" | [[image:K02_hC.png|center]] | |colspan="3" | [[image:K02_hC.png|center]] | ||
| Line 243: | Line 243: | ||
|align="center"| 8/3+4/- | |align="center"| 8/3+4/- | ||
|align="center"| -/- | |align="center"| -/- | ||
| | |align="center"| S | ||
|align="center"| H | |align="center"| H | ||
|valign="bottom" style="border-right:0px;"| [[image:K02_hD1.png|center]] | |valign="bottom" style="border-right:0px;"| [[image:K02_hD1.png|center]] | ||
Revision as of 04:11, 5 August 2013
General Info
Crouch height: Low
Colors:

|

|

|

|
Movelist
| Special Moves | ||||
1. The Trigger - qcf+P
|
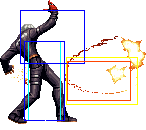
| |||
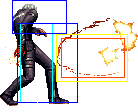
| ||||
1a. Second Shot - f + B (after The Trigger)
|
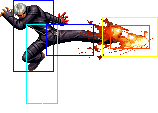
| |||
1b. Second Shell - f + D (after The Trigger)
|
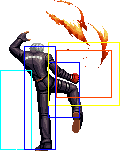
|
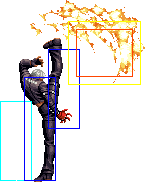
| ||
2. Crow Bites - dp+P
|

|

|
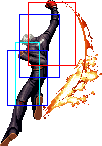
| |

|
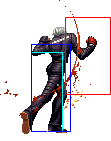
|

| ||
| f+ |
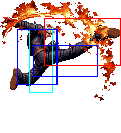
|
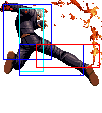
| ||
3. Blackout - qcf+K
|
||||
4. Minute Spike - qcb+K
|
Ground | 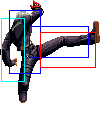
| ||
| Air |
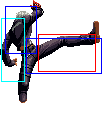
| |||
| Air |
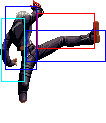
| |||
4a. Narrow Spike - (during Minute Spike) qcb+K
|

| |||
| DMs | ||||
1. Heat Drive - qcfx2+P
|

|

|
||
2. Chain Drive - qcf hcb+P
|

|
|||
| SDMs | ||||
1. Chain Drive - qcf hcb+AC
|

|
|||
| HSDMs | ||||
1. Crimson Star Road - qcb+C~A
|
File:QcbCA.png | |||
Notes
- There exists a bug where, if K' did his qcf+P on a waking up K9999, who decided to do his db hcb df+P moon DM, the moon DM will be negated entirely by the qcf+P. K9999's sphere animation will still be visible but since it was negated, K' can now just walk right through it
Combos
Anywhere
1. Close C(2), f+B, qcb+B - 25%
2. Crouch B, Crouch A, qcf+C, f+B - 20%
3. Close C(1), f+A, qcf hcb+P - 50%
4. Close C(1), f+A, qcb+Kx2, (S)qcf hcb+P - 55%
Corner
1. Crouch B, Crouch A, qcf+C, f+D, CD/(dp+C, f+D) - 32%/37%
2. Crouch B, Crouch A, qcf+C, f+D, qcf hcb+P - 55%
3. Close C(1), f+A, qcf+C, f+D, CD/(dp+C, f+D) - 40%/45%
4. Close C(1), f+A, qcf+C, f+D, qcf hcb+P - 65%
Counterhit
1. f+A(counterhit), qcf hcb+C(doesn't always hit)/qcfx2+P - 45%/31%
Maxmode
1. Crouch B, Crouch A, qcf+BC, f+D, qcf hcb+AC - 65%
2. Crouch C, BC, walk Crouch C, qcb+Dx2, dp+A(2), (C)qcb+Dx2, dp+A(2), (C)qcb+Dx2, dp+A(1), (S)qcf hcb+AC - 90%
3. Crouch B, Crouch A, qcf+BC, f+D, dp+A(1), (C)qcb+Dx2, dp+A(2), (C)qcb+Dx2, dp+A(2), (C)qcb+Dx2, dp+A(2), (C)qcb+Dx2, dp+A(1), (S)qcf hcb+AC
Strategies
Safejumps
K' has a safejump against Ryo and Kim in the corner off the standard corner combo:
- [cr.BA/j.C, cr.A/cl.C f+A] xx qcf+C, f+D, f+A, immediately jump forward.
