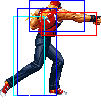
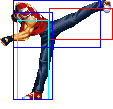
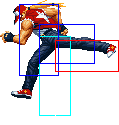
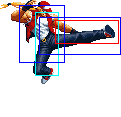
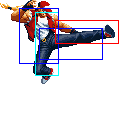
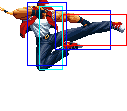
| Line 32: | Line 32: | ||
|align="center"| R,C,S,Su | |align="center"| R,C,S,Su | ||
|align="center"| HL | |align="center"| HL | ||
|colspan="2" | [[image: | |colspan="2" | [[image:Terry02_clA.png|center]] | ||
| | | | ||
|- | |- | ||
| Line 40: | Line 40: | ||
|align="center"| C,S,Su | |align="center"| C,S,Su | ||
|align="center"| HL | |align="center"| HL | ||
|colspan="2" | [[image: | |colspan="2" | [[image:Terry02_clB.png|center]] | ||
| | | | ||
|- | |- | ||
| Line 48: | Line 48: | ||
|align="center"| C,S,Su | |align="center"| C,S,Su | ||
|align="center"| HL | |align="center"| HL | ||
|valign="bottom" style="border-right:0px;"| [[image: | |valign="bottom" style="border-right:0px;"| [[image:Terry02_clC1.png|center]] | ||
|valign="bottom" style="border-left:0px;"| [[image: | |valign="bottom" style="border-left:0px;"| [[image:Terry02_clC2.png|center]] | ||
| | | | ||
|- | |- | ||
| Line 57: | Line 57: | ||
|align="center"| C,S,Su | |align="center"| C,S,Su | ||
|align="center"| HL | |align="center"| HL | ||
|colspan="2"| [[image: | |colspan="2"| [[image:Terry02_clD.png|center]] | ||
| | | | ||
|- | |- | ||
| Line 67: | Line 67: | ||
|align="center"| R,C,S,Su | |align="center"| R,C,S,Su | ||
|align="center"| HL | |align="center"| HL | ||
|colspan="2" | [[image: | |colspan="2" | [[image:Terry02_stA.png|center]] | ||
| | | | ||
|- | |- | ||
| Line 75: | Line 75: | ||
| | | | ||
|align="center"| HL | |align="center"| HL | ||
|colspan="2" | [[image: | |colspan="2" | [[image:Terry02_stB.png|center]] | ||
| | | | ||
|- | |- | ||
| Line 83: | Line 83: | ||
| | | | ||
|align="center"| HL | |align="center"| HL | ||
|colspan="2" | [[image: | |colspan="2" | [[image:Terry02_stC.png|center]] | ||
| | | | ||
|- | |- | ||
| Line 91: | Line 91: | ||
| | | | ||
|align="center"| HL | |align="center"| HL | ||
|colspan="2"| [[image: | |colspan="2"| [[image:Terry02_stD.png|center]] | ||
| | | | ||
|- | |- | ||
| Line 99: | Line 99: | ||
|align="center"| S,Su | |align="center"| S,Su | ||
|align="center"| HL | |align="center"| HL | ||
|colspan="2"| [[image: | |colspan="2"| [[image:Terry02_stCD.png|center]] | ||
| | | | ||
|- | |- | ||
| Line 109: | Line 109: | ||
|align="center"| R,C,S,Su | |align="center"| R,C,S,Su | ||
|align="center"| HL | |align="center"| HL | ||
|colspan="2" | [[image: | |colspan="2" | [[image:Terry02_crA.png|center]] | ||
| | | | ||
|- | |- | ||
| Line 117: | Line 117: | ||
|align="center"| R | |align="center"| R | ||
|align="center"| L | |align="center"| L | ||
|colspan="2" | [[image: | |colspan="2" | [[image:Terry02_crB.png|center]] | ||
| | | | ||
|- | |- | ||
| Line 125: | Line 125: | ||
|align="center"| C,S,Su | |align="center"| C,S,Su | ||
|align="center"| HL | |align="center"| HL | ||
| | |colspan="2" | [[image:Terry02_crC.png|center]] | ||
| | | | ||
|- | |- | ||
| Line 134: | Line 133: | ||
|align="center"| C,S,Su | |align="center"| C,S,Su | ||
|align="center"| L | |align="center"| L | ||
| | |colspan="2" | [[image:Terry02_crD.png|center]] | ||
| | | | ||
|- | |- | ||
| Line 145: | Line 143: | ||
| | | | ||
|align="center"| H | |align="center"| H | ||
|colspan="2" | [[image: | |colspan="2" | [[image:Terry02_jA.png|center]] | ||
| | | | ||
|- | |- | ||
| Line 153: | Line 151: | ||
| | | | ||
|align="center"| H | |align="center"| H | ||
| | |valign="bottom" style="border-right:0px;"| [[image:Terry02_jB1.png|center]] | ||
|valign="bottom" style="border-left:0px;"| [[image:Terry02_jB2.png|center]] | |||
| | | | ||
|- | |- | ||
| Line 161: | Line 160: | ||
| | | | ||
|align="center"| H | |align="center"| H | ||
|colspan="2" | [[image: | |colspan="2" | [[image:Terry02_jC.png|center]] | ||
| | | | ||
|- | |- | ||
| Line 169: | Line 168: | ||
| | | | ||
|align="center"| H | |align="center"| H | ||
|colspan="2" | [[image: | |colspan="2" | [[image:Terry02_jD.png|center]] | ||
| | | | ||
|- | |- | ||
| Line 177: | Line 176: | ||
| | | | ||
|align="center"| HL | |align="center"| HL | ||
|colspan="2"| [[image: | |colspan="2"| [[image:Terry02_jCD.png|center]] | ||
| | | | ||
|- | |- | ||
| Line 187: | Line 186: | ||
| | | | ||
|align="center"| H | |align="center"| H | ||
|colspan="2" | [[image: | |colspan="2" | [[image:Terry02_juA.png|center]] | ||
| | | | ||
|- | |- | ||
| Line 195: | Line 194: | ||
| | | | ||
|align="center"| H | |align="center"| H | ||
|colspan="2" | [[image: | |colspan="2" | [[image:Terry02_jB2.png|center]] | ||
| | | | ||
|- | |- | ||
| Line 203: | Line 202: | ||
| | | | ||
|align="center"| H | |align="center"| H | ||
|colspan="2" | [[image: | |colspan="2" | [[image:Terry02_jC.png|center]] | ||
| | | | ||
|- | |- | ||
| Line 211: | Line 210: | ||
| | | | ||
|align="center"| H | |align="center"| H | ||
|colspan="2" | [[image: | |colspan="2" | [[image:Terry02_juD.png|center]] | ||
| | | | ||
|- | |- | ||
| Line 221: | Line 220: | ||
| | | | ||
|align="center"| H | |align="center"| H | ||
|colspan="2" | [[image: | |colspan="2" | [[image:Terry02_hA.png|center]] | ||
| | | | ||
|- | |- | ||
| Line 229: | Line 228: | ||
| | | | ||
|align="center"| H | |align="center"| H | ||
|colspan="2" | [[image: | |colspan="2" | [[image:Terry02_jB2.png|center]] | ||
| | | | ||
|- | |- | ||
| Line 237: | Line 236: | ||
| | | | ||
|align="center"| H | |align="center"| H | ||
|colspan="2" | [[image: | |colspan="2" | [[image:Terry02_hC.png|center]] | ||
| | | | ||
|- | |- | ||
| Line 245: | Line 244: | ||
| | | | ||
|align="center"| H | |align="center"| H | ||
|colspan="2" | [[image: | |colspan="2" | [[image:Terry02_jD.png|center]] | ||
| | | | ||
|- | |- | ||
|colspan="8" align="center"| '''Command Normals''' | |colspan="8" align="center"| '''Command Normals''' | ||
|- | |- | ||
! | ! df+[[image:snkc.gif]] | ||
|align="center"| 11/5/28 | |align="center"| 11/5/28 | ||
|align="center"| -13/-15 | |align="center"| -13/-15 | ||
|align="center"| S,Su | |align="center"| S,Su | ||
|align="center"| HL | |align="center"| HL | ||
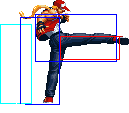
|colspan="2" | [[image: | |colspan="2" | [[image:Terry02_dfC.png|center]] | ||
|align="center"| | |align="center"| | ||
|} | |} | ||
Revision as of 15:41, 13 July 2013
General Info
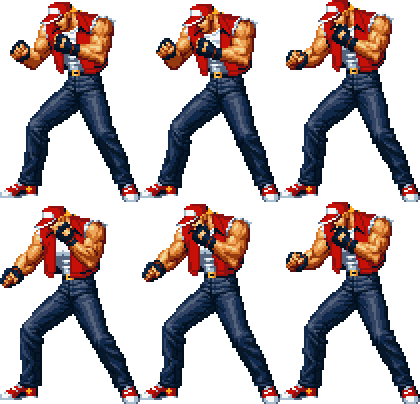
Crouch height: Medium
Colors:

|

|

|

|
Movelist
Normals
Command Normals
1. Rising Upper - df+C
- a very fast uppercut that works great as an anti-air
- cancellable
Special Moves
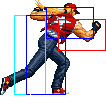
1. Power Wave - qcf+A
- Terry pounds the ground, sending a ground projectile across the screen
2. Round Wave - qcf+C
- Terry pounds the ground, creating a wave in front of him that doesn't travel forward and comes out slower than Power Wave qcf+A
- cancellable into other special moves except Power Wave qcf+A or Round Wave qcf+C
- free cancellable into
- supercancellable
3. Burn Knuckle - qcb+P
- Terry dashes quickly across the screen with a high priority attack with his knuckle
- qcb+C goes a full screen length while qcb+A will only go about about a third of a screen. Thus, qcb+A is extremely safe, except maybe if you cancelled into it deep when the opponent was in the corner
- free cancellable into
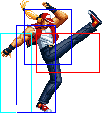
4. Crack Shoot - qcb+K
- Terry does a forward flip kick in the air
- qcb+D travels further and higher than qcb+B, but is far too slow and has a bad hitbox, whiffing against crouching opponents
- qcb+B works fairly well as an anti-air to stop early jumpins in progress, although may be a bit too slow to stop any jump attacks on reaction
- free cancellable into
5. Power Dunk - dp+K
- Terry jumps into the air, the first hit coming out fast and on the ground, and the second one hitting as Terry falls to the ground
- hard knockdown on the second hit if it hits an opponent in the air
- free cancellable into
- free cancellable out of on the first hit
6. Rising Tackle - _d u+P
- supercancellable on the first hit
- free cancellable out of on the first hit
DMs
1. High Angle Geyser - qcfx2+K
2. Power Geyser - qcb hcf+P
- Terry powers up and pounds the ground, creating a geyser of flame in front of him
- large startup invincibility
SDMs
1. Power Geyser - qcb hcf+AC
HSDM
1. Rising Force - qcfx2+AC
- starts up fairly slow but can travel across the screen incredibly fast
Notes
-cancellable normals are close A, far A, crouch A, close B, crouch B, close C, crouch C, close D, crouch D
-CD is cancellable into command moves, specials and DMs
-CD evades low attacks
-for the counterhit combo in the corner, jump CD, qcf+C, qcb+B, df+C, the df+C will have to be done as db+C, since the game thinks Terry has switched sides, even though it doesn't look like he has)
Combos
Anywhere
1. cl.C(2), df+C, qcb+A/qcb hcf+P - 30%/50%
2. cr.B, cr.A, df+C, qcb+A/qcb hcf+P - 30%/50%
Corner
1. qcf+C, qcb+B, j.C - 33%
Counterhit
1. j.CD(counterhit), qcb hcf+P - 40%
2. j.CD(counterhit), qcf+C, qcb+C/(qcb+B, j.C)/(S)qcb hcf+P - 45%/50%/55% (Corner)
Maxmode
1. cl.C(2), BC, run cl.C(2), df+C, qcb hcf+AC - 55-60%
2. cl.C(2), BC, run cl.C(1), dp+K(1), (C)qcf+C, (S)qcb hcf+P - 55% (Corner)
3. cl.C(2), BC, run cl.C(1), dp+K(1), (C)qcf+C, qcb+B, df+C - 45% (Corner)
Attack Strings
1. cl.C(1)/cr.D, ~qcf+C, qcb+A
2. cl.C(1)/cr.B, df+C, qcb+A
