No edit summary |
No edit summary |
||
| Line 2: | Line 2: | ||
== Movelist == | == Movelist == | ||
{| | |||
== | |style="border-top:1px solid #000000" colspan="5"| '''Command Normals''' | ||
1. One Inch - f+A | |- | ||
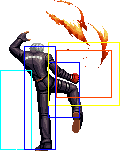
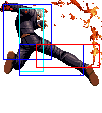
|style="border-top:1px solid #000000"|1. One Inch - f+A | |||
*Counterwire | |||
*Hard knockdown | |||
*Cancellable to DMs, cancellable to special moves if cancelled into | |||
*Free cancellable out of | |||
2. Knee Assault - f+B | |style="border-top:1px solid #000000"| | ||
- overhead | |style="border-top:1px solid #000000"| | ||
|style="border-top:1px solid #000000" colspan="2"| [[file:K02_FA.png]] | |||
- free cancellable out of | |- | ||
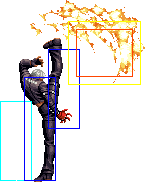
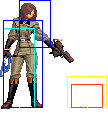
- has a | |style="border-top:1px solid #000000"|2. Knee Assault - f+B | ||
*Overhead | |||
*Cancellable if cancelled into | |||
*Free cancellable out of | |||
*Has a frame disadvantage even if it hits the opponent | |||
|style="border-top:1px solid #000000"| | |||
|style="border-top:1px solid #000000"| | |||
|style="border-top:1px solid #000000" colspan="2"| [[file:K02_FB.png]] | |||
|- | |||
|style="border-top:1px solid #000000" colspan="5"| '''Special Moves''' | |||
|- | |||
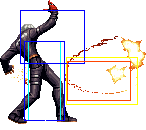
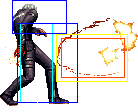
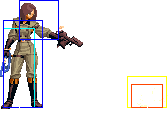
|style="border-top:1px solid #000000" rowspan="2"|1. The Trigger - qcf+P | |||
*qcf+C comes out faster than qcf+A, but recovers slower | |||
*Negates normal projectiles | |||
*Can be followed up by Second Shot (f+B) or Second Shell (f+D) | |||
*There exists a bug where, if K' did his qcf+P on a waking up K9999, who decided to do his db hcb df+P moon DM, the moon DM will be negated entirely by the qcf+P. K9999's sphere animation will still be visible but since it was negated, K' can now just walk right through it | |||
|style="border-top:1px solid #000000" width="40px"| [[File:Snka.gif|center]] | |||
|style="border-top:1px solid #000000" | | |||
|style="border-top:1px solid #000000" valign="bottom" colspan="2"| [[File:K02_QcfA.png]] | |||
|- | |||
|width="40px"| [[File:Snkc.gif|center]] | |||
| | |||
|valign="bottom" colspan="2"| [[File:K02_QcfC.png]] | |||
|- | |||
|style="border-top:1px solid #000000"|1a. Second Shot - f + B (after The Trigger) | |||
*Projectile that moves faster if qcf+C was used than if qcf+A was used | |||
|style="border-top:1px solid #000000"| | |||
|style="border-top:1px solid #000000" valign="bottom"| | |||
|style="border-top:1px solid #000000" valign="bottom" colspan="2"| [[File:KO2_QcfPfB.png]] | |||
|- | |||
|style="border-top:1px solid #000000"|1b. Second Shell - f + D (after The Trigger) | |||
*Vertical anti-air that knocks opponent into the air for juggles | |||
|style="border-top:1px solid #000000"| | |||
|style="border-top:1px solid #000000" valign="bottom"| [[File:K02_QcfPfD1.png]] | |||
|style="border-top:1px solid #000000" valign="bottom" colspan="2"| [[File:K02_QcfPfD2.png]] | |||
|- | |||
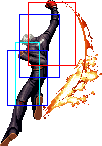
|style="border-top:1px solid #000000" rowspan="3" |2. Crow Bites - dp+P | |||
*dp+A is supercancellable on both hits, dp+C is supercancellable on the first two hits on the ground | |||
*dp+C can be followed up by f+D, which is an overhead hard knockdown. The f+D followup is free cancellable out of | |||
*dp+C has some startup invincibility | |||
*Free cancellable into | |||
*Free cancellable out of on all hits | |||
|style="border-top:1px solid #000000" width="40px" | [[File:Snka.gif|center]] | |||
|style="border-top:1px solid #000000" valign="bottom"| [[File:K02_DpA1.png]] | |||
|style="border-top:1px solid #000000" valign="bottom"| [[File:K02_DpA2.png]] | |||
|style="border-top:1px solid #000000" valign="bottom"| [[File:K02_DpA3.png]] | |||
|- | |||
|width="40px" | [[File:Snkc.gif|center]] | |||
|valign="bottom"| [[File:K02_DpC1.png]] | |||
|valign="bottom"| [[File:K02_DpC1.png]] | |||
|valign="bottom"| [[File:K02_DpC3.png]] | |||
|- | |||
|f+[[File:Snkd.gif]] | |||
| | |||
|valign="bottom"| [[File:K02_DpCfD1.png]] | |||
|valign="bottom"| [[File:K02_DpCfD2.png]] | |||
|- | |||
|style="border-top:1px solid #000000"|3. Blackout - qcf+K | |||
*Teleport's K' forward. qcf+B goes half screen length and qcf+D goes full screen length | |||
*Can be hit out of it fairly easily | |||
|style="border-top:1px solid #000000" colspan="4"| | |||
|- | |||
|style="border-top:1px solid #000000"|6. Assassin Strike "Code: BB" - dp+P/K | |||
* Whip throws her whip into the air, pulls herself up off the screen, and comes down | |||
* the location of where she falls is determined by the button used. A makes her drop almost exactly where she started from, B makes her land about a quarter screen from her current location, C makes her go another quarter screen, and D almost full screen | |||
* it is possible to crossup the opponent with this move. However, it has such horrible recovery time that it shouldn't ever be used | |||
* hard knockdown on the last hit when she comes down | |||
* free cancellable out of into qcb+P(air) when she comes down | |||
* this move can OTG against some characters after throwing them with her b/f+D, such as Yashiro, Mary, May Lee and Kula | |||
|style="border-top:1px solid #000000"| | |||
|style="border-top:1px solid #000000" valign="top"| [[File:Whip02_DpPK1.png]] | |||
|style="border-top:1px solid #000000" valign="top"| [[File:Whip_DpPK2.png]] | |||
|- | |||
|style="border-top:1px solid #000000" rowspan="2"|7. Desert Eagle - rdp+P, tap P rapidly | |||
* Whip takes out her gun and shoots at the ground. rdp+C shoots further than rdp+A | |||
* hits low | |||
* this move has the ability to hit an opponent on the ground. It is best used after a throw. rdp+C might miss after a throw, so use rdp+A instead | |||
* Whip starts with a random number of bullets in her gun, up to a maximum of 7. When she has wasted all of her bullets, she will reload on her next use of the move, resulting in very long recovery time | |||
* it is possible to combo with this move multiple times, by tapping P. It's fairly risky to do this though since you can easily run out of bullets, getting yourself killed when she starts to reload her gun | |||
|style="border-top:1px solid #000000" width="40px" | [[File:Snka.gif|center]] | |||
|style="border-top:1px solid #000000"| | |||
|style="border-top:1px solid #000000"| [[File:Whip02_RdpA.png]] | |||
|- | |||
|width="40px" | [[File:Snkc.gif|center]] | |||
| | |||
|[[File:Whip02_RdpC.png]] | |||
|- | |||
|style="border-top:1px solid #000000" colspan="4"| '''DMs''' | |||
|- | |||
|style="border-top:1px solid #000000"|1. Sonic Slaughter "Code: KW" | |||
* Whip goes into a stance at startup. If the opponent was in the vicinity of that stance, they will be sucked into a series of whip lashes that knocks the opponent away | |||
* the startup of this move is completely invincible, making for one of the best anti-airs in the game | |||
* if the first hit of qcb hcf+P misses, the other hits do no damage and do not suck the opponent into the DM. This means that if she does do the DM and it whiffs on the first hit, the opponent can fearlessly run into her while she's still swinging her whip, without getting hurt and punish her badly | |||
|style="border-top:1px solid #000000"| | |||
|style="border-top:1px solid #000000"| | |||
|style="border-top:1px solid #000000"| | |||
|- | |||
|style="border-top:1px solid #000000" colspan="4"| '''SDMs''' | |||
|- | |||
|style="border-top:1px solid #000000"|1. Sonic Slaughter "Code: KW" | |||
* same properties as the DM version, but more damage | |||
|style="border-top:1px solid #000000"| | |||
|style="border-top:1px solid #000000"| | |||
|style="border-top:1px solid #000000"| | |||
|- | |||
|style="border-top:1px solid #000000" colspan="4"| '''HSDMs''' | |||
|- | |||
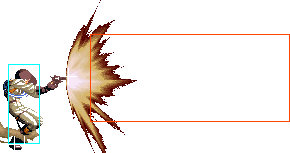
|style="border-top:1px solid #000000; border-bottom:1px solid #000000"|1. Super Black Hawk - b B C b C | |||
* Whip pulls out her gun, yells "Game over" and fires it | |||
* the gunshot is unblockable and goes full screen length. It can be rolled, or jumped | |||
* she is invincible during the entire move, except to throw | |||
* if you run up right beside her, the gunshot will whiff | |||
|style="border-top:1px solid #000000; border-bottom:1px solid #000000"| | |||
|style="border-top:1px solid #000000; border-bottom:1px solid #000000"| | |||
|style="border-top:1px solid #000000; border-bottom:1px solid #000000"|[[File:Whip02_HSDM.png]] | |||
|} | |||
===Special Moves=== | ===Special Moves=== | ||
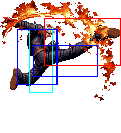
4. Minute Spike - qcb+K<br> | 4. Minute Spike - qcb+K<br> | ||
Revision as of 03:22, 5 July 2013
Movelist
Special Moves
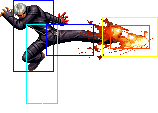
4. Minute Spike - qcb+K
- can be done in the air as well
- can be followed up by Minute Spike (qcb+K), on the ground only
- free cancellable into
- free cancellable out of
4a. Narrow Spike - (during Minute Spike) qcb+K
- low attack
- supercancellable
- free cancellable out of
DMs
1. Heat Drive - qcfx2+P
- A version comes out faster, but C version will hit if the opponent is right in front of you
- can be held to make unblockable (takes a long time though)
- hard knockdown
2. Chain Drive - qcf hcb+P
- throws his sunglasses...if he whiffs, he will stand there for a long time, otherwise he will dash forward
- hard knockdown
- qcf hcb+C is more likely to juggle than qcf hcb+A (mainly if used after his qcf+C, f+D)
SDMs
1. Chain Drive - qcf hcb+AC
- same properties as qcf hcb+P, except it is not a hard knockdown
HSDMs
1. Crimson Star Road - qcb+C,A
- A must be pressed immediately after C
- K' travels forward a distance slighty more than his roll
- unblockable
Notes
-cancellable normals are close A, crouch A, close B, close C, crouch C,
close D, crouch D, jump C, jump D, hop CD
-CD is cancellable into specials and DMs
-close B is a low attack
Combos
Anywhere
1. Close C(2), f+B, qcb+B - 25%
2. Crouch B, Crouch A, qcf+C, f+B - 20%
3. Close C(1), f+A, qcf hcb+P - 50%
4. Close C(1), f+A, qcb+Kx2, (S)qcf hcb+P - 55%
Corner
1. Crouch B, Crouch A, qcf+C, f+D, CD/(dp+C, f+D) - 32%/37%
2. Crouch B, Crouch A, qcf+C, f+D, qcf hcb+P - 55%
3. Close C(1), f+A, qcf+C, f+D, CD/(dp+C, f+D) - 40%/45%
4. Close C(1), f+A, qcf+C, f+D, qcf hcb+P - 65%
Counterhit
1. f+A(counterhit), qcf hcb+C(doesn't always hit)/qcfx2+P - 45%/31%
Maxmode
1. Crouch B, Crouch A, qcf+BC, f+D, qcf hcb+AC - 65%
2. Crouch C, BC, walk Crouch C, qcb+Dx2, dp+A(2), (C)qcb+Dx2, dp+A(2), (C)qcb+Dx2, dp+A(1), (S)qcf hcb+AC - 90%
3. Crouch B, Crouch A, qcf+BC, f+D, dp+A(1), (C)qcb+Dx2, dp+A(2), (C)qcb+Dx2, dp+A(2), (C)qcb+Dx2, dp+A(2), (C)qcb+Dx2, dp+A(1), (S)qcf hcb+AC
Strategies
Safejumps
K' has a safejump against Ryo and Kim in the corner off the standard corner combo:
- [cr.BA/j.C, cr.A/cl.C f+A] xx qcf+C, f+D, f+A, immediately jump forward.
