| Line 926: | Line 926: | ||
====Ultra Move II: Soul Satellite==== | ====Ultra Move II: Soul Satellite==== | ||
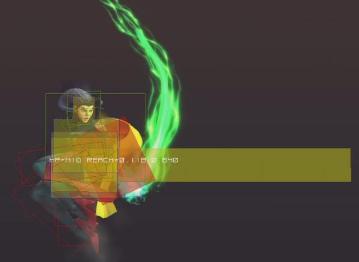
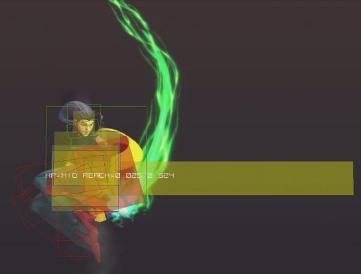
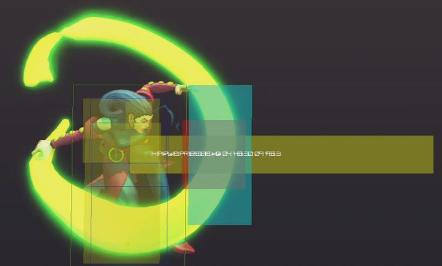
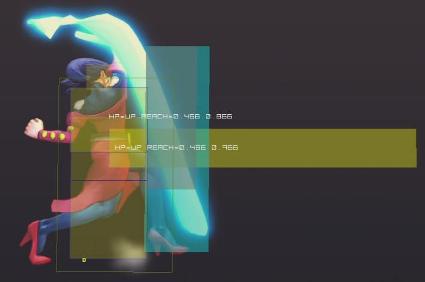
The prefered choice for most Rose players, due to its offensive and defensive potential. Rose summons two orbs that orbit around her for approximately 10 seconds if left undisturbed. The orbs will disapear after its alotted time, connects with the opponent, blocked or Rose takes damage. This Ultra by itself is not very powerful. Each of the orbs only do 120 damage a piece but serve as an extension to Rose's combo variations. Example: Jump in HP xx Ultra II xx C.MP xx M.Spiral xx Super Note: Rose cannot exectute her Super until both orbs are expended. Any combo involving her Super will only work after her second orb connects. With the two extra hits from the orbs, Rose is able to execute follow up attacks, extending your combo and significantly increasing your damage output. This is one of the many possiblities with this Ultra and the damage potential will keep your opponents mindful and will often avoid the orbs by retreating a safe distance until the orbs vanish.<br> That is when the defensive aspect of this Ultra comes in. Rush down characters are usually a problem for Rose and become fairly difficult to push back during a never ending onslaught of attacks. Soul Satellite becomes a life saver during its activation and your orbs begin to rotate, forcing your opponent to cease and desist or risk a possible table turning combo. This allows you to recover and regain some ground and buy you some time to come up with a plan of action. Be forewarned though, for experienced players have learned to to attack in between the two orbs during its revolution to snuff them out early, making it a complete waste of Ultra.<br> | The prefered choice for most Rose players, due to its offensive and defensive potential. Rose summons two orbs that orbit around her for approximately 10 seconds if left undisturbed. The orbs will disapear after its alotted time, connects with the opponent, blocked or Rose takes damage. This Ultra by itself is not very powerful. Each of the orbs only do 120 damage a piece but serve as an extension to Rose's combo variations. =Example=: ''Jump in HP xx Ultra II xx C.MP xx M.Spiral xx Super'' =Note=: ''Rose cannot exectute her Super until both orbs are expended. Any combo involving her Super will only work after her second orb connects''. With the two extra hits from the orbs, Rose is able to execute follow up attacks, extending your combo and significantly increasing your damage output. This is one of the many possiblities with this Ultra and the damage potential will keep your opponents mindful and will often avoid the orbs by retreating a safe distance until the orbs vanish.<br> That is when the defensive aspect of this Ultra comes in. Rush down characters are usually a problem for Rose and become fairly difficult to push back during a never ending onslaught of attacks. Soul Satellite becomes a life saver during its activation and your orbs begin to rotate, forcing your opponent to cease and desist or risk a possible table turning combo. This allows you to recover and regain some ground and buy you some time to come up with a plan of action. Be forewarned though, for experienced players have learned to to attack in between the two orbs during its revolution to snuff them out early, making it a complete waste of Ultra.<br> | ||
[[File:Ultra 2.jpg]] | [[File:Ultra 2.jpg]] | ||
Revision as of 04:36, 25 August 2010
Introduction To Rose
Rose is a character best played with Flexibility. All the necessary tools in order to deal with the vast collection of character in SSF4 are present. She has excellent walking speed to get in and out of places with relative safety and begin her offence. Her back dash is amazing for those moment when being too close becomes quite unfavorable. Rose also has very good reach with her standing M.Kick, H.Kick, crouching H.Kick and H.Punch, as well as a very useful slide which timed apropriately, can actually slide under projectiles. She can quickly transition between defensive and offensive play depending on the situation and opponent and her crouching M.Punch is an example of this as a very viable poke with its quick start up and recovery and able to combo into Soul Spiral. The very trade mark that makes Rose what she is, is her Soul Reflect. This special move can either absorb a projectile and fill almost one half of a super meter bar or Reflect it back horizontally to advancing enemies or at an angle to ward off jump in attacks, giving her a very strong defence against projectile spammers. At close range this attack quickly turns offensive with the ability to send your opponent flying. With these tools her her ability to defend as well as launch effective attacks is very strong.
Rose is not a weak character but due to her flexibility she isn't especially strong in any given area either. Her stamina, damage output and heavy combo damage are below average and can take quite a beating against rush down characters if you are not on guard. One other sigh of dismay goes to the absence of an overhead attack which, not all too crippling, would be a more then welcomed addition if they chose to give her one. Other then those few gripes, Rose is more then a worthy adversary to any of the characters on the roster and in the hands of pro-player Rose can be a force to be reconned with.
Strengths
- Above average foot speed and an excellent dash
- Great range for some of her attacks
- Good throw game
- Good pokes
- Good anti air
- Both of her Ultras are useful in there own right
- Very fast meter build up
- Can beat down the egos of any projectile happy players that wish to test it
Weaknesses
- Below average stamina
- Below average damage output
- No highly damaging combos
- No overhead attack
- Lacking in strong reversals, making her wakeup after a knockdown very unfriendly
The Basics
Standing Normal Moves
Stand jab
Block:HL
Damage:20
Stun: 50
Super Gain: 20
Cancel: ch/sp/su
Startup: 4
Active: 2
Recovery: 11
Block Advantage: -2
Hit Advantage: 1
Analysis:
Standing Strong
Block:HL
Damage:70
Stun: 100
Super Gain: 40
Cancel: sp/su
Startup: 7
Active: 2
Recovery: 112
Block Advantage: 0
Hit Advantage: 3
Analysis:
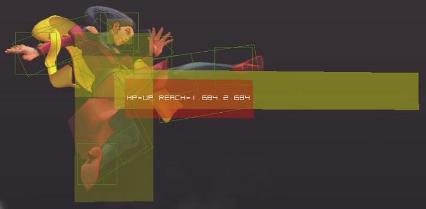
Standing Fierce
Block:HL
Damage:100
Stun: 200
Super Gain: 40
Cancel: none
Startup: 11
Active: 5
Recovery: 18
Block Advantage: -5
Hit Advantage: -1
Analysis:
Standing Short
Block:HL
Damage:30
Stun: 50
Super Gain: 20
Cancel: none
Startup: 4
Active: 2
Recovery: 10
Block Advantage: -1
Hit Advantage: 2
Analysis:
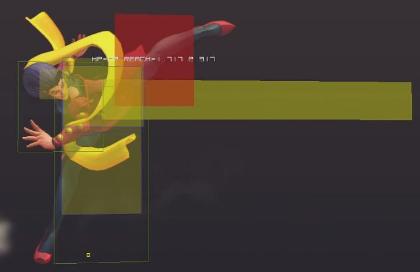
Standing Forward
Block:HL
Damage:60
Stun: 100
Super Gain: 40
Cancel: none
Startup: 6
Active: 2
Recovery: 13
Block Advantage: -1
Hit Advantage: 2
Analysis:
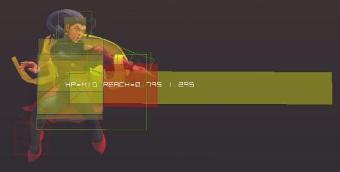
Standing Roundhouse
Block:HL
Damage:100
Stun: 200
Super Gain: 60
Cancel: none
Startup: 9
Active: 2
Recovery: 19
Block Advantage: -3
Hit Advantage: 1
Analysis:
Crouching Normal Moves
Crouching Jab
Block:HL
Damage:20
Stun: 50
Super Gain: 20
Cancel: ch/sp/su
Startup: 3
Active: 3
Recovery: 8
Block Advantage: 0
Hit Advantage: 3
Analysis:
Crouching Strong
Block:HL
Damage:60
Stun: 100
Super Gain: 40
Cancel: sp/su
Startup: 4
Active: 3
Recovery: 14
Block Advantage: -3
Hit Advantage: 0
Analysis:
Crouching Fierce
Block:HL
Damage:100
Stun: 150
Super Gain: 60
Cancel: sp/su
Startup: 5
Active: 5
Recovery: 28
Block Advantage: -15
Hit Advantage: -10
Analysis:
Forces Stand
Crouching Short
Block:L
Damage:30
Stun: 50
Super Gain: 20
Cancel: none
Startup: 4
Active: 4
Recovery: 6
Block Advantage: 1
Hit Advantage: 4
Analysis:
Crouching Forward
Block:L
Damage:60
Stun: 100
Super Gain: 40
Cancel: sp/su
Startup: 7
Active: 2
Recovery: 12
Block Advantage: 0
Hit Advantage: 3
Analysis:
Crouching Roundhouse
Block:L
Damage:90
Stun: 200
Super Gain: 60
Cancel: none
Startup: 9
Active: 2
Recovery: 26
Block Advantage: -10
Hit Advantage: Knockdown
Analysis:
Proximity Normal Moves
Close Jab
Block:HL
Damage:20
Stun: 50
Super Gain: 20
Cancel: ch/sp/su
Startup: 4
Active: 2
Recovery: 10
Block Advantage: -1
Hit Advantage: 2
Analysis:
Close Strong
Block:HL
Damage:70
Stun: 100
Super Gain: 40
Cancel: sp/su
Startup: 6
Active: 2
Recovery: 11
Block Advantage: 1
Hit Advantage: 4
Analysis:
Close Fierce
Block:HL
Damage:90
Stun: 200
Super Gain: 60
Cancel: sp/su
Startup: 6
Active: 2
Recovery: 19
Block Advantage: -3
Hit Advantage: 1
Analysis:
Close Short
Block:HL
Damage:40
Stun: 50
Super Gain: 20
Cancel: sp/su
Startup: 4
Active: 2
Recovery: 10
Block Advantage: -1
Hit Advantage: 2
Analysis:
Close Forward
Block:HL
Damage:70
Stun: 100
Super Gain: 40
Cancel: sp/su
Startup: 7
Active: 3
Recovery: 11
Block Advantage: 0
Hit Advantage: 3
Analysis:
Frame 1~20 Cannot be thrown
Close Roundhouse
Block: HL
Damage: 100
Stun: 200
Super Gain: 60
Cancel: Sp/Su
Startup: 7
Active: 2
Recovery: 18
Block Advantage: -2
Hit Advantage: +3
Analysis:
Jumping Toward Attacks
Jumping Toward Jab
Block: H
Damage: 40
Stun: 50
Super Gain: 20
Cancel: -
Startup: 4
Active: 6
Recovery: -
Block Advantage: -
Hit Advantage: -
Analysis:
Jumping Toward Strong
Block: H
Damage: 70
Stun: 100
Super Gain: 40
Cancel: -
Startup: 7
Active: 3
Recovery: -
Block Advantage: -
Hit Advantage: -
Analysis:
Jumping Toward Fierce
Block: H
Damage: 90
Stun: 150
Super Gain: 60
Cancel: -
Startup: 7
Active: 7
Recovery: -
Block Advantage: -
Hit Advantage: -
Analysis:
Jumping Toward Short
Block: H
Damage: 30
Stun: 50
Super Gain: 20
Cancel: -
Startup: 4
Active: 7
Recovery: -
Block Advantage: -
Hit Advantage: -
Analysis:
Jumping Toward Forward
Block: H
Damage: 60
Stun: 100
Super Gain: 40
Cancel: -
Startup: 7
Active: 5
Recovery: -
Block Advantage: -
Hit Advantage: -
Analysis:
Jumping Toward Roundhouse
Block: H
Damage: 100
Stun: 200
Super Gain: 60
Cancel: -
Startup: 6
Active: 5
Recovery: -
Block Advantage: -
Hit Advantage: -
Analysis:
Neutral Jump Attacks
Neutral Jump Jab
Block: H
Damage: 40
Stun: 50
Super Gain: 20
Cancel: -
Startup: 4
Active: 6
Recovery: -
Block Advantage: -
Hit Advantage: -
Analysis:
Neutral Jump Strong
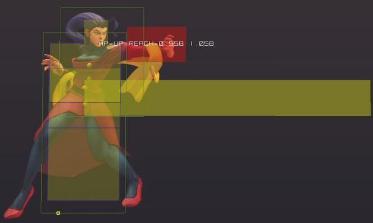
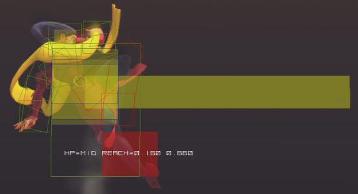
Frame 1
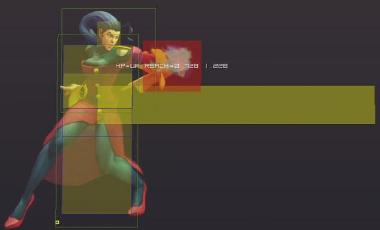
Frame 2
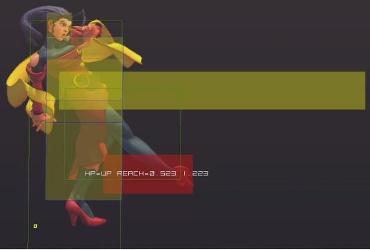
Frame 3
Frame 4
Frame 5
Frame 6
Block: H
Damage: 70
Stun: 100
Super Gain: 40
Cancel: -
Startup: 6
Active: 6
Recovery: -
Block Advantage: -
Hit Advantage: -
Analysis:
Neutral Jump Fierce
Block: H
Damage: 90
Stun: 150
Super Gain: 60
Cancel: -
Startup: 9
Active: 6
Recovery: -
Block Advantage: -
Hit Advantage: -
Analysis:
Neutral Jump Short
Block: H
Damage: 50
Stun: 50
Super Gain: 20
Cancel: -
Startup: 4
Active: 7
Recovery: -
Block Advantage: -
Hit Advantage: -
Analysis:
Neutral Jump Forward
Block: H
Damage: 80
Stun: 100
Super Gain: 40
Cancel: -
Startup: 7
Active: 6
Recovery: -
Block Advantage: -
Hit Advantage: -
Analysis:
Neutral Jump Roundhouse
Block: H
Damage: 90
Stun: 200
Super Gain: 60
Cancel: -
Startup: 11
Active: 5
Recovery: -
Block Advantage: -
Hit Advantage: -
Analysis:
Normal Throw
Block: 1
Damage: 140
Stun: 100
Super Gain: 40
Cancel: -
Startup: 3
Active: 2
Recovery: 20
Block Advantage: -
Hit Advantage: D
Analysis:
Throw Range 1.0
Command Normals
Slide
Block: L
Damage: 60
Stun: 100
Super Gain: 40
Cancel: -
Startup: 7
Active: 8
Recovery: 12
Block Advantage: -6
Hit Advantage: -3
Analysis:
Low Attack
Properly Timed, can slide under projectile attacks
Lunge Kick
Block: HL
Damage: 100
Stun: 200
Super Gain: 60
Cancel: -
Startup: 11
Active: 12
Recovery: 21
Block Advantage: -5
Hit Advantage: -1
Analysis:
Can be used to keep an opponent from jumping if you feel an attempt coming
Focus / Saving Attack
Level 1
Block: HL
Damage: 60
Stun: 100
Super Gain: 20
Cancel: -
Startup: 21
Active: 2
Recovery: 35
Block Advantage: -21
Hit Advantage: -21
Analysis:
Level 2
Block: HL
Damage: 80
Stun: 150
Super Gain: 40
Cancel: -
Startup: 17+14
Active: 2
Recovery: 35
Block Advantage: -15
Hit Advantage: D
Analysis:
Level 3
Block: -
Damage: 120
Stun: 200
Super Gain: 60
Cancel: -
Startup: 65
Active: 2
Recovery: 35
Block Advantage: D
Hit Advantage: D
Analysis:
Special Moves
Soul Spark

Roses's projectile. Used to agitate your opponent as well as control space. Not very affective at beating down other projectiles due to its high start up and recovery but decent for gaining a little super meter and keeping your opponent on his toes. Use with caution, for it can and will be punished if used Indiscriminately. EX spark being the more viable selection, especially since Rose can spare the meter.
L.Soul Spark
Block: HL
Damage: 80
Stun: 50
Super Gain: 30/20
Cancel: Su
Startup: 14
Active: -
Recovery: 52
Block Advantage: -12
Hit Advantage: -8
Analysis:
M.Soul Spark
Block: HL
Damage: 80
Stun: 50
Super Gain: 30/20
Cancel: Su
Startup: 22
Active: -
Recovery: 52
Block Advantage: -4
Hit Advantage: 0
Analysis:
H.Soul Spark
Block: HL
Damage: 80
Stun: 50
Super Gain: 30/20
Cancel: Su
Startup: 29
Active: -
Recovery: 53
Block Advantage: 2
Hit Advantage: 6
Analysis:
EX.Soul Spark
Block: HL
Damage: 30*70
Stun: 50*50
Super Gain: #DIV/0!
Cancel: Su
Startup: 14
Active: -
Recovery: 48
Block Advantage: 0
Hit Advantage: 4
Analysis:
Soul Spiral
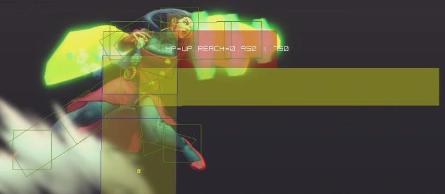
Rose's only Armor breaker outside of Ultra I. You will see this special alot since it is part of Rose's bread and butter tactic. Very affective special with a slight invincibility on EX. Use at maximum range to benefit from the distance. If blocked, you can easily dash back from an incoming punish, assuming your opponent can do so.
L.Soul Spiral
Block: HL
Damage: 100
Stun: 100
Super Gain: 20/40
Cancel: Su
Startup: 12
Active: 6
Recovery: 23
Block Advantage: -8
Hit Advantage: D
Analysis:
Armor Break
M.Soul Spiral
Block: HL
Damage: 100
Stun: 100
Super Gain: 20/40
Cancel: Su
Startup: 15
Active: 6
Recovery: 21
Block Advantage: -6
Hit Advantage: D
Analysis:
Armor Break
H.Soul Spiral
Block: HL
Damage: 100
Stun: 100
Super Gain: 20/40
Cancel: Su
Startup: 16
Active: 6
Recovery: 19
Block Advantage: -4
Hit Advantage: D
Analysis:
Armor Break
EX.Soul Spiral
Block: HL
Damage: 100
Stun: 100
Super Gain: #DIV/0!
Cancel: Su
Startup: 13
Active: 6
Recovery: 21
Block Advantage: -6
Hit Advantage: D
Analysis:
Armor Break
Frame 1~11 invincible
Soul Throw
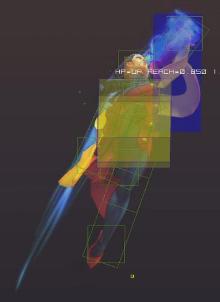
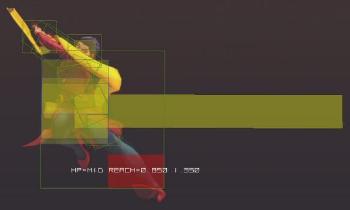
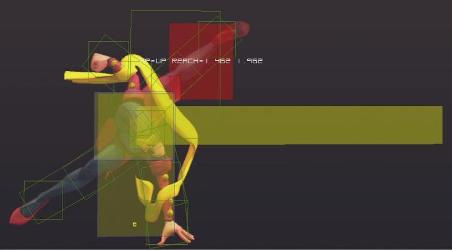
Considered an anti air but use sparingly, for it is often snuffed out in mid air if not timed accurately. In most cases, you would be better off using crouching H.Punch for more consistant results if your opponent is anticipating the throw. Can be linked after a H.Punch Reflect, which was absent from the original SF4 vanilla as well as a finisher for both hits from Ultra II while your opponent is still in mid air.
L.Soul Throw
Block: 0.4
Damage: 100
Stun: 20/40
Super Gain: -
Cancel: 6
Startup: 10
Active: 26+8
Recovery: D
Block Advantage: D
Hit Advantage:
Analysis:
Throw Range 0.4
M.Soul Throw
Block: 0.4
Damage: 160
Stun: 100
Super Gain: 20/40
Cancel: -
Startup: 6
Active: 11
Recovery: 27+8
Block Advantage: D
Hit Advantage: D
Analysis:
Throw Range 0.4
H.Soul Throw
Block: 0.4
Damage: 160
Stun: 100
Super Gain: 20/40
Cancel: -
Startup: 6
Active: 11
Recovery: 30+8
Block Advantage: D
Hit Advantage: D
Analysis:
Throw Range 0.4
EX.Soul Throw
Block: 0.4
Damage: 160
Stun: 100
Super Gain: #DIV/0!
Cancel: -
Startup: 6
Active: 11
Recovery: 30+8
Block Advantage: D
Hit Advantage: D
Analysis:
Frame 1~7 Invincible
Throw Range 0.4
Soul Reflect
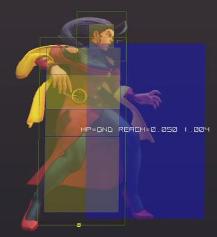
Rose's signature special as well as her most well loved and feared. Can be used to either absorb an enemy projectile and transfer its energy into almost half a super meter bar or reflect horizontally or at an angle for incoming jump in attacks. Very good start up and recovery, which allows to easily beat down projectile spammers all the while gaining meter at an insane rate. At close range, reflect becomes a good link for your combos and can be used to link into a Soul Throw, Super and Ultra II.
L.Reflect
Block: HL
Damage: 50
Stun: 100
Super Gain: 20/30
Cancel: Su
Startup: 13
Active: 2
Recovery: 27
Block Advantage: -8
Hit Advantage: D
Analysis:
Gives super gauge +100
Frame 11~22(???)
Increases super damage by 5% up to 7 time/35%
EX(???)
M.Reflect
Block: HL
Damage: 50
Stun: 100
Super Gain: 20/30
Cancel: Su
Startup: 13
Active: 3
Recovery: 25
Block Advantage: -7
Hit Advantage: D
Analysis:
(???)
Frames 10~19(???)
EX(???)
H.Reflect
Block: HL
Damage: 50
Stun: 100
Super Gain: 20/30
Cancel: Su
Startup: 12
Active: 2
Recovery: 26
Block Advantage: -7
Hit Advantage: D
Analysis:
(???)
Frames 11~19(???)
EX(???)
EX.Reflect
Block: HL
Damage: 50
Stun: 100
Super Gain: #DIV/0!
Cancel: Su
Startup: 8
Active: 2
Recovery: 24
Block Advantage: -5
Hit Advantage: D
Analysis:
(???)
Frame 7~14(???)
Increases damage of reflected projectile by 10%
(???)
Super Move
Aura Soul Spark
Block: HL
Damage: 50x4*100
Stun: 0
Super Gain: #DIV/0!
Cancel: -
Startup: 1+8
Active: -
Recovery: 53
Block Advantage: 16
Hit Advantage: D
Analysis:
Frame 1~7 invincible
Ultra Move
Ultra Move I: Illusion Spark
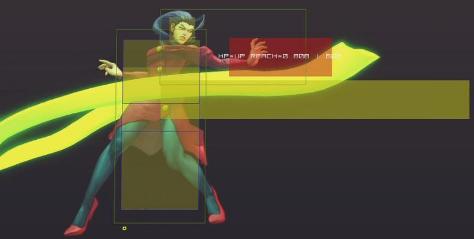
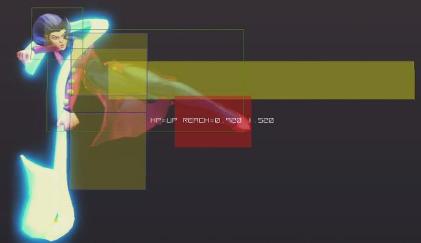
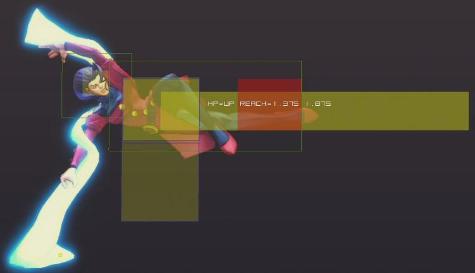
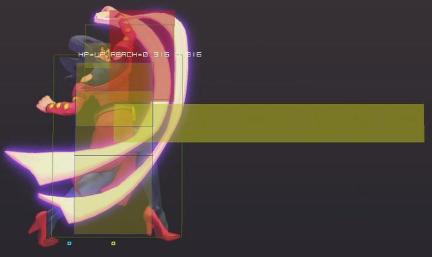
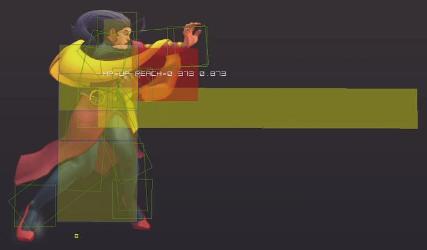
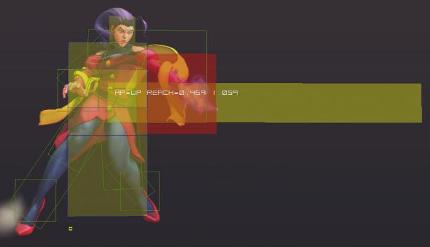
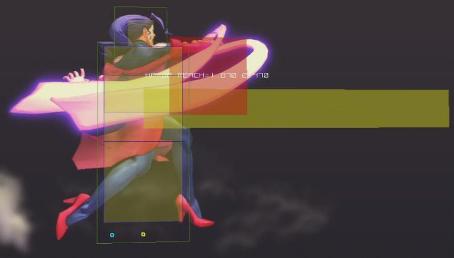
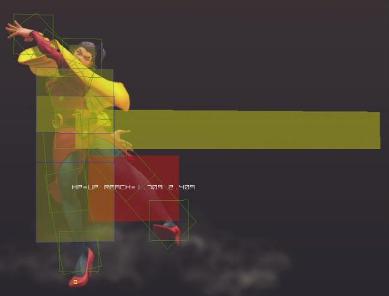
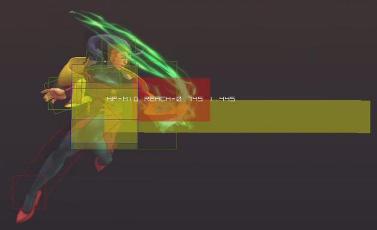
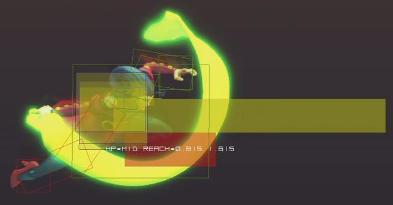
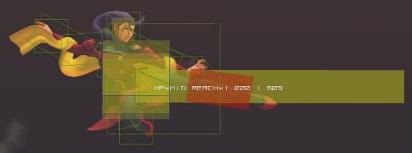
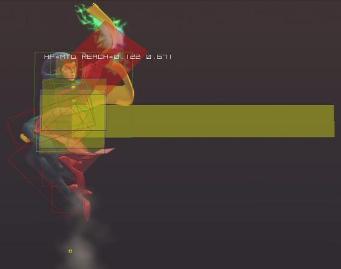
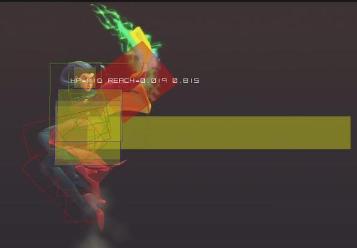
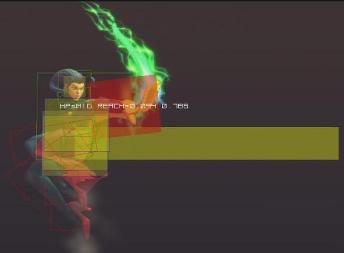
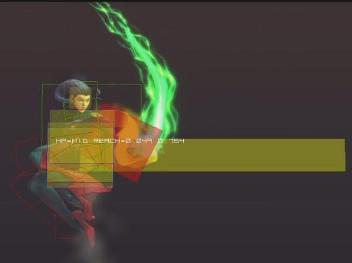
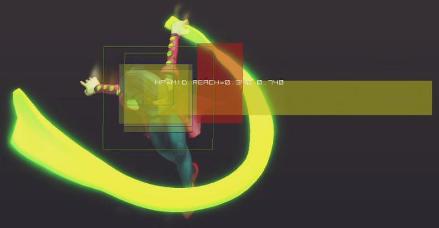
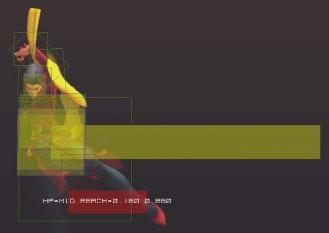
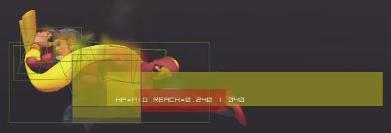
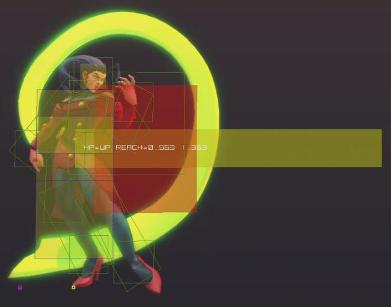
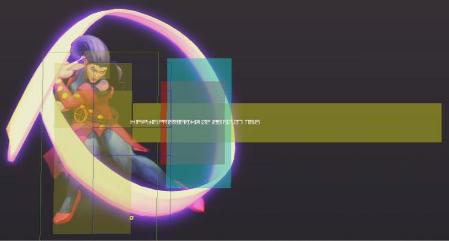
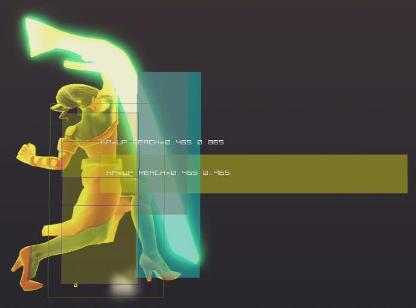
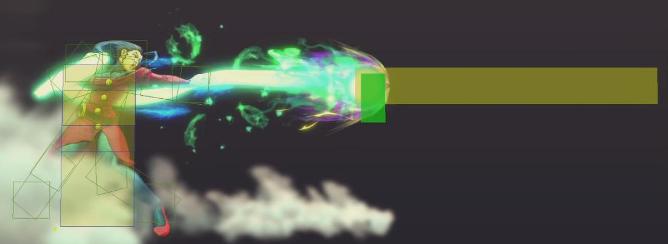
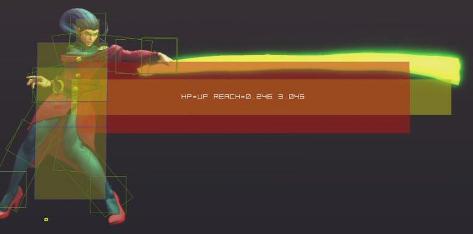
Illusion Spark is a short to mid range attack that causes Rose's scarf to extend and can grab an unwary opponent for major damage. Players who have a tendency of jumping in have much to fear from this Ultra, for they risk landing on top of the active frames, which is similar to dhalsim's S.HP hitbox. Another good thing about this Ultra other then its excellent reach is its invincibility that helps wonders for players attempting to counter.
You can quickly execute this attack as a reaction to many opposing Specials and Ultras, so quick execuion is key for landing it as soon as your opponent activates any of his attack or opens himself up with a whiff or you can snatch the player on start up if you are quick enough. It is very easy to avoid this Ultra, so setting up for its execution is very important, but once you land it, you are treated with one very entertaining animation and lots of damage.
Block: HL
Damage: 498
Stun: 0
Super Gain: 0/0
Cancel: -
Startup: 1+11
Active: 14
Recovery: 44
Block Advantage: -37
Hit Advantage: D
Analysis:
Frame 1~11 incincible
Armor Break
Ultra Move II: Soul Satellite
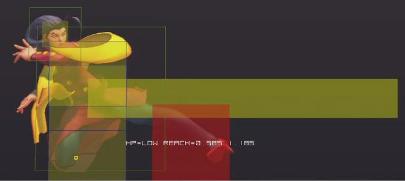
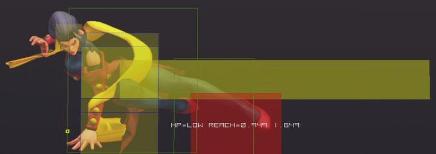
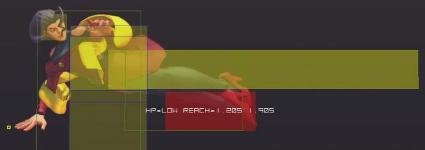
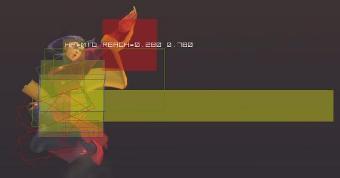
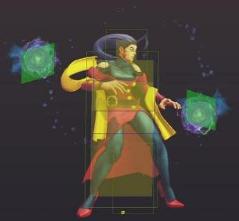
The prefered choice for most Rose players, due to its offensive and defensive potential. Rose summons two orbs that orbit around her for approximately 10 seconds if left undisturbed. The orbs will disapear after its alotted time, connects with the opponent, blocked or Rose takes damage. This Ultra by itself is not very powerful. Each of the orbs only do 120 damage a piece but serve as an extension to Rose's combo variations. =Example=: Jump in HP xx Ultra II xx C.MP xx M.Spiral xx Super =Note=: Rose cannot exectute her Super until both orbs are expended. Any combo involving her Super will only work after her second orb connects. With the two extra hits from the orbs, Rose is able to execute follow up attacks, extending your combo and significantly increasing your damage output. This is one of the many possiblities with this Ultra and the damage potential will keep your opponents mindful and will often avoid the orbs by retreating a safe distance until the orbs vanish.
That is when the defensive aspect of this Ultra comes in. Rush down characters are usually a problem for Rose and become fairly difficult to push back during a never ending onslaught of attacks. Soul Satellite becomes a life saver during its activation and your orbs begin to rotate, forcing your opponent to cease and desist or risk a possible table turning combo. This allows you to recover and regain some ground and buy you some time to come up with a plan of action. Be forewarned though, for experienced players have learned to to attack in between the two orbs during its revolution to snuff them out early, making it a complete waste of Ultra.
Block: HL
Damage: 120*120
Stun: 0
Super Gain: 0/0
Cancel: -
Startup: 1+4
Active: 600
Recovery: 4
Block Advantage: -
Hit Advantage: D
Analysis:
Cannot activate Aura Soul Spark untill both orbs have been expended.
Combos
Basic Chain Combos
Simple Chain Combos
- C.LP x 3 xx LK Spiral
- C.LP x 2, C.LK, C.MP xx EX Spiral
- C.LK, C.LP, C.LK, C.MP xx LK/EX Spiral
- C.MK, C.LP xx EX Spiral
- C.HP xx HP Reflect xx FADC, Soul Throw
(No FADC needed in corner) - LP Spark, FADC, Dash, C.LP, C.LK xx C.MP, xx LK Spiral
Proximity Combos
- Close S.MP, C.MP xx HK Spiral
- Close S.MK, C.LP xx LK/EX Spiral
- Close S.HK xx LP Spark xx FADC, C.HP xx HK Spiral
- Close S.HK xx EX Spark, C.MP xx HK Spiral
(corner only)
Jump In Combos
- Jump MK, C.MP xx LK Spiral
- Jump HK, C.HP xx LP Spark, FADC, C.LP, C.LK xx C.MP xx LK Spiral
Note: Difficult combo to pull off, but the damage is good. Instead of following up with
C.LP after the FADC, you can set up a throw instead, which usually catches people off guard.
Cross Up Combos
- Cross up Jump MK, C.HP xx EX Spark
- Cross up Jump MK, C.LP, C.LK xx C.MP xx EX Spiral
Note: On bigger characters you can do a LK xx Spiral instead of an EX version,
but from mid-size characters or smaller, only the EX version will combo.
Ultra 2 combos
- Jump HP/MK, Ultra 2, Slide, C.HP, HK Spiral
- (counter hit/meaty) C. LK, Ultra 2, Slide, C.HP, HK Spiral
- C.HP xx HP Reflect xx FADC, Ultra 2, Soul Throw
(no FADC needed in corner)
- Close S.HK xx LP Spark xx FADC, Ultra 2, Slide, C.HP xx HK Spiral
- Jump HK/HP, Ultra 2, Slide, C.MP xx HK Spiral xx Super
- Anti Air Ultra 2, Soul Throw
Super Combos
- C.HP, HK Spiral xx Super
(can tack on Ultra 2) - C.LP x 2, C.LK, C.MP xx Super
- C.HP xx HP Reflect, Ultra 2, Super
Note: Super Distance dependant to be able to get ultra 2 Anti Air. Easy when executed in a corner - Jump HK/Stand HP xx EX Spark, FADC, HP xx HK Spiral
Focus attack only combos
- FA 2/3, FA1, Soul Throw
Note: character specific does not work on Ryu, Ken, Ibuki, Bison confirmed so far - FA 2/3, Dash Forward/Backwards, Ultra 1
- FA 3, Fierce Spark, Ultra 2, soul throw
Rose Statistics and Frame Data
Vitality/Stun
| Character | Vitality | Stun |
| Rose | 950 | 1000 |
Dash
| Character | Toward Dash | Distance | Backdash | Distance | Invincible | Grounded | Airborne |
| Rose | 21 | 1.7 | 22 | 1.2 | 1~8 | 19~22 | 9~18 |
Focus Attack Dash
| Character | Level 1 | Level 2 |
| Rose | -5 | +1 |
Jump
| Character | Total | Startup | Airborne | Recovery |
| Rose | 47 | 4 | 39 | 4 |
Frame Data
| Block | Super Meter | Frames | |||||||||
|---|---|---|---|---|---|---|---|---|---|---|---|
| Move Name | HL | Damage | Stun | Gain | Cancel Ability | Startup | Active | Recovery | On Guard | On Hit | Notes |
| Close LP | HL | 20 | 50 | 20 | ch/sp/su | 4 | 2 | 10 | -1 | +2 | |
| Close MP | HL | 70 | 100 | 40 | sp/su | 6 | 2 | 11 | +1 | +4 | |
| Close HP | HL | 90 | 200 | 60 | sp/su | 6 | 2 | 19 | -3 | +1 | |
| Close LK | HL | 40 | 50 | 20 | sp/su | 4 | 2 | 10 | -1 | +2 | |
| Close MK | HL | 70 | 100 | 40 | sp/su | 7 | 3 | 11 | 0 | +3 | 1~20 cannot be thrown |
| Close HK | HL | 100 | 200 | 60 | sp/su | 7 | 2 | 18 | -2 | +3 | |
| Far LP | HL | 20 | 50 | 20 | ch/sp/su | 4 | 2 | 11 | -2 | +1 | |
| Far MP | HL | 70 | 100 | 40 | sp/su | 7 | 2 | 12 | 0 | +3 | |
| Far HP | HL | 100 | 200 | 60 | - | 11 | 5 | 18 | -5 | -1 | |
| Far LK | HL | 30 | 50 | 20 | - | 4 | 2 | 10 | -1 | +2 | |
| Far MK | HL | 70 | 100 | 40 | - | 6 | 2 | 13 | -1 | +2 | |
| Far HK | HL | 100 | 200 | 60 | - | 9 | 2 | 19 | -3 | +1 | |
| crouch LP | HL | 20 | 50 | 20 | sp/chp/su | 3 | 3 | 8 | 0 | +3 | |
| crouch MP | HL | 60 | 100 | 40 | sp/su | 4 | 3 | 14 | -3 | 0 | |
| crouch HP | HL | 100 | 150 | 60 | sp/su | 5 | 5 | 28 | -15 | -10 | Forces stand |
| crouch LK | L | 30 | 50 | 20 | - | 4 | 4 | 6 | +1 | +4 | |
| crouch MK | L | 60 | 100 | 40 | sp/su | 7 | 2 | 12 | 0 | +3 | |
| crouch HK | L | 90 | 200 | 60 | - | 9 | 2 | 26 | -10 | - | cannot fast recover |
| Jump up LP | H | 40 | 50 | 20 | - | 4 | 6 | - | - | - | |
| Jump up MP | H | 70 | 100 | 40 | - | 6 | 6 | - | - | - | |
| Jump up HP | H | 90 | 150 | 60 | - | 9 | 6 | - | - | - | |
| Jump up LK | H | 50 | 50 | 20 | - | 4 | 7 | - | - | - | |
| Jump up MK | H | 80 | 100 | 40 | - | 7 | 6 | - | - | - | |
| Jump up HK | H | 90 | 200 | 60 | - | 11 | 5 | - | - | - | |
| Jump forward LP | H | 40 | 50 | 20 | - | 4 | 6 | - | - | - | |
| Jump forward MP | H | 70 | 100 | 40 | - | 7 | 3 | - | - | - | |
| Jump forward HP | H | 90 | 150 | 60 | - | 7 | 7 | - | - | - | |
| Jump forward LK | H | 30 | 50 | 20 | - | 4 | 7 | - | - | - | |
| Jump forward MK | H | 60 | 100 | 40 | - | 7 | 5 | - | - | - | |
| Jump forward HK | H | 100 | 200 | 60 | - | 6 | 5 | - | - | - | |
| Slide | L | 60 | 100 | 40 | - | 7 | 8 | 12 | -6 | -3 | |
| Soul Piety | HL | 100 | 200 | 60 | - | 11 | 2 | 21 | -5 | -1 | |
| Focus Attack LVL 1 | HL | 60 | 100 | 20 | - | 21 | 2 | 35 | -21 | -21 | |
| Focus attack LVL 2 | HL | 80 | 150 | 40 | - | 17+14 | 2 | 35 | -15 | - | |
| Focus attack LVL 3 | - | 120 | 200 | 60 | - | 65 | 2 | 35 | - | - | |
| Forward Throw | 1.0 | 140 | 100 | 40 | - | 3 | 2 | 20 | - | - | |
| Back throw | 1.0 | 140 | 100 | 40 | - | 3 | 2 | 20 | - | - | |
| Soul Spark LP | HL | 80 | 50 | 30/20 | su | 14 | - | 52 (total duration) | -12 | -8 | |
| Soul Spark MP | HL | 80 | 50 | 30/20 | su | 22 | - | 52 (total duration) | -4 | 0 | |
| Soul Spark HP | HL | 80 | 50 | 30/20 | su | 29 | - | 53 (total duration) | +2 | +6 | |
| Soul Spark EX | HL | 30*70 | 50*50 | -250/0 | su | 14 | - | 48 (total duration) | 0 | +4 | |
| Soul Spiral LK | HL | 100 | 100 | 20/40 | su | 12 | 6 | 23 | -8 | - | Armor break |
| Soul Spiral MK | HL | 100 | 100 | 20/40 | su | 15 | 6 | 21 | -6 | - | Armor break |
| Soul Spiral HK | HL | 100 | 100 | 20/40 | su | 16 | 6 | 19 | -4 | - | Armor break |
| Soul Spiral EX | HL | 100 | 100 | -250/0 | su | 13 | 6 | 21 | -6 | - | 1~11f invincible, Armor break |
| Soul Reflect LP | HL | 50 | 100 | 20/30 | su | 13 | 2 | 27 | -8 | - | gives super gauge +100, increases super damage by 5% up to 7 times/35% |
| Soul Reflect MP | HL | 50 | 100 | 20/30 | su | 13 | 3 | 25 | -7 | - | |
| Soul Reflect HP | HL | 50 | 100 | 20/30 | su | 12 | 2 | 26 | -7 | - | |
| Soul Reflect EX | HL | 50 | 100 | -250/0 | su | 8 | 2 | 24 | -5 | - | Increases damage of reflected projectile by 10% |
| Soul Throw LP | 0.4 | 160 | 100 | 20/40 | - | 6 | 10 | 26+8 | - | - | |
| Soul Throw MP | 0.4 | 160 | 100 | 20/40 | - | 6 | 11 | 27+8 | - | - | |
| Soul Throw HP | 0.4 | 160 | 100 | 20/40 | - | 6 | 11 | 30+8 | - | - | |
| Soul Throw EX | 0.4 | 160 | 100 | -250/0 | - | 6 | 11 | 30+8 | - | - | 1~7f invincible |
| Super Combo | HL | 50x4*100 | 0 | -1000/0 | - | 1+8 | - | 54 (total duration) | +16 | - | 1~7f invincible |
| Ultra Combo 1 | HL | 498 | 0 | 0/0 | - | 1+11 | 14 | 45 | -37 | - | 1~11f invincible, Armor break |
| Ultra Combo 2 | HL | 120*120 | 0 | 0/0 | - | 1+4 | 600 | 5 (total duration) | - | - | |
| Block | Super Meter | Frames | |||||||||
| Move Name | HL | Damage | Stun | Gain | Cancel Ability | Startup | Active | Recovery | On Guard | On Hit | Notes |
Matchups
Abel
Adon
Akuma
Balrog
Blanka
Cammy
Chun-Li
Cody
C. Viper
Dan
Deejay
Dhalsim
Dudley
E.Honda
El Fuerte
Fei Long
Gen
Gouken
Guile
Guy
Hakan
Ibuki
Juri
Ken
Makoto
M. Bison
Rose
Rufus
Ryu
Sagat
Sakura
Seth
T.hawk
Vega
Zangief
| The characters | Abel • Adon • Akuma • Balrog • Blanka • C. Viper • Cammy • Chun-Li • Cody • Dan • Dee Jay • Dhalsim • Dudley • E. Honda • El Fuerte • Fei Long • Gen • Gouken • Guile • Guy • Hakan • Ibuki • Juri • Ken • M. Bison • Makoto • Rose • Rufus • Ryu • Sagat • Sakura • Seth • T.Hawk • Vega • Zangief |
|---|
