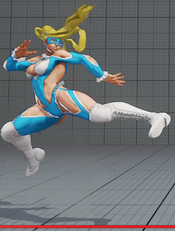
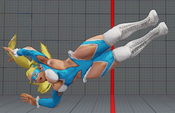
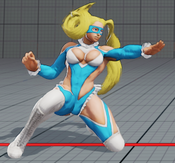
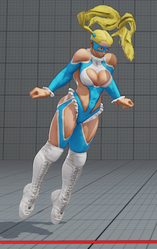
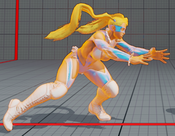
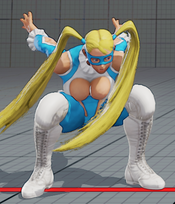
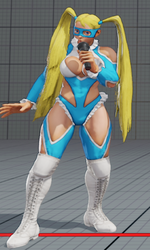
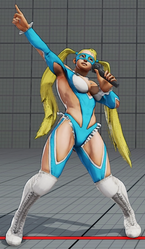
No edit summary |
No edit summary |
||
| Line 110: | Line 110: | ||
|stun=<nowiki>70</nowiki> | |stun=<nowiki>70</nowiki> | ||
|attack=<nowiki>H</nowiki> | |attack=<nowiki>H</nowiki> | ||
|cancel=<nowiki>vt1 vt2</nowiki> | |cancel=<nowiki>sp vt1 vt2</nowiki> | ||
|hcWinSpCa=<nowiki>10</nowiki> | |||
|hcWinVt=<nowiki>10</nowiki> | |hcWinVt=<nowiki>10</nowiki> | ||
|hcWinTc=<nowiki>16</nowiki> | |hcWinTc=<nowiki>16</nowiki> | ||
| Line 214: | Line 215: | ||
|hit=<nowiki>3</nowiki> | |hit=<nowiki>3</nowiki> | ||
|block=<nowiki>1</nowiki> | |block=<nowiki>1</nowiki> | ||
|damage=<nowiki> | |damage=<nowiki>30</nowiki> | ||
|stun=<nowiki>70</nowiki> | |stun=<nowiki>70</nowiki> | ||
|attack=<nowiki>H</nowiki> | |attack=<nowiki>H</nowiki> | ||
| Line 266: | Line 267: | ||
|hcWinNotes=<nowiki>*CA only</nowiki> | |hcWinNotes=<nowiki>*CA only</nowiki> | ||
|description= | |description= | ||
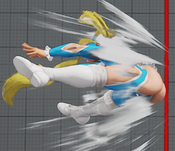
:Shifts hurtbox backward on frames 2-8 | |||
:+3 oH / -1 oB on last active frame | :+3 oH / -1 oB on last active frame | ||
:Advantage listed with parentheses format; x(y) - refers to worst(x) to best(y) frame advantage depending on how late into active frames it hits | :Advantage listed with parentheses format; x(y) - refers to worst(x) to best(y) frame advantage depending on how late into active frames it hits | ||
| Line 302: | Line 304: | ||
{{AttackData-SFV | {{AttackData-SFV | ||
|startup=<nowiki>7</nowiki> | |startup=<nowiki>7</nowiki> | ||
|active=<nowiki> | |active=<nowiki>3</nowiki> | ||
|recovery=<nowiki> | |recovery=<nowiki>15</nowiki> | ||
|hit=<nowiki>3</nowiki> | |hit=<nowiki>3</nowiki> | ||
|block=<nowiki>-2</nowiki> | |block=<nowiki>-2</nowiki> | ||
| Line 309: | Line 311: | ||
|stun=<nowiki>100</nowiki> | |stun=<nowiki>100</nowiki> | ||
|attack=<nowiki>H</nowiki> | |attack=<nowiki>H</nowiki> | ||
|cancel=<nowiki>vt1 vt2</nowiki> | |cancel=<nowiki>sp vt1 vt2</nowiki> | ||
|hcWinVt=<nowiki>14</nowiki> | |hcWinVt=<nowiki>14</nowiki> | ||
|description= | |description= | ||
:Not a low attack like most cr.MK are | :Not a low attack like most cr.MK are | ||
{{SFV Button FAT|link=https://fullmeter.com/fatonline/#/framedata/movedetail/SFV/R.Mika/normal/Crouch%20MK}} | {{SFV Button FAT|link=https://fullmeter.com/fatonline/#/framedata/movedetail/SFV/R.Mika/normal/Crouch%20MK}} | ||
| Line 570: | Line 571: | ||
|attack=<nowiki>H</nowiki> | |attack=<nowiki>H</nowiki> | ||
|description= | |description= | ||
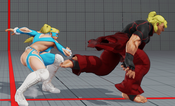
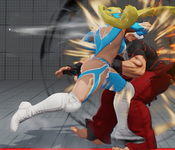
:Ropes the opponent into a stumble | :Ropes the opponent into a stumble behind R.Mika | ||
:Opponent bounces off the wall if it stumbles into a corner | :Opponent bounces off the wall if it stumbles into a corner | ||
:Can bounce opponent off of an invisible wall midscreen if you backdash first | |||
:The wall bounce puts the opponent into an airborne free juggle state (even though it looks like they're grounded) | :The wall bounce puts the opponent into an airborne free juggle state (even though it looks like they're grounded) | ||
:KDA varies wildly depending on how far / close to a corner the opponent is and whether or not they wall bounce | :KDA varies wildly depending on how far / close to a corner the opponent is and whether or not they wall bounce | ||
| Line 596: | Line 598: | ||
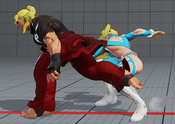
:Ropes the opponent into a stumble behind R.Mika | :Ropes the opponent into a stumble behind R.Mika | ||
:Opponent bounces off the wall if it stumbles into a corner | :Opponent bounces off the wall if it stumbles into a corner | ||
:Can bounce opponent off of an invisible wall midscreen if you backdash first | |||
:The wall bounce puts the opponent into an airborne free juggle state (even though it looks like they're grounded) | :The wall bounce puts the opponent into an airborne free juggle state (even though it looks like they're grounded) | ||
:KDA varies wildly depending on how far / close to a corner the opponent is and whether or not they wall bounce | :KDA varies wildly depending on how far / close to a corner the opponent is and whether or not they wall bounce | ||
| Line 738: | Line 741: | ||
|recovery=<nowiki>4+19</nowiki> | |recovery=<nowiki>4+19</nowiki> | ||
|hit=<nowiki>KD</nowiki> | |hit=<nowiki>KD</nowiki> | ||
|block=<nowiki>- | |block=<nowiki>-8</nowiki> | ||
|damage=<nowiki>90</nowiki> | |damage=<nowiki>90</nowiki> | ||
|stun=<nowiki>150</nowiki> | |stun=<nowiki>150</nowiki> | ||
| Line 765: | Line 768: | ||
|recovery=<nowiki>2+15</nowiki> | |recovery=<nowiki>2+15</nowiki> | ||
|hit=<nowiki>KD</nowiki> | |hit=<nowiki>KD</nowiki> | ||
|block=<nowiki>- | |block=<nowiki>-10</nowiki> | ||
|damage=<nowiki>100</nowiki> | |damage=<nowiki>100</nowiki> | ||
|stun=<nowiki>150</nowiki> | |stun=<nowiki>150</nowiki> | ||
| Line 1,182: | Line 1,185: | ||
|data= | |data= | ||
{{AttackData-SFV | {{AttackData-SFV | ||
|startup=<nowiki> | |startup=<nowiki>60</nowiki> | ||
|active=<nowiki>25(29)</nowiki> | |active=<nowiki>25(29)</nowiki> | ||
|recovery=<nowiki>15</nowiki> | |recovery=<nowiki>15</nowiki> | ||
| Line 1,239: | Line 1,242: | ||
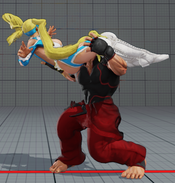
:Parry window on frames 3-12 | :Parry window on frames 3-12 | ||
:Cannot parry Low hits / Projectiles / EX Specials / Supers / V-Reversals / V-Trigger Specials (Nadeshiko, Cody Pipe Swing, etc) | :Cannot parry Low hits / Projectiles / EX Specials / Supers / V-Reversals / V-Trigger Specials (Nadeshiko, Cody Pipe Swing, etc) | ||
:DOES work against V-Trigger enhanced moves such as Cammy Cannon Strike and Ryu V-Trigger 1 Enhanced Normals | |||
:Counter-Hit state for the entire duration | :Counter-Hit state for the entire duration | ||
:On successful parry, causes 40 grey health damage to R.Mika, builds 20 V-Gauge, and builds another 80 V-Gauge on the follow-up counter (100 V-Gauge total) | :On successful parry, causes 40 grey health damage to R.Mika, builds 20 V-Gauge, and builds another 80 V-Gauge on the follow-up counter (100 V-Gauge total) | ||
| Line 1,276: | Line 1,280: | ||
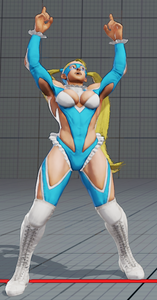
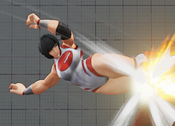
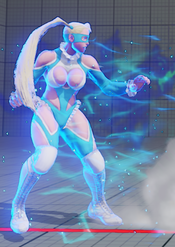
[[Image: SFV_R.Mika_VT_(hold).png|thumb|x300px|R. Mika's animation indicating a delayed V-Trigger.]] | [[Image: SFV_R.Mika_VT_(hold).png|thumb|x300px|R. Mika's animation indicating a delayed V-Trigger.]] | ||
* R. Mika can hold HP and HK when using either V-Trigger to delay Nadeshiko's arrival. This is shown with R. Mika doing an additional animation after the V-Trigger activation. | * R. Mika can hold HP and HK when using either V-Trigger to delay Nadeshiko's arrival. This is shown with R. Mika doing an additional animation after the V-Trigger activation. | ||
=====<font style="visibility:hidden; float:right">HPHK (VT1)</font>===== | =====<font style="visibility:hidden; float:right">HPHK (VT1)</font>===== | ||
{{MoveData | {{MoveData | ||
| Line 1,458: | Line 1,461: | ||
|startup=<nowiki>64</nowiki> | |startup=<nowiki>64</nowiki> | ||
|recovery=<nowiki>7</nowiki> | |recovery=<nowiki>7</nowiki> | ||
|damage=<nowiki> | |damage=<nowiki>30x3 (90)</nowiki> | ||
|stun=<nowiki>50x3 (150)</nowiki> | |stun=<nowiki>50x3 (150)</nowiki> | ||
|attack=<nowiki>H</nowiki> | |attack=<nowiki>H</nowiki> | ||
| Line 1,467: | Line 1,470: | ||
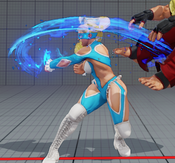
:Calls Nadeshiko in for help (can be held down for a different version of Nadeshiko's attack) | :Calls Nadeshiko in for help (can be held down for a different version of Nadeshiko's attack) | ||
:Can call for Nadeshiko one more time before V-Timer ends (doing so depletes the rest of the V-Timer) | :Can call for Nadeshiko one more time before V-Timer ends (doing so depletes the rest of the V-Timer) | ||
:VTC frame advangate on cancelable moves is listed as Quick/Hold (2nd Quick/2nd Hold) | |||
{{SFV Button FAT|link=https://fullmeter.com/fatonline/#/framedata/movedetail/SFV/R.Mika/normal/Steel%20Chair}} | {{SFV Button FAT|link=https://fullmeter.com/fatonline/#/framedata/movedetail/SFV/R.Mika/normal/Steel%20Chair}} | ||
}} | }} | ||
| Line 1,479: | Line 1,483: | ||
{{AttackData-SFV | {{AttackData-SFV | ||
|recovery=<nowiki>11</nowiki> | |recovery=<nowiki>11</nowiki> | ||
|damage=<nowiki>100*60</nowiki> | |damage=<nowiki>100*60 (160)</nowiki> | ||
|stun=<nowiki>100*100</nowiki> | |stun=<nowiki>100*100 (200)</nowiki> | ||
|attack=<nowiki>H</nowiki> | |attack=<nowiki>H</nowiki> | ||
|description= | |description= | ||
| Line 1,489: | Line 1,493: | ||
:Calls Nadeshiko in for help | :Calls Nadeshiko in for help | ||
:Can call for Nadeshiko one more time before V-Timer ends (doing so depletes the rest of the V-Timer) | :Can call for Nadeshiko one more time before V-Timer ends (doing so depletes the rest of the V-Timer) | ||
:VTC frame advantage on cancelable moves is listed as Quick/Hold (2nd Quick/2nd Hold) | |||
{{SFV Button FAT|link=https://fullmeter.com/fatonline/#/framedata/movedetail/SFV/R.Mika/normal/Fightin'%20Dirty}} | {{SFV Button FAT|link=https://fullmeter.com/fatonline/#/framedata/movedetail/SFV/R.Mika/normal/Fightin'%20Dirty}} | ||
}} | }} | ||
| Line 1,506: | Line 1,511: | ||
|attack=<nowiki>H</nowiki> | |attack=<nowiki>H</nowiki> | ||
|description= | |description= | ||
:Does not increase combo scaling when canceled into | |||
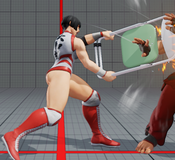
:This version is faster and has Nadeshko run in to throw her chair across the screen (the chair throw can nullify 1 hit of projectiles) | :This version is faster and has Nadeshko run in to throw her chair across the screen (the chair throw can nullify 1 hit of projectiles) | ||
:Calls Nadeshiko in for help (can be held down for a different version of Nadeshiko's attack) | :Calls Nadeshiko in for help (can be held down for a different version of Nadeshiko's attack) | ||
| Line 1,525: | Line 1,531: | ||
|attack=<nowiki>H</nowiki> | |attack=<nowiki>H</nowiki> | ||
|description= | |description= | ||
:Does not increase combo scaling when canceled into | |||
:This version is slower and has Nadeshiko run in about 80% screen length and start swinging her chair twice to attack | :This version is slower and has Nadeshiko run in about 80% screen length and start swinging her chair twice to attack | ||
:Calls Nadeshiko in for help | :Calls Nadeshiko in for help | ||
Revision as of 00:51, 4 June 2022
Introduction
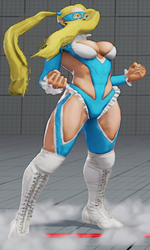
About R. Mika
Hailing from Japan, Rainbow Mika is a trained professional women's wrestler, already on her path to stardom.
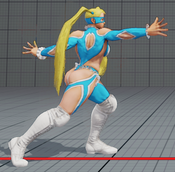
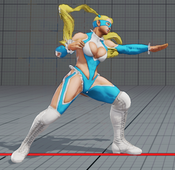
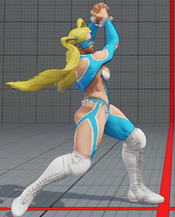
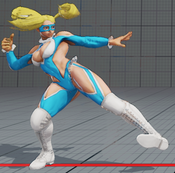
To put it simply. Mika is annoying. She loves harassing the opponent with her great normals, a command grab that loops into itself, and great mobility. Mika has a vast variety of tools to keep the opponent on their toes and make sure they aren't falling asleep. Although her damage output isn't remarkable, this is more than made up for by the fact that her moveset is designed to annoy your opponent with fast and long ranged normals. If you like frustrating your opponent, testing their patience, and overcoming their mentality, then Mika might be just for you.
Final Patch
Players to Watch
- Fuudo
- Luffy
- Nuckledu
| R.Mika | |
|---|---|
| Vitals | |
| Life Points | 950 |
| Stun Points | 1000 |
| V-Gauge Points | |
| V-Trigger 1 | 2 Bars |
| V-Trigger 2 | 3 Bars |
| Ground Movement | |
| Forward Walk Speed | 0.042 |
| Backward Walk Speed | 0.03 |
| Forward Dash Speed | 18 |
| Backward Dash Speed | 24 |
| Forward Dash Distance | 1.342 |
| Backward Dash Distance | 1.2 |
| Backdash CH Frames | 3-10 |
| Jumping | |
| Back Jump Speed | 46 (4+38+4) |
| Neutral Jump Speed | 46 (4+38+4) |
| Forward Jump Speed | 45 (3+38+4) |
| Forward Jump Distance | 2.128 |
| Backward Jump Distance | 1.824 |
| Throws | |
| Throw Hurtbox | 0.25 |
| Throw Range | 0.85 |
Frame Data & Descriptions are provided by FATOnline.
|
| SFV Frame Data Glossary | |
|---|---|
| Active |
How many frames a move remains active (can hurt opponents) for. |
| Attack |
Attack level is L for low attacks (must be blocked crouching), H is for High attacks (which can be blocked high or low) and M for overhead (must be blocked standing). T is for throw attacks (which cannot be blocked). |
| Cancel options |
Available cancel options.
|
| Confirm windows |
Hit confirm windows written as Specials & CAs/Target Combos/V-Trigger. Notation may denote V-Skill only cancel windows in Specials.
|
| Crush Counter |
Crush Counter hit advantage written as opponent state, frame advantage, and v-gauge gain on hit. |
| Damage |
Attack damage on hit. Notation may denote multi-hit or "sweet spot" damage values on certain frames. |
| Hit/Block |
These are frame advantage values when the attack hits or is blocked. If the number is positive, then the move will end before the defender can act again. If the number is negative, the defender will be able to act before the attacker and maybe even punish. KD refers to knockdown on hit.
|
| Knockdown |
Knockdown advantage against Normal, Quick Rise and Back Rise wake up options. |
| Recovery |
How many frames it takes for a move to finish after it's been active. |
| Startup |
How many frames it takes before the move becomes 'active' or have a hit box. The last startup frame and the first active frame are the same frame, meaning all values are written as Startup + 1. |
| Stun |
Amount of stun added to the opponent's stun bar on hit. |
Normals
5LP
5MP
5HP
5LK
5MK
5HK
5HK (hold)
2LP
2MP
2HP
2LK
2MK
2HK
8LP
8MP
8HP
8LK
8MK
8HK
Command Normals
9 > 2MP
6HP
4 or 6MP
4 or 6MP > MP
4 or 6MP > 4MP
Target Combos
8MP > 8HP
LK > MP
Throws
LPLK
4LPLK
Special Moves
236LP
236MP
236HP
236PP
236LK
236MK
236HK
236KK
63214LP
63214MP
63214HP
63214PP
63214LK
63214MK
63214HK
63214KK
Critical Art
214214P
Taunts
5PPPKKK
V-System
V-Skill 1
MPMK (VS1)
MPMK (VS1) (hold)
V-Skill 2
MPMK (VS2)
MPMK (VS2) (counter)
V-Trigger 1
- R. Mika can hold HP and HK when using either V-Trigger to delay Nadeshiko's arrival. This is shown with R. Mika doing an additional animation after the V-Trigger activation.
HPHK (VT1)
HPHK (VT1 hold)
4HPHK (VT1)
4HPHK (VT1 hold)
6HPHK (can hold)
6HPHK (hold)
V-Trigger 2
HPHK (VT2)
HPHK (VT2 hold)
HPHK
HPHK (hold)
V-Shift
MKHP
V-Shift Break
MKHP
V-Reversal
6KKK
