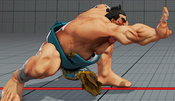
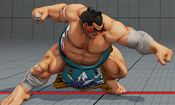
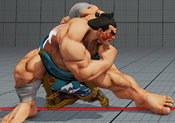
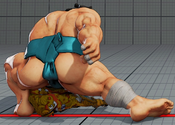
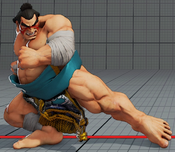
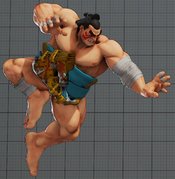
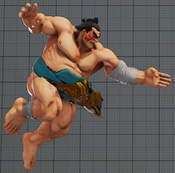
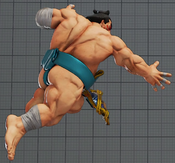
No edit summary |
No edit summary |
||
| Line 5: | Line 5: | ||
|hp=1050 | |hp=1050 | ||
|stun=1075 | |stun=1075 | ||
|vt1= | |vt1=3 Bars | ||
|vt2= | |vt2=2 Bars | ||
|movef=0.044 | |movef=0.044 | ||
|moveb=0.027 | |moveb=0.027 | ||
| Line 50: | Line 50: | ||
* Quite a long special cancel window (uncharacteristic for a LP) | * Quite a long special cancel window (uncharacteristic for a LP) | ||
* Deals 20 more stun (90) compared to most light attacks in the game | * Deals 20 more stun (90) compared to most light attacks in the game | ||
{{SFV Button FAT|link=https://fullmeter.com/fatonline/#/framedata/movedetail/SFV/E.Honda/normal/Stand%20LP}} | |||
}} | }} | ||
}} | }} | ||
| Line 79: | Line 80: | ||
* Can be a good oki tool (4 active frames for both wake-ups and good + frames) | * Can be a good oki tool (4 active frames for both wake-ups and good + frames) | ||
* Deals 10 more damage (70) and 20 more stun (120) compared to most medium attacks in the game | * Deals 10 more damage (70) and 20 more stun (120) compared to most medium attacks in the game | ||
{{SFV Button FAT|link=https://fullmeter.com/fatonline/#/framedata/movedetail/SFV/E.Honda/normal/Stand%20MP}} | |||
}} | }} | ||
}} | }} | ||
| Line 106: | Line 108: | ||
* Deals 10 less damage (80) on active frames 4-6 | * Deals 10 less damage (80) on active frames 4-6 | ||
* Can hit cross-up (behind E.Honda) | * Can hit cross-up (behind E.Honda) | ||
{{SFV Button FAT|link=https://fullmeter.com/fatonline/#/framedata/movedetail/SFV/E.Honda/normal/Stand%20HP}} | |||
}} | }} | ||
}} | }} | ||
| Line 131: | Line 134: | ||
* Quite a long special cancel window (uncharacteristic for a LK) | * Quite a long special cancel window (uncharacteristic for a LK) | ||
* Deals 20 more stun (90) compared to most light attacks in the game | * Deals 20 more stun (90) compared to most light attacks in the game | ||
{{SFV Button FAT|link=https://fullmeter.com/fatonline/#/framedata/movedetail/SFV/E.Honda/normal/Stand%20LK}} | |||
}} | }} | ||
}} | }} | ||
| Line 157: | Line 161: | ||
* Good frametrap / combo tool | * Good frametrap / combo tool | ||
* Deals 20 more stun (120) compared to most medium attacks in the game | * Deals 20 more stun (120) compared to most medium attacks in the game | ||
{{SFV Button FAT|link=https://fullmeter.com/fatonline/#/framedata/movedetail/SFV/E.Honda/normal/Stand%20MK}} | |||
}} | }} | ||
}} | }} | ||
| Line 185: | Line 190: | ||
* -4 on block vs crouching when the second hit whiffs | * -4 on block vs crouching when the second hit whiffs | ||
* Decent anti-air on 2nd hit (albeit a bit slow startup) | * Decent anti-air on 2nd hit (albeit a bit slow startup) | ||
{{SFV Button FAT|link=https://fullmeter.com/fatonline/#/framedata/movedetail/SFV/E.Honda/normal/Stand%20HK}} | |||
}} | }} | ||
}} | }} | ||
| Line 213: | Line 219: | ||
* Good hitboxes to poke / check the opponent | * Good hitboxes to poke / check the opponent | ||
* Deals 20 more stun (90) compared to most light attacks in the game | * Deals 20 more stun (90) compared to most light attacks in the game | ||
{{SFV Button FAT|link=https://fullmeter.com/fatonline/#/framedata/movedetail/SFV/E.Honda/normal/Crouch%20LP}} | |||
}} | }} | ||
}} | }} | ||
| Line 240: | Line 247: | ||
* Good hitboxes to poke / check the opponent | * Good hitboxes to poke / check the opponent | ||
* Deals 20 more stun (120) compared to most medium attacks in the game | * Deals 20 more stun (120) compared to most medium attacks in the game | ||
{{SFV Button FAT|link=https://fullmeter.com/fatonline/#/framedata/movedetail/SFV/E.Honda/normal/Crouch%20MP}} | |||
}} | }} | ||
}} | }} | ||
| Line 266: | Line 274: | ||
* Crush Counter (Stagger: +25) | * Crush Counter (Stagger: +25) | ||
* Recovery Frames (21F) and Total Frames (32F) listed refers to the whiff version (-1F recovery on hit / +5F recovery on block) | * Recovery Frames (21F) and Total Frames (32F) listed refers to the whiff version (-1F recovery on hit / +5F recovery on block) | ||
{{SFV Button FAT|link=https://fullmeter.com/fatonline/#/framedata/movedetail/SFV/E.Honda/normal/Crouch%20HP}} | |||
}} | }} | ||
}} | }} | ||
| Line 292: | Line 301: | ||
* Can cancel into Hundred Hand Slap special or V-Trigger activation / specials | * Can cancel into Hundred Hand Slap special or V-Trigger activation / specials | ||
* If canceled into VT1 or VT2 activation, recovery is 11F instead of 6F | * If canceled into VT1 or VT2 activation, recovery is 11F instead of 6F | ||
{{SFV Button FAT|link=https://fullmeter.com/fatonline/#/framedata/movedetail/SFV/E.Honda/normal/Crouch%20LK}} | |||
}} | }} | ||
}} | }} | ||
| Line 319: | Line 329: | ||
* Deals 20 more stun (120) compared to most medium attacks in the game | * Deals 20 more stun (120) compared to most medium attacks in the game | ||
* If canceled into VT1 or VT2 activation, recovery is 11F instead of 6F | * If canceled into VT1 or VT2 activation, recovery is 11F instead of 6F | ||
{{SFV Button FAT|link=https://fullmeter.com/fatonline/#/framedata/movedetail/SFV/E.Honda/normal/Crouch%20MK}} | |||
}} | }} | ||
}} | }} | ||
| Line 349: | Line 360: | ||
* Second hit does not play out if the first hit connects to opponent (hit or block) | * Second hit does not play out if the first hit connects to opponent (hit or block) | ||
* 3 extra recovery frames on whiff (17F) | * 3 extra recovery frames on whiff (17F) | ||
{{SFV Button FAT|link=https://fullmeter.com/fatonline/#/framedata/movedetail/SFV/E.Honda/normal/Crouch%20HK}} | |||
}} | }} | ||
}} | }} | ||
| Line 354: | Line 366: | ||
=====<font style="visibility:hidden; float:right">Jump LP</font>===== | =====<font style="visibility:hidden; float:right">Jump LP</font>===== | ||
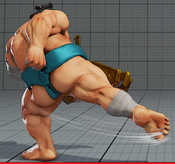
{{MoveData | {{MoveData | ||
|image=SFV_E. | |image=SFV_E.Honda_8LP.png | ||
|name=Jump LP | |name=Jump LP | ||
|input= | |input=8LP | ||
|data= | |data= | ||
{{AttackData-SFV | {{AttackData-SFV | ||
| Line 374: | Line 386: | ||
* Incredible hitbox priority for a horizontal jump-in | * Incredible hitbox priority for a horizontal jump-in | ||
* Deals 10 more damage (50) and 20 more stun (90) compared to most light jump-ins in the game | * Deals 10 more damage (50) and 20 more stun (90) compared to most light jump-ins in the game | ||
{{SFV Button FAT|link=https://fullmeter.com/fatonline/#/framedata/movedetail/SFV/E.Honda/normal/Jump%20LP}} | |||
}} | }} | ||
}} | }} | ||
| Line 379: | Line 392: | ||
=====<font style="visibility:hidden; float:right">Jump MP</font>===== | =====<font style="visibility:hidden; float:right">Jump MP</font>===== | ||
{{MoveData | {{MoveData | ||
|image=SFV_E. | |image=SFV_E.Honda_8MP.png | ||
|name=Jump MP | |name=Jump MP | ||
|input= | |input=8MP | ||
|data= | |data= | ||
{{AttackData-SFV | {{AttackData-SFV | ||
| Line 399: | Line 412: | ||
* Great hitbox for both air-to-air and jump-in | * Great hitbox for both air-to-air and jump-in | ||
* Deals 10 more damage (70) and 20 more stun (120) compared to most medium jump-ins in the game | * Deals 10 more damage (70) and 20 more stun (120) compared to most medium jump-ins in the game | ||
{{SFV Button FAT|link=https://fullmeter.com/fatonline/#/framedata/movedetail/SFV/E.Honda/normal/Jump%20MP}} | |||
}} | }} | ||
}} | }} | ||
| Line 404: | Line 418: | ||
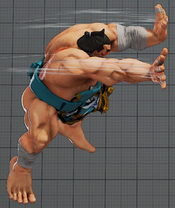
=====<font style="visibility:hidden; float:right">Jump HP</font>===== | =====<font style="visibility:hidden; float:right">Jump HP</font>===== | ||
{{MoveData | {{MoveData | ||
|image=SFV_E. | |image=SFV_E.Honda_7or9HP.png | ||
|name=Jump HP | |name=Jump HP | ||
|input= | |input=7or9HP | ||
|data= | |data= | ||
{{AttackData-SFV | {{AttackData-SFV | ||
| Line 422: | Line 436: | ||
|confirm=<nowiki>- / - / -</nowiki> | |confirm=<nowiki>- / - / -</nowiki> | ||
|description= | |description= | ||
{{SFV Button FAT|link=https://fullmeter.com/fatonline/#/framedata/movedetail/SFV/E.Honda/normal/Jump%20HP}} | |||
}} | }} | ||
}} | }} | ||
| Line 447: | Line 462: | ||
* Strong air-to-air hitbox | * Strong air-to-air hitbox | ||
* Can steer E.Honda's air momentum forward or backwards on frames 1-28 (forward momentum is faster than backwards) | * Can steer E.Honda's air momentum forward or backwards on frames 1-28 (forward momentum is faster than backwards) | ||
{{SFV Button FAT|link=https://fullmeter.com/fatonline/#/framedata/movedetail/SFV/E.Honda/normal/Neutral%20Jump%20HP}} | |||
}} | }} | ||
}} | }} | ||
| Line 452: | Line 468: | ||
=====<font style="visibility:hidden; float:right">Jump LK</font>===== | =====<font style="visibility:hidden; float:right">Jump LK</font>===== | ||
{{MoveData | {{MoveData | ||
|image=SFV_E. | |image=SFV_E.Honda_8LK.png | ||
|name=Jump LK | |name=Jump LK | ||
|input= | |input=8LK | ||
|data= | |data= | ||
{{AttackData-SFV | {{AttackData-SFV | ||
| Line 473: | Line 489: | ||
* Shrinks bottom hurtbox on frame 3 and onwards | * Shrinks bottom hurtbox on frame 3 and onwards | ||
* Deals 10 more damage (50) and 20 more stun (90) compared to most light jump-ins in the game | * Deals 10 more damage (50) and 20 more stun (90) compared to most light jump-ins in the game | ||
{{SFV Button FAT|link=https://fullmeter.com/fatonline/#/framedata/movedetail/SFV/E.Honda/normal/Jump%20LK}} | |||
}} | }} | ||
}} | }} | ||
| Line 478: | Line 495: | ||
=====<font style="visibility:hidden; float:right">Jump MK</font>===== | =====<font style="visibility:hidden; float:right">Jump MK</font>===== | ||
{{MoveData | {{MoveData | ||
|image=SFV_E. | |image=SFV_E.Honda_8MK.png | ||
|name=Jump MK | |name=Jump MK | ||
|input= | |input=8MK | ||
|data= | |data= | ||
{{AttackData-SFV | {{AttackData-SFV | ||
| Line 497: | Line 514: | ||
|description= | |description= | ||
* Deals 10 more damage (70) and 20 more stun (120) compared to most medium jump-ins in the game | * Deals 10 more damage (70) and 20 more stun (120) compared to most medium jump-ins in the game | ||
{{SFV Button FAT|link=https://fullmeter.com/fatonline/#/framedata/movedetail/SFV/E.Honda/normal/Jump%20MK}} | |||
}} | }} | ||
}} | }} | ||
| Line 502: | Line 520: | ||
=====<font style="visibility:hidden; float:right">Jump HK</font>===== | =====<font style="visibility:hidden; float:right">Jump HK</font>===== | ||
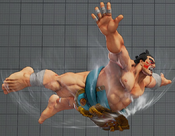
{{MoveData | {{MoveData | ||
|image=SFV_E. | |image=SFV_E.Honda_8HK.png | ||
|name=Jump HK | |name=Jump HK | ||
|input= | |input=8HK | ||
|data= | |data= | ||
{{AttackData-SFV | {{AttackData-SFV | ||
| Line 520: | Line 538: | ||
|confirm=<nowiki>- / - / -</nowiki> | |confirm=<nowiki>- / - / -</nowiki> | ||
|description= | |description= | ||
{{SFV Button FAT|link=https://fullmeter.com/fatonline/#/framedata/movedetail/SFV/E.Honda/normal/Jump%20HK}} | |||
}} | }} | ||
}} | }} | ||
| Line 527: | Line 546: | ||
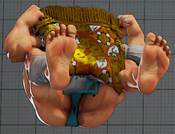
=====<font style="visibility:hidden; float:right">Flying Sumo Press</font>===== | =====<font style="visibility:hidden; float:right">Flying Sumo Press</font>===== | ||
{{MoveData | {{MoveData | ||
|image=SFV_E. | |image=SFV_E.Honda_9 2MK.png | ||
|name=Flying Sumo Press | |name=Flying Sumo Press | ||
|input=2MK | |input=9 > 2MK | ||
|data= | |data= | ||
{{AttackData-SFV | {{AttackData-SFV | ||
| Line 549: | Line 568: | ||
* Highly vulnerable hurtbox below his body | * Highly vulnerable hurtbox below his body | ||
* Deals 10 more damage (70) and 20 more stun (120) compared to most medium jump-ins in the game | * Deals 10 more damage (70) and 20 more stun (120) compared to most medium jump-ins in the game | ||
{{SFV Button FAT|link=https://fullmeter.com/fatonline/#/framedata/movedetail/SFV/E.Honda/normal/Flying%20Sumo%20Press}} | |||
}} | }} | ||
}} | }} | ||
| Line 576: | Line 596: | ||
* +1F recovery on whiff | * +1F recovery on whiff | ||
* Juggle Limit: 1 | * Juggle Limit: 1 | ||
{{SFV Button FAT|link=https://fullmeter.com/fatonline/#/framedata/movedetail/SFV/E.Honda/normal/Flying%20Sumo%20Press}} | |||
}} | }} | ||
}} | }} | ||
| Line 607: | Line 628: | ||
* Pulls back E.Honda's hurtbox a bit on frames 4-17 | * Pulls back E.Honda's hurtbox a bit on frames 4-17 | ||
* Juggle Limit: 5 | * Juggle Limit: 5 | ||
{{SFV Button FAT|link=https://fullmeter.com/fatonline/#/framedata/movedetail/SFV/E.Honda/normal/Flying%20Sumo%20Press}} | |||
}} | }} | ||
}} | }} | ||
| Line 638: | Line 660: | ||
* Juggle Limit on df+HK: 5 | * Juggle Limit on df+HK: 5 | ||
* 70dmg / 100 stun if only df HK hits | * 70dmg / 100 stun if only df HK hits | ||
{{SFV Button FAT|link=https://fullmeter.com/fatonline/#/framedata/movedetail/SFV/E.Honda/normal/Tokoshizume}} | |||
}} | }} | ||
}} | }} | ||
| Line 663: | Line 686: | ||
* Cancels into Specials / V-Skill 1 Target Combo / Super (CA) on hit only | * Cancels into Specials / V-Skill 1 Target Combo / Super (CA) on hit only | ||
* Puts grounded opponents into a limited juggle state (Juggle Start: +1) | * Puts grounded opponents into a limited juggle state (Juggle Start: +1) | ||
{{SFV Button FAT|link=https://fullmeter.com/fatonline/#/framedata/movedetail/SFV/E.Honda/normal/Tsurane%20Harite}} | |||
}} | }} | ||
}} | }} | ||
| Line 691: | Line 715: | ||
* Puts opponent into a limited juggle state (Juggle Count: 1) | * Puts opponent into a limited juggle state (Juggle Count: 1) | ||
* Juggle Limit / Increase / Start: 3 / 0 / 1 | * Juggle Limit / Increase / Start: 3 / 0 / 1 | ||
{{SFV Button FAT|link=https://fullmeter.com/fatonline/#/framedata/movedetail/SFV/E.Honda/normal/Hirate}} | |||
}} | }} | ||
}} | }} | ||
| Line 717: | Line 742: | ||
|confirm=<nowiki>- / - / -</nowiki> | |confirm=<nowiki>- / - / -</nowiki> | ||
|description= | |description= | ||
{{SFV Button FAT|link=https://fullmeter.com/fatonline/#/framedata/movedetail/SFV/E.Honda/normal/Saba-Ori}} | |||
}} | }} | ||
}} | }} | ||
| Line 742: | Line 768: | ||
|description= | |description= | ||
* No difference in stun damage from forward throw | * No difference in stun damage from forward throw | ||
{{SFV Button FAT|link=https://fullmeter.com/fatonline/#/framedata/movedetail/SFV/E.Honda/normal/Tawara%20Throw}} | |||
}} | }} | ||
}} | }} | ||
| Line 772: | Line 799: | ||
* All 3 hits can cancel into V-Trigger 1 / V-Trigger 2 specials | * All 3 hits can cancel into V-Trigger 1 / V-Trigger 2 specials | ||
* Values in parentheses refer to the buffed V-Skill 2 version | * Values in parentheses refer to the buffed V-Skill 2 version | ||
{{SFV Button FAT|link=https://fullmeter.com/fatonline/#/framedata/movedetail/SFV/E.Honda/normal/LP%20Hundred%20Hand%20Slap}} | |||
}} | }} | ||
}} | }} | ||
| Line 800: | Line 828: | ||
* All 5 hits can cancel into V-Trigger 1 / V-Trigger 2 specials | * All 5 hits can cancel into V-Trigger 1 / V-Trigger 2 specials | ||
* Values in parentheses refer to the buffed V-Skill 2 version | * Values in parentheses refer to the buffed V-Skill 2 version | ||
{{SFV Button FAT|link=https://fullmeter.com/fatonline/#/framedata/movedetail/SFV/E.Honda/normal/MP%20Hundred%20Hand%20Slap}} | |||
}} | }} | ||
}} | }} | ||
| Line 828: | Line 857: | ||
* All 7 hits can cancel into V-Trigger 1 / V-Trigger 2 specials | * All 7 hits can cancel into V-Trigger 1 / V-Trigger 2 specials | ||
* Values in parentheses refer to the buffed V-Skill 2 version | * Values in parentheses refer to the buffed V-Skill 2 version | ||
{{SFV Button FAT|link=https://fullmeter.com/fatonline/#/framedata/movedetail/SFV/E.Honda/normal/HP%20Hundred%20Hand%20Slap}} | |||
}} | }} | ||
}} | }} | ||
| Line 856: | Line 886: | ||
* All 7 hits can cancel into V-Trigger 1 / V-Trigger 2 specials | * All 7 hits can cancel into V-Trigger 1 / V-Trigger 2 specials | ||
* Values in parentheses refer to the buffed V-Skill 2 version | * Values in parentheses refer to the buffed V-Skill 2 version | ||
{{SFV Button FAT|link=https://fullmeter.com/fatonline/#/framedata/movedetail/SFV/E.Honda/normal/EX%20Hundred%20Hand%20Slap}} | |||
}} | }} | ||
}} | }} | ||
| Line 891: | Line 922: | ||
* KDA varies if canceled into VT1 Headbutt (see Oni-Daikaku for KDA data) | * KDA varies if canceled into VT1 Headbutt (see Oni-Daikaku for KDA data) | ||
* Juggle Limit / Increase / Start: 0 / 1 / 1 | * Juggle Limit / Increase / Start: 0 / 1 / 1 | ||
{{SFV Button FAT|link=https://fullmeter.com/fatonline/#/framedata/movedetail/SFV/E.Honda/normal/LP%20Sumo%20Headbutt}} | |||
}} | }} | ||
}} | }} | ||
| Line 926: | Line 958: | ||
* KDA varies if canceled into VT1 Headbutt (see Oni-Daikaku for KDA data) | * KDA varies if canceled into VT1 Headbutt (see Oni-Daikaku for KDA data) | ||
* Juggle Limit / Increase / Start: 0 / 1 / 1 | * Juggle Limit / Increase / Start: 0 / 1 / 1 | ||
{{SFV Button FAT|link=https://fullmeter.com/fatonline/#/framedata/movedetail/SFV/E.Honda/normal/MP%20Sumo%20Headbutt}} | |||
}} | }} | ||
}} | }} | ||
| Line 962: | Line 995: | ||
* KDA varies if canceled into VT1 Headbutt (see Oni-Daikaku for KDA data) | * KDA varies if canceled into VT1 Headbutt (see Oni-Daikaku for KDA data) | ||
* Juggle Limit / Increase / Start: 0 / 1 / 1 | * Juggle Limit / Increase / Start: 0 / 1 / 1 | ||
{{SFV Button FAT|link=https://fullmeter.com/fatonline/#/framedata/movedetail/SFV/E.Honda/normal/HP%20Sumo%20Headbutt}} | |||
}} | }} | ||
}} | }} | ||
| Line 994: | Line 1,028: | ||
* KDA shown in parantheses (X) refers to when both hits connect (up close) | * KDA shown in parantheses (X) refers to when both hits connect (up close) | ||
* Juggle Limit / Increase / Start: 2*5 / 1*1 / 1*1 | * Juggle Limit / Increase / Start: 2*5 / 1*1 / 1*1 | ||
{{SFV Button FAT|link=https://fullmeter.com/fatonline/#/framedata/movedetail/SFV/E.Honda/normal/EX%20Sumo%20Headbutt}} | |||
}} | }} | ||
}} | }} | ||
| Line 1,027: | Line 1,062: | ||
* KDA varies depending on how tall / high in the air opponent is (higher KDA the closer to ground the collision happens) | * KDA varies depending on how tall / high in the air opponent is (higher KDA the closer to ground the collision happens) | ||
* Juggle Limit / Increase / Start: 1*2 / 1*1 / 1*1 | * Juggle Limit / Increase / Start: 1*2 / 1*1 / 1*1 | ||
{{SFV Button FAT|link=https://fullmeter.com/fatonline/#/framedata/movedetail/SFV/E.Honda/normal/LK%20Sumo%20Smash}} | |||
}} | }} | ||
}} | }} | ||
| Line 1,060: | Line 1,096: | ||
* KDA varies depending on how tall / high in the air opponent is (higher KDA the closer to ground the collision happens) | * KDA varies depending on how tall / high in the air opponent is (higher KDA the closer to ground the collision happens) | ||
* Juggle Limit / Increase / Start: 1*2 / 1*1 / 1*1 | * Juggle Limit / Increase / Start: 1*2 / 1*1 / 1*1 | ||
{{SFV Button FAT|link=https://fullmeter.com/fatonline/#/framedata/movedetail/SFV/E.Honda/normal/MK%20Sumo%20Smash}} | |||
}} | }} | ||
}} | }} | ||
| Line 1,093: | Line 1,130: | ||
* KDA varies depending on how tall / high in the air opponent is (higher KDA the closer to ground the collision happens) | * KDA varies depending on how tall / high in the air opponent is (higher KDA the closer to ground the collision happens) | ||
* Juggle Limit / Increase / Start: 1*2 / 1*1 / 1*1 | * Juggle Limit / Increase / Start: 1*2 / 1*1 / 1*1 | ||
{{SFV Button FAT|link=https://fullmeter.com/fatonline/#/framedata/movedetail/SFV/E.Honda/normal/HK%20Sumo%20Smash}} | |||
}} | }} | ||
}} | }} | ||
| Line 1,127: | Line 1,165: | ||
* KDA varies depending on how tall / high in the air opponent is (higher KDA the closer to ground the collision happens) | * KDA varies depending on how tall / high in the air opponent is (higher KDA the closer to ground the collision happens) | ||
* Juggle Limit / Increase / Start: 6*7 / 1*1 / 1*1 | * Juggle Limit / Increase / Start: 6*7 / 1*1 / 1*1 | ||
{{SFV Button FAT|link=https://fullmeter.com/fatonline/#/framedata/movedetail/SFV/E.Honda/normal/EX%20Sumo%20Smash}} | |||
}} | }} | ||
}} | }} | ||
| Line 1,152: | Line 1,191: | ||
* Denies back-roll | * Denies back-roll | ||
* Grab Range: 1.19 | * Grab Range: 1.19 | ||
{{SFV Button FAT|link=https://fullmeter.com/fatonline/#/framedata/movedetail/SFV/E.Honda/normal/LP%20Oicho%20Throw}} | |||
}} | }} | ||
}} | }} | ||
| Line 1,177: | Line 1,217: | ||
* Denies back-roll | * Denies back-roll | ||
* Grab Range: 1.15 | * Grab Range: 1.15 | ||
{{SFV Button FAT|link=https://fullmeter.com/fatonline/#/framedata/movedetail/SFV/E.Honda/normal/MP%20Oicho%20Throw}} | |||
}} | }} | ||
}} | }} | ||
| Line 1,202: | Line 1,243: | ||
* Denies back-roll | * Denies back-roll | ||
* Grab Range: 1.08 | * Grab Range: 1.08 | ||
{{SFV Button FAT|link=https://fullmeter.com/fatonline/#/framedata/movedetail/SFV/E.Honda/normal/HP%20Oicho%20Throw}} | |||
}} | }} | ||
}} | }} | ||
| Line 1,227: | Line 1,269: | ||
* Denies back-roll | * Denies back-roll | ||
* Grab Range: 1.30 | * Grab Range: 1.30 | ||
{{SFV Button FAT|link=https://fullmeter.com/fatonline/#/framedata/movedetail/SFV/E.Honda/normal/EX%20Oicho%20Throw}} | |||
}} | }} | ||
}} | }} | ||
== Critical | == Critical Art == | ||
=====<font style="visibility:hidden; float:right">Kamigashima</font>===== | =====<font style="visibility:hidden; float:right">Kamigashima</font>===== | ||
| Line 1,259: | Line 1,302: | ||
* Honda and opponents end up mid-screen far away from each other after the cutscene on hit | * Honda and opponents end up mid-screen far away from each other after the cutscene on hit | ||
* Inflicts a total of 340 damage but 50% of damage is inflicted in one hit at the end | * Inflicts a total of 340 damage but 50% of damage is inflicted in one hit at the end | ||
{{SFV Button FAT|link=https://fullmeter.com/fatonline/#/framedata/movedetail/SFV/E.Honda/normal/Kamigashima}} | |||
}} | }} | ||
}} | }} | ||
| Line 1,284: | Line 1,328: | ||
|confirm=<nowiki>- / - / -</nowiki> | |confirm=<nowiki>- / - / -</nowiki> | ||
|description= | |description= | ||
{{SFV Button FAT|link=https://fullmeter.com/fatonline/#/framedata/movedetail/SFV/E.Honda/normal/Taunt}} | |||
}} | }} | ||
}} | }} | ||
| Line 1,312: | Line 1,357: | ||
|description= | |description= | ||
* Nullifies 1 hit of projectiles | * Nullifies 1 hit of projectiles | ||
{{SFV Button FAT|link=https://fullmeter.com/fatonline/#/framedata/movedetail/SFV/E.Honda/normal/Neko%20Damashi}} | |||
}} | }} | ||
}} | }} | ||
| Line 1,339: | Line 1,385: | ||
* Powers up next Hundred Hand Slap (increased damage, stun, and on hit advantage only) | * Powers up next Hundred Hand Slap (increased damage, stun, and on hit advantage only) | ||
* Allows all normals / command normals to cancel into Hundred Hand Slap even if they are not normally special cancelable | * Allows all normals / command normals to cancel into Hundred Hand Slap even if they are not normally special cancelable | ||
{{SFV Button FAT|link=https://fullmeter.com/fatonline/#/framedata/movedetail/SFV/E.Honda/normal/Sumo%20Spirit}} | |||
}} | }} | ||
}} | }} | ||
| Line 1,367: | Line 1,414: | ||
* Duration of 3000 frames (50 seconds) | * Duration of 3000 frames (50 seconds) | ||
* Unlocks Oni-Daikaku (1000 V-Meter) and Oni-Muso (1200 V-Meter) | * Unlocks Oni-Daikaku (1000 V-Meter) and Oni-Muso (1200 V-Meter) | ||
{{SFV Button FAT|link=https://fullmeter.com/fatonline/#/framedata/movedetail/SFV/E.Honda/normal/Onigawara}} | |||
}} | }} | ||
}} | }} | ||
| Line 1,399: | Line 1,447: | ||
* Has fixed KDA (KDA does not vary depending on distance traveled) on grounded opponents | * Has fixed KDA (KDA does not vary depending on distance traveled) on grounded opponents | ||
* Juggle Limit / Increase / Start: 10 / 1 / 1 | * Juggle Limit / Increase / Start: 10 / 1 / 1 | ||
{{SFV Button FAT|link=https://fullmeter.com/fatonline/#/framedata/movedetail/SFV/E.Honda/vtOne/Oni-Daikaku}} | |||
}} | }} | ||
}} | }} | ||
| Line 1,414: | Line 1,463: | ||
|hit=<nowiki>KD</nowiki> | |hit=<nowiki>KD</nowiki> | ||
|crush=<nowiki>- / - / -</nowiki> | |crush=<nowiki>- / - / -</nowiki> | ||
|block=<nowiki>27</nowiki> | |block=<nowiki>27(GB)</nowiki> | ||
|knockdown=<nowiki>90(87) / 31(8) / 36(13)</nowiki> | |knockdown=<nowiki>90(87) / 31(8) / 36(13)</nowiki> | ||
|damage=<nowiki>180(160)</nowiki> | |damage=<nowiki>180(160)</nowiki> | ||
| Line 1,424: | Line 1,473: | ||
* Spends 1000 V-Meter (33% V-Timer) | * Spends 1000 V-Meter (33% V-Timer) | ||
* Airborne frames 65-96 | * Airborne frames 65-96 | ||
* Causes | * Causes Guard Break (+27 frame advantage) when fully charged | ||
* Only cancelable into Super (Critical Art) on first 3 active frames (up close) | * Only cancelable into Super (Critical Art) on first 3 active frames (up close) | ||
* Has 1 point of armor on frame 4 and onwards during hold (if released early on frames 8-51 then the armor disappears and the headbutt active frames start 3F after release) | * Has 1 point of armor on frame 4 and onwards during hold (if released early on frames 8-51 then the armor disappears and the headbutt active frames start 3F after release) | ||
| Line 1,435: | Line 1,484: | ||
* Recovery and Total frames listed refers to the whiffed version (11+14 recovery frames on hit / block) | * Recovery and Total frames listed refers to the whiffed version (11+14 recovery frames on hit / block) | ||
* Juggle Limit / Increase / Start: 10 / 1 / 1 | * Juggle Limit / Increase / Start: 10 / 1 / 1 | ||
{{SFV Button FAT|link=https://fullmeter.com/fatonline/#/framedata/movedetail/SFV/E.Honda/vtOne/Oni-Daikaku%20(Hold)}} | |||
}} | }} | ||
}} | }} | ||
| Line 1,469: | Line 1,519: | ||
* KDA listed in parentheses is refers to Sumo Headbutt canceled into VT1 Headbutt (+2 extra KDA in corner) | * KDA listed in parentheses is refers to Sumo Headbutt canceled into VT1 Headbutt (+2 extra KDA in corner) | ||
* Juggle Limit / Increase / Start: 10 / 1 / 1 | * Juggle Limit / Increase / Start: 10 / 1 / 1 | ||
{{SFV Button FAT|link=https://fullmeter.com/fatonline/#/framedata/movedetail/SFV/E.Honda/vtOne/Oni-Daikaku%20(Release)}} | |||
}} | }} | ||
}} | }} | ||
| Line 1,500: | Line 1,551: | ||
* Recovery and Total frames listed refers to the whiffed version (11+14 recovery frames on hit) | * Recovery and Total frames listed refers to the whiffed version (11+14 recovery frames on hit) | ||
* Juggle Limit: 11 | * Juggle Limit: 11 | ||
{{SFV Button FAT|link=https://fullmeter.com/fatonline/#/framedata/movedetail/SFV/E.Honda/vtOne/Oni-Muso}} | |||
}} | }} | ||
}} | }} | ||
| Line 1,528: | Line 1,580: | ||
* Duration of 2000 frames (~33 seconds) | * Duration of 2000 frames (~33 seconds) | ||
* Unlocks Iwato Biraki (1000 V-Meter per use) | * Unlocks Iwato Biraki (1000 V-Meter per use) | ||
{{SFV Button FAT|link=https://fullmeter.com/fatonline/#/framedata/movedetail/SFV/E.Honda/normal/Tajikarao}} | |||
}} | }} | ||
}} | }} | ||
| Line 1,556: | Line 1,609: | ||
* Carries opponent to the nearest corner | * Carries opponent to the nearest corner | ||
* Faster startup (17F) and combos if canceled into from Hundred Hand Slap | * Faster startup (17F) and combos if canceled into from Hundred Hand Slap | ||
{{SFV Button FAT|link=https://fullmeter.com/fatonline/#/framedata/movedetail/SFV/E.Honda/vtTwo/Iwato%20Biraki}} | |||
}} | }} | ||
}} | }} | ||
| Line 1,563: | Line 1,617: | ||
=====<font style="visibility:hidden; float:right">V-Shift</font>===== | =====<font style="visibility:hidden; float:right">V-Shift</font>===== | ||
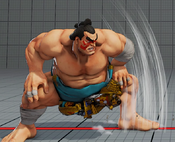
{{MoveData | {{MoveData | ||
|image=SFV_E. | |image=SFV_E.Honda_5MKHP.png | ||
|name=V-Shift | |name=V-Shift | ||
|input= | |input=5MKHP | ||
|data= | |data= | ||
{{AttackData-SFV | {{AttackData-SFV | ||
| Line 1,589: | Line 1,643: | ||
* Costs 300 V-Gauge (1 bar) to use and refunds 150 V-Gauge back (1/2 bar) on a successful V-Shift if the slow-mo is triggered | * Costs 300 V-Gauge (1 bar) to use and refunds 150 V-Gauge back (1/2 bar) on a successful V-Shift if the slow-mo is triggered | ||
* If the V-Shift is successful you can cancel it into a follow-up attack (see V-Shift Break) that's fully invincible and knocks the opponent down on hit | * If the V-Shift is successful you can cancel it into a follow-up attack (see V-Shift Break) that's fully invincible and knocks the opponent down on hit | ||
{{SFV Button FAT|link=https://fullmeter.com/fatonline/#/framedata/movedetail/SFV/E.Honda/normal/V-Shift}} | |||
}} | }} | ||
}} | }} | ||
| Line 1,596: | Line 1,651: | ||
=====<font style="visibility:hidden; float:right">Super Sumo Impact</font>===== | =====<font style="visibility:hidden; float:right">Super Sumo Impact</font>===== | ||
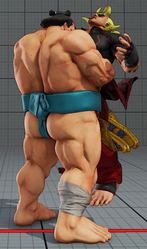
{{MoveData | {{MoveData | ||
|image=SFV_E. | |image=SFV_E.Honda_5MKHP_break.png | ||
|name=Super Sumo Impact | |name=Super Sumo Impact | ||
|input= | |input=5MKHP | ||
|data= | |data= | ||
{{AttackData-SFV | {{AttackData-SFV | ||
| Line 1,607: | Line 1,662: | ||
|crush=<nowiki>- / - / -</nowiki> | |crush=<nowiki>- / - / -</nowiki> | ||
|block=<nowiki>-2</nowiki> | |block=<nowiki>-2</nowiki> | ||
|knockdown=<nowiki> | |knockdown=<nowiki>77 / 18 / 23</nowiki> | ||
|damage=<nowiki>60</nowiki> | |damage=<nowiki>60</nowiki> | ||
|stun=<nowiki>0</nowiki> | |stun=<nowiki>0</nowiki> | ||
| Line 1,615: | Line 1,670: | ||
|description= | |description= | ||
* Fully invincible during startup and active frames | * Fully invincible during startup and active frames | ||
{{SFV Button FAT|link=https://fullmeter.com/fatonline/#/framedata/movedetail/SFV/E.Honda/normal/Super%20Sumo%20Impact}} | |||
}} | }} | ||
}} | }} | ||
| Line 1,641: | Line 1,697: | ||
|description= | |description= | ||
* Strike and Projectile invincible for frames 1-30 | * Strike and Projectile invincible for frames 1-30 | ||
{{SFV Button FAT|link=https://fullmeter.com/fatonline/#/framedata/movedetail/SFV/E.Honda/normal/Raiden-Ho}} | |||
}} | }} | ||
}} | }} | ||
Revision as of 17:56, 13 April 2021
Introduction
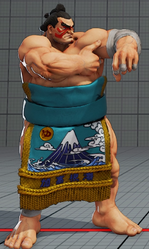
About E.Honda
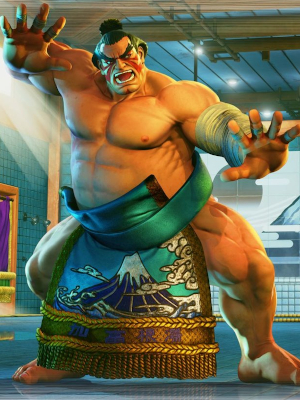
One of the original 8 world warriors joins the fight in season 4.
Honda is possibly the most volatile character in the game. His tools, weirdly enough, give him a very skewed matchup chart compared to every other character in the game. He does better against a lot of top tiers than many other characters however, he has more trouble with some mid and low tiers compared to everyone else as well. This makes him the perfect counter pick character, and to accomplish this, he has some amazing buttons and specials. His Hundred Hand Slap is a plus on block, fast move that moves Honda forward, and his EX Sumo Smash allows him to get in easily and continue his obnoxious pressure. The constant threat of his command grab and armor breaking VT1 only adds to his pressure. If you want an incredibly volatile character that has all the tools he needs to be a great counter pick, then check out Honda.
Final Patch
Players to Watch
| E.Honda | |
|---|---|
| Vitals | |
| Life Points | 1050 |
| Stun Points | 1075 |
| V-Gauge Points | |
| V-Trigger 1 | 3 Bars |
| V-Trigger 2 | 2 Bars |
| Ground Movement | |
| Forward Walk Speed | 0.044 |
| Backward Walk Speed | 0.027 |
| Forward Dash Speed | 20 |
| Backward Dash Speed | 24 |
| Forward Dash Distance | 1.661 |
| Backward Dash Distance | 0.951 |
| Backdash CH Frames | 3-10 |
| Jumping | |
| Back Jump Speed | 49(5+40+4) |
| Neutral Jump Speed | 49(5+40+4) |
| Forward Jump Speed | 48(4+40+4) |
| Forward Jump Distance | 2.08 |
| Backward Jump Distance | 1.8 |
| Throws | |
| Throw Hurtbox | 0.25 |
| Throw Range | 0.9 |
Frame Data & Descriptions are provided by FATOnline.
|
| SFV Frame Data Glossary | |
|---|---|
| Active |
How many frames a move remains active (can hurt opponents) for. |
| Attack |
Attack level is L for low attacks (must be blocked crouching), H is for High attacks (which can be blocked high or low) and M for overhead (must be blocked standing). T is for throw attacks (which cannot be blocked). |
| Cancel options |
Available cancel options.
|
| Confirm windows |
Hit confirm windows written as Specials & CAs/Target Combos/V-Trigger. Notation may denote V-Skill only cancel windows in Specials.
|
| Crush Counter |
Crush Counter hit advantage written as opponent state, frame advantage, and v-gauge gain on hit. |
| Damage |
Attack damage on hit. Notation may denote multi-hit or "sweet spot" damage values on certain frames. |
| Hit/Block |
These are frame advantage values when the attack hits or is blocked. If the number is positive, then the move will end before the defender can act again. If the number is negative, the defender will be able to act before the attacker and maybe even punish. KD refers to knockdown on hit.
|
| Knockdown |
Knockdown advantage against Normal, Quick Rise and Back Rise wake up options. |
| Recovery |
How many frames it takes for a move to finish after it's been active. |
| Startup |
How many frames it takes before the move becomes 'active' or have a hit box. The last startup frame and the first active frame are the same frame, meaning all values are written as Startup + 1. |
| Stun |
Amount of stun added to the opponent's stun bar on hit. |
Normals
Stand LP
Stand MP
Stand HP
Stand LK
Stand MK
Stand HK
Crouch LP
Crouch MP
Crouch HP
Crouch LK
Crouch MK
Crouch HK
Jump LP
Jump MP
Jump HP
Neutral Jump HP
Jump LK
Jump MK
Jump HK
Command Normals
Flying Sumo Press
Harai-Geri
Chikara-Ashi
Target Combos
Tokoshizume
Tsurane Harite
Hirate
Throws
Saba-Ori
Tawara Throw
Special Moves
LP Hundred Hand Slap
MP Hundred Hand Slap
HP Hundred Hand Slap
EX Hundred Hand Slap
LP Sumo Headbutt
MP Sumo Headbutt
HP Sumo Headbutt
EX Sumo Headbutt
LK Sumo Smash
MK Sumo Smash
HK Sumo Smash
EX Sumo Smash
LP Oicho Throw
MP Oicho Throw
HP Oicho Throw
EX Oicho Throw
Critical Art
Kamigashima
Taunts
Taunt
V-System
V-Skill 1
Neko Damashi
V-Skill 2
Sumo Spirit
V-Trigger 1
Onigawara
Oni-Daikaku
Oni-Daikaku (Hold)
Oni-Daikaku (Release)
Oni-Muso
V-Trigger 2
Tajikarao
Iwato Biraki
V-Shift
V-Shift
V-Shift Break
Super Sumo Impact
V-Reversal
Raiden-Ho
