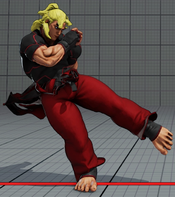
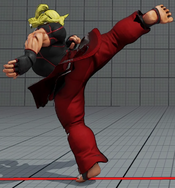
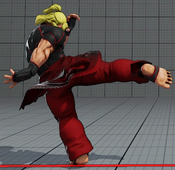
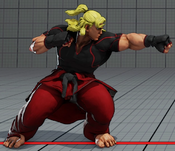
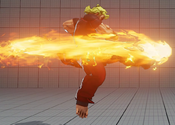
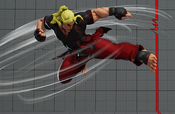
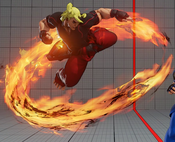
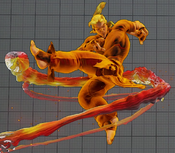
No edit summary |
No edit summary |
||
| Line 5: | Line 5: | ||
|hp=1025 | |hp=1025 | ||
|stun=1050 | |stun=1050 | ||
|vt1= | |vt1=3 Bars | ||
|vt2= | |vt2=2 Bars | ||
|movef=0.05 | |movef=0.05 | ||
|moveb=0.035 | |moveb=0.035 | ||
| Line 47: | Line 47: | ||
|description= | |description= | ||
* Chains into st.LP / cr.LP / cr.LK | * Chains into st.LP / cr.LP / cr.LK | ||
{{SFV Button FAT|link=https://fullmeter.com/fatonline/#/framedata/movedetail/SFV/Ken/normal/Stand%20LP}} | |||
}} | }} | ||
}} | }} | ||
| Line 70: | Line 71: | ||
|confirm=<nowiki>14 / 14 / -</nowiki> | |confirm=<nowiki>14 / 14 / -</nowiki> | ||
|description= | |description= | ||
{{SFV Button FAT|link=https://fullmeter.com/fatonline/#/framedata/movedetail/SFV/Ken/normal/Stand%20MP}} | |||
}} | }} | ||
}} | }} | ||
| Line 94: | Line 96: | ||
|description= | |description= | ||
* If canceled into HK Tatsu from tip range; 1st hit will whiff resulting in the opponent staying grounded at +3 advantage for combo extension | * If canceled into HK Tatsu from tip range; 1st hit will whiff resulting in the opponent staying grounded at +3 advantage for combo extension | ||
{{SFV Button FAT|link=https://fullmeter.com/fatonline/#/framedata/movedetail/SFV/Ken/normal/Stand%20HP}} | |||
}} | }} | ||
}} | }} | ||
| Line 117: | Line 120: | ||
|confirm=<nowiki>- / - / -</nowiki> | |confirm=<nowiki>- / - / -</nowiki> | ||
|description= | |description= | ||
{{SFV Button FAT|link=https://fullmeter.com/fatonline/#/framedata/movedetail/SFV/Ken/normal/Stand%20LK}} | |||
}} | }} | ||
}} | }} | ||
| Line 143: | Line 147: | ||
* Forces opponent into standing state on hit | * Forces opponent into standing state on hit | ||
* Cancelable on whiff into the HK follow-up target combo on frame 18 | * Cancelable on whiff into the HK follow-up target combo on frame 18 | ||
{{SFV Button FAT|link=https://fullmeter.com/fatonline/#/framedata/movedetail/SFV/Ken/normal/Stand%20MK}} | |||
}} | }} | ||
}} | }} | ||
| Line 168: | Line 173: | ||
* Combos into LK Tatsu and LP DP up close | * Combos into LK Tatsu and LP DP up close | ||
* Doesn't get good conversions from Crush Counter mid-screen without canceling into V-Skill / V-Trigger | * Doesn't get good conversions from Crush Counter mid-screen without canceling into V-Skill / V-Trigger | ||
{{SFV Button FAT|link=https://fullmeter.com/fatonline/#/framedata/movedetail/SFV/Ken/normal/Stand%20HK}} | |||
}} | }} | ||
}} | }} | ||
| Line 192: | Line 198: | ||
|description= | |description= | ||
* Chains into st.LP / cr.LP / cr.LK | * Chains into st.LP / cr.LP / cr.LK | ||
{{SFV Button FAT|link=https://fullmeter.com/fatonline/#/framedata/movedetail/SFV/Ken/normal/Crouch%20LP}} | |||
}} | }} | ||
}} | }} | ||
| Line 216: | Line 223: | ||
|description= | |description= | ||
* Collision box shifts pretty far forward during startup (this is the main cause of why Ken's cr.MP combos are so prone to whiffing due to minor collision box changes on opponent) | * Collision box shifts pretty far forward during startup (this is the main cause of why Ken's cr.MP combos are so prone to whiffing due to minor collision box changes on opponent) | ||
{{SFV Button FAT|link=https://fullmeter.com/fatonline/#/framedata/movedetail/SFV/Ken/normal/Crouch%20MP}} | |||
}} | }} | ||
}} | }} | ||
| Line 242: | Line 250: | ||
* Can only Crush Counter on the first active frame | * Can only Crush Counter on the first active frame | ||
* Does 20 less damage (70) past the first active frame | * Does 20 less damage (70) past the first active frame | ||
{{SFV Button FAT|link=https://fullmeter.com/fatonline/#/framedata/movedetail/SFV/Ken/normal/Crouch%20HP}} | |||
}} | }} | ||
}} | }} | ||
| Line 266: | Line 275: | ||
|description= | |description= | ||
* Chains into st.LP / cr.LP / cr.LK | * Chains into st.LP / cr.LP / cr.LK | ||
{{SFV Button FAT|link=https://fullmeter.com/fatonline/#/framedata/movedetail/SFV/Ken/normal/Crouch%20LK}} | |||
}} | }} | ||
}} | }} | ||
| Line 291: | Line 301: | ||
* Hit Confirm notes: *VS1 and VS2 | * Hit Confirm notes: *VS1 and VS2 | ||
* Long special cancel window frames (6 extra special cancel window frames past active frames) | * Long special cancel window frames (6 extra special cancel window frames past active frames) | ||
{{SFV Button FAT|link=https://fullmeter.com/fatonline/#/framedata/movedetail/SFV/Ken/normal/Crouch%20MK}} | |||
}} | }} | ||
}} | }} | ||
| Line 315: | Line 326: | ||
|description= | |description= | ||
* Hit Confirm notes: *VS1 only | * Hit Confirm notes: *VS1 only | ||
{{SFV Button FAT|link=https://fullmeter.com/fatonline/#/framedata/movedetail/SFV/Ken/normal/Crouch%20HK}} | |||
}} | }} | ||
}} | }} | ||
| Line 320: | Line 332: | ||
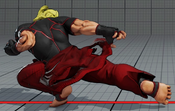
=====<font style="visibility:hidden; float:right">Jump LP</font>===== | =====<font style="visibility:hidden; float:right">Jump LP</font>===== | ||
{{MoveData | {{MoveData | ||
|image= | |image=SFV_Ken_8LP.png | ||
|name=Jump LP | |name=Jump LP | ||
|input= | |input=8LP | ||
|data= | |data= | ||
{{AttackData-SFV | {{AttackData-SFV | ||
| Line 338: | Line 350: | ||
|confirm=<nowiki>- / - / -</nowiki> | |confirm=<nowiki>- / - / -</nowiki> | ||
|description= | |description= | ||
{{SFV Button FAT|link=https://fullmeter.com/fatonline/#/framedata/movedetail/SFV/Ken/normal/Jump%20LP}} | |||
}} | }} | ||
}} | }} | ||
| Line 343: | Line 356: | ||
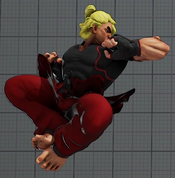
=====<font style="visibility:hidden; float:right">Jump MP</font>===== | =====<font style="visibility:hidden; float:right">Jump MP</font>===== | ||
{{MoveData | {{MoveData | ||
|image= | |image=SFV_Ken_8MP.png | ||
|name=Jump MP | |name=Jump MP | ||
|input= | |input=8MP | ||
|data= | |data= | ||
{{AttackData-SFV | {{AttackData-SFV | ||
| Line 363: | Line 376: | ||
* Strong horizontal hitbox priority | * Strong horizontal hitbox priority | ||
* Removes Ken's leg hurtboxes on frames 4-19 | * Removes Ken's leg hurtboxes on frames 4-19 | ||
{{SFV Button FAT|link=https://fullmeter.com/fatonline/#/framedata/movedetail/SFV/Ken/normal/Jump%20MP}} | |||
}} | }} | ||
}} | }} | ||
| Line 368: | Line 382: | ||
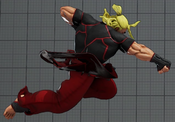
=====<font style="visibility:hidden; float:right">Jump HP</font>===== | =====<font style="visibility:hidden; float:right">Jump HP</font>===== | ||
{{MoveData | {{MoveData | ||
|image= | |image=SFV_Ken_8HP.png | ||
|name=Jump HP | |name=Jump HP | ||
|input= | |input=8HP | ||
|data= | |data= | ||
{{AttackData-SFV | {{AttackData-SFV | ||
| Line 388: | Line 402: | ||
* Decent vertical hitbox reach | * Decent vertical hitbox reach | ||
* Widens Ken's hurtboxes during entire animation | * Widens Ken's hurtboxes during entire animation | ||
{{SFV Button FAT|link=https://fullmeter.com/fatonline/#/framedata/movedetail/SFV/Ken/normal/Jump%20HP}} | |||
}} | }} | ||
}} | }} | ||
| Line 393: | Line 408: | ||
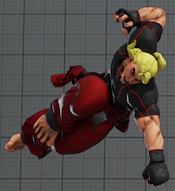
=====<font style="visibility:hidden; float:right">Jump LK</font>===== | =====<font style="visibility:hidden; float:right">Jump LK</font>===== | ||
{{MoveData | {{MoveData | ||
|image= | |image=SFV_Ken_8LK.png | ||
|name=Jump LK | |name=Jump LK | ||
|input= | |input=8LK | ||
|data= | |data= | ||
{{AttackData-SFV | {{AttackData-SFV | ||
| Line 412: | Line 427: | ||
|description= | |description= | ||
* Pretty good air-to-air hitboxes | * Pretty good air-to-air hitboxes | ||
{{SFV Button FAT|link=https://fullmeter.com/fatonline/#/framedata/movedetail/SFV/Ken/normal/Jump%20LK}} | |||
}} | }} | ||
}} | }} | ||
| Line 417: | Line 433: | ||
=====<font style="visibility:hidden; float:right">Jump MK</font>===== | =====<font style="visibility:hidden; float:right">Jump MK</font>===== | ||
{{MoveData | {{MoveData | ||
|image= | |image=SFV_Ken_8MK.png | ||
|name=Jump MK | |name=Jump MK | ||
|input= | |input=8MK | ||
|data= | |data= | ||
{{AttackData-SFV | {{AttackData-SFV | ||
| Line 436: | Line 452: | ||
|description= | |description= | ||
* Can cross-up | * Can cross-up | ||
{{SFV Button FAT|link=https://fullmeter.com/fatonline/#/framedata/movedetail/SFV/Ken/normal/Jump%20MK}} | |||
}} | }} | ||
}} | }} | ||
| Line 441: | Line 458: | ||
=====<font style="visibility:hidden; float:right">Jump HK</font>===== | =====<font style="visibility:hidden; float:right">Jump HK</font>===== | ||
{{MoveData | {{MoveData | ||
|image= | |image=SFV_Ken_8HK.png | ||
|name=Jump HK | |name=Jump HK | ||
|input= | |input=8HK | ||
|data= | |data= | ||
{{AttackData-SFV | {{AttackData-SFV | ||
| Line 460: | Line 477: | ||
|description= | |description= | ||
* Ken's furthest reaching horizontal jump-in with decent hitbox priority | * Ken's furthest reaching horizontal jump-in with decent hitbox priority | ||
{{SFV Button FAT|link=https://fullmeter.com/fatonline/#/framedata/movedetail/SFV/Ken/normal/Jump%20HK}} | |||
}} | }} | ||
}} | }} | ||
| Line 486: | Line 504: | ||
|description= | |description= | ||
* First active frame cannot hit crouching characters (so this Overhead becomes +3 on hit on crouching opponents) | * First active frame cannot hit crouching characters (so this Overhead becomes +3 on hit on crouching opponents) | ||
{{SFV Button FAT|link=https://fullmeter.com/fatonline/#/framedata/movedetail/SFV/Ken/normal/Thunder%20Kick}} | |||
}} | }} | ||
}} | }} | ||
| Line 510: | Line 529: | ||
|description= | |description= | ||
* Can be used to feint the Overhead and go for a low (or some oki setup) | * Can be used to feint the Overhead and go for a low (or some oki setup) | ||
{{SFV Button FAT|link=https://fullmeter.com/fatonline/#/framedata/movedetail/SFV/Ken/normal/Thunder%20Kick}} | |||
}} | }} | ||
}} | }} | ||
| Line 533: | Line 553: | ||
|confirm=<nowiki>- / - / -</nowiki> | |confirm=<nowiki>- / - / -</nowiki> | ||
|description= | |description= | ||
{{SFV Button FAT|link=https://fullmeter.com/fatonline/#/framedata/movedetail/SFV/Ken/normal/Thunder%20Kick}} | |||
}} | }} | ||
}} | }} | ||
| Line 556: | Line 577: | ||
|confirm=<nowiki>10 / 10 / 20</nowiki> | |confirm=<nowiki>10 / 10 / 20</nowiki> | ||
|description= | |description= | ||
{{SFV Button FAT|link=https://fullmeter.com/fatonline/#/framedata/movedetail/SFV/Ken/normal/Thunder%20Kick}} | |||
}} | }} | ||
}} | }} | ||
| Line 583: | Line 605: | ||
* Hit Confirm notes: *VS2 | * Hit Confirm notes: *VS2 | ||
* Target combo can be performed on whiff | * Target combo can be performed on whiff | ||
{{SFV Button FAT|link=https://fullmeter.com/fatonline/#/framedata/movedetail/SFV/Ken/normal/Chin%20Buster%202nd}} | |||
}} | }} | ||
}} | }} | ||
| Line 609: | Line 632: | ||
* Second HK hit whiffs on standing (but the initial MK forces standing on hit) | * Second HK hit whiffs on standing (but the initial MK forces standing on hit) | ||
* Second HK hit is a tight frametrap when canceled from MK on block | * Second HK hit is a tight frametrap when canceled from MK on block | ||
{{SFV Button FAT|link=https://fullmeter.com/fatonline/#/framedata/movedetail/SFV/Ken/normal/Lion%20Breaker}} | |||
}} | }} | ||
}} | }} | ||
| Line 636: | Line 660: | ||
|description= | |description= | ||
* Still has a non-legit psuedo-throw loop in the corner if the opponent wakes up with a fast button that moves their grab-box forward (such as Akuma's 3F st.LP), but the throw would otherwise whiff on moves that don't extend their grab-box forward | * Still has a non-legit psuedo-throw loop in the corner if the opponent wakes up with a fast button that moves their grab-box forward (such as Akuma's 3F st.LP), but the throw would otherwise whiff on moves that don't extend their grab-box forward | ||
{{SFV Button FAT|link=https://fullmeter.com/fatonline/#/framedata/movedetail/SFV/Ken/normal/Knee%20Bash}} | |||
}} | }} | ||
}} | }} | ||
| Line 661: | Line 686: | ||
|description= | |description= | ||
* NO MOVE Bug: Ken recovers 1 frame slower (KDA: +69/10/10) if he doesn't input a normal/special after back throw | * NO MOVE Bug: Ken recovers 1 frame slower (KDA: +69/10/10) if he doesn't input a normal/special after back throw | ||
{{SFV Button FAT|link=https://fullmeter.com/fatonline/#/framedata/movedetail/SFV/Ken/normal/Hell%20Wheel}} | |||
}} | }} | ||
}} | }} | ||
| Line 694: | Line 720: | ||
* Not projectile invincible on extended arms or leg during startup | * Not projectile invincible on extended arms or leg during startup | ||
* Juggle Limit / Increase / Start: 1 / 1 / 3 | * Juggle Limit / Increase / Start: 1 / 1 / 3 | ||
{{SFV Button FAT|link=https://fullmeter.com/fatonline/#/framedata/movedetail/SFV/Ken/normal/LP%20Hadoken}} | |||
}} | }} | ||
{{AttackData-SFV | {{AttackData-SFV | ||
|version= | |version=VT1 | ||
|startup=<nowiki>13</nowiki> | |startup=<nowiki>13</nowiki> | ||
|active=<nowiki>-</nowiki> | |active=<nowiki>-</nowiki> | ||
| Line 746: | Line 773: | ||
* Not projectile invincible on extended arms or leg during startup | * Not projectile invincible on extended arms or leg during startup | ||
* Juggle Limit / Increase / Start: 1 / 1 / 3 | * Juggle Limit / Increase / Start: 1 / 1 / 3 | ||
{{SFV Button FAT|link=https://fullmeter.com/fatonline/#/framedata/movedetail/SFV/Ken/normal/MP%20Hadoken}} | |||
}} | }} | ||
{{AttackData-SFV | {{AttackData-SFV | ||
|version= | |version=VT1 | ||
|startup=<nowiki>13</nowiki> | |startup=<nowiki>13</nowiki> | ||
|active=<nowiki>-</nowiki> | |active=<nowiki>-</nowiki> | ||
| Line 798: | Line 826: | ||
* Not projectile invincible on extended arms or leg during startup | * Not projectile invincible on extended arms or leg during startup | ||
* Juggle Limit / Increase / Start: 1 / 1 / 3 | * Juggle Limit / Increase / Start: 1 / 1 / 3 | ||
{{SFV Button FAT|link=https://fullmeter.com/fatonline/#/framedata/movedetail/SFV/Ken/normal/HP%20Hadoken}} | |||
}} | }} | ||
{{AttackData-SFV | {{AttackData-SFV | ||
|version= | |version=VT1 | ||
|startup=<nowiki>13</nowiki> | |startup=<nowiki>13</nowiki> | ||
|active=<nowiki>-</nowiki> | |active=<nowiki>-</nowiki> | ||
| Line 850: | Line 879: | ||
* No hurtbox on extended arms of legs until frame 13 | * No hurtbox on extended arms of legs until frame 13 | ||
* Juggle Limit / Increase / Start: 3*3 / 0*1 / 0*3 | * Juggle Limit / Increase / Start: 3*3 / 0*1 / 0*3 | ||
{{SFV Button FAT|link=https://fullmeter.com/fatonline/#/framedata/movedetail/SFV/Ken/normal/EX%20Hadoken}} | |||
}} | }} | ||
{{AttackData-SFV | {{AttackData-SFV | ||
|version= | |version=VT1 | ||
|startup=<nowiki>12</nowiki> | |startup=<nowiki>12</nowiki> | ||
|active=<nowiki>-</nowiki> | |active=<nowiki>-</nowiki> | ||
| Line 905: | Line 935: | ||
* Active frames 2-3: Juggle Limit / Increase / Start: 1 / 1 / 99 | * Active frames 2-3: Juggle Limit / Increase / Start: 1 / 1 / 99 | ||
* Active frames 4-11: Juggle Limit / Increase / Start: 4 / 1 / 99 | * Active frames 4-11: Juggle Limit / Increase / Start: 4 / 1 / 99 | ||
{{SFV Button FAT|link=https://fullmeter.com/fatonline/#/framedata/movedetail/SFV/Ken/normal/LP%20Shoryuken}} | |||
}} | }} | ||
{{AttackData-SFV | {{AttackData-SFV | ||
|version= | |version=VT1 | ||
|startup=<nowiki>3</nowiki> | |startup=<nowiki>3</nowiki> | ||
|active=<nowiki>12</nowiki> | |active=<nowiki>12</nowiki> | ||
| Line 963: | Line 994: | ||
* Active frame 4: Juggle Limit / Increase / Start: 3 / 1 / 3 | * Active frame 4: Juggle Limit / Increase / Start: 3 / 1 / 3 | ||
* Active frames 5-12: Juggle Limit / Increase / Start: 3 / 99 / 3 | * Active frames 5-12: Juggle Limit / Increase / Start: 3 / 99 / 3 | ||
{{SFV Button FAT|link=https://fullmeter.com/fatonline/#/framedata/movedetail/SFV/Ken/normal/MP%20Shoryuken}} | |||
}} | }} | ||
{{AttackData-SFV | {{AttackData-SFV | ||
|version= | |version=VT1 | ||
|startup=<nowiki>4</nowiki> | |startup=<nowiki>4</nowiki> | ||
|active=<nowiki>3*10</nowiki> | |active=<nowiki>3*10</nowiki> | ||
| Line 1,019: | Line 1,051: | ||
* Ken is in a counter-hit state for the entire duration | * Ken is in a counter-hit state for the entire duration | ||
* Juggle Limit / Increase / Start: 2*6*7 / 1*1*99 / 3*3*1 (1st hit has +5 Juggle Start on airborne) | * Juggle Limit / Increase / Start: 2*6*7 / 1*1*99 / 3*3*1 (1st hit has +5 Juggle Start on airborne) | ||
{{SFV Button FAT|link=https://fullmeter.com/fatonline/#/framedata/movedetail/SFV/Ken/normal/HP%20Shoryuken}} | |||
}} | }} | ||
{{AttackData-SFV | {{AttackData-SFV | ||
|version= | |version=VT1 | ||
|startup=<nowiki>4</nowiki> | |startup=<nowiki>4</nowiki> | ||
|active=<nowiki>2*1*1*3*7</nowiki> | |active=<nowiki>2*1*1*3*7</nowiki> | ||
| Line 1,079: | Line 1,112: | ||
* There is a 7-frame punishment gap between the first and second uppercuts (grounded trade with 8f) which is identical to a V-Trigger cancel situation, also -7 oB | * There is a 7-frame punishment gap between the first and second uppercuts (grounded trade with 8f) which is identical to a V-Trigger cancel situation, also -7 oB | ||
* Can only cancel into VT2 on first rep | * Can only cancel into VT2 on first rep | ||
{{SFV Button FAT|link=https://fullmeter.com/fatonline/#/framedata/movedetail/SFV/Ken/normal/EX%20Shoryuken}} | |||
}} | }} | ||
{{AttackData-SFV | {{AttackData-SFV | ||
|version= | |version=VT1 | ||
|startup=<nowiki>4</nowiki> | |startup=<nowiki>4</nowiki> | ||
|active=<nowiki>2*1*5(18)2*1*1*1*2*4</nowiki> | |active=<nowiki>2*1*5(18)2*1*1*1*2*4</nowiki> | ||
| Line 1,133: | Line 1,167: | ||
* Has a 3rd hit that only hits behind Ken | * Has a 3rd hit that only hits behind Ken | ||
* Juggle Limit / Increase / Start: 1*1*1 / 1*1*5 / 1*1*1 | * Juggle Limit / Increase / Start: 1*1*1 / 1*1*5 / 1*1*1 | ||
{{SFV Button FAT|link=https://fullmeter.com/fatonline/#/framedata/movedetail/SFV/Ken/normal/LK%20Tatsumaki%20Senpukyaku}} | |||
}} | }} | ||
{{AttackData-SFV | {{AttackData-SFV | ||
|version= | |version=VT1 | ||
|startup=<nowiki>3</nowiki> | |startup=<nowiki>3</nowiki> | ||
|active=<nowiki>2(5)4(2)2</nowiki> | |active=<nowiki>2(5)4(2)2</nowiki> | ||
| Line 1,187: | Line 1,222: | ||
* 3rd and 5th hit behind Ken | * 3rd and 5th hit behind Ken | ||
* Juggle Limit / Increase / Start: 1*1*1*6*1 / 1*1*1*5*1 / 1*6*6*1*1 | * Juggle Limit / Increase / Start: 1*1*1*6*1 / 1*1*1*5*1 / 1*6*6*1*1 | ||
{{SFV Button FAT|link=https://fullmeter.com/fatonline/#/framedata/movedetail/SFV/Ken/normal/MK%20Tatsumaki%20Senpukyaku}} | |||
}} | }} | ||
{{AttackData-SFV | {{AttackData-SFV | ||
|version= | |version=VT1 | ||
|startup=<nowiki>6</nowiki> | |startup=<nowiki>6</nowiki> | ||
|active=<nowiki>2(5)5(1)3(3)3(3)3</nowiki> | |active=<nowiki>2(5)5(1)3(3)3(3)3</nowiki> | ||
| Line 1,242: | Line 1,278: | ||
* First active frame of the second hit cannot hit standing opponents | * First active frame of the second hit cannot hit standing opponents | ||
* Juggle Limit / Increase / Start: 1*3*4*5 / 1*1*1*1 / 1*1*1*1 | * Juggle Limit / Increase / Start: 1*3*4*5 / 1*1*1*1 / 1*1*1*1 | ||
{{SFV Button FAT|link=https://fullmeter.com/fatonline/#/framedata/movedetail/SFV/Ken/normal/HK%20Tatsumaki%20Senpukyaku}} | |||
}} | }} | ||
{{AttackData-SFV | {{AttackData-SFV | ||
|version= | |version=VT1 | ||
|startup=<nowiki>13</nowiki> | |startup=<nowiki>13</nowiki> | ||
|active=<nowiki>4(10)2(10)2(10)3</nowiki> | |active=<nowiki>4(10)2(10)2(10)3</nowiki> | ||
| Line 1,295: | Line 1,332: | ||
* Has pretty far horizontal reach on the 1st hit (can be used to punish some moves from far away) | * Has pretty far horizontal reach on the 1st hit (can be used to punish some moves from far away) | ||
* Juggle Limit: 2*7*7*8*8 | * Juggle Limit: 2*7*7*8*8 | ||
{{SFV Button FAT|link=https://fullmeter.com/fatonline/#/framedata/movedetail/SFV/Ken/normal/EX%20Tatsumaki%20Senpukyaku}} | |||
}} | }} | ||
{{AttackData-SFV | {{AttackData-SFV | ||
|version= | |version=VT1 | ||
|startup=<nowiki>6</nowiki> | |startup=<nowiki>6</nowiki> | ||
|active=<nowiki>5(8)3(4)3(3)3(5)2</nowiki> | |active=<nowiki>5(8)3(4)3(3)3(5)2</nowiki> | ||
| Line 1,319: | Line 1,357: | ||
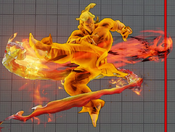
=====<font style="visibility:hidden; float:right">LK Air Tatsumaki Senpukyaku</font>===== | =====<font style="visibility:hidden; float:right">LK Air Tatsumaki Senpukyaku</font>===== | ||
{{MoveData | {{MoveData | ||
|image=SFV_Ken_214LK(air).png | |image=SFV_Ken_214LK (air).png | ||
|caption=Normal | |caption=Normal | ||
|image2=SFV_Ken_214LK(air)_vt1.png | |image2=SFV_Ken_214LK (air)_vt1.png | ||
|caption2=V-Trigger 1 | |caption2=V-Trigger 1 | ||
|name=LK Air Tatsumaki Senpukyaku | |name=LK Air Tatsumaki Senpukyaku | ||
|input=214LK(air) | |input=214LK (air) | ||
|data= | |data= | ||
{{AttackData-SFV | {{AttackData-SFV | ||
| Line 1,343: | Line 1,381: | ||
* Can cross-up | * Can cross-up | ||
* Frame Advantage varies depending on angle and height | * Frame Advantage varies depending on angle and height | ||
{{SFV Button FAT|link=https://fullmeter.com/fatonline/#/framedata/movedetail/SFV/Ken/normal/LK%20Air%20Tatsumaki%20Senpukyaku}} | |||
}} | }} | ||
{{AttackData-SFV | {{AttackData-SFV | ||
|version= | |version=VT1 | ||
|startup=<nowiki>9</nowiki> | |startup=<nowiki>9</nowiki> | ||
|active=<nowiki>2(6)2(5)2</nowiki> | |active=<nowiki>2(6)2(5)2</nowiki> | ||
| Line 1,368: | Line 1,407: | ||
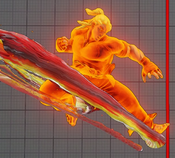
=====<font style="visibility:hidden; float:right">MK Air Tatsumaki Senpukyaku</font>===== | =====<font style="visibility:hidden; float:right">MK Air Tatsumaki Senpukyaku</font>===== | ||
{{MoveData | {{MoveData | ||
|image=SFV_Ken_214MK(air).png | |image=SFV_Ken_214MK (air).png | ||
|caption=Normal | |caption=Normal | ||
|image2=SFV_Ken_214MK(air)_vt1.png | |image2=SFV_Ken_214MK (air)_vt1.png | ||
|caption2=V-Trigger 1 | |caption2=V-Trigger 1 | ||
|name=MK Air Tatsumaki Senpukyaku | |name=MK Air Tatsumaki Senpukyaku | ||
|input=214MK(air) | |input=214MK (air) | ||
|data= | |data= | ||
{{AttackData-SFV | {{AttackData-SFV | ||
| Line 1,393: | Line 1,432: | ||
* On Block ranges from: 0 -> +6 | * On Block ranges from: 0 -> +6 | ||
* Frame Advantage varies depending on angle and height | * Frame Advantage varies depending on angle and height | ||
{{SFV Button FAT|link=https://fullmeter.com/fatonline/#/framedata/movedetail/SFV/Ken/normal/MK%20Air%20Tatsumaki%20Senpukyaku}} | |||
}} | }} | ||
{{AttackData-SFV | {{AttackData-SFV | ||
|version= | |version=VT1 | ||
|startup=<nowiki>9</nowiki> | |startup=<nowiki>9</nowiki> | ||
|active=<nowiki>2(5)2(4)2</nowiki> | |active=<nowiki>2(5)2(4)2</nowiki> | ||
| Line 1,418: | Line 1,458: | ||
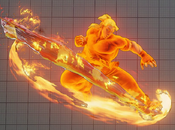
=====<font style="visibility:hidden; float:right">HK Air Tatsumaki Senpukyaku</font>===== | =====<font style="visibility:hidden; float:right">HK Air Tatsumaki Senpukyaku</font>===== | ||
{{MoveData | {{MoveData | ||
|image=SFV_Ken_214HK(air).png | |image=SFV_Ken_214HK (air).png | ||
|caption=Normal | |caption=Normal | ||
|image2=SFV_Ken_214HK(air)_vt1.png | |image2=SFV_Ken_214HK (air)_vt1.png | ||
|caption2=V-Trigger 1 | |caption2=V-Trigger 1 | ||
|name=HK Air Tatsumaki Senpukyaku | |name=HK Air Tatsumaki Senpukyaku | ||
|input=214HK(air) | |input=214HK (air) | ||
|data= | |data= | ||
{{AttackData-SFV | {{AttackData-SFV | ||
| Line 1,443: | Line 1,483: | ||
* On Block ranges from: 0 -> +6 | * On Block ranges from: 0 -> +6 | ||
* Frame Advantage varies depending on angle and height | * Frame Advantage varies depending on angle and height | ||
{{SFV Button FAT|link=https://fullmeter.com/fatonline/#/framedata/movedetail/SFV/Ken/normal/HK%20Air%20Tatsumaki%20Senpukyaku}} | |||
}} | }} | ||
{{AttackData-SFV | {{AttackData-SFV | ||
|version= | |version=VT1 | ||
|startup=<nowiki>9</nowiki> | |startup=<nowiki>9</nowiki> | ||
|active=<nowiki>2(4)2(3)2</nowiki> | |active=<nowiki>2(4)2(3)2</nowiki> | ||
| Line 1,468: | Line 1,509: | ||
=====<font style="visibility:hidden; float:right">EX Air Tatsumaki Senpukyaku</font>===== | =====<font style="visibility:hidden; float:right">EX Air Tatsumaki Senpukyaku</font>===== | ||
{{MoveData | {{MoveData | ||
|image=SFV_Ken_214KK(air).png | |image=SFV_Ken_214KK (air).png | ||
|caption=Normal | |caption=Normal | ||
|image2=SFV_Ken_214KK(air)_vt1.png | |image2=SFV_Ken_214KK (air)_vt1.png | ||
|caption2=V-Trigger 1 | |caption2=V-Trigger 1 | ||
|name=EX Air Tatsumaki Senpukyaku | |name=EX Air Tatsumaki Senpukyaku | ||
|input=214KK(air) | |input=214KK (air) | ||
|data= | |data= | ||
{{AttackData-SFV | {{AttackData-SFV | ||
| Line 1,493: | Line 1,534: | ||
* KDA varies depending on angle and height | * KDA varies depending on angle and height | ||
* Cannot cross-up | * Cannot cross-up | ||
{{SFV Button FAT|link=https://fullmeter.com/fatonline/#/framedata/movedetail/SFV/Ken/normal/EX%20Air%20Tatsumaki%20Senpukyaku}} | |||
}} | }} | ||
{{AttackData-SFV | {{AttackData-SFV | ||
|version= | |version=VT1 | ||
|startup=<nowiki>8</nowiki> | |startup=<nowiki>8</nowiki> | ||
|active=<nowiki>2(6)2(7)2</nowiki> | |active=<nowiki>2(6)2(7)2</nowiki> | ||
| Line 1,517: | Line 1,559: | ||
}} | }} | ||
== Critical | == Critical Art == | ||
=====<font style="visibility:hidden; float:right">Guren Enjikyaku</font>===== | =====<font style="visibility:hidden; float:right">Guren Enjikyaku</font>===== | ||
| Line 1,541: | Line 1,583: | ||
* Completely invincible on frames 1-5 | * Completely invincible on frames 1-5 | ||
* Not actually airborne at all | * Not actually airborne at all | ||
{{SFV Button FAT|link=https://fullmeter.com/fatonline/#/framedata/movedetail/SFV/Ken/normal/Guren%20Enjikyaku}} | |||
}} | }} | ||
}} | }} | ||
| Line 1,566: | Line 1,609: | ||
|confirm=<nowiki>- / - / -</nowiki> | |confirm=<nowiki>- / - / -</nowiki> | ||
|description= | |description= | ||
{{SFV Button FAT|link=https://fullmeter.com/fatonline/#/framedata/movedetail/SFV/Ken/normal/Taunt}} | |||
}} | }} | ||
}} | }} | ||
| Line 1,596: | Line 1,640: | ||
* Cancels into Quick Step Kick follow-up on the 16th frame of buttons are held down until then | * Cancels into Quick Step Kick follow-up on the 16th frame of buttons are held down until then | ||
* Rewards counter-hit to opponent if hit during any frames of the Run itself | * Rewards counter-hit to opponent if hit during any frames of the Run itself | ||
{{SFV Button FAT|link=https://fullmeter.com/fatonline/#/framedata/movedetail/SFV/Ken/normal/Run}} | |||
}} | }} | ||
}} | }} | ||
| Line 1,623: | Line 1,668: | ||
* 3 extra KDA when juggled after b+MP > HP target combo | * 3 extra KDA when juggled after b+MP > HP target combo | ||
* Juggle Limit / Increase / Start: 1 / 0 / 3 | * Juggle Limit / Increase / Start: 1 / 0 / 3 | ||
{{SFV Button FAT|link=https://fullmeter.com/fatonline/#/framedata/movedetail/SFV/Ken/normal/Quick%20Step%20Kick}} | |||
}} | }} | ||
}} | }} | ||
| Line 1,660: | Line 1,706: | ||
* Can hit on later active frames with good spacing | * Can hit on later active frames with good spacing | ||
* Builds 80/40 V-Gauge on Hit / Block | * Builds 80/40 V-Gauge on Hit / Block | ||
{{SFV Button FAT|link=https://fullmeter.com/fatonline/#/framedata/movedetail/SFV/Ken/normal/Ryusenkyaku}} | |||
}} | }} | ||
{{AttackData-SFV | {{AttackData-SFV | ||
|version= | |version=VT1 | ||
|startup=<nowiki>5+21 (3+21)</nowiki> | |startup=<nowiki>5+21 (3+21)</nowiki> | ||
|active=<nowiki>4</nowiki> | |active=<nowiki>4</nowiki> | ||
| Line 1,716: | Line 1,763: | ||
* Can hit on later active frames with good spacing | * Can hit on later active frames with good spacing | ||
* Builds 100/50 V-Gauge on Hit / Block | * Builds 100/50 V-Gauge on Hit / Block | ||
{{SFV Button FAT|link=https://fullmeter.com/fatonline/#/framedata/movedetail/SFV/Ken/normal/Ryusenkyaku%20(hold)}} | |||
}} | }} | ||
{{AttackData-SFV | {{AttackData-SFV | ||
|version= | |version=VT1 | ||
|startup=<nowiki>43(36)</nowiki> | |startup=<nowiki>43(36)</nowiki> | ||
|active=<nowiki>7</nowiki> | |active=<nowiki>7</nowiki> | ||
| Line 1,770: | Line 1,818: | ||
* Can hit on later active frames with good spacing | * Can hit on later active frames with good spacing | ||
* Builds 80/40 V-Gauge on Hit / Block | * Builds 80/40 V-Gauge on Hit / Block | ||
{{SFV Button FAT|link=https://fullmeter.com/fatonline/#/framedata/movedetail/SFV/Ken/normal/Ryusenkyaku%20(release)}} | |||
}} | }} | ||
{{AttackData-SFV | {{AttackData-SFV | ||
|version= | |version=VT1 | ||
|startup=<nowiki>21</nowiki> | |startup=<nowiki>21</nowiki> | ||
|active=<nowiki>4</nowiki> | |active=<nowiki>4</nowiki> | ||
| Line 1,820: | Line 1,869: | ||
* Makes Ken more Ken; his body heat reaching 100°C | * Makes Ken more Ken; his body heat reaching 100°C | ||
* Transforms most of Ken's tatsus into projectile type hitboxes instead of strike hitboxes (this can be a detriment in matchups with easy access to Projectile invincible moves) | * Transforms most of Ken's tatsus into projectile type hitboxes instead of strike hitboxes (this can be a detriment in matchups with easy access to Projectile invincible moves) | ||
{{SFV Button FAT|link=https://fullmeter.com/fatonline/#/framedata/movedetail/SFV/Ken/normal/Heat%20Rush}} | |||
}} | }} | ||
}} | }} | ||
| Line 1,834: | Line 1,884: | ||
|startup=<nowiki>9(7)</nowiki> | |startup=<nowiki>9(7)</nowiki> | ||
|active=<nowiki>4(3)3(2)3(2)3(2)3</nowiki> | |active=<nowiki>4(3)3(2)3(2)3(2)3</nowiki> | ||
|recovery=<nowiki> | |recovery=<nowiki>2830</nowiki> | ||
|hit=<nowiki>KD</nowiki> | |hit=<nowiki>KD</nowiki> | ||
|crush=<nowiki>- / - / -</nowiki> | |crush=<nowiki>- / - / -</nowiki> | ||
| Line 1,855: | Line 1,905: | ||
* On HIT only: Can cancel into specials / V-Skills during grounded recovery frames | * On HIT only: Can cancel into specials / V-Skills during grounded recovery frames | ||
* Can only continue into higher level Shinryukens on hit by mashing the punch button | * Can only continue into higher level Shinryukens on hit by mashing the punch button | ||
* After doing this lvl 1 Shinryuken, before the V-Timer depletes Ken can do either: 3x lvl 1 Shinryukens | * After doing this lvl 1 Shinryuken, before the V-Timer depletes Ken can do either: 3x lvl 1 Shinryukens ** 1x lvl 1 + 1x lvl 2 Shinryuken ** 1x lvl 3 Shinryuken | ||
* The first hit is on frame 9 of startup but there is a big hitbox on frame 7 of startup that pulls the opponent towards Ken if it connects with their hurtboxes (so it can be used to whiff punish from very far away) | * The first hit is on frame 9 of startup but there is a big hitbox on frame 7 of startup that pulls the opponent towards Ken if it connects with their hurtboxes (so it can be used to whiff punish from very far away) | ||
* Can hit cross-up (behind Ken) from 2nd hit onwards | * Can hit cross-up (behind Ken) from 2nd hit onwards | ||
{{SFV Button FAT|link=https://fullmeter.com/fatonline/#/framedata/movedetail/SFV/Ken/normal/Shinryuken%20lvl%201}} | |||
}} | }} | ||
}} | }} | ||
| Line 1,893: | Line 1,944: | ||
* The first hit is on frame 9 of startup but there is a big hitbox on frame 7 of startup that pulls the opponent towards Ken if it connects with their hurtboxes (so it can be used to whiff punish from very far away) | * The first hit is on frame 9 of startup but there is a big hitbox on frame 7 of startup that pulls the opponent towards Ken if it connects with their hurtboxes (so it can be used to whiff punish from very far away) | ||
* Can hit cross-up (behind Ken) from 2nd hit onwards | * Can hit cross-up (behind Ken) from 2nd hit onwards | ||
{{SFV Button FAT|link=https://fullmeter.com/fatonline/#/framedata/movedetail/SFV/Ken/normal/Shinryuken%20lvl%202}} | |||
}} | }} | ||
}} | }} | ||
| Line 1,928: | Line 1,980: | ||
* The first hit is on frame 9 of startup but there is a big hitbox on frame 7 of startup that pulls the opponent towards Ken if it connects with their hurtboxes (so it can be used to whiff punish from very far away) | * The first hit is on frame 9 of startup but there is a big hitbox on frame 7 of startup that pulls the opponent towards Ken if it connects with their hurtboxes (so it can be used to whiff punish from very far away) | ||
* Can hit cross-up (behind Ken) from 2nd hit onwards | * Can hit cross-up (behind Ken) from 2nd hit onwards | ||
{{SFV Button FAT|link=https://fullmeter.com/fatonline/#/framedata/movedetail/SFV/Ken/normal/Shinryuken%20lvl%203}} | |||
}} | }} | ||
}} | }} | ||
| Line 1,935: | Line 1,988: | ||
=====<font style="visibility:hidden; float:right">V-Shift</font>===== | =====<font style="visibility:hidden; float:right">V-Shift</font>===== | ||
{{MoveData | {{MoveData | ||
|image= | |image=SFV_Ken_5MKHP.png | ||
|name=V-Shift | |name=V-Shift | ||
|input= | |input=5MKHP | ||
|data= | |data= | ||
{{AttackData-SFV | {{AttackData-SFV | ||
| Line 1,961: | Line 2,014: | ||
* Costs 300 V-Gauge (1 bar) to use and refunds 150 V-Gauge back (1/2 bar) on a successful V-Shift if the slow-mo is triggered | * Costs 300 V-Gauge (1 bar) to use and refunds 150 V-Gauge back (1/2 bar) on a successful V-Shift if the slow-mo is triggered | ||
* If the V-Shift is successful you can cancel it into a follow-up attack (see V-Shift Break) that's fully invincible and knocks the opponent down on hit | * If the V-Shift is successful you can cancel it into a follow-up attack (see V-Shift Break) that's fully invincible and knocks the opponent down on hit | ||
{{SFV Button FAT|link=https://fullmeter.com/fatonline/#/framedata/movedetail/SFV/Ken/normal/V-Shift}} | |||
}} | }} | ||
}} | }} | ||
| Line 1,968: | Line 2,022: | ||
=====<font style="visibility:hidden; float:right">Shadow Thunder-Kick</font>===== | =====<font style="visibility:hidden; float:right">Shadow Thunder-Kick</font>===== | ||
{{MoveData | {{MoveData | ||
|image= | |image=SFV_Ken_5MKHP_break.png | ||
|name=Shadow Thunder-Kick | |name=Shadow Thunder-Kick | ||
|input= | |input=5MKHP | ||
|data= | |data= | ||
{{AttackData-SFV | {{AttackData-SFV | ||
| Line 1,979: | Line 2,033: | ||
|crush=<nowiki>- / - / -</nowiki> | |crush=<nowiki>- / - / -</nowiki> | ||
|block=<nowiki>-2</nowiki> | |block=<nowiki>-2</nowiki> | ||
|knockdown=<nowiki> | |knockdown=<nowiki>72 / 13 / 18</nowiki> | ||
|damage=<nowiki>60</nowiki> | |damage=<nowiki>60</nowiki> | ||
|stun=<nowiki>0</nowiki> | |stun=<nowiki>0</nowiki> | ||
| Line 1,987: | Line 2,041: | ||
|description= | |description= | ||
* Fully invincible during startup and active frames | * Fully invincible during startup and active frames | ||
{{SFV Button FAT|link=https://fullmeter.com/fatonline/#/framedata/movedetail/SFV/Ken/normal/Shadow%20Thunder-Kick}} | |||
}} | }} | ||
}} | }} | ||
| Line 2,015: | Line 2,070: | ||
* No longer airborne at any point | * No longer airborne at any point | ||
* Does not reward extra frame advantage on counter-hit | * Does not reward extra frame advantage on counter-hit | ||
{{SFV Button FAT|link=https://fullmeter.com/fatonline/#/framedata/movedetail/SFV/Ken/normal/Senpu%20Nataotoshi}} | |||
}} | }} | ||
}} | }} | ||
Revision as of 18:06, 13 April 2021
Introduction
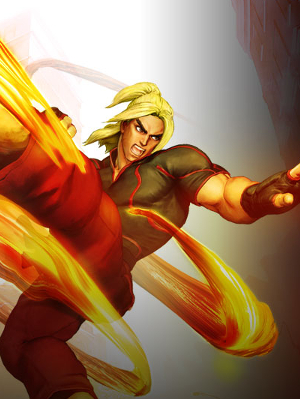
About Ken
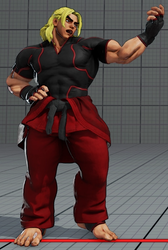
Ken needs little introduction. One of the two famous shotos, he's a beginner-friendly character. A bit unlike in the past, his tools are now more directly oriented towards rushdown, and is now more easily seperatable from Ryu in terms of gameplay. He has a slowish fireball and bad pokes, but instead has great corner carry, great mobility, solid damage and some of the better v-meter building in the game. Despite that, one of this most notable weaknesses in his offensive game is that he doesn't gain many + frames on block from his normals, limiting his pressure game. Overall, Ken isn't a bad character at all to start.
| Strengths | Weaknesses |
|---|---|
|
|
Final Patch
Players to Watch
- ChrisT
- Kenpi
- Momochi
| Ken | |
|---|---|
| Vitals | |
| Life Points | 1025 |
| Stun Points | 1050 |
| V-Gauge Points | |
| V-Trigger 1 | 3 Bars |
| V-Trigger 2 | 2 Bars |
| Ground Movement | |
| Forward Walk Speed | 0.05 |
| Backward Walk Speed | 0.035 |
| Forward Dash Speed | 15 |
| Backward Dash Speed | 24 |
| Forward Dash Distance | 1.384 |
| Backward Dash Distance | 1.277 |
| Backdash CH Frames | 3-12 |
| Jumping | |
| Back Jump Speed | 46 (4+38+4) |
| Neutral Jump Speed | 46 (4+38+4) |
| Forward Jump Speed | 45 (3+38+4) |
| Forward Jump Distance | 2.128 |
| Backward Jump Distance | 1.824 |
| Throws | |
| Throw Hurtbox | 0.25 |
| Throw Range | 0.8 |
Frame Data & Descriptions are provided by FATOnline.
|
| SFV Frame Data Glossary | |
|---|---|
| Active |
How many frames a move remains active (can hurt opponents) for. |
| Attack |
Attack level is L for low attacks (must be blocked crouching), H is for High attacks (which can be blocked high or low) and M for overhead (must be blocked standing). T is for throw attacks (which cannot be blocked). |
| Cancel options |
Available cancel options.
|
| Confirm windows |
Hit confirm windows written as Specials & CAs/Target Combos/V-Trigger. Notation may denote V-Skill only cancel windows in Specials.
|
| Crush Counter |
Crush Counter hit advantage written as opponent state, frame advantage, and v-gauge gain on hit. |
| Damage |
Attack damage on hit. Notation may denote multi-hit or "sweet spot" damage values on certain frames. |
| Hit/Block |
These are frame advantage values when the attack hits or is blocked. If the number is positive, then the move will end before the defender can act again. If the number is negative, the defender will be able to act before the attacker and maybe even punish. KD refers to knockdown on hit.
|
| Knockdown |
Knockdown advantage against Normal, Quick Rise and Back Rise wake up options. |
| Recovery |
How many frames it takes for a move to finish after it's been active. |
| Startup |
How many frames it takes before the move becomes 'active' or have a hit box. The last startup frame and the first active frame are the same frame, meaning all values are written as Startup + 1. |
| Stun |
Amount of stun added to the opponent's stun bar on hit. |
Normals
Stand LP
Stand MP
Stand HP
Stand LK
Stand MK
Stand HK
Crouch LP
Crouch MP
Crouch HP
Crouch LK
Crouch MK
Crouch HK
Jump LP
Jump MP
Jump HP
Jump LK
Jump MK
Jump HK
Command Normals
Thunder Kick
Thunder Kick (Feint)
Inazuma Kick
Chin Buster
Target Combos
Chin Buster 2nd
Lion Breaker
Throws
Knee Bash
Hell Wheel
Special Moves
LP Hadoken
MP Hadoken
HP Hadoken
EX Hadoken
LP Shoryuken
MP Shoryuken
HP Shoryuken
EX Shoryuken
LK Tatsumaki Senpukyaku
MK Tatsumaki Senpukyaku
HK Tatsumaki Senpukyaku
EX Tatsumaki Senpukyaku
LK Air Tatsumaki Senpukyaku
MK Air Tatsumaki Senpukyaku
HK Air Tatsumaki Senpukyaku
EX Air Tatsumaki Senpukyaku
Critical Art
Guren Enjikyaku
Taunts
Taunt
V-System
V-Skill 1
Run
Quick Step Kick
V-Skill 2
Ryusenkyaku
Ryusenkyaku (hold)
Ryusenkyaku (release)
V-Trigger 1
Heat Rush
V-Trigger 2
Shinryuken lvl 1
Shinryuken lvl 2
Shinryuken lvl 3
V-Shift
V-Shift
V-Shift Break
Shadow Thunder-Kick
V-Reversal
Senpu Nataotoshi
