No edit summary |
No edit summary |
||
| Line 5: | Line 5: | ||
|hp=1025 | |hp=1025 | ||
|stun=1050 | |stun=1050 | ||
|vt1= | |vt1=3 Bars | ||
|vt2= | |vt2=2 Bars | ||
|movef=0.048 | |movef=0.048 | ||
|moveb=0.03 | |moveb=0.03 | ||
| Line 46: | Line 46: | ||
|confirm=<nowiki>- / - / -</nowiki> | |confirm=<nowiki>- / - / -</nowiki> | ||
|description= | |description= | ||
{{SFV Button FAT|link=https://fullmeter.com/fatonline/#/framedata/movedetail/SFV/Balrog/normal/Stand%20LP}} | |||
}} | }} | ||
}} | }} | ||
| Line 71: | Line 72: | ||
* Good vertical anti-air (can hit cross-up) | * Good vertical anti-air (can hit cross-up) | ||
* Forces standing on hit | * Forces standing on hit | ||
{{SFV Button FAT|link=https://fullmeter.com/fatonline/#/framedata/movedetail/SFV/Balrog/normal/Stand%20MP}} | |||
}} | }} | ||
}} | }} | ||
| Line 96: | Line 98: | ||
* Hit Confirm notes: *CA only | * Hit Confirm notes: *CA only | ||
* DUFF!~ | * DUFF!~ | ||
{{SFV Button FAT|link=https://fullmeter.com/fatonline/#/framedata/movedetail/SFV/Balrog/normal/Stand%20HP}} | |||
}} | }} | ||
}} | }} | ||
| Line 119: | Line 122: | ||
|confirm=<nowiki>- / - / 11</nowiki> | |confirm=<nowiki>- / - / 11</nowiki> | ||
|description= | |description= | ||
{{SFV Button FAT|link=https://fullmeter.com/fatonline/#/framedata/movedetail/SFV/Balrog/normal/Stand%20LK}} | |||
}} | }} | ||
}} | }} | ||
| Line 142: | Line 146: | ||
|confirm=<nowiki>14 / 14 / 14</nowiki> | |confirm=<nowiki>14 / 14 / 14</nowiki> | ||
|description= | |description= | ||
{{SFV Button FAT|link=https://fullmeter.com/fatonline/#/framedata/movedetail/SFV/Balrog/normal/Stand%20MK}} | |||
}} | }} | ||
}} | }} | ||
| Line 166: | Line 171: | ||
|description= | |description= | ||
* 4 extra recovery frames on whiff | * 4 extra recovery frames on whiff | ||
{{SFV Button FAT|link=https://fullmeter.com/fatonline/#/framedata/movedetail/SFV/Balrog/normal/Stand%20HK}} | |||
}} | }} | ||
}} | }} | ||
| Line 190: | Line 196: | ||
|description= | |description= | ||
* Chains into crouch LP | * Chains into crouch LP | ||
{{SFV Button FAT|link=https://fullmeter.com/fatonline/#/framedata/movedetail/SFV/Balrog/normal/Crouch%20LP}} | |||
}} | }} | ||
}} | }} | ||
| Line 213: | Line 220: | ||
|confirm=<nowiki>14 / 14 / -</nowiki> | |confirm=<nowiki>14 / 14 / -</nowiki> | ||
|description= | |description= | ||
* Very little pushback on block compared to most mediums | |||
{{SFV Button FAT|link=https://fullmeter.com/fatonline/#/framedata/movedetail/SFV/Balrog/normal/Crouch%20MP}} | |||
}} | }} | ||
}} | }} | ||
| Line 239: | Line 248: | ||
* Deals 10 less damage (80) after first active frame | * Deals 10 less damage (80) after first active frame | ||
* Can only Crush Counter on the first active frame | * Can only Crush Counter on the first active frame | ||
{{SFV Button FAT|link=https://fullmeter.com/fatonline/#/framedata/movedetail/SFV/Balrog/normal/Crouch%20HP}} | |||
}} | }} | ||
}} | }} | ||
| Line 262: | Line 272: | ||
|confirm=<nowiki>- / - / -</nowiki> | |confirm=<nowiki>- / - / -</nowiki> | ||
|description= | |description= | ||
{{SFV Button FAT|link=https://fullmeter.com/fatonline/#/framedata/movedetail/SFV/Balrog/normal/Crouch%20LK}} | |||
}} | }} | ||
}} | }} | ||
| Line 285: | Line 296: | ||
|confirm=<nowiki>- / 13 / 13</nowiki> | |confirm=<nowiki>- / 13 / 13</nowiki> | ||
|description= | |description= | ||
{{SFV Button FAT|link=https://fullmeter.com/fatonline/#/framedata/movedetail/SFV/Balrog/normal/Crouch%20MK}} | |||
}} | }} | ||
}} | }} | ||
| Line 308: | Line 320: | ||
|confirm=<nowiki>- / 16 / -</nowiki> | |confirm=<nowiki>- / 16 / -</nowiki> | ||
|description= | |description= | ||
{{SFV Button FAT|link=https://fullmeter.com/fatonline/#/framedata/movedetail/SFV/Balrog/normal/Crouch%20HK}} | |||
}} | }} | ||
}} | }} | ||
| Line 313: | Line 326: | ||
=====<font style="visibility:hidden; float:right">Jump LP</font>===== | =====<font style="visibility:hidden; float:right">Jump LP</font>===== | ||
{{MoveData | {{MoveData | ||
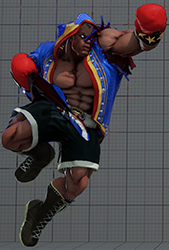
|image= | |image=SFV_Balrog_8LP.png | ||
|name=Jump LP | |name=Jump LP | ||
|input= | |input=8LP | ||
|data= | |data= | ||
{{AttackData-SFV | {{AttackData-SFV | ||
| Line 331: | Line 344: | ||
|confirm=<nowiki>- / - / -</nowiki> | |confirm=<nowiki>- / - / -</nowiki> | ||
|description= | |description= | ||
{{SFV Button FAT|link=https://fullmeter.com/fatonline/#/framedata/movedetail/SFV/Balrog/normal/Jump%20LP}} | |||
}} | }} | ||
}} | }} | ||
| Line 336: | Line 350: | ||
=====<font style="visibility:hidden; float:right">Jump MP</font>===== | =====<font style="visibility:hidden; float:right">Jump MP</font>===== | ||
{{MoveData | {{MoveData | ||
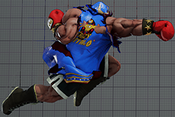
|image= | |image=SFV_Balrog_8MP.png | ||
|name=Jump MP | |name=Jump MP | ||
|input= | |input=8MP | ||
|data= | |data= | ||
{{AttackData-SFV | {{AttackData-SFV | ||
| Line 354: | Line 368: | ||
|confirm=<nowiki>- / - / -</nowiki> | |confirm=<nowiki>- / - / -</nowiki> | ||
|description= | |description= | ||
{{SFV Button FAT|link=https://fullmeter.com/fatonline/#/framedata/movedetail/SFV/Balrog/normal/Jump%20MP}} | |||
}} | }} | ||
}} | }} | ||
| Line 359: | Line 374: | ||
=====<font style="visibility:hidden; float:right">Jump HP</font>===== | =====<font style="visibility:hidden; float:right">Jump HP</font>===== | ||
{{MoveData | {{MoveData | ||
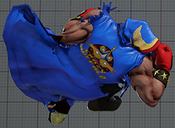
|image= | |image=SFV_Balrog_8HP.png | ||
|name=Jump HP | |name=Jump HP | ||
|input= | |input=8HP | ||
|data= | |data= | ||
{{AttackData-SFV | {{AttackData-SFV | ||
| Line 377: | Line 392: | ||
|confirm=<nowiki>- / - / -</nowiki> | |confirm=<nowiki>- / - / -</nowiki> | ||
|description= | |description= | ||
{{SFV Button FAT|link=https://fullmeter.com/fatonline/#/framedata/movedetail/SFV/Balrog/normal/Jump%20HP}} | |||
}} | }} | ||
}} | }} | ||
| Line 382: | Line 398: | ||
=====<font style="visibility:hidden; float:right">Jump LK</font>===== | =====<font style="visibility:hidden; float:right">Jump LK</font>===== | ||
{{MoveData | {{MoveData | ||
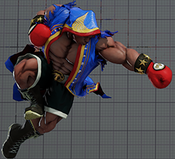
|image= | |image=SFV_Balrog_8LK.png | ||
|name=Jump LK | |name=Jump LK | ||
|input= | |input=8LK | ||
|data= | |data= | ||
{{AttackData-SFV | {{AttackData-SFV | ||
| Line 400: | Line 416: | ||
|confirm=<nowiki>- / - / -</nowiki> | |confirm=<nowiki>- / - / -</nowiki> | ||
|description= | |description= | ||
{{SFV Button FAT|link=https://fullmeter.com/fatonline/#/framedata/movedetail/SFV/Balrog/normal/Jump%20LK}} | |||
}} | }} | ||
}} | }} | ||
| Line 405: | Line 422: | ||
=====<font style="visibility:hidden; float:right">Jump MK</font>===== | =====<font style="visibility:hidden; float:right">Jump MK</font>===== | ||
{{MoveData | {{MoveData | ||
|image= | |image=SFV_Balrog_8MK.png | ||
|name=Jump MK | |name=Jump MK | ||
|input= | |input=8MK | ||
|data= | |data= | ||
{{AttackData-SFV | {{AttackData-SFV | ||
| Line 423: | Line 440: | ||
|confirm=<nowiki>- / - / -</nowiki> | |confirm=<nowiki>- / - / -</nowiki> | ||
|description= | |description= | ||
{{SFV Button FAT|link=https://fullmeter.com/fatonline/#/framedata/movedetail/SFV/Balrog/normal/Jump%20MK}} | |||
}} | }} | ||
}} | }} | ||
| Line 428: | Line 446: | ||
=====<font style="visibility:hidden; float:right">Jump HK</font>===== | =====<font style="visibility:hidden; float:right">Jump HK</font>===== | ||
{{MoveData | {{MoveData | ||
|image= | |image=SFV_Balrog_8HK.png | ||
|name=Jump HK | |name=Jump HK | ||
|input= | |input=8HK | ||
|data= | |data= | ||
{{AttackData-SFV | {{AttackData-SFV | ||
| Line 446: | Line 464: | ||
|confirm=<nowiki>- / - / -</nowiki> | |confirm=<nowiki>- / - / -</nowiki> | ||
|description= | |description= | ||
{{SFV Button FAT|link=https://fullmeter.com/fatonline/#/framedata/movedetail/SFV/Balrog/normal/Jump%20HK}} | |||
}} | }} | ||
}} | }} | ||
| Line 473: | Line 492: | ||
* Cancelable into both V-Skills on Hit/Block (see both MP+MK follow-ups) | * Cancelable into both V-Skills on Hit/Block (see both MP+MK follow-ups) | ||
* Launches opponent into a limited juggle state (Juggle Start: +1) | * Launches opponent into a limited juggle state (Juggle Start: +1) | ||
{{SFV Button FAT|link=https://fullmeter.com/fatonline/#/framedata/movedetail/SFV/Balrog/normal/Hard%20Lead%20In}} | |||
}} | }} | ||
}} | }} | ||
| Line 497: | Line 517: | ||
|description= | |description= | ||
* Functions just like V-Skill 1 normally does (but 2F slower at canceling into follow-ups) | * Functions just like V-Skill 1 normally does (but 2F slower at canceling into follow-ups) | ||
{{SFV Button FAT|link=https://fullmeter.com/fatonline/#/framedata/movedetail/SFV/Balrog/normal/Hard%20KKB}} | |||
}} | }} | ||
}} | }} | ||
| Line 521: | Line 542: | ||
|description= | |description= | ||
* Functions just like V-Skill 2 normally does | * Functions just like V-Skill 2 normally does | ||
{{SFV Button FAT|link=https://fullmeter.com/fatonline/#/framedata/movedetail/SFV/Balrog/normal/OTB}} | |||
}} | }} | ||
}} | }} | ||
| Line 546: | Line 568: | ||
* Places opponent in juggle state | * Places opponent in juggle state | ||
* Builds 100 V-Meter (1/3rd V-bar) on hit and 55 V-Meter on block | * Builds 100 V-Meter (1/3rd V-bar) on hit and 55 V-Meter on block | ||
{{SFV Button FAT|link=https://fullmeter.com/fatonline/#/framedata/movedetail/SFV/Balrog/normal/Hard%20Smasher}} | |||
}} | }} | ||
}} | }} | ||
| Line 571: | Line 594: | ||
* Spikes opponent down to the ground | * Spikes opponent down to the ground | ||
* Builds 100 V-Meter (1/3rd V-bar) on hit and 55 V-Meter on block | * Builds 100 V-Meter (1/3rd V-bar) on hit and 55 V-Meter on block | ||
{{SFV Button FAT|link=https://fullmeter.com/fatonline/#/framedata/movedetail/SFV/Balrog/normal/Hard%20Pressure}} | |||
}} | }} | ||
}} | }} | ||
| Line 595: | Line 619: | ||
|description= | |description= | ||
* Second hit (MK) is cancelable into B3 (V-Trigger 2 Command Grab) on Hit/Block | * Second hit (MK) is cancelable into B3 (V-Trigger 2 Command Grab) on Hit/Block | ||
* This Target Combo never whiffs | |||
{{SFV Button FAT|link=https://fullmeter.com/fatonline/#/framedata/movedetail/SFV/Balrog/normal/Under%20Impact%201}} | |||
}} | }} | ||
}} | }} | ||
| Line 619: | Line 645: | ||
|description= | |description= | ||
* Can be canceled into V-Skill 2 (results in oki pressure in corner) | * Can be canceled into V-Skill 2 (results in oki pressure in corner) | ||
* This Target Combo never whiffs | |||
{{SFV Button FAT|link=https://fullmeter.com/fatonline/#/framedata/movedetail/SFV/Balrog/normal/Under%20Impact%202}} | |||
}} | }} | ||
}} | }} | ||
| Line 640: | Line 668: | ||
|attack=<nowiki>L*L</nowiki> | |attack=<nowiki>L*L</nowiki> | ||
|cancel=<nowiki>vt1 vt2</nowiki> | |cancel=<nowiki>vt1 vt2</nowiki> | ||
|confirm=<nowiki>- / 16 / | |confirm=<nowiki>- / 16 / 13</nowiki> | ||
|description= | |description= | ||
* The only actual kick move given to Boxer | * The only actual kick move given to Boxer | ||
* Cancelable into B3 (V-Trigger 2 Command Grab) on Hit/Block | * Cancelable into B3 (V-Trigger 2 Command Grab) on Hit/Block | ||
* Has a specific V-Trigger cancel version that takes longer to recover than normal (13F recovery) but the first 4 frames of recovery are fully invincible | * Has a specific V-Trigger cancel version that takes longer to recover than normal (13F recovery) but the first 4 frames of recovery are fully invincible | ||
{{SFV Button FAT|link=https://fullmeter.com/fatonline/#/framedata/movedetail/SFV/Balrog/normal/Stomping%20Combo}} | |||
}} | }} | ||
}} | }} | ||
| Line 671: | Line 700: | ||
|confirm=<nowiki>- / - / -</nowiki> | |confirm=<nowiki>- / - / -</nowiki> | ||
|description= | |description= | ||
{{SFV Button FAT|link=https://fullmeter.com/fatonline/#/framedata/movedetail/SFV/Balrog/normal/Dirty%20Bomber}} | |||
}} | }} | ||
}} | }} | ||
| Line 695: | Line 725: | ||
|confirm=<nowiki>- / - / -</nowiki> | |confirm=<nowiki>- / - / -</nowiki> | ||
|description= | |description= | ||
{{SFV Button FAT|link=https://fullmeter.com/fatonline/#/framedata/movedetail/SFV/Balrog/normal/Dirty%20Shot}} | |||
}} | }} | ||
}} | }} | ||
| Line 724: | Line 755: | ||
* Takes 40 frames to charge | * Takes 40 frames to charge | ||
* Not cancelable into V-Trigger 2 activation | * Not cancelable into V-Trigger 2 activation | ||
{{SFV Button FAT|link=https://fullmeter.com/fatonline/#/framedata/movedetail/SFV/Balrog/normal/LP%20Dash%20Straight}} | |||
}} | }} | ||
}} | }} | ||
| Line 751: | Line 783: | ||
* Takes 40 frames to charge | * Takes 40 frames to charge | ||
* Not cancelable into V-Trigger 2 activation | * Not cancelable into V-Trigger 2 activation | ||
{{SFV Button FAT|link=https://fullmeter.com/fatonline/#/framedata/movedetail/SFV/Balrog/normal/MP%20Dash%20Straight}} | |||
}} | }} | ||
}} | }} | ||
| Line 778: | Line 811: | ||
* Takes 40 frames to charge | * Takes 40 frames to charge | ||
* Not cancelable into V-Trigger 2 activation | * Not cancelable into V-Trigger 2 activation | ||
{{SFV Button FAT|link=https://fullmeter.com/fatonline/#/framedata/movedetail/SFV/Balrog/normal/HP%20Dash%20Straight}} | |||
}} | }} | ||
}} | }} | ||
| Line 803: | Line 837: | ||
* Can be canceled into V-Skill 1 on frame 6 and onward of first punch and during startup of the second punch | * Can be canceled into V-Skill 1 on frame 6 and onward of first punch and during startup of the second punch | ||
* Startup frames based on proximity range to target (22fr startup if not in range yet) | * Startup frames based on proximity range to target (22fr startup if not in range yet) | ||
* Second punch only occurs on hit | |||
* Takes 40 frames to charge | * Takes 40 frames to charge | ||
* 1.3 on the UNGA scale | * 1.3 on the UNGA scale | ||
{{SFV Button FAT|link=https://fullmeter.com/fatonline/#/framedata/movedetail/SFV/Balrog/normal/EX%20Dash%20Straight}} | |||
}} | }} | ||
}} | }} | ||
| Line 833: | Line 869: | ||
* Not cancelable into V-Trigger 2 activation | * Not cancelable into V-Trigger 2 activation | ||
* Also known as 'Rush Punch to the Legs' by Lee Chung | * Also known as 'Rush Punch to the Legs' by Lee Chung | ||
{{SFV Button FAT|link=https://fullmeter.com/fatonline/#/framedata/movedetail/SFV/Balrog/normal/LK%20Dash%20Grand%20Blow}} | |||
}} | }} | ||
}} | }} | ||
| Line 861: | Line 898: | ||
* Not cancelable into V-Trigger 2 activation | * Not cancelable into V-Trigger 2 activation | ||
* Also known as 'Rush Punch to the Legs' by Lee Chung | * Also known as 'Rush Punch to the Legs' by Lee Chung | ||
{{SFV Button FAT|link=https://fullmeter.com/fatonline/#/framedata/movedetail/SFV/Balrog/normal/MK%20Dash%20Grand%20Blow}} | |||
}} | }} | ||
}} | }} | ||
| Line 889: | Line 927: | ||
* Not cancelable into V-Trigger 2 activation | * Not cancelable into V-Trigger 2 activation | ||
* Also known as 'Rush Punch to the Legs' by Lee Chung | * Also known as 'Rush Punch to the Legs' by Lee Chung | ||
{{SFV Button FAT|link=https://fullmeter.com/fatonline/#/framedata/movedetail/SFV/Balrog/normal/HK%20Dash%20Grand%20Blow}} | |||
}} | }} | ||
}} | }} | ||
| Line 916: | Line 955: | ||
* Takes 40 frames to charge | * Takes 40 frames to charge | ||
* Also known as 'Rush Punch to the Legs' by Lee Chung | * Also known as 'Rush Punch to the Legs' by Lee Chung | ||
{{SFV Button FAT|link=https://fullmeter.com/fatonline/#/framedata/movedetail/SFV/Balrog/normal/EX%20Dash%20Grand%20Blow}} | |||
}} | }} | ||
}} | }} | ||
| Line 941: | Line 981: | ||
* Cannot hit crouching opponents | * Cannot hit crouching opponents | ||
* Can cancel into V-Skill 2, Super, V-Trigger 1 rekka follow-ups, and V-Skill 2 V-Trigger 1 rekka follow-ups on hit or block | * Can cancel into V-Skill 2, Super, V-Trigger 1 rekka follow-ups, and V-Skill 2 V-Trigger 1 rekka follow-ups on hit or block | ||
{{SFV Button FAT|link=https://fullmeter.com/fatonline/#/framedata/movedetail/SFV/Balrog/normal/LK%20Screw%20Smash}} | |||
}} | }} | ||
}} | }} | ||
| Line 966: | Line 1,007: | ||
* Cannot hit crouching opponents | * Cannot hit crouching opponents | ||
* Can cancel into V-Skill 2, Super, V-Trigger 1 rekka follow-ups, and V-Skill 2 V-Trigger 1 rekka follow-ups on hit or block | * Can cancel into V-Skill 2, Super, V-Trigger 1 rekka follow-ups, and V-Skill 2 V-Trigger 1 rekka follow-ups on hit or block | ||
{{SFV Button FAT|link=https://fullmeter.com/fatonline/#/framedata/movedetail/SFV/Balrog/normal/MK%20Screw%20Smash}} | |||
}} | }} | ||
}} | }} | ||
| Line 981: | Line 1,023: | ||
|hit=<nowiki>KD</nowiki> | |hit=<nowiki>KD</nowiki> | ||
|crush=<nowiki>- / - / -</nowiki> | |crush=<nowiki>- / - / -</nowiki> | ||
|block=<nowiki>- | |block=<nowiki>-12</nowiki> | ||
|knockdown=<nowiki>97 / 38 / 43</nowiki> | |knockdown=<nowiki>97 / 38 / 43</nowiki> | ||
|damage=<nowiki>100</nowiki> | |damage=<nowiki>100</nowiki> | ||
| Line 991: | Line 1,033: | ||
* Cannot hit crouching opponents | * Cannot hit crouching opponents | ||
* Can cancel into V-Skill 2, Super, V-Trigger 1 rekka follow-ups, and V-Skill 2 V-Trigger 1 rekka follow-ups on hit or block | * Can cancel into V-Skill 2, Super, V-Trigger 1 rekka follow-ups, and V-Skill 2 V-Trigger 1 rekka follow-ups on hit or block | ||
{{SFV Button FAT|link=https://fullmeter.com/fatonline/#/framedata/movedetail/SFV/Balrog/normal/HK%20Screw%20Smash}} | |||
}} | }} | ||
}} | }} | ||
| Line 1,015: | Line 1,058: | ||
|description= | |description= | ||
* 1 hit of armor on frames 3-16 | * 1 hit of armor on frames 3-16 | ||
* | * CAN hit crouching opponents | ||
* Can cancel into V-Skill 2, Super, V-Trigger 1 rekka follow-ups, and V-Skill 2 V-Trigger 1 rekka follow-ups on hit or block | * Can cancel into V-Skill 2, Super, V-Trigger 1 rekka follow-ups, and V-Skill 2 V-Trigger 1 rekka follow-ups on hit or block | ||
{{SFV Button FAT|link=https://fullmeter.com/fatonline/#/framedata/movedetail/SFV/Balrog/normal/EX%20Screw%20Smash}} | |||
}} | }} | ||
}} | }} | ||
| Line 1,044: | Line 1,088: | ||
* Projectile invincible on frames 3-18 | * Projectile invincible on frames 3-18 | ||
* Requires 32 frames of charging (0.5 seconds ~) | * Requires 32 frames of charging (0.5 seconds ~) | ||
{{SFV Button FAT|link=https://fullmeter.com/fatonline/#/framedata/movedetail/SFV/Balrog/normal/TAP%20lvl%201}} | |||
}} | }} | ||
}} | }} | ||
| Line 1,071: | Line 1,116: | ||
* Projectile invincible on frames 3-18 | * Projectile invincible on frames 3-18 | ||
* Requires 121 frames of charging (2 seconds ~) | * Requires 121 frames of charging (2 seconds ~) | ||
{{SFV Button FAT|link=https://fullmeter.com/fatonline/#/framedata/movedetail/SFV/Balrog/normal/TAP%20lvl%202}} | |||
}} | }} | ||
}} | }} | ||
| Line 1,098: | Line 1,144: | ||
* Projectile invincible on frames 3-18 | * Projectile invincible on frames 3-18 | ||
* Requires 241 frames of charging (4 seconds ~) | * Requires 241 frames of charging (4 seconds ~) | ||
{{SFV Button FAT|link=https://fullmeter.com/fatonline/#/framedata/movedetail/SFV/Balrog/normal/TAP%20lvl%203}} | |||
}} | }} | ||
}} | }} | ||
| Line 1,125: | Line 1,172: | ||
* Strike invincible on upper body and full-body Projectile invincible on frames 3-18 | * Strike invincible on upper body and full-body Projectile invincible on frames 3-18 | ||
* Requires 481 frames of charging (8 seconds ~) | * Requires 481 frames of charging (8 seconds ~) | ||
{{SFV Button FAT|link=https://fullmeter.com/fatonline/#/framedata/movedetail/SFV/Balrog/normal/TAP%20lvl%204}} | |||
}} | }} | ||
}} | }} | ||
| Line 1,152: | Line 1,200: | ||
* Strike invincible on upper body and full-body Projectile invincible on frames 3-18 | * Strike invincible on upper body and full-body Projectile invincible on frames 3-18 | ||
* Requires 961 frames of charging (16 seconds ~) | * Requires 961 frames of charging (16 seconds ~) | ||
{{SFV Button FAT|link=https://fullmeter.com/fatonline/#/framedata/movedetail/SFV/Balrog/normal/TAP%20lvl%205}} | |||
}} | }} | ||
}} | }} | ||
| Line 1,179: | Line 1,228: | ||
* Strike invincible on upper body and full-body Projectile invincible on frames 3-18 | * Strike invincible on upper body and full-body Projectile invincible on frames 3-18 | ||
* Requires 1441 frames of charging (24 seconds ~) | * Requires 1441 frames of charging (24 seconds ~) | ||
{{SFV Button FAT|link=https://fullmeter.com/fatonline/#/framedata/movedetail/SFV/Balrog/normal/TAP%20lvl%206}} | |||
}} | }} | ||
}} | }} | ||
| Line 1,207: | Line 1,257: | ||
* Strike invincible on upper body on frames 1-18 | * Strike invincible on upper body on frames 1-18 | ||
* Requires 1921 frames of charging (32 seconds ~) | * Requires 1921 frames of charging (32 seconds ~) | ||
{{SFV Button FAT|link=https://fullmeter.com/fatonline/#/framedata/movedetail/SFV/Balrog/normal/TAP%20lvl%207}} | |||
}} | }} | ||
}} | }} | ||
| Line 1,235: | Line 1,286: | ||
* Strike invincible on upper body on frames 1-18 | * Strike invincible on upper body on frames 1-18 | ||
* Requires 2401 frames of charging (40 seconds ~) | * Requires 2401 frames of charging (40 seconds ~) | ||
{{SFV Button FAT|link=https://fullmeter.com/fatonline/#/framedata/movedetail/SFV/Balrog/normal/TAP%20lvl%208}} | |||
}} | }} | ||
}} | }} | ||
| Line 1,263: | Line 1,315: | ||
* Strike invincible on upper body on frames 1-18 | * Strike invincible on upper body on frames 1-18 | ||
* Requires 2881 frames of charging (48 seconds ~) | * Requires 2881 frames of charging (48 seconds ~) | ||
{{SFV Button FAT|link=https://fullmeter.com/fatonline/#/framedata/movedetail/SFV/Balrog/normal/TAP%20lvl%209}} | |||
}} | }} | ||
}} | }} | ||
| Line 1,292: | Line 1,345: | ||
* Causes wall bounce and free juggle state on hit | * Causes wall bounce and free juggle state on hit | ||
* Will most certainly Bust you up | * Will most certainly Bust you up | ||
{{SFV Button FAT|link=https://fullmeter.com/fatonline/#/framedata/movedetail/SFV/Balrog/normal/TAP%20lvl%2010}} | |||
}} | }} | ||
}} | }} | ||
== Critical | == Critical Art == | ||
=====<font style="visibility:hidden; float:right">Gigaton Blow</font>===== | =====<font style="visibility:hidden; float:right">Gigaton Blow</font>===== | ||
| Line 1,322: | Line 1,376: | ||
* Does 10 less damage (330) after first active frame | * Does 10 less damage (330) after first active frame | ||
* Does a totally cool rad camera zoom-in if it hits on the first active frame! | * Does a totally cool rad camera zoom-in if it hits on the first active frame! | ||
{{SFV Button FAT|link=https://fullmeter.com/fatonline/#/framedata/movedetail/SFV/Balrog/normal/Gigaton%20Blow}} | |||
}} | }} | ||
}} | }} | ||
| Line 1,347: | Line 1,402: | ||
|confirm=<nowiki>- / - / -</nowiki> | |confirm=<nowiki>- / - / -</nowiki> | ||
|description= | |description= | ||
{{SFV Button FAT|link=https://fullmeter.com/fatonline/#/framedata/movedetail/SFV/Balrog/normal/Taunt}} | |||
}} | }} | ||
}} | }} | ||
| Line 1,378: | Line 1,434: | ||
* Can be canceled into V-Skill punch follow-ups or TAP; follow-up cancels begin on 12th frame | * Can be canceled into V-Skill punch follow-ups or TAP; follow-up cancels begin on 12th frame | ||
* Follow-up cancels begin 2 frames earlier (10th frame) if the VS is canceled into from other moves; essentially increasing startup of the VS follow-ups by 2 frames | * Follow-up cancels begin 2 frames earlier (10th frame) if the VS is canceled into from other moves; essentially increasing startup of the VS follow-ups by 2 frames | ||
{{SFV Button FAT|link=https://fullmeter.com/fatonline/#/framedata/movedetail/SFV/Balrog/normal/KKB}} | |||
}} | }} | ||
}} | }} | ||
| Line 1,403: | Line 1,460: | ||
* Projectile invincible from frames 4-17 | * Projectile invincible from frames 4-17 | ||
* Buils 100 V-Meter (1/3rd V-bar) on hit and 50 V-Meter (1/6th V-bar) on block | * Buils 100 V-Meter (1/3rd V-bar) on hit and 50 V-Meter (1/6th V-bar) on block | ||
{{SFV Button FAT|link=https://fullmeter.com/fatonline/#/framedata/movedetail/SFV/Balrog/normal/KKB%20%3E%20Buffalo%20Swing}} | |||
}} | }} | ||
}} | }} | ||
| Line 1,428: | Line 1,486: | ||
* Projectile invincible from frames 4-26 | * Projectile invincible from frames 4-26 | ||
* Buils 80 V-Meter on hit and 40 V-Meter on block | * Buils 80 V-Meter on hit and 40 V-Meter on block | ||
{{SFV Button FAT|link=https://fullmeter.com/fatonline/#/framedata/movedetail/SFV/Balrog/normal/KKB%20%3E%20Buffalo%20Pressure}} | |||
}} | }} | ||
}} | }} | ||
| Line 1,455: | Line 1,514: | ||
* Powers up Boxer's next Dash Punch / V-Trigger 1 Rekkas with increased damage / stun / properties | * Powers up Boxer's next Dash Punch / V-Trigger 1 Rekkas with increased damage / stun / properties | ||
* Boxer is NOT in a Counter-Hit state during this power-up | * Boxer is NOT in a Counter-Hit state during this power-up | ||
{{SFV Button FAT|link=https://fullmeter.com/fatonline/#/framedata/movedetail/SFV/Balrog/normal/FFB}} | |||
}} | }} | ||
}} | }} | ||
| Line 1,483: | Line 1,543: | ||
* Builds 40/20 V-Gauge on Hit/Block | * Builds 40/20 V-Gauge on Hit/Block | ||
* Juggle Limit / Increase / Start: 1*1*1 / 0*0*1 / 1*1*1 | * Juggle Limit / Increase / Start: 1*1*1 / 0*0*1 / 1*1*1 | ||
{{SFV Button FAT|link=https://fullmeter.com/fatonline/#/framedata/movedetail/SFV/Balrog/normal/LP%20Dash%20Straight%20(V-Skill%202)}} | |||
}} | }} | ||
}} | }} | ||
| Line 1,511: | Line 1,572: | ||
* Builds 40/20 V-Gauge on Hit/Block | * Builds 40/20 V-Gauge on Hit/Block | ||
* Juggle Limit / Increase / Start: 1*1*1 / 0*0*1 / 1*1*1 | * Juggle Limit / Increase / Start: 1*1*1 / 0*0*1 / 1*1*1 | ||
{{SFV Button FAT|link=https://fullmeter.com/fatonline/#/framedata/movedetail/SFV/Balrog/normal/MP%20Dash%20Straight%20(V-Skill%202)}} | |||
}} | }} | ||
}} | }} | ||
| Line 1,539: | Line 1,601: | ||
* Builds 40/20 V-Gauge on Hit/Block | * Builds 40/20 V-Gauge on Hit/Block | ||
* Juggle Limit / Increase / Start: 1*1*1 / 0*0*1 / 1*1*1 | * Juggle Limit / Increase / Start: 1*1*1 / 0*0*1 / 1*1*1 | ||
{{SFV Button FAT|link=https://fullmeter.com/fatonline/#/framedata/movedetail/SFV/Balrog/normal/HP%20Dash%20Straight%20(V-Skill%202)}} | |||
}} | }} | ||
}} | }} | ||
| Line 1,564: | Line 1,627: | ||
* Does NOT require any charge time | * Does NOT require any charge time | ||
* Startup frames based on proximity range to target (22fr startup if not in range yet) | * Startup frames based on proximity range to target (22fr startup if not in range yet) | ||
* Second punch only occurs on hit | |||
* First 5 hits do not increase the juggle state (Juggle Increase: +0) | * First 5 hits do not increase the juggle state (Juggle Increase: +0) | ||
* Builds 50/25 V-Gauge on Hit/Block | * Builds 50/25 V-Gauge on Hit/Block | ||
* Juggle Limit / Increase / Start: 3*4*4*4*5*5 / 0*0*0*0*1 / 1*1*1*1*1 | * Juggle Limit / Increase / Start: 3*4*4*4*5*5 / 0*0*0*0*1 / 1*1*1*1*1 | ||
{{SFV Button FAT|link=https://fullmeter.com/fatonline/#/framedata/movedetail/SFV/Balrog/normal/EX%20Dash%20Straight%20(V-Skill%202)}} | |||
}} | }} | ||
}} | }} | ||
| Line 1,596: | Line 1,661: | ||
* Allows use of Charging Buffalo and Bursting Buffalo | * Allows use of Charging Buffalo and Bursting Buffalo | ||
* Corner Carry 101 | * Corner Carry 101 | ||
{{SFV Button FAT|link=https://fullmeter.com/fatonline/#/framedata/movedetail/SFV/Balrog/normal/Crazy%20Rush}} | |||
}} | }} | ||
}} | }} | ||
| Line 1,622: | Line 1,688: | ||
* Can be canceled into more V-Trigger rekkas | * Can be canceled into more V-Trigger rekkas | ||
* Can be canceled during startup and on hit or block into V-Skill 1 on frames 8-24 | * Can be canceled during startup and on hit or block into V-Skill 1 on frames 8-24 | ||
{{SFV Button FAT|link=https://fullmeter.com/fatonline/#/framedata/movedetail/SFV/Balrog/vtOne/Charging%20Buffalo%20(stage%201)%20(vt)}} | |||
}} | }} | ||
}} | }} | ||
| Line 1,648: | Line 1,715: | ||
* Can be canceled into more V-Trigger rekkas | * Can be canceled into more V-Trigger rekkas | ||
* Can be canceled during startup and on hit or block into V-Skill 1 on frames 8-24 | * Can be canceled during startup and on hit or block into V-Skill 1 on frames 8-24 | ||
{{SFV Button FAT|link=https://fullmeter.com/fatonline/#/framedata/movedetail/SFV/Balrog/vtOne/Charging%20Buffalo%20(stage%202)%20(vt)}} | |||
}} | }} | ||
}} | }} | ||
| Line 1,674: | Line 1,742: | ||
* Can be canceled into more V-Trigger rekkas | * Can be canceled into more V-Trigger rekkas | ||
* Can be canceled during startup and on hit or block into V-Skill 1 on frames 8-24 | * Can be canceled during startup and on hit or block into V-Skill 1 on frames 8-24 | ||
{{SFV Button FAT|link=https://fullmeter.com/fatonline/#/framedata/movedetail/SFV/Balrog/vtOne/Charging%20Buffalo%20(stage%203)%20(vt)}} | |||
}} | }} | ||
}} | }} | ||
| Line 1,698: | Line 1,767: | ||
|description= | |description= | ||
* Consumes 300 frames of V-Timer (15% V-Timer) | * Consumes 300 frames of V-Timer (15% V-Timer) | ||
{{SFV Button FAT|link=https://fullmeter.com/fatonline/#/framedata/movedetail/SFV/Balrog/vtOne/Final%20Charging%20Buffalo%20(vt)}} | |||
}} | }} | ||
}} | }} | ||
| Line 1,724: | Line 1,794: | ||
* Can be canceled into V-Skill 1 on hit or block on the first hit | * Can be canceled into V-Skill 1 on hit or block on the first hit | ||
* Can only be canceled into EX Charging Buffalo or EX Bursting Buffalo once, for two EX Rekkas total (compared to the usual four non-EX stages possible) | * Can only be canceled into EX Charging Buffalo or EX Bursting Buffalo once, for two EX Rekkas total (compared to the usual four non-EX stages possible) | ||
{{SFV Button FAT|link=https://fullmeter.com/fatonline/#/framedata/movedetail/SFV/Balrog/vtOne/EX%20Charging%20Buffalo%20(stage%201)%20(vt)}} | |||
}} | }} | ||
}} | }} | ||
| Line 1,748: | Line 1,819: | ||
|description= | |description= | ||
* Consumes 500 frames of V-Timer (25% V-Timer) | * Consumes 500 frames of V-Timer (25% V-Timer) | ||
{{SFV Button FAT|link=https://fullmeter.com/fatonline/#/framedata/movedetail/SFV/Balrog/vtOne/EX%20Final%20Charging%20Buffalo%20(vt)}} | |||
}} | }} | ||
}} | }} | ||
| Line 1,773: | Line 1,845: | ||
* Consumes 500 frames of V-Timer (25% V-Timer) | * Consumes 500 frames of V-Timer (25% V-Timer) | ||
* KDA varies based on previous juggle hits; listed advantage is against a grounded opponent | * KDA varies based on previous juggle hits; listed advantage is against a grounded opponent | ||
{{SFV Button FAT|link=https://fullmeter.com/fatonline/#/framedata/movedetail/SFV/Balrog/vtOne/Charging%20Buffalo%20(stage%201)%20(V-Skill%202)%20(vt)}} | |||
}} | }} | ||
}} | }} | ||
| Line 1,797: | Line 1,870: | ||
|description= | |description= | ||
* Consumes 300 frames of V-Timer (15% V-Timer) | * Consumes 300 frames of V-Timer (15% V-Timer) | ||
{{SFV Button FAT|link=https://fullmeter.com/fatonline/#/framedata/movedetail/SFV/Balrog/vtOne/Charging%20Buffalo%20(stage%202)%20(V-Skill%202)%20(vt)}} | |||
}} | }} | ||
}} | }} | ||
| Line 1,821: | Line 1,895: | ||
|description= | |description= | ||
* Consumes 300 frames of V-Timer (15% V-Timer) | * Consumes 300 frames of V-Timer (15% V-Timer) | ||
{{SFV Button FAT|link=https://fullmeter.com/fatonline/#/framedata/movedetail/SFV/Balrog/vtOne/Charging%20Buffalo%20(stage%203)%20(V-Skill%202)%20(vt)}} | |||
}} | }} | ||
}} | }} | ||
| Line 1,845: | Line 1,920: | ||
|description= | |description= | ||
* Consumes 300 frames of V-Timer (15% V-Timer) | * Consumes 300 frames of V-Timer (15% V-Timer) | ||
{{SFV Button FAT|link=https://fullmeter.com/fatonline/#/framedata/movedetail/SFV/Balrog/vtOne/Final%20Charging%20Buffalo%20(V-Skill%202)%20(vt)}} | |||
}} | }} | ||
}} | }} | ||
| Line 1,869: | Line 1,945: | ||
|description= | |description= | ||
* Consumes 500 frames of V-Timer (25% V-Timer) | * Consumes 500 frames of V-Timer (25% V-Timer) | ||
{{SFV Button FAT|link=https://fullmeter.com/fatonline/#/framedata/movedetail/SFV/Balrog/vtOne/EX%20Charging%20Buffalo%20(stage%201)%20(V-Skill%202))%20(vt)}} | |||
}} | }} | ||
}} | }} | ||
| Line 1,893: | Line 1,970: | ||
|description= | |description= | ||
* Consumes 500 frames of V-Timer (25% V-Timer) | * Consumes 500 frames of V-Timer (25% V-Timer) | ||
{{SFV Button FAT|link=https://fullmeter.com/fatonline/#/framedata/movedetail/SFV/Balrog/vtOne/EX%20Final%20Charging%20Buffalo%20(V-Skill%202)%20(vt)}} | |||
}} | }} | ||
}} | }} | ||
| Line 1,919: | Line 1,997: | ||
* Can be canceled into more V-Trigger rekkas | * Can be canceled into more V-Trigger rekkas | ||
* Can be canceled during startup and on hit or block into V-Skill 1 on frames 11-25 | * Can be canceled during startup and on hit or block into V-Skill 1 on frames 11-25 | ||
{{SFV Button FAT|link=https://fullmeter.com/fatonline/#/framedata/movedetail/SFV/Balrog/vtOne/Bursting%20Buffalo%20(stage%201)%20(vt)}} | |||
}} | }} | ||
}} | }} | ||
| Line 1,945: | Line 2,024: | ||
* Can be canceled into more V-Trigger rekkas | * Can be canceled into more V-Trigger rekkas | ||
* Can be canceled during startup and on hit or block into V-Skill 1 on frames 11-25 | * Can be canceled during startup and on hit or block into V-Skill 1 on frames 11-25 | ||
{{SFV Button FAT|link=https://fullmeter.com/fatonline/#/framedata/movedetail/SFV/Balrog/vtOne/Bursting%20Buffalo%20(stage%202)%20(vt)}} | |||
}} | }} | ||
}} | }} | ||
| Line 1,971: | Line 2,051: | ||
* Can be canceled into more V-Trigger rekkas | * Can be canceled into more V-Trigger rekkas | ||
* Can be canceled during startup and on hit or block into V-Skill 1 on frames 11-25 | * Can be canceled during startup and on hit or block into V-Skill 1 on frames 11-25 | ||
{{SFV Button FAT|link=https://fullmeter.com/fatonline/#/framedata/movedetail/SFV/Balrog/vtOne/Bursting%20Buffalo%20(stage%203)%20(vt)}} | |||
}} | }} | ||
}} | }} | ||
| Line 1,996: | Line 2,077: | ||
* Consumes 300 frames of V-Timer (15% V-Timer) | * Consumes 300 frames of V-Timer (15% V-Timer) | ||
* Cannot be canceled into Critical Art (use Final Charging Buffalo instead) | * Cannot be canceled into Critical Art (use Final Charging Buffalo instead) | ||
{{SFV Button FAT|link=https://fullmeter.com/fatonline/#/framedata/movedetail/SFV/Balrog/vtOne/Final%20Bursting%20Buffalo%20(vt)}} | |||
}} | }} | ||
}} | }} | ||
| Line 2,022: | Line 2,104: | ||
* Can be canceled into V-Skill 1 on hit or block | * Can be canceled into V-Skill 1 on hit or block | ||
* Can only be canceled into EX Charging Buffalo or EX Bursting Buffalo once, for two EX Rekkas total (compared to the usual four non-EX stages possible) | * Can only be canceled into EX Charging Buffalo or EX Bursting Buffalo once, for two EX Rekkas total (compared to the usual four non-EX stages possible) | ||
{{SFV Button FAT|link=https://fullmeter.com/fatonline/#/framedata/movedetail/SFV/Balrog/vtOne/EX%20Bursting%20Buffalo%20(stage%201)%20(vt)}} | |||
}} | }} | ||
}} | }} | ||
| Line 2,046: | Line 2,129: | ||
|description= | |description= | ||
* Consumes 500 frames of V-Timer (25% V-Timer) | * Consumes 500 frames of V-Timer (25% V-Timer) | ||
{{SFV Button FAT|link=https://fullmeter.com/fatonline/#/framedata/movedetail/SFV/Balrog/vtOne/EX%20Final%20Bursting%20Buffalo%20(vt)}} | |||
}} | }} | ||
}} | }} | ||
| Line 2,074: | Line 2,158: | ||
* Duration of 2000 frames (~33 seconds) | * Duration of 2000 frames (~33 seconds) | ||
* Gives access to a 350 stun command grab special (B3) | * Gives access to a 350 stun command grab special (B3) | ||
{{SFV Button FAT|link=https://fullmeter.com/fatonline/#/framedata/movedetail/SFV/Balrog/normal/No%20Mercy}} | |||
}} | }} | ||
}} | }} | ||
| Line 2,099: | Line 2,184: | ||
* Functions like a Command Grab special (but can also be combo'd into) | * Functions like a Command Grab special (but can also be combo'd into) | ||
* Spends 600 V-Meter (~30% V-Meter) on activation and extra 400 V-meter (total of 50% V-Meter) if the throw lands successfully | * Spends 600 V-Meter (~30% V-Meter) on activation and extra 400 V-meter (total of 50% V-Meter) if the throw lands successfully | ||
{{SFV Button FAT|link=https://fullmeter.com/fatonline/#/framedata/movedetail/SFV/Balrog/vtTwo/B3}} | |||
}} | }} | ||
}} | }} | ||
| Line 2,106: | Line 2,192: | ||
=====<font style="visibility:hidden; float:right">V-Shift</font>===== | =====<font style="visibility:hidden; float:right">V-Shift</font>===== | ||
{{MoveData | {{MoveData | ||
|image= | |image=SFV_Balrog_5MKHP.png | ||
|name=V-Shift | |name=V-Shift | ||
|input= | |input=5MKHP | ||
|data= | |data= | ||
{{AttackData-SFV | {{AttackData-SFV | ||
| Line 2,132: | Line 2,218: | ||
* Costs 300 V-Gauge (1 bar) to use and refunds 150 V-Gauge back (1/2 bar) on a successful V-Shift if the slow-mo is triggered | * Costs 300 V-Gauge (1 bar) to use and refunds 150 V-Gauge back (1/2 bar) on a successful V-Shift if the slow-mo is triggered | ||
* If the V-Shift is successful you can cancel it into a follow-up attack (see V-Shift Break) that's fully invincible and knocks the opponent down on hit | * If the V-Shift is successful you can cancel it into a follow-up attack (see V-Shift Break) that's fully invincible and knocks the opponent down on hit | ||
{{SFV Button FAT|link=https://fullmeter.com/fatonline/#/framedata/movedetail/SFV/Balrog/normal/V-Shift}} | |||
}} | }} | ||
}} | }} | ||
| Line 2,139: | Line 2,226: | ||
=====<font style="visibility:hidden; float:right">Buffalo Breaker</font>===== | =====<font style="visibility:hidden; float:right">Buffalo Breaker</font>===== | ||
{{MoveData | {{MoveData | ||
|image= | |image=SFV_Balrog_5MKHP_break.png | ||
|name=Buffalo Breaker | |name=Buffalo Breaker | ||
|input= | |input=5MKHP | ||
|data= | |data= | ||
{{AttackData-SFV | {{AttackData-SFV | ||
| Line 2,150: | Line 2,237: | ||
|crush=<nowiki>- / - / -</nowiki> | |crush=<nowiki>- / - / -</nowiki> | ||
|block=<nowiki>-2</nowiki> | |block=<nowiki>-2</nowiki> | ||
|knockdown=<nowiki> | |knockdown=<nowiki>74 / 15 / 20</nowiki> | ||
|damage=<nowiki>60</nowiki> | |damage=<nowiki>60</nowiki> | ||
|stun=<nowiki>0</nowiki> | |stun=<nowiki>0</nowiki> | ||
| Line 2,158: | Line 2,245: | ||
|description= | |description= | ||
* Fully invincible during startup and active frames | * Fully invincible during startup and active frames | ||
{{SFV Button FAT|link=https://fullmeter.com/fatonline/#/framedata/movedetail/SFV/Balrog/normal/Buffalo%20Breaker}} | |||
}} | }} | ||
}} | }} | ||
| Line 2,186: | Line 2,274: | ||
* Airborne on frames 18-31 | * Airborne on frames 18-31 | ||
* 10 grounded recovery frames | * 10 grounded recovery frames | ||
{{SFV Button FAT|link=https://fullmeter.com/fatonline/#/framedata/movedetail/SFV/Balrog/normal/Buffalo%20Headbutt}} | |||
}} | }} | ||
}} | }} | ||
Revision as of 17:16, 13 April 2021
Introduction
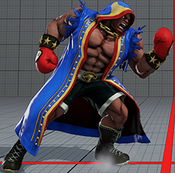
About Balrog
A disgraced boxing champion, Balrog joined Shadaloo in search of more riches. Disatisfied with his role in the organization, Balrog searches for things to steal as he leaves S.I.N., and finds a young boy (Ed). Convinced he'll be of use to him in the future, Balrog leaves S.I.N. and Shadaloo behind to seek further riches.
Balrog focuses on aggressive play and annoying his opponents. His trademark dash punches can quickly close the distance to punish any opponent attempting to walk forward or whiffing buttons, and once in he can force the opponent to play his game with his great + on block buttons and crush counters. His V-Skill 1 and Critical Art also allows him to easily deal with projectiles, while his V-Skill 2 lets him make his dash punches multi-hitting and safe, making his approach even easier. However Balrog is a fairly straight-forward character; he does not have many setups, his lows aren't very threatening without V-Trigger, and he doesn't have many mixups in general which can make opening up opponents difficult. He is also the only character in the game with no cross up button. If you like simple, aggressive bruisers then Balrog is a great choice.
| Strengths | Weaknesses |
|---|---|
|
|
Final Patch
Players to Watch
| Balrog | |
|---|---|
| Vitals | |
| Life Points | 1025 |
| Stun Points | 1050 |
| V-Gauge Points | |
| V-Trigger 1 | 3 Bars |
| V-Trigger 2 | 2 Bars |
| Ground Movement | |
| Forward Walk Speed | 0.048 |
| Backward Walk Speed | 0.03 |
| Forward Dash Speed | 17 |
| Backward Dash Speed | 24 |
| Forward Dash Distance | 1.319 |
| Backward Dash Distance | 1.061 |
| Backdash CH Frames | 3-10 |
| Jumping | |
| Back Jump Speed | 47(4+39+4) |
| Neutral Jump Speed | 47(4+39+4) |
| Forward Jump Speed | 46(3+39+4) |
| Forward Jump Distance | 2.067 |
| Backward Jump Distance | 1.638 |
| Throws | |
| Throw Hurtbox | 0.35 |
| Throw Range | 0.85 |
Frame Data & Descriptions are provided by FATOnline.
|
| SFV Frame Data Glossary | |
|---|---|
| Active |
How many frames a move remains active (can hurt opponents) for. |
| Attack |
Attack level is L for low attacks (must be blocked crouching), H is for High attacks (which can be blocked high or low) and M for overhead (must be blocked standing). T is for throw attacks (which cannot be blocked). |
| Cancel options |
Available cancel options.
|
| Confirm windows |
Hit confirm windows written as Specials & CAs/Target Combos/V-Trigger. Notation may denote V-Skill only cancel windows in Specials.
|
| Crush Counter |
Crush Counter hit advantage written as opponent state, frame advantage, and v-gauge gain on hit. |
| Damage |
Attack damage on hit. Notation may denote multi-hit or "sweet spot" damage values on certain frames. |
| Hit/Block |
These are frame advantage values when the attack hits or is blocked. If the number is positive, then the move will end before the defender can act again. If the number is negative, the defender will be able to act before the attacker and maybe even punish. KD refers to knockdown on hit.
|
| Knockdown |
Knockdown advantage against Normal, Quick Rise and Back Rise wake up options. |
| Recovery |
How many frames it takes for a move to finish after it's been active. |
| Startup |
How many frames it takes before the move becomes 'active' or have a hit box. The last startup frame and the first active frame are the same frame, meaning all values are written as Startup + 1. |
| Stun |
Amount of stun added to the opponent's stun bar on hit. |
Normals
Stand LP
Stand MP
Stand HP
Stand LK
Stand MK
Stand HK
Crouch LP
Crouch MP
Crouch HP
Crouch LK
Crouch MK
Crouch HK
Jump LP
Jump MP
Jump HP
Jump LK
Jump MK
Jump HK
Target Combos
Hard Lead In
Hard KKB
OTB
Hard Smasher
Hard Pressure
Under Impact 1
Under Impact 2
Stomping Combo
Throws
Dirty Bomber
Dirty Shot
Special Moves
LP Dash Straight
MP Dash Straight
HP Dash Straight
EX Dash Straight
LK Dash Grand Blow
MK Dash Grand Blow
HK Dash Grand Blow
EX Dash Grand Blow
LK Screw Smash
MK Screw Smash
HK Screw Smash
EX Screw Smash
TAP lvl 1
TAP lvl 2
TAP lvl 3
TAP lvl 4
TAP lvl 5
TAP lvl 6
TAP lvl 7
TAP lvl 8
TAP lvl 9
TAP lvl 10
Critical Art
Gigaton Blow
Taunts
Taunt
V-System
V-Skill 1
KKB
KKB > Buffalo Swing
KKB > Buffalo Pressure
V-Skill 2
FFB
LP Dash Straight (V-Skill 2)
MP Dash Straight (V-Skill 2)
HP Dash Straight (V-Skill 2)
EX Dash Straight (V-Skill 2)
V-Trigger 1
Crazy Rush
Charging Buffalo (stage 1) (vt)
Charging Buffalo (stage 2) (vt)
Charging Buffalo (stage 3) (vt)
Final Charging Buffalo (vt)
EX Charging Buffalo (stage 1) (vt)
EX Final Charging Buffalo (vt)
Charging Buffalo (stage 1) (V-Skill 2) (vt)
Charging Buffalo (stage 2) (V-Skill 2) (vt)
Charging Buffalo (stage 3) (V-Skill 2) (vt)
Final Charging Buffalo (V-Skill 2) (vt)
EX Charging Buffalo (stage 1) (V-Skill 2)) (vt)
EX Final Charging Buffalo (V-Skill 2) (vt)
Bursting Buffalo (stage 1) (vt)
Bursting Buffalo (stage 2) (vt)
Bursting Buffalo (stage 3) (vt)
Final Bursting Buffalo (vt)
EX Bursting Buffalo (stage 1) (vt)
EX Final Bursting Buffalo (vt)
V-Trigger 2
No Mercy
B3
V-Shift
V-Shift
V-Shift Break
Buffalo Breaker
V-Reversal
Buffalo Headbutt

