No edit summary |
No edit summary |
||
| Line 7: | Line 7: | ||
|vt1=600 | |vt1=600 | ||
|vt2=900 | |vt2=900 | ||
|movef= | |movef=0.052 | ||
|moveb= | |moveb=0.035 | ||
|dashf=16 | |dashf=16 | ||
|dashb=21 | |dashb=21 | ||
|dashfd= | |dashfd=1.241 | ||
|dashbd= | |dashbd=0.824 | ||
|dashch=3-10 | |dashch=3-10 | ||
|jumpb=46 (4+38+4) | |jumpb=46 (4+38+4) | ||
|jumpn=46 (4+38+4) | |jumpn=46 (4+38+4) | ||
|jumpf=45 (3+38+4) | |jumpf=45 (3+38+4) | ||
|jumpbd= | |jumpbd=1.776 | ||
|jumpfd= | |jumpfd=2.072 | ||
|throwh=0.25 | |throwh=0.25 | ||
|throwr=0.8 | |throwr=0.8 | ||
Revision as of 01:39, 14 March 2021
Introduction
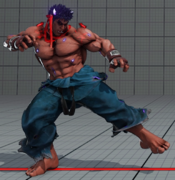
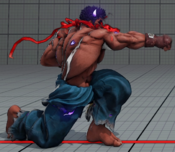
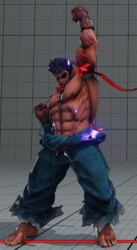
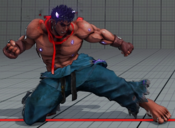
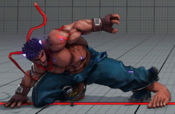
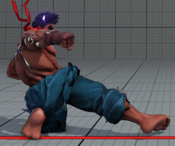
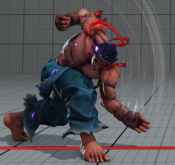
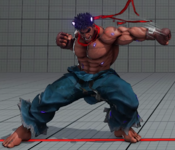
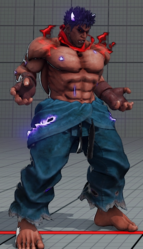
About Kage
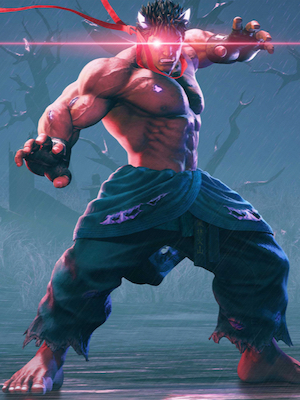
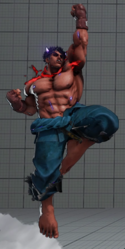
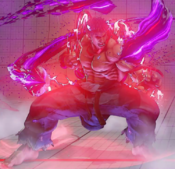
The embodiment of the Satsui No Hado haunting Ryu, Kage seeks to persuade Ryu to give into his dark desires.
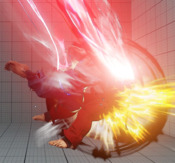
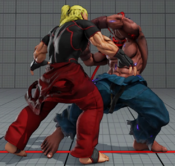
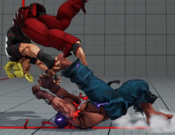
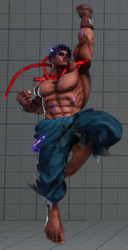
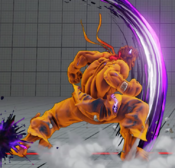
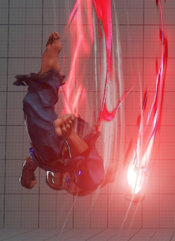
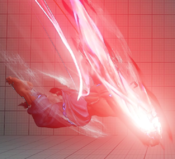
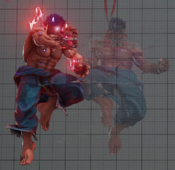
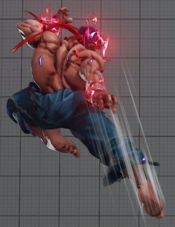
Kage is a low-health short-range brawling character with powerful combos. His poking options are lacking compared to most characters, with short normals and fairly slow startup on his fireball, but he makes up for it with raw damage output and a huge capability to style on opponents. His unique air fireball and surprisingly good divekick give him above average air approach, and his EX air specials give him punishing air-to-air damage output. One of his most notable attributes is his advantage after his forward throw, as he's +9 within poking range; compared to many other characters, Kage is much better at continuing offensive pressure after throwing the opponent. Add his powerful V-Triggers to the mix and what you're left with is an explosive character capable of quickly taking hold of the momentum of a match, even if he might struggle against opponents with more range.
V-System
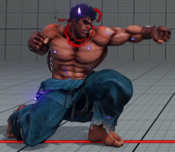
V-Trigger 1: Taigyaku Mudo
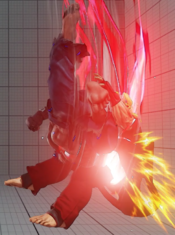
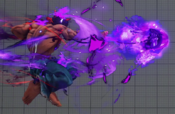
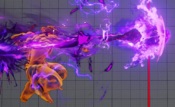
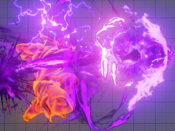
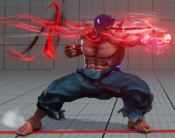
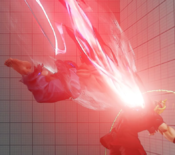
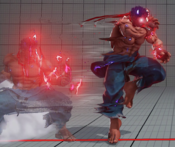
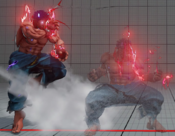
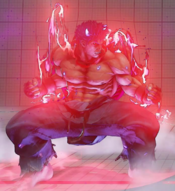
Gives Kage access to a teleport and greatly enhances his V-Skills, opening up devastating extended combo routes that deal heavy damage and can carry the opponent a great distance to the corner. Cancels into teleport can be used as an approach option with regular or EX red fireball, and from close range an EX red fireball teleport cancel can be used as a corner escape that maintains frame advantage. It can also be used for some almost unblockable cross up setups where Kage hits cross up then lands in front. One of its most notable abilities is cancelling his EX reversal to teleport back with a specific timing that only cancels on block, leaving him at a range most character's can't punish. This effectively means that Kage has the best defensive V-Trigger in the game.
V-Trigger 2: Rikudo Osatsu
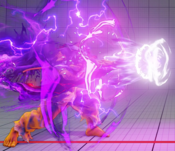
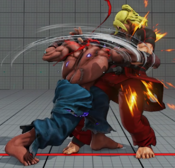
Gives Kage access to Raging Demon, a highly damaging command grab super, and Misogi, an extremely versatile hard knockdown combo ender. Misogi freezes the screen, allowing it to combo from virtually anything except an air reset; this makes Kage's whiff punishment dangerous since he can buffer low-risk moves in neutral that will convert to dangerous mixups if they connect. Additionally, it enhances Kage's HP Hadoken and HK Ryusokyaku (stomp). In VT2, HP hadoken is a mostly normal fireball, traveling about 80% of the screen before dissipating. His HK Stomp gains +1 advantage on hit or block (+6/+4 total), allowing for new combos and stronger pressure.
V-Skill 1: Senha Kassatsu
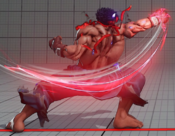
An unsafe attack with armor vs mids and overheads that can be made safe via charging. Both versions of the move crush counter, the uncharged version giving a limited juggle state and the charged version giving a grounded combo. The charged version can be dash cancelled, making it unsafe on block but giving better knockdown advantage on the non-CC version.
In VT1, VS1 becomes armored much earlier, has much greater horizontal range, is safe on block, and cancels to CA. The charged version has even more gigantic range, crumples the opponent, and gives an absurd +6 on block. It also grants extremely relaxed juggle states and can be canceled to from abnormal starters. Less useful for extended combos than VS2, but has great neutral application and can punish V-Reversal and V-Break.
V-Skill 2: Sekieiken
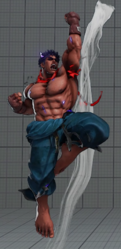
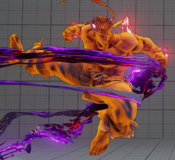
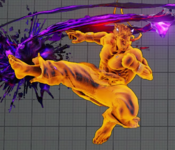
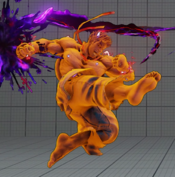
A safe leaping attack that works as an ender for his target combo and can go over the opponent's ground pokes. Has a close and far version. Good as an activation point for V-trigger combos.
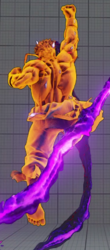
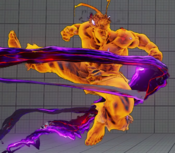
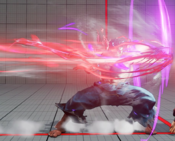
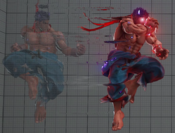
In VT1, VS2 is faster, hits twice, launches the opponent for a juggle, and can be cancelled into from his EX moves and heavy normals. In addition, it can be used in the air after either air EX move, gaining many hits and dragging the opponent to the ground for devastating air-to-air damage. Doesn't combo from medium normals, unlike VS1, but gives higher returns. Can also punish V-Reversal, but it's much worse at doing so than VS1.
Final Patch
Players to Watch
| Kage | |
|---|---|
| Vitals | |
| Life Points | 925 |
| Stun Points | 950 |
| V-Gauge Points | |
| V-Trigger 1 | 600 |
| V-Trigger 2 | 900 |
| Ground Movement | |
| Forward Walk Speed | 0.052 |
| Backward Walk Speed | 0.035 |
| Forward Dash Speed | 16 |
| Backward Dash Speed | 21 |
| Forward Dash Distance | 1.241 |
| Backward Dash Distance | 0.824 |
| Backdash CH Frames | 3-10 |
| Jumping | |
| Back Jump Speed | 46 (4+38+4) |
| Neutral Jump Speed | 46 (4+38+4) |
| Forward Jump Speed | 45 (3+38+4) |
| Forward Jump Distance | 2.072 |
| Backward Jump Distance | 1.776 |
| Throws | |
| Throw Hurtbox | 0.25 |
| Throw Range | 0.8 |
Frame Data & Descriptions are provided by FATOnline.
|
| SFV Frame Data Glossary | |
|---|---|
| Active |
How many frames a move remains active (can hurt opponents) for. |
| Attack |
Attack level is L for low attacks (must be blocked crouching), H is for High attacks (which can be blocked high or low) and M for overhead (must be blocked standing). T is for throw attacks (which cannot be blocked). |
| Cancel options |
Available cancel options.
|
| Confirm windows |
Hit confirm windows written as Specials & CAs/Target Combos/V-Trigger. Notation may denote V-Skill only cancel windows in Specials.
|
| Crush Counter |
Crush Counter hit advantage written as opponent state, frame advantage, and v-gauge gain on hit. |
| Damage |
Attack damage on hit. Notation may denote multi-hit or "sweet spot" damage values on certain frames. |
| Hit/Block |
These are frame advantage values when the attack hits or is blocked. If the number is positive, then the move will end before the defender can act again. If the number is negative, the defender will be able to act before the attacker and maybe even punish. KD refers to knockdown on hit.
|
| Knockdown |
Knockdown advantage against Normal, Quick Rise and Back Rise wake up options. |
| Recovery |
How many frames it takes for a move to finish after it's been active. |
| Startup |
How many frames it takes before the move becomes 'active' or have a hit box. The last startup frame and the first active frame are the same frame, meaning all values are written as Startup + 1. |
| Stun |
Amount of stun added to the opponent's stun bar on hit. |
Normals
Stand LP
| Startup | Active | Recovery | Hit | ||
|---|---|---|---|---|---|
| 4 | 3 | 5 | 4 | ||
| Damage | Stun | Attack | Block | ||
| 30 | 70 | H | 3 | ||
| |||||
Stand MP
| Startup | Active | Recovery | Hit | ||
|---|---|---|---|---|---|
| 6 | 3 | 12 | 4 | ||
| Damage | Stun | Attack | Block | ||
| 60 | 100 | H | -1 | ||
| |||||
Stand HP
| Startup | Active | Recovery | Hit | ||
|---|---|---|---|---|---|
| 6 | 2 | 23 | -3 | ||
| Damage | Stun | Attack | Block | ||
| 80 | 120 | H | -5 | ||
| |||||
Stand LK
| Startup | Active | Recovery | Hit | ||
|---|---|---|---|---|---|
| 4 | 3 | 10 | 1 | ||
| Damage | Stun | Attack | Block | ||
| 30 | 70 | H | 1 | ||
| |||||
Stand MK
| Startup | Active | Recovery | Hit | ||
|---|---|---|---|---|---|
| 9 | 3 | 17 | 3 | ||
| Damage | Stun | Attack | Block | ||
| 70 | 100 | H | -3 | ||
| |||||
Stand HK
| Startup | Active | Recovery | Hit | ||
|---|---|---|---|---|---|
| 11 | 2 | 19 | 4 | ||
| Damage | Stun | Attack | Block | ||
| 80 | 150 | H | -2 | ||
| |||||
Crouch LP
| Startup | Active | Recovery | Hit | ||
|---|---|---|---|---|---|
| 3 | 2 | 8 | 3 | ||
| Damage | Stun | Attack | Block | ||
| 30 | 70 | H | 1 | ||
| |||||
Crouch MP
| Startup | Active | Recovery | Hit | ||
|---|---|---|---|---|---|
| 5 | 3 | 12(15) | 6 | ||
| Damage | Stun | Attack | Block | ||
| 60 | 100 | H | 3 | ||
| |||||
Crouch HP
| Startup | Active | Recovery | Hit | ||
|---|---|---|---|---|---|
| 8 | 6 | 20 | 3 | ||
| Damage | Stun | Attack | Block | ||
| 80 | 120 | H | -4 | ||
| |||||
Crouch LK
| Startup | Active | Recovery | Hit | ||
|---|---|---|---|---|---|
| 4 | 2 | 8 | 2 | ||
| Damage | Stun | Attack | Block | ||
| 20 | 70 | L | 1 | ||
| |||||
Crouch MK
| Startup | Active | Recovery | Hit |
|---|---|---|---|
| 7 | 2 | 15 | 2 |
| Damage | Stun | Attack | Block |
| 60 | 100 | L | -2 |
Crouch HK
| Startup | Active | Recovery | Hit | ||
|---|---|---|---|---|---|
| 8 | 2 | 24 | KD | ||
| Damage | Stun | Attack | Block | ||
| 90 | 150 | L | -11 | ||
| |||||
Jump LP
| Startup | Active | Recovery | Hit |
|---|---|---|---|
| 4 | 5 | - | - |
| Damage | Stun | Attack | Block |
| 40 | 70 | M | - |
Jump MP
| Startup | Active | Recovery | Hit | ||
|---|---|---|---|---|---|
| 7 | 5 | - | - | ||
| Damage | Stun | Attack | Block | ||
| 60 | 100 | M | - | ||
| |||||
Jump HP
| Startup | Active | Recovery | Hit | ||
|---|---|---|---|---|---|
| 8 | 5 | - | - | ||
| Damage | Stun | Attack | Block | ||
| 90 | 150 | M | - | ||
| |||||
Jump LK
| Startup | Active | Recovery | Hit | ||
|---|---|---|---|---|---|
| 4 | 5 | - | - | ||
| Damage | Stun | Attack | Block | ||
| 40 | 70 | M | - | ||
| |||||
Jump MK
| Startup | Active | Recovery | Hit | ||
|---|---|---|---|---|---|
| 8 | 5 | - | - | ||
| Damage | Stun | Attack | Block | ||
| 60 | 100 | M | - | ||
| |||||
Jump HK
| Startup | Active | Recovery | Hit | ||
|---|---|---|---|---|---|
| 10 | 4 | - | - | ||
| Damage | Stun | Attack | Block | ||
| 90 | 150 | M | - | ||
| |||||
Command Normals
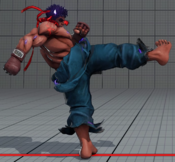
Tenmakujinkyaku
| Startup | Active | Recovery | Hit | ||
|---|---|---|---|---|---|
| 16 | - | 6 | 3(12) | ||
| Damage | Stun | Attack | Block | ||
| 60 | 100 | H | -4(6) | ||
| |||||
Zugaihasatsu
| Startup | Active | Recovery | Hit | ||
|---|---|---|---|---|---|
| 22 | 3 | 22 | 1 | ||
| Damage | Stun | Attack | Block | ||
| 70 | 100 | M | -7 | ||
| |||||
Kikokuduki
| Startup | Active | Recovery | Hit | ||
|---|---|---|---|---|---|
| 9 | 4 | 20 | 2 | ||
| Damage | Stun | Attack | Block | ||
| 80 | 150 | H | -4 | ||
| |||||
Target Combos
Kikokuretsuzan
| Startup | Active | Recovery | Hit | ||
|---|---|---|---|---|---|
| 9+14 | 2 | 26 | KD | ||
| Damage | Stun | Attack | Block | ||
| 80*63 (143) | 150*90 (240) | H*H | -12 | ||
| |||||
Sekiei Gozanken
| Normal | Startup | Active | Recovery | Hit | ||
|---|---|---|---|---|---|---|
| 27 | 2 | 29 | KD | |||
| Damage | Stun | Attack | Block | |||
| 60 | 100 | H*H*H | - | |||
| ||||||
| V-Trigger 1 | Startup | Active | Recovery | Hit | ||
| 24 | 6 | 24 | KD | |||
| Damage | Stun | Attack | Block | |||
| 100 | 150 | H*H*H | - | |||
| ||||||
Throws
Shoulder Throw
| Startup | Active | Recovery | Hit | ||
|---|---|---|---|---|---|
| 5 | 3 | 17 | KD | ||
| Damage | Stun | Attack | Block | ||
| 130 | 170 | T | KD | ||
| |||||
Somersault Throw
| Startup | Active | Recovery | Hit | ||
|---|---|---|---|---|---|
| 5 | 3 | 17 | KD | ||
| Damage | Stun | Attack | Block | ||
| 150 | 170 | T | KD | ||
| |||||
Special Moves
Hadoken
| Startup | Active | Recovery | Hit | ||
|---|---|---|---|---|---|
| 13 | 5 | 23 | 2 | ||
| Damage | Stun | Attack | Block | ||
| 60 | 100 | H | -3 | ||
| |||||
EX Hadoken
| Startup | Active | Recovery | Hit | ||
|---|---|---|---|---|---|
| 17 | 6 | 36 (32) | KD | ||
| Damage | Stun | Attack | Block | ||
| 70 | 120 | H | 2 | ||
| |||||
Airborne Hadoken
| Startup | Active | Recovery | Hit | ||
|---|---|---|---|---|---|
| 10 | 23 | 7 | 3 | ||
| Damage | Stun | Attack | Block | ||
| 90 | 100 | H | -6 | ||
| |||||
EX Airborne Hadoken
| Normal | Startup | Active | Recovery | Hit | ||
|---|---|---|---|---|---|---|
| 9 | - | 11 | KD | |||
| Damage | Stun | Attack | Block | |||
| 50x2 (100) | 50x2 (100) | H*H | 5 | |||
| ||||||
| V-Trigger 1 | Startup | Active | Recovery | Hit | ||
| 9 | - | 11 | KD | |||
| Damage | Stun | Attack | Block | |||
| 50x2 (100) | 50x2 (100) | H*H | 2 | |||
| ||||||
LP Shakunetsu Hadoken
| Startup | Active | Recovery | Hit | ||
|---|---|---|---|---|---|
| 18 | - | 34 | KD | ||
| Damage | Stun | Attack | Block | ||
| 60 | 100 | H | -6 | ||
| |||||
MP Shakunetsu Hadoken
| Startup | Active | Recovery | Hit | ||
|---|---|---|---|---|---|
| 21 | - | 40 | KD | ||
| Damage | Stun | Attack | Block | ||
| 30*40 | 60x2 | H | -6 | ||
| |||||
HP Shakunetsu Hadoken
| Startup | Active | Recovery | Hit | ||
|---|---|---|---|---|---|
| 25 | - | 42 | KD | ||
| Damage | Stun | Attack | Block | ||
| 20x2*40 (80) | 50x3 (150) | H | -6 | ||
| |||||
EX Shakunetsu Hadoken
| Startup | Active | Recovery | Hit | ||
|---|---|---|---|---|---|
| 21 | - | 34 | KD | ||
| Damage | Stun | Attack | Block | ||
| 30x4 (120) | 30x3*60 (150) | H | 6 | ||
| |||||
LP Shoryuken
| Startup | Active | Recovery | Hit | ||
|---|---|---|---|---|---|
| 3 | 12 | 18+19 | KD | ||
| Damage | Stun | Attack | Block | ||
| 80 | 120 | H | -27 | ||
| |||||
MP Shoryuken
| Startup | Active | Recovery | Hit | ||
|---|---|---|---|---|---|
| 4 | 2*10 | 23+19 | KD | ||
| Damage | Stun | Attack | Block | ||
| 60x2 | 100*50 | H | -33 | ||
| |||||
HP Shoryuken
| Startup | Active | Recovery | Hit | ||
|---|---|---|---|---|---|
| 5 | 2*2(1)8 | 29+19 | KD | ||
| Damage | Stun | Attack | Block | ||
| 60*20*40 (120) | 100*20*30 (150) | H | -36 | ||
| |||||
EX Shoryuken
| Startup | Active | Recovery | Hit | ||
|---|---|---|---|---|---|
| 3 | 3*9(27)2*2*2*13 | 32+15 | KD | ||
| Damage | Stun | Attack | Block | ||
| 30*20x2*30x3 (160) | 0x3*50x2*100 (200) | H | -41 | ||
| |||||
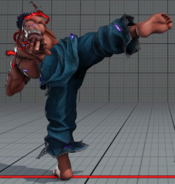
LK Kurekijin
| Startup | Active | Recovery | Hit | ||
|---|---|---|---|---|---|
| 10 | 2 | 12+14 | KD | ||
| Damage | Stun | Attack | Block | ||
| 50 | 100 | H | -10 | ||
| |||||
MK Kurekijin
| Startup | Active | Recovery | Hit | ||
|---|---|---|---|---|---|
| 17 | 2 | 12+14 | KD | ||
| Damage | Stun | Attack | Block | ||
| 50 | 100 | H | -11 | ||
| |||||
HK Kurekijin
| Startup | Active | Recovery | Hit | ||
|---|---|---|---|---|---|
| 20 | 2 | 11+15 | KD | ||
| Damage | Stun | Attack | Block | ||
| 60 | 100 | H | -10 | ||
| |||||
EX Kurekijin
| Normal | Startup | Active | Recovery | Hit | ||
|---|---|---|---|---|---|---|
| 11 | 2 | 12+14 | KD | |||
| Damage | Stun | Attack | Block | |||
| 80 | 120 | H | -10 | |||
| ||||||
| V-Trigger 1 | Startup | Active | Recovery | Hit | ||
| 16 | 2 | 12+14 | KD | |||
| Damage | Stun | Attack | Block | |||
| 80 | 120 | H | -10 | |||
| ||||||
Airborne Kurekijin
| Startup | Active | Recovery | Hit | ||
|---|---|---|---|---|---|
| 6 | 2(6)2 | 12 | KD (0~4) | ||
| Damage | Stun | Attack | Block | ||
| 90(70) | 150 | H | -2(2) | ||
| |||||
EX Airborne Kurekijin
| Normal | Startup | Active | Recovery | Hit | ||
|---|---|---|---|---|---|---|
| 12 | 2(4)2 | 12 | KD (6~10) | |||
| Damage | Stun | Attack | Block | |||
| 100(70) | 150 | H | 0(4) | |||
| ||||||
| V-Trigger 1 | Startup | Active | Recovery | Hit | ||
| 12 | 2(4)2 | 12 | KD (6~10) | |||
| Damage | Stun | Attack | Block | |||
| 100(70) | 150 | H | 0(4) | |||
| ||||||
EX Airborne Kurekijin (instant)
| Startup | Active | Recovery | Hit | ||
|---|---|---|---|---|---|
| 12 | 2(4)2 | 12 | KD (2) | ||
| Damage | Stun | Attack | Block | ||
| 90(70) | 150 | H | -9(-4) | ||
| |||||
LK Ryusokyaku
| Startup | Active | Recovery | Hit | ||
|---|---|---|---|---|---|
| 15 | 3 | 20 | 2 | ||
| Damage | Stun | Attack | Block | ||
| 60 | 100 | H | -4 | ||
| |||||
MK Ryusokyaku
| Startup | Active | Recovery | Hit | ||
|---|---|---|---|---|---|
| 18 | 3 | 18 | 2 | ||
| Damage | Stun | Attack | Block | ||
| 60 | 100 | H | -2 | ||
| |||||
HK Ryusokyaku
| Startup | Active | Recovery | Hit | ||
|---|---|---|---|---|---|
| 26 | 3 | 16 | 5 | ||
| Damage | Stun | Attack | Block | ||
| 60 | 100 | H | 3 | ||
| |||||
EX Ryusokyaku
| Startup | Active | Recovery | Hit | ||
|---|---|---|---|---|---|
| 20 | 2 | 26 | KD | ||
| Damage | Stun | Attack | Block | ||
| 120 | 200 | M | -8 | ||
| |||||
Critical Arts
Metsu Shoryuken
| Startup | Active | Recovery | Hit | ||
|---|---|---|---|---|---|
| 4 | 1(1)1(1)1(1)1(1)1(1)1(1)1(1)1 | 23+30 | KD | ||
| Damage | Stun | Attack | Block | ||
| 340(280) | 0 | H | -38 | ||
| |||||
Taunts
Taunt
| Startup | Active | Recovery | Hit |
|---|---|---|---|
| - | - | 61 | - |
| Damage | Stun | Attack | Block |
| - | - | - | - |
V-System
V-Skill 1
Senha Kassatsu
| Normal | Startup | Active | Recovery | Hit | ||
|---|---|---|---|---|---|---|
| 12+10(41) | 4 | 21 | 2 | |||
| Damage | Stun | Attack | Block | |||
| 60 | 100 | H | -6 | |||
| ||||||
| V-Trigger 1 | Startup | Active | Recovery | Hit | ||
| 9+9 | 3 | 20 | KD | |||
| Damage | Stun | Attack | Block | |||
| 100 | 100 | H | 0 | |||
| ||||||
Senha Kassatsu (hold)
| Normal | Startup | Active | Recovery | Hit | ||
|---|---|---|---|---|---|---|
| 42 | 4 | 21 (22) | KD | |||
| Damage | Stun | Attack | Block | |||
| 90 | 150 | H | -2 (-4) | |||
| ||||||
| V-Trigger 1 | Startup | Active | Recovery | Hit | ||
| 39 | 3 | 17 | KD | |||
| Damage | Stun | Attack | Block | |||
| 120 | 150 | H | 6 | |||
| ||||||
V-Skill 2
Sekieiken
| Normal | Startup | Active | Recovery | Hit | ||
|---|---|---|---|---|---|---|
| 24 | 6 | 24 | 1 | |||
| Damage | Stun | Attack | Block | |||
| 60 | 100 | H | -2 | |||
| ||||||
| V-Trigger 1 | Startup | Active | Recovery | Hit | ||
| 27 | 2 | 29 | KD | |||
| Damage | Stun | Attack | Block | |||
| 100 | 150 | H*H | -2 | |||
| ||||||
V-Trigger 1
Taigyaku Mudo
| Startup | Active | Recovery | Hit | ||
|---|---|---|---|---|---|
| 1 | - | 4 | - | ||
| Damage | Stun | Attack | Block | ||
| - | - | - | - | ||
| |||||
Sekieiken (Airborne)
| Startup | Active | Recovery | Hit | ||
|---|---|---|---|---|---|
| 27 | 2 | 29 | KD | ||
| Damage | Stun | Attack | Block | ||
| 130 | 150 | H*H | -4 | ||
| |||||
Ashura Senku (Forward)
| Startup | Active | Recovery | Hit | ||
|---|---|---|---|---|---|
| - | - | 32 | - | ||
| Damage | Stun | Attack | Block | ||
| - | - | - | - | ||
| |||||
Ashura Senku (Back)
| Startup | Active | Recovery | Hit | ||
|---|---|---|---|---|---|
| - | - | 32 | - | ||
| Damage | Stun | Attack | Block | ||
| - | - | - | - | ||
| |||||
Airborne Ashura Senku (Forward)
| Startup | Active | Recovery | Hit | ||
|---|---|---|---|---|---|
| - | - | - | - | ||
| Damage | Stun | Attack | Block | ||
| - | - | - | - | ||
| |||||
Airborne Ashura Senku (Back)
| Startup | Active | Recovery | Hit | ||
|---|---|---|---|---|---|
| - | - | - | - | ||
| Damage | Stun | Attack | Block | ||
| - | - | - | - | ||
| |||||
Airborne Ashura Senku (F or B )> Divekick
| Startup | Active | Recovery | Hit | ||
|---|---|---|---|---|---|
| - | - | - | 3(12) | ||
| Damage | Stun | Attack | Block | ||
| 60 | 100 | H | -4(6) | ||
| |||||
V-Trigger 2
Rikudo Osatsu
| Startup | Active | Recovery | Hit | ||
|---|---|---|---|---|---|
| 1 | - | 4 | - | ||
| Damage | Stun | Attack | Block | ||
| - | - | - | - | ||
| |||||
Misogi
| Startup | Active | Recovery | Hit | ||
|---|---|---|---|---|---|
| 30(7) | - | 31 | KD | ||
| Damage | Stun | Attack | Block | ||
| 150 | 150 | H | -2 | ||
| |||||
Shun Goku Satsu
| Startup | Active | Recovery | Hit | ||
|---|---|---|---|---|---|
| 1+0 | 30 | 49 | KD | ||
| Damage | Stun | Attack | Block | ||
| 400 | 0 | H | - | ||
| |||||
V-Shift
V-Shift
| Startup | Active | Recovery | Hit | ||
|---|---|---|---|---|---|
| 1 | 9 | 22 | - | ||
| Damage | Stun | Attack | Block | ||
| - | - | - | - | ||
| |||||
V-Shift Break
Yashazuki
| Startup | Active | Recovery | Hit | ||
|---|---|---|---|---|---|
| ? | 3 | ? | KD | ||
| Damage | Stun | Attack | Block | ||
| 60 | 0 | H | -2 | ||
| |||||
V-Reversal
Senbugeki
| Startup | Active | Recovery | Hit | ||
|---|---|---|---|---|---|
| 12 | 2 | 24 | 2 | ||
| Damage | Stun | Attack | Block | ||
| 40 | 0 | H | -2 | ||
| |||||
