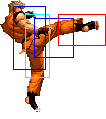
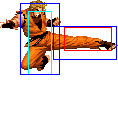
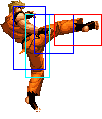
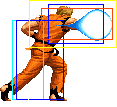
m (→Anywhere) |
mNo edit summary |
||
| Line 114: | Line 114: | ||
| | | | ||
|- | |- | ||
! [[image:snkc.gif]]+[[image:snkd.gif]] | ! [[image:snkc.gif]] + [[image:snkd.gif]] | ||
|align="center"| 9/8/18 | |align="center"| 9/8/18 | ||
|align="center"| KD/-4 | |align="center"| KD/-4 | ||
| Line 134: | Line 134: | ||
! [[image:snkb.gif]] | ! [[image:snkb.gif]] | ||
|align="center"| 3/3/5 | |align="center"| 3/3/5 | ||
|align="center"| +4/+2 | |align="center"| +4/ + 2 | ||
|align="center"| R | |align="center"| R | ||
|align="center"| L | |align="center"| L | ||
| Line 191: | Line 191: | ||
| | | | ||
|- | |- | ||
! [[image:snkc.gif]]+[[image:snkd.gif]] | ! [[image:snkc.gif]] + [[image:snkd.gif]] | ||
|align="center"| 13/5/- | |align="center"| 13/5/- | ||
|align="center"| KD/- | |align="center"| KD/- | ||
| Line 271: | Line 271: | ||
|colspan="10" align="center"| '''Command Normals''' | |colspan="10" align="center"| '''Command Normals''' | ||
|- | |- | ||
! <br>f+[[image:snka.gif]]<br><br> | ! <br>f + [[image:snka.gif]]<br><br> | ||
|align="center"| 17/9/11 | |align="center"| 17/9/11 | ||
|align="center"| 0/-2 | |align="center"| 0/-2 | ||
| Line 279: | Line 279: | ||
| | | | ||
|- | |- | ||
! f+[[image:snka.gif]]<br>(cancel) | ! f + [[image:snka.gif]]<br>(cancel) | ||
|align="center"| 14/9/11 | |align="center"| 14/9/11 | ||
|align="center"| 0/-2 | |align="center"| 0/-2 | ||
| Line 286: | Line 286: | ||
| | | | ||
|- | |- | ||
! f+[[image:snkb.gif]] | ! f + [[image:snkb.gif]] | ||
|align="center"| 5/15/14 | |align="center"| 5/15/14 | ||
|align="center"| -/- | |align="center"| -/- | ||
| Line 294: | Line 294: | ||
|align="center"|Guard point: Active period. Is not an attack. | |align="center"|Guard point: Active period. Is not an attack. | ||
|- | |- | ||
! df+[[image:snkb.gif]] | ! df + [[image:snkb.gif]] | ||
|align="center"| 7/9/10 | |align="center"| 7/9/10 | ||
|align="center"| -/- | |align="center"| -/- | ||
| Line 304: | Line 304: | ||
|colspan="10" align="center"| '''Special Moves''' | |colspan="10" align="center"| '''Special Moves''' | ||
|- | |- | ||
! <br>qcf+[[image:snka.gif]]<br><br> | ! <br>qcf + [[image:snka.gif]]<br><br> | ||
|align="center"| 12/3+6/29 | |align="center"| 12/3+6/29 | ||
|align="center"| KD/-9 | |align="center"| KD/-9 | ||
| Line 311: | Line 311: | ||
|rowspan="2" colspan="2" style="border-right:0px;"| [[image:Ryo02_QcfP1.png|center]] | |rowspan="2" colspan="2" style="border-right:0px;"| [[image:Ryo02_QcfP1.png|center]] | ||
|rowspan="2" colspan="2" style="border-left:0px;"| [[image:Ryo02_QcfP2.png|center]] | |rowspan="2" colspan="2" style="border-left:0px;"| [[image:Ryo02_QcfP2.png|center]] | ||
|rowspan="2" align="left"|'''Ko'ou Ken - qcf+P''' | |rowspan="2" align="left"|'''Ko'ou Ken - qcf + P''' | ||
*Ryo releases a blast of energy from his hand. qcf+C travels a bit further than qcf+A, where qcf+A goes almost half screen<br> | *Ryo releases a blast of energy from his hand. qcf + C travels a bit further than qcf + A, where qcf + A goes almost half screen<br> | ||
*qcf+C does a very slight amount of damage more than qcf+A, but has greater recovery time | *qcf + C does a very slight amount of damage more than qcf + A, but has greater recovery time | ||
|- | |- | ||
! qcf+[[image:snkc.gif]] | ! qcf + [[image:snkc.gif]] | ||
|align="center"| 16/3+6/33 | |align="center"| 16/3+6/33 | ||
|align="center"| KD/-11 | |align="center"| KD/-11 | ||
| Line 321: | Line 321: | ||
|align="center"| HL | |align="center"| HL | ||
|- | |- | ||
! <br>qcf+[[image:snkb.gif]]<br><br> | ! <br>qcf + [[image:snkb.gif]]<br><br> | ||
|align="center"| 25/3+3/17 | |align="center"| 25/3+3/17 | ||
|align="center"| KD/-5 | |align="center"| KD/-5 | ||
| Line 328: | Line 328: | ||
|rowspan="2" colspan="2" style="border-right:0px;"| [[image:Ryo02_QcfK1.png|center]] | |rowspan="2" colspan="2" style="border-right:0px;"| [[image:Ryo02_QcfK1.png|center]] | ||
|rowspan="2" colspan="2" style="border-left:0px;"| [[image:Ryo02_QcfK2.png|center]] | |rowspan="2" colspan="2" style="border-left:0px;"| [[image:Ryo02_QcfK2.png|center]] | ||
|rowspan="2" align="left"|'''Mouko Rajin Setsu - qcf+K''' | |rowspan="2" align="left"|'''Mouko Rajin Setsu - qcf + K''' | ||
*Ryo jumps into the air, landing with an overhead chop. qcf+D goes higher and further (almost full screen) than qcf+B | *Ryo jumps into the air, landing with an overhead chop. qcf + D goes higher and further (almost full screen) than qcf + B | ||
*Has very good priority and is almost always safe on block | *Has very good priority and is almost always safe on block | ||
*Overhead | *Overhead | ||
| Line 335: | Line 335: | ||
*Free cancellable into | *Free cancellable into | ||
|- | |- | ||
! qcf+[[image:snkd.gif]] | ! qcf + [[image:snkd.gif]] | ||
|align="center"| 27/3+3/21 | |align="center"| 27/3+3/21 | ||
|align="center"| KD/-9 | |align="center"| KD/-9 | ||
| Line 341: | Line 341: | ||
|align="center"| H | |align="center"| H | ||
|- | |- | ||
! <br>f b f+[[image:snka.gif]]<br><br> | ! <br>f b f + [[image:snka.gif]]<br><br> | ||
|align="center"| 13/2(4)x8/21 | |align="center"| 13/2(4)x8/21 | ||
|align="center"| KD/-35 | |align="center"| KD/-35 | ||
| Line 350: | Line 350: | ||
|rowspan="2" style="border-right:0px; border-left:0px;"| [[image:Ryo02_fbfP3.png|center]] | |rowspan="2" style="border-right:0px; border-left:0px;"| [[image:Ryo02_fbfP3.png|center]] | ||
|rowspan="2" style="border-left:0px;"| [[image:Ryo02_fbfP4.png|center]] | |rowspan="2" style="border-left:0px;"| [[image:Ryo02_fbfP4.png|center]] | ||
|rowspan="2" align="left"|'''Zanretsu Ken - f b f+P''' | |rowspan="2" align="left"|'''Zanretsu Ken - f b f + P''' | ||
*Ryo repeatedly punches in front of him. This move has a "sucking" effect, in the sense that it can pull the opponent in if they are close. If the opponent gets sucked in, Ryo does a 13 hit combo punching them away | *Ryo repeatedly punches in front of him. This move has a "sucking" effect, in the sense that it can pull the opponent in if they are close. If the opponent gets sucked in, Ryo does a 13 hit combo punching them away | ||
*Has autoguard before Ryo begins punching rapidly (frames 3-8) | *Has autoguard before Ryo begins punching rapidly (frames 3-8) | ||
*f b f+A is a hard knockdown | *f b f + A is a hard knockdown | ||
*Free cancellable out of on the last hit. It is only possible to juggle the opponent after f b f+C | *Free cancellable out of on the last hit. It is only possible to juggle the opponent after f b f + C | ||
|- | |- | ||
! f b f+[[image:snkc.gif]] | ! f b f + [[image:snkc.gif]] | ||
|align="center"| 13/2(4)x15/23 | |align="center"| 13/2(4)x15/23 | ||
|align="center"| KD/-85 | |align="center"| KD/-85 | ||
| Line 362: | Line 362: | ||
|align="center"| HL | |align="center"| HL | ||
|- | |- | ||
! dp+[[image:snka.gif]] | ! dp + [[image:snka.gif]] | ||
|align="center"| 5/3*12/11+16 | |align="center"| 5/3*12/11+16 | ||
|align="center"| KD/-21 | |align="center"| KD/-21 | ||
| Line 369: | Line 369: | ||
|colspan="2" style="border-right:0px;" valign="bottom"| [[image:Ryo02_DpA1.png|center]] | |colspan="2" style="border-right:0px;" valign="bottom"| [[image:Ryo02_DpA1.png|center]] | ||
|colspan="2" style="border-left:0px;" valign="bottom"| [[image:Ryo02_DpA2.png|center]] | |colspan="2" style="border-left:0px;" valign="bottom"| [[image:Ryo02_DpA2.png|center]] | ||
|rowspan="2" align="left"|'''Kohou - dp+P''' | |rowspan="2" align="left"|'''Kohou - dp + P''' | ||
*Ryo performs a rising uppercut that has great speed and priority. | *Ryo performs a rising uppercut that has great speed and priority. | ||
*dp+A does one hit, knocking down, while dp+C does two hits, where only the second hit knocks down. Usually, the second hit whiffs an opponent on the ground<br> | *dp + A does one hit, knocking down, while dp + C does two hits, where only the second hit knocks down. Usually, the second hit whiffs an opponent on the ground<br> | ||
*free cancellable into<br> | *free cancellable into<br> | ||
*free cancellable out of on the first hit | *free cancellable out of on the first hit | ||
*Both versions are invincible for the full startup and the first three frames of the first active period | *Both versions are invincible for the full startup and the first three frames of the first active period | ||
|- | |- | ||
! dp+[[image:snkc.gif]] | ! dp + [[image:snkc.gif]] | ||
|align="center"| 5/3*17/16+13 | |align="center"| 5/3*17/16+13 | ||
|align="center"| KD/-21 | |align="center"| KD/-21 | ||
| Line 384: | Line 384: | ||
|colspan="2" style="border-left:0px;" valign="bottom"| [[image:Ryo02_DpC1.png|center]] | |colspan="2" style="border-left:0px;" valign="bottom"| [[image:Ryo02_DpC1.png|center]] | ||
|- | |- | ||
! hcb+[[image:snkb.gif]] | ! hcb + [[image:snkb.gif]] | ||
|align="center"| 6/3*6/13+17 | |align="center"| 6/3*6/13+17 | ||
|align="center"| KD/-18 | |align="center"| KD/-18 | ||
| Line 391: | Line 391: | ||
|colspan="2" style="border-right:0px;" valign="bottom"| [[image:Ryo02_hcbB1.png|center]] | |colspan="2" style="border-right:0px;" valign="bottom"| [[image:Ryo02_hcbB1.png|center]] | ||
|colspan="2" style="border-left:0px;" valign="bottom"| [[image:Ryo02_hcbB2.png|center]] | |colspan="2" style="border-left:0px;" valign="bottom"| [[image:Ryo02_hcbB2.png|center]] | ||
|rowspan="2" align="left"|'''Hien Shippuu Kyaku - hcb+K''' | |rowspan="2" align="left"|'''Hien Shippuu Kyaku - hcb + K''' | ||
*Ryo jumps forward, kicking multiple times. hcb+B does two hits, going about 1/3 of the screen, while hcb+D does three hits, and goes full screen | *Ryo jumps forward, kicking multiple times. hcb + B does two hits, going about 1/3 of the screen, while hcb + D does three hits, and goes full screen | ||
*both moves are severely punishable on block, especially hcb+D | *both moves are severely punishable on block, especially hcb + D | ||
*free cancellable into | *free cancellable into | ||
*even if comboed into, his hcb+D will whiff on the third (and sometimes second) hits against a crouching opponent, giving them more than enough time to punish him | *even if comboed into, his hcb + D will whiff on the third (and sometimes second) hits against a crouching opponent, giving them more than enough time to punish him | ||
|- | |- | ||
! hcb+[[image:snkd.gif]] | ! hcb + [[image:snkd.gif]] | ||
|align="center"| 9/4*5(9)6/8+19 | |align="center"| 9/4*5(9)6/8+19 | ||
|align="center"| KD/-15 | |align="center"| KD/-15 | ||
| Line 408: | Line 408: | ||
|colspan="10" align="center"| '''DMs''' | |colspan="10" align="center"| '''DMs''' | ||
|- | |- | ||
! <br>f hcf+[[image:snka.gif]]<br><br> | ! <br>f hcf + [[image:snka.gif]]<br><br> | ||
|align="center"| 1+12/-/53 | |align="center"| 1+12/-/53 | ||
|align="center"| KD/-23 | |align="center"| KD/-23 | ||
| Line 414: | Line 414: | ||
|align="center"| HL | |align="center"| HL | ||
|rowspan="2" colspan="4"| [[image:Ryo02_DM1.png|center]] | |rowspan="2" colspan="4"| [[image:Ryo02_DM1.png|center]] | ||
|rowspan="2" align="left"|'''Haou Shoukou Ken - f hcf+P''' | |rowspan="2" align="left"|'''Haou Shoukou Ken - f hcf + P''' | ||
*Ryo releases a large fireball that does good damage | *Ryo releases a large fireball that does good damage | ||
*f hcf+A comes out faster but moves much slower than f hcf+C | *f hcf + A comes out faster but moves much slower than f hcf + C | ||
|- | |- | ||
! f hcf+[[image:snkc.gif]] | ! f hcf + [[image:snkc.gif]] | ||
|align="center"| 1+17/-/55 | |align="center"| 1+17/-/55 | ||
|align="center"| KD/-25 | |align="center"| KD/-25 | ||
| Line 424: | Line 424: | ||
|align="center"| HL | |align="center"| HL | ||
|- | |- | ||
! <br>qcf,hcb+[[image:snka.gif]]<br><br> | ! <br>qcf,hcb + [[image:snka.gif]]<br><br> | ||
|align="center"| 1+10/13/38 | |align="center"| 1+10/13/38 | ||
|align="center"| KD/-21 | |align="center"| KD/-21 | ||
| Line 430: | Line 430: | ||
|align="center"| HL | |align="center"| HL | ||
|rowspan="2" colspan="4"| [[image:Ryo02_DM2.png|center]] | |rowspan="2" colspan="4"| [[image:Ryo02_DM2.png|center]] | ||
|rowspan="2" align="left"|'''Ryuuko Ranbu - qcf hcb+P''' | |rowspan="2" align="left"|'''Ryuuko Ranbu - qcf hcb + P''' | ||
*Ryo dashes across the screen. If he connects, he does a combo on the opponent. Otherwise, he stops and is open to attack | *Ryo dashes across the screen. If he connects, he does a combo on the opponent. Otherwise, he stops and is open to attack | ||
*qcf hcb+A comes out slightly slower than qcf hcb+C. qcf hcb+A goes almost full screen, while qcf hcb+C goes full screen | *qcf hcb + A comes out slightly slower than qcf hcb + C. qcf hcb + A goes almost full screen, while qcf hcb + C goes full screen | ||
|- | |- | ||
! qcf,hcb+[[image:snkc.gif]] | ! qcf,hcb + [[image:snkc.gif]] | ||
|align="center"| 1+12/26/38 | |align="center"| 1+12/26/38 | ||
|align="center"| KD/-21 | |align="center"| KD/-21 | ||
| Line 442: | Line 442: | ||
|colspan="10" align="center"| '''SDM''' | |colspan="10" align="center"| '''SDM''' | ||
|- | |- | ||
! qcf+[[image:snkc.gif]]~[[image:snka.gif]] | ! qcf + [[image:snkc.gif]]~[[image:snka.gif]] | ||
|align="center"| 1+14/13/38 | |align="center"| 1+14/13/38 | ||
|align="center"| KD/-21 | |align="center"| KD/-21 | ||
| Line 448: | Line 448: | ||
|align="center"| HL | |align="center"| HL | ||
|colspan="4"| [[image:Ryo02_SDM.png|center]] | |colspan="4"| [[image:Ryo02_SDM.png|center]] | ||
|align="left"|'''Ryuuko Ranbu - qcf+C~A''' | |align="left"|'''Ryuuko Ranbu - qcf + C~A''' | ||
*Ryo dashes forward. If he connects, he does a strong combo on the opponent | *Ryo dashes forward. If he connects, he does a strong combo on the opponent | ||
*the range on this move is less than his qcf hcb+P DM version | *the range on this move is less than his qcf hcb + P DM version | ||
*unblockable | *unblockable | ||
|- | |- | ||
|colspan="10" align="center"| '''HSDM''' | |colspan="10" align="center"| '''HSDM''' | ||
|- | |- | ||
!qcfx2+[[image:snka.gif]]+[[image:snkc.gif]] | !qcfx2+[[image:snka.gif]] + [[image:snkc.gif]] | ||
|align="center"| 1+6/9/34 | |align="center"| 1+6/9/34 | ||
|align="center"| KD/-25 | |align="center"| KD/-25 | ||
| Line 467: | Line 467: | ||
===Notes=== | ===Notes=== | ||
*Whiff cancellable normals are cl.B, cl.C, cl.D, cr.D, CD | *Whiff cancellable normals are cl.B, cl.C, cl.D, cr.D, CD | ||
*Doing Ryo's SDM is nearly impossible, due to a glitch. The motion of the Ko'ou Ken qcf+C overlaps with this move. Thus, attempting to do it results in qcf+C coming out. The only reliable way to do it is to do the qcf+C part of the motion during a state where he is not able to do his Ko'ou Ken qcf+C. Such states are: | *Doing Ryo's SDM is nearly impossible, due to a glitch. The motion of the Ko'ou Ken qcf + C overlaps with this move. Thus, attempting to do it results in qcf + C coming out. The only reliable way to do it is to do the qcf + C part of the motion during a state where he is not able to do his Ko'ou Ken qcf + C. Such states are: | ||
**right before waking up | **right before waking up | ||
**just as you land from a jump | **just as you land from a jump | ||
**just as you recover from a roll | **just as you recover from a roll | ||
**recovering from a move that is not cancellable into qcf+C | **recovering from a move that is not cancellable into qcf + C | ||
**supercancelling from his Kohou dp+C(1) | **supercancelling from his Kohou dp + C(1) | ||
**cancelling a CD attack(this is an exception) | **cancelling a CD attack(this is an exception) | ||
**activating maxmode | **activating maxmode | ||
| Line 484: | Line 484: | ||
* cr.B, cr.C > | * cr.B, cr.C > | ||
** qcf + C {30%} | ** qcf + C {30%} | ||
** DM qcf hcb+A {45%} | ** DM qcf hcb + A {45%} | ||
** DM f hcf + A | ** DM f hcf + A | ||
| Line 532: | Line 532: | ||
==Strategies== | ==Strategies== | ||
*Since Ryo's f+A is an overhead and is not cancellable even if cancelled into, you should exploit the "glitch" which allows the command normals to not lose their properties if you cancel into them a bit late. Thus, you can do close C or close D, then late cancel the move into f+A if they blocked, making it hit as an overhead. The main disadvantage to doing this is that the opponent could do a very fast attack in between the cancel, such as Kim's _d u+B. Note that Ryo's crouch C cannot be cancelled late in it's animation, so doing crouch B, crouch C, delayed f+A will not work. Using crouch D instead of close C or close D also works, as his crouch D is late cancellable as well. This gives you an effective low into overhead attack string which is far less punishable than doing crouch D into qcf+B. | *Since Ryo's f + A is an overhead and is not cancellable even if cancelled into, you should exploit the "glitch" which allows the command normals to not lose their properties if you cancel into them a bit late. Thus, you can do close C or close D, then late cancel the move into f + A if they blocked, making it hit as an overhead. The main disadvantage to doing this is that the opponent could do a very fast attack in between the cancel, such as Kim's _d u + B. Note that Ryo's crouch C cannot be cancelled late in it's animation, so doing crouch B, crouch C, delayed f + A will not work. Using crouch D instead of close C or close D also works, as his crouch D is late cancellable as well. This gives you an effective low into overhead attack string which is far less punishable than doing crouch D into qcf + B. | ||
*His f+A overhead is very meaty compared to most moves. If done very early on a waking up opponent, Ryo will recover fast enough to be able to land a far A, hcb+B/HSDM combo. Thus, Ryo has a good high/low game with his f+A, qcf+B, crouch B and crouch D. It is especially good to cancel his crouch D into a qcf+B overhead and mix this up with f+A and crouch B, crouch C mixups | *His f + A overhead is very meaty compared to most moves. If done very early on a waking up opponent, Ryo will recover fast enough to be able to land a far A, hcb + B/HSDM combo. Thus, Ryo has a good high/low game with his f + A, qcf + B, crouch B and crouch D. It is especially good to cancel his crouch D into a qcf + B overhead and mix this up with f + A and crouch B, crouch C mixups | ||
*The f+B parry is a great move for countering predictable yet high priority and unpunishable moves, such as Robert's air qcb+K, May Lee's qcf+B in Hero Mode, Terry's qcb+P, etc. After parrying the move, cancel to dp+C (if the opponent was airborne) or dp+A or qcf hcb+P if the opponent was parried on the ground. | *The f + B parry is a great move for countering predictable yet high priority and unpunishable moves, such as Robert's air qcb + K, May Lee's qcf + B in Hero Mode, Terry's qcb + P, etc. After parrying the move, cancel to dp + C (if the opponent was airborne) or dp + A or qcf hcb + P if the opponent was parried on the ground. | ||
{{Template:The King of Fighters 2002}} | {{Template:The King of Fighters 2002}} | ||
[[Category:The King of Fighters 2002]] | [[Category:The King of Fighters 2002]] | ||
Revision as of 13:12, 8 February 2020
General Info
Crouch height: Medium
Jump: 4/33/1
Hop: 4/25/1
Dash: 3/10~∞/3
Backdash: 3/14/3
Wakeup: 21 frames
Recovery roll: 26 frames
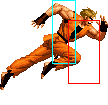
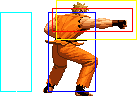
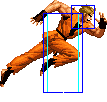
| Stand | Crouch | Jump | Grab | Run |
|---|---|---|---|---|

|

|

|
|
Colors

|

|

|

|
Movelist
Notes
- Whiff cancellable normals are cl.B, cl.C, cl.D, cr.D, CD
- Doing Ryo's SDM is nearly impossible, due to a glitch. The motion of the Ko'ou Ken qcf + C overlaps with this move. Thus, attempting to do it results in qcf + C coming out. The only reliable way to do it is to do the qcf + C part of the motion during a state where he is not able to do his Ko'ou Ken qcf + C. Such states are:
- right before waking up
- just as you land from a jump
- just as you recover from a roll
- recovering from a move that is not cancellable into qcf + C
- supercancelling from his Kohou dp + C(1)
- cancelling a CD attack(this is an exception)
- activating maxmode
- possibly some other ways
Combos
Anywhere
- cr.B, cr.C >
- qcf + C {30%}
- DM qcf hcb + A {45%}
- DM f hcf + A
- cr.B x 3 > st.A > hcb + B {28%}
- cl.C > dp + C (1) >> DM qcf hcb + A (Buffer: qcb + A) {55%}
- f + A (early on opponent's wakeup), st.A / cl.A > hcb + B {22%}
- j.C, cl.C > hcb + D {33%} (Will miss some crouchers)
Maxmode
- cl.C > f + A >> BC, HSDM qcf qcf +AC (quickly),
- j.C, cl.C > hcb + D {75%}
- j.C, cr.B, cr.C > DM qcf hcb + A {88%}
- (Already in maxmode) f + A >> dp + C(1) >>
- DM qcf hcb + A {48%}
- DM f hcf + A (Buffer: hcf + A) {42%}
Normal Links
- cr.B, cl.C / cr.C
- f + A (very early on the opponent's wakeup), st.A / cr.A
Attack Strings
- cr.D / CD > qcf + B / qcf + A
- cr.B, cr.C > qcf + B / qcf + A
- (cr.B, cl.C) / cl.D > f + A (delayed)
Strategies
- Since Ryo's f + A is an overhead and is not cancellable even if cancelled into, you should exploit the "glitch" which allows the command normals to not lose their properties if you cancel into them a bit late. Thus, you can do close C or close D, then late cancel the move into f + A if they blocked, making it hit as an overhead. The main disadvantage to doing this is that the opponent could do a very fast attack in between the cancel, such as Kim's _d u + B. Note that Ryo's crouch C cannot be cancelled late in it's animation, so doing crouch B, crouch C, delayed f + A will not work. Using crouch D instead of close C or close D also works, as his crouch D is late cancellable as well. This gives you an effective low into overhead attack string which is far less punishable than doing crouch D into qcf + B.
- His f + A overhead is very meaty compared to most moves. If done very early on a waking up opponent, Ryo will recover fast enough to be able to land a far A, hcb + B/HSDM combo. Thus, Ryo has a good high/low game with his f + A, qcf + B, crouch B and crouch D. It is especially good to cancel his crouch D into a qcf + B overhead and mix this up with f + A and crouch B, crouch C mixups
- The f + B parry is a great move for countering predictable yet high priority and unpunishable moves, such as Robert's air qcb + K, May Lee's qcf + B in Hero Mode, Terry's qcb + P, etc. After parrying the move, cancel to dp + C (if the opponent was airborne) or dp + A or qcf hcb + P if the opponent was parried on the ground.
