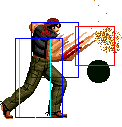
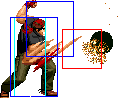
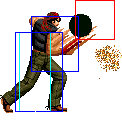
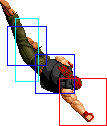
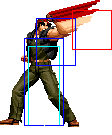
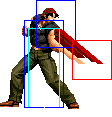
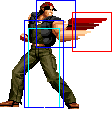
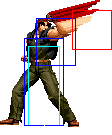
m (→Movelist) |
m (→Movelist) |
||
| Line 338: | Line 338: | ||
|- | |- | ||
! <br>qcfx2+[[image:snka.gif]]<br><br> | ! <br>qcfx2+[[image:snka.gif]]<br><br> | ||
|align="center"| | |align="center"| 52+25+7+2/4/33 | ||
|align="center"| | |align="center"| KD | ||
|align="center"| | |align="center"| Fo | ||
|align="center"| - | |align="center"| - | ||
|valign="bottom" style="border-right:0px; border-bottom:0px;"| [[image:Ralf02_qcfx2P1.png|center]] | |valign="bottom" style="border-right:0px; border-bottom:0px;"| [[image:Ralf02_qcfx2P1.png|center]] | ||
| Line 348: | Line 348: | ||
* unblockable | * unblockable | ||
* hard knockdown | * hard knockdown | ||
* | * Autoguard: Startup after first 52 frames (notice the 25 following frames are still hittable at the feet) and complete active period. | ||
* counterwire | * counterwire | ||
|- | |- | ||
| Line 361: | Line 360: | ||
|- | |- | ||
! hcb+[[image:snkb.gif]] | ! hcb+[[image:snkb.gif]] | ||
|align="center"| | |align="center"| 32/21/12 | ||
|align="center"| | |align="center"| KD/-15 | ||
|align="center"| | |align="center"| Fi, Fo | ||
|align="center"| HL | |align="center"| HL | ||
|colspan="3" | [[image:Ralf02_hcbB.png|center]] | |colspan="3" | [[image:Ralf02_hcbB.png|center]] | ||
| Line 373: | Line 372: | ||
* has some upper-body invincibility during the startup frames | * has some upper-body invincibility during the startup frames | ||
* if it connects, opponent is knocked away into a juggleable state | * if it connects, opponent is knocked away into a juggleable state | ||
* | * Invincibility: 10-21. | ||
|- | |- | ||
! hcb+[[image:snkd.gif]] | ! hcb+[[image:snkd.gif]] | ||
|align="center"| | |align="center"| 3+9/2(2)3(6)3(9)3(10)2/13+23 | ||
|align="center"| | |align="center"| KD/-20 | ||
|align="center"| | |align="center"| Fi, Fo | ||
|align="center"| HL | |align="center"| HL | ||
|valign="bottom" style="border-right:0px;"| [[image:Ralf02_hcbD1.png|center]] | |valign="bottom" style="border-right:0px;"| [[image:Ralf02_hcbD1.png|center]] | ||
| Line 386: | Line 385: | ||
* Ralf charges across the screen, hitting about 4-5 times in the process | * Ralf charges across the screen, hitting about 4-5 times in the process | ||
* knocks down but can be recovery rolled | * knocks down but can be recovery rolled | ||
* | * Guard point: 4f-end of startup, whole active period and first 13f of recovery. | ||
* has horrible recovery if blocked and if the opponent gets hit by it in the air, they can recovery roll and punish him before he recovers as well | * has horrible recovery if blocked and if the opponent gets hit by it in the air, they can recovery roll and punish him before he recovers as well | ||
|- | |- | ||
! hcf+[[image:kick.gif]] | ! hcf+[[image:kick.gif]] | ||
|align="center"| | |align="center"| 0/1/39 | ||
|align="center"| | |align="center"| KD | ||
|align="center"| | |align="center"| | ||
|align="center"| Grab | |align="center"| Grab | ||
| Line 405: | Line 402: | ||
|- | |- | ||
! <br>qcb,hcf+[[image:snkb.gif]]<br><br> | ! <br>qcb,hcf+[[image:snkb.gif]]<br><br> | ||
|align="center"| | |align="center"| 7/16/14 (Attack: 2/5/57) | ||
|align="center"| | |align="center"| KD/-29 | ||
|align="center"| | |align="center"| | ||
|align="center"| HL | |align="center"| HL | ||
| Line 415: | Line 412: | ||
* the hard knockdown gives Ralf a very long time to position himself however he likes before the opponent gets up | * the hard knockdown gives Ralf a very long time to position himself however he likes before the opponent gets up | ||
* D version makes him run about full screen length, while B version makes him run about 60% screen length | * D version makes him run about full screen length, while B version makes him run about 60% screen length | ||
* Invincibility: Complete startup of run. Lower budy invincible during complete active period of run. | |||
|- | |- | ||
! qcb,hcf+[[image:snkd.gif]] | ! qcb,hcf+[[image:snkd.gif]] | ||
|align="center"| | |align="center"| 7/24/18 (Attack: 2/5/61) | ||
|align="center"| | |align="center"| KD/-33 | ||
|align="center"| | |align="center"| | ||
|align="center"| HL | |align="center"| HL | ||
|- | |- | ||
! qcf,hcb+[[image:snka.gif]] | ! qcf,hcb+[[image:snka.gif]] | ||
|align="center"| | |align="center"| 12/4(6)4(4+1)[2(4)2(4)2(4)]x3,2(4)2(4)2(16)4/36 | ||
|align="center"| | |align="center"| KD/-22 | ||
| | | | ||
|align="center"| HL | |align="center"| HL | ||
| Line 435: | Line 433: | ||
* has some problems with the first hit connecting against crouching opponents or opponents that aren't very close, making it difficult to combo into | * has some problems with the first hit connecting against crouching opponents or opponents that aren't very close, making it difficult to combo into | ||
* hard knockdown on the last hit | * hard knockdown on the last hit | ||
* Invincibility: Complete Startup. Lower body invincibility: First 18 frames of active period. | |||
|- | |- | ||
! qcf,hcb+[[image:snkc.gif]] | ! qcf,hcb+[[image:snkc.gif]] | ||
|align="center"| | |align="center"| 12/4(6)4(4+1)[2(4)]x11,2(16)4/42 | ||
|align="center"| | |align="center"| KD/-28 | ||
| | | | ||
|align="center"| HL | |align="center"| HL | ||
| Line 448: | Line 447: | ||
|- | |- | ||
!rowspan="4"| qcf,hcb+[[image:snka.gif]]+[[image:snkc.gif]] | !rowspan="4"| qcf,hcb+[[image:snka.gif]]+[[image:snkc.gif]] | ||
|rowspan="4" align="center"| | |rowspan="4" align="center"| 13/4(6)4(6)4(6)4(4)[2(2)]x19,2(4)4(15)2(10)4*12/33+16 | ||
|rowspan="4" align="center"| | |rowspan="4" align="center"| KD/-43 | ||
|rowspan="4" align="center"| | |rowspan="4" align="center"| | ||
|rowspan="4" align="center"| HL | |rowspan="4" align="center"| HL | ||
| Line 461: | Line 460: | ||
* does lots of chip damage, so could be useful to cancel into if opponent has no stock | * does lots of chip damage, so could be useful to cancel into if opponent has no stock | ||
* hard knockdown on the last hit | * hard knockdown on the last hit | ||
* Invincibility: Complete startup and first active period. Lower body invincible: Following 28f after first active period. | |||
|- | |- | ||
|valign="bottom" style="border-right:0px; border-top:0px; border-bottom:0px;"| [[image:Ralf02_qcfhcbAC4.png|center]] | |valign="bottom" style="border-right:0px; border-top:0px; border-bottom:0px;"| [[image:Ralf02_qcfhcbAC4.png|center]] | ||
| Line 476: | Line 476: | ||
|- | |- | ||
! qcb,hcf,qcf+[[image:snka.gif]]+[[image:snkd.gif]] | ! qcb,hcf,qcf+[[image:snka.gif]]+[[image:snkd.gif]] | ||
|align="center"| | |align="center"| 7/24/13 (Attack: 2/5/61) | ||
|align="center"| | |align="center"| KD/-33 | ||
|align="center"| | |align="center"| | ||
|align="center"| HL | |align="center"| HL | ||
| Line 485: | Line 485: | ||
* very punishable if blocked | * very punishable if blocked | ||
* fast enough that it can be comboed into from strong attacks, though the motion is not practical at all | * fast enough that it can be comboed into from strong attacks, though the motion is not practical at all | ||
* Invincible: Complete startup, Lower body invincible: Active portion of the run. | |||
|} | |} | ||
===Notes=== | ===Notes=== | ||
Revision as of 13:40, 24 December 2016
General Info
Ralf likes to drink beer and punch people. Sometimes he'll punch people and then drink beer. One time he tried to drink beer and punch people at the same time but it ended up making a pretty big mess.
Crouch height: Medium
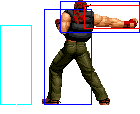
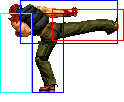
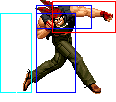
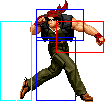
Colors

|

|

|

|
Movelist
Notes
- D throw is a hard knockdown
Combos
1. [Jump attack] Close C/Crouch AA, hcf+K - 28%
Probably your best punish combo that doesn't use meter. Close C comes out slow so it is difficult to combo after a jump attack unless it hit deep. The hcf+K sets up a decent wakeup mixup after. You can replace the close C with a crouch A which is easier to combo from a jump attack. If you did do a jumpin right before, then more than one crouch A will likely put you out of range.
2. [Jump attack] Crouch AA, _b f+C - 26%
This is a much easier combo than the above in terms of execution and ease of landing off a jump attack, but it is situational. The combo does not work on crouching Mature, Vice, K', Joe, Athena, Kensou, Benimaru, Mai, Yuri, Chris, Leona, Choi, Kula, Angel.
3. [Jump attack] Crouch AA, _b f+C(2), (S)qcb hcf+K - 50%
Probably his highest damage practical combo, that can be easily set up from a jump attack. It is advisable to supercancel into qcb hcf+K as the other supers, including the qcf hcb+AC SDM, will very likely whiff on the first hit, making the rest of the super not combo.
4. Crouch B, BC, Close C, qcb hcf+K - 40%
Ralf cannot cancel or link his crouch B into anything. The best he can do is cancel to maxmode and immediately close C on the first frame. To do it, you must input the attacks as crouch B, C~B, qcb hcf+K. This combo gives him about 40% damage from a low attack
5. [Jump attack] Crouch AA, BC, _b f+C(3), (C)hcb+D(4), (C)mash P(hold forward) - 46%
A flashy combo with no reason to be used over a simpler combo 3. The beginning part of the combo can be input using the shortcut crouch AA, _b f+BC(3).
6. [Jump attack] Crouch AA, BC, _b f+C(2), (S)qcf hcb+AC - 60%
Fairly damaging combo that requires 4 stocks. Keep in mind that it will almost never work on a crouching opponent, so your best bet at landing this combo is by punishing a move with a jump attack (most likely a fireball).
Strategies
Matchup Information
Kula
- hit by dp+C while on the ground
If Ralf is hit with her dp+C while he is on the ground, he can recovery roll and punish her before she can recover, with hcf+K
- blocking qcb+B from relatively close
From many distances (though not all), you can do a reversal hcf+K after blocking her qcb+B, and it will grab her whether she decides to followup with f+B/f+D or do no followup at all
