mNo edit summary |
m (→Short Movelist) |
||
| (43 intermediate revisions by 3 users not shown) | |||
| Line 1: | Line 1: | ||
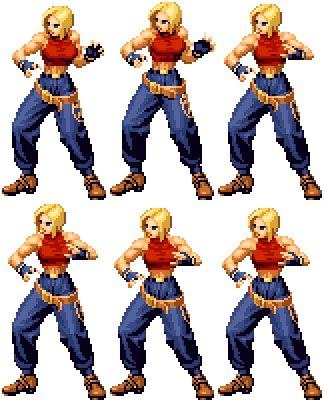
[[image:Mary02_stance.gif|right]] | [[image:Mary02_stance.gif|right]] | ||
==General Info== | ==General Info== | ||
Crouch height: Medium | Crouch height: Medium<br> | ||
Jump: 4/34/1<br> | |||
Hop: 4/25/1<br> | |||
Dash: 3/10~∞/3<br> | |||
Backdash: 3/17/4<br> | |||
Wakeup: 21 frames<br> | |||
Recovery roll: 31 frames<br> | |||
{| | {| | ||
! Stand | ! Stand | ||
| Line 113: | Line 120: | ||
| | | | ||
|- | |- | ||
! [[image:snkc.gif]]+[[image:snkd.gif]] | ! [[image:snkc.gif]] + [[image:snkd.gif]] | ||
|align="center"| 15/4+4/20 | |align="center"| 15/4+4/20 | ||
|align="center"| KD/-13 | |align="center"| KD/-13 | ||
| Line 191: | Line 198: | ||
| | | | ||
|- | |- | ||
! [[image:snkc.gif]]+[[image:snkd.gif]] | ! [[image:snkc.gif]] + [[image:snkd.gif]] | ||
|align="center"| 12/3+3/- | |align="center"| 12/3+3/- | ||
|align="center"| KD/- | |align="center"| KD/- | ||
| Line 268: | Line 275: | ||
| | | | ||
|- | |- | ||
! [[image:snkc.gif]]+[[image:snkd.gif]] | ! [[image:snkc.gif]] + [[image:snkd.gif]] | ||
|align="center"| 12/6/- | |align="center"| 12/6/- | ||
|align="center"| KD/- | |align="center"| KD/- | ||
| Line 278: | Line 285: | ||
|colspan="9" align="center"| '''Command Normals''' | |colspan="9" align="center"| '''Command Normals''' | ||
|- | |- | ||
! <br>b/f+[[image:snka.gif]]<br><br> | ! <br>b/f + [[image:snka.gif]]<br><br> | ||
|align="center"| 18/4/33 | |align="center"| 18/4/33 | ||
|align="center"| -17/-19 | |align="center"| -17/-19 | ||
| Line 286: | Line 293: | ||
|rowspan="2"| | |rowspan="2"| | ||
|- | |- | ||
! b/f+[[image:snka.gif]]<br>(cancel) | ! b/f + [[image:snka.gif]]<br>(cancel) | ||
|align="center"| 18/4/33 | |align="center"| 18/4/33 | ||
|align="center"| -17/-19 | |align="center"| -17/-19 | ||
| Line 292: | Line 299: | ||
|align="center"| HL | |align="center"| HL | ||
|- | |- | ||
! b/f+[[image:snkb.gif]] | ! b/f + [[image:snkb.gif]] | ||
|align="center"| 16/3(14)3/24 | |align="center"| 16/3(14)3/24 | ||
|align="center"| KD/-7 | |align="center"| KD/-7 | ||
| Line 303: | Line 310: | ||
|colspan="9" align="center"| '''Special Moves''' | |colspan="9" align="center"| '''Special Moves''' | ||
|- | |- | ||
! qcf+[[image:snka.gif]] | ! qcf + [[image:snka.gif]] | ||
|align="center"| | |align="center"| (4+23, 4, 1+16) | ||
|align="center"| | |align="center"| | ||
|align="center"| | |align="center"| | ||
|align="center"| H | |align="center"| H | ||
|colspan="3" | [[image:Mary02_qcfA.png|center]] | |colspan="3" | [[image:Mary02_qcfA.png|center]] | ||
|rowspan="2"| '''Spin Fall - qcf+P''' | |rowspan="2"| '''Spin Fall - qcf + P''' | ||
* Mary jumps into the air with a kick that does not knockdown | * Mary jumps into the air with a kick that does not knockdown | ||
* the initial qcf+A makes her jump higher but less horizontally than qcf+C. It also has better recovery on block than qcf+C | * the initial qcf + A makes her jump higher but less horizontally than qcf + C. It also has better recovery on block than qcf + C | ||
* qcf+A is an overhead | * qcf + A is an overhead | ||
* the followup qcf+P can be performed after this move connects. It will only come out only if the move hits and not if it's blocked or whiffs | * the followup qcf + P can be performed after this move connects. It will only come out only if the move hits and not if it's blocked or whiffs | ||
* the followup is a hard knockdown | * the followup is a hard knockdown | ||
* free cancellable into | * free cancellable into | ||
|- | |- | ||
! qcf+[[image:snkc.gif]] | ! qcf + [[image:snkc.gif]] | ||
|align="center"| | |align="center"| (6+17, 4, 2+18) | ||
|align="center"| | |align="center"| | ||
|align="center"| | |align="center"| | ||
| Line 324: | Line 331: | ||
|colspan="3" | [[image:Mary02_qcfC.png|center]] | |colspan="3" | [[image:Mary02_qcfC.png|center]] | ||
|- | |- | ||
! dp+[[image:snkb.gif]] | ! dp + [[image:snkb.gif]] | ||
|align="center"| | |align="center"| (5[全身M], 4[胸から上M], 0, 14, 15+16) | ||
|align="center"| | |align="center"| | ||
|align="center"| | |align="center"| | ||
| Line 331: | Line 338: | ||
|valign="bottom" style="border-right:0px;"| [[image:Mary02_dpB1.png|center]] | |valign="bottom" style="border-right:0px;"| [[image:Mary02_dpB1.png|center]] | ||
|colspan="2" valign="bottom" style="border-left:0px;"| [[image:Mary02_dpB2.png|center]] | |colspan="2" valign="bottom" style="border-left:0px;"| [[image:Mary02_dpB2.png|center]] | ||
|rowspan="2"| '''Vertical Arrow - dp+K''' | |rowspan="2"| '''Vertical Arrow - dp + K''' | ||
* Mary performs a very fast rising attack that knocks the opponent down | * Mary performs a very fast rising attack that knocks the opponent down | ||
* initial dp+B(not dp+D) is supercancellable on the first hit, though you have to be close to the opponent for the first hit to connect | * initial dp + B(not dp + D) is supercancellable on the first hit, though you have to be close to the opponent for the first hit to connect | ||
* free cancellable out of on the first hit | * free cancellable out of on the first hit | ||
* free cancellable into | * free cancellable into | ||
* can be followed up with another dp+K which will grab the opponent out of the air. This move only connects if the initial dp+K hit and was not blocked or whiffed | * can be followed up with another dp + K which will grab the opponent out of the air. This move only connects if the initial dp + K hit and was not blocked or whiffed | ||
* the followup dp+K is a hard knockdown and the opponent gets up with their back turned | * the followup dp + K is a hard knockdown and the opponent gets up with their back turned | ||
|- | |- | ||
! dp+[[image:snkd.gif]] | ! dp + [[image:snkd.gif]] | ||
|align="center"| | |align="center"| (8[全身M], 4[腰から上M], 0, 19, 19+14) | ||
|align="center"| | |align="center"| | ||
|align="center"| | |align="center"| | ||
| Line 347: | Line 354: | ||
|colspan="2" valign="bottom" style="border-left:0px;"| [[image:Mary02_dpD2.png|center]] | |colspan="2" valign="bottom" style="border-left:0px;"| [[image:Mary02_dpD2.png|center]] | ||
|- | |- | ||
! _b,f+[[image:snkb.gif]] | ! _b,f + [[image:snkb.gif]] | ||
|align="center"| | |align="center"| (6+10, 9, 19) | ||
|align="center"| | |align="center"| | ||
|align="center"| | |align="center"| | ||
|align="center"| | |align="center"| | ||
|colspan="3" | [[image:Mary02_bfB.png|center]] | |colspan="3" | [[image:Mary02_bfB.png|center]] | ||
|rowspan="2"| '''Straight Slicer - _b f+K''' | |rowspan="2"| '''Straight Slicer - _b f + K''' | ||
* Mary performs a sliding attack that goes fairly far | * Mary performs a sliding attack that goes fairly far | ||
* D version goes full screen length while B version goes about 3/4 screen | * D version goes full screen length while B version goes about 3/4 screen | ||
* _b f+B is supercancellable | * _b f + B is supercancellable | ||
* both versions hit low but for the D version, the tip of her foot must connect in order for it to be a low attack | * both versions hit low but for the D version, the tip of her foot must connect in order for it to be a low attack | ||
* free cancellable out of | * free cancellable out of | ||
* free cancellable into | * free cancellable into | ||
* can be followed up by qcf+K, which grabs the opponent after the slide has connected. This move does not come out if the slide is blocked or whiffs | * can be followed up by qcf + K, which grabs the opponent after the slide has connected. This move does not come out if the slide is blocked or whiffs | ||
* the followup qcf+K is a hard knockdown | * the followup qcf + K is a hard knockdown | ||
|- | |- | ||
! _b,f+[[image:snkd.gif]] | ! _b,f + [[image:snkd.gif]] | ||
|align="center"| | |align="center"| (5+11, 19, 18) | ||
|align="center"| | |align="center"| | ||
|align="center"| | |align="center"| | ||
| Line 371: | Line 378: | ||
|colspan="2" valign="bottom" style="border-left:0px;"| [[image:Mary02_bfD2.png|center]] | |colspan="2" valign="bottom" style="border-left:0px;"| [[image:Mary02_bfD2.png|center]] | ||
|- | |- | ||
! qcb+[[image:snkb.gif]] | ! qcb + [[image:snkb.gif]] | ||
| | | (1, 24, 26) | ||
| | | | ||
| | | | ||
| | | | ||
|colspan="3" | [[image:Mary02_qcbB.png|center]] | |colspan="3" | [[image:Mary02_qcbB.png|center]] | ||
| '''M. Reverse Facelock - qcb+B''' | | '''M. Reverse Facelock - qcb + B''' | ||
* Mary goes into a counter stance. This move reverses jumping attacks and special moves that don't hit low | * Mary goes into a counter stance. This move reverses jumping attacks and special moves that don't hit low | ||
* the counter becomes active immediately, but has bad recovery time | * the counter becomes active immediately, but has bad recovery time | ||
| Line 383: | Line 390: | ||
* free cancellable into | * free cancellable into | ||
|- | |- | ||
! qcb+[[image:snkd.gif]] | ! qcb + [[image:snkd.gif]] | ||
| | | (1, 24, 26) | ||
| | | | ||
| | | | ||
| | | | ||
|colspan="3" | [[image:Mary02_qcbD.png|center]] | |colspan="3" | [[image:Mary02_qcbD.png|center]] | ||
| '''M. Head Buster - qcb+D''' | | '''M. Head Buster - qcb + D''' | ||
* Mary goes into a counter stance. This move reverses midlevel attacks | * Mary goes into a counter stance. This move reverses midlevel attacks | ||
* the opponent is thrown into the air behind her and can be juggled afterwards | * the opponent is thrown into the air behind her and can be juggled afterwards | ||
| Line 395: | Line 402: | ||
* free cancellable into | * free cancellable into | ||
|- | |- | ||
! <br>qcb+[[image:snka.gif]]<br><br> | ! <br>qcb + [[image:snka.gif]]<br><br> | ||
|align="center"| | |align="center"| (4, 33[全身M], 4) | ||
|align="center"| | |align="center"| | ||
|align="center"| | |align="center"| | ||
| Line 402: | Line 409: | ||
|rowspan="2" valign="bottom" style="border-right:0px;"| [[image:Mary02_qcbP.png|center]] | |rowspan="2" valign="bottom" style="border-right:0px;"| [[image:Mary02_qcbP.png|center]] | ||
|rowspan="2" colspan="2" valign="bottom" style="border-left:0px;"| [[image:Mary02_qcbPqcbP.png|center]] | |rowspan="2" colspan="2" valign="bottom" style="border-left:0px;"| [[image:Mary02_qcbPqcbP.png|center]] | ||
|rowspan="2"| '''Real Counter - qcb+P''' | |rowspan="2"| '''Real Counter - qcb + P''' | ||
* Mary goes into a stance where she is invincible to all attacks except throws. The invincibility lasts for about a second | * Mary goes into a stance where she is invincible to all attacks except throws. The invincibility lasts for about a second | ||
* during the stance, Mary can cancel it into qcf+P, which is an instant unblockable throw | * during the stance, Mary can cancel it into qcf + P, which is an instant unblockable throw | ||
* the qcf+P followup is a hard knockdown | * the qcf + P followup is a hard knockdown | ||
|- | |- | ||
! qcb+[[image:snkc.gif]] | ! qcb + [[image:snkc.gif]] | ||
|align="center"| | |align="center"| (4, 33[全身M], 4) | ||
|align="center"| | |align="center"| | ||
|align="center"| | |align="center"| | ||
| Line 415: | Line 422: | ||
|colspan="9" align="center"| '''DMs''' | |colspan="9" align="center"| '''DMs''' | ||
|- | |- | ||
! <br>qcf,hcb+[[image:snka.gif]]<br><br> | ! <br>qcf,hcb + [[image:snka.gif]]<br><br> | ||
| | | ( {1 + 28[暗転] + 10}[全身M], 16[脛下M], 36) | ||
| | | | ||
| | | | ||
|align="center"| HL | |align="center"| HL | ||
|rowspan="2" colspan="3" | [[image:Mary02_qcfhcbP.png|center]] | |rowspan="2" colspan="3" | [[image:Mary02_qcfhcbP.png|center]] | ||
|rowspan="2"| '''Splash Rose - qcf hcb+P''' | |rowspan="2"| '''Splash Rose - qcf hcb + P''' | ||
* Mary dashes forward. If she connects, she will perform a combo that does decent damage. If it whiffs or is blocked, she will not continue and can be punished | * Mary dashes forward. If she connects, she will perform a combo that does decent damage. If it whiffs or is blocked, she will not continue and can be punished | ||
* qcf hcb+A goes about 3/4 screen length, while qcf hcb+C goes full screen | * qcf hcb + A goes about 3/4 screen length, while qcf hcb + C goes full screen | ||
* this move has a tendency to switch sides on the opponent, after it has been blocked. This will throw off some opponents trying to combo punish the move | * this move has a tendency to switch sides on the opponent, after it has been blocked. This will throw off some opponents trying to combo punish the move | ||
|- | |- | ||
! qcf,hcb+[[image:snkc.gif]] | ! qcf,hcb + [[image:snkc.gif]] | ||
| | | ( {1 + 28[暗転] + 10}[全身M], 24[脛下M], 38) | ||
| | | | ||
| | | | ||
| Line 433: | Line 440: | ||
|- | |- | ||
! [[image:snka.gif]],[[image:snka.gif]], f,[[image:snkb.gif]],[[image:snkc.gif]] | ! [[image:snka.gif]],[[image:snka.gif]], f,[[image:snkb.gif]],[[image:snkc.gif]] | ||
| | | ( {1 + 28[暗転] + 1, 19}[全身M], 19+21) | ||
| | | | ||
| | | | ||
| Line 447: | Line 454: | ||
|- | |- | ||
! [[image:snka.gif]],[[image:snka.gif]], b,[[image:snkb.gif]],[[image:snkc.gif]] | ! [[image:snka.gif]],[[image:snka.gif]], b,[[image:snkb.gif]],[[image:snkc.gif]] | ||
| | | ( {1 + 28[暗転] + 1, 19}[全身M], 19+21) | ||
| | | | ||
| | | | ||
| Line 457: | Line 464: | ||
|colspan="9" align="center"| '''HSDM''' | |colspan="9" align="center"| '''HSDM''' | ||
|- | |- | ||
! db,qcf,uf,u,d+[[image:snkb.gif]]+[[image:snkd.gif]] | ! db,qcf,uf,u,d + [[image:snkb.gif]] + [[image:snkd.gif]] | ||
| | | (0, 1 + 28[暗転] + 1 + 27 + 10) | ||
| | | | ||
| | | | ||
|align="center"| HL | |align="center"| HL | ||
|colspan="3" | [[image:Mary02_HSDM.png|center]] | |colspan="3" | [[image:Mary02_HSDM.png|center]] | ||
| '''Typhoon - db qcf uf u d+BD''' | | '''Typhoon - db qcf uf u d + BD''' | ||
* this is an instant one frame grab that does very good damage | * this is an instant one frame grab that does very good damage | ||
* hard knockdown | * hard knockdown | ||
| Line 472: | Line 479: | ||
=== Throws === | === Throws === | ||
1. Victor Nage - b/f+C | 1. Victor Nage - b/f + C | ||
* Mary knocks the opponent to the ground and elbows them, knocking them in the direction opposite the one she was facing | * Mary knocks the opponent to the ground and elbows them, knocking them in the direction opposite the one she was facing | ||
* hard knockdown | * hard knockdown | ||
| Line 478: | Line 485: | ||
2. Head Throw - b/f+D | 2. Head Throw - b/f + D | ||
* Mary grabs the opponent and throws them over her head in the direction opposite the one she was facing | * Mary grabs the opponent and throws them over her head in the direction opposite the one she was facing | ||
* the opponent will get up with their back turned | * the opponent will get up with their back turned | ||
| Line 485: | Line 492: | ||
=== Command Normals === | === Command Normals === | ||
1. Hammer Arch - b/f+A | 1. Hammer Arch - b/f + A | ||
* Mary hops forward slightly and performs a two-handed hammerfist that doesn't knockdown on impact unless it hits an airborn opponent(in which case, it is a hard knockdown) | * Mary hops forward slightly and performs a two-handed hammerfist that doesn't knockdown on impact unless it hits an airborn opponent(in which case, it is a hard knockdown) | ||
* Mary is considered airborn throughout most of this move but the when the contact is made, she is considered grounded | * Mary is considered airborn throughout most of this move but the when the contact is made, she is considered grounded | ||
| Line 494: | Line 501: | ||
2. Double Rolling - b/f+B | 2. Double Rolling - b/f + B | ||
* Mary performs a two hit kicking move that does very good damage | * Mary performs a two hit kicking move that does very good damage | ||
* hits low on the second hit | * hits low on the second hit | ||
| Line 502: | Line 509: | ||
=== Notes === | ==Short Movelist== | ||
* b / f + A (Overhead if not cancelled into.) | |||
* b / f + B (Low (2).) | |||
* qcf + P (A: Overhead.) | |||
** qcf + P (Only on hit & opponent in the ground.) | |||
* qcb + P (Dodge.) | |||
** qcf + P (Throw.) | |||
* dp + K | |||
** dp + K (Only on hit.) | |||
* (b) f + K (B: Low.) (D: Low when hit from distance.) | |||
** qcf + K (Only on hit & opponent in the ground.) | |||
* qcb + B (Counter: air normals + non-low specials. Throw on trigger.) | |||
* qcb + D (Counter: ground normals + low specials. Throw on trigger.) | |||
* DM qcf hcb + P | |||
* DM A A f B C | |||
* SDM A A b B C | |||
* HSDM db qcf uf u d + BD (Throw. 0 frame startup.) | |||
== Notes == | |||
===Cancellable moves=== | |||
* Close: A, B, C (1-2; 2 cannot be cancelled on command attacks.), D (2) | |||
* Far: A, B, C (1-2) | |||
* Crouch: A, B, C | |||
* CD is cancellable to special moves and DMs | * CD is cancellable to special moves and DMs | ||
* | |||
* b / f + B (2) is cancellable. | |||
* b / f + A is cancellable only when you cancel into it. | |||
===Super cancellable moves=== | |||
* (b) f + B | |||
* dp + B (1) | |||
* dp + K > dp + K (Only into DM A A f B C or SDM A A b B C, but super will whiff...) | |||
===Free cancellable into moves=== | |||
* qcf + P | |||
* '''dp + K''' | |||
* '''(b) f + K''' | |||
* qcb + B | |||
* qcb + D | |||
* qcb + P | |||
=== Free cancellable out-of moves=== | |||
* b / f + A | |||
* b / f + B (1) | |||
* '''dp + K (1)''' | |||
* '''(b) f + K''' | |||
===Moves with Invincibility=== | |||
?? | |||
=== Moves with autoguard=== | |||
(none) | |||
===Other Notes=== | |||
* cl.B is a low attack. | |||
* C throw switch sides. | |||
== Combos == | == Combos == | ||
===Basic Combos=== | |||
* cl.C (1) > | |||
** (b / f + A) / (b / f + B (2)) | |||
*** dp + D > dp + K (Only after b / f + A.) {35%} | |||
*** (b) f + K > qcf + K {35%} | |||
*** (b) f + B >> | |||
**** DM qcf hcb + P {55%} {2 stocks} | |||
**** DM A A f B C (Corner.) {55%} {2 stocks} | |||
**** SDM A A b B C (Corner.) {Max Mode + 2 stocks} | |||
*** DM qcf hcb + P {45%} {1 stock} | |||
*** DM A A f B C (Only after b / f + A.){45%} {1 stock} | |||
*** SDM A A b B C (Only after b / f + A.) {Max Mode + 1 stock} | |||
*** HSDM db qcf uf u d + BD {60%} {Max Mode + 1 stock} | |||
Damage above is based on cl.C (1) > b / f + A as starter. | |||
About (b / f + A) / (b / f + B (2)): b / f + B deals more damage (~+??) than b / f + A, and, actually, b / f + B alone deals more damage (~+??) than cl.C (1) > b / f + A, but b / f + B will only combos from very close cl.C (1), while b / f + A combos even from a far st.C (2). | |||
* cr.B, cr.B / cr.A > | |||
** dp + B > dp + K | |||
** DM A A f B C {35%} {1 stock} | |||
** SDM A A b B C {Max Mode + 1 stock} | |||
** HSDM db qcf uf u d + BD {Max Mode + 1 stock} | |||
* cr.B x 1-3, st.B | |||
* b / f + A > | |||
** DM qcf hcb + P {40%} {1 stock} | |||
** DM A A f B C {40%} {1 stock} | |||
** SDM A A b B C {Max Mode + 1 stock} | |||
** HSDM db qcf uf u d + BD {Max Mode + 1 stock} | |||
===Max Mode=== | |||
* cl.C (1) > b / f + A >> BC, run, cl.C (1) > b / f + A > SDM A A b B C {70%} | |||
* cl.C (1) > b / f + A >> BC, run, cl.C (1) > b / f + B > (b) f + B >> dp + K (1) >> | |||
** SDM A A b B C {75%} | |||
** DM A A f B C | |||
** DM qcf hcb + C | |||
== Strategies == | == Strategies == | ||
Latest revision as of 22:12, 24 October 2021
General Info
Crouch height: Medium
Jump: 4/34/1
Hop: 4/25/1
Dash: 3/10~∞/3
Backdash: 3/17/4
Wakeup: 21 frames
Recovery roll: 31 frames
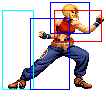
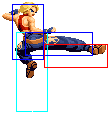
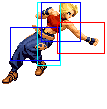
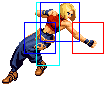
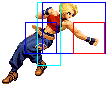
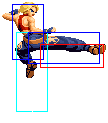
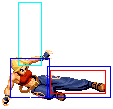
| Stand | Crouch | Jump | Grab | Run |
|---|---|---|---|---|

|

|

|

|

|
Colors

|

|

|

|
Movelist
Throws
1. Victor Nage - b/f + C
- Mary knocks the opponent to the ground and elbows them, knocking them in the direction opposite the one she was facing
- hard knockdown
- very useful throw that has many possible crossup setups afterwards. Discussed in strategy section
2. Head Throw - b/f + D
- Mary grabs the opponent and throws them over her head in the direction opposite the one she was facing
- the opponent will get up with their back turned
Command Normals
1. Hammer Arch - b/f + A
- Mary hops forward slightly and performs a two-handed hammerfist that doesn't knockdown on impact unless it hits an airborn opponent(in which case, it is a hard knockdown)
- Mary is considered airborn throughout most of this move but the when the contact is made, she is considered grounded
- this move is very useful in combos but is punishable by some things even on hit, if it isn't cancelled
- overhead
- cancellable only to DMs if not cancelled into
- cancellable if cancelled into
2. Double Rolling - b/f + B
- Mary performs a two hit kicking move that does very good damage
- hits low on the second hit
- cancellable on the second hit
- great move to use in combos for the damage adn cancellability, but can be guard rolled and punished if blocked
Short Movelist
- b / f + A (Overhead if not cancelled into.)
- b / f + B (Low (2).)
- qcf + P (A: Overhead.)
- qcf + P (Only on hit & opponent in the ground.)
- qcb + P (Dodge.)
- qcf + P (Throw.)
- dp + K
- dp + K (Only on hit.)
- (b) f + K (B: Low.) (D: Low when hit from distance.)
- qcf + K (Only on hit & opponent in the ground.)
- qcb + B (Counter: air normals + non-low specials. Throw on trigger.)
- qcb + D (Counter: ground normals + low specials. Throw on trigger.)
- DM qcf hcb + P
- DM A A f B C
- SDM A A b B C
- HSDM db qcf uf u d + BD (Throw. 0 frame startup.)
Notes
Cancellable moves
- Close: A, B, C (1-2; 2 cannot be cancelled on command attacks.), D (2)
- Far: A, B, C (1-2)
- Crouch: A, B, C
- CD is cancellable to special moves and DMs
- b / f + B (2) is cancellable.
- b / f + A is cancellable only when you cancel into it.
Super cancellable moves
- (b) f + B
- dp + B (1)
- dp + K > dp + K (Only into DM A A f B C or SDM A A b B C, but super will whiff...)
Free cancellable into moves
- qcf + P
- dp + K
- (b) f + K
- qcb + B
- qcb + D
- qcb + P
Free cancellable out-of moves
- b / f + A
- b / f + B (1)
- dp + K (1)
- (b) f + K
Moves with Invincibility
??
Moves with autoguard
(none)
Other Notes
- cl.B is a low attack.
- C throw switch sides.
Combos
Basic Combos
- cl.C (1) >
- (b / f + A) / (b / f + B (2))
- dp + D > dp + K (Only after b / f + A.) {35%}
- (b) f + K > qcf + K {35%}
- (b) f + B >>
- DM qcf hcb + P {55%} {2 stocks}
- DM A A f B C (Corner.) {55%} {2 stocks}
- SDM A A b B C (Corner.) {Max Mode + 2 stocks}
- DM qcf hcb + P {45%} {1 stock}
- DM A A f B C (Only after b / f + A.){45%} {1 stock}
- SDM A A b B C (Only after b / f + A.) {Max Mode + 1 stock}
- HSDM db qcf uf u d + BD {60%} {Max Mode + 1 stock}
- (b / f + A) / (b / f + B (2))
Damage above is based on cl.C (1) > b / f + A as starter.
About (b / f + A) / (b / f + B (2)): b / f + B deals more damage (~+??) than b / f + A, and, actually, b / f + B alone deals more damage (~+??) than cl.C (1) > b / f + A, but b / f + B will only combos from very close cl.C (1), while b / f + A combos even from a far st.C (2).
- cr.B, cr.B / cr.A >
- dp + B > dp + K
- DM A A f B C {35%} {1 stock}
- SDM A A b B C {Max Mode + 1 stock}
- HSDM db qcf uf u d + BD {Max Mode + 1 stock}
- cr.B x 1-3, st.B
- b / f + A >
- DM qcf hcb + P {40%} {1 stock}
- DM A A f B C {40%} {1 stock}
- SDM A A b B C {Max Mode + 1 stock}
- HSDM db qcf uf u d + BD {Max Mode + 1 stock}
Max Mode
- cl.C (1) > b / f + A >> BC, run, cl.C (1) > b / f + A > SDM A A b B C {70%}
- cl.C (1) > b / f + A >> BC, run, cl.C (1) > b / f + B > (b) f + B >> dp + K (1) >>
- SDM A A b B C {75%}
- DM A A f B C
- DM qcf hcb + C
