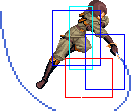
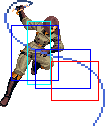
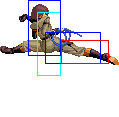
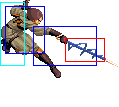
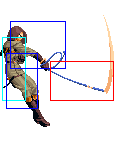
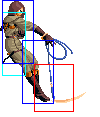
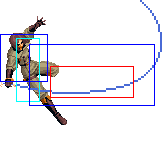
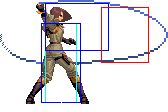
m (→Movelist) |
|||
| (48 intermediate revisions by 5 users not shown) | |||
| Line 2: | Line 2: | ||
==General Info== | ==General Info== | ||
Crouch height: High<br> | Crouch height: High<br> | ||
Jump: 4/34/1<br> | |||
Hop: 4/25/1<br> | |||
Dash: 3/10~∞/3<br> | |||
Backdash: 3/14/3<br> | |||
Wakeup: 19 frames<br> | |||
Recovery roll: 21 frames<br> | |||
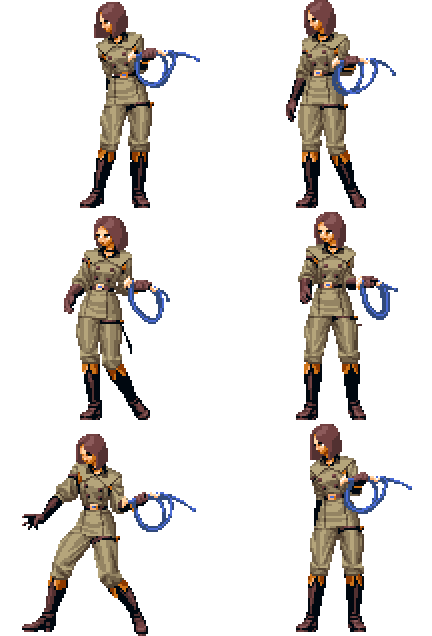
{| | {| | ||
! Stand | ! Stand | ||
| Line 27: | Line 34: | ||
| [[image:Whip02_colorD.png]] | | [[image:Whip02_colorD.png]] | ||
|} | |} | ||
{{ ProConTable | |||
| pros= | |||
* Great jump buttons and crossups | |||
* One of the best CDs in the game | |||
* CD counterhits convert to high damage combos | |||
* Extra mobility with j.qcb P and dp X specials | |||
| cons= | |||
* Long recovery on several moves | |||
* Difficult hitconfirms | |||
* Extremely difficult Max Mode combos | |||
}} | |||
==[[The_King_of_Fighters_2002/Movelist_Guide|Movelist]]== | ==[[The_King_of_Fighters_2002/Movelist_Guide|Movelist]]== | ||
{|border="1" | {|border="1" | ||
| Line 108: | Line 128: | ||
| | | | ||
|- | |- | ||
! [[image:snkc.gif]]+[[image:snkd.gif]] | ! [[image:snkc.gif]] + [[image:snkd.gif]] | ||
|align="center"| 15/7/15 | |align="center"| 15/7/15 | ||
|align="center"| KD/0 | |align="center"| KD/0 | ||
| Line 188: | Line 208: | ||
| | | | ||
|- | |- | ||
! [[image:snkc.gif]]+[[image:snkd.gif]] | ! [[image:snkc.gif]] + [[image:snkd.gif]] | ||
|align="center"| 16/4/- | |align="center"| 16/4/- | ||
|align="center"| KD/- | |align="center"| KD/- | ||
| Line 270: | Line 290: | ||
|colspan="9" align="center"| '''Command Normals''' | |colspan="9" align="center"| '''Command Normals''' | ||
|- | |- | ||
! f+[[image:snka.gif]]<br>(first hit) | ! f + [[image:snka.gif]]<br>(first hit) | ||
|align="center"| 19/2[2]2/41 | |align="center"| 19/2[2]2/41 | ||
|align="center"| -19/-21 | |align="center"| -19/-21 | ||
| Line 277: | Line 297: | ||
|rowspan="5" valign="bottom" style="border-right:0px;"| [[image:Whip02_fA1.png|center]] | |rowspan="5" valign="bottom" style="border-right:0px;"| [[image:Whip02_fA1.png|center]] | ||
|rowspan="5" valign="bottom" style="border-left:0px;" colspan="2"| [[image:Whip02_fA2.png|center]] | |rowspan="5" valign="bottom" style="border-left:0px;" colspan="2"| [[image:Whip02_fA2.png|center]] | ||
|rowspan="5"| '''Whip Shot (f+A)''' | |rowspan="5"| '''Whip Shot (f + A)''' | ||
* 27 frames of hitstun, 25 frames of blockstun | * 27 frames of hitstun, 25 frames of blockstun | ||
* hard knockdown on final hit | * hard knockdown on final hit | ||
* does large amounts of guard crush damage | * does large amounts of guard crush damage | ||
|- | |- | ||
! f+[[image:snka.gif]]<br>(second hit) | ! f + [[image:snka.gif]]<br>(second hit) | ||
|align="center"| 19/3+3/38 | |align="center"| 19/3+3/38 | ||
|align="center"| -16/-18 | |align="center"| -16/-18 | ||
| Line 288: | Line 308: | ||
|align="center"| HL | |align="center"| HL | ||
|- | |- | ||
! f+[[image:snka.gif]]<br>(third hit) | ! f + [[image:snka.gif]]<br>(third hit) | ||
|align="center"| 13/3[2]2/41 | |align="center"| 13/3[2]2/41 | ||
|align="center"| -15/-17 | |align="center"| -15/-17 | ||
| Line 294: | Line 314: | ||
|align="center"| HL | |align="center"| HL | ||
|- | |- | ||
! f+[[image:snka.gif]]<br>(fourth hit) | ! f + [[image:snka.gif]]<br>(fourth hit) | ||
|align="center"| 20/3+3/38 | |align="center"| 20/3+3/38 | ||
|align="center"| -16/-18 | |align="center"| -16/-18 | ||
| Line 300: | Line 320: | ||
|align="center"| HL | |align="center"| HL | ||
|- | |- | ||
! f+[[image:snka.gif]]<br>(fifth hit) | ! f + [[image:snka.gif]]<br>(fifth hit) | ||
|align="center"| 12/2[2]3/42 | |align="center"| 12/2[2]3/42 | ||
|align="center"| KD/-23 | |align="center"| KD/-23 | ||
| Line 308: | Line 328: | ||
|colspan="9" align="center"| '''Special Moves''' | |colspan="9" align="center"| '''Special Moves''' | ||
|- | |- | ||
! hcb+[[image:snka.gif]]<br>(stance) | ! hcb + [[image:snka.gif]]<br>(stance) | ||
|align="center"| 15/-/15 | |align="center"| 15/-/15 | ||
|align="center"| -/- | |align="center"| -/- | ||
|align="center"| hcb+A | |align="center"| hcb + A | ||
|align="center"| - | |align="center"| - | ||
|colspan="3" | [[image:Whip02_hcbAstance.png|center]] | |colspan="3" | [[image:Whip02_hcbAstance.png|center]] | ||
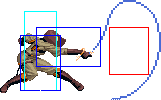
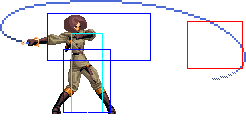
|rowspan="2"| '''Strings Shot Type A "Code: Yuuetsu" - hcb+A (can be held)''' | |rowspan="2"| '''Strings Shot Type A "Code: Yuuetsu" - hcb + A (can be held)''' | ||
* Whip goes into a stance if the button is held. When released, she will swing her whip forward | * Whip goes into a stance if the button is held. When released, she will swing her whip forward | ||
* Whip can walk back and forth while in this stance | * Whip can walk back and forth while in this stance | ||
| Line 323: | Line 343: | ||
* Invincible: Frame 1~7. Lower body invincible Frame 8~15, complete 'stance' period, and first 5 frames of recovery. | * Invincible: Frame 1~7. Lower body invincible Frame 8~15, complete 'stance' period, and first 5 frames of recovery. | ||
|- | |- | ||
! hcb+[[image:snka.gif]]<br>(attack) | ! hcb + [[image:snka.gif]]<br>(attack) | ||
|align="center"| 10/4(9)5/22 | |align="center"| 10/4(9)5/22 | ||
|align="center"| KD/-9 | |align="center"| KD/-9 | ||
| Line 331: | Line 351: | ||
|valign="bottom" style="border-left:0px;" colspan="2"| [[image:Whip02_HcbA2.png|center]] | |valign="bottom" style="border-left:0px;" colspan="2"| [[image:Whip02_HcbA2.png|center]] | ||
|- | |- | ||
! hcb+[[image:snkb.gif]]<br>(stance) | ! hcb + [[image:snkb.gif]]<br>(stance) | ||
|align="center"| 15/-/15 | |align="center"| 15/-/15 | ||
|align="center"| -/- | |align="center"| -/- | ||
|align="center"| hcb+B | |align="center"| hcb + B | ||
|align="center"| - | |align="center"| - | ||
|colspan="3" | [[image:Whip02_hcbAstance.png|center]] | |colspan="3" | [[image:Whip02_hcbAstance.png|center]] | ||
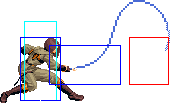
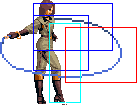
|rowspan="2"| '''Strings Shot Type B "Code: Chikara" - hcb+B (can be held)''' | |rowspan="2"| '''Strings Shot Type B "Code: Chikara" - hcb + B (can be held)''' | ||
* Whip goes into a stance if the button is held. When released, she will swing her whip forward | * Whip goes into a stance if the button is held. When released, she will swing her whip forward | ||
* if it hits, the opponent is pulled close to Whip, allowing her to followup with pretty much any combo | * if it hits, the opponent is pulled close to Whip, allowing her to followup with pretty much any combo | ||
| Line 345: | Line 365: | ||
* 40 frames of hitstun, 17 frames of blockstun | * 40 frames of hitstun, 17 frames of blockstun | ||
|- | |- | ||
! hcb+[[image:snkb.gif]]<br>(attack) | ! hcb + [[image:snkb.gif]]<br>(attack) | ||
|align="center"| 6/4(16)3/22 | |align="center"| 6/4(16)3/22 | ||
|align="center"| +16/-7 | |align="center"| +16/-7 | ||
| Line 353: | Line 373: | ||
|valign="bottom" style="border-left:0px;" colspan="2"| [[image:Whip02_HcbB2.png|center]] | |valign="bottom" style="border-left:0px;" colspan="2"| [[image:Whip02_HcbB2.png|center]] | ||
|- | |- | ||
! hcb+[[image:snkc.gif]]<br>(stance) | ! hcb + [[image:snkc.gif]]<br>(stance) | ||
|align="center"| 15/-/15 | |align="center"| 15/-/15 | ||
|align="center"| -/- | |align="center"| -/- | ||
|align="center"| hcb+C | |align="center"| hcb + C | ||
|align="center"| - | |align="center"| - | ||
|colspan="3" | [[image:Whip02_hcbAstance.png|center]] | |colspan="3" | [[image:Whip02_hcbAstance.png|center]] | ||
|rowspan="2"| '''Strings Shot Type C "Code: Shouri" - hcb+C (can be held)''' | |rowspan="2"| '''Strings Shot Type C "Code: Shouri" - hcb + C (can be held)''' | ||
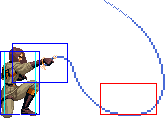
* Whip goes into a stance if the button is held. When released, she will swing her her whip along the ground, tripping the opponent | * Whip goes into a stance if the button is held. When released, she will swing her her whip along the ground, tripping the opponent | ||
* low attack on the second hit | * low attack on the second hit | ||
| Line 367: | Line 387: | ||
* Invincible: Frame 1~7. Lower body invincible Frame 8~15, complete 'stance' period, and first 5 frames of recovery. | * Invincible: Frame 1~7. Lower body invincible Frame 8~15, complete 'stance' period, and first 5 frames of recovery. | ||
|- | |- | ||
! hcb+[[image:snkc.gif]]<br>(attack) | ! hcb + [[image:snkc.gif]]<br>(attack) | ||
|align="center"| 7/4(16)5/31 | |align="center"| 7/4(16)5/31 | ||
|align="center"| KD/-18 | |align="center"| KD/-18 | ||
| Line 375: | Line 395: | ||
|valign="bottom" style="border-left:0px;" colspan="2"| [[image:Whip02_HcbC2.png|center]] | |valign="bottom" style="border-left:0px;" colspan="2"| [[image:Whip02_HcbC2.png|center]] | ||
|- | |- | ||
! hcf+[[image:snka.gif]] | ! hcf + [[image:snka.gif]] | ||
|align="center"| 6/3(17)4/50 | |align="center"| 6/3(17)4/50 | ||
|align="center"| KD/-43 | |align="center"| KD/-43 | ||
| Line 382: | Line 402: | ||
|valign="bottom" style="border-right:0px;"| [[image:Whip_HcfA1.png|center]] | |valign="bottom" style="border-right:0px;"| [[image:Whip_HcfA1.png|center]] | ||
|valign="bottom" style="border-left:0px;" colspan="2"| [[image:Whip_HcfA2.png|center]] | |valign="bottom" style="border-left:0px;" colspan="2"| [[image:Whip_HcfA2.png|center]] | ||
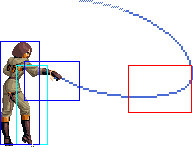
|rowspan="2"| '''Boomerang Shot "Code: SC" - hcf+P''' | |rowspan="2"| '''Boomerang Shot "Code: SC" - hcf + P''' | ||
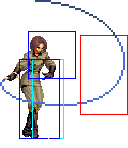
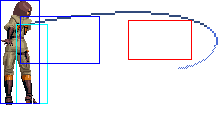
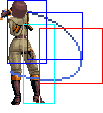
* Whip will perform an anti-air move that comes out fairly quickly. There are two parts - the quick reversal part and then the second hit which grabs the opponent out of the air | * Whip will perform an anti-air move that comes out fairly quickly. There are two parts - the quick reversal part and then the second hit which grabs the opponent out of the air | ||
* hcf+C does a reasonable amount more damage than hcf+A, but the first hit of hcf+C whiffs against most crouching opponents, except Whip, Seth, Maxima, Daimon and Chang | * hcf + C does a reasonable amount more damage than hcf + A, but the first hit of hcf + C whiffs against most crouching opponents, except Whip, Seth, Maxima, Daimon and Chang | ||
* the second hit of this move has a property where it will grab always grab the opponent out of the air even if it were to break the KOF juggle system. For example, you can technically land a non-counterhit anti-air/knock back normal and then juggle with hcf+P after | * the second hit of this move has a property where it will grab always grab the opponent out of the air even if it were to break the KOF juggle system. For example, you can technically land a non-counterhit anti-air/knock back normal and then juggle with hcf + P after | ||
* supercancellable on the first hit | * supercancellable on the first hit | ||
* free cancellable out of on the first hit | * free cancellable out of on the first hit | ||
| Line 393: | Line 413: | ||
* 10 frames of blockstun | * 10 frames of blockstun | ||
|- | |- | ||
! hcf+[[image:snkc.gif]] | ! hcf + [[image:snkc.gif]] | ||
|align="center"| 8/4(20)4/53 | |align="center"| 8/4(20)4/53 | ||
|align="center"| KD/-46 | |align="center"| KD/-46 | ||
| Line 401: | Line 421: | ||
|valign="bottom" style="border-left:0px;" colspan="2"| [[image:Whip_HcfC2.png|center]] | |valign="bottom" style="border-left:0px;" colspan="2"| [[image:Whip_HcfC2.png|center]] | ||
|- | |- | ||
! j.qcb+[[image:punch.gif]] | ! j.qcb + [[image:punch.gif]] | ||
|align="center"| 14/2+21/0 | |align="center"| 14/2+21/0 | ||
|align="center"| KD/-5 | |align="center"| KD/-5 | ||
| Line 408: | Line 428: | ||
|valign="top" style="border-right:0px;"| [[image:Whip_JqcbP1.png|center]] | |valign="top" style="border-right:0px;"| [[image:Whip_JqcbP1.png|center]] | ||
|valign="top" style="border-left:0px;" colspan="2"| [[image:Whip_JqcbP2.png|center]] | |valign="top" style="border-left:0px;" colspan="2"| [[image:Whip_JqcbP2.png|center]] | ||
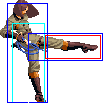
| '''Hook Shot "Code: Kaze" - qcb+P (air)''' | | '''Hook Shot "Code: Kaze" - qcb + P (air)''' | ||
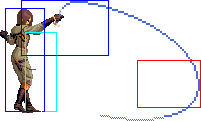
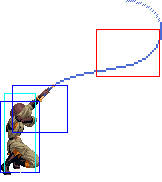
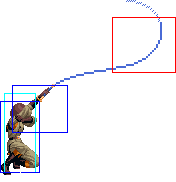
* Whip will do a swinging kick while hanging on to her whip (which is tied to the ceiling) | * Whip will do a swinging kick while hanging on to her whip (which is tied to the ceiling) | ||
* Has no ground recovery time - However, after blocking the move, she can easily be hit out of the air as she's coming down. Even worse, what they hit her with will be a counterhit. There are a variety of counterhit combos that the opponent can punish Whip with in the air. For example, Clark can do Close C(1), dp+A, qcf+P to punish | * Has no ground recovery time - However, after blocking the move, she can easily be hit out of the air as she's coming down. Even worse, what they hit her with will be a counterhit. There are a variety of counterhit combos that the opponent can punish Whip with in the air. For example, Clark can do Close C(1), dp + A, qcf + P to punish | ||
|- | |- | ||
! <br>dp+[[image:snka.gif]]/[[image:snkb.gif]]<br><br> | ! <br>dp + [[image:snka.gif]]/[[image:snkb.gif]]<br><br> | ||
|align="center"| 13/13(16)16/45 | |align="center"| 13/13(16)16/45 | ||
|align="center"| KD/-43 | |align="center"| KD/-43 | ||
| Line 419: | Line 439: | ||
|rowspan="2" valign="top" style="border-right:0px;"| [[image:Whip02_DpPK1.png|center]] | |rowspan="2" valign="top" style="border-right:0px;"| [[image:Whip02_DpPK1.png|center]] | ||
|rowspan="2" valign="top" style="border-left:0px;" colspan="2"| [[image:Whip_DpPK2.png|center]] | |rowspan="2" valign="top" style="border-left:0px;" colspan="2"| [[image:Whip_DpPK2.png|center]] | ||
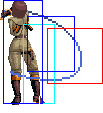
|rowspan="2"| '''Assassin Strike "Code: BB" - dp+P/K''' | |rowspan="2"| '''Assassin Strike "Code: BB" - dp + P/K''' | ||
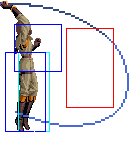
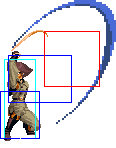
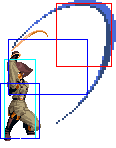
* Whip throws her whip into the air, pulls herself up off the screen, and comes down | * Whip throws her whip into the air, pulls herself up off the screen, and comes down | ||
* the location of where she falls is determined by the button used. A makes her drop almost exactly where she started from, B makes her land about a quarter screen from her current location, C makes her go another quarter screen, and D almost full screen | * the location of where she falls is determined by the button used. A makes her drop almost exactly where she started from, B makes her land about a quarter screen from her current location, C makes her go another quarter screen, and D almost full screen | ||
* it is possible to crossup the opponent with this move. However, it has such horrible recovery time that it shouldn't ever be used | * it is possible to crossup the opponent with this move. However, it has such horrible recovery time that it shouldn't ever be used | ||
* hard knockdown on the last hit when she comes down | * hard knockdown on the last hit when she comes down | ||
* free cancellable out of into qcb+P(air) when she comes down | * free cancellable out of into qcb + P(air) when she comes down | ||
* this move can OTG against some characters after throwing them with her b/f+D, such as Yashiro, Mary, May Lee and Kula | * this move can OTG against some characters after throwing them with her b/f + D, such as Yashiro, Mary, May Lee and Kula | ||
* A/B versions: Lower body invincible: Frame 1~9. Invincible: Frame 10~13. | * A/B versions: Lower body invincible: Frame 1~9. Invincible: Frame 10~13. | ||
* C/D versions: Lower body invincible: Frame 1~12. Invincible: Frame 13~18. | * C/D versions: Lower body invincible: Frame 1~12. Invincible: Frame 13~18. | ||
|- | |- | ||
! dp+[[image:snkc.gif]]/[[image:snkd.gif]] | ! dp + [[image:snkc.gif]]/[[image:snkd.gif]] | ||
|align="center"| 18/13(16)16/47 | |align="center"| 18/13(16)16/47 | ||
|align="center"| KD/-45 | |align="center"| KD/-45 | ||
| Line 435: | Line 455: | ||
|align="center"| HL*H | |align="center"| HL*H | ||
|- | |- | ||
! <br>rdp+[[image:snka.gif]]<br><br> | ! <br>rdp + [[image:snka.gif]]<br><br> | ||
|align="center"| 27+5/7/5+39 | |align="center"| 27+5/7/5+39 | ||
|align="center"| KD/-40 | |align="center"| KD/-40 | ||
| Line 441: | Line 461: | ||
|align="center"| L | |align="center"| L | ||
|rowspan="2" colspan="3" | [[image:Whip02_RdpA.png|center]] | |rowspan="2" colspan="3" | [[image:Whip02_RdpA.png|center]] | ||
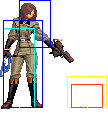
|rowspan="4"| '''Desert Eagle - rdp+P, tap P rapidly''' | |rowspan="4"| '''Desert Eagle - rdp + P, tap P rapidly''' | ||
* Whip takes out her gun and shoots at the ground. rdp+C shoots further than rdp+A | * Whip takes out her gun and shoots at the ground. rdp + C shoots further than rdp + A | ||
* hits low | * hits low | ||
* this move has the ability to hit an opponent on the ground. It is best used after a throw. rdp+C might miss after a throw, so use rdp+A instead | * this move has the ability to hit an opponent on the ground. It is best used after a throw. rdp + C might miss after a throw, so use rdp + A instead | ||
* Whip starts with a random number of bullets in her gun, up to a maximum of 7. When she has wasted all of her bullets, she will reload on her next use of the move, resulting in very long recovery time | * Whip starts with a random number of bullets in her gun, up to a maximum of 7. When she has wasted all of her bullets, she will reload on her next use of the move, resulting in very long recovery time | ||
* it is possible to combo with this move multiple times, by tapping P. It's fairly risky to do this though since you can easily run out of bullets, getting yourself killed when she starts to reload her gun | * it is possible to combo with this move multiple times, by tapping P. It's fairly risky to do this though since you can easily run out of bullets, getting yourself killed when she starts to reload her gun | ||
* framedata of repeated shots: 5/7/5 (A version), 9/7/4 (C version) | * framedata of repeated shots: 5/7/5 (A version), 9/7/4 (C version) | ||
|- | |- | ||
! rdp+[[image:snka.gif]]<br>(reload) | ! rdp + [[image:snka.gif]]<br>(reload) | ||
|align="center"| 7/-/111 | |align="center"| 7/-/111 | ||
|align="center"| -/- | |align="center"| -/- | ||
| Line 455: | Line 475: | ||
|align="center"| - | |align="center"| - | ||
|- | |- | ||
! <br>rdp+[[image:snkc.gif]]<br><br> | ! <br>rdp + [[image:snkc.gif]]<br><br> | ||
|align="center"| 24+9/7/4+52 | |align="center"| 24+9/7/4+52 | ||
|align="center"| KD/-52 | |align="center"| KD/-52 | ||
| Line 462: | Line 482: | ||
|rowspan="2" colspan="3" | [[image:Whip02_RdpC.png|center]] | |rowspan="2" colspan="3" | [[image:Whip02_RdpC.png|center]] | ||
|- | |- | ||
! rdp+[[image:snkc.gif]]<br>(reload) | ! rdp + [[image:snkc.gif]]<br>(reload) | ||
|align="center"| 7/-/124 | |align="center"| 7/-/124 | ||
|align="center"| -/- | |align="center"| -/- | ||
| Line 470: | Line 490: | ||
|colspan="9" align="center"| '''DM''' | |colspan="9" align="center"| '''DM''' | ||
|- | |- | ||
! qcb,hcf+[[image:snka.gif]] | ! qcb,hcf + [[image:snka.gif]] | ||
|align="center"| 5/2(7)3(8)2(11)2[(11)2(11)2]/62 | |align="center"| 5/2(7)3(8)2(11)2[(11)2(11)2]/62 | ||
|align="center"| KD/-85 | |align="center"| KD/-85 | ||
| Line 477: | Line 497: | ||
|valign="bottom" style="border-right:0px; border-bottom:0px;"| [[image:Whip02_qcbhcfP1.png|center]] | |valign="bottom" style="border-right:0px; border-bottom:0px;"| [[image:Whip02_qcbhcfP1.png|center]] | ||
|valign="bottom" style="border-left:0px; border-bottom:0px;" colspan="2"| [[image:Whip02_qcbhcfP2.png|center]] | |valign="bottom" style="border-left:0px; border-bottom:0px;" colspan="2"| [[image:Whip02_qcbhcfP2.png|center]] | ||
|rowspan="2"| '''Sonic Slaughter "Code: KW" (qcb,hcf+P)''' | |rowspan="2"| '''Sonic Slaughter "Code: KW" (qcb,hcf + P)''' | ||
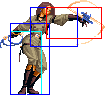
* Whip goes into a stance at startup. If the opponent was in the vicinity of that stance, they will be sucked into a series of whip lashes that knocks the opponent away | * Whip goes into a stance at startup. If the opponent was in the vicinity of that stance, they will be sucked into a series of whip lashes that knocks the opponent away | ||
* the startup of this move is completely invincible, making for one of the best anti-airs in the game | * the startup of this move is completely invincible, making for one of the best anti-airs in the game | ||
* if the first hit of qcb hcf+P misses, the other hits do no damage and do not suck the opponent into the DM. This means that if she does do the DM and it whiffs on the first hit, the opponent can fearlessly run into her while she's still swinging her whip, without getting hurt and punish her badly | * if the first hit of qcb hcf + P misses, the other hits do no damage and do not suck the opponent into the DM. This means that if she does do the DM and it whiffs on the first hit, the opponent can fearlessly run into her while she's still swinging her whip, without getting hurt and punish her badly | ||
* A version: Invincible first 9 frames | * A version: Invincible first 9 frames | ||
* C version: Invincible first 11 frames | * C version: Invincible first 11 frames | ||
* The portion of the active period in brackets only comes out if the first hit whiffs. | * The portion of the active period in brackets only comes out if the first hit whiffs. | ||
|- | |- | ||
! qcb,hcf+[[image:snkc.gif]] | ! qcb,hcf + [[image:snkc.gif]] | ||
|align="center"| 6/3(7)3(8)2(11)2[(11)2(11)2]/62 | |align="center"| 6/3(7)3(8)2(11)2[(11)2(11)2]/62 | ||
|align="center"| KD/-85 | |align="center"| KD/-85 | ||
| Line 495: | Line 515: | ||
|colspan="9" align="center"| '''SDM''' | |colspan="9" align="center"| '''SDM''' | ||
|- | |- | ||
!rowspan="2"| qcb,hcf+[[image:snka.gif]]+[[image:snkc.gif]] | !rowspan="2"| qcb,hcf + [[image:snka.gif]] + [[image:snkc.gif]] | ||
|rowspan="2" align="center"| 8/3(7)3(8)2(11)2[(11)2(11)2]/62 | |rowspan="2" align="center"| 8/3(7)3(8)2(11)2[(11)2(11)2]/62 | ||
|rowspan="2" align="center"| KD/-85 | |rowspan="2" align="center"| KD/-85 | ||
| Line 502: | Line 522: | ||
|valign="bottom" style="border-right:0px; border-bottom:0px;"| [[image:Whip02_qcbhcfAC1.png|center]] | |valign="bottom" style="border-right:0px; border-bottom:0px;"| [[image:Whip02_qcbhcfAC1.png|center]] | ||
|valign="bottom" style="border-left:0px; border-bottom:0px;" colspan="2"| [[image:Whip02_qcbhcfAC2.png|center]] | |valign="bottom" style="border-left:0px; border-bottom:0px;" colspan="2"| [[image:Whip02_qcbhcfAC2.png|center]] | ||
|rowspan="2"| '''Sonic Slaughter "Code: KW" (qcb,hcf+AC)''' | |rowspan="2"| '''Sonic Slaughter "Code: KW" (qcb,hcf + AC)''' | ||
* same properties as the DM version, but more damage | * same properties as the DM version, but more damage | ||
* Invincible first 13 frames | * Invincible first 13 frames | ||
| Line 525: | Line 545: | ||
* if you run up right beside her, the gunshot will whiff | * if you run up right beside her, the gunshot will whiff | ||
|} | |} | ||
* | ==Short Movelist== | ||
* whiff cancellable normals are | |||
* f + A x 1-5 | |||
* hcf + P ("Anywhere jungle" (2), but C version, seems to only work this way after f + A x 5) | |||
* hcb + A/B/C (May charge.) (A: Overhead (2).) (C: Low (2).) | |||
** D (Cancel. Only during startup/charge.) | |||
* dp + P/K (May OTG. Overhead (2nd part).) | |||
* rdp + P (May OTG. Low.) | |||
** mash P (May OTG. Low.) | |||
* air qcb + P | |||
* DM qcb hcf + P | |||
* SDM qcb hcf + P | |||
* HSDM b B C b C (Unblockable.) | |||
==Notes== | |||
===Cancellable moves=== | |||
* Close: A, B, C, D | |||
* Far: B, D (Special moves and DMs.) | |||
* Crouch: B, C (1-2) | |||
* Jump: B | |||
* whiff cancellable normals are: | |||
** Close: C, D | |||
** Far: D | |||
** Crouch: B, C | |||
* CD is cancellable into command moves, specials and DMs | * CD is cancellable into command moves, specials and DMs | ||
* | |||
* | * f + A x 5 is cancellable. | ||
===Super cancellable moves=== | |||
* hcf + P (1) | |||
* hcb + A/B/C (1) | |||
===Free cancellable into moves=== | |||
* '''hcf + P''' | |||
* '''hcb + A/B/C''' | |||
* '''dp + P/K''' | |||
* air qcb + P | |||
=== Free cancellable out-of moves=== | |||
* f + A X 1-4 | |||
* '''dp + P/K (2nd part & off the ground.) | |||
* '''hcf + P (1)''' | |||
* '''hcb + A/B/C (1)''' | |||
===Moves with Invincibility=== | |||
* CD (Full: startup (last part) & recovery.) | |||
* hcf + P (Full: startup (1st part). Upper: startup.) | |||
* dp + P/K (Full: startup (last part). Lower: startup.) | |||
* hcb + A/B/C (Full: startup (1st part). Lower: startup & "charge" & recovery (1st part).) | |||
* DM qcb hcf + P (Full: startup & active (1st part).) | |||
* SDM qcb hcf + AC (Full: startup & active (1st part).) | |||
* HSDM b B C b C (Full: startup & active & recovery.) | |||
=== Moves with autoguard=== | |||
(none) | |||
===Other Notes=== | |||
* cl.B and cr.A are low attacks | |||
* close A whiffs against low crouching opponents like Iori, Chin, Choi, Athena, etc | * close A whiffs against low crouching opponents like Iori, Chin, Choi, Athena, etc | ||
* C and D throws are both back-turned hard knockdowns | * C and D throws are both back-turned hard knockdowns | ||
* C throw switch sides. | |||
* cl.D does more hit stun than a regular hard attack. That's why you can combo f + A from it. | |||
== Combos == | == Combos == | ||
===Anywhere:=== | |||
* hcb + B, any combo (if Whip is too far away you could try to run a little bit but if she's really far away Whip will not be able to combo) | |||
* cl.C / cl.D / cr.C (1) > | |||
** SDM qcb hcf + AC [47%] {Max Mode + 1 Stock} | |||
** DM qcb hcf + P [40%] {1 Stock} | |||
** hcf + C (Standing.) [33%] | |||
** hcf + A [28%] | |||
* cl.D > f + A x 5 > hcf + A [41%] | |||
Close to the corner, may use hcf + C instead, but deals almost the same damage. It's the only situation where you can use hcf + C as an "anywhere jungle". | |||
* Corner: cl.D > f + A x 5 > | |||
** dp + B (OTG.) | |||
** rdp + C (OTG.) > mash P (OTG.) | |||
* cl.B x 2, cl.A (must be very close to connect, besides Whip need to do cl.B x 2 as quickly as fast as possible or it will do st.A instead of cl.A), cr.B > | |||
** SDM qcb hcf + AC {Max Mode + 1 Stock} | |||
** DM qcb hcf + P {45%} {1 Stock} | |||
** hcf + C (Standing.) {35%} | |||
** hcf + A | |||
* st.B > | |||
** SDM qcb hcf + AC {Max Mode + 1 Stock} | |||
** DM qcb hcf + P {1 Stock} | |||
** hcf + C (Standing.) | |||
** hcf + A | |||
* C throw / D throw, rdp + A (OTG.) > mash P (OTG.) {20+%} | |||
* CD / j.CD, hcf + A {25%} | |||
* Opponent in the air: any cancellable normal > hcf + A {up to 20%} | |||
* D throw, immediately dp + A {30%} (Mary, Kula, Yashiro, Orochi Yashiro, May Lee) | |||
===Corner:=== | |||
* Corner & Whip full screen away: air qcb + A, CD, hcf + A (switched sides) {38%} | |||
===Counterhit:=== | |||
* Counterhit & corner: j.CD, CD, hcf + A {40%} | |||
* Counterhit & corner: CD > hcf + A {33%} | |||
===Maxmode:=== | |||
* cr.C(1) >> BC, cr.C(1) > | |||
** SDM qcb hcf + AC {55%} {3 stocks} | |||
** hcf + C (1) >> | |||
*** SDM qcb hcf + AC {65%} {4 stocks} | |||
*** hcb + A (1; Hold for split second and release) >> hcf + C (1) >> hcb + B, walk backwards slightly, st.C (1) >> hcb + B, cl.D > f + A x 5 > hcf + A (Corner) {85%} {2 Stocks} | |||
* hcb + B, cl.D, f + A x 5, BC, run, cl.B x2, cr.B, >> hcf + P, SDM qcb hcf + AC {80%} {4 stocks} | |||
** DM qcb hcf + P {70% } {3 stocks} | |||
* Counterhit & corner: CD >> BC, hcf + A (1) >> hcb + A (1; Hold for split second and release) >> hcf + C (1) >> hcb + B, cl.B x 2, cl.A, cr.B, SDM qcb hcf + AC {80%} {3 Stocks} | |||
1 | |||
2. | |||
''' | * '''Note''': To connect hcf + P into qcb, hcf + P or AC you can try this: cr.B, hcf + P, hcf + P/AC. If you do this quickly you can do it a lot more consistently. | ||
= Strategies = | = Strategies = | ||
* Whip's main offensive comes from her jump attacks, which are some of the best in the game. Her jump CD is very high priority. Her forward jump C is a great crossup attack especially when done early off a jumpin, since it acts as an instant overhead and very ambigious as to which direction to block. This can be abused by repeatedly hyper hopping over the opponent with jump C, which is very difficult to counter. Her jump D is fairly high priority and is two hits, and thus even if it is done early during a jump, it is still possible to combo after it with a close B. Mixing up jump crossup C and jump D with her close B (which hits low) gives her a good high/low game | |||
* Her jumpins can also be used very defensively as well. Her vertical high jump A and C are great for intercepting jumpins as they have huge horizontal and vertical range. Jump A has less horizontal range but hits opponents above her as well | |||
* Whip has one of the best standing CDs in the game, due to it's invincibility. This invincibility should not be overlooked. From testing, it is able to ALWAYS counterhit any counterattack on wakeup that does not have invincibility. This includes all rush DMs, and dp moves. Against moves with invincibility, if timed and spaced correctly, it can still win, or in the usual case, the stand CD and the invincible wakeup move will whiff. However, Whip is able to block immediately after her invincibility from the move is gone, which means if both moves whiff, she can still block and punish. This works against Ryo's dp + A and Athena's hcbx2+P, although it is suggested that you keep maximum distance from the opponent when fighting against those moves. | |||
Of course, if the opponent knows that a move with invinciblity will beat the CD, you could try baiting them into doing the move by purposely mistiming your CD attack such that it whiffs just as they get up. This may trick a good player into reacting to the CD on wakeup, and since you will be blocking, you will have the opportunity to punish. Of course, this "trick" works as a general strategy for any character, but it works especially good with Whip if the opponent is aware of how good her CD attack is. Make sure to keep your distance with this move when fighting grapplers, as you can still be thrown out of it if close. | Of course, if the opponent knows that a move with invinciblity will beat the CD, you could try baiting them into doing the move by purposely mistiming your CD attack such that it whiffs just as they get up. This may trick a good player into reacting to the CD on wakeup, and since you will be blocking, you will have the opportunity to punish. Of course, this "trick" works as a general strategy for any character, but it works especially good with Whip if the opponent is aware of how good her CD attack is. Make sure to keep your distance with this move when fighting grapplers, as you can still be thrown out of it if close. | ||
The stand CD is best used as an attack on the opponent's wakeup, but it can also be used as a ranged poke, as well as after a jumpin (although it would be recommended that the jump attack does not hit too deep, so that the stand CD is spaced). Cancel any CD that hits as an anti-air, into hcf+A which combos. Using it as a poke totally destroys Billy because it is able to hit him out of his crouch A, f+A and hcf+P with ease, and Whip doesn't even have to be anywhere near Billy. | The stand CD is best used as an attack on the opponent's wakeup, but it can also be used as a ranged poke, as well as after a jumpin (although it would be recommended that the jump attack does not hit too deep, so that the stand CD is spaced). Cancel any CD that hits as an anti-air, into hcf + A which combos. Using it as a poke totally destroys Billy because it is able to hit him out of his crouch A, f + A and hcf + P with ease, and Whip doesn't even have to be anywhere near Billy. | ||
Assuming the opponent is not careful when fighting Whip (or just doesn't know about the stand CD invincibility), she will almost always counterhit the opponent. It is possible to combo hcf+A after a counterhit CD, and it is not required that you actually cancel the stand CD into hcf+A (but rather, do hcf+A as soon as she recovers from stand CD). Supercancelling the hcf+A to DM will also connect. Cancelling the CD into maxmode and going for her corner maxmode juggle combo also works. If the opponent is being very careful against her stand CD, then you can create more mindgames by throwing on the opponent's wakeup instead of doing the CD. In addition, if the opponent rolls forward, through the CD, Whip recovers first and is able to throw the opponent. | Assuming the opponent is not careful when fighting Whip (or just doesn't know about the stand CD invincibility), she will almost always counterhit the opponent. It is possible to combo hcf + A after a counterhit CD, and it is not required that you actually cancel the stand CD into hcf + A (but rather, do hcf + A as soon as she recovers from stand CD). Supercancelling the hcf + A to DM will also connect. Cancelling the CD into maxmode and going for her corner maxmode juggle combo also works. If the opponent is being very careful against her stand CD, then you can create more mindgames by throwing on the opponent's wakeup instead of doing the CD. In addition, if the opponent rolls forward, through the CD, Whip recovers first and is able to throw the opponent. | ||
Her stand CD can also avoid a variety of counters. CD counters will sometimes whiff, depending on who the character is that's doing the counter. May Lee's hcb+K counter also whiffs on the first hit, and be blockable on the other hits (allowing you to roll out during the counter, and combo her). If Yamazaki does hcf+K to counter the CD, Whip can actually hit him with a qcb hcf+P or hcf+C, while he is in the process of executing his uppercut punch. It does not seem possible to evade Billy's counters though. | Her stand CD can also avoid a variety of counters. CD counters will sometimes whiff, depending on who the character is that's doing the counter. May Lee's hcb + K counter also whiffs on the first hit, and be blockable on the other hits (allowing you to roll out during the counter, and combo her). If Yamazaki does hcf + K to counter the CD, Whip can actually hit him with a qcb hcf + P or hcf + C, while he is in the process of executing his uppercut punch. It does not seem possible to evade Billy's counters though. | ||
| Line 582: | Line 737: | ||
=== Yamazaki === | === Yamazaki === | ||
* Baiting Yamazaki's hcf+K counter | * Baiting Yamazaki's hcf + K counter | ||
Like most characters, Yamazaki can't do much of anything about Whip's well spaced on his wakeup. You can try to be predictable with it to make Yama want to use his hcf+K counter. Since Whip's stand CD has full invincibility on recovery, she will be able to hit Yama in the middle of his hcf+K using hcf+P or qcb hcf+P, though it must be done immediately after recovering from stand CD. | Like most characters, Yamazaki can't do much of anything about Whip's well spaced on his wakeup. You can try to be predictable with it to make Yama want to use his hcf + K counter. Since Whip's stand CD has full invincibility on recovery, she will be able to hit Yama in the middle of his hcf + K using hcf + P or qcb hcf + P, though it must be done immediately after recovering from stand CD. | ||
{{Template:The King of Fighters 2002}} | {{Template:The King of Fighters 2002}} | ||
[[Category:The King of Fighters 2002]] | [[Category:The King of Fighters 2002]] | ||
Latest revision as of 11:52, 9 February 2025
General Info
Crouch height: High
Jump: 4/34/1
Hop: 4/25/1
Dash: 3/10~∞/3
Backdash: 3/14/3
Wakeup: 19 frames
Recovery roll: 21 frames
| Stand | Crouch | Jump | Grab | Run |
|---|---|---|---|---|

|

|

|

|

|
Colors

|

|

|

|
| Strengths | Weaknesses |
|---|---|
|
|
Movelist
Short Movelist
- f + A x 1-5
- hcf + P ("Anywhere jungle" (2), but C version, seems to only work this way after f + A x 5)
- hcb + A/B/C (May charge.) (A: Overhead (2).) (C: Low (2).)
- D (Cancel. Only during startup/charge.)
- dp + P/K (May OTG. Overhead (2nd part).)
- rdp + P (May OTG. Low.)
- mash P (May OTG. Low.)
- air qcb + P
- DM qcb hcf + P
- SDM qcb hcf + P
- HSDM b B C b C (Unblockable.)
Notes
Cancellable moves
- Close: A, B, C, D
- Far: B, D (Special moves and DMs.)
- Crouch: B, C (1-2)
- Jump: B
- whiff cancellable normals are:
- Close: C, D
- Far: D
- Crouch: B, C
- CD is cancellable into command moves, specials and DMs
- f + A x 5 is cancellable.
Super cancellable moves
- hcf + P (1)
- hcb + A/B/C (1)
Free cancellable into moves
- hcf + P
- hcb + A/B/C
- dp + P/K
- air qcb + P
Free cancellable out-of moves
- f + A X 1-4
- dp + P/K (2nd part & off the ground.)
- hcf + P (1)
- hcb + A/B/C (1)
Moves with Invincibility
- CD (Full: startup (last part) & recovery.)
- hcf + P (Full: startup (1st part). Upper: startup.)
- dp + P/K (Full: startup (last part). Lower: startup.)
- hcb + A/B/C (Full: startup (1st part). Lower: startup & "charge" & recovery (1st part).)
- DM qcb hcf + P (Full: startup & active (1st part).)
- SDM qcb hcf + AC (Full: startup & active (1st part).)
- HSDM b B C b C (Full: startup & active & recovery.)
Moves with autoguard
(none)
Other Notes
- cl.B and cr.A are low attacks
- close A whiffs against low crouching opponents like Iori, Chin, Choi, Athena, etc
- C and D throws are both back-turned hard knockdowns
- C throw switch sides.
- cl.D does more hit stun than a regular hard attack. That's why you can combo f + A from it.
Combos
Anywhere:
- hcb + B, any combo (if Whip is too far away you could try to run a little bit but if she's really far away Whip will not be able to combo)
- cl.C / cl.D / cr.C (1) >
- SDM qcb hcf + AC [47%] {Max Mode + 1 Stock}
- DM qcb hcf + P [40%] {1 Stock}
- hcf + C (Standing.) [33%]
- hcf + A [28%]
- cl.D > f + A x 5 > hcf + A [41%]
Close to the corner, may use hcf + C instead, but deals almost the same damage. It's the only situation where you can use hcf + C as an "anywhere jungle".
- Corner: cl.D > f + A x 5 >
- dp + B (OTG.)
- rdp + C (OTG.) > mash P (OTG.)
- cl.B x 2, cl.A (must be very close to connect, besides Whip need to do cl.B x 2 as quickly as fast as possible or it will do st.A instead of cl.A), cr.B >
- SDM qcb hcf + AC {Max Mode + 1 Stock}
- DM qcb hcf + P {45%} {1 Stock}
- hcf + C (Standing.) {35%}
- hcf + A
- st.B >
- SDM qcb hcf + AC {Max Mode + 1 Stock}
- DM qcb hcf + P {1 Stock}
- hcf + C (Standing.)
- hcf + A
- C throw / D throw, rdp + A (OTG.) > mash P (OTG.) {20+%}
- CD / j.CD, hcf + A {25%}
- Opponent in the air: any cancellable normal > hcf + A {up to 20%}
- D throw, immediately dp + A {30%} (Mary, Kula, Yashiro, Orochi Yashiro, May Lee)
Corner:
- Corner & Whip full screen away: air qcb + A, CD, hcf + A (switched sides) {38%}
Counterhit:
- Counterhit & corner: j.CD, CD, hcf + A {40%}
- Counterhit & corner: CD > hcf + A {33%}
Maxmode:
- cr.C(1) >> BC, cr.C(1) >
- SDM qcb hcf + AC {55%} {3 stocks}
- hcf + C (1) >>
- SDM qcb hcf + AC {65%} {4 stocks}
- hcb + A (1; Hold for split second and release) >> hcf + C (1) >> hcb + B, walk backwards slightly, st.C (1) >> hcb + B, cl.D > f + A x 5 > hcf + A (Corner) {85%} {2 Stocks}
- hcb + B, cl.D, f + A x 5, BC, run, cl.B x2, cr.B, >> hcf + P, SDM qcb hcf + AC {80%} {4 stocks}
- DM qcb hcf + P {70% } {3 stocks}
- Counterhit & corner: CD >> BC, hcf + A (1) >> hcb + A (1; Hold for split second and release) >> hcf + C (1) >> hcb + B, cl.B x 2, cl.A, cr.B, SDM qcb hcf + AC {80%} {3 Stocks}
- Note: To connect hcf + P into qcb, hcf + P or AC you can try this: cr.B, hcf + P, hcf + P/AC. If you do this quickly you can do it a lot more consistently.
Strategies
- Whip's main offensive comes from her jump attacks, which are some of the best in the game. Her jump CD is very high priority. Her forward jump C is a great crossup attack especially when done early off a jumpin, since it acts as an instant overhead and very ambigious as to which direction to block. This can be abused by repeatedly hyper hopping over the opponent with jump C, which is very difficult to counter. Her jump D is fairly high priority and is two hits, and thus even if it is done early during a jump, it is still possible to combo after it with a close B. Mixing up jump crossup C and jump D with her close B (which hits low) gives her a good high/low game
- Her jumpins can also be used very defensively as well. Her vertical high jump A and C are great for intercepting jumpins as they have huge horizontal and vertical range. Jump A has less horizontal range but hits opponents above her as well
- Whip has one of the best standing CDs in the game, due to it's invincibility. This invincibility should not be overlooked. From testing, it is able to ALWAYS counterhit any counterattack on wakeup that does not have invincibility. This includes all rush DMs, and dp moves. Against moves with invincibility, if timed and spaced correctly, it can still win, or in the usual case, the stand CD and the invincible wakeup move will whiff. However, Whip is able to block immediately after her invincibility from the move is gone, which means if both moves whiff, she can still block and punish. This works against Ryo's dp + A and Athena's hcbx2+P, although it is suggested that you keep maximum distance from the opponent when fighting against those moves.
Of course, if the opponent knows that a move with invinciblity will beat the CD, you could try baiting them into doing the move by purposely mistiming your CD attack such that it whiffs just as they get up. This may trick a good player into reacting to the CD on wakeup, and since you will be blocking, you will have the opportunity to punish. Of course, this "trick" works as a general strategy for any character, but it works especially good with Whip if the opponent is aware of how good her CD attack is. Make sure to keep your distance with this move when fighting grapplers, as you can still be thrown out of it if close.
The stand CD is best used as an attack on the opponent's wakeup, but it can also be used as a ranged poke, as well as after a jumpin (although it would be recommended that the jump attack does not hit too deep, so that the stand CD is spaced). Cancel any CD that hits as an anti-air, into hcf + A which combos. Using it as a poke totally destroys Billy because it is able to hit him out of his crouch A, f + A and hcf + P with ease, and Whip doesn't even have to be anywhere near Billy.
Assuming the opponent is not careful when fighting Whip (or just doesn't know about the stand CD invincibility), she will almost always counterhit the opponent. It is possible to combo hcf + A after a counterhit CD, and it is not required that you actually cancel the stand CD into hcf + A (but rather, do hcf + A as soon as she recovers from stand CD). Supercancelling the hcf + A to DM will also connect. Cancelling the CD into maxmode and going for her corner maxmode juggle combo also works. If the opponent is being very careful against her stand CD, then you can create more mindgames by throwing on the opponent's wakeup instead of doing the CD. In addition, if the opponent rolls forward, through the CD, Whip recovers first and is able to throw the opponent.
Her stand CD can also avoid a variety of counters. CD counters will sometimes whiff, depending on who the character is that's doing the counter. May Lee's hcb + K counter also whiffs on the first hit, and be blockable on the other hits (allowing you to roll out during the counter, and combo her). If Yamazaki does hcf + K to counter the CD, Whip can actually hit him with a qcb hcf + P or hcf + C, while he is in the process of executing his uppercut punch. It does not seem possible to evade Billy's counters though.
Matchup Information
Yamazaki
- Baiting Yamazaki's hcf + K counter
Like most characters, Yamazaki can't do much of anything about Whip's well spaced on his wakeup. You can try to be predictable with it to make Yama want to use his hcf + K counter. Since Whip's stand CD has full invincibility on recovery, she will be able to hit Yama in the middle of his hcf + K using hcf + P or qcb hcf + P, though it must be done immediately after recovering from stand CD.
