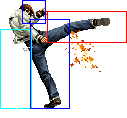
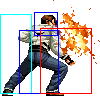
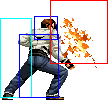
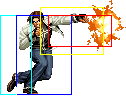
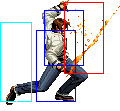
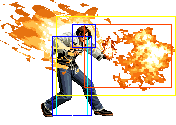
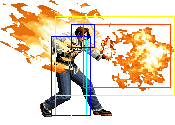
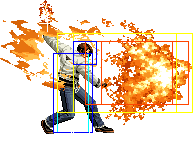
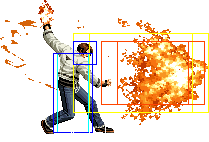
m (→Movelist) |
No edit summary |
||
| (61 intermediate revisions by 5 users not shown) | |||
| Line 1: | Line 1: | ||
[[File:Kyo_stance.gif|right|International singing sensation Kyō Kusanagi]] | [[File:Kyo_stance.gif|right|International singing sensation Kyō Kusanagi]] | ||
==General Info== | ==General Info== | ||
Kyo is the prom queen and everyone wants to fuck him.<br><br> | |||
Crouch height: Medium<br> | Crouch height: Medium<br> | ||
Jump: 4/31/1<br> | |||
Hop: 4/23/1<br> | |||
Dash: 3/10~∞/3<br> | |||
Backdash: 3/15/3<br> | |||
Wakeup: 26 frames<br> | |||
Recovery roll: 23 frames<br> | |||
{| | {| | ||
! Stand | ! Stand | ||
| Line 94: | Line 101: | ||
|align="center"| 12/2/17 | |align="center"| 12/2/17 | ||
|align="center"| +1/-1 | |align="center"| +1/-1 | ||
|align="center"| | |align="center"| | ||
|align="center"| HL | |align="center"| HL | ||
|colspan="3" | [[image:Kyo02_stC.png|center]] | |colspan="3" | [[image:Kyo02_stC.png|center]] | ||
| Line 107: | Line 114: | ||
|align="center"| Avoids lows | |align="center"| Avoids lows | ||
|- | |- | ||
! [[image:snkc.gif]]+[[image:snkd.gif]] | ! [[image:snkc.gif]] + [[image:snkd.gif]] | ||
|align="center"| 19/4/16 | |align="center"| 19/4/16 | ||
|align="center"| KD/+2 | |align="center"| KD/+2 | ||
| Line 184: | Line 191: | ||
| | | | ||
|- | |- | ||
! [[image:snkc.gif]]+[[image:snkd.gif]] | ! [[image:snkc.gif]] + [[image:snkd.gif]] | ||
|align="center"| 13/4/- | |align="center"| 13/4/- | ||
|align="center"| KD/- | |align="center"| KD/- | ||
| Line 262: | Line 269: | ||
|colspan="9" align="center"| '''Command Normals''' | |colspan="9" align="center"| '''Command Normals''' | ||
|- | |- | ||
! f+[[image:snkb.gif]] | ! f + [[image:snkb.gif]] | ||
|align="center"| 22/2/27 | |align="center"| 22/2/27 | ||
|align="center"| -9/-11 | |align="center"| -9/-11 | ||
| Line 270: | Line 277: | ||
| | | | ||
|- | |- | ||
! f+[[image:snkb.gif]] (cancel) | ! f + [[image:snkb.gif]] (cancel) | ||
|align="center"| 11/5(2)7/18 | |align="center"| 11/5(2)7/18 | ||
|align="center"| -5/-7 | |align="center"| -5/-7 | ||
| Line 279: | Line 286: | ||
| | | | ||
|- | |- | ||
! df+[[image:snkd.gif]] | ! df + [[image:snkd.gif]] | ||
|align="center"| 2/3(12)4/24 | |align="center"| 2/3(12)4/24 | ||
|align="center"| -8/-10 | |align="center"| -8/-10 | ||
| Line 288: | Line 295: | ||
| | | | ||
|- | |- | ||
! j.d+[[image:snkc.gif]] | ! j.d + [[image:snkc.gif]] | ||
|align="center"| 6/5/- | |align="center"| 6/5/- | ||
|align="center"| -/- | |align="center"| -/- | ||
| Line 298: | Line 305: | ||
|colspan="9" align="center"| '''Special Moves''' | |colspan="9" align="center"| '''Special Moves''' | ||
|- | |- | ||
! dp+[[image:snka.gif]] | ! dp + [[image:snka.gif]] | ||
|align="center"| 5/4*13/16+11 | |align="center"| 5/4*13/16+11 | ||
|align="center"| KD/-22 | |align="center"| KD/-22 | ||
| Line 305: | Line 312: | ||
|valign="bottom" style="border-right:0px;"| [[image:Kyo02_dpA1.png|center]] | |valign="bottom" style="border-right:0px;"| [[image:Kyo02_dpA1.png|center]] | ||
|colspan="2" valign="bottom" style="border-left:0px;" | [[image:Kyo02_dpA2.png|center]] | |colspan="2" valign="bottom" style="border-left:0px;" | [[image:Kyo02_dpA2.png|center]] | ||
|rowspan="2"| '''100 Shiki: Oniyaki - dp+P''' | |rowspan="2"| '''100 Shiki: Oniyaki - dp + P''' | ||
*Invincibility: A: First active period. C: Startup and first active period. | *Invincibility: A: First active period. C: Startup and first active period. | ||
|- | |- | ||
! dp+[[image:snkc.gif]] | ! dp + [[image:snkc.gif]] | ||
|align="center"| 5/4*16/22+13 | |align="center"| 5/4*16/22+13 | ||
|align="center"| KD/-33 | |align="center"| KD/-33 | ||
| Line 316: | Line 323: | ||
|colspan="2" valign="bottom" style="border-left:0px;" | [[image:Kyo02_dpC2.png|center]] | |colspan="2" valign="bottom" style="border-left:0px;" | [[image:Kyo02_dpC2.png|center]] | ||
|- | |- | ||
! qcf+[[image:snkb.gif]] | ! qcf + [[image:snkb.gif]] | ||
|align="center"| 13/5/27 | |align="center"| 13/5/27 | ||
|align="center"| -12/-14 | |align="center"| -12/-14 | ||
| Line 332: | Line 339: | ||
|align="center"| HL | |align="center"| HL | ||
|- | |- | ||
! qcf+[[image:snkd.gif]] | ! qcf + [[image:snkd.gif]] | ||
|align="center"| 17/5/27 | |align="center"| 17/5/27 | ||
|align="center"| KD/-14 | |align="center"| KD/-14 | ||
| Line 344: | Line 351: | ||
|align="center"| HL | |align="center"| HL | ||
|- | |- | ||
! hcb+[[image:snkb.gif]] | ! hcb + [[image:snkb.gif]] | ||
|align="center"| 19/3/31 | |align="center"| 19/3/31 | ||
|align="center"| KD/-16 | |align="center"| KD/-16 | ||
| Line 350: | Line 357: | ||
|align="center"| HL | |align="center"| HL | ||
|colspan="3" | [[image:Kyo02_hcbB.png|center]] | |colspan="3" | [[image:Kyo02_hcbB.png|center]] | ||
|rowspan="2"| '''412 Shiki: Hikigane - hcb+K''' | |rowspan="2"| '''412 Shiki: Hikigane - hcb + K''' | ||
*B version: Lower body invincibility: Complete startup. C version: Upperbody invincbility: Frame 3-12. | *B version: Lower body invincibility: Complete startup. C version: Upperbody invincbility: Frame 3-12. | ||
|- | |- | ||
! hcb+[[image:snkd.gif]] | ! hcb + [[image:snkd.gif]] | ||
|align="center"| 14/2[1]3/25 | |align="center"| 14/2[1]3/25 | ||
|align="center"| KD/-13 | |align="center"| KD/-13 | ||
| Line 361: | Line 368: | ||
|colspan="2" valign="bottom" style="border-left:0px;" | [[image:Kyo02_hcbD2.png|center]] | |colspan="2" valign="bottom" style="border-left:0px;" | [[image:Kyo02_hcbD2.png|center]] | ||
|- | |- | ||
! rdp+[[image:snkb.gif]] | ! rdp + [[image:snkb.gif]] | ||
|align="center"| 18/2+2+2/3+15 | |align="center"| 18/2+2+2/3+15 | ||
|align="center"| KD/-4 | |align="center"| KD/-4 | ||
| Line 369: | Line 376: | ||
|valign="bottom" style="border-right:0px; border-left:0px;"| [[image:Kyo02_rdpB2.png|center]] | |valign="bottom" style="border-right:0px; border-left:0px;"| [[image:Kyo02_rdpB2.png|center]] | ||
|valign="bottom" style="border-left:0px;"| [[image:Kyo02_rdpB3.png|center]] | |valign="bottom" style="border-left:0px;"| [[image:Kyo02_rdpB3.png|center]] | ||
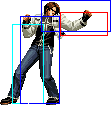
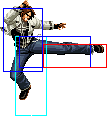
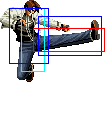
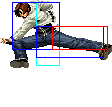
|rowspan="2"| '''R.E.D. Kick - rdp+K''' | |rowspan="2"| '''R.E.D. Kick - rdp + K''' | ||
|- | |- | ||
! rdp+[[image:snkd.gif]] | ! rdp + [[image:snkd.gif]] | ||
|align="center"| 29/2+2+2/2+16 | |align="center"| 29/2+2+2/2+16 | ||
|align="center"| KD/-2 | |align="center"| KD/-2 | ||
| Line 380: | Line 387: | ||
|valign="bottom" style="border-left:0px;"| [[image:Kyo02_rdpD3.png|center]] | |valign="bottom" style="border-left:0px;"| [[image:Kyo02_rdpD3.png|center]] | ||
|- | |- | ||
! qcf+[[image:snka.gif]] | ! qcf + [[image:snka.gif]] | ||
|align="center"| 11/2+6/24 | |align="center"| 11/2+6/24 | ||
|align="center"| -12/-14 | |align="center"| -12/-14 | ||
|align="center"| >qcf+P,>hcb+P,Fi,Fo | |align="center"| >qcf + P,>hcb + P,Fi,Fo | ||
|align="center"| HL | |align="center"| HL | ||
|valign="bottom" style="border-right:0px;"| [[image:Kyo02_qcfA1.png|center]] | |valign="bottom" style="border-right:0px;"| [[image:Kyo02_qcfA1.png|center]] | ||
|valign="bottom" style="border-right:0px; border-left:0px;"| [[image:Kyo02_qcfA2.png|center]] | |valign="bottom" style="border-right:0px; border-left:0px;"| [[image:Kyo02_qcfA2.png|center]] | ||
|valign="bottom" style="border-left:0px;"| [[image:Kyo02_qcfA3.png|center]] | |valign="bottom" style="border-left:0px;"| [[image:Kyo02_qcfA3.png|center]] | ||
| '''114 Shiki: Aragami - qcf+A''' | | '''114 Shiki: Aragami - qcf + A''' | ||
*Guard point: Frame 10-11. | *Guard point: Frame 10-11. | ||
|- | |- | ||
!> qcf+[[image:punch.gif]] | !> qcf + [[image:punch.gif]] | ||
|align="center"| 8/4+4/31 | |align="center"| 8/4+4/31 | ||
|align="center"| KD/-21 | |align="center"| KD/-21 | ||
| Line 398: | Line 405: | ||
|valign="bottom" style="border-right:0px;"|[[image:Kyo02_qcfAqcfP.png|center]] | |valign="bottom" style="border-right:0px;"|[[image:Kyo02_qcfAqcfP.png|center]] | ||
|colspan="2" valign="bottom" style="border-left:0px;"|[[image:Kyo02_qcfAqcfP2.png|center]] | |colspan="2" valign="bottom" style="border-left:0px;"|[[image:Kyo02_qcfAqcfP2.png|center]] | ||
| '''128 Shiki: Konokizu - qcf+P (after qcf+A)''' | | '''128 Shiki: Konokizu - qcf + P (after qcf + A)''' | ||
|- | |- | ||
!>> [[image:punch.gif]] | !>> [[image:punch.gif]] | ||
| Line 406: | Line 413: | ||
|align="center"| H | |align="center"| H | ||
|colspan="3" | [[image:Kyo02_qcfAqcfPP.png|center]] | |colspan="3" | [[image:Kyo02_qcfAqcfPP.png|center]] | ||
| '''127 Shiki: Yanosabi - P (after qcf+A qcf+P)''' | | '''127 Shiki: Yanosabi - P (after qcf + A qcf + P)''' | ||
|- | |- | ||
!>> [[image:kick.gif]] | !>> [[image:kick.gif]] | ||
| Line 414: | Line 421: | ||
|align="center"| HL | |align="center"| HL | ||
|colspan="3" | [[image:Kyo02_qcfAqcfPK.png|center]] | |colspan="3" | [[image:Kyo02_qcfAqcfPK.png|center]] | ||
| '''125 Shiki: Nanase - K (after qcf+A qcf+P)''' | | '''125 Shiki: Nanase - K (after qcf + A qcf + P)''' | ||
|- | |- | ||
!> hcb+[[image:punch.gif]] | !> hcb + [[image:punch.gif]] | ||
|align="center"| 23/4/35 | |align="center"| 23/4/35 | ||
|align="center"| KD/-21 | |align="center"| KD/-21 | ||
|align="center"| >>P,>>K,>>HCB+K,Fo | |align="center"| >>P,>>K,>>HCB + K,Fo | ||
|align="center"| H | |align="center"| H | ||
|colspan="3" | [[image:Kyo02_qcfAhcbP.png|center]] | |colspan="3" | [[image:Kyo02_qcfAhcbP.png|center]] | ||
| '''127 Shiki: Yanosabi - hcb+P (after qcf+A)''' | | '''127 Shiki: Yanosabi - hcb + P (after qcf + A)''' | ||
|- | |- | ||
!>> [[image:punch.gif]] | !>> [[image:punch.gif]] | ||
| Line 430: | Line 437: | ||
|align="center"| HL | |align="center"| HL | ||
|colspan="3" | [[image:Kyo02_qcfAhcbPP.png|center]] | |colspan="3" | [[image:Kyo02_qcfAhcbPP.png|center]] | ||
| '''Geshiki: Migiri Ugachi - P (after qcf+A hcb+P)''' | | '''Geshiki: Migiri Ugachi - P (after qcf + A hcb + P)''' | ||
|- | |- | ||
!>> [[image:kick.gif]] | !>> [[image:kick.gif]] | ||
| Line 438: | Line 445: | ||
|align="center"| HL | |align="center"| HL | ||
|colspan="3" | [[image:Kyo02_qcfAhcbPK.png|center]] | |colspan="3" | [[image:Kyo02_qcfAhcbPK.png|center]] | ||
| '''125 Shiki: Nanase - K (after qcf+A hcb+P)''' | | '''125 Shiki: Nanase - K (after qcf + A hcb + P)''' | ||
|- | |- | ||
!>> hcb+[[image:kick.gif]] | !>> hcb + [[image:kick.gif]] | ||
|align="center"| 9/3+2/38 | |align="center"| 9/3+2/38 | ||
|align="center"| KD/-25 | |align="center"| KD/-25 | ||
| Line 447: | Line 454: | ||
|valign="bottom" style="border-right:0px;"|[[image:Kyo02_qcfAhcbPhcbK1.png|center]] | |valign="bottom" style="border-right:0px;"|[[image:Kyo02_qcfAhcbPhcbK1.png|center]] | ||
|colspan="2" valign="bottom" style="border-left:0px;"|[[image:Kyo02_qcfAhcbPhcbK2.png|center]] | |colspan="2" valign="bottom" style="border-left:0px;"|[[image:Kyo02_qcfAhcbPhcbK2.png|center]] | ||
| '''212 Shiki: Kototsuki You - hcb+K (after qcf+A hcb+P)''' | | '''212 Shiki: Kototsuki You - hcb + K (after qcf + A hcb + P)''' | ||
|- | |- | ||
! qcf+[[image:snkc.gif]] | ! qcf + [[image:snkc.gif]] | ||
|align="center"| 17/6/21 | |align="center"| 17/6/21 | ||
|align="center"| -7/-9 | |align="center"| -7/-9 | ||
|align="center"| >hcb+P,Fi,Fo | |align="center"| >hcb + P,Fi,Fo | ||
|align="center"| HL | |align="center"| HL | ||
|colspan="3" | [[image:Kyo02_qcfC.png|center]] | |colspan="3" | [[image:Kyo02_qcfC.png|center]] | ||
| '''115 Shiki: Dokugami - qcf+C''' | | '''115 Shiki: Dokugami - qcf + C''' | ||
|- | |- | ||
!> hcb+[[image:punch.gif]] | !> hcb + [[image:punch.gif]] | ||
|align="center"| 11/3/34 | |align="center"| 11/3/34 | ||
|align="center"| -17/-19 | |align="center"| -17/-19 | ||
|align="center"| >>f+P,Fo | |align="center"| >>f + P,Fo | ||
|align="center"| HL | |align="center"| HL | ||
|colspan="3" | [[image:Kyo02_qcfChcbP.png|center]] | |colspan="3" | [[image:Kyo02_qcfChcbP.png|center]] | ||
| '''401 Shiki: Tsumi Yomi - hcb+P (after qcf+C)''' | | '''401 Shiki: Tsumi Yomi - hcb + P (after qcf + C)''' | ||
|- | |- | ||
!>> f+[[image:punch.gif]] | !>> f + [[image:punch.gif]] | ||
|align="center"| 13/4/21+21 | |align="center"| 13/4/21+21 | ||
|align="center"| KD/-28 | |align="center"| KD/-28 | ||
|align="center"| >>>dp+P | |align="center"| >>>dp + P | ||
|align="center"| HL | |align="center"| HL | ||
|colspan="3" | [[image:Kyo02_qcfChcbPfP.png|center]] | |colspan="3" | [[image:Kyo02_qcfChcbPfP.png|center]] | ||
| '''402 Shiki: Batsu Yomi - f+P (after qcf+C hcb+P)''' | | '''402 Shiki: Batsu Yomi - f + P (after qcf + C hcb + P)''' | ||
|- | |- | ||
!>>> dp+[[image:punch.gif]] | !>>> dp + [[image:punch.gif]] | ||
|align="center"| 1/14/10+14 | |align="center"| 1/14/10+14 | ||
|align="center"| KD/-20 | |align="center"| KD/-20 | ||
| Line 479: | Line 486: | ||
|align="center"| HL | |align="center"| HL | ||
|colspan="3" | [[image:Kyo02_dpA2.png|center]] | |colspan="3" | [[image:Kyo02_dpA2.png|center]] | ||
| '''100 Shiki: Oniyaki - dp+P (after qcf+C hcb+P dp+P)''' | | '''100 Shiki: Oniyaki - dp + P (after qcf + C hcb + P dp + P)''' | ||
|- | |- | ||
|colspan="9" align="center"| '''DM''' | |colspan="9" align="center"| '''DM''' | ||
|- | |- | ||
! <br>qcb,hcf+[[image:snka.gif]]<br><br> | ! <br>qcb,hcf + [[image:snka.gif]]<br><br> | ||
|align="center"| 20/17/27 | |align="center"| 20/17/27 | ||
|align="center"| KD/-15 | |align="center"| KD/-15 | ||
|align="center"| | |align="center"| | ||
|align="center"| HL | |align="center"| HL | ||
|rowspan=" | |rowspan="3" colspan="3" | [[image:Kyo02_qcbhcfP.png|center]] | ||
|rowspan=" | |rowspan="3"| '''Ura 108 Shiki: Orochi Nagi - qcb,hcf + P''' | ||
*28 frames of blockstun. | *28 frames of blockstun. | ||
*Can combo off a heavy attack if charged slightly. | *Can combo off a heavy attack if charged slightly. | ||
*Invincibility: Frame 1-8 Charged: Frame: 1-2 and 4 frames after charge. Lower body invincible during charge. | *Invincibility: Frame 1-8 Charged: Frame: 1-2 and 4 frames after charge. Lower body invincible during charge. | ||
|- | |- | ||
! qcb,hcf+[[image:snkc.gif]] | ! <br>qcb,hcf + [[image:snkc.gif]]<br><br> | ||
|align="center"| 19/17/31 | |align="center"| 19/17/31 | ||
|align="center"| KD/ | |align="center"| KD/-19 | ||
|align="center"| | |||
|align="center"| HL | |||
|- | |||
! qcb,hcf + [[image:punch.gif]]<br>(held) | |||
|align="center"| 2+1~90+4+7/17/30 | |||
|align="center"| KD/-18 | |||
|align="center"| | |align="center"| | ||
|align="center"| HL | |align="center"| HL | ||
| Line 502: | Line 515: | ||
|colspan="9" align="center"| '''SDM''' | |colspan="9" align="center"| '''SDM''' | ||
|- | |- | ||
!rowspan="2"| qcb,hcf+[[image:snka.gif]]+[[image:snkc.gif]] | !rowspan="2"| qcb,hcf + [[image:snka.gif]] + [[image:snkc.gif]] | ||
|rowspan="2" align="center"| 2/0~90(17)-/52 | |rowspan="2" align="center"| 2/0~90(17)-/52 | ||
|rowspan="2" align="center"| KD/+1 | |rowspan="2" align="center"| KD/+1 | ||
| Line 509: | Line 522: | ||
|valign="bottom" style="border-right:0px; border-bottom:0px;"| [[image:Kyo02_SDM1.png|center]] | |valign="bottom" style="border-right:0px; border-bottom:0px;"| [[image:Kyo02_SDM1.png|center]] | ||
|colspan="2" valign="bottom" style="border-left:0px; border-bottom:0px;"| [[image:Kyo02_SDM2.png|center]] | |colspan="2" valign="bottom" style="border-left:0px; border-bottom:0px;"| [[image:Kyo02_SDM2.png|center]] | ||
|rowspan="2"| '''Ura 108 Shiki: Orochi Nagi - qcb,hcf+AC''' | |rowspan="2"| '''Ura 108 Shiki: Orochi Nagi - qcb,hcf + AC''' | ||
*During the charge of 90 frames, the attackbox surrounding Kyo flashes with the following framedata: 2(3)14x[3(3)]1. | *During the charge of 90 frames, the attackbox surrounding Kyo flashes with the following framedata: 2(3)14x[3(3)]1. | ||
*Framedata of the three fireballs after buttons release are: 14 active frames, after 11 frames: 14 active frames, after 22 frames: 17 frames active. | *Framedata of the three fireballs after buttons release are: 14 active frames, after 11 frames: 14 active frames, after 22 frames: 17 frames active. | ||
| Line 519: | Line 532: | ||
|colspan="9" align="center"| '''HSDM''' | |colspan="9" align="center"| '''HSDM''' | ||
|- | |- | ||
! hcbx2+[[image:snka.gif]]+[[image:snkc.gif]] | ! hcbx2+[[image:snka.gif]] + [[image:snkc.gif]] | ||
|align="center"| 5/1/30 | |align="center"| 5/1/30 | ||
|align="center"| KD/- | |align="center"| KD/- | ||
| Line 526: | Line 539: | ||
|colspan="3" | [[image:Kyo02_HSDM.png|center]] | |colspan="3" | [[image:Kyo02_HSDM.png|center]] | ||
| '''524 Shiki: Kamukura - hcbx2+AC''' | | '''524 Shiki: Kamukura - hcbx2+AC''' | ||
*Invincibility: Complete startup | *Invincibility: Complete startup and active period. | ||
|} | |} | ||
==Short Movelist== | |||
* air d + C | |||
* f + B (Overhead (2) if not cancelled into.) | |||
* df + D (Low.) | |||
* qcf + A | |||
** qcf + P | |||
*** P (Overhead.) | |||
*** K | |||
** hcb + P (Overhead.) | |||
*** P (Low. May OTG.) | |||
*** K | |||
*** hcb + K (May OTG.) | |||
* qcf + C | |||
** hcb + C | |||
*** f + C | |||
**** dp + C | |||
* dp + P | |||
* qcf + K | |||
** K | |||
* hcb + B | |||
* hcb + D | |||
* rdp + K | |||
* DM qcb hcf + P (May charge.) | |||
* SDM qcb hcf + AC (May charge.) | |||
* HSDM hcb hcb + AC (Throw.) | |||
==Notes== | |||
===Cancellable moves=== | |||
* Close: A, B, C, D | |||
* Far: A | |||
* Crouch: A, C, D | |||
* CD is cancellable into specials and DMs. | |||
* f + B (2) is cancellable only when you cancel into it. | |||
===Super cancellable moves=== | |||
* hcb + B | |||
* dp + C (1) | |||
===Free cancellable into moves=== | |||
* '''dp + P''' | |||
* '''qcf + A''' | |||
* '''qcf + C''' | |||
* '''hcb + B''' | |||
* qcf + K | |||
* rdp + K | |||
=== Free cancellable out-of moves=== | |||
* f + B | |||
* df + D | |||
* '''qcf + A''' | |||
* '''qcf + A > ... (Except qcf + A > hcb + P > hcb + K)''' | |||
* '''qcf + C''' | |||
* '''qcf + C > hcb + C''' | |||
* '''hcb + B''' | |||
* '''dp + P (1)''' | |||
===Moves with Invincibility=== | |||
* dp + A (Full: active (1st part).) | |||
* dp + C (Full: startup & active (1st part).) | |||
* hcb + B (Lower: startup.) | |||
* hcb + D (Upper: startup (middle).) | |||
* DM qcb hcf + P (Full: startup (1st part) & "after charge" (1st part). Lower: "charge".) | |||
* SDM qcb hcf + AC (Full: startup & "after charge" (1st part). Lower: "charge".) | |||
* HSDM hcb hcb + AC (Full: startup.) | |||
=== Moves with autoguard=== | |||
* qcf + A (startup (last part).) | |||
* qcf + C (startup (??).) | |||
===Other Notes=== | |||
* cl.B is a low attack. | |||
* st.D can evade low attacks. | |||
==Combos== | ==Combos== | ||
=== | ===Basic Combos=== | ||
* (cr.B, cr.A) / st.A > | |||
** df + D | |||
** dp + A | |||
* cl.C > | |||
** DM qcb hcf + C (Charge slightly. Timing Required.) {1 Stock} | |||
** qcf + C > hcb + C > f + C > dp + C [25%] | |||
** qcf + A > qcf + P > P / K (Corner. Point Blank.) [22%/26%] | |||
** qcf + D > D, (Very close) | |||
*** DM qcb hcf + C [39%] {1 Stock} | |||
*** hcb + B, | |||
**** qcf + A {25%} | |||
**** >> DM qcb hcf + C (Charge for some time.) [44.5%] {2 Stock} | |||
*** rdp + B [26%] | |||
** f + B (2) > | |||
*** DM qcb hcf + C (Charge slightly. Timing Required.) | |||
*** rdp + B {23%} (only on Yamazaki, Goro, Chang, Yashiro, Maxima, Seth) | |||
*** qcf + C > hcb + C > [18%] | |||
**** f + C > dp + C (Corner. Point blank.) [27.5] | |||
*** qcf + A [19%] | |||
** df + D [22.5%] | |||
** dp + A [14%] | |||
* cl.A > HSDM hcb hcb + AC, [47%] {Max Mode + 1 Stock} | |||
** qcf + A (Miss.) > hcb + P (Miss.) > P / hcb + K (Corner. OTG.) [54%/59%] | |||
* df + D (2) / f + B (2) >> BC ~ DM qcb hcf + C (Charge slightly. Timing Required.) | |||
===Corner=== | ===Corner=== | ||
* cl.C > qcf + D > D, hcb + B, qcf + B > B, | |||
** dp + C {35%} | |||
** j.CD | |||
===Max Mode Activation=== | ===Max Mode Activation=== | ||
* cr.B, cr.A > df + D (2) >> BC, DM qcb hcf + C (Charge slightly.) {2 stocks} | |||
Buffer as: df + D (2) >> qcb hcf + BC | |||
* Anywhere, should end up in the corner: cr.B, cr.A > df + D >> BC, qcf + C >> qcf + A >> qcf + C >> qcf + A >> qcf + C >> qcf + D > D, (S)DM qcb hcf + P/AC {65%/??%} {2/3 stocks} | |||
Buffer as: df + D (2) >> qcf + BC | |||
* Corner: cl.C >> BC, run, cl.C > dp + C (1) >> qcf + C >> qcf + A >> qcf + C >> qcf + D > D, hcb + B >> (S)DM qcb hcf + P/AC {60%/80%} {3/4 stocks} | |||
* Corner: cl.C >> BC, run, cl.C > qcf + D D, hcb + B, qcf + A >> hcb + B, qcf + A >> hcb + B, qcf + A >> hcb + B, | |||
** qcf + A > qcf + A > K {2 stocks} | |||
** >> (S)DM qcb hcf + P/AC {3/4 stocks} | |||
* Corner: cl.C > df + D (1) >> BC, run, cl.C > qcf + D > D, qcf + C >> qcf + A (whiff), qcf + A >> qcf + C (whiff), hcb + B >> qcf + A (whiff), qcf + A >> hcb + B >> (S)DM qcb hcf + P/AC {3/4 stocks} | |||
==Attack Strings== | |||
* cl.C / cl.D > qcf + A > qcf + A > K | |||
* cl.C > f + B > rdp + B | |||
* Corner: cl.C > qcf + D > D (repeat) | |||
* cr.D > | |||
** f + B > rdp + B | |||
** qcf + B > B | |||
** qcf + A | |||
** rdp + B | |||
==Timings== | ==Timings== | ||
To get some of the | To get some of the qcb hcf + P combos to work you must use the JF timing release method. | ||
How to do the c.B c.A df + D qcbhcf + BC combo | |||
Surprisingly, the fastest hit possible from qcb hcf + P is not no delay, but a half second delay. It's just shortly after (like right away) Kyo says "ayeeee" when charging it up. To learn the timing, the easiest method is to practice the df + D qcb hcf + BC combo. The BC break timing is easy, it's right after the second hit, but to get it to combo, you must hold the BC (or just C) until Kyo begins to back up. As soon as you see Kyo move backwards, release. Master the timing, once you learn the timing you can now implement it in his hcb + B super cancel super, super combos. | |||
==Strategies== | ==Strategies== | ||
*Always backdash with d+C, as it makes him go back further than normal, and can hit some opponents out of their moves (such as far reaching Billy pokes) | *Always backdash with d + C, as it makes him go back further than normal, and can hit some opponents out of their moves (such as far reaching Billy pokes) | ||
*Learn to do the max mode combos. They aren't as hard as they seem, they don't require as much memory as it looks, and Kyo is much weaker without them. | *Learn to do the max mode combos. They aren't as hard as they seem, they don't require as much memory as it looks, and Kyo is much weaker without them. | ||
*j.d+C has amazing priority, if you use it as a jump in, hit early. It stuns and staggers very heavily. If you hit late, you will stagger too far, comboing a far version instead of a close and killing any non BC cancel combo. <br> | *j.d + C has amazing priority, if you use it as a jump in, hit early. It stuns and staggers very heavily. If you hit late, you will stagger too far, comboing a far version instead of a close and killing any non BC cancel combo. <br> | ||
*Learn the art to comboing with Kyo instead of memorizing combos. This will make you more dangerous. Learn to BC cancel moves and combo them into qcf+C, after landing qcf+C you can push your opponent into the corner for a corner combo finish. | *Learn the art to comboing with Kyo instead of memorizing combos. This will make you more dangerous. Learn to BC cancel moves and combo them into qcf + C, after landing qcf + C you can push your opponent into the corner for a corner combo finish. | ||
*While, qcf+A and qcf+C might look like good pokes, both are punishable, do not abuse them. <br> | *While, qcf + A and qcf + C might look like good pokes, both are punishable, do not abuse them. <br> | ||
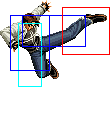
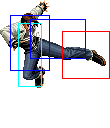
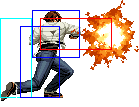
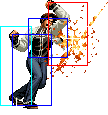
*rdp+K has high air to air priority, high air to ground priority and hops lows and fireballs, that said, don't abuse since on whiff it's very punishable. It has a nasty habit of beating late uppercuts. <br> | *rdp + K has high air to air priority, high air to ground priority and hops lows and fireballs, that said, don't abuse since on whiff it's very punishable. It has a nasty habit of beating late uppercuts. <br> | ||
*RED kick (rdp+K) will cross up if space right. This can be very effective on wakeup, since opponents will have a tough time anti airing kyo from above and will have to block from the other side, very difficult to see since most of kyo's body will still be in front of the opponent. | *RED kick (rdp + K) will cross up if space right. This can be very effective on wakeup, since opponents will have a tough time anti airing kyo from above and will have to block from the other side, very difficult to see since most of kyo's body will still be in front of the opponent. | ||
{{Template:The King of Fighters 2002}} | {{Template:The King of Fighters 2002}} | ||
[[Category:The King of Fighters 2002]] | [[Category:The King of Fighters 2002]] | ||
[[Category:Kyo Kusanagi]] | |||
Latest revision as of 00:28, 24 October 2020
General Info
Kyo is the prom queen and everyone wants to fuck him.
Crouch height: Medium
Jump: 4/31/1
Hop: 4/23/1
Dash: 3/10~∞/3
Backdash: 3/15/3
Wakeup: 26 frames
Recovery roll: 23 frames
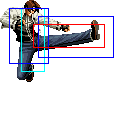
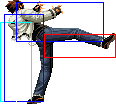
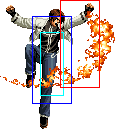
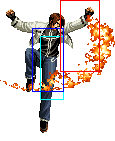
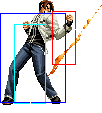
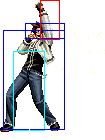
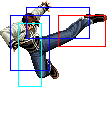
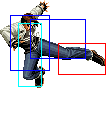
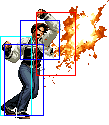
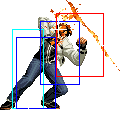
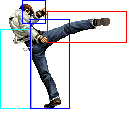
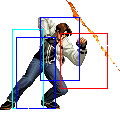
| Stand | Crouch | Jump | Grab | Run |
|---|---|---|---|---|

|

|

|
|
Colors

|

|

|

|
Movelist
Short Movelist
- air d + C
- f + B (Overhead (2) if not cancelled into.)
- df + D (Low.)
- qcf + A
- qcf + P
- P (Overhead.)
- K
- hcb + P (Overhead.)
- P (Low. May OTG.)
- K
- hcb + K (May OTG.)
- qcf + P
- qcf + C
- hcb + C
- f + C
- dp + C
- f + C
- hcb + C
- dp + P
- qcf + K
- K
- hcb + B
- hcb + D
- rdp + K
- DM qcb hcf + P (May charge.)
- SDM qcb hcf + AC (May charge.)
- HSDM hcb hcb + AC (Throw.)
Notes
Cancellable moves
- Close: A, B, C, D
- Far: A
- Crouch: A, C, D
- CD is cancellable into specials and DMs.
- f + B (2) is cancellable only when you cancel into it.
Super cancellable moves
- hcb + B
- dp + C (1)
Free cancellable into moves
- dp + P
- qcf + A
- qcf + C
- hcb + B
- qcf + K
- rdp + K
Free cancellable out-of moves
- f + B
- df + D
- qcf + A
- qcf + A > ... (Except qcf + A > hcb + P > hcb + K)
- qcf + C
- qcf + C > hcb + C
- hcb + B
- dp + P (1)
Moves with Invincibility
- dp + A (Full: active (1st part).)
- dp + C (Full: startup & active (1st part).)
- hcb + B (Lower: startup.)
- hcb + D (Upper: startup (middle).)
- DM qcb hcf + P (Full: startup (1st part) & "after charge" (1st part). Lower: "charge".)
- SDM qcb hcf + AC (Full: startup & "after charge" (1st part). Lower: "charge".)
- HSDM hcb hcb + AC (Full: startup.)
Moves with autoguard
- qcf + A (startup (last part).)
- qcf + C (startup (??).)
Other Notes
- cl.B is a low attack.
- st.D can evade low attacks.
Combos
Basic Combos
- (cr.B, cr.A) / st.A >
- df + D
- dp + A
- cl.C >
- DM qcb hcf + C (Charge slightly. Timing Required.) {1 Stock}
- qcf + C > hcb + C > f + C > dp + C [25%]
- qcf + A > qcf + P > P / K (Corner. Point Blank.) [22%/26%]
- qcf + D > D, (Very close)
- DM qcb hcf + C [39%] {1 Stock}
- hcb + B,
- qcf + A {25%}
- >> DM qcb hcf + C (Charge for some time.) [44.5%] {2 Stock}
- rdp + B [26%]
- f + B (2) >
- DM qcb hcf + C (Charge slightly. Timing Required.)
- rdp + B {23%} (only on Yamazaki, Goro, Chang, Yashiro, Maxima, Seth)
- qcf + C > hcb + C > [18%]
- f + C > dp + C (Corner. Point blank.) [27.5]
- qcf + A [19%]
- df + D [22.5%]
- dp + A [14%]
- cl.A > HSDM hcb hcb + AC, [47%] {Max Mode + 1 Stock}
- qcf + A (Miss.) > hcb + P (Miss.) > P / hcb + K (Corner. OTG.) [54%/59%]
- df + D (2) / f + B (2) >> BC ~ DM qcb hcf + C (Charge slightly. Timing Required.)
Corner
- cl.C > qcf + D > D, hcb + B, qcf + B > B,
- dp + C {35%}
- j.CD
Max Mode Activation
- cr.B, cr.A > df + D (2) >> BC, DM qcb hcf + C (Charge slightly.) {2 stocks}
Buffer as: df + D (2) >> qcb hcf + BC
- Anywhere, should end up in the corner: cr.B, cr.A > df + D >> BC, qcf + C >> qcf + A >> qcf + C >> qcf + A >> qcf + C >> qcf + D > D, (S)DM qcb hcf + P/AC {65%/??%} {2/3 stocks}
Buffer as: df + D (2) >> qcf + BC
- Corner: cl.C >> BC, run, cl.C > dp + C (1) >> qcf + C >> qcf + A >> qcf + C >> qcf + D > D, hcb + B >> (S)DM qcb hcf + P/AC {60%/80%} {3/4 stocks}
- Corner: cl.C >> BC, run, cl.C > qcf + D D, hcb + B, qcf + A >> hcb + B, qcf + A >> hcb + B, qcf + A >> hcb + B,
- qcf + A > qcf + A > K {2 stocks}
- >> (S)DM qcb hcf + P/AC {3/4 stocks}
- Corner: cl.C > df + D (1) >> BC, run, cl.C > qcf + D > D, qcf + C >> qcf + A (whiff), qcf + A >> qcf + C (whiff), hcb + B >> qcf + A (whiff), qcf + A >> hcb + B >> (S)DM qcb hcf + P/AC {3/4 stocks}
Attack Strings
- cl.C / cl.D > qcf + A > qcf + A > K
- cl.C > f + B > rdp + B
- Corner: cl.C > qcf + D > D (repeat)
- cr.D >
- f + B > rdp + B
- qcf + B > B
- qcf + A
- rdp + B
Timings
To get some of the qcb hcf + P combos to work you must use the JF timing release method.
How to do the c.B c.A df + D qcbhcf + BC combo
Surprisingly, the fastest hit possible from qcb hcf + P is not no delay, but a half second delay. It's just shortly after (like right away) Kyo says "ayeeee" when charging it up. To learn the timing, the easiest method is to practice the df + D qcb hcf + BC combo. The BC break timing is easy, it's right after the second hit, but to get it to combo, you must hold the BC (or just C) until Kyo begins to back up. As soon as you see Kyo move backwards, release. Master the timing, once you learn the timing you can now implement it in his hcb + B super cancel super, super combos.
Strategies
- Always backdash with d + C, as it makes him go back further than normal, and can hit some opponents out of their moves (such as far reaching Billy pokes)
- Learn to do the max mode combos. They aren't as hard as they seem, they don't require as much memory as it looks, and Kyo is much weaker without them.
- j.d + C has amazing priority, if you use it as a jump in, hit early. It stuns and staggers very heavily. If you hit late, you will stagger too far, comboing a far version instead of a close and killing any non BC cancel combo.
- Learn the art to comboing with Kyo instead of memorizing combos. This will make you more dangerous. Learn to BC cancel moves and combo them into qcf + C, after landing qcf + C you can push your opponent into the corner for a corner combo finish.
- While, qcf + A and qcf + C might look like good pokes, both are punishable, do not abuse them.
- rdp + K has high air to air priority, high air to ground priority and hops lows and fireballs, that said, don't abuse since on whiff it's very punishable. It has a nasty habit of beating late uppercuts.
- RED kick (rdp + K) will cross up if space right. This can be very effective on wakeup, since opponents will have a tough time anti airing kyo from above and will have to block from the other side, very difficult to see since most of kyo's body will still be in front of the opponent.
