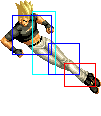
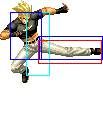
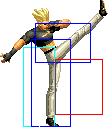
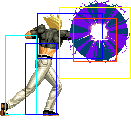
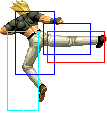
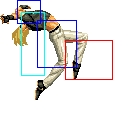
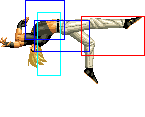
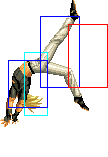
m (Scanman moved page Benimaru 02 to The King of Fighters 2002/Benimaru: moving 2002 Benimaru page to be a subpage) |
|||
| (34 intermediate revisions by 5 users not shown) | |||
| Line 1: | Line 1: | ||
[[image:Benimaru02_stance.gif|right]] | [[image:Benimaru02_stance.gif|right]] | ||
==General Info== | ==General Info== | ||
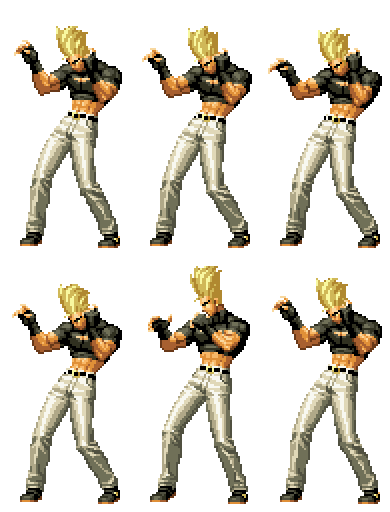
Crouch height: Low<br> | Crouch height: Low<br> | ||
Jump: 4/37/1<br> | |||
Hop: 4/28/1<br> | |||
Dash: 3/10~∞/3<br> | |||
Backdash: 3/18/4<br> | |||
Wakeup: 32 frames<br> | |||
Recovery roll: 27 frames<br> | |||
{| | {| | ||
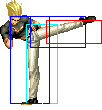
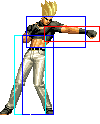
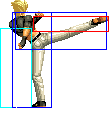
! Stand | ! Stand | ||
| Line 27: | Line 34: | ||
| [[image:Benimaru02_colorD.png]] | | [[image:Benimaru02_colorD.png]] | ||
|} | |} | ||
==[[The_King_of_Fighters_2002/Normals_Guide|Movelist]]== | ==[[The_King_of_Fighters_2002/Normals_Guide|Movelist]]== | ||
{|border="1" | {|border="1" | ||
| Line 107: | Line 115: | ||
|Avoids lows | |Avoids lows | ||
|- | |- | ||
! [[image:snkc.gif]]+[[image:snkd.gif]] | ! [[image:snkc.gif]] + [[image:snkd.gif]] | ||
|align="center"| 17/4/20 | |align="center"| 17/4/20 | ||
|align="center"| KD/-2 | |align="center"| KD/-2 | ||
| Line 186: | Line 194: | ||
| | | | ||
|- | |- | ||
! [[image:snkc.gif]]+[[image:snkd.gif]] | ! [[image:snkc.gif]] + [[image:snkd.gif]] | ||
|align="center"| 14/5/- | |align="center"| 14/5/- | ||
|align="center"| KD/- | |align="center"| KD/- | ||
| Line 267: | Line 275: | ||
|colspan="8" align="center"| '''Command Normals''' | |colspan="8" align="center"| '''Command Normals''' | ||
|- | |- | ||
! f+[[image:snkb.gif]] | ! f + [[image:snkb.gif]] | ||
|align="center"| 19/3/27 | |align="center"| 19/3/27 | ||
|align="center"| -10/-12 | |align="center"| -10/-12 | ||
| Line 275: | Line 283: | ||
|Can avoid lows | |Can avoid lows | ||
|- | |- | ||
! j.d+[[image:snkd.gif]] | ! j.d + [[image:snkd.gif]] | ||
|align="center"| 13/1[(2)2]*n/19 | |align="center"| 13/1[(2)2]*n/19 | ||
|align="center"| -/- | |align="center"| -/- | ||
| Line 281: | Line 289: | ||
|align="center"| HL | |align="center"| HL | ||
|colspan="2" | [[image:Beni02_jdD.png|center]] | |colspan="2" | [[image:Beni02_jdD.png|center]] | ||
|Free cancellable into j.qcf+P | |Free cancellable into j.qcf + P | ||
|- | |- | ||
|colspan="8" align="center"| '''Special Moves''' | |colspan="8" align="center"| '''Special Moves''' | ||
|- | |- | ||
! qcf+[[image:snka.gif]] | ! qcf + [[image:snka.gif]] | ||
|align="center"| 15/1+4(3)4/30 | |align="center"| 15/1+4(3)4/30 | ||
|align="center"| -13/-15 | |align="center"| -13/-15 | ||
| Line 292: | Line 300: | ||
|valign="bottom" style="border-right:0px;"|[[image:Beni02_qcfA1.png|center]] | |valign="bottom" style="border-right:0px;"|[[image:Beni02_qcfA1.png|center]] | ||
|valign="bottom" style="border-left:0px;"|[[image:Beni02_qcfA2.png|center]] | |valign="bottom" style="border-left:0px;"|[[image:Beni02_qcfA2.png|center]] | ||
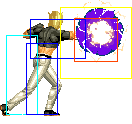
| '''Raijin Ken - qcf+A''' | | '''Raijin Ken - qcf + A''' | ||
* Benimaru extends his arm forward and a ball of energy surrounds his hand | * Benimaru extends his arm forward and a ball of energy surrounds his hand | ||
|- | |- | ||
! qcf+[[image:snkc.gif]] | ! qcf + [[image:snkc.gif]] | ||
|align="center"| 18/1+4(3)4/30 | |align="center"| 18/1+4(3)4/30 | ||
|align="center"| -13/-15 | |align="center"| -13/-15 | ||
| Line 302: | Line 310: | ||
|valign="bottom" style="border-right:0px;"|[[image:Beni02_qcfC1.png|center]] | |valign="bottom" style="border-right:0px;"|[[image:Beni02_qcfC1.png|center]] | ||
|valign="bottom" style="border-left:0px;"|[[image:Beni02_qcfC2.png|center]] | |valign="bottom" style="border-left:0px;"|[[image:Beni02_qcfC2.png|center]] | ||
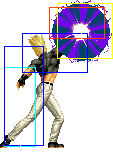
| '''Taikuu Raijin Ken - qcf+C''' | | '''Taikuu Raijin Ken - qcf + C''' | ||
* Benimaru extends his arm diagonally upwards and a ball of energy surrounds his hand | * Benimaru extends his arm diagonally upwards and a ball of energy surrounds his hand | ||
* comes out too slow to be reliable as an anti-air, unless the opponent did a high jump from full screen away | * comes out too slow to be reliable as an anti-air, unless the opponent did a high jump from full screen away | ||
|- | |- | ||
! <br>j.qcf+[[image:snka.gif]]<br><br> | ! <br>j.qcf + [[image:snka.gif]]<br><br> | ||
|align="center"| 6/1+4(3)4/8+Till land+14 | |align="center"| 6/1+4(3)4/8+Till land+14 | ||
|align="center"| -/- | |align="center"| -/- | ||
| Line 312: | Line 320: | ||
|align="center"| HL | |align="center"| HL | ||
|rowspan="2" colspan="2" | [[image:Beni02_jqcfP.png|center]] | |rowspan="2" colspan="2" | [[image:Beni02_jqcfP.png|center]] | ||
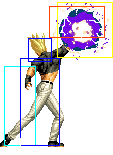
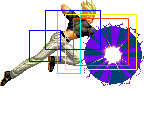
|rowspan="2"| '''Kuuchuu Raijin Ken - qcf+P(air)''' | |rowspan="2"| '''Kuuchuu Raijin Ken - qcf + P(air)''' | ||
* similar to his qcf+P except done in the air. Benimaru does the attack diagonally downward and it comes out fairly fast | * similar to his qcf + P except done in the air. Benimaru does the attack diagonally downward and it comes out fairly fast | ||
* make Benimaru float in the air for a bit, before coming down | * make Benimaru float in the air for a bit, before coming down | ||
* if Benimaru jumps over the opponent and does this move, Benimaru will face the correct direction | * if Benimaru jumps over the opponent and does this move, Benimaru will face the correct direction | ||
* free cancellable into | * free cancellable into | ||
|- | |- | ||
! j.qcf+[[image:snkc.gif]] | ! j.qcf + [[image:snkc.gif]] | ||
|align="center"| 6/1+4(3)4/10+Till land+17 | |align="center"| 6/1+4(3)4/10+Till land+17 | ||
|align="center"| -/- | |align="center"| -/- | ||
| Line 324: | Line 332: | ||
|align="center"| HL | |align="center"| HL | ||
|- | |- | ||
! <br>qcb+[[image:snka.gif]]<br><br> | ! <br>qcb + [[image:snka.gif]]<br><br> | ||
|align="center"| 14/2(4)2(4)2(4)2(4)2/32 | |align="center"| 14/2(4)2(4)2(4)2(4)2/32 | ||
|align="center"| KD/-8 | |align="center"| KD/-8 | ||
| Line 331: | Line 339: | ||
|rowspan="2" valign="bottom" style="border-right:0px;"|[[image:Beni02_qcbP1.png|center]] | |rowspan="2" valign="bottom" style="border-right:0px;"|[[image:Beni02_qcbP1.png|center]] | ||
|rowspan="2" valign="bottom" style="border-left:0px;"|[[image:Beni02_qcbP2.png|center]] | |rowspan="2" valign="bottom" style="border-left:0px;"|[[image:Beni02_qcbP2.png|center]] | ||
|rowspan="2"| '''Shinkuu Katategoma - qcb+P''' | |rowspan="2"| '''Shinkuu Katategoma - qcb + P''' | ||
* Benimaru spins around on his hands. qcb+A does 3 hits while qcb+C does 5 hits. The opponent is knocked away on the last hit | * Benimaru spins around on his hands. qcb + A does 3 hits while qcb + C does 5 hits. The opponent is knocked away on the last hit | ||
* qcb+A is best used in combos starting from strong attacks because the last hits of qcb+C do not connect. In addition, the supercancels can whiff | * qcb + A is best used in combos starting from strong attacks because the last hits of qcb + C do not connect. In addition, the supercancels can whiff | ||
* supercancellable on all hits but qcb+Kx2 will whiff if supercancelled on the last hit | * supercancellable on all hits but qcb + Kx2 will whiff if supercancelled on the last hit | ||
* Invincibility: Frame 1-4. | * Invincibility: Frame 1-4. | ||
* free cancellable into | * free cancellable into | ||
* A: 25 frames of blockstun. C: 20 frames of blockstun. | * A: 25 frames of blockstun. C: 20 frames of blockstun. | ||
|- | |- | ||
! qcb+[[image:snkc.gif]] | ! qcb + [[image:snkc.gif]] | ||
|align="center"| 14/2(4)2(4)2(4)2(4)2(4)2(4)2(4)2(4)2(4)2(4)2/36 | |align="center"| 14/2(4)2(4)2(4)2(4)2(4)2(4)2(4)2(4)2(4)2(4)2/36 | ||
|align="center"| KD/-17 | |align="center"| KD/-17 | ||
| Line 345: | Line 353: | ||
|align="center"| HL | |align="center"| HL | ||
|- | |- | ||
! hcb,f+[[image:punch.gif]] | ! hcb,f + [[image:punch.gif]] | ||
|align="center"| 0/1/29 | |align="center"| 0/1/29 | ||
|align="center"| KD/- | |align="center"| KD/- | ||
| Line 351: | Line 359: | ||
|align="center"| Grab | |align="center"| Grab | ||
|colspan="2"|[[image:Beni02_hcbfP.png|center]] | |colspan="2"|[[image:Beni02_hcbfP.png|center]] | ||
| '''Benimaru Corridor - hcb,f+P''' | | '''Benimaru Corridor - hcb,f + P''' | ||
* command throw | * command throw | ||
* hard knockdown | * hard knockdown | ||
| Line 357: | Line 365: | ||
* Invincibility: Frame 12-20. | * Invincibility: Frame 12-20. | ||
|- | |- | ||
! | ! qcf + [[image:kick.gif]] | ||
|align="center"| 7/2+3/26 | |align="center"| 7/2+3/26 | ||
|align="center"| -11/-13 | |align="center"| -11/-13 | ||
|align="center"| d,u+K | |align="center"| d,u + K | ||
|align="center"| HL | |align="center"| HL | ||
| | |valign="bottom" style="border-right:0px;"|[[image:Beni02_qcfK1.png|center]] | ||
| | |valign="bottom" style="border-left:0px;"|[[image:Beni02_qcfK2.png|center]] | ||
| '''Iai Geri - qcf + K''' | |||
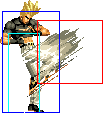
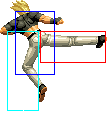
* Benimaru does a quick knee | * Benimaru does a quick knee | ||
* | * If the second active period hits, it couses hard knockdown, and on counterhit, counterwires. | ||
* can be followed up by Handou Sandan Geri d,u+K on hit or whiff, 5 frames after the active period. | * can be followed up by Handou Sandan Geri d,u + K on hit or whiff, 5 frames after the active period. | ||
* free cancellable into | * free cancellable into | ||
|- | |- | ||
!rowspan="2"| > d,u + [[image:snkb.gif]] | |||
!rowspan="2"| > d,u+[[image:snkb.gif]] | |||
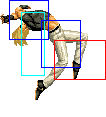
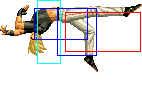
|rowspan="2" align="center"| 7/3(9)1+2+2/19+11 | |rowspan="2" align="center"| 7/3(9)1+2+2/19+11 | ||
|rowspan="2" align="center"| KD/-17 | |rowspan="2" align="center"| KD/-17 | ||
| Line 383: | Line 385: | ||
|valign="bottom" style="border-right:0px; border-bottom:0px;"|[[image:Beni02_duB1.png|center]] | |valign="bottom" style="border-right:0px; border-bottom:0px;"|[[image:Beni02_duB1.png|center]] | ||
|valign="bottom" style="border-left:0px; border-bottom:0px;"|[[image:Beni02_duB2.png|center]] | |valign="bottom" style="border-left:0px; border-bottom:0px;"|[[image:Beni02_duB2.png|center]] | ||
|rowspan="4"| '''Handou Sandan Geri - d,u+K (after qcf+K)''' | |rowspan="4"| '''Handou Sandan Geri - d,u + K (after qcf + K)''' | ||
* supercancellable on the first hit, although this cancel is really difficult to do, requiring speed and timing | * supercancellable on the first hit, although this cancel is really difficult to do, requiring speed and timing | ||
* free cancellable out of to all free cancellable special moves except qcf+K | * free cancellable out of to all free cancellable special moves except qcf + K | ||
* D version does 9 frames of blockstun. | * D version does 9 frames of blockstun. | ||
* Lower body Invincible: Complete startup, first active period, and 5 (B version) or 4 (D version) after the first active period. Invincible: 4 frames before the second ative period. | * Lower body Invincible: Complete startup, first active period, and 5 (B version) or 4 (D version) after the first active period. Invincible: 4 frames before the second ative period. | ||
| Line 393: | Line 395: | ||
|- | |- | ||
|- | |- | ||
!rowspan="2"| > d,u+[[image:snkd.gif]] | !rowspan="2"| > d,u + [[image:snkd.gif]] | ||
|rowspan="2" align="center"| 8/3(8)1+2+2/31+18 | |rowspan="2" align="center"| 8/3(8)1+2+2/31+18 | ||
|rowspan="2" align="center"| KD/-44 | |rowspan="2" align="center"| KD/-44 | ||
| Line 413: | Line 415: | ||
|colspan="2" | [[image:Beni02_qcfx2A.png|center]] | |colspan="2" | [[image:Beni02_qcfx2A.png|center]] | ||
| '''Raikou Ken - qcfx2+A''' | | '''Raikou Ken - qcfx2+A''' | ||
* Benimaru extends his arm forward and an electrical ball surrounds his hand, larger than his qcf+A | * Benimaru extends his arm forward and an electrical ball surrounds his hand, larger than his qcf + A | ||
|- | |- | ||
! qcfx2+[[image:snkc.gif]] | ! qcfx2+[[image:snkc.gif]] | ||
| Line 428: | Line 430: | ||
* A: Invincibility Frame 1-2. C: Invincibility Frame 1-6. Upper body invincibility: Frame 7-14. | * A: Invincibility Frame 1-2. C: Invincibility Frame 1-6. Upper body invincibility: Frame 7-14. | ||
|- | |- | ||
! | ! qcbx2+[[image:kick.gif]] | ||
|align="center"| 15/-/30 | |align="center"| 15/-/30 | ||
|align="center"| KD/-13 | |align="center"| KD/-13 | ||
|align="center"| | |align="center"| | ||
|align="center"| HL | |align="center"| HL | ||
| | |colspan="2"|[[image:Beni02_qcbx2K.png|center]] | ||
| '''Gen'ei Hurricane - qcbx2+K''' | |||
* Benimaru disappears and a shadow of him quickly moves across the screen. If it connects when the opponent is on the ground, he will combo the opponent | * Benimaru disappears and a shadow of him quickly moves across the screen. If it connects when the opponent is on the ground, he will combo the opponent | ||
* if the first hit hits the opponent in the air, the rest of the hits won't connect | * if the first hit hits the opponent in the air, the rest of the hits won't connect | ||
* Invincibility: Complete startup. Frame 31. | * Invincibility: Complete startup. Frame 31. | ||
* hard knockdown (if all the hits connects) | * hard knockdown (if all the hits connects) | ||
|- | |- | ||
|colspan="8" align="center"| '''SDM''' | |colspan="8" align="center"| '''SDM''' | ||
|- | |- | ||
! qcfx2+[[image:snka.gif]]+[[image:snkc.gif]] | ! qcfx2+[[image:snka.gif]] + [[image:snkc.gif]] | ||
|align="center"| 9/-/88 | |align="center"| 9/-/88 | ||
|align="center"| KD/-36 | |align="center"| KD/-36 | ||
| Line 462: | Line 458: | ||
|colspan="8" align="center"| '''HSDM''' | |colspan="8" align="center"| '''HSDM''' | ||
|- | |- | ||
! f,db,df,b,f+[[image:snka.gif]] | ! f,db,df,b,f + [[image:snka.gif]] | ||
|align="center"| 8/-/9 | |align="center"| 8/-/9 | ||
|align="center"| -/- | |align="center"| -/- | ||
| Line 468: | Line 464: | ||
|align="center"| - | |align="center"| - | ||
|colspan="2" | [[image:Beni02_HSDM-A.png|center]] | |colspan="2" | [[image:Beni02_HSDM-A.png|center]] | ||
|rowspan="4"| '''Raijin Ten - f,db,df,b,f+A/B/C/D''' | |rowspan="4"| '''Raijin Ten - f,db,df,b,f + A/B/C/D''' | ||
* can be done using hcfx3+P/K, instead of it's original motion of f,db,df,b,f+P/K | * can be done using hcfx3+P/K, instead of it's original motion of f,db,df,b,f + P/K | ||
* can negate most projectiles an infinite number of times, except for DMs which go straight through. The location of the HSDM does matter when it comes to negating projectiles. If he puts it in front of his head, then he cannot negate ground projectiles like Iori's qcf+P. However, placing it in front of his foot will block ground projectiles as well as air projectiles like Athena's qcb+P | * can negate most projectiles an infinite number of times, except for DMs which go straight through. The location of the HSDM does matter when it comes to negating projectiles. If he puts it in front of his head, then he cannot negate ground projectiles like Iori's qcf + P. However, placing it in front of his foot will block ground projectiles as well as air projectiles like Athena's qcb + P | ||
* the spark disappears if Benimaru is hit, or if the spark hits the opponent 8 times | * the spark disappears if Benimaru is hit, or if the spark hits the opponent 8 times | ||
* Invincible: Complete animation. | * Invincible: Complete animation. | ||
* Framedata of fireball [5(3)]xn | * Framedata of fireball [5(3)]xn | ||
|- | |- | ||
! f,db,df,b,f+[[image:snkb.gif]] | ! f,db,df,b,f + [[image:snkb.gif]] | ||
|align="center"| 8/-/9 | |align="center"| 8/-/9 | ||
|align="center"| -/- | |align="center"| -/- | ||
| Line 483: | Line 478: | ||
|colspan="2" | [[image:Beni02_HSDM-B.png|center]] | |colspan="2" | [[image:Beni02_HSDM-B.png|center]] | ||
|- | |- | ||
! f,db,df,b,f+[[image:snkc.gif]] | ! f,db,df,b,f + [[image:snkc.gif]] | ||
|align="center"| 8/-/9 | |align="center"| 8/-/9 | ||
|align="center"| -/- | |align="center"| -/- | ||
| Line 490: | Line 485: | ||
|colspan="2" | [[image:Beni02_HSDM-C.png|center]] | |colspan="2" | [[image:Beni02_HSDM-C.png|center]] | ||
|- | |- | ||
! f,db,df,b,f+[[image:snkd.gif]] | ! f,db,df,b,f + [[image:snkd.gif]] | ||
|align="center"| 8/-/9 | |align="center"| 8/-/9 | ||
|align="center"| -/- | |align="center"| -/- | ||
| Line 497: | Line 492: | ||
|colspan="2" | [[image:Beni02_HSDM-D.png|center]] | |colspan="2" | [[image:Beni02_HSDM-D.png|center]] | ||
|} | |} | ||
===Notes=== | ==Short Movelist== | ||
* f + B | |||
* air d + D | |||
* Air throw. | |||
- far D evades low attacks | |||
* qcf + A | |||
* qcf + C | |||
* qcb + P | |||
* hcb f + P (Throw. 0 frame startup.) | |||
* air qcf + P | |||
* qcf + K (Counterwire (2nd part of active period).) | |||
** d u + K | |||
* DM qcb qcb + K | |||
* DM qcf qcf + P | |||
* SDM qcf qcf + AC | |||
* HSDM f db df b f + P/K | |||
==Notes== | |||
===Cancellable moves=== | |||
* Close: A, B, C, D | |||
* Far: - | |||
* Crouch: A, B, C, D | |||
* Jump: C | |||
* Whiff cancellable normals are: | |||
** Close: - | |||
** Far: - | |||
** Crouch: C, D | |||
* CD is cancellable into specials and DMs. | |||
* f + B is cancellable. | |||
===Super cancellable moves=== | |||
* qcb + P | |||
* qcf + K > d u + K (1) | |||
===Free cancellable into moves=== | |||
* air qcf + P | |||
* '''qcf + K''' | |||
* '''qcb + P''' | |||
=== Free cancellable out-of moves=== | |||
* air d + D | |||
* '''qcb + P''' | |||
* '''qcf + K > d u + K''' | |||
===Moves with Invincibility=== | |||
* qcb + P (Full: startup (1st part).) | |||
* hcb f + P (Full: recovery (middle).) | |||
* qcf + K > d u + K (1) (Lower: startup & active & recovery (1st part).) | |||
* qcf + K > d u + K (2) (Full: startup (1st part).) | |||
* DM qcf qcf + A (Full: startup (1st part).) | |||
* DM qcf qcf + C (Full: startup (1st part). Upper: startup & active (1st part).) | |||
* DM qcb qcb + K (Full: startup.) | |||
* SDM qcf qcf + AC (Full: startup & active (1st part). Upper: active (middle, just after full invincibility ends).) | |||
* HSDM f db df b f + P/K (Full: startup & active & recovery.) | |||
=== Moves with autoguard=== | |||
(none) | |||
===Other Notes=== | |||
* far D evades low attacks. | |||
== Combos == | == Combos == | ||
=== | ===Basic Combos=== | ||
* cr.C / cl.D > | |||
2. | ** hcb f + P [25%] | ||
** qcb + A [24.5%] | |||
** qcb + C (2 last hits whiff and leave you vulnerable.) [25%] | |||
** qcb + A (2) / qcb + C (3)>> DM qcb qcb + K [49%/50%] {2 stocks} | |||
** qcb + P (3) >> DM qcf qcf + A [47%] {2 stocks} | |||
** qcf + K > [21%] | |||
*** d u + K (1) >> | |||
**** DM qcb qcb + K {2 stocks} | |||
**** DM qcf qcf + A {2 stocks} | |||
*** d u + K (Point blank) [34%] | |||
** qcf + A [25%] | |||
** DM qcb qcb + K [37%] {1 stock} | |||
** DM qcf qcf + A [32%] {1 stock} | |||
* cr.B > | |||
** qcf + K > | |||
*** d u + K | |||
*** d u + K (1) >> | |||
**** DM qcb qcb + K {2 stocks} | |||
**** DM qcf qcf + A {2 stocks} | |||
** hcb f + P | |||
* cr.B x 3+ > | |||
** qcf + K > | |||
** DM qcf qcf + A {1 stocks} | |||
===Counterhit=== | ===Counterhit=== | ||
* Counterhit: j.CD > air qcf + P {25%} | |||
* Counterhit: j.CD, DM qcf qcf + C {35%} | |||
===Maxmode=== | ===Maxmode=== | ||
* Already in Max Mode: air d + D (2) >> air qcf + P {15%} | |||
* cl.D >> BC, run, | |||
** cl.D >> SDM qcf qcf + AC {55%} | |||
** cr.B > qcf + K > d u + K (1) >> qcb + A (3) >> qcf qcf +AC {75%} | |||
** qcf + B > d u + B (1) >> qcb + C (3) >> qcf + B > d u + B (1) >> qcb + A(3) >> qcf qcf + AC (Corner) | |||
== Strategies == | == Strategies == | ||
| Line 526: | Line 628: | ||
Benimaru's game specializes on poking. His far B is a good ranged diagonal poke that hit the opponent out of a variety of special moves, including jump attempts. His far D is very good because it also avoids various low attacks. His most useful poke is probably his far C though. It has high priority, comes out fast and its hitbox is high enough that it will stuff many jump attempts. His hop D also has very high priority and horizontal range, not to mention crossing up extremely well. | Benimaru's game specializes on poking. His far B is a good ranged diagonal poke that hit the opponent out of a variety of special moves, including jump attempts. His far D is very good because it also avoids various low attacks. His most useful poke is probably his far C though. It has high priority, comes out fast and its hitbox is high enough that it will stuff many jump attempts. His hop D also has very high priority and horizontal range, not to mention crossing up extremely well. | ||
When it comes to combos, his crouch BB, qcf+B, d u+B combo is his most useful one, because his crouch B's are very good low pokes, and qcf+B is completely safe and easy to it confirm into the followup. If you land a close D, it should immediately be hit confirmed into his qcb+A supercancel combo. To combo the qcb+ | When it comes to combos, his crouch BB, qcf + B, d u + B combo is his most useful one, because his crouch B's are very good low pokes, and qcf + B is completely safe and easy to it confirm into the followup. If you land a close D, it should immediately be hit confirmed into his qcb + A supercancel combo. To combo the DM qcb qcb + K, you must supercancel the qcb + A on the second hit. This will make the combo do a sliver of health less than if you were to supercancel after three hits into his DM qcf qcf + A, but will give you the advantage of being able to mixup afterwords, since DM qcb qcb + K is a hard knockdown attack. | ||
Benimaru's | Benimaru's DM qcb qcb + K has very good startup invincibility and should thus be used between attack strings you can see coming. Examples of attack strings where this DM is effective would be immediately after Yashiro's hcf + AC in his Close D, f + A, hcf + AC, qcf + C attack string, or right before Yuri's qcf + A in her crouch D, qcf + P string. Sadly though, this is probably his most reliable counter move, because his anti-airs are generally very weak. He doesn't have any fast reversals that can be used as anti-air, and thus suffers from jump rushdown, especially Whip's. There are some things he can do against this though, such as jumping backwards with an immediate jump D or perhaps even going for an airthrow with jump b/f + D. Generally though, Benimaru is going to struggle against rushdown if you let them start it, so make sure you don't allow them to get in by utilizing his pokes. | ||
{{Template:The King of Fighters 2002}} | {{Template:The King of Fighters 2002}} | ||
[[Category:The King of Fighters 2002]] | [[Category:The King of Fighters 2002]] | ||
Latest revision as of 22:59, 23 July 2020
General Info
Crouch height: Low
Jump: 4/37/1
Hop: 4/28/1
Dash: 3/10~∞/3
Backdash: 3/18/4
Wakeup: 32 frames
Recovery roll: 27 frames
| Stand | Crouch | Jump | Grab | Run |
|---|---|---|---|---|

|

|
Colors

|

|

|

|
Movelist
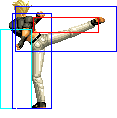
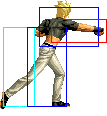
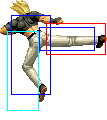
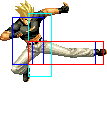
Short Movelist
- f + B
- air d + D
- Air throw.
- qcf + A
- qcf + C
- qcb + P
- hcb f + P (Throw. 0 frame startup.)
- air qcf + P
- qcf + K (Counterwire (2nd part of active period).)
- d u + K
- DM qcb qcb + K
- DM qcf qcf + P
- SDM qcf qcf + AC
- HSDM f db df b f + P/K
Notes
Cancellable moves
- Close: A, B, C, D
- Far: -
- Crouch: A, B, C, D
- Jump: C
- Whiff cancellable normals are:
- Close: -
- Far: -
- Crouch: C, D
- CD is cancellable into specials and DMs.
- f + B is cancellable.
Super cancellable moves
- qcb + P
- qcf + K > d u + K (1)
Free cancellable into moves
- air qcf + P
- qcf + K
- qcb + P
Free cancellable out-of moves
- air d + D
- qcb + P
- qcf + K > d u + K
Moves with Invincibility
- qcb + P (Full: startup (1st part).)
- hcb f + P (Full: recovery (middle).)
- qcf + K > d u + K (1) (Lower: startup & active & recovery (1st part).)
- qcf + K > d u + K (2) (Full: startup (1st part).)
- DM qcf qcf + A (Full: startup (1st part).)
- DM qcf qcf + C (Full: startup (1st part). Upper: startup & active (1st part).)
- DM qcb qcb + K (Full: startup.)
- SDM qcf qcf + AC (Full: startup & active (1st part). Upper: active (middle, just after full invincibility ends).)
- HSDM f db df b f + P/K (Full: startup & active & recovery.)
Moves with autoguard
(none)
Other Notes
- far D evades low attacks.
Combos
Basic Combos
- cr.C / cl.D >
- hcb f + P [25%]
- qcb + A [24.5%]
- qcb + C (2 last hits whiff and leave you vulnerable.) [25%]
- qcb + A (2) / qcb + C (3)>> DM qcb qcb + K [49%/50%] {2 stocks}
- qcb + P (3) >> DM qcf qcf + A [47%] {2 stocks}
- qcf + K > [21%]
- d u + K (1) >>
- DM qcb qcb + K {2 stocks}
- DM qcf qcf + A {2 stocks}
- d u + K (Point blank) [34%]
- d u + K (1) >>
- qcf + A [25%]
- DM qcb qcb + K [37%] {1 stock}
- DM qcf qcf + A [32%] {1 stock}
- cr.B >
- qcf + K >
- d u + K
- d u + K (1) >>
- DM qcb qcb + K {2 stocks}
- DM qcf qcf + A {2 stocks}
- hcb f + P
- qcf + K >
- cr.B x 3+ >
- qcf + K >
- DM qcf qcf + A {1 stocks}
Counterhit
- Counterhit: j.CD > air qcf + P {25%}
- Counterhit: j.CD, DM qcf qcf + C {35%}
Maxmode
- Already in Max Mode: air d + D (2) >> air qcf + P {15%}
- cl.D >> BC, run,
- cl.D >> SDM qcf qcf + AC {55%}
- cr.B > qcf + K > d u + K (1) >> qcb + A (3) >> qcf qcf +AC {75%}
- qcf + B > d u + B (1) >> qcb + C (3) >> qcf + B > d u + B (1) >> qcb + A(3) >> qcf qcf + AC (Corner)
Strategies
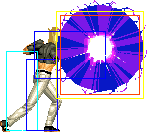
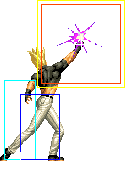
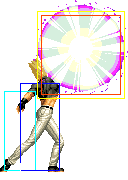
Benimaru's game specializes on poking. His far B is a good ranged diagonal poke that hit the opponent out of a variety of special moves, including jump attempts. His far D is very good because it also avoids various low attacks. His most useful poke is probably his far C though. It has high priority, comes out fast and its hitbox is high enough that it will stuff many jump attempts. His hop D also has very high priority and horizontal range, not to mention crossing up extremely well.
When it comes to combos, his crouch BB, qcf + B, d u + B combo is his most useful one, because his crouch B's are very good low pokes, and qcf + B is completely safe and easy to it confirm into the followup. If you land a close D, it should immediately be hit confirmed into his qcb + A supercancel combo. To combo the DM qcb qcb + K, you must supercancel the qcb + A on the second hit. This will make the combo do a sliver of health less than if you were to supercancel after three hits into his DM qcf qcf + A, but will give you the advantage of being able to mixup afterwords, since DM qcb qcb + K is a hard knockdown attack.
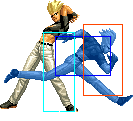
Benimaru's DM qcb qcb + K has very good startup invincibility and should thus be used between attack strings you can see coming. Examples of attack strings where this DM is effective would be immediately after Yashiro's hcf + AC in his Close D, f + A, hcf + AC, qcf + C attack string, or right before Yuri's qcf + A in her crouch D, qcf + P string. Sadly though, this is probably his most reliable counter move, because his anti-airs are generally very weak. He doesn't have any fast reversals that can be used as anti-air, and thus suffers from jump rushdown, especially Whip's. There are some things he can do against this though, such as jumping backwards with an immediate jump D or perhaps even going for an airthrow with jump b/f + D. Generally though, Benimaru is going to struggle against rushdown if you let them start it, so make sure you don't allow them to get in by utilizing his pokes.
