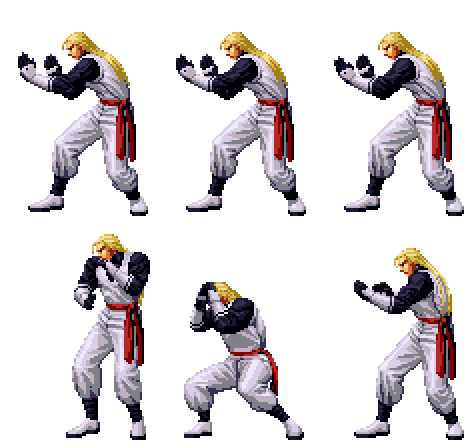
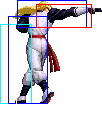
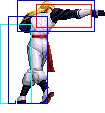
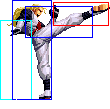
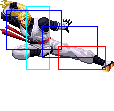
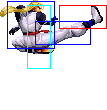
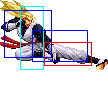
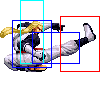
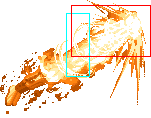
No edit summary |
|||
| (87 intermediate revisions by 5 users not shown) | |||
| Line 1: | Line 1: | ||
[[image:Andy02_stance.gif|right]] | |||
==General Info== | ==General Info== | ||
Crouch height: Low<br> | Crouch height: Low<br> | ||
Colors | Jump: 4/38/1<br> | ||
Hop: 4/28/1<br> | |||
Dash: 3/10~∞/3<br> | |||
Backdash: 3/9/3<br> | |||
Wakeup: 30 frames<br> | |||
Recovery roll: 29 frames<br> | |||
{| | |||
! Stand | |||
! Crouch | |||
! Jump | |||
! Grab | |||
! Run | |||
|- | |||
|valign="bottom"| [[image:Andy02_stand.png]] | |||
|valign="bottom"| [[image:Andy02_crouch.png]] | |||
|valign="bottom"| [[image:Andy02_jump.png]] | |||
|valign="bottom"| [[image:Andy02_grab.png]] | |||
|valign="bottom"| [[image:Andy02_run.png]] | |||
|} | |||
===Colors=== | |||
{| | {| | ||
! [[image:snka.gif]] | ! [[image:snka.gif]] | ||
| Line 13: | Line 33: | ||
| [[image:Andy02_colorD.png]] | | [[image:Andy02_colorD.png]] | ||
|} | |} | ||
==Movelist== | |||
==[[The_King_of_Fighters_2002/Normals_Guide|Movelist]]== | |||
{|border="1" | |||
!width="10%"| | |||
! Frames | |||
! Advantage | |||
! Cancel | |||
! Block | |||
!colspan="5"| Hitbox | |||
! Notes | |||
|- | |||
|colspan="11" align="center"| '''Standing Close''' | |||
|- | |||
! [[image:snka.gif]] | |||
|align="center"| 2/3/7 | |||
|align="center"| +2/0 | |||
|align="center"| R,C,S,Su | |||
|align="center"| HL | |||
|colspan="5" | [[image:Andy02_clA.png|center]] | |||
| | |||
|- | |||
! [[image:snkb.gif]] | |||
|align="center"| 3/8/5 | |||
|align="center"| -1/-3 | |||
|align="center"| C,S,Su | |||
|align="center"| HL | |||
|colspan="5" | [[image:Andy02_clB.png|center]] | |||
| | |||
|- | |||
! [[image:snkc.gif]] | |||
|align="center"| 2/4*6/17 | |||
|align="center"| -3/-5 | |||
|align="center"| C,S,Su | |||
|align="center"| HL | |||
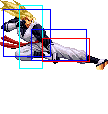
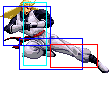
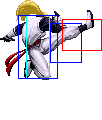
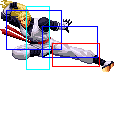
|colspan="2" valign="bottom" style="border-right:0px;"| [[image:Andy02_clC1.png|center]] | |||
|colspan="3" valign="bottom" style="border-left:0px;"| [[image:Andy02_clC2.png|center]] | |||
| | |||
|- | |||
! [[image:snkd.gif]] | |||
|align="center"| 7/5/20 | |||
|align="center"| -5/-7 | |||
| | |||
|align="center"| HL | |||
|colspan="5"| [[image:Andy02_clD.png|center]] | |||
| | |||
|- | |||
|colspan="11" align="center"| '''Standing Far''' | |||
|- | |||
! [[image:snka.gif]] | |||
|align="center"| 5/3+3/10 | |||
|align="center"| -4/-6 | |||
| | |||
|align="center"| HL | |||
|colspan="2" valign="bottom" style="border-right:0px;"| [[image:Andy02_stA1.png|center]] | |||
|colspan="3" valign="bottom" style="border-left:0px;"| [[image:Andy02_stA2.png|center]] | |||
| | |||
|- | |||
! [[image:snkb.gif]] | |||
|align="center"| 5/5/11 | |||
|align="center"| -4/-6 | |||
| | |||
|align="center"| HL | |||
|colspan="5" | [[image:Andy02_stB.png|center]] | |||
| | |||
|- | |||
! [[image:snkc.gif]] | |||
|align="center"| 7/8/17 | |||
|align="center"| -5/-7 | |||
| | |||
|align="center"| HL | |||
|colspan="5" | [[image:Andy02_stC.png|center]] | |||
| | |||
|- | |||
! [[image:snkd.gif]] | |||
|align="center"| 11/3+9/5 | |||
|align="center"| +1/-1 | |||
| | |||
|align="center"| HL | |||
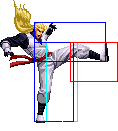
|colspan="2" valign="bottom" style="border-right:0px;"| [[image:Andy02_stD1.png|center]] | |||
|colspan="3" valign="bottom" style="border-left:0px;"| [[image:Andy02_stD2.png|center]] | |||
| | |||
|- | |||
! [[image:snkc.gif]] + [[image:snkd.gif]] | |||
|align="center"| 23/3+8/20 | |||
|align="center"| KD/-9 | |||
|align="center"| C,S,Su | |||
|align="center"| HL | |||
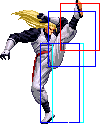
|colspan="2" valign="bottom" style="border-right:0px;"| [[image:Andy02_stCD1.png|center]] | |||
|colspan="3" valign="bottom" style="border-left:0px;"| [[image:Andy02_stCD2.png|center]] | |||
| | |||
|- | |||
|colspan="11" align="center"| '''Crouching''' | |||
|- | |||
! [[image:snka.gif]] | |||
|align="center"| 4/4/5 | |||
|align="center"| +3/+1 | |||
|align="center"| R,C,S,Su | |||
|align="center"| HL | |||
|colspan="5" | [[image:Andy02_crA.png|center]] | |||
| | |||
|- | |||
! [[image:snkb.gif]] | |||
|align="center"| 4/4/5 | |||
|align="center"| +3/+1 | |||
|align="center"| R,C,S,Su | |||
|align="center"| L | |||
|colspan="5" | [[image:Andy02_crB.png|center]] | |||
| | |||
|- | |||
! [[image:snka.gif]] | |||
|align="center"| 6/7/18 | |||
|align="center"| -5/-7 | |||
|align="center"| C,S,Su | |||
|align="center"| HL | |||
|colspan="5" | [[image:Andy02_crC.png|center]] | |||
| | |||
|- | |||
! [[image:snka.gif]] | |||
|align="center"| 6/4/19 | |||
|align="center"| KD/-5 | |||
| | |||
|align="center"| L | |||
|colspan="5" | [[image:Andy02_crD.png|center]] | |||
| | |||
|- | |||
|colspan="11" align="center"| '''Jump''' | |||
|- | |||
! [[image:snka.gif]] | |||
|align="center"| 3/11/- | |||
|align="center"| -/- | |||
|align="center"| S | |||
|align="center"| H | |||
|colspan="5" | [[image:Andy02_jA.png|center]] | |||
| | |||
|- | |||
! [[image:snkb.gif]] | |||
|align="center"| 5/12/- | |||
|align="center"| -/- | |||
| | |||
|align="center"| H | |||
|colspan="5" | [[image:Andy02_jB.png|center]] | |||
| | |||
|- | |||
! [[image:snkc.gif]] | |||
|align="center"| 5/14/- | |||
|align="center"| -/- | |||
|align="center"| S | |||
|align="center"| H | |||
|colspan="5" | [[image:Andy02_jC.png|center]] | |||
| | |||
|- | |||
! [[image:snkd.gif]] | |||
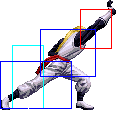
|align="center"| 6/4+6/- | |||
|align="center"| -/- | |||
| | |||
|align="center"| H | |||
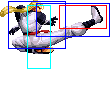
|colspan="2" valign="bottom" style="border-right:0px;"| [[image:Andy02_jD1.png|center]] | |||
|colspan="3" valign="bottom" style="border-left:0px;"| [[image:Andy02_jD2.png|center]] | |||
| | |||
|- | |||
! [[image:snkc.gif]] + [[image:snkd.gif]] | |||
|align="center"| 13/7/- | |||
|align="center"| KD/- | |||
| | |||
|align="center"| HL | |||
|colspan="5" | [[image:Andy02_jCD.png|center]] | |||
| | |||
|- | |||
|colspan="11" align="center"| '''Neutral Jump''' | |||
|- | |||
! [[image:snka.gif]] | |||
|align="center"| 3/9/- | |||
|align="center"| -/- | |||
|align="center"| S | |||
|align="center"| H | |||
|colspan="5" | [[image:Andy02_juA.png|center]] | |||
| | |||
|- | |||
! [[image:snkb.gif]] | |||
|align="center"| 4/12/- | |||
|align="center"| -/- | |||
| | |||
|align="center"| H | |||
|colspan="5" | [[image:Andy02_juB.png|center]] | |||
| | |||
|- | |||
! [[image:snkc.gif]] | |||
|align="center"| 5/8/- | |||
|align="center"| -/- | |||
|align="center"| S | |||
|align="center"| H | |||
|colspan="5" | [[image:Andy02_juC.png|center]] | |||
| | |||
|- | |||
! [[image:snkd.gif]] | |||
|align="center"| 6/4+6/- | |||
|align="center"| -/- | |||
| | |||
|align="center"| H | |||
|colspan="2" valign="bottom" style="border-right:0px;"| [[image:Andy02_juD1.png|center]] | |||
|colspan="3" valign="bottom" style="border-left:0px;"| [[image:Andy02_juD2.png|center]] | |||
| | |||
|- | |||
|colspan="11" align="center"| '''Hop''' | |||
|- | |||
! [[image:snka.gif]] | |||
|align="center"| 3/9/- | |||
|align="center"| -/- | |||
|align="center"| S | |||
|align="center"| H | |||
|colspan="5" | [[image:Andy02_hA.png|center]] | |||
| | |||
|- | |||
! [[image:snkb.gif]] | |||
|align="center"| 5/10/- | |||
|align="center"| -/- | |||
| | |||
|align="center"| H | |||
|colspan="5" | [[image:Andy02_hB.png|center]] | |||
| | |||
|- | |||
! [[image:snkc.gif]] | |||
|align="center"| 5/5/- | |||
|align="center"| -/- | |||
|align="center"| S | |||
|align="center"| H | |||
|colspan="5" | [[image:Andy02_hC.png|center]] | |||
| | |||
|- | |||
! [[image:snkd.gif]] | |||
|align="center"| 6/8/- | |||
|align="center"| -/- | |||
| | |||
|align="center"| H | |||
|colspan="5" | [[image:Andy02_hD.png|center]] | |||
| | |||
|- | |||
! [[image:snkc.gif]] + [[image:snkd.gif]] | |||
|align="center"| 15/7/- | |||
|align="center"| KD/- | |||
| | |||
|align="center"| HL | |||
|colspan="5" | [[image:Andy02_jCD.png|center]] | |||
| | |||
|- | |||
|colspan="11" align="center"| '''Command Normals''' | |||
|- | |||
! <br>f + [[image:snkb.gif]]<br><br> | |||
|align="center"| 16/4+4/21 | |||
|align="center"| -9/-11 | |||
| | |||
|align="center"| H | |||
|rowspan="2" colspan="2" valign="bottom" style="border-right:0px;"| [[image:Andy02_fB1.png|center]] | |||
|rowspan="2" colspan="3" valign="bottom" style="border-left:0px;"| [[image:Andy02_fB2.png|center]] | |||
|rowspan="2"| | |||
*Goes over lows | |||
*Unsafe on hit unless spaced | |||
|- | |||
! f + [[image:snkb.gif]]<br>(cancel) | |||
|align="center"| 14/4+4/23 | |||
|align="center"| -11/-13 | |||
|align="center"| S | |||
|align="center"| HL | |||
|- | |||
! df + [[image:snka.gif]] | |||
|align="center"| 7/2*3/22 | |||
|align="center"| -5/-7 | |||
|align="center"| S,Su[1] | |||
|align="center"| HL | |||
|colspan="2" valign="bottom" style="border-right:0px;"| [[image:Andy02_dfA1.png|center]] | |||
|colspan="3" valign="bottom" style="border-left:0px;"| [[image:Andy02_dfA2.png|center]] | |||
|Jugglable afterwards if it hits an airborne opponent | |||
|- | |||
|colspan="11" align="center"| '''Special Moves''' | |||
|- | |||
! qcb + [[image:snka.gif]] | |||
|align="center"| 15/4/28 | |||
|align="center"| KD/-3 | |||
| | |||
|align="center"| HL | |||
|colspan="5" | [[image:Andy02_qcbA.png|center]] | |||
|'''Hishou Ken - qcb + A''' | |||
* Andy releases a small burst of energy in front of him, which has limited range | |||
* has good recovery on block | |||
* opponent is in a jugglable state after getting hit with this move | |||
|- | |||
! qcb + [[image:snkc.gif]] | |||
|align="center"| 15/<br>4(24)12*12*12*13/<br>28 | |||
|align="center"| -2/-4 | |||
| | |||
|align="center"| HL | |||
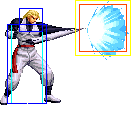
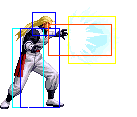
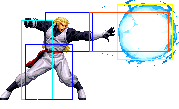
|colspan="2" valign="bottom" style="border-right:0px;"| [[image:Andy02_qcbC1.png|center]] | |||
|colspan="3" valign="bottom" style="border-left:0px;"| [[image:Andy02_qcbC2.png|center]] | |||
|'''Geki Hishou Ken - qcb + C''' | |||
* Andy extends his palm creating a ball of energy in front of him. The ball stays in front of him for 5 hits | |||
* not possible to punish on block if the opponent has no stock and it is difficult to guard roll behind him, unless the opponent does so on the first hit. It's a good chipping tool if opponent has no stock | |||
|- | |||
!rowspan="2"| dp + [[image:snka.gif]] | |||
|rowspan="2" align="center"| 5/<br>3*2(4)4*4/<br>12+12 | |||
|rowspan="2" align="center"| KD/-20 | |||
|rowspan="2"| | |||
|rowspan="2" align="center"| HL | |||
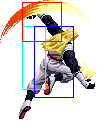
|colspan="2" valign="bottom" style="border-right:0px; border-bottom:0px;"| [[image:Andy02_dpA1.png|center]] | |||
|colspan="3" valign="bottom" style="border-left:0px; border-bottom:0px;"| [[image:Andy02_dpA2.png|center]] | |||
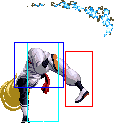
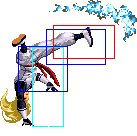
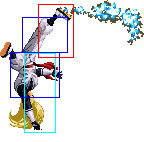
|rowspan="4"|'''Shouryuu Dan - dp + P''' | |||
* Andy performs a rising uppercut attack with good startup priority | |||
* dp + A doesn't rise as high and has much better recovery than dp + C, though technically both are punishable | |||
* supercancellable on the first hit though technically you will do about a jab's worth of damage since the majority of the qcb hcf + K DM will whiff | |||
* free cancellable out of on the first hit to ground attacks and on the rest of the hits to qcf + K(air) | |||
* hard knockdown on the last hit | |||
|- | |||
|colspan="2" valign="bottom" style="border-right:0px; border-top:0px;"| [[image:Andy02_dpA3.png|center]] | |||
|colspan="3" valign="bottom" style="border-left:0px; border-top:0px;"| [[image:Andy02_dpA4.png|center]] | |||
|- | |||
!rowspan="2"| dp + [[image:snkc.gif]] | |||
|rowspan="2" align="center"| 6/<br>3*2(4)4*4*4/<br>23+14 | |||
|rowspan="2" align="center"| KD/-37 | |||
|rowspan="2"| | |||
|rowspan="2" align="center"| HL | |||
|valign="bottom" style="border-right:0px; border-bottom:0px;"| [[image:Andy02_dpC1.png|center]] | |||
|colspan="2" valign="bottom" style="border-right:0px; border-left:0px; border-bottom:0px;"| [[image:Andy02_dpA2.png|center]] | |||
|colspan="2" valign="bottom" style="border-left:0px; border-bottom:0px;"| [[image:Andy02_dpC3.png|center]] | |||
|- | |||
|colspan="2" valign="bottom" style="border-right:0px;border-top:0px;"| [[image:Andy02_dpC4.png|center]] | |||
|colspan="3" valign="bottom" style="border-left:0px; border-top:0px;"| [[image:Andy02_dpC5.png|center]] | |||
|- | |||
!rowspan="2"| rdp + [[image:snkb.gif]] | |||
|rowspan="2" align="center"| 11/2*2*2*2/29 | |||
|rowspan="2" align="center"| KD/-17 | |||
|rowspan="2"| | |||
|rowspan="2" align="center"| HL | |||
|colspan="2" valign="bottom" style="border-right:0px; border-bottom:0px;"| [[image:Andy02_rdpB1.png|center]] | |||
|colspan="3" valign="bottom" style="border-left:0px; border-bottom:0px;"| [[image:Andy02_rdpB2.png|center]] | |||
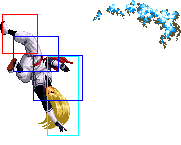
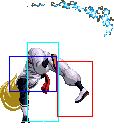
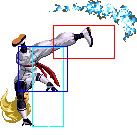
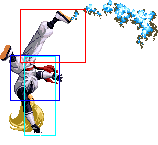
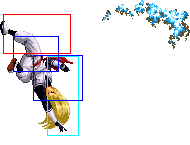
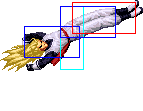
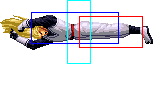
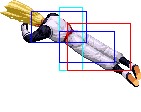
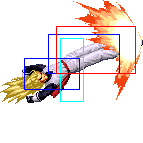
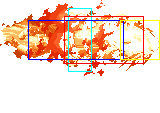
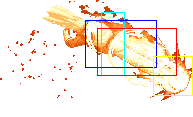
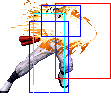
|rowspan="4"|'''Yami Abise Geri - rdp + K''' | |||
* Andy rolls backwards, creating a flame in front of him, acting as a reasonably good prediction anti-air that is also very safe | |||
* the move is very slow so it shouldn't be used as a reversal. rdp + D comes out slower than rdp + B but does more damage | |||
* rdp + D has a lot of startup invincibility | |||
* free cancellable out of | |||
|- | |||
|colspan="2" valign="bottom" style="border-right:0px; border-top:0px;"| [[image:Andy02_rdpB3.png|center]] | |||
|colspan="3" valign="bottom" style="border-left:0px; border-top:0px;"| [[image:Andy02_rdpB4.png|center]] | |||
|- | |||
!rowspan="2"| rdp + [[image:snkd.gif]] | |||
|rowspan="2" align="center"| 23/3*3*3*3/31 | |||
|rowspan="2" align="center"| KD/-22 | |||
|rowspan="2"| | |||
|rowspan="2" align="center"| HL | |||
|colspan="2" valign="bottom" style="border-right:0px; border-bottom:0px;"| [[image:Andy02_rdpD1.png|center]] | |||
|colspan="3" valign="bottom" style="border-left:0px; border-bottom:0px;"| [[image:Andy02_rdpD2.png|center]] | |||
|- | |||
|colspan="2" valign="bottom" style="border-right:0px; border-top:0px;"| [[image:Andy02_rdpD3.png|center]] | |||
|colspan="3" valign="bottom" style="border-left:0px; border-top:0px;"| [[image:Andy02_rdpD4.png|center]] | |||
|- | |||
!rowspan="2"| hcf + [[image:snkb.gif]] | |||
|rowspan="2" align="center"| 11/<br>4*9*10*6*7/<br>16 | |||
|rowspan="2" align="center"| -3/-5 | |||
|rowspan="2"| | |||
|rowspan="2" align="center"| HL | |||
|valign="bottom" style="border-right:0px; border-bottom:0px;"| [[image:Andy02_hcfK1.png|center]] | |||
|colspan="2" valign="bottom" style="border-right:0px; border-left:0px; border-bottom:0px;"| [[image:Andy02_hcfK2.png|center]] | |||
|colspan="2" valign="bottom" style="border-left:0px; border-bottom:0px;"| [[image:Andy02_hcfK3.png|center]] | |||
|rowspan="3"| '''Kuuha Dan - hcf + K''' | |||
* Andy performs a very high priority spiraling kick that travels in a parabolic motion. The arc on hcf + D is bigger than hcf + B | |||
* only sometimes punishable on block by throws or fast normals but can be rolled behind and punished easily. It is also possible for the move to go over the opponent, allowing them to just run behind and combo you in the back | |||
* free cancellable out of on the first hit to ground attacks and on the rest of the hits to qcf + K(air) | |||
|- | |||
|colspan="3" rowspan="2" valign="bottom" style="border-right:0px; border-top:0px;"| [[image:Andy02_hcfK4.png|center]] | |||
|colspan="2" rowspan="2" valign="bottom" style="border-left:0px; border-top:0px;"| [[image:Andy02_hcfK5.png|center]] | |||
|- | |||
! hcf + [[image:snkd.gif]] | |||
|align="center"| 17/<br>5*11*12*10*5/<br>18 | |||
|align="center"| -3(-36)/-5(-38) | |||
| | |||
|align="center"| HL | |||
|- | |||
! hcf + [[image:punch.gif]] | |||
|align="center"| 8/-/- | |||
|align="center"| KD/- | |||
| | |||
|align="center"| Grab | |||
|colspan="5" | [[image:Andy02_hcfP.png|center]] | |||
|'''Gekiheki Haisui Shou - hcf + P''' | |||
* a proximity unblockable attack that only comes out if Andy is in throw range and opponent is not in blockstun. Otherwise, a close A/close C comes out instead | |||
* last hit knocks the opponent into the air where they can be juggled | |||
* free cancellable out of on all four hits | |||
|- | |||
! j.qcf + [[image:snkb.gif]] | |||
|align="center"| 11/-/2+17 | |||
|align="center"| -/- | |||
| | |||
|align="center"| HL | |||
|colspan="5" | [[image:Andy02_jqcfB.png|center]] | |||
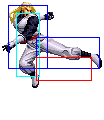
|rowspan="2"|'''Gen'ei Shiranui - qcf + K(air)''' | |||
* Andy performs a diagonal "dive" downwards which has a very large hitbox | |||
* free cancellable into | |||
* can be followed up with either P or K, see below | |||
|- | |||
! j.qcf + [[image:snkd.gif]] | |||
|align="center"| 15/-/2+17 | |||
|align="center"| -/- | |||
| | |||
|align="center"| HL | |||
|colspan="5" | [[image:Andy02_jqcfD.png|center]] | |||
|- | |||
! > [[image:punch.gif]] | |||
|align="center"| 9/4+5/27 | |||
|align="center"| KD/-18 | |||
| | |||
|align="center"| L | |||
|colspan="2" valign="bottom" style="border-right:0px;"| [[image:Andy02_jqcfBA1.png|center]] | |||
|colspan="3" valign="bottom" style="border-left:0px;"| [[image:Andy02_jqcfBA2.png|center]] | |||
|'''Gen'ei Shiranui: Shimo Agito - P (after j.qcf + K) | |||
* Andy performs a low kick that comes out fairly quick and has good recovery if blocked | |||
* low attack | |||
* supercancellable, though supercancelling into qcb hcf + P will whiff | |||
* free cancellable out of | |||
|- | |||
! > [[image:kick.gif]] | |||
|align="center"| 2+7+7/4/9+19 | |||
|align="center"| KD/-17 | |||
| | |||
|align="center"| H | |||
|colspan="5" | [[image:Andy02_jqcfBB.png|center]] | |||
|'''Gen'ei Shiranui: Uwa Agito - K (after j.qcf + K)''' | |||
* Andy does a hop kick that comes out fairly quick though not as fast as the P followup | |||
* has horrible recovery time if blocked, so it's a risk to use it | |||
* free cancellable out of into qcf + K | |||
|- | |||
! db,f + [[image:snka.gif]] | |||
|align="center"| 10/8/7 | |||
|align="center"| -/- | |||
| | |||
|align="center"| - | |||
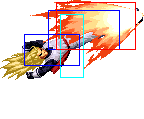
|rowspan="4" colspan="5" | [[image:Andy02_dbfP.png|center]] | |||
|rowspan="4" |'''Zan'ei Ken - db f + P''' | |||
* Andy performs a dashing attack forward. db f + A comes out faster than dp + C | |||
* db f + A goes less than half screen distance, while db f + C goes full screen | |||
* an alternate motion for this move is to just do hcf + P. If you are not in throw range, this move will come out instead of the hcf + P proximity unblockable | |||
* on whiff, this move recovers extremely fast, though it is very punishable if it hits or is blocked | |||
* can be followed up with qcf + P on hit or block | |||
* supercancellable | |||
* free cancellable into | |||
* free cancellable out of | |||
* 22 frames of hitstun, 20 frames of blockstun | |||
|- | |||
! db,f + [[image:snka.gif]]<br>(connect) | |||
|align="center"| 0/7/24 | |||
|align="center"| -8/-10 | |||
| | |||
|align="center"| - | |||
|- | |||
! db,f + [[image:snkc.gif]] | |||
|align="center"| 12/21/20 | |||
|align="center"| -/- | |||
| | |||
|align="center"| HL | |||
|- | |||
! db,f + [[image:snkc.gif]]<br>(connect) | |||
|align="center"| 0/8/28 | |||
|align="center"| -13/-15 | |||
| | |||
|align="center"| HL | |||
|- | |||
! > qcf + [[image:punch.gif]] | |||
|align="center"| 9/9/15+15 | |||
|align="center"| KD/-21 | |||
| | |||
|align="center"| HL | |||
|colspan="5" | [[image:Andy02_dbfPqcfP.png|center]] | |||
|'''Shippuu Ouken - qcf + P (after db,f + P)''' | |||
* Andy does another strike that pushes him back a bit, which is safer than just not doing this followup | |||
* supercancellable but all DMs whiff anyway | |||
* free cancellable out of although all attacks whiff anyway | |||
* 17 frames of blockstun | |||
|- | |||
|colspan="11" align="center"| '''DMs''' | |||
|- | |||
! <br>qcb db f + [[image:snka.gif]]<br><br> | |||
|align="center"| 6/8/17 (0/4/28) | |||
|align="center"| KD/-13 | |||
| | |||
|align="center"| HL | |||
|rowspan="2" colspan="5" | [[image:Andy02_qcbfP.png|center]] | |||
|rowspan="2"|'''Zan'ei Ryuusei Ken - qcb db f + P''' | |||
* Andy dashes forward similar to his db f + P, except it comes out much faster. If the first hit connects, he will a series of additional hits, koncking the opponent back | |||
* very low damage, but comes out very fast and has very good recovery time | |||
* Active frames is the moving forward portion. Cancels to the attack with the framedata given in between brackets when opponent gets in range. | |||
* Invincibility: Complete startup. | |||
|- | |||
! qcb db f + [[image:snkc.gif]] | |||
|align="center"| 6/21/23 (0/4/31) | |||
|align="center"| KD/-16 | |||
| | |||
|align="center"| HL | |||
|- | |||
! qcb db f + [[image:snkb.gif]] | |||
|align="center"| 13/4*7*2(2)2(2)2(2)2(2)2(2)2/3+28 | |||
|align="center"| KD/-22 | |||
| | |||
|align="center"| HL | |||
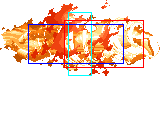
|colspan="2" valign="bottom" style="border-right:0px; border-bottom:0px;"| [[image:Andy02_qcbfK1.png|center]] | |||
|colspan="3" valign="bottom" style="border-left:0px; border-bottom:0px;"| [[image:Andy02_qcbfK2.png|center]] | |||
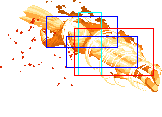
|rowspan="2"|'''Chou Reppa Dan - qcb db f + K''' | |||
* This move is similar to Andy's hcf + K except his feet are on fire, dealing more damage, but the super flash activation makes it easier to react to and punish by rolling. | |||
* Invincibility: Complete startup. | |||
|- | |||
! qcb db f + [[image:snkd.gif]] | |||
|align="center"| 16/4*10*2(2)2(2)2(2)2(2)2(2)2/6+32 | |||
|align="center"| KD/-22 | |||
| | |||
|align="center"| HL | |||
|colspan="2" valign="bottom" style="border-right:0px; border-top:0px;"| [[image:Andy02_qcbfK3.png|center]] | |||
|colspan="3" valign="bottom" style="border-left:0px; border-top:0px;"| [[image:Andy02_qcbfK4.png|center]] | |||
|- | |||
|colspan="11" align="center"| '''SDM''' | |||
|- | |||
!rowspan="2"| qcb db f + [[image:snkb.gif]] + [[image:snkd.gif]] | |||
|rowspan="2" align="center"| 13/4*8*1(1)1(1)1(1)1(1)1(1)1(1)1(1)1(1)1(1)1(1)1(1)1/7+34 | |||
|rowspan="2" align="center"| KD/-28 | |||
|rowspan="2"| | |||
|rowspan="2" align="center"| HL | |||
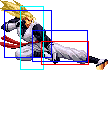
|colspan="2" valign="bottom" style="border-right:0px; border-bottom:0px;"| [[image:Andy02_qcbfBD1.png|center]] | |||
|colspan="3" valign="bottom" style="border-left:0px; border-bottom:0px;"| [[image:Andy02_qcbfBD2.png|center]] | |||
|rowspan="2"|'''Chou Reppa Dan - qcb db f + BD''' | |||
* Similar to his DM version except does even more damage and can usually juggled for all the hits in the air, unlike hcf + K or the DM | |||
* best to use in juggle combos, such as after hcf + P | |||
* Invincibility: Whole startup and first four active frames. | |||
|- | |||
|colspan="2" valign="bottom" style="border-right:0px; border-top:0px;"| [[image:Andy02_qcbfBD3.png|center]] | |||
|colspan="3" valign="bottom" style="border-left:0px; border-top:0px;"| [[image:Andy02_qcbfBD4.png|center]] | |||
|- | |||
|colspan="11" align="center"| '''HSDM''' | |||
|- | |||
! qcfx2+[[image:snka.gif]] + [[image:snkc.gif]] | |||
|align="center"| 6/128/0 | |||
|align="center"| KD/-111 | |||
| | |||
|align="center"| HL | |||
|colspan="5" | [[image:Andy02_HSDM1.png|center]] | |||
| '''Zan'ei Shitou Reppa Dan - qcfx2+AC''' | |||
* Andy performs a dash forward similar to his db f + P that comes out very fast | |||
* the move does one hit only, but after it hits or is blocked, Andy will continue to dash forward for a few seconds. At any point during this, as well as before it has made contact, the move can be followed up by BCD | |||
|- | |||
!> [[image:snkb.gif]] + [[image:snkc.gif]] + [[image:snkd.gif]] | |||
|align="center"| 0/1(1)1(1)2(1)1(1)2(1)1(1)2(1)1(1)1/21+14) | |||
|align="center"| KD/-31 | |||
| | |||
|align="center"| HL | |||
|colspan="5" | [[image:Andy02_HSDM2.png|center]] | |||
| '''Hiryuu Bakuha Dan - BCD (after Zan'ei Shitou Reppa Dan qcfx2+AC)''' | |||
* Andy does a diagonally upwards attack that does several hits | |||
* has a long recovery time if blocked | |||
* Invincibility: Complete startup. | |||
|} | |||
===Throws=== | ===Throws=== | ||
1. Gourin Kai - b/f+C | 1. Gourin Kai - b/f + C | ||
* Andy grabs the opponent, throws them down, then delivers a kick while they are on the ground | * Andy grabs the opponent, throws them down, then delivers a kick while they are on the ground | ||
* hard knockdown | * hard knockdown | ||
| Line 24: | Line 597: | ||
2. Kakaekomi Nage - b/f+D | 2. Kakaekomi Nage - b/f + D | ||
* Andy grabs the opponent and throws them behind him across the screen | * Andy grabs the opponent and throws them behind him across the screen | ||
* Since it can be recovery rolled and Andy takes a while to recover from the throw, it isn't useful for setting up additional pressure afterwards | * Since it can be recovery rolled and Andy takes a while to recover from the throw, it isn't useful for setting up additional pressure afterwards | ||
| Line 30: | Line 603: | ||
== | ==Short Movelist== | ||
* df + A | |||
* f + B (Overhead if not cancelled into.) | |||
* Close, hcf + P (Proximity unblockable) | |||
* | |||
* db f + P | |||
** qcf + P (Only on hit/block.) | |||
* dp + P | |||
* qcb + A | |||
* qcb + C | |||
* hcf + K | |||
* rdp + K | |||
* air qcf + K | |||
** K (Overhead.) | |||
** P (Low.) | |||
* DM qcb db f + P | |||
* DM qcb db f + K | |||
* SDM qcb db f + BD | |||
* HSDM qcf qcf + AC | |||
** BCD | |||
==Notes== | |||
* | ===Cancellable moves=== | ||
* | * Close: A, B, C (1-2) | ||
* | * Far: - | ||
* Crouch: A, B, C | |||
* Jump: A, C | |||
* CD is cancellable into command moves, specials and DMs | |||
* | |||
* df + A (1) is cancellable. | |||
* f + B is cancellable (on air attacks) only when you cancel into it. | |||
===Super cancellable moves=== | |||
* | * air qcf + K > P | ||
* | * dp + P (1) | ||
* df f + A | |||
* df f + P > qcf + P | |||
===Free cancellable into moves=== | |||
* '''hcf + K''' | |||
* '''air qcf + K''' | |||
* '''db f + P''' | |||
=== | === Free cancellable out-of moves=== | ||
* C throw (The kick.) | |||
* f + B | |||
* df + A (2) | |||
* dp + P | |||
* rdp + K | |||
* '''hcf + K''' | |||
* Close, hcf + P | |||
* '''air qcf + K > P''' | |||
* '''air qcf + K > K''' | |||
* '''db f + P''' | |||
* '''db f + P > qcf + P''' | |||
===Moves with Invincibility=== | |||
* | * rdp + D (Full: startup (??).) | ||
* | * DM qcb db f + P (Full: startup.) | ||
* DM qcb db f + K (Full: startup.) | |||
* SDM qcb db f + BD (Full: startup & active (1st part).) | |||
* HSDM qcf qcf + AC (Full: startup.) | |||
=== Moves with autoguard=== | |||
(none) | |||
===Other Notes=== | |||
(none) | |||
==Combos== | |||
=== | ===Basic Combos=== | ||
* cr.B, cr.B > | |||
** DM qcb db f + P {1 stock} | |||
** df + A (1) > | |||
*** DM qcb db f + P {30%} {1 stock} | |||
*** qcb + A {20%} | |||
*** '''db f + A > qcf + P {25%}''' | |||
* cl.B > | |||
** '''hcf + P, ...''' | |||
* cr.C / cl.C (2) / (cl.C (1) > df + A (1) > | |||
** HSDM qcf qcf + AC > BCD {Max Mode + 1 stock} | |||
** DM qcb db f + P {25%} {1 stock} | |||
** '''db f + A > qcf + P''' | |||
* cl.C (1) > | |||
** '''hcf + P,''' | |||
*** (S)DM qcb db f + K/BD {20%/40%} {1 stock/Max Mode + 1 stock} | |||
*** '''run df + A, hj.C (Timing required.) {45%}''' | |||
*** df + A, rdp + K (Corner.) {40%} | |||
*** df + A (1) > qcb + A, dp + C (Corner. Timing required.){50%} | |||
*** hcf + K {25-30%} | |||
*** db f + P {25%} | |||
*** dp + P {20%} | |||
** df + A (1) > qcb + A, st.B (Very close) | |||
** qcb + C (Corner.) | |||
** qcb + A, df + A, j.C (Corner.) {40%} | |||
** f + B > | |||
*** air qcf + K, P >> (Corner.) {25%} | |||
**** (S)DM qcb db f + K/BD {45/??%} {2 stocks/Max Mode + 2 stocks} | |||
===Max Mode=== | |||
* cl.C (1) >> BC, run cl.C (1) > hcf + C (3) >> hcf + B (1) >> df f + A >> hcf + B (4) >> air qcf + B > P >> (S)DM qcb db f + D/BD {75%/80%} | |||
==Strategies== | ==Strategies== | ||
| Line 174: | Line 747: | ||
* In the corner, doing cl.C (1) > qcb + C puts the opponent into block stun. It is difficult to guard roll this move since Andy gets pushed back and the opponent's guard roll will make him roll back into the ball. It can be guard rolled on the first hit and punished. Thus, it is best to use this when the opponent does not have any stock, which will guarantee 5 ticks of chip damage, and is not punishable in any way, if they blocked the close C (1). Since Andy will be the first character, the opponent won't have stock, so this strategy could be used more often. | |||
===Andy Throw Glitch=== | ===Andy Throw Glitch=== | ||
Andy has a strange glitch involving his b/f+C throw. The throw itself has two parts - the slam to the ground, followed by the kick. It is possible to cancel the kick into maxmode. Doing this creates a glitch in which Andy can move through the opponent's sprite. Since the throw is a hard knockdown, you can setup some ambigious crossups by just positioning your character on top of the opponent's sprite on wakeup, then in the last moment, walking back or forth and immediately doing close C. | Andy has a strange glitch involving his b / f + C throw. The throw itself has two parts - the slam to the ground, followed by the kick. It is possible to cancel the kick into maxmode. Doing this creates a glitch in which Andy can move through the opponent's sprite. Since the throw is a hard knockdown, you can setup some ambigious crossups by just positioning your character on top of the opponent's sprite on wakeup, then in the last moment, walking back or forth and immediately doing close C. | ||
The glitch also has some applications in the corner. If the opponent is in the right corner and is crouch blocking, they have to crouch block his close C as expected - by holding downback. However, in the left corner, the opponent has to actually hold downforward to block it | The glitch also has some applications in the corner. If the opponent is in the right corner and is crouch blocking, they have to crouch block his close C as expected - by holding downback. However, in the left corner, the opponent has to actually hold downforward to block it | ||
| Line 186: | Line 759: | ||
===Safejumps=== | ===Safejumps=== | ||
In the corner, Andy gets a safejump on Ryo and Kim off dp+C. After recoverying from dp+C immediately superjump. Normal jump does not work. | In the corner, Andy gets a safejump on Ryo and Kim off dp + C. After recoverying from dp + C immediately superjump. Normal jump does not work. | ||
{{Template:The King of Fighters 2002}} | {{Template:The King of Fighters 2002}} | ||
[[Category:The King of Fighters 2002]] | [[Category:The King of Fighters 2002]] | ||
Latest revision as of 22:01, 24 October 2021
General Info
Crouch height: Low
Jump: 4/38/1
Hop: 4/28/1
Dash: 3/10~∞/3
Backdash: 3/9/3
Wakeup: 30 frames
Recovery roll: 29 frames
| Stand | Crouch | Jump | Grab | Run |
|---|---|---|---|---|

|

|

|

|
Colors

|

|

|

|
Movelist
Throws
1. Gourin Kai - b/f + C
- Andy grabs the opponent, throws them down, then delivers a kick while they are on the ground
- hard knockdown
- it is possible to cancel the kick part of this throw into maxmode, which creates a glitch in which Andy's sprite can pass straight through the opponent's. This bug is explained in the strategy section
- kick part of this move is free cancellable out of, though nothing that you cancel into will combo
2. Kakaekomi Nage - b/f + D
- Andy grabs the opponent and throws them behind him across the screen
- Since it can be recovery rolled and Andy takes a while to recover from the throw, it isn't useful for setting up additional pressure afterwards
- the opponent gets up with their back turned
Short Movelist
- df + A
- f + B (Overhead if not cancelled into.)
- Close, hcf + P (Proximity unblockable)
- db f + P
- qcf + P (Only on hit/block.)
- dp + P
- qcb + A
- qcb + C
- hcf + K
- rdp + K
- air qcf + K
- K (Overhead.)
- P (Low.)
- DM qcb db f + P
- DM qcb db f + K
- SDM qcb db f + BD
- HSDM qcf qcf + AC
- BCD
Notes
Cancellable moves
- Close: A, B, C (1-2)
- Far: -
- Crouch: A, B, C
- Jump: A, C
- CD is cancellable into command moves, specials and DMs
- df + A (1) is cancellable.
- f + B is cancellable (on air attacks) only when you cancel into it.
Super cancellable moves
- air qcf + K > P
- dp + P (1)
- df f + A
- df f + P > qcf + P
Free cancellable into moves
- hcf + K
- air qcf + K
- db f + P
Free cancellable out-of moves
- C throw (The kick.)
- f + B
- df + A (2)
- dp + P
- rdp + K
- hcf + K
- Close, hcf + P
- air qcf + K > P
- air qcf + K > K
- db f + P
- db f + P > qcf + P
Moves with Invincibility
- rdp + D (Full: startup (??).)
- DM qcb db f + P (Full: startup.)
- DM qcb db f + K (Full: startup.)
- SDM qcb db f + BD (Full: startup & active (1st part).)
- HSDM qcf qcf + AC (Full: startup.)
Moves with autoguard
(none)
Other Notes
(none)
Combos
Basic Combos
- cr.B, cr.B >
- DM qcb db f + P {1 stock}
- df + A (1) >
- DM qcb db f + P {30%} {1 stock}
- qcb + A {20%}
- db f + A > qcf + P {25%}
- cl.B >
- hcf + P, ...
- cr.C / cl.C (2) / (cl.C (1) > df + A (1) >
- HSDM qcf qcf + AC > BCD {Max Mode + 1 stock}
- DM qcb db f + P {25%} {1 stock}
- db f + A > qcf + P
- cl.C (1) >
- hcf + P,
- (S)DM qcb db f + K/BD {20%/40%} {1 stock/Max Mode + 1 stock}
- run df + A, hj.C (Timing required.) {45%}
- df + A, rdp + K (Corner.) {40%}
- df + A (1) > qcb + A, dp + C (Corner. Timing required.){50%}
- hcf + K {25-30%}
- db f + P {25%}
- dp + P {20%}
- df + A (1) > qcb + A, st.B (Very close)
- qcb + C (Corner.)
- qcb + A, df + A, j.C (Corner.) {40%}
- f + B >
- air qcf + K, P >> (Corner.) {25%}
- (S)DM qcb db f + K/BD {45/??%} {2 stocks/Max Mode + 2 stocks}
- air qcf + K, P >> (Corner.) {25%}
- hcf + P,
Max Mode
- cl.C (1) >> BC, run cl.C (1) > hcf + C (3) >> hcf + B (1) >> df f + A >> hcf + B (4) >> air qcf + B > P >> (S)DM qcb db f + D/BD {75%/80%}
Strategies
- In the corner, doing cl.C (1) > qcb + C puts the opponent into block stun. It is difficult to guard roll this move since Andy gets pushed back and the opponent's guard roll will make him roll back into the ball. It can be guard rolled on the first hit and punished. Thus, it is best to use this when the opponent does not have any stock, which will guarantee 5 ticks of chip damage, and is not punishable in any way, if they blocked the close C (1). Since Andy will be the first character, the opponent won't have stock, so this strategy could be used more often.
Andy Throw Glitch
Andy has a strange glitch involving his b / f + C throw. The throw itself has two parts - the slam to the ground, followed by the kick. It is possible to cancel the kick into maxmode. Doing this creates a glitch in which Andy can move through the opponent's sprite. Since the throw is a hard knockdown, you can setup some ambigious crossups by just positioning your character on top of the opponent's sprite on wakeup, then in the last moment, walking back or forth and immediately doing close C.
The glitch also has some applications in the corner. If the opponent is in the right corner and is crouch blocking, they have to crouch block his close C as expected - by holding downback. However, in the left corner, the opponent has to actually hold downforward to block it
The glitch effect ends when Andy is hit with an attack or blocks it, as well as if he executes a normal throw, command normal, special move or DM. Rolling also ends the glitch state.
Safejumps
In the corner, Andy gets a safejump on Ryo and Kim off dp + C. After recoverying from dp + C immediately superjump. Normal jump does not work.
