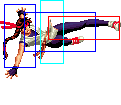
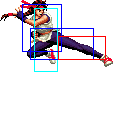
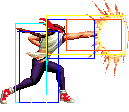
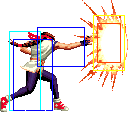
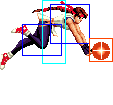
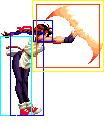
No edit summary |
m (Scanman moved page Yuri 02 to The King of Fighters 2002/Yuri: moving 2002 Yuri page to be a subpage) |
||
| (53 intermediate revisions by 4 users not shown) | |||
| Line 1: | Line 1: | ||
== | [[image:Yuri02_stance.gif|right]] | ||
==General Info== | |||
Crouch height: Low<br> | |||
Jump: 4/36/1<br> | |||
Hop: 4/27/1<br> | |||
Dash: 3/10~∞/3<br> | |||
Backdash: 3/13/3<br> | |||
Wakeup: 13 frames<br> | |||
Recovery roll: 23 frames<br> | |||
{| | |||
! Stand | |||
! Crouch | |||
! Jump | |||
! Grab | |||
! Run | |||
|- | |||
|valign="bottom"| [[image:Yuri02_stand.png]] | |||
|valign="bottom"| [[image:Yuri02_crouch.png]] | |||
|valign="bottom"| [[image:Yuri02_jump.png]] | |||
|valign="bottom"| [[image:Yuri02_grab.png]] | |||
|valign="bottom"| [[image:Yuri02_run.png]] | |||
|} | |||
===Colors=== | |||
{| | |||
! [[image:snka.gif]] | |||
! [[image:snkb.gif]] | |||
! [[image:snkc.gif]] | |||
! [[image:snkd.gif]] | |||
|- | |||
| [[image:Yuri02_colorA.png]] | |||
| [[image:Yuri02_colorB.png]] | |||
| [[image:Yuri02_colorC.png]] | |||
| [[image:Yuri02_colorD.png]] | |||
|} | |||
'''Command Normals | ==[[The_King_of_Fighters_2002/Normals_Guide|Movelist]]== | ||
1. | {|border="1" | ||
- Yuri | !width="8%"| | ||
- | ! Frames | ||
- can | ! Advantage | ||
- free cancellable out of into Raiou Ken qcf+K(air) | ! Cancel | ||
! Block | |||
!colspan="2"| Hitbox | |||
! Notes | |||
|- | |||
|colspan="8" align="center"| '''Standing Close''' | |||
|- | |||
! [[image:snka.gif]] | |||
|align="center"| 3/4/6 | |||
|align="center"| +2/0 | |||
|align="center"| R,C,S,Su | |||
|align="center"| HL | |||
|colspan="2" | [[image:Yuri02_clA.png|center]] | |||
| | |||
|- | |||
! [[image:snkb.gif]] | |||
|align="center"| 4/4/6 | |||
|align="center"| +2/0 | |||
|align="center"| C,S,Su | |||
|align="center"| L | |||
|colspan="2" | [[image:Yuri02_clB.png|center]] | |||
| | |||
|- | |||
! [[image:snkc.gif]] | |||
|align="center"| 3/3[2]6/25 | |||
|align="center"| -16/-18 | |||
|align="center"| C,S,Su | |||
|align="center"| HL | |||
|valign="bottom" style="border-right:0px;"| [[image:Yuri02_clC1.png|center]] | |||
|valign="bottom" style="border-left:0px;"| [[image:Yuri02_clC2.png|center]] | |||
| | |||
|- | |||
! [[image:snkd.gif]] | |||
|align="center"| 5/8/13 | |||
|align="center"| -1/-3 | |||
|align="center"| C,S,Su | |||
|align="center"| HL | |||
|colspan="2"| [[image:Yuri02_clD.png|center]] | |||
| | |||
|- | |||
|colspan="8" align="center"| '''Standing Far''' | |||
|- | |||
! [[image:snka.gif]] | |||
|align="center"| 3/2/13 | |||
|align="center"| -3/-5 | |||
|align="center"| R,C,S,Su | |||
|align="center"| HL | |||
|colspan="2" | [[image:Yuri02_stA.png|center]] | |||
|Recovery is cancellable | |||
|- | |||
! [[image:snkb.gif]] | |||
|align="center"| 5/3/15 | |||
|align="center"| -6/-8 | |||
| | |||
|align="center"| HL | |||
|colspan="2" | [[image:Yuri02_stB.png|center]] | |||
| | |||
|- | |||
! [[image:snkc.gif]] | |||
|align="center"| 5/3+4/22 | |||
|align="center"| -9/-11 | |||
| | |||
|align="center"| HL | |||
|valign="bottom" style="border-right:0px;"| [[image:Yuri02_stC1.png|center]] | |||
|valign="bottom" style="border-left:0px;"| [[image:Yuri02_stC2.png|center]] | |||
| | |||
|- | |||
! [[image:snkd.gif]] | |||
|align="center"| 11/7/19 | |||
|align="center"| -6/-8 | |||
| | |||
|align="center"| HL | |||
|colspan="2"| [[image:Yuri02_stD.png|center]] | |||
| | |||
|- | |||
! [[image:snkc.gif]] + [[image:snkd.gif]] | |||
|align="center"| 15/7/19 | |||
|align="center"| KD/-4 | |||
|align="center"| S,Su | |||
|align="center"| HL | |||
|colspan="2"| [[image:Yuri02_stCD.png|center]] | |||
| | |||
|- | |||
|colspan="8" align="center"| '''Crouching''' | |||
|- | |||
! [[image:snka.gif]] | |||
|align="center"| 4/4/5 | |||
|align="center"| +3/+1 | |||
|align="center"| R,C,S,Su | |||
|align="center"| HL | |||
|colspan="2" | [[image:Yuri02_crA.png|center]] | |||
| | |||
|- | |||
! [[image:snkb.gif]] | |||
|align="center"| 3/4/5 | |||
|align="center"| +3/+1 | |||
|align="center"| R | |||
|align="center"| L | |||
|colspan="2" | [[image:Yuri02_crB.png|center]] | |||
| | |||
|- | |||
! [[image:snkc.gif]] | |||
|align="center"| 2/3+3/22 | |||
|align="center"| -8/-10 | |||
|align="center"| C,S,Su | |||
|align="center"| HL | |||
|valign="bottom" style="border-right:0px;"| [[image:Yuri02_crC1.png|center]] | |||
|valign="bottom" style="border-left:0px;"| [[image:Yuri02_crC2.png|center]] | |||
| | |||
|- | |||
! [[image:snkd.gif]] | |||
|align="center"| 7/5/21 | |||
|align="center"| KD/-8 | |||
|align="center"| C,S,Su | |||
|align="center"| L | |||
|colspan="2" | [[image:Yuri02_crD.png|center]] | |||
| | |||
|- | |||
|colspan="8" align="center"| '''Jump''' | |||
|- | |||
! [[image:snka.gif]] | |||
|align="center"| 5/7/- | |||
|align="center"| -/- | |||
| | |||
|align="center"| H | |||
|colspan="2" | [[image:Yuri02_jA.png|center]] | |||
| | |||
|- | |||
! [[image:snkb.gif]] | |||
|align="center"| 2/7/- | |||
|align="center"| -/- | |||
| | |||
|align="center"| H | |||
|colspan="2" | [[image:Yuri02_jB.png|center]] | |||
| | |||
|- | |||
! [[image:snkc.gif]] | |||
|align="center"| 5/8/- | |||
|align="center"| -/- | |||
| | |||
|align="center"| H | |||
|colspan="2" | [[image:Yuri02_jC.png|center]] | |||
| | |||
|- | |||
! [[image:snkd.gif]] | |||
|align="center"| 7/10/- | |||
|align="center"| -/- | |||
| | |||
|align="center"| H | |||
|colspan="2" | [[image:Yuri02_jD.png|center]] | |||
| | |||
|- | |||
! [[image:snkc.gif]] + [[image:snkd.gif]] | |||
|align="center"| 14/4/- | |||
|align="center"| KD/- | |||
| | |||
|align="center"| HL | |||
|colspan="2"| [[image:Yuri02_jCD.png|center]] | |||
| | |||
|- | |||
|colspan="8" align="center"| '''Neutral Jump''' | |||
|- | |||
! [[image:snka.gif]] | |||
|align="center"| 5/7/- | |||
|align="center"| -/- | |||
| | |||
|align="center"| H | |||
|colspan="2" | [[image:Yuri02_juA.png|center]] | |||
| | |||
|- | |||
! [[image:snkb.gif]] | |||
|align="center"| 5/8/- | |||
|align="center"| -/- | |||
| | |||
|align="center"| H | |||
|colspan="2" | [[image:Yuri02_juB.png|center]] | |||
| | |||
|- | |||
! [[image:snkc.gif]] | |||
|align="center"| 5/7/- | |||
|align="center"| -/- | |||
| | |||
|align="center"| H | |||
|colspan="2" | [[image:Yuri02_juC.png|center]] | |||
| | |||
|- | |||
! [[image:snkd.gif]] | |||
|align="center"| 5/10/- | |||
|align="center"| -/- | |||
| | |||
|align="center"| H | |||
|colspan="2" | [[image:Yuri02_juD.png|center]] | |||
| | |||
|- | |||
|colspan="8" align="center"| '''Hop''' | |||
|- | |||
! [[image:snka.gif]] | |||
|align="center"| 5/6/- | |||
|align="center"| -/- | |||
| | |||
|align="center"| H | |||
|colspan="2" | [[image:Yuri02_jA.png|center]] | |||
| | |||
|- | |||
! [[image:snkb.gif]] | |||
|align="center"| 2/6/- | |||
|align="center"| -/- | |||
| | |||
|align="center"| H | |||
|colspan="2" | [[image:Yuri02_hB.png|center]] | |||
| | |||
|- | |||
! [[image:snkc.gif]] | |||
|align="center"| 5/6/- | |||
|align="center"| -/- | |||
| | |||
|align="center"| H | |||
|colspan="2" | [[image:Yuri02_hC.png|center]] | |||
| | |||
|- | |||
! [[image:snkd.gif]] | |||
|align="center"| 7/7/- | |||
|align="center"| -/- | |||
| | |||
|align="center"| H | |||
|colspan="2" | [[image:Yuri02_jD.png|center]] | |||
| | |||
|- | |||
|colspan="8" align="center"| '''Command Normals''' | |||
|- | |||
! <br>f + [[image:snka.gif]]<br><br> | |||
|align="center"| 14/12/12 | |||
|align="center"| -4/-6 | |||
| | |||
|align="center"| H | |||
|rowspan="2" colspan="2" | [[image:Yuri02_fA.png|center]] | |||
|Can evade lows | |||
|- | |||
! f + [[image:snka.gif]]<br>(cancel) | |||
|align="center"| 14/12/12 | |||
|align="center"| -4/-6 | |||
| | |||
|align="center"| HL | |||
|Can evade lows. Free cancellable into j.qcf + K | |||
|- | |||
! df + [[image:snkb.gif]] | |||
|align="center"| 9/5/16 | |||
|align="center"| -1/-3 | |||
|align="center"| S,Su | |||
|align="center"| L | |||
|colspan="2" | [[image:Yuri02_dfB.png|center]] | |||
| | |||
|- | |||
! df + [[image:snkd.gif]] | |||
|align="center"| 14/11/23 | |||
|align="center"| KD/-16 | |||
|align="center"| S,Su | |||
|align="center"| HL | |||
|colspan="2" | [[image:Yuri02_dfD.png|center]] | |||
|Does chip damage | |||
|- | |||
|colspan="8" align="center"| '''Special Moves''' | |||
|- | |||
! qcf + [[image:snka.gif]] | |||
|align="center"| 19/3+6/12 | |||
|align="center"| KD/+8 | |||
| | |||
|align="center"| HL | |||
|valign="bottom" style="border-right:0px;"| [[image:Yuri02_qcfA1.png|center]] | |||
|valign="bottom" style="border-left:0px;"| [[image:Yuri02_qcfA2.png|center]] | |||
|rowspan="2"|'''Ko'ou Ken - qcf + P''' | |||
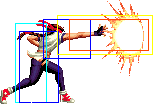
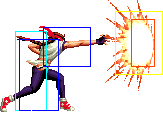
*Yuri emits a blast of energy in front of her. qcf + A does not go very far, but qcf + C goes about half screen<br> | |||
*can be delayed by holding the attack button, resulting in a Haou Shoukou Ken | |||
|- | |||
! qcf + [[image:snkc.gif]] | |||
|align="center"| 23/3+6/18 | |||
|align="center"| KD/+2 | |||
| | |||
|align="center"| HL | |||
|valign="bottom" style="border-right:0px;"| [[image:Yuri02_qcfC1.png|center]] | |||
|valign="bottom" style="border-left:0px;"| [[image:Yuri02_qcfC2.png|center]] | |||
|- | |||
! qcf + [[image:snka.gif]]<br>(hold) | |||
|align="center"| 50/-/27 | |||
|align="center"| KD/+3 | |||
| | |||
|align="center"| HL | |||
|rowspan="2" colspan="2" | [[image:Yuri02_qcfAhold.png|center]] | |||
|rowspan="2"|'''Haou Shoukou Ken - hold P (after Ko'ou Ken qcf + P)''' | |||
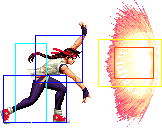
*Yuri charges and releases a large fireball. Using A will result in a very slow fireball being released, while C results in a slightly faster one | |||
*it is possible to juggle the opponent if this move connects | |||
|- | |||
! qcf + [[image:snkc.gif]]<br>(hold) | |||
|align="center"| 56/-/27 | |||
|align="center"| KD/+3 | |||
| | |||
|align="center"| HL | |||
|- | |||
! <br>j.qcf + [[image:snkb.gif]]<br><br> | |||
|align="center"| 11/-/until land+24 | |||
|align="center"| -/- | |||
|align="center"| Fi | |||
|align="center"| HL | |||
|rowspan="2" valign="bottom" style="border-right:0px;"| [[image:Yuri02_jqcfK1.png|center]] | |||
|rowspan="2" valign="bottom" style="border-left:0px;"| [[image:Yuri02_jqcfK2.png|center]] | |||
|rowspan="2"|'''Raiou Ken - qcf + K(air)''' | |||
* Yuri throws a fireball downwards. qcf + B goes down at a 45 degree angle, while qcf + D goes down at a 30 degree angle to the vertical | |||
* free cancellable into | |||
|- | |||
! j.qcf + [[image:snkd.gif]] | |||
|align="center"| 13/-/until land+27 | |||
|align="center"| -/- | |||
|align="center"| Fi | |||
|align="center"| HL | |||
|- | |||
! <br>qcb + [[image:snka.gif]]<br><br> | |||
|align="center"| 25/9/14 | |||
|align="center"| KD/+6 | |||
| | |||
|align="center"| HL | |||
|rowspan="2" colspan="2" | [[image:Yuri02_qcbP.png|center]] | |||
|rowspan="2"|'''Saifa - qcb + P''' | |||
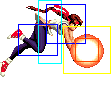
*Yuri creates a ball of energy in front of her | |||
*has fairly slow startup, but works well as a psychic anti-air, and is fairly difficult to punish | |||
*negates normal projectiles | |||
|- | |||
! qcb + [[image:snkc.gif]] | |||
|align="center"| 25/9/13 | |||
|align="center"| KD/+7 | |||
| | |||
|align="center"| HL | |||
|- | |||
! <br>hcb + [[image:snkb.gif]]<br><br> | |||
|align="center"| 10/16/36 (Throw: 4/1/12) | |||
|align="center"| KD | |||
|align="center"| Fi | |||
|align="center"| Grab | |||
|rowspan="2" colspan="2" | [[image:Yuri02_hcbK.png|center]] | |||
|rowspan="2"|'''Hyakuretsu Binta - hcb + K''' | |||
* Yuri runs forward, slapping them if she connects. hcb + B travels about half screen, while hcb + D travels about three quarter screen length | |||
* Invincible feet during active portion. | |||
|- | |||
! hcb + [[image:snkd.gif]] | |||
|align="center"| 10/24/38 (Throw: 4/1/13) | |||
|align="center"| KD | |||
|align="center"| Fi | |||
|align="center"| Grab | |||
|- | |||
! dp + [[image:snka.gif]] | |||
|align="center"| 3/6*8/20+13 | |||
|align="center"| KD/-23 | |||
|align="center"| Su | |||
|align="center"| HL | |||
|valign="bottom" style="border-right:0px;"| [[image:Yuri02_dpA1.png|center]] | |||
|valign="bottom" style="border-left:0px;"| [[image:Yuri02_dpA2.png|center]] | |||
|rowspan="2"|'''Yuri Chou Upper (Kuuga) - dp + P''' | |||
*for dp + A, Yuri does an jumping uppercut that is fairly vertical while for dp + C she will run forward before doing the uppercut | |||
*dp + C can be followed up by another dp + C. Yuri can be be punished before the followup comes out though | |||
*supercancellable on the first hit | |||
*free cancellable into | |||
|- | |||
! dp + [[image:snkc.gif]] | |||
|align="center"| 10/4*8/20+15 | |||
|align="center"| KD/-25 | |||
|align="center"| Su | |||
|align="center"| HL | |||
|valign="bottom" style="border-right:0px;"| [[image:Yuri02_dpC1.png|center]] | |||
|valign="bottom" style="border-left:0px;"| [[image:Yuri02_dpC2.png|center]] | |||
|- | |||
! > dp + [[image:snkc.gif]] | |||
|align="center"| 3/3*21/22+16 | |||
|align="center"| KD/-41 | |||
| | |||
|align="center"| HL | |||
|valign="bottom" style="border-right:0px;"| [[image:Yuri02_dpCdpC1.png|center]] | |||
|valign="bottom" style="border-left:0px;"| [[image:Yuri02_dpCdpC2.png|center]] | |||
|'''Double Yuri Chou Upper (Ura Kuuga) - dp + P (after dp + C)''' | |||
*Yuri does a followup uppercut | |||
*free cancellable out of on the first hit into ground attacks and on the second hit into Raiou Ken qcf + K(air) | |||
|- | |||
|colspan="8" align="center"| '''DMs''' | |||
|- | |||
! <br>qcf,hcb + [[image:snkb.gif]]<br><br> | |||
|align="center"| 8/16/35 | |||
|align="center"| KD/-51 | |||
| | |||
|align="center"| HL | |||
|rowspan="2" colspan="2" | [[image:Yuri02_qcfhcbK.png|center]] | |||
|rowspan="2"|'''Hien Hou'ou Kyaku - qcf hcb + K''' | |||
* Framedata of run. On hit, the framedata is: 6/3(7)1(2)2(2)2/23+40 | |||
* Yuri runs almost almost an entire full screen. If she connects, she will do a combo on the opponent | |||
* if this move is blocked, she does a backflip away from the opponent. The opponent can easily run up and punish her while she is flipping. | |||
* Invincibility: B version: Frame 1-5. D version: Complete startup. | |||
|- | |||
! qcf,hcb + [[image:snkd.gif]] | |||
|align="center"| 8/24/37 | |||
|align="center"| KD/-51 | |||
| | |||
|align="center"| HL | |||
|- | |||
|colspan="8" align="center"| '''SDM''' | |||
|- | |||
! qcfx2+[[image:snkb.gif]] + [[image:snkd.gif]] | |||
|align="center"| 4/3(16)2(3)18/17+14 | |||
|align="center"| KD/-31 | |||
|align="center"| | |||
|align="center"| HL | |||
|valign="bottom" style="border-right:0px;"| [[image:Yuri02_qcfx2BD1.png|center]] | |||
|valign="bottom" style="border-left:0px;"| [[image:Yuri02_qcfx2BD2.png|center]] | |||
| '''Shin! Chou Upper - qcfx2+BD''' | |||
* Yuri does a vertical anti-air. The second hit of this move does a lot of damage, but it only hits if the opponent was hit by the first part of the move, on the ground | |||
* as an anti-air, this move is useless. It will hit but the damage is too low. Best to use this move in combo or possibly as a reversal | |||
* hard knockdown on the last hit | |||
* If the first hit whiffs, framedata is: 4/3*18/17+15 | |||
* Invincible: Complete startup and first active period. | |||
|- | |||
|colspan="8" align="center"| '''HSDM''' | |||
|- | |||
! f,b,hcb + [[image:snkb.gif]] + [[image:snkd.gif]] | |||
|align="center"| 30/24/39 | |||
|align="center"| KD/-22 | |||
|align="center"| | |||
|align="center"| HL | |||
|valign="bottom" style="border-right:0px;"| [[image:Yuri02_HSDM1.png|center]] | |||
|valign="bottom" style="border-left:0px;"| [[image:Yuri02_HSDM2.png|center]] | |||
| '''"Ee!" Hien Hou'ou Kyaku - f b hcb + BD''' | |||
* has similar properties to her DM version, except this one has slower startup but way more damage. Yuri also runs faster across the screen. | |||
* Completely invincible during Startup and active period. On hit immediately cancels to recovery. | |||
|} | |||
==Short Movelist== | |||
* f + A (Overhead if not cancelled into.) | |||
* df + B (Low.) | |||
* df + D | |||
* Air throw. | |||
* qcf + P (May charge. Bigger and fullscreen projectile when fully charged.) | |||
* dp + P | |||
** dp + C (Only after C version.) | |||
* qcb + P | |||
* hcb + K (Throw.) | |||
* air qcf + K | |||
* DM qcf hcb + K | |||
* SDM qcf qcf + BD | |||
* HSDM f b hcb + BD | |||
==Notes== | |||
===Cancellable moves=== | |||
* Close: A, B, C, D | |||
* Far: A | |||
* Crouch: A, C, D | |||
* CD is cancellable into specials and DMs | |||
* df + B is cancellable. | |||
* df + D is cancellable. | |||
===Super cancellable moves=== | |||
* dp + C (1) | |||
===Free cancellable into moves=== | |||
* '''dp + P''' | |||
* air qcf + K | |||
* hcb + K | |||
=== Free cancellable out-of moves=== | |||
* f + A | |||
* '''dp + P''' | |||
* '''dp + C > dp + C''' | |||
===Moves with Invincibility=== | |||
* hcb + K (Feet: "run".) | |||
* DM qcf hcb + B (Full: startup (1st part).) | |||
* DM qcf hcb + D (Full: startup.) | |||
* SDM qcf qcf + BD (Full: startup & active (1st part).) | |||
* HSDM b f hcb + BD (Full: startup & active.) | |||
=== Moves with autoguard=== | |||
(none) | |||
===Other Notes=== | |||
(none) | |||
== Combos == | == Combos == | ||
''' | ===Basic Combos=== | ||
1. | |||
2. | * cl.C > | ||
** '''dp + C > dp + C [30%]''' | |||
** dp + C (1) >> DM qcf hcb + K [40%] {2 stock} | |||
** DM qcf hcb + K [30%] {1 stock} | |||
** SDM qcf qcf + BD [51%] {Max Mode + 1 stock} | |||
** df + D > hcb + K (whiff), (Corner.) | |||
*** dp + C > dp + C {38%} | |||
*** dp + C (1) >> DM qcf hcb + K {48%} {2 stocks} | |||
*** DM qcf hcb + K {38%} {1 stock} | |||
*** HSDM f b hcb + BD {Max Mode + 1 stock} | |||
* cr.A > df + B > | |||
** dp + C > dp + C [28%] | |||
** dp + C (1) >> DM qcf hcb + K [38%] {2 stock} | |||
* cr.B x 2, cr.A > | |||
** '''dp + C > dp + C [28%]''' | |||
** dp + C (1) >> DM qcf hcb + K [38%] {2 stock} | |||
* cr.B, cr.A > | |||
** '''dp + C > dp + C [26%]''' | |||
** dp + C (1) >> DM qcf hcb + K [36%] {2 stock} | |||
** DM qcf hcb + K [26%] {1 stock} | |||
** SDM qcf qcf + BD [45%] {Max Mode + 1 stock} | |||
* Corner: qcf + A (hold), DM qcf hcb + K {45%} | |||
===Maxmode=== | |||
* Already in Max Mode: f + A >> air qcf + K, cl.C > | |||
** SDM qcf qcf + BD {65%} {+1 stock} | |||
** df + D > hcb + K (whiff), (Corner) | |||
*** dp + C > dp + C {50%} | |||
*** dp + C (1) >> DM qcf hcb + K {60%} {+1 stock} | |||
*** DM qcf hcb + K {50%} | |||
*** HSDM f b hcb + BD {85%} {+1 stock} | |||
* Corner & Chang only: cl.C >> BC, run, {2 stock} | |||
** (cl.C > f + A >> qcf + D) x 3, | |||
*** cl.D > df + D > hcb + K (whiff), | |||
**** dp + C > dp + C | |||
**** dp + C (1) >> DM qcf hcb + K {100%} {+1 stock} | |||
**** DM qcf hcb + K | |||
**** HSDM f b hcb + BD {+1 stock} | |||
== Strategies == | == Strategies == | ||
| Line 93: | Line 599: | ||
Yuri has incredibly good keep-away strategies, but can also excel with some intense rushdown tactics. Her hop D has good priority, and she has some of the best crouch B's in the game, which are very easy to hit confirm. | Yuri has incredibly good keep-away strategies, but can also excel with some intense rushdown tactics. Her hop D has good priority, and she has some of the best crouch B's in the game, which are very easy to hit confirm. | ||
For keep-away, her qcf+K | For keep-away, her air qcf + K fireball is just too good. It would be recommended to use the air qcf + B version since it does not go as vertical as the air qcf + D. It is also best to jump back with this move, since even if the opponent rolls it, Yuri will landed backwards and recovered. Usually when someone spams the air fireballs with Yuri, the opponent will get jumpy or start rolling. Thus, it is usually a good idea to jump back and not throw a fireball, to see if they still react to your jump as if you had thrown a fireball. If they rolled, punish them as they come out of the roll with any combo. If they decided to do a jump attack, dp + A will usually beat them out. Her vertical high jump D is also a very high priority jump attack, best used for intercepting the opponent's jump attempts. Therefore, you can use this move instead, if they start anticipating your air fireballs. Another good strategy would be to do a run up crouch C anti-air after tossing out a number of air fireballs. The run up crouch C works in a similar way that Iori's run up close C does - it will stuff any jump attempt. Running up and doing far B instead is safer since crouch C cannot be whiff cancelled and takes longer to recover. In addition, far B can be done from a distance, and recovers faster, but does less damage. | ||
Yuri also has great rushdown mindgames. Using any of the attack strings listed that end with qcf+A, cannot be punished even if the opponent guard rolls the attack before. For example, her Crouch B, Crouch A, df+B, qcf+A or crouch B, Crouch A, Crouch D, qcf+A cannot be punished even if the opponent guard rolls the df+B and crouch D. The only problem with this attack string is that the qcf+A does not actually make contact with the opponent if he's standing still, but it will hit him if he attacks, moves forward slightly, or jumps. The attack string is more useful with qcf+C but if the opponent guard rolls before this move comes out, he can punish Yuri. Mind you that a guard roll must be used to punish the move. If the opponent simply did a normal roll after the df+B or crouch D, they will not be able to punish her. | Yuri also has great rushdown mindgames. Using any of the attack strings listed that end with qcf + A, cannot be punished even if the opponent guard rolls the attack before. For example, her Crouch B, Crouch A, df + B, qcf + A or crouch B, Crouch A, Crouch D, qcf + A cannot be punished even if the opponent guard rolls the df + B and crouch D. The only problem with this attack string is that the qcf + A does not actually make contact with the opponent if he's standing still, but it will hit him if he attacks, moves forward slightly, or jumps. The attack string is more useful with qcf + C but if the opponent guard rolls before this move comes out, he can punish Yuri. Mind you that a guard roll must be used to punish the move. If the opponent simply did a normal roll after the df + B or crouch D, they will not be able to punish her. | ||
Yuri's crouch D and close D(especially) can be cancelled very late if they make contact with the opponent. Thus, it is possible to cancel these moves as late as possible, into her hcb+K running throw and have it still hit, if the opponent blocked the normal. This is not the case if you cancel her close C or crouch C into hcb+K, since they will still be in blockstun, resulting in hcb+K whiffing. Cancelling a delayed close D into qcf+A can result in some good mindgames. Followup the delayed close D with what is appropriate. If the opponent guard rolls the close D, then it is best to not followup with anything. If the opponent keeps blocking or does a normal roll, cancelling to hcb+K will get him usually. The cancel to qcf+A will hit them if they decide to attack right after the close D, or jump. | Yuri's crouch D and close D(especially) can be cancelled very late if they make contact with the opponent. Thus, it is possible to cancel these moves as late as possible, into her hcb + K running throw and have it still hit, if the opponent blocked the normal. This is not the case if you cancel her close C or crouch C into hcb + K, since they will still be in blockstun, resulting in hcb + K whiffing. Cancelling a delayed close D into qcf + A can result in some good mindgames. Followup the delayed close D with what is appropriate. If the opponent guard rolls the close D, then it is best to not followup with anything. If the opponent keeps blocking or does a normal roll, cancelling to hcb + K will get him usually. The cancel to qcf + A will hit them if they decide to attack right after the close D, or jump. | ||
Another tricky mixup is her Crouch B, ~Crouch B, Crouch A, qcf+A which again cannot be punished, even if the opponent guard rolls. The qcf+A can be replaced with an hcb+K, which will still throw an opponent even if they blocked the crouch A. A similar mixup exists with her Close C/D, df+B, qcf+C. The qcf+C can be replaced with an hcb+K which will hit them if they are blocking. This does not work if you use a close/crouch A, df+B, hcb+K since the opponent stays in block/hit stun. | Another tricky mixup is her Crouch B, ~Crouch B, Crouch A, qcf + A which again cannot be punished, even if the opponent guard rolls. The qcf + A can be replaced with an hcb + K, which will still throw an opponent even if they blocked the crouch A. A similar mixup exists with her Close C/D, df + B, qcf + C. The qcf + C can be replaced with an hcb + K which will hit them if they are blocking. This does not work if you use a close/crouch A, df + B, hcb + K since the opponent stays in block/hit stun. | ||
If you have atleast two stocks, you can do a normal such as close D, then cancel with BC, immediately do a f+A overhead and free cancel to qcf+B in the air. From here you can followup with any combo listed in the combo section. This is a great setup since you are doing an overhead immediately after a strong normal, which is unexpected. This can also work well if you started with a sweep, assuming the opponent blocked the sweep. If the opponent somehow blocks the low attack and the f+A overhead, Yuri has a frame advantage on the air fireball anyway and can followup with any of the other mixups mentioned. | If you have atleast two stocks, you can do a normal such as close D, then cancel with BC, immediately do a f + A overhead and free cancel to qcf + B in the air. From here you can followup with any combo listed in the combo section. This is a great setup since you are doing an overhead immediately after a strong normal, which is unexpected. This can also work well if you started with a sweep, assuming the opponent blocked the sweep. If the opponent somehow blocks the low attack and the f + A overhead, Yuri has a frame advantage on the air fireball anyway and can followup with any of the other mixups mentioned. | ||
-incomplete- | -incomplete- | ||
Latest revision as of 23:59, 23 July 2020
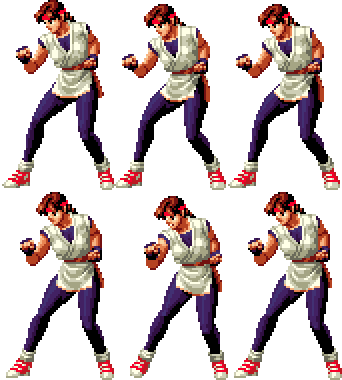
General Info
Crouch height: Low
Jump: 4/36/1
Hop: 4/27/1
Dash: 3/10~∞/3
Backdash: 3/13/3
Wakeup: 13 frames
Recovery roll: 23 frames
| Stand | Crouch | Jump | Grab | Run |
|---|---|---|---|---|

|

|

|
Colors

|

|

|

|
Movelist
Short Movelist
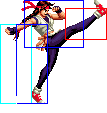
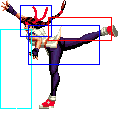
- f + A (Overhead if not cancelled into.)
- df + B (Low.)
- df + D
- Air throw.
- qcf + P (May charge. Bigger and fullscreen projectile when fully charged.)
- dp + P
- dp + C (Only after C version.)
- qcb + P
- hcb + K (Throw.)
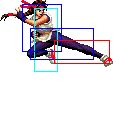
- air qcf + K
- DM qcf hcb + K
- SDM qcf qcf + BD
- HSDM f b hcb + BD
Notes
Cancellable moves
- Close: A, B, C, D
- Far: A
- Crouch: A, C, D
- CD is cancellable into specials and DMs
- df + B is cancellable.
- df + D is cancellable.
Super cancellable moves
- dp + C (1)
Free cancellable into moves
- dp + P
- air qcf + K
- hcb + K
Free cancellable out-of moves
- f + A
- dp + P
- dp + C > dp + C
Moves with Invincibility
- hcb + K (Feet: "run".)
- DM qcf hcb + B (Full: startup (1st part).)
- DM qcf hcb + D (Full: startup.)
- SDM qcf qcf + BD (Full: startup & active (1st part).)
- HSDM b f hcb + BD (Full: startup & active.)
Moves with autoguard
(none)
Other Notes
(none)
Combos
Basic Combos
- cl.C >
- dp + C > dp + C [30%]
- dp + C (1) >> DM qcf hcb + K [40%] {2 stock}
- DM qcf hcb + K [30%] {1 stock}
- SDM qcf qcf + BD [51%] {Max Mode + 1 stock}
- df + D > hcb + K (whiff), (Corner.)
- dp + C > dp + C {38%}
- dp + C (1) >> DM qcf hcb + K {48%} {2 stocks}
- DM qcf hcb + K {38%} {1 stock}
- HSDM f b hcb + BD {Max Mode + 1 stock}
- cr.A > df + B >
- dp + C > dp + C [28%]
- dp + C (1) >> DM qcf hcb + K [38%] {2 stock}
- cr.B x 2, cr.A >
- dp + C > dp + C [28%]
- dp + C (1) >> DM qcf hcb + K [38%] {2 stock}
- cr.B, cr.A >
- dp + C > dp + C [26%]
- dp + C (1) >> DM qcf hcb + K [36%] {2 stock}
- DM qcf hcb + K [26%] {1 stock}
- SDM qcf qcf + BD [45%] {Max Mode + 1 stock}
- Corner: qcf + A (hold), DM qcf hcb + K {45%}
Maxmode
- Already in Max Mode: f + A >> air qcf + K, cl.C >
- SDM qcf qcf + BD {65%} {+1 stock}
- df + D > hcb + K (whiff), (Corner)
- dp + C > dp + C {50%}
- dp + C (1) >> DM qcf hcb + K {60%} {+1 stock}
- DM qcf hcb + K {50%}
- HSDM f b hcb + BD {85%} {+1 stock}
- Corner & Chang only: cl.C >> BC, run, {2 stock}
- (cl.C > f + A >> qcf + D) x 3,
- cl.D > df + D > hcb + K (whiff),
- dp + C > dp + C
- dp + C (1) >> DM qcf hcb + K {100%} {+1 stock}
- DM qcf hcb + K
- HSDM f b hcb + BD {+1 stock}
- cl.D > df + D > hcb + K (whiff),
- (cl.C > f + A >> qcf + D) x 3,
Strategies
Yuri has incredibly good keep-away strategies, but can also excel with some intense rushdown tactics. Her hop D has good priority, and she has some of the best crouch B's in the game, which are very easy to hit confirm.
For keep-away, her air qcf + K fireball is just too good. It would be recommended to use the air qcf + B version since it does not go as vertical as the air qcf + D. It is also best to jump back with this move, since even if the opponent rolls it, Yuri will landed backwards and recovered. Usually when someone spams the air fireballs with Yuri, the opponent will get jumpy or start rolling. Thus, it is usually a good idea to jump back and not throw a fireball, to see if they still react to your jump as if you had thrown a fireball. If they rolled, punish them as they come out of the roll with any combo. If they decided to do a jump attack, dp + A will usually beat them out. Her vertical high jump D is also a very high priority jump attack, best used for intercepting the opponent's jump attempts. Therefore, you can use this move instead, if they start anticipating your air fireballs. Another good strategy would be to do a run up crouch C anti-air after tossing out a number of air fireballs. The run up crouch C works in a similar way that Iori's run up close C does - it will stuff any jump attempt. Running up and doing far B instead is safer since crouch C cannot be whiff cancelled and takes longer to recover. In addition, far B can be done from a distance, and recovers faster, but does less damage.
Yuri also has great rushdown mindgames. Using any of the attack strings listed that end with qcf + A, cannot be punished even if the opponent guard rolls the attack before. For example, her Crouch B, Crouch A, df + B, qcf + A or crouch B, Crouch A, Crouch D, qcf + A cannot be punished even if the opponent guard rolls the df + B and crouch D. The only problem with this attack string is that the qcf + A does not actually make contact with the opponent if he's standing still, but it will hit him if he attacks, moves forward slightly, or jumps. The attack string is more useful with qcf + C but if the opponent guard rolls before this move comes out, he can punish Yuri. Mind you that a guard roll must be used to punish the move. If the opponent simply did a normal roll after the df + B or crouch D, they will not be able to punish her.
Yuri's crouch D and close D(especially) can be cancelled very late if they make contact with the opponent. Thus, it is possible to cancel these moves as late as possible, into her hcb + K running throw and have it still hit, if the opponent blocked the normal. This is not the case if you cancel her close C or crouch C into hcb + K, since they will still be in blockstun, resulting in hcb + K whiffing. Cancelling a delayed close D into qcf + A can result in some good mindgames. Followup the delayed close D with what is appropriate. If the opponent guard rolls the close D, then it is best to not followup with anything. If the opponent keeps blocking or does a normal roll, cancelling to hcb + K will get him usually. The cancel to qcf + A will hit them if they decide to attack right after the close D, or jump.
Another tricky mixup is her Crouch B, ~Crouch B, Crouch A, qcf + A which again cannot be punished, even if the opponent guard rolls. The qcf + A can be replaced with an hcb + K, which will still throw an opponent even if they blocked the crouch A. A similar mixup exists with her Close C/D, df + B, qcf + C. The qcf + C can be replaced with an hcb + K which will hit them if they are blocking. This does not work if you use a close/crouch A, df + B, hcb + K since the opponent stays in block/hit stun.
If you have atleast two stocks, you can do a normal such as close D, then cancel with BC, immediately do a f + A overhead and free cancel to qcf + B in the air. From here you can followup with any combo listed in the combo section. This is a great setup since you are doing an overhead immediately after a strong normal, which is unexpected. This can also work well if you started with a sweep, assuming the opponent blocked the sweep. If the opponent somehow blocks the low attack and the f + A overhead, Yuri has a frame advantage on the air fireball anyway and can followup with any of the other mixups mentioned.
-incomplete-
