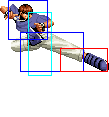
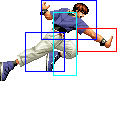
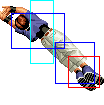
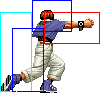
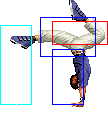
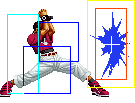
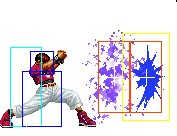
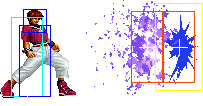
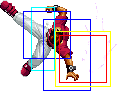
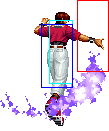
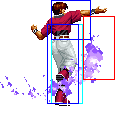
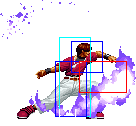
No edit summary |
m (Scanman moved page Orochi Chris 02 to The King of Fighters 2002/Orochi Chris: moving 2002 Orochi Chris page to be a subpage) |
||
| (57 intermediate revisions by 7 users not shown) | |||
| Line 1: | Line 1: | ||
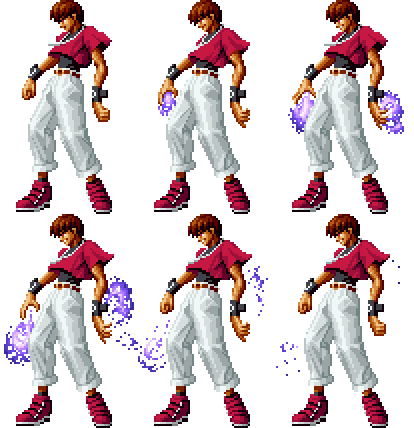
== | [[image:OChris02_stance.gif|right]] | ||
==General Info== | |||
Crouch height: Medium<br> | |||
Jump: 4/31/1<br> | |||
Hop: 4/23/1<br> | |||
Dash: 3/10~∞/3<br> | |||
Backdash: 3/21/3<br> | |||
Wakeup: 29 frames<br> | |||
Recovery roll: 20 frames<br> | |||
{| | |||
! Stand | |||
! Crouch | |||
! Jump | |||
! Grab | |||
! Run | |||
|- | |||
|valign="bottom"| [[image:OChris02_stand.png]] | |||
|valign="bottom"| [[image:OChris02_crouch.png]] | |||
|valign="bottom"| [[image:OChris02_jump.png]] | |||
|valign="bottom"| [[image:OChris02_grab.png]] | |||
|valign="bottom"| [[image:OChris02_run.png]] | |||
|} | |||
===Colors=== | |||
{| | |||
! [[image:snka.gif]] | |||
! [[image:snkb.gif]] | |||
! [[image:snkc.gif]] | |||
! [[image:snkd.gif]] | |||
|- | |||
| [[image:OChris02_colorA.png]] | |||
| [[image:OChris02_colorB.png]] | |||
| [[image:OChris02_colorC.png]] | |||
| [[image:OChris02_colorD.png]] | |||
|} | |||
3. Setsudan no Koto - df+B<br> | ==[[The_King_of_Fighters_2002/Normals_Guide|Movelist]]== | ||
- | {|border="1" | ||
- free cancellable out of | ! | ||
! Frames | |||
! Advantage | |||
! Cancel | |||
! Block | |||
!colspan="2"| Hitbox | |||
! Notes | |||
|- | |||
|colspan="8" align="center"| '''Standing Close''' | |||
|- | |||
! [[image:snka.gif]] | |||
|align="center"| 4/3/5 | |||
|align="center"| +4/+2 | |||
|align="center"| R,C,S,Su | |||
|align="center"| HL | |||
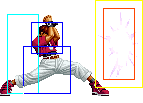
|colspan="2" | [[image:Chris02_clA.png|center]] | |||
| | |||
|- | |||
! [[image:snkb.gif]] | |||
|align="center"| 4/3/7 | |||
|align="center"| +2/0 | |||
|align="center"| C,S,Su | |||
|align="center"| HL | |||
|colspan="2" | [[image:Chris02_clB.png|center]] | |||
| | |||
|- | |||
! [[image:snkc.gif]] | |||
|align="center"| 3/3+3/29 | |||
|align="center"| -15/-17 | |||
|align="center"| C,S,Su | |||
|align="center"| HL | |||
|valign="bottom" style="border-right:0px;"| [[image:Chris02_clC1.png|center]] | |||
|valign="bottom" style="border-left:0px;"| [[image:Chris02_clC2.png|center]] | |||
| | |||
|- | |||
! [[image:snkd.gif]] | |||
|align="center"| 4/4/20 | |||
|align="center"| -4/-6 | |||
|align="center"| C,S,Su | |||
|align="center"| HL | |||
|colspan="2"| [[image:Chris02_clD.png|center]] | |||
| | |||
|- | |||
|colspan="8" align="center"| '''Standing Far''' | |||
|- | |||
! [[image:snka.gif]] | |||
|align="center"| 4/3/5 | |||
|align="center"| +4/+2 | |||
|align="center"| R,C,S,Su | |||
|align="center"| HL | |||
|colspan="2" | [[image:Chris02_clA.png|center]] | |||
| | |||
|- | |||
! [[image:snkb.gif]] | |||
|align="center"| 7/6/9 | |||
|align="center"| -4/-6 | |||
| | |||
|align="center"| HL | |||
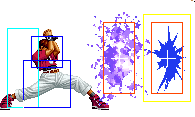
|colspan="2" | [[image:Chris02_stB.png|center]] | |||
| | |||
|- | |||
! [[image:snkc.gif]] | |||
|align="center"| 7/3(12)6/17 | |||
|align="center"| -3/-5 | |||
|align="center"| C,S,Su | |||
|align="center"| HL | |||
|valign="bottom" style="border-right:0px;"| [[image:Chris02_stC1.png|center]] | |||
|valign="bottom" style="border-left:0px;"| [[image:Chris02_stC2.png|center]] | |||
| | |||
|- | |||
! [[image:snkd.gif]] | |||
|align="center"| 8/4/29 | |||
|align="center"| -13/-15 | |||
| | |||
|align="center"| HL | |||
|colspan="2"| [[image:Chris02_stD.png|center]] | |||
| | |||
|- | |||
! [[image:snkc.gif]] + [[image:snkd.gif]] | |||
|align="center"| 15/3/28 | |||
|align="center"| KD/-9 | |||
|align="center"| S,Su | |||
|align="center"| HL | |||
|colspan="2"| [[image:Chris02_stCD.png|center]] | |||
|align="center"| Goes over lows | |||
|- | |||
|colspan="8" align="center"| '''Crouching''' | |||
|- | |||
! [[image:snka.gif]] | |||
|align="center"| 4/3/5 | |||
|align="center"| +4/+2 | |||
|align="center"| R,C,S,Su | |||
|align="center"| HL | |||
|colspan="2" | [[image:Chris02_crA.png|center]] | |||
| | |||
|- | |||
! [[image:snkb.gif]] | |||
|align="center"| 3/4/5 | |||
|align="center"| +3/+1 | |||
|align="center"| R | |||
|align="center"| L | |||
|colspan="2" | [[image:Chris02_crB.png|center]] | |||
| | |||
|- | |||
! [[image:snkc.gif]] | |||
|align="center"| 3/5*3/17 | |||
|align="center"| 0/-2 | |||
|align="center"| C,S,Su | |||
|align="center"| HL | |||
|valign="bottom" style="border-right:0px;"| [[image:Chris02_crC1.png|center]] | |||
|valign="bottom" style="border-left:0px;"| [[image:Chris02_crC2.png|center]] | |||
|Only first hit is cancellable | |||
|- | |||
! [[image:snkd.gif]] | |||
|align="center"| 8/7/19 | |||
|align="center"| KD/-8 | |||
| | |||
|align="center"| L | |||
|colspan="2" | [[image:Chris02_crD.png|center]] | |||
| | |||
|- | |||
|colspan="8" align="center"| '''Jump''' | |||
|- | |||
! [[image:snka.gif]] | |||
|align="center"| 4/9/- | |||
|align="center"| -/- | |||
| | |||
|align="center"| H | |||
|colspan="2" | [[image:Chris02_jA.png|center]] | |||
| | |||
|- | |||
! [[image:snkb.gif]] | |||
|align="center"| 4/9/- | |||
|align="center"| -/- | |||
| | |||
|align="center"| H | |||
|colspan="2" | [[image:Chris02_jB.png|center]] | |||
| | |||
|- | |||
! [[image:snkc.gif]] | |||
|align="center"| 5/4/- | |||
|align="center"| -/- | |||
| | |||
|align="center"| H | |||
|colspan="2" | [[image:Chris02_jC.png|center]] | |||
| | |||
|- | |||
! [[image:snkd.gif]] | |||
|align="center"| 5/4/- | |||
|align="center"| -/- | |||
| | |||
|align="center"| H | |||
|colspan="2" | [[image:Chris02_jD.png|center]] | |||
| | |||
|- | |||
! [[image:snkc.gif]] + [[image:snkd.gif]] | |||
|align="center"| 16/3+3/- | |||
|align="center"| KD/- | |||
|align="center"| S | |||
|align="center"| HL | |||
|valign="bottom" style="border-right:0px;"| [[image:Chris02_jCD1.png|center]] | |||
|valign="bottom" style="border-left:0px;"| [[image:Chris02_jCD2.png|center]] | |||
| | |||
|- | |||
|colspan="8" align="center"| '''Neutral Jump''' | |||
|- | |||
! [[image:snka.gif]] | |||
|align="center"| 4/9/- | |||
|align="center"| -/- | |||
| | |||
|align="center"| H | |||
|colspan="2" | [[image:Chris02_jA.png|center]] | |||
| | |||
|- | |||
! [[image:snkb.gif]] | |||
|align="center"| 5/9/- | |||
|align="center"| -/- | |||
| | |||
|align="center"| H | |||
|colspan="2" | [[image:Chris02_juB.png|center]] | |||
| | |||
|- | |||
! [[image:snkc.gif]] | |||
|align="center"| 5/4/- | |||
|align="center"| -/- | |||
|align="center"| S | |||
|align="center"| H | |||
|colspan="2" | [[image:Chris02_jC.png|center]] | |||
| | |||
|- | |||
! [[image:snkd.gif]] | |||
|align="center"| 5/4/- | |||
|align="center"| -/- | |||
| | |||
|align="center"| H | |||
|colspan="2" | [[image:Chris02_jD.png|center]] | |||
| | |||
|- | |||
|colspan="8" align="center"| '''Hop''' | |||
|- | |||
! [[image:snka.gif]] | |||
|align="center"| 4/9/- | |||
|align="center"| -/- | |||
| | |||
|align="center"| H | |||
|colspan="2" | [[image:Chris02_jA.png|center]] | |||
| | |||
|- | |||
! [[image:snkb.gif]] | |||
|align="center"| 4/9/- | |||
|align="center"| -/- | |||
| | |||
|align="center"| H | |||
|colspan="2" | [[image:Chris02_jB.png|center]] | |||
| | |||
|- | |||
! [[image:snkc.gif]] | |||
|align="center"| 5/4/- | |||
|align="center"| -/- | |||
|align="center"| S | |||
|align="center"| H | |||
|colspan="2" | [[image:Chris02_jC.png|center]] | |||
| | |||
|- | |||
! [[image:snkd.gif]] | |||
|align="center"| 5/4/- | |||
|align="center"| -/- | |||
| | |||
|align="center"| H | |||
|colspan="2" | [[image:Chris02_jD.png|center]] | |||
| | |||
|- | |||
! [[image:snkc.gif]] + [[image:snkd.gif]] | |||
|align="center"| 14/3+3/- | |||
|align="center"| KD/- | |||
|align="center"| S | |||
|align="center"| HL | |||
|valign="bottom" style="border-right:0px;"| [[image:Chris02_jCD1.png|center]] | |||
|valign="bottom" style="border-left:0px;"| [[image:Chris02_jCD2.png|center]] | |||
| | |||
|- | |||
|colspan="8" align="center"| '''Command Normals''' | |||
|- | |||
! f + [[image:snka.gif]] | |||
|align="center"| 10/3/26 | |||
|align="center"| -9/-11 | |||
|align="center"| S,Su | |||
|align="center"| HL | |||
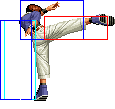
|colspan="2" | [[image:Chris02_fA.png|center]] | |||
| '''Muyou no Ono - f + A''' | |||
* does very little damage but comes out fast enough to punish some fast recovering moves from a distance | |||
|- | |||
! <br>f + [[image:snkb.gif]]<br><br> | |||
|align="center"| 10/2(2)2/23 | |||
|align="center"| -5/-7 | |||
| | |||
|align="center"| HL*H | |||
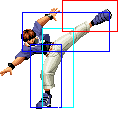
|rowspan="2" valign="bottom" style="border-right:0px;"| [[image:Chris02_fB1.png|center]] | |||
|rowspan="2" valign="bottom" style="border-left:0px;"| [[image:Chris02_fB2.png|center]] | |||
| | |||
|- | |||
! f + [[image:snkb.gif]]<br>(cancel) | |||
|align="center"| 10/2(2)2/23 | |||
|align="center"| -5/-7 | |||
|align="center"| S,Su | |||
|align="center"| HL | |||
| | |||
|- | |||
! df + [[image:snkb.gif]] | |||
|align="center"| 8/13/10 | |||
|align="center"| -3/-5 | |||
| | |||
|align="center"| L | |||
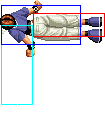
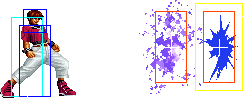
|colspan="2" | [[image:Chris02_dfB.png|center]] | |||
| '''Setsudan no Koto - df + B''' | |||
* safe on block from many distances though it's best if it is spaced | |||
|- | |||
|colspan="8" align="center"| '''Special Moves''' | |||
|- | |||
!rowspan="2"| qcf + [[image:snka.gif]] | |||
|rowspan="2" align="center"| (30, 26)、(1段目)(0, 8+4)、(2段目)(9, 8+4)、(3段目)(18, 8+4) | |||
|rowspan="2" align="center"| | |||
|rowspan="2" align="center"| | |||
|rowspan="2" align="center"| | |||
|valign="bottom" style="border-right:0px; border-bottom:0px;"| [[image:OChris02_qcfA1.png|center]] | |||
|valign="bottom" style="border-left:0px; border-bottom:0px;"| [[image:OChris02_qcfA2.png|center]] | |||
|rowspan="4"| '''Taiyou wo Iru Honoo - qcf + P''' | |||
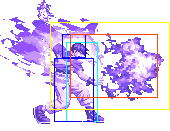
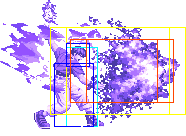
* Chris sends forth three balls of flame that travel forward | |||
* qcf + A comes out faster than qcf + C and recovers faster allowing the possibility of comboing after them | |||
* qcf + C projectiles move faster than qcf + A and travel further (almost full screen length) | |||
|- | |||
|colspan="2" valign="bottom" style="border-top:0px;"| [[image:OChris02_qcfA3.png|center]] | |||
|- | |||
!rowspan="2"| qcf + [[image:snkc.gif]] | |||
|rowspan="2" align="center"| (33, 28)、(1段目)(0, 8+4)、(2段目)(9, 8+4)、(3段目)(18, 8+4) | |||
|rowspan="2" align="center"| | |||
|rowspan="2" align="center"| | |||
|rowspan="2" align="center"| | |||
|valign="bottom" style="border-right:0px; border-bottom:0px;"| [[image:OChris02_qcfC1.png|center]] | |||
|valign="bottom" style="border-left:0px; border-bottom:0px;"| [[image:OChris02_qcfC2.png|center]] | |||
|- | |||
|colspan="2" valign="bottom" style="border-top:0px;"| [[image:OChris02_qcfC3.png|center]] | |||
|- | |||
! <br>qcb + [[image:snka.gif]]<br><br> | |||
|align="center"| 5+11, 4+4, 9+19 | |||
|align="center"| | |||
|align="center"| | |||
|align="center"| HL | |||
|rowspan="2" valign="bottom" style="border-right:0px;"| [[image:OChris02_qcbP1.png|center]] | |||
|rowspan="2" valign="bottom" style="border-left:0px;"| [[image:OChris02_qcbP2.png|center]] | |||
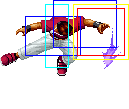
|rowspan="2"| '''Kagami wo Hofuru Honoo - qcb + P''' | |||
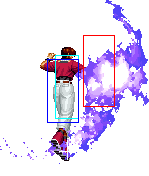
* Orochi Chris jumps forward with a flame in front of him | |||
* the flame can negate projectiles but it comes out too slow and recovers too slow for this to be practical | |||
* does not combo against crouching characters | |||
* free cancellable into | |||
|- | |||
! qcb + [[image:snkc.gif]] | |||
|align="center"| 5+11, 4+4, 9+21 | |||
|align="center"| | |||
|align="center"| | |||
|align="center"| HL | |||
|- | |||
! dp + [[image:snka.gif]] | |||
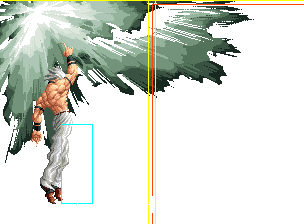
|align="center"| 5 + 2[胸上M], 2[胸上M], 5, 8, 19+11 | |||
|align="center"| | |||
|align="center"| | |||
|align="center"| | |||
|valign="bottom" style="border-right:0px;"| [[image:OChris02_dpA1.png|center]] | |||
|valign="bottom" style="border-left:0px;"| [[image:OChris02_dpA2.png|center]] | |||
|rowspan="3"| '''Tsuki wo Tsumu Honoo - dp + P''' | |||
* Chris performs a rising uppercut attack that comes out fairly quick | |||
* this move does not have much vertical range compared to other dragon punch moves. dp + A does one hit in which Chris moves forward before rising, while dp + C does 4 hits, where he rises during the 4th | |||
* free cancellable into | |||
* free cancellable out of on the first three hits | |||
* supercancellable on the third hit | |||
|- | |||
!rowspan="2"| dp + [[image:snkc.gif]] | |||
|rowspan="2" align="center"| 8, 3, 6, 3, 15, 3, 7, 13, 25+13 | |||
|rowspan="2" align="center"| | |||
|rowspan="2" align="center"| | |||
|rowspan="2" align="center"| | |||
|valign="bottom" style="border-right:0px; border-bottom:0px;"| [[image:OChris02_dpC1.png|center]] | |||
|valign="bottom" style="border-left:0px; border-bottom:0px;"| [[image:OChris02_dpC2.png|center]] | |||
|- | |||
|valign="bottom" style="border-right:0px; border-top:0px;"| [[image:OChris02_dpC3.png|center]] | |||
|valign="bottom" style="border-left:0px; border-top:0px;"| [[image:OChris02_dpC4.png|center]] | |||
|- | |||
! <br>hcf + [[image:snkb.gif]]<br><br> | |||
|align="center"| 5[全身M] + 4, 2, 12, 3, 5, 3, 5, 3, 6, 4, 6, 4, 22 | |||
|align="center"| | |||
|align="center"| | |||
|align="center"| Grab | |||
|rowspan="2" colspan="2"| [[image:OChris02_hcfK.png|center]] | |||
|rowspan="2"| '''Shishi wo Kamu Honoo - hcf + K''' | |||
* a proximity unblockable attack which only comes out if Chris is near the opponent | |||
* the first hit causes guard crush | |||
* last hit is cancellable into special moves and supercancellable, though the only cancellable move that will combo after it is dp + A | |||
* free cancellable out of on all hits | |||
|- | |||
! hcf + [[image:snkd.gif]] | |||
|align="center"| 5[全身M] + 4, 2, 12, 3, 5, 3, 5, 3, 6, 4, 6, 4, 22 | |||
|align="center"| | |||
|align="center"| | |||
|align="center"| Grab | |||
|- | |||
|colspan="8" align="center"| '''DMs''' | |||
|- | |||
! <br>qcb,hcf + [[image:snka.gif]]<br><br> | |||
|align="center"| {1 + 28[暗転] + 1}[全身M] + {0 ~ 90}[膝下M] + 16, 21, 37 | |||
|align="center"| | |||
|align="center"| | |||
|align="center"| HL | |||
|rowspan="2" colspan="2"| [[image:OChris02_qcbhcfP.png|center]] | |||
|rowspan="2"| '''Ankoku Orochi Nagi - qcb hcf + P (can be held)''' | |||
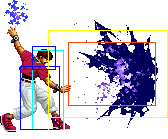
* Chris creates a flame, then throws it forward, covering a fairly wide area in front of him | |||
* the A version comes out faster than the C version | |||
* can be delayed by holding the P button used, but is not useful | |||
* works very similar to Kyo's qcb hcf + P except Chris has no invinciblity on his | |||
|- | |||
! qcb,hcf + [[image:snkc.gif]] | |||
|align="center"| {1 + 28[暗転] + 1}[全身M] + {0 ~ 90}[膝下M] + 19, 21, 40 | |||
|align="center"| | |||
|align="center"| | |||
|align="center"| HL | |||
|- | |||
|colspan="8" align="center"| '''SDM''' | |||
|- | |||
!rowspan="2"| qcb,hcf + [[image:snka.gif]] + [[image:snkc.gif]] | |||
|rowspan="2" align="center"| {1 + 28[暗転] + 1}[全身M] + {0 ~ 90}[膝下M] + 19, {[1](0, 16), [2](11, 16), [3](22, 21)}, 20 | |||
|rowspan="2" align="center"| | |||
|rowspan="2" align="center"| | |||
|rowspan="2" align="center"| | |||
|valign="bottom" style="border-right:0px; border-bottom:0px;"| [[image:OChris02_qcbhcfP.png|center]] | |||
|valign="bottom" style="border-left:0px; border-bottom:0px;"| [[image:OChris02_SDM2.png|center]] | |||
|rowspan="2"| '''Ankoku Orochi Nagi - qcb hcf + AC (can be held)''' | |||
* works similar to his normal DM version except the flame is larger, doing 3 hits | |||
* cannot be comboed into normally | |||
|- | |||
|colspan="2" valign="bottom" style="border-top:0px;"| [[image:OChris02_SDM3.png|center]] | |||
|- | |||
|colspan="8" align="center"| '''HSDM''' | |||
|- | |||
! [[image:snkd.gif]],[[image:snkc.gif]],d,[[image:snkc.gif]],[[image:snkd.gif]] | |||
|align="center"| ( {5 + 28[暗転] + 8}[全身M] + 28 + {1 + 13, 50, 20+27}[全身M] + 35),(8ヒット時){(1, 6)*7 + (1, 0)},(15ヒット時){(1, 0, 1, 5)*7 + (1, 0)} | |||
|align="center"| | |||
|align="center"| | |||
|align="center"| HL | |||
|colspan="2" | [[image:OChris02_HSDM.png|center]] | |||
| '''Sanagi wo Yaburi, Chou wa Mau - D, C, d, C, D''' | |||
* Orochi Chris transforms into Orochi and performs an attack that covers the entire screen for about a second | |||
* Chris is invincible during this attack | |||
|} | |||
==Short Movelist== | |||
* f + A | |||
* f + B (Overhead (2) if not cancelled into.) | |||
* df + B (Low.) | |||
* qcf + P | |||
* dp + P | |||
* qcb + P | |||
* Close, hcf + K (Proximity unblockable.) | |||
** Any other special. (Only on hit.) | |||
* DM qcb hcf + P (May charge.) | |||
* SDM qcb hcf + AC (May charge.) | |||
* HSDM D C d C D (Hit anywhere on the screen.) | |||
== Notes == | |||
===Cancellable moves=== | |||
* Close: A, B, C, D (Special moves and DMs.) | |||
* Far: A, C (1) | |||
* Crouch: A, C (1) | |||
* CD is cancellable into special moves and DMs. | |||
* f + A is cancellable. | |||
* f + B (2) is cancellable only when you cancel into it. | |||
===Super cancellable moves=== | |||
* dp + C (3) | |||
* Close, hcf + K (Last hit.) | |||
===Free cancellable into moves=== | |||
* qcb + P | |||
* dp + P | |||
=== Free cancellable out-of moves=== | |||
* f + B | |||
* df + B | |||
* dp + C (1-3) | |||
* Close, hcf + K | |||
===Moves with Invincibility=== | |||
* HSDM D C d C D (Full: startup & active & recovery.) | |||
=== Moves with autoguard=== | |||
(none) | |||
===Other Notes=== | |||
* D throw is a backturned hard knockdown. | |||
== Combos == | == Combos == | ||
''' | === Basic Combos === | ||
2. | * cl.C / (cr.B, cr.A) > | ||
** f + A > [11.1%] | |||
*** '''DM qcb hcf + A [38.6%] {1 stock}''' | |||
*** '''hcf + K, [24.7%]''' | |||
**** '''> dp + A [35.6%]''' | |||
**** j.D (Corner.) [34.2%] | |||
**** st.D (Corner. Timming required.) [35.9%] | |||
*** dp + C [25.8%] | |||
*** '''dp + C (3) >> DM qcb hcf + A [52.8%] {2 stocks}''' | |||
*** qcb + C (Standing.) [21.2%] | |||
*** dp + A [19.8%] | |||
** f + B (2) > [15.9] | |||
*** qcb + C (Standing & close. A version will only combo in the corner.) [27.1%] | |||
** df + B [15.2%] | |||
Damage above is based on cl.C as starter. | |||
About cl.C / (cr.B, cr.A): cl.C deals more damage (~+5%). If you want to use just cr.A, the combos will deal ~-7% less damage. If you are close, you may replace cr.A for cl.A / cl.B for ~+1% more damage (cl.A only against standing). | |||
About f + A: if you skip it, the combo damage is reduced by ~-2%. If you started with a weak attack and skip this, only hcf + K or dp +P will combo. Keep in mind that while weak attack > f + A leave you closer than just a weak attack, hard attack > f + A leave you further than just a hard attack, so, starting from a hard attack, you should skip f + A if you are not very close and want to combo into hcf + K or dp +P. | |||
* qcf + A, | |||
1. | ** DM qcb hcf + A [40.6%] {1 stock} | ||
** dp + C (Close.) [28.3%] | |||
** dp + C (3) >> DM qcb hcf + A (Close.) [53.8%] {2 stocks} | |||
** qcb + C [24.5%] | |||
The qcf + C deals a little more damage (~+2%) than qcf + A, but from many distances and positions not all flames will hit and is harder to follow up. | |||
=== Max Mode=== | |||
* qcf + A, j.D, cl.C > f + A >> BC, st.C (1) > f + A > hcf + K (5) > dp + C (3) >> | |||
** qcb + P (Standing) | |||
** DM qcb hcf + A | |||
== Strategies == | == Strategies == | ||
KUSANAGI's childhood friend in the puerto rican downtowns, he is Justin Bieber when becames angry and its a strong zoning character focused in standing rushdowns, spam qcf + P its your main far distance tool but try to approach a failed anti air to hit low cr.B, cr.A, f + A to hcf + K juggles or your special overhead qcb + P for a jummp a ground projectile. | |||
Sadly your main problem will be jumping opponent because you had a poor recovery anti air special, try to use crouching C or low hit him/her instead. | |||
comboing a hcf + K its your main strategy, also you must be a battery character in middle or point in the team to gain stocks for a HSDM comebacks if your are an anchor one, or use it for his great Max Cancel Combos, a random qcb,hcf + P its a decent hit or miss idea when you only had at least 2 stocks. | |||
{{Template:The King of Fighters 2002}} | |||
[[Category:The King of Fighters 2002]] | |||
Latest revision as of 01:19, 24 July 2020
General Info
Crouch height: Medium
Jump: 4/31/1
Hop: 4/23/1
Dash: 3/10~∞/3
Backdash: 3/21/3
Wakeup: 29 frames
Recovery roll: 20 frames
| Stand | Crouch | Jump | Grab | Run |
|---|---|---|---|---|

|

|

|

|
Colors
Movelist
Short Movelist
- f + A
- f + B (Overhead (2) if not cancelled into.)
- df + B (Low.)
- qcf + P
- dp + P
- qcb + P
- Close, hcf + K (Proximity unblockable.)
- Any other special. (Only on hit.)
- DM qcb hcf + P (May charge.)
- SDM qcb hcf + AC (May charge.)
- HSDM D C d C D (Hit anywhere on the screen.)
Notes
Cancellable moves
- Close: A, B, C, D (Special moves and DMs.)
- Far: A, C (1)
- Crouch: A, C (1)
- CD is cancellable into special moves and DMs.
- f + A is cancellable.
- f + B (2) is cancellable only when you cancel into it.
Super cancellable moves
- dp + C (3)
- Close, hcf + K (Last hit.)
Free cancellable into moves
- qcb + P
- dp + P
Free cancellable out-of moves
- f + B
- df + B
- dp + C (1-3)
- Close, hcf + K
Moves with Invincibility
- HSDM D C d C D (Full: startup & active & recovery.)
Moves with autoguard
(none)
Other Notes
- D throw is a backturned hard knockdown.
Combos
Basic Combos
- cl.C / (cr.B, cr.A) >
- f + A > [11.1%]
- DM qcb hcf + A [38.6%] {1 stock}
- hcf + K, [24.7%]
- > dp + A [35.6%]
- j.D (Corner.) [34.2%]
- st.D (Corner. Timming required.) [35.9%]
- dp + C [25.8%]
- dp + C (3) >> DM qcb hcf + A [52.8%] {2 stocks}
- qcb + C (Standing.) [21.2%]
- dp + A [19.8%]
- f + B (2) > [15.9]
- qcb + C (Standing & close. A version will only combo in the corner.) [27.1%]
- df + B [15.2%]
- f + A > [11.1%]
Damage above is based on cl.C as starter.
About cl.C / (cr.B, cr.A): cl.C deals more damage (~+5%). If you want to use just cr.A, the combos will deal ~-7% less damage. If you are close, you may replace cr.A for cl.A / cl.B for ~+1% more damage (cl.A only against standing).
About f + A: if you skip it, the combo damage is reduced by ~-2%. If you started with a weak attack and skip this, only hcf + K or dp +P will combo. Keep in mind that while weak attack > f + A leave you closer than just a weak attack, hard attack > f + A leave you further than just a hard attack, so, starting from a hard attack, you should skip f + A if you are not very close and want to combo into hcf + K or dp +P.
- qcf + A,
- DM qcb hcf + A [40.6%] {1 stock}
- dp + C (Close.) [28.3%]
- dp + C (3) >> DM qcb hcf + A (Close.) [53.8%] {2 stocks}
- qcb + C [24.5%]
The qcf + C deals a little more damage (~+2%) than qcf + A, but from many distances and positions not all flames will hit and is harder to follow up.
Max Mode
- qcf + A, j.D, cl.C > f + A >> BC, st.C (1) > f + A > hcf + K (5) > dp + C (3) >>
- qcb + P (Standing)
- DM qcb hcf + A
Strategies
KUSANAGI's childhood friend in the puerto rican downtowns, he is Justin Bieber when becames angry and its a strong zoning character focused in standing rushdowns, spam qcf + P its your main far distance tool but try to approach a failed anti air to hit low cr.B, cr.A, f + A to hcf + K juggles or your special overhead qcb + P for a jummp a ground projectile.
Sadly your main problem will be jumping opponent because you had a poor recovery anti air special, try to use crouching C or low hit him/her instead.
comboing a hcf + K its your main strategy, also you must be a battery character in middle or point in the team to gain stocks for a HSDM comebacks if your are an anchor one, or use it for his great Max Cancel Combos, a random qcb,hcf + P its a decent hit or miss idea when you only had at least 2 stocks.
