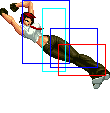
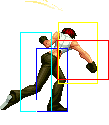
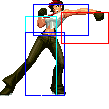
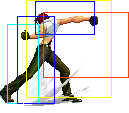
No edit summary |
Loserprance (talk | contribs) m (typo fix) |
||
| (93 intermediate revisions by 8 users not shown) | |||
| Line 1: | Line 1: | ||
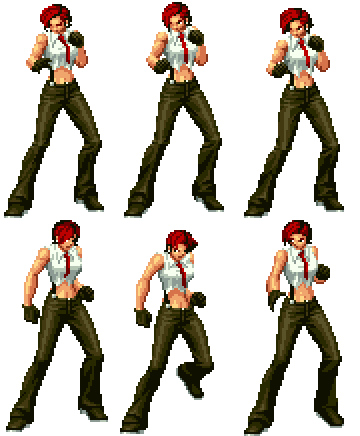
[[image:Vanessa02_stance.gif|right]] | |||
1 | ==General Info== | ||
Crouch height: Medium<br> | |||
3 | Jump: 4/36/1<br> | ||
Hop: 4/27/1<br> | |||
Dash: 3/10~∞/3<br> | |||
Backdash: 3/10/3<br> | |||
Wakeup: 25 frames<br> | |||
Recovery roll: 27 frames<br> | |||
{| | |||
! Stand | |||
! Crouch | |||
! Jump | |||
! Grab | |||
! Run | |||
|- | |||
|valign="bottom"| [[image:Vanessa02_stand.png]] | |||
|valign="bottom"| [[image:Vanessa02_crouch.png]] | |||
|valign="bottom"| [[image:Vanessa02_jump.png]] | |||
|valign="bottom"| [[image:Vanessa02_grab.png]] | |||
|valign="bottom"| [[image:Vanessa02_run.png]] | |||
|} | |||
===Colors=== | |||
{| | |||
! [[image:snka.gif]] | |||
! [[image:snkb.gif]] | |||
! [[image:snkc.gif]] | |||
! [[image:snkd.gif]] | |||
|- | |||
| [[image:Vanessa02_colorA.png]] | |||
| [[image:Vanessa02_colorB.png]] | |||
| [[image:Vanessa02_colorC.png]] | |||
| [[image:Vanessa02_colorD.png]] | |||
|} | |||
''' | ==[[The_King_of_Fighters_2002/Normals_Guide|Movelist]]== | ||
1. | {|border="1" | ||
2. | !width="9%"| | ||
3. | ! Frames | ||
4. | ! Advantage | ||
! Cancel | |||
! Block | |||
!colspan="4"| Hitbox | |||
! Notes | |||
|- | |||
|colspan="10" align="center"| '''Standing Close''' | |||
|- | |||
! [[image:snka.gif]] | |||
|align="center"| 5/4/5 | |||
|align="center"| +3/+1 | |||
|align="center"| R,C,S,Su | |||
|align="center"| HL | |||
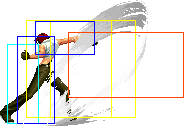
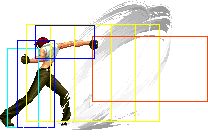
|colspan="4" | [[image:Vanessa02_clA.png|center]] | |||
| | |||
|- | |||
! [[image:snkb.gif]] | |||
|align="center"| 6/3/7 | |||
|align="center"| +2/0 | |||
|align="center"| C,S,Su | |||
|align="center"| HL | |||
|colspan="4" | [[image:Vanessa02_clB.png|center]] | |||
| | |||
|- | |||
! [[image:snkc.gif]] | |||
|align="center"| 4/2(7)5/19 | |||
|align="center"| -4/-6 | |||
|align="center"| C,S,Su | |||
|align="center"| HL | |||
|colspan="2" valign="bottom" style="border-right:0px;"| [[image:Vanessa02_clC1.png|center]] | |||
|colspan="2" valign="bottom" style="border-left:0px;"| [[image:Vanessa02_clC2.png|center]] | |||
| | |||
|- | |||
! [[image:snkd.gif]] | |||
|align="center"| 4/2(7)5/19 | |||
|align="center"| -4/-6 | |||
|align="center"| C,S,Su | |||
|align="center"| HL | |||
|colspan="2" valign="bottom" style="border-right:0px;"| [[image:Vanessa02_clD1.png|center]] | |||
|colspan="2" valign="bottom" style="border-left:0px;"| [[image:Vanessa02_clD2.png|center]] | |||
| | |||
|- | |||
|colspan="10" align="center"| '''Standing Far''' | |||
|- | |||
! [[image:snka.gif]] | |||
|align="center"| 6/4/7 | |||
|align="center"| +1/-1 | |||
|align="center"| R,C,S,Su | |||
|align="center"| HL | |||
|colspan="4" | [[image:Vanessa02_stA.png|center]] | |||
| | |||
|- | |||
! [[image:snkb.gif]] | |||
|align="center"| 5/3/11 | |||
|align="center"| -2/-4 | |||
|align="center"| C,S,Su | |||
|align="center"| HL | |||
|colspan="4" | [[image:Vanessa02_stB.png|center]] | |||
| | |||
|- | |||
! [[image:snkc.gif]] | |||
|align="center"| 5/2(3)3/28 | |||
|align="center"| -11/-13 | |||
|align="center"| C,S,Su | |||
|align="center"| HL | |||
|colspan="2" valign="bottom" style="border-right:0px;"| [[image:Vanessa02_stC1.png|center]] | |||
|colspan="2" valign="bottom" style="border-left:0px;"| [[image:Vanessa02_stC2.png|center]] | |||
| | |||
|- | |||
! [[image:snkd.gif]] | |||
|align="center"| 4/3(15)3/29 | |||
|align="center"| -12/-14 | |||
|align="center"| C,S,Su | |||
|align="center"| HL | |||
|colspan="2" valign="bottom" style="border-right:0px;"| [[image:Vanessa02_clD1.png|center]] | |||
|colspan="2" valign="bottom" style="border-left:0px;"| [[image:Vanessa02_stD2.png|center]] | |||
| | |||
|- | |||
! [[image:snkc.gif]] + [[image:snkd.gif]] | |||
|align="center"| 17/7/13 | |||
|align="center"| KD/+2 | |||
|align="center"| C,S,Su | |||
|align="center"| HL | |||
|colspan="4"| [[image:Vanessa02_stCD.png|center]] | |||
| | |||
|- | |||
|colspan="10" align="center"| '''Crouching''' | |||
|- | |||
! [[image:snka.gif]] | |||
|align="center"| 6/3/7 | |||
|align="center"| +2/0 | |||
|align="center"| R,C,S,Su | |||
|align="center"| HL | |||
|colspan="4" | [[image:Vanessa02_crA.png|center]] | |||
| | |||
|- | |||
! [[image:snkb.gif]] | |||
|align="center"| 5/3/5 | |||
|align="center"| +4/+2 | |||
|align="center"| R,C,S,Su | |||
|align="center"| L | |||
|colspan="4" | [[image:Vanessa02_crB.png|center]] | |||
| | |||
|- | |||
! [[image:snkc.gif]] | |||
|align="center"| 5/3[3]6/23 | |||
|align="center"| -9/-11 | |||
|align="center"| C,S,Su | |||
|align="center"| HL | |||
|colspan="2" valign="bottom" style="border-right:0px;"| [[image:Vanessa02_crC1.png|center]] | |||
|colspan="2" valign="bottom" style="border-left:0px;"| [[image:Vanessa02_crC2.png|center]] | |||
| | |||
|- | |||
! [[image:snkd.gif]] | |||
|align="center"| 7/4/20 | |||
|align="center"| KD/-6 | |||
|align="center"| C,S,Su | |||
|align="center"| L | |||
|colspan="4" | [[image:Vanessa02_crD.png|center]] | |||
| | |||
|- | |||
|colspan="10" align="center"| '''Jump''' | |||
|- | |||
! [[image:snka.gif]] | |||
|align="center"| 3/6/- | |||
|align="center"| -/- | |||
| | |||
|align="center"| H | |||
|colspan="4" | [[image:Vanessa02_jA.png|center]] | |||
| | |||
|- | |||
! [[image:snkb.gif]] | |||
|align="center"| 3/3+9/- | |||
|align="center"| -/- | |||
| | |||
|align="center"| H | |||
|colspan="4" | [[image:Vanessa02_jB.png|center]] | |||
|align="left"| First 3 frames: Hittable box on outstretched arm does not appear | |||
|- | |||
! [[image:snkc.gif]] | |||
|align="center"| 4/4/- | |||
|align="center"| -/- | |||
| | |||
|align="center"| H | |||
|colspan="4" | [[image:Vanessa02_jC.png|center]] | |||
| | |||
|- | |||
! [[image:snkd.gif]] | |||
|align="center"| 8/5/- | |||
|align="center"| -/- | |||
| | |||
|align="center"| H | |||
|colspan="4" | [[image:Vanessa02_jD.png|center]] | |||
| | |||
|- | |||
! [[image:snkc.gif]] + [[image:snkd.gif]] | |||
|align="center"| 14/4/- | |||
|align="center"| KD/- | |||
| | |||
|align="center"| HL | |||
|colspan="4"| [[image:Vanessa02_jCD.png|center]] | |||
| | |||
|- | |||
|colspan="10" align="center"| '''Neutral Jump''' | |||
|- | |||
! [[image:snka.gif]] | |||
|align="center"| 3/12/- | |||
|align="center"| -/- | |||
| | |||
|align="center"| H | |||
|colspan="4" | [[image:Vanessa02_juA.png|center]] | |||
| | |||
|- | |||
! [[image:snkb.gif]] | |||
|align="center"| 3/12/- | |||
|align="center"| -/- | |||
| | |||
|align="center"| H | |||
|colspan="4" | [[image:Vanessa02_jB.png|center]] | |||
|align="left"| Frame 4-6: Hittable box on outstretched arm does not appear | |||
|- | |||
! [[image:snkc.gif]] | |||
|align="center"| 4/4/- | |||
|align="center"| -/- | |||
| | |||
|align="center"| H | |||
|colspan="4" | [[image:Vanessa02_jC.png|center]] | |||
| | |||
|- | |||
! [[image:snkd.gif]] | |||
|align="center"| 8/5/- | |||
|align="center"| -/- | |||
| | |||
|align="center"| H | |||
|colspan="4" | [[image:Vanessa02_jD.png|center]] | |||
| | |||
|- | |||
|colspan="10" align="center"| '''Hop''' | |||
|- | |||
! [[image:snka.gif]] | |||
|align="center"| 3/12/- | |||
|align="center"| -/- | |||
| | |||
|align="center"| H | |||
|colspan="4" | [[image:Vanessa02_hA.png|center]] | |||
| | |||
|- | |||
! [[image:snkb.gif]] | |||
|align="center"| 2/12/- | |||
|align="center"| -/- | |||
| | |||
|align="center"| H | |||
|colspan="4" | [[image:Vanessa02_hB.png|center]] | |||
| | |||
|- | |||
! [[image:snkc.gif]] | |||
|align="center"| 4/3/- | |||
|align="center"| -/- | |||
| | |||
|align="center"| H | |||
|colspan="4" | [[image:Vanessa02_jC.png|center]] | |||
| | |||
|- | |||
! [[image:snkd.gif]] | |||
|align="center"| 6/4/- | |||
|align="center"| -/- | |||
| | |||
|align="center"| H | |||
|colspan="4" | [[image:Vanessa02_jD.png|center]] | |||
| | |||
|- | |||
|colspan="10" align="center"| '''Command Normals''' | |||
|- | |||
! f + [[image:snka.gif]] | |||
|align="center"| 12/4(11)6/24 | |||
|align="center"| KD/-12 | |||
| | |||
|align="center"| H | |||
|rowspan="2" colspan="2" valign="bottom" style="border-right:0px;"| [[image:Vanessa_fA1.png|center]] | |||
|rowspan="2" colspan="2" valign="bottom" style="border-left:0px;"| [[image:Vanessa_fA2.png|center]] | |||
| | |||
|- | |||
! f + [[image:snka.gif]] (cancel) | |||
|align="center"| 5/3(8)6/24 | |||
|align="center"| KD/-12 | |||
|align="center"| S,Su | |||
|align="center"| HL | |||
|align="left"| Cancellable on first hit only | |||
|- | |||
! df + [[image:snkb.gif]] | |||
|align="center"| 10/12/23 | |||
|align="center"| KD/-17 | |||
| | |||
|align="center"| L | |||
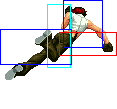
|colspan="4" | [[image:Vanessa_dfB.png|center]] | |||
| | |||
|- | |||
|colspan="10" align="center"| '''Special Moves''' | |||
|- | |||
! _b f + [[image:snka.gif]] | |||
|align="center"| 17/4/16 | |||
|align="center"| KD/-2 | |||
|align="center"| Fo | |||
|align="center"| HL | |||
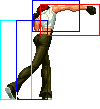
|rowspan="2" colspan="4"| [[image:Vanessa02_bfA.png|center]] | |||
|rowspan="2" align="left"| '''Dash Puncher - _b f + P''' | |||
*Vanessa dashes across the screen, performing an uppercut. _b f + A travels about half screen and comes out faster than _b f + C, which goes full screen | |||
*Vanessa has mid and upper body invincibility from the beginning of the move to before she performs the actual uppercut (A: Frame 4-10 C: Frame 6-22) | |||
*Vanessa recovers extremely fast after this move, making it impossible to punish on block | |||
*an opponent hit by the uppercut is knocked into the air, and can be juggled easily | |||
*free cancellable out of | |||
|- | |||
! _b f + [[image:snkc.gif]] | |||
|align="center"| 29/4/18 | |||
|align="center"| KD/-4 | |||
|align="center"| Fo | |||
|align="center"| HL | |||
|- | |||
! <br>hcf + [[image:punch.gif]]<br><br> | |||
|align="center"| 5/2(7)2(8)3(15)3/27 | |||
|align="center"| KD/-4 | |||
|align="center"| Fo | |||
|align="center"| HL | |||
|rowspan="3" valign="bottom" style="border-right:0px;"| [[image:Vanessa02_hcfP1.png|center]] | |||
|rowspan="3" valign="bottom" style="border-right:0px; border-left:0px;"| [[image:Vanessa02_hcfP2.png|center]] | |||
|rowspan="3" valign="bottom" style="border-right:0px; border-left:0px;"| [[image:Vanessa02_hcfP3.png|center]] | |||
|rowspan="3" valign="bottom" style="border-left:0px;"| [[image:Vanessa02_hcfP4.png|center]] | |||
|rowspan="3" align="left"| '''Machine Gun Puncher - hcf + P''' | |||
*Vanessa does a series of three very fast punches. If P is mashed, she does up to three more hits | |||
*does good damage and has good recovery on block, but can be easily punished if the opponent guard rolls behind | |||
*counterwire and hard knockdown on the last hit | |||
*27 frames of hitstun, 25 frames of blockstun. | |||
*free cancellable out of on all hits | |||
|- | |||
! hcf + [[image:punch.gif]]<br>(light mash) | |||
|align="center"| 5/2(7)2(8)2(7)3(15)3/27 | |||
|align="center"| KD/-4 | |||
|align="center"| Fo | |||
|align="center"| HL | |||
|- | |||
! hcf + [[image:punch.gif]]<br>(full mash) | |||
|align="center"| 5/2(7)2(8)2(7)2(8)3(15)3/27 | |||
|align="center"| KD/-4 | |||
|align="center"| Fo | |||
|align="center"| HL | |||
|- | |||
! dp + [[image:snka.gif]] | |||
|align="center"| 8/3(9)3+3/18 | |||
|align="center"| KD/-6 | |||
|align="center"| Fi,Fo | |||
|align="center"| HL | |||
|valign="bottom" style="border-right:0px;"| [[image:Vanessa02_dpA1.png|center]] | |||
|valign="bottom" style="border-right:0px; border-left:0px;"| [[image:Vanessa02_dpA2.png|center]] | |||
|valign="bottom" style="border-right:0px; border-left:0px;"| [[image:Vanessa02_dpA3.png|center]] | |||
|valign="bottom" style="border-left:0px;"| [[image:Vanessa02_dpA4.png|center]] | |||
|align="left"| '''Forbidden Eagle - dp + A''' | |||
*Vanessa punches the air, creating two quick yellow blades. These blades have good priority and range, beating pokes fairly easily | |||
*the first hit does not knock down the opponent but the second one does. The opponent can be juggled if only the first hit connects, or if the second hit connects when the opponent is on the ground | |||
*Invincible: Frames 1-6. Lower body invincible: Frame 7-8. Upperbody invincible: Frame 8-19. | |||
*Negates normal and DM projectiles (Frame 9-13, 19-23) | |||
*free cancellable into | |||
*free cancellable out of on both hits | |||
|- | |||
! dp + [[image:snkc.gif]] | |||
|align="center"| 13/9/28 | |||
|align="center"| KD/-19 | |||
|align="center"| Su,Fi,Fo | |||
|align="center"| HL | |||
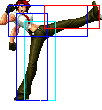
|colspan="4"| [[image:Vanessa02_dpC1.png|center]] | |||
|align="left"| '''Parrying Puncher - dp + C''' | |||
*Vanessa does a big punch attack that does good damage | |||
*reflects normal and DM projectiles | |||
*supercancellable, but only the qcfx2+P DM will connect | |||
*free cancellable into | |||
*free cancellable out of | |||
|- | |||
! qcf/qcb + [[image:kick.gif]] | |||
| | |||
| | |||
| | |||
| | |||
|colspan="4"| | |||
|align="left"| '''Puncher Vision - qcf + K/qcb + K''' | |||
*Vanessa has mid and upper body invincibility during' | |||
*Free cancellable into | |||
|- | |||
! f + [[image:snka.gif]] | |||
|align="center"| 10/3(14)3/26 | |||
|align="center"| KD/-11 | |||
|align="center"| S,Su | |||
|align="center"| HL | |||
|colspan="2" valign="bottom" style="border-right:0px;"| [[image:Vanessa02_qcfKfA1.png|center]] | |||
|colspan="2" valign="bottom" style="border-left:0px;"| [[image:Vanessa02_qcfKfA2.png|center]] | |||
|align="left"| '''Puncher Upper - f + A (after Puncher Vision qcf + K/qcb + K)''' | |||
*Vanessa does a reasonably fast two hit punch attack that has some vertical range | |||
*cancellable into special moves on the second hit | |||
*supercancellable on the second hit | |||
*Upper body invincible: Frame 1-6 | |||
|- | |||
! f + [[image:snkc.gif]] | |||
|align="center"| 10/3(11)3/33 | |||
|align="center"| KD/-9 | |||
|align="center"| Fo | |||
|align="center"| HL | |||
|colspan="2" valign="bottom" style="border-right:0px;"| [[image:Vanessa02_qcfKfC1.png|center]] | |||
|colspan="2" valign="bottom" style="border-left:0px;"| [[image:Vanessa02_qcfKfC2.png|center]] | |||
|align="left"| '''Puncher Straight - f + C (after Puncher Vision qcf + K/qcb + K)''' | |||
*Vanessa does a two hit horizontal punch coming out reasonably fast | |||
*causes guardcrush on the second hit. Even if this move causes guardcrush, she can be punished. Thus, it is only useful in maxmode | |||
*counterwire and hard knockdown on the second hit | |||
*free cancellable out of on the second hit | |||
*Upper body invincible: Complete startup. | |||
|- | |||
! b + [[image:punch.gif]] | |||
| | |||
| | |||
| | |||
| | |||
|colspan="4"| | |||
|align="left"| '''Puncher Weaving - b + P (after Puncher Vision qcf + K/qcb + K)''' | |||
*see below | |||
|- | |||
! qcb + [[image:punch.gif]] | |||
|align="center"| 14/0~∞/0 | |||
|align="center"| | |||
|align="center"| | |||
|align="center"| | |||
|colspan="1" valign="bottom" style="border-right:0px;"| [[image:Vanessa02_qcbP1.png|center]] | |||
|colspan="1" valign="bottom" style="border-right:0px; border-left:0px;"| [[image:Vanessa02_qcbP2.png|center]] | |||
|colspan="2" valign="bottom" style="border-left:0px;"| [[image:Vanessa02_qcbP3.png|center]] | |||
|align="left"| '''Puncher Weaving - qcb + P (can be held)''' | |||
*Vanessa goes into what seems to be a crouching stance. If the button is held, she will continue to repeat this stance | |||
*Vanessa has mid and upper body invincibility during the beginning of this move, and possibly everytime she ducks down during the stance | |||
*this move recovers very quickly if you do not hold it, thus it is ideal to end your normals with this move, to allow long attack strings | |||
*Invincible: Frame 1-7. Upper body invincible: Frame 8-14 and complete active period. | |||
|- | |||
!<br>> f + [[image:snka.gif]]<br><br> | |||
|align="center"| (3[全身M] + 3, 3, 40) | |||
|align="center"| | |||
|align="center"| | |||
|align="center"| HL | |||
|rowspan="2" colspan="4" | [[image:Vanessa02_qcbPfP.png|center]] | |||
|rowspan="2"| '''Dash Puncher - f + P (after Puncher Weaving qcb + P)''' | |||
* Vanessa does an uppercut with the same animation as the one from her dash puncher, except she doesn't dash | |||
* cancellable into special moves if it makes contact with the opponent | |||
|- | |||
!> f + [[image:snkc.gif]] | |||
|align="center"| (3[全身M] + 3, 3, 40) | |||
|align="center"| | |||
|align="center"| | |||
|align="center"| HL | |||
|- | |||
!<br>> b + [[image:snka.gif]]<br><br> | |||
|align="center"| (2[G] + 3[胸上M] + 1[全身] + 2, 1[飛び道具判定のみ] + 7, 29) | |||
|align="center"| | |||
|align="center"| | |||
|align="center"| HL | |||
|colspan="2" valign="bottom" style="border-right:0px;"| [[image:Vanessa02_qcbPbA1.png|center]] | |||
|colspan="2" valign="bottom" style="border-left:0px;"| [[image:Vanessa02_qcbPbA2.png|center]] | |||
|rowspan="2"| '''Parrying Puncher - b + P (after Puncher Weaving qcb + P)''' | |||
* Vanessa does a hard punch. The animation is slightly different depending if b + A or b + C is used | |||
* b + A can only be used if qcb + C Puncher Weaving was used. b + C can only be used if qcb + A was used | |||
* b + A is a hard knockdown | |||
* b + C reflects normal and DM projectiles | |||
|- | |||
!> b + [[image:snkc.gif]] | |||
|align="center"| (8[全身M], 1+7, 26)) | |||
|align="center"| | |||
|align="center"| | |||
|align="center"| HL | |||
|colspan="4" | [[image:Vanessa02_qcbPbC.png|center]] | |||
|- | |||
!> f/b + [[image:kick.gif]] | |||
|align="center"| | |||
|align="center"| | |||
|align="center"| | |||
|align="center"| | |||
|colspan="4" | | |||
| '''Puncher Vision - f + K/b + K (after Puncher Weaving qcb + P)''' | |||
* refer to Puncher Vision qcf + K/qcb + K | |||
|- | |||
|colspan="10" align="center"| '''DMs''' | |||
|- | |||
! <br>qcfx2+[[image:snka.gif]]<br><br> | |||
|align="center"| ( {1 + 28[暗転] + 3}[全身M], 5, 47) | |||
|align="center"| | |||
|align="center"| | |||
|align="center"| H | |||
|rowspan="2" colspan="4" | [[image:Vanessa02_qcfx2P.png|center]] | |||
|rowspan="2"| '''Champion Puncher - qcfx2+P''' | |||
* Vanessa does a very fast punch. If it connects, she does three more punches on the opponent. If it is blocked or whiffs, she is very open to attack | |||
* the opponent must be right in front of Vanessa for this move to come out, otherwise you will get dp + P instead | |||
* overhead | |||
* hard knockdown on the last hit | |||
|- | |||
! qcfx2+[[image:snkc.gif]] | |||
|align="center"| ( {1 + 28[暗転] + 3}[全身M], 5, 47) | |||
|align="center"| | |||
|align="center"| | |||
|align="center"| H | |||
|- | |||
! <br>qcb,hcf + [[image:snka.gif]]<br><br> | |||
|align="center"| ( {1 + 28[暗転] + 11}[全身M], 16, 25) | |||
|align="center"| | |||
|align="center"| | |||
|align="center"| HL | |||
|rowspan="2" colspan="4" | [[image:Vanessa02_qcbhcfP.png|center]] | |||
|rowspan="2"| '''Crazy Puncher - qcb,hcf + P''' | |||
* Vanessa dashes across the screen. If she connects, she does a combo on the opponent, otherwise she stops in front of them | |||
* has startup invincibility, and relatively good recovery if blocked (although can still be punished) | |||
* qcf,hcb + C goes full screen while qcf,hcb + A goes about 4/5 or more of a screen | |||
|- | |||
! qcb,hcf + [[image:snkc.gif]] | |||
|align="center"| ( {1 + 28[暗転] + 11}[全身M], 24, 25) | |||
|align="center"| | |||
|align="center"| | |||
|align="center"| HL | |||
|- | |||
|colspan="10" align="center"| '''SDM''' | |||
|- | |||
! qcb,hcf + [[image:snka.gif]] + [[image:snkc.gif]] | |||
|align="center"| ( {1 + 28[暗転] + 11}[全身M], 24, 25) | |||
|align="center"| | |||
|align="center"| | |||
|align="center"| HL | |||
|colspan="4" | [[image:Vanessa02_qcbhcfP.png|center]] | |||
| '''Crazy Puncher - qcb,hcf + AC''' | |||
* same properties as her DM version except this one goes full screen length and does more damage | |||
|- | |||
|colspan="10" align="center"| '''HSDM''' | |||
|- | |||
!rowspan="2"| f,hcf + [[image:snka.gif]] + [[image:snkc.gif]] | |||
|rowspan="2" align="center"| ( {0 + 28[暗転] + 2}[全身M] + 5, 4, 21, {[1](0, 2, 1, 1, 1, 1, 1, 1, 1, 1, 1, 1, 4), [2](6, 2, 14), [3](12, 2, 14), 17) | |||
|rowspan="2" align="center"| | |||
|rowspan="2" align="center"| | |||
|rowspan="2" align="center"| HL | |||
|colspan="2" valign="bottom" style="border-right:0px; border-bottom:0px;"| [[image:Vanessa02_HSDM1.png|center]] | |||
|colspan="2" valign="bottom" style="border-left:0px; border-bottom:0px;"| [[image:Vanessa02_HSDM2.png|center]] | |||
|rowspan="2"| '''Gaia Gear - f,hcf + AC''' | |||
* Vanessa does one punch. If it connects, the screen goes blue and she creates a wirlwind, hitting the opponent for the full hits | |||
* if the initial punch does not connect, the screen does not go blue and she tosses out the wirlwind anyway | |||
* counterwire and hard knockdown on the last hit | |||
* can hit the opponent on the ground | |||
|- | |||
|colspan="2" valign="bottom" style="border-right:0px; border-top:0px;"| [[image:Vanessa02_HSDM3.png|center]] | |||
|colspan="2" valign="bottom" style="border-left:0px; border-top:0px;"| [[image:Vanessa02_HSDM4.png|center]] | |||
|} | |||
==Short Movelist== | |||
* f + A (Overhead (1) if not cancelled into.) | |||
* df + B (Low.) | |||
* hcf + P (Counterwire (last hit).) | |||
** Mash P | |||
* dp + A | |||
* dp + C (Reflect projectiles.) | |||
* qcb + P (May charge.) | |||
** f + K (Same move as qcf + K.) | |||
** b + K (Same move as qcb + K.) | |||
** b + P (C: Reflect projectiles.) | |||
** f + P | |||
*** Any special. | |||
* (b) f + P | |||
''' | * qcf + K | ||
-Close B, far A and far C, miss some low crouching opponents, like Iori, Athena, Choi, Chin | ** [FOLLOWUPS-1] | ||
* qcb + K | |||
** [FOLLOWUPS-1] | |||
* [FOLLOWUPS-1]: | |||
** b + P (Same move as qcb + P.) | |||
** f + A | |||
*** Any special. | |||
** f + C (Counterwire (2).) | |||
* DM close, qcf qcf + P (Overhead (1). Contrary to popular belief, this move is '''not''' a 'proximity unblockable' and may actually be blocked - only high blocked as it is an overhead; it cannot be done if opponent is already in block stun, but other than that, as long as you are close, it can be done independent from the opponent status - laying on the floor, air recovering, jumping, knocked down, etc...) | |||
* DM qcb hcf + P | |||
* SDM qcb hcf + AC | |||
* HSDM f hcf + AC (May OTG. Counterwire (last hit).) | |||
==Notes== | |||
===Cancellable moves=== | |||
* Close: A, B, C (2), D (2) | |||
* Far: A, B, C (2), D (2) | |||
* Crouch: A, B, C, D | |||
* CD is cancellable into command moves, specials and DMs. | |||
* f + A (1) is cancellable only when you cancel into it. | |||
===Super cancellable moves=== | |||
* dp + C | |||
* qcb + K / qcf + K > f + A (2) | |||
===Free cancellable into moves=== | |||
?? | |||
=== Free cancellable out-of moves=== | |||
?? | |||
===Moves with Invincibility=== | |||
?? | |||
=== Moves with autoguard=== | |||
(none) | |||
===Other Notes=== | |||
* Close B, far A and far C, miss some low crouching opponents, like Iori, Athena, Choi, Chin | |||
* D throw is mashable. | |||
==Combos== | |||
* Best jump-ins: | |||
** j.A | |||
** j.D | |||
===Basic Combos=== | |||
* cr.B x 2 > | |||
** DM qcf qcf + P | |||
** dp + A, [jungler] | |||
** df + B | |||
* cr.B > f + A (1) > qcb + P, almost any combo. | |||
The f + A (1) and qcb + P cause no pushback. | |||
* cr.B x 2 / cl.D (2) > f + A (1) | |||
** (b) f + A, [jungler] | |||
** dp + A, [jungler] | |||
** dp + C >> DM qcf qcf + P (Buffer: qcf + P) {??/55-60%} | |||
** DM qcb hcf + P | |||
** DM qcf qcf + P | |||
** hcf + C > mash P {??/30%} | |||
The f + A is optional from a hard attack. | |||
* ... (b) f + A, | |||
** run, dp + A, [jungler] (Close to corner) | |||
** dp + C >> DM qcf qcf + P (Corner) | |||
** DM qcf qcf + P (Corner) | |||
** qcf + B, DM qcf qcf + A | |||
** j.CD | |||
** j.D (Reset) | |||
* ... dp + A, | |||
** dp + C >> DM qcf qcf + P (Corner) | |||
** HSDM f hcf + AC (Corner) | |||
** DM qcf qcf + P (Corner) | |||
** j.D (Reset) | |||
* cr.C > (b) f + A, j.CD {35%} | |||
* qcf + K / qcb + K > f + A (2) > | |||
** qcf + D, | |||
*** dp + C {25%} | |||
*** DM qcf qcf + P {45%} | |||
** qcb + P, j.CD {25%} | |||
===Corner=== | |||
* cl.C (2) > f + A(1) > dp + A, | |||
** dp + C {30%} | |||
** DM qcf qcf + P {50%} | |||
* cr.C > (b) f + A, | |||
** DM qcf qcf + P {55%} | |||
** dp + A, | |||
*** j.D {30%} | |||
*** HSDM f hcf + AC {65%} | |||
* CD >> BC, HSDM f hcf + AC {50%} | |||
===Maxmode=== | |||
* cl.C (2) > f + A (1) >> BC, walk, | |||
** (cl.C (2) > f + A (1) > hcf + P (3) >> qcf + B) x 3 > | |||
*** f + A (2) > qcb + P, dp + C >> qcf + B, DM qcf qcf + P {95%} | |||
*** cl.C (2) > f + A (1) > | |||
**** (S)DM qcb hcf + P/AC {90%/95%} | |||
**** HSDM f hcf + AC {100%} | |||
* Corner: cl.C (2) > f + A (1) >> BC, walk, | |||
** (cl.C (2) > f + A (1) > hcf + P (3) >> qcf + B) x 4, | |||
*** cl.C (2) > f + A (1) > dp + A, dp + C {95%} | |||
* cl.C (2) > f + A (1) >> BC, walk, cl.C (2) > f + A (1) > dp + A (1) >> dp + C >> | |||
** (qcf + B, dp + A(1)) x 3 >> | |||
*** qcf + B, DM qcf qcf + P {75%} | |||
==Attack Strings== | |||
* cr D > | |||
** qcb + P | |||
** qcf + K | |||
** qcb + K | |||
* qcf + K / qcb + K > f + A (2) > | |||
** qcb + P | |||
** qcf + K | |||
** qcb + K | |||
* cr.C > (b) f + A | |||
* cl.C (2) > f + A (1) > dp + A | |||
* Max Mode: df + B >> qcf + B > f + C | |||
unblockable combo | |||
* cl.C (2) > f + A (1) > qcb + P, | |||
** repeat previus | |||
** cr.D > qcf + B, cl.D (2) > f + A (1) > qcb + P | |||
** cr.D > qcb + P | |||
** f + A (1) >> BC, [Max Mode combo] | |||
==Strategies== | |||
* it is advisable to not keep Vanessa as the first character, as her really damaging combos waste lots of stock | |||
* qcf + K teleport goes through most air projectiles; (b) f + P goes through all air projectiles, including DM projectiles. Both moves have upper body invincibility | |||
* if the f + A followup of her qcf + K teleport is blocked, cancel to qcb + K to run away or qcb+ P, which gives her a frame advantage. Following up with a cr.D > qcb + B / qcf + B will hit anyone who attempts to attack her after the qcb + P. If they happen to roll through the sweep, whiff cancelling to qcb + B / qcf + B will keep her out of danger | |||
* if the f + A followup of her qcf + K teleport connects, you can start a good mixup that can easily lead into her max combos. Cancel the f + A to qcf + D, and do cr.C as the opponent is landing. Then, cancel the cr.C to either qcf + B or qcf + D. If qcf + B is used, you will land right in front of them as they do, but they will be facing backwards, while if you use qcf + D, you will teleport all the way to the other side and land right in front of them. From here on, you can go for cl.C (2) > f + A (1) or cr.B > f + A (1) or f + A (1) into max combo, or attempt an instant overhead to finish off opponent (see below). The opponent is required to do a lot of guessing to get out of this mixup and the reward is very much worth it if you are proficient in combos. This mixup can also be done after her dash puncher, but it is harder. It requires running forward after dash puncher and doing a cr.C, cancel to either qcf + B or qcf + D | |||
* hop back + C is an instant overhead if done the moment she leaves the ground, and is pretty much impossible to block on reaction. This is best done when the opponent will get killed by the hop back + C | |||
* Vanessa's qcf + K / qcb + K > f + C causes guard crush, and thus can be used to do unblockable combos in maxmode. Going into maxmode just to attempt this unblockable may become predictable, so it is better to enter maxmode out of the blue, such as cancelling into maxmode after a blocked cl.C (2) > f + A (1) or even a df + B (since this move is punishable) and going straight into the unblockable. This will work more often because it is unexpected, and the opponent is already in block stun, giving him very little time to counter or roll out | |||
* constantly pressure opponent with last attack string that uses qcb + P; attack string should usually be started from a sweep cancel to qcf + B forward teleport | |||
* Vanessa's biggest weakness is opponents who spam crouch B's, as it will beat out the dash puncher and teleports. To combat this, use dp + A which is safe and has an unusual hitbox that usually catches people poking. dp + A is also a very good anti-air and can be spammed for the most part without fear of being punished | |||
{{Template:The King of Fighters 2002}} | |||
[[Category:The King of Fighters 2002]] | |||
Latest revision as of 22:20, 8 April 2021
General Info
Crouch height: Medium
Jump: 4/36/1
Hop: 4/27/1
Dash: 3/10~∞/3
Backdash: 3/10/3
Wakeup: 25 frames
Recovery roll: 27 frames
| Stand | Crouch | Jump | Grab | Run |
|---|---|---|---|---|

|

|

|

|
Colors

|

|

|

|
Movelist
Short Movelist
- f + A (Overhead (1) if not cancelled into.)
- df + B (Low.)
- hcf + P (Counterwire (last hit).)
- Mash P
- dp + A
- dp + C (Reflect projectiles.)
- qcb + P (May charge.)
- f + K (Same move as qcf + K.)
- b + K (Same move as qcb + K.)
- b + P (C: Reflect projectiles.)
- f + P
- Any special.
- (b) f + P
- qcf + K
- [FOLLOWUPS-1]
- qcb + K
- [FOLLOWUPS-1]
- [FOLLOWUPS-1]:
- b + P (Same move as qcb + P.)
- f + A
- Any special.
- f + C (Counterwire (2).)
- DM close, qcf qcf + P (Overhead (1). Contrary to popular belief, this move is not a 'proximity unblockable' and may actually be blocked - only high blocked as it is an overhead; it cannot be done if opponent is already in block stun, but other than that, as long as you are close, it can be done independent from the opponent status - laying on the floor, air recovering, jumping, knocked down, etc...)
- DM qcb hcf + P
- SDM qcb hcf + AC
- HSDM f hcf + AC (May OTG. Counterwire (last hit).)
Notes
Cancellable moves
- Close: A, B, C (2), D (2)
- Far: A, B, C (2), D (2)
- Crouch: A, B, C, D
- CD is cancellable into command moves, specials and DMs.
- f + A (1) is cancellable only when you cancel into it.
Super cancellable moves
- dp + C
- qcb + K / qcf + K > f + A (2)
Free cancellable into moves
??
Free cancellable out-of moves
??
Moves with Invincibility
??
Moves with autoguard
(none)
Other Notes
- Close B, far A and far C, miss some low crouching opponents, like Iori, Athena, Choi, Chin
- D throw is mashable.
Combos
- Best jump-ins:
- j.A
- j.D
Basic Combos
- cr.B x 2 >
- DM qcf qcf + P
- dp + A, [jungler]
- df + B
- cr.B > f + A (1) > qcb + P, almost any combo.
The f + A (1) and qcb + P cause no pushback.
- cr.B x 2 / cl.D (2) > f + A (1)
- (b) f + A, [jungler]
- dp + A, [jungler]
- dp + C >> DM qcf qcf + P (Buffer: qcf + P) {??/55-60%}
- DM qcb hcf + P
- DM qcf qcf + P
- hcf + C > mash P {??/30%}
The f + A is optional from a hard attack.
- ... (b) f + A,
- run, dp + A, [jungler] (Close to corner)
- dp + C >> DM qcf qcf + P (Corner)
- DM qcf qcf + P (Corner)
- qcf + B, DM qcf qcf + A
- j.CD
- j.D (Reset)
- ... dp + A,
- dp + C >> DM qcf qcf + P (Corner)
- HSDM f hcf + AC (Corner)
- DM qcf qcf + P (Corner)
- j.D (Reset)
- cr.C > (b) f + A, j.CD {35%}
- qcf + K / qcb + K > f + A (2) >
- qcf + D,
- dp + C {25%}
- DM qcf qcf + P {45%}
- qcb + P, j.CD {25%}
- qcf + D,
Corner
- cl.C (2) > f + A(1) > dp + A,
- dp + C {30%}
- DM qcf qcf + P {50%}
- cr.C > (b) f + A,
- DM qcf qcf + P {55%}
- dp + A,
- j.D {30%}
- HSDM f hcf + AC {65%}
- CD >> BC, HSDM f hcf + AC {50%}
Maxmode
- cl.C (2) > f + A (1) >> BC, walk,
- (cl.C (2) > f + A (1) > hcf + P (3) >> qcf + B) x 3 >
- f + A (2) > qcb + P, dp + C >> qcf + B, DM qcf qcf + P {95%}
- cl.C (2) > f + A (1) >
- (S)DM qcb hcf + P/AC {90%/95%}
- HSDM f hcf + AC {100%}
- (cl.C (2) > f + A (1) > hcf + P (3) >> qcf + B) x 3 >
- Corner: cl.C (2) > f + A (1) >> BC, walk,
- (cl.C (2) > f + A (1) > hcf + P (3) >> qcf + B) x 4,
- cl.C (2) > f + A (1) > dp + A, dp + C {95%}
- (cl.C (2) > f + A (1) > hcf + P (3) >> qcf + B) x 4,
- cl.C (2) > f + A (1) >> BC, walk, cl.C (2) > f + A (1) > dp + A (1) >> dp + C >>
- (qcf + B, dp + A(1)) x 3 >>
- qcf + B, DM qcf qcf + P {75%}
- (qcf + B, dp + A(1)) x 3 >>
Attack Strings
- cr D >
- qcb + P
- qcf + K
- qcb + K
- qcf + K / qcb + K > f + A (2) >
- qcb + P
- qcf + K
- qcb + K
- cr.C > (b) f + A
- cl.C (2) > f + A (1) > dp + A
- Max Mode: df + B >> qcf + B > f + C
unblockable combo
- cl.C (2) > f + A (1) > qcb + P,
- repeat previus
- cr.D > qcf + B, cl.D (2) > f + A (1) > qcb + P
- cr.D > qcb + P
- f + A (1) >> BC, [Max Mode combo]
Strategies
- it is advisable to not keep Vanessa as the first character, as her really damaging combos waste lots of stock
- qcf + K teleport goes through most air projectiles; (b) f + P goes through all air projectiles, including DM projectiles. Both moves have upper body invincibility
- if the f + A followup of her qcf + K teleport is blocked, cancel to qcb + K to run away or qcb+ P, which gives her a frame advantage. Following up with a cr.D > qcb + B / qcf + B will hit anyone who attempts to attack her after the qcb + P. If they happen to roll through the sweep, whiff cancelling to qcb + B / qcf + B will keep her out of danger
- if the f + A followup of her qcf + K teleport connects, you can start a good mixup that can easily lead into her max combos. Cancel the f + A to qcf + D, and do cr.C as the opponent is landing. Then, cancel the cr.C to either qcf + B or qcf + D. If qcf + B is used, you will land right in front of them as they do, but they will be facing backwards, while if you use qcf + D, you will teleport all the way to the other side and land right in front of them. From here on, you can go for cl.C (2) > f + A (1) or cr.B > f + A (1) or f + A (1) into max combo, or attempt an instant overhead to finish off opponent (see below). The opponent is required to do a lot of guessing to get out of this mixup and the reward is very much worth it if you are proficient in combos. This mixup can also be done after her dash puncher, but it is harder. It requires running forward after dash puncher and doing a cr.C, cancel to either qcf + B or qcf + D
- hop back + C is an instant overhead if done the moment she leaves the ground, and is pretty much impossible to block on reaction. This is best done when the opponent will get killed by the hop back + C
- Vanessa's qcf + K / qcb + K > f + C causes guard crush, and thus can be used to do unblockable combos in maxmode. Going into maxmode just to attempt this unblockable may become predictable, so it is better to enter maxmode out of the blue, such as cancelling into maxmode after a blocked cl.C (2) > f + A (1) or even a df + B (since this move is punishable) and going straight into the unblockable. This will work more often because it is unexpected, and the opponent is already in block stun, giving him very little time to counter or roll out
- constantly pressure opponent with last attack string that uses qcb + P; attack string should usually be started from a sweep cancel to qcf + B forward teleport
- Vanessa's biggest weakness is opponents who spam crouch B's, as it will beat out the dash puncher and teleports. To combat this, use dp + A which is safe and has an unusual hitbox that usually catches people poking. dp + A is also a very good anti-air and can be spammed for the most part without fear of being punished
