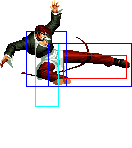
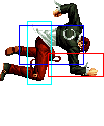
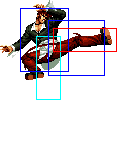
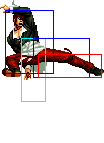
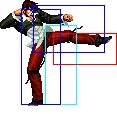
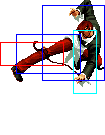
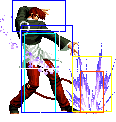
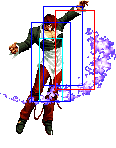
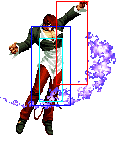
No edit summary |
No edit summary |
||
| (73 intermediate revisions by 15 users not shown) | |||
| Line 1: | Line 1: | ||
''' | [[File:Iori stance.gif|right|Un taco por favor]] | ||
1 | ==General Info== | ||
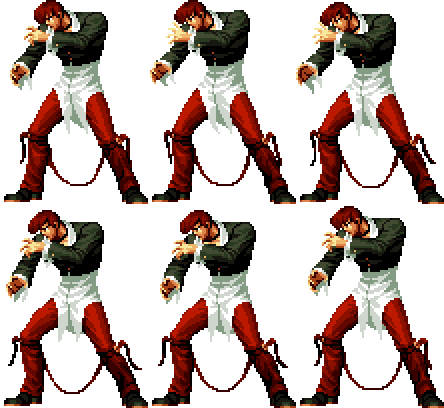
The second-handsomest man in Japan, Iori awakened his Orochi blood so that he could hunt down and kill the first-handsomest man, Kyo Kusanagi. He'd be doing a better job of it if his legs weren't tied together -- but Iori understands what's truly important.<br><br> | |||
3 | Crouch height: Low<br> | ||
Jump: 4/31/1<br> | |||
Hop: 4/23/1<br> | |||
Dash: 3/10~∞/3<br> | |||
Backdash: 3/16/3<br> | |||
Wakeup: 28 frames<br> | |||
Recovery roll: 24 frames<br> | |||
{| | |||
! Stand | |||
! Crouch | |||
! Jump | |||
! Grab | |||
! Run | |||
|- | |||
|valign="bottom"| [[image:Iori02_stand.png]] | |||
|valign="bottom"| [[image:Iori02_crouch.png]] | |||
|valign="bottom"| [[image:Iori02_jump.png]] | |||
|valign="bottom"| [[image:Iori02_grab.png]] | |||
|valign="bottom"| [[image:Iori02_run.png]] | |||
|} | |||
Colors: | |||
{| | |||
! [[image:snka.gif]] | |||
! [[image:snkb.gif]] | |||
! [[image:snkc.gif]] | |||
! [[image:snkd.gif]] | |||
|- | |||
| [[image:Iori02_colorA.png]] | |||
| [[image:Iori02_colorB.png]] | |||
| [[image:Iori02_colorC.png]] | |||
| [[image:Iori02_colorD.png]] | |||
|} | |||
{{ ProConTable | |||
| pros= | |||
* placeholder | |||
| cons= | |||
* placeholder | |||
}} | |||
==Movelist== | |||
=== Normals === | |||
==== Far Normals ==== | |||
===== <span class="invisible-header"></span> ===== | |||
<font style="visibility:hidden" size="0"></font> | |||
{{MoveData | |||
|image=Iori02_stA.png | |||
|caption= | |||
|name=st.A | |||
|input={{Icon-SNK|a}} | |||
|data= | |||
{{AttackData-KOF02 | |||
|Damage= | |||
|G. Damage= | |||
|Cancel= | |||
|Guard=Mid | |||
|Startup=6 | |||
|Active=3 | |||
|Recovery=3 | |||
|Total= | |||
|Hit Adv=+6 | |||
|Block Adv=+4 | |||
|Invul=- | |||
|description= | |||
}} | |||
}} | |||
- | ===== <span class="invisible-header"></span> ===== | ||
<font style="visibility:hidden" size="0"></font> | |||
{{MoveData | |||
|image=Iori02_stB.png | |||
|caption= | |||
|name=st.B | |||
|input={{Icon-SNK|b}} | |||
|data= | |||
{{AttackData-KOF02 | |||
|Damage= | |||
|G. Damage= | |||
|Cancel= | |||
|Guard= Mid | |||
|Startup=7 | |||
|Active=3 | |||
|Recovery=20 | |||
|Total= | |||
|Hit Adv=-3 | |||
|Block Adv=-5 | |||
|Invul=- | |||
|description= | |||
}} | |||
}} | |||
- | ===== <span class="invisible-header"></span> ===== | ||
<font style="visibility:hidden" size="0"></font> | |||
{{MoveData | |||
|image=Iori02_stC.png | |||
|caption= | |||
|name=st.C | |||
|input={{Icon-SNK|c}} | |||
|data= | |||
{{AttackData-KOF02 | |||
|Damage= | |||
|G. Damage= | |||
|Cancel=K,C,S,Su | |||
|Guard= Mid | |||
|Startup=7 | |||
|Active=3 | |||
|Recovery=20 | |||
|Total= | |||
|Hit Adv=-3 | |||
|Block Adv=-5 | |||
|Invul=- | |||
|description= | |||
}} | |||
}} | |||
- | ===== <span class="invisible-header"></span> ===== | ||
<font style="visibility:hidden" size="0"></font> | |||
{{MoveData | |||
|image=Iori02_stD.png | |||
|caption= | |||
|name=st.D | |||
|input={{Icon-SNK|d}} | |||
|data= | |||
{{AttackData-KOF02 | |||
|Damage= | |||
|G. Damage= | |||
|Cancel= | |||
|Guard= Mid | |||
|Startup=10 | |||
|Active=8 | |||
|Recovery=20 | |||
|Total= | |||
|Hit Adv=-8 | |||
|Block Adv=-10 | |||
|Invul=- | |||
|description= | |||
}} | |||
}} | |||
- | ==== Close Range Normals ==== | ||
===== <span class="invisible-header"></span> ===== | |||
<font style="visibility:hidden" size="0"></font> | |||
{{MoveData | |||
|image=Iori02_clA.png | |||
|caption= | |||
|name=cl.A | |||
|input={{Icon-SNK|a}} | |||
|data= | |||
{{AttackData-KOF02 | |||
|Damage= | |||
|G. Damage= | |||
|Cancel=K,R,C,S,Su | |||
|Guard=Mid | |||
|Startup=4 | |||
|Active=5 | |||
|Recovery=5 | |||
|Total= | |||
|Hit Adv=+2 | |||
|Block Adv=0 | |||
|Invul=- | |||
|description= | |||
}} | |||
}} | |||
- | ===== <span class="invisible-header"></span> ===== | ||
<font style="visibility:hidden" size="0"></font> | |||
{{MoveData | |||
|image=Iori02_clB.png | |||
|caption= | |||
|name=cl.B | |||
|input={{Icon-SNK|b}} | |||
|data= | |||
{{AttackData-KOF02 | |||
|Damage= | |||
|G. Damage= | |||
|Cancel=K,C,S,Su | |||
|Guard=Low | |||
|Startup=5 | |||
|Active=3 | |||
|Recovery=5 | |||
|Total= | |||
|Hit Adv=+4 | |||
|Block Adv=+2 | |||
|Invul=- | |||
|description= | |||
}} | |||
}} | |||
- | ===== <span class="invisible-header"></span> ===== | ||
<font style="visibility:hidden" size="0"></font> | |||
{{MoveData | |||
|image=Iori02_clC1.png | |||
|image2=Iori02_clC2.png | |||
|caption= | |||
|name=cl.C | |||
|input={{Icon-SNK|c}} | |||
|data= | |||
{{AttackData-KOF02 | |||
|Damage= | |||
|G. Damage= | |||
|Cancel=C,S,Su | |||
|Guard= Mid | |||
|Startup=2 | |||
|Active=2+5 | |||
|Recovery=11 | |||
|Total= | |||
|Hit Adv=+2 | |||
|Block Adv=0 | |||
|Invul=- | |||
|description= | |||
}} | |||
}} | |||
- | ===== <span class="invisible-header"></span> ===== | ||
<font style="visibility:hidden" size="0"></font> | |||
{{MoveData | |||
|image=Iori02_clD.png | |||
|caption= | |||
|name=cl.D | |||
|input={{Icon-SNK|d}} | |||
|data= | |||
{{AttackData-KOF02 | |||
|Damage= | |||
|G. Damage= | |||
|Cancel= | |||
|Guard= Mid | |||
|Startup=5 | |||
|Active=6 | |||
|Recovery=13 | |||
|Total= | |||
|Hit Adv=+1 | |||
|Block Adv=-1 | |||
|Invul=- | |||
|description= | |||
}} | |||
}} | |||
- | ==== Crouching Normals ==== | ||
===== <span class="invisible-header"></span> ===== | |||
<font style="visibility:hidden" size="0"></font> | |||
{{MoveData | |||
|image=Iori02_crA.png | |||
|caption= | |||
|name=cr.A | |||
|input={{Motion|2}}{{Icon-SNK|a}} | |||
|data= | |||
{{AttackData-KOF02 | |||
|Damage= | |||
|G. Damage= | |||
|Cancel=K,R,C,S,Su | |||
|Guard= Mid | |||
|Startup=5 | |||
|Active=4 | |||
|Recovery=7 | |||
|Total= | |||
|Hit Adv=+1 | |||
|Block Adv=-1 | |||
|Invul=- | |||
|description= | |||
}} | |||
}} | |||
===== <span class="invisible-header"></span> ===== | |||
<font style="visibility:hidden" size="0"></font> | |||
{{MoveData | |||
|image=Iori02_crB.png | |||
|caption= | |||
|name=cr.B | |||
|input={{Motion|2}}{{Icon-SNK|b}} | |||
|data= | |||
{{AttackData-KOF02 | |||
|Damage= | |||
|G. Damage= | |||
|Cancel=R | |||
|Guard= Low | |||
|Startup=5 | |||
|Active=5 | |||
|Recovery=5 | |||
|Total= | |||
|Hit Adv=+2 | |||
|Block Adv=0 | |||
|Invul=- | |||
|description= | |||
}} | |||
}} | |||
===== <span class="invisible-header"></span> ===== | |||
<font style="visibility:hidden" size="0"></font> | |||
{{MoveData | |||
|image=Iori02_crC.png | |||
|caption= | |||
|name=cr.C | |||
|input={{Motion|2}}{{Icon-SNK|c}} | |||
|data= | |||
{{AttackData-KOF02 | |||
|Damage= | |||
|G. Damage= | |||
|Cancel=K,C,S,Su | |||
|Guard= Mid | |||
|Startup=7 | |||
|Active=5 | |||
|Recovery=16 | |||
|Total= | |||
|Hit Adv=-1 | |||
|Block Adv=-3 | |||
|Invul=- | |||
|description= | |||
}} | |||
}} | |||
===== <span class="invisible-header"></span> ===== | |||
<font style="visibility:hidden" size="0"></font> | |||
{{MoveData | |||
|image=Iori02_crD.png | |||
|caption=stop using sweep | |||
|name=cr.D | |||
|input={{Motion|2}}{{Icon-SNK|d}} | |||
|data= | |||
{{AttackData-KOF02 | |||
|Damage= | |||
|G. Damage= | |||
|Cancel= | |||
|Guard= Low | |||
|Startup=5 | |||
|Active=6 | |||
|Recovery=31 | |||
|Total= | |||
|Hit Adv=KD | |||
|Block Adv=-19 | |||
|Invul=- | |||
|description= | |||
}} | |||
}} | |||
==== Neutral Jumping Normals ==== | |||
===== <span class="invisible-header"></span> ===== | |||
<font style="visibility:hidden" size="0"></font> | |||
{{MoveData | |||
|image=Iori02_jA.png | |||
|caption= | |||
|name=nj.A | |||
|input={{Motion|8}}{{Icon-SNK|a}} | |||
|data= | |||
{{AttackData-KOF02 | |||
|Damage=- | |||
|G. Damage= | |||
|Cancel= | |||
|Guard= Overhead | |||
|Startup=3 | |||
|Active=9 | |||
|Recovery=- | |||
|Total= | |||
|Hit Adv=- | |||
|Block Adv=- | |||
|Invul=- | |||
|description= | |||
}} | |||
}} | |||
===== <span class="invisible-header"></span> ===== | |||
<font style="visibility:hidden" size="0"></font> | |||
{{MoveData | |||
|image=Iori02_jB.png | |||
|caption= | |||
|name=nj.B | |||
|input={{Motion|8}}{{Icon-SNK|b}} | |||
|data= | |||
{{AttackData-KOF02 | |||
|Damage=- | |||
|G. Damage= | |||
|Cancel= | |||
|Guard= Overhead | |||
|Startup=4 | |||
|Active=7 | |||
|Recovery=- | |||
|Total= | |||
|Hit Adv=- | |||
|Block Adv=- | |||
|Invul=- | |||
|description= | |||
}} | |||
}} | |||
===== <span class="invisible-header"></span> ===== | |||
<font style="visibility:hidden" size="0"></font> | |||
{{MoveData | |||
|image=Iori02_jC.png | |||
|caption= | |||
|name=nj.C | |||
|input={{Motion|8}}{{Icon-SNK|c}} | |||
|data= | |||
{{AttackData-KOF02 | |||
|Damage=- | |||
|G. Damage= | |||
|Cancel= | |||
|Guard= Overhead | |||
|Startup=8 | |||
|Active=3 | |||
|Recovery=- | |||
|Total= | |||
|Hit Adv=- | |||
|Block Adv=- | |||
|Invul=- | |||
|description= | |||
}} | |||
}} | |||
===== <span class="invisible-header"></span> ===== | |||
<font style="visibility:hidden" size="0"></font> | |||
{{MoveData | |||
|image=Iori02_jD1.png | |||
|image2=Iori02_jD2.png | |||
|caption= | |||
|name=nj.D | |||
|input={{Motion|8}}{{Icon-SNK|d}} | |||
|data= | |||
{{AttackData-KOF02 | |||
|Damage=- | |||
|G. Damage= | |||
|Cancel= | |||
|Guard= Overhead | |||
|Startup=5 | |||
|Active=3+2 | |||
|Recovery=- | |||
|Total= | |||
|Hit Adv=- | |||
|Block Adv=- | |||
|Invul=- | |||
|description= | |||
}} | |||
}} | |||
==== Diagonal Jump Normals ==== | |||
===== <span class="invisible-header"></span> ===== | |||
<font style="visibility:hidden" size="0"></font> | |||
{{MoveData | |||
|image=Iori02_jA.png | |||
|caption= | |||
|name=dj.A | |||
|input={{Motion|7}}/{{Motion|9}}+{{Icon-SNK|a}} | |||
|data= | |||
{{AttackData-KOF02 | |||
|Damage=- | |||
|G. Damage= | |||
|Cancel= | |||
|Guard= Overhead | |||
|Startup=3 | |||
|Active=9 | |||
|Recovery=- | |||
|Total= | |||
|Hit Adv=- | |||
|Block Adv=- | |||
|Invul=- | |||
|description= | |||
}} | |||
}} | |||
===== <span class="invisible-header"></span> ===== | |||
<font style="visibility:hidden" size="0"></font> | |||
{{MoveData | |||
|image=Iori02_jB.png | |||
|caption= | |||
|name=dj.B | |||
|input={{Motion|7}}/{{Motion|9}}+{{Icon-SNK|b}} | |||
|data= | |||
{{AttackData-KOF02 | |||
|Damage=- | |||
|G. Damage= | |||
|Cancel= | |||
|Guard= Overhead | |||
|Startup=4 | |||
|Active=7 | |||
|Recovery=- | |||
|Total= | |||
|Hit Adv=- | |||
|Block Adv=- | |||
|Invul=- | |||
|description= | |||
}} | |||
}} | |||
===== <span class="invisible-header"></span> ===== | |||
<font style="visibility:hidden" size="0"></font> | |||
{{MoveData | |||
|image=Iori02_jC.png | |||
|caption= | |||
|name=dj.C | |||
|input={{Motion|7}}/{{Motion|9}}+{{Icon-SNK|c}} | |||
|data= | |||
{{AttackData-KOF02 | |||
|Damage=- | |||
|G. Damage= | |||
|Cancel= | |||
|Guard= Overhead | |||
|Startup=8 | |||
|Active=3 | |||
|Recovery=- | |||
|Total= | |||
|Hit Adv=- | |||
|Block Adv=- | |||
|Invul=- | |||
|description= | |||
}} | |||
}} | |||
===== <span class="invisible-header"></span> ===== | |||
<font style="visibility:hidden" size="0"></font> | |||
{{MoveData | |||
|image=Iori02_jD1.png | |||
|image2=Iori02_jD2.png | |||
|caption= | |||
|name=dj.D | |||
|input={{Motion|7}}/{{Motion|9}}+{{Icon-SNK|d}} | |||
|data= | |||
{{AttackData-KOF02 | |||
|Damage=- | |||
|G. Damage= | |||
|Cancel= | |||
|Guard= Overhead | |||
|Startup=5 | |||
|Active=3+2 | |||
|Recovery=- | |||
|Total= | |||
|Hit Adv=- | |||
|Block Adv=- | |||
|Invul=- | |||
|description= | |||
}} | |||
}} | |||
==== Hop Normals ==== | |||
===== <span class="invisible-header"></span> ===== | |||
<font style="visibility:hidden" size="0"></font> | |||
{{MoveData | |||
|image=Iori02_jA.png | |||
|caption= | |||
|name=HH.A | |||
|input=tap {{Motion|7}}/{{Motion|9}}+{{Icon-SNK|a}} | |||
|data= | |||
{{AttackData-KOF02 | |||
|Damage=- | |||
|G. Damage= | |||
|Cancel= | |||
|Guard= Overhead | |||
|Startup=3 | |||
|Active=9 | |||
|Recovery=- | |||
|Total= | |||
|Hit Adv=- | |||
|Block Adv=- | |||
|Invul=- | |||
|description= | |||
}} | |||
}} | |||
===== <span class="invisible-header"></span> ===== | |||
<font style="visibility:hidden" size="0"></font> | |||
{{MoveData | |||
|image=Iori02_jB.png | |||
|caption= | |||
|name=HH.B | |||
|input=tap {{Motion|7}}/{{Motion|9}}+{{Icon-SNK|b}} | |||
|data= | |||
{{AttackData-KOF02 | |||
|Damage=- | |||
|G. Damage= | |||
|Cancel= | |||
|Guard= Overhead | |||
|Startup=4 | |||
|Active=7 | |||
|Recovery=- | |||
|Total= | |||
|Hit Adv=- | |||
|Block Adv=- | |||
|Invul=- | |||
|description= | |||
}} | |||
}} | |||
===== <span class="invisible-header"></span> ===== | |||
<font style="visibility:hidden" size="0"></font> | |||
{{MoveData | |||
|image=Iori02_hC.png | |||
|caption= | |||
|name=HH.C | |||
|input=tap {{Motion|7}}/{{Motion|9}}+{{Icon-SNK|c}} | |||
|data= | |||
{{AttackData-KOF02 | |||
|Damage=- | |||
|G. Damage= | |||
|Cancel= | |||
|Guard= Overhead | |||
|Startup=8 | |||
|Active=3 | |||
|Recovery=- | |||
|Total= | |||
|Hit Adv=- | |||
|Block Adv=- | |||
|Invul=- | |||
|description= | |||
}} | |||
}} | |||
===== <span class="invisible-header"></span> ===== | |||
<font style="visibility:hidden" size="0"></font> | |||
{{MoveData | |||
|image=Iori02_hD1.png | |||
|image2=Iori02_hD2.png | |||
|caption= | |||
|name=HH.D | |||
|input=tap {{Motion|7}}/{{Motion|9}}+{{Icon-SNK|d}} | |||
|data= | |||
{{AttackData-KOF02 | |||
|Damage=- | |||
|G. Damage= | |||
|Cancel= | |||
|Guard= Overhead | |||
|Startup=5 | |||
|Active=3+2 | |||
|Recovery=- | |||
|Total= | |||
|Hit Adv=- | |||
|Block Adv=- | |||
|Invul=- | |||
|description= | |||
}} | |||
}} | |||
==== Blowback Attack ==== | |||
===== <span class="invisible-header"></span> ===== | |||
<font style="visibility:hidden" size="0"></font> | |||
{{MoveData | |||
|image=Iori02_stCD.png | |||
|caption= | |||
|name=CD | |||
|input={{Icon-SNK|c}}+{{Icon-SNK|d}} | |||
|data= | |||
{{AttackData-KOF02 | |||
|Damage=- | |||
|G. Damage= | |||
|Cancel=C,S,Su | |||
|Guard= Mid | |||
|Startup=11 | |||
|Active=5 | |||
|Recovery=24 | |||
|Total= | |||
|Hit Adv=KD | |||
|Block Adv=-7 | |||
|Invul=- | |||
|description= | |||
}} | |||
}} | |||
===== <span class="invisible-header"></span> ===== | |||
<font style="visibility:hidden" size="0"></font> | |||
{{MoveData | |||
|image=Iori02_jCD.png | |||
|caption= | |||
|name=jp.CD | |||
|input={{Motion|7}}/{{Motion|8}}/{{Motion|9}}+{{Icon-SNK|c}}+{{Icon-SNK|d}} | |||
|data= | |||
{{AttackData-KOF02 | |||
|Damage=- | |||
|G. Damage= | |||
|Cancel= | |||
|Guard= Mid | |||
|Startup=12 | |||
|Active=4 | |||
|Recovery=- | |||
|Total= | |||
|Hit Adv=KD | |||
|Block Adv=- | |||
|Invul=- | |||
|description= | |||
}} | |||
}} | |||
=== Throws === | |||
===== <span class="invisible-header"></span> ===== | |||
<font style="visibility:hidden" size="0"></font> | |||
{{MoveData | |||
|image= | |||
|caption= | |||
|name=Sakahagi | |||
|input={{Motion|4}}/{{Motion|6}}+{{Icon-SNK|c}} | |||
|data= | |||
{{AttackData-KOF02 | |||
|Damage=- | |||
|G. Damage= | |||
|Cancel= | |||
|Guard= | |||
|Startup= | |||
|Active= | |||
|Recovery= | |||
|Total= | |||
|Hit Adv= | |||
|Block Adv= | |||
|Invul=- | |||
|description= | |||
}} | |||
}} | |||
===== <span class="invisible-header"></span> ===== | |||
<font style="visibility:hidden" size="0"></font> | |||
{{MoveData | |||
|image= | |||
|caption= | |||
|name=Saka Sakahagi | |||
|input={{Motion|4}}/{{Motion|6}}+{{Icon-SNK|d}} | |||
|data= | |||
{{AttackData-KOF02 | |||
|Damage=- | |||
|G. Damage= | |||
|Cancel= | |||
|Guard= | |||
|Startup= | |||
|Active= | |||
|Recovery= | |||
|Total= | |||
|Hit Adv= | |||
|Block Adv= | |||
|Invul=- | |||
|description= | |||
}} | |||
}} | |||
=== Command Normals === | |||
===== <span class="invisible-header"></span> ===== | |||
<font style="visibility:hidden" size="0"></font> | |||
{{MoveData | |||
|image=Iori02_fA.png | |||
|image2=Iori02_fAA.png | |||
|caption= | |||
|name=Ge Shiki~Yumebiki | |||
|input={{Motion|6}}{{Icon-SNK|a}}{{Icon-SNK|a}} | |||
|data= | |||
{{AttackData-KOF02 | |||
|version={{Motion|6}}{{Icon-SNK|a}} | |||
|Damage=- | |||
|G. Damage= | |||
|Cancel=Su,F+A,A | |||
|Guard= Mid | |||
|Startup=8 | |||
|Active=4 | |||
|Recovery=19 | |||
|Total= | |||
|Hit Adv=-3 | |||
|Block Adv=-5 | |||
|Invul=- | |||
|description= *can only cancel into DMs on the 1st hit | |||
}} | |||
{{AttackData-KOF02 | |||
|version={{Icon-SNK|a}} | |||
|Damage=- | |||
|G. Damage= | |||
|Cancel=S,Su | |||
|Guard= Mid | |||
|Startup=9 | |||
|Active=7 | |||
|Recovery=15 | |||
|Total= | |||
|Hit Adv=-2 | |||
|Block Adv=-4 | |||
|Invul=- | |||
|description= | |||
}} | |||
}} | |||
===== <span class="invisible-header"></span> ===== | |||
<font style="visibility:hidden" size="0"></font> | |||
{{MoveData | |||
|image=Iori02_fB1.png | |||
|image2=Iori02_fB2.png | |||
|caption= | |||
|name=Ge Shiki~Goufu In Shinigame | |||
|input={{Motion|6}}{{Icon-SNK|b}} | |||
|data= | |||
{{AttackData-KOF02 | |||
|Damage=- | |||
|G. Damage= | |||
|Cancel= | |||
|Guard= Mid | |||
|Startup=27 (23) | |||
|Active=3(3)3 (5(3) | |||
|Recovery=20 | |||
|Total= | |||
|Hit Adv=-9 (-11) | |||
|Block Adv=-11 (-13) | |||
|Invul=- | |||
|description=*Second hit usually whiffs, this has been taken into account in the frame advantage calculations. | |||
*when canceled into, it no longer an overhead, has worser frames on hit and block, but now gains special and super cancel properties | |||
}} | |||
}} | |||
===== <span class="invisible-header"></span> ===== | |||
<font style="visibility:hidden" size="0"></font> | |||
{{MoveData | |||
|image=Iori02_jb+B.png | |||
|caption= | |||
|name=Ge Shiki~Yuri Ori | |||
|input=Jump {{Motion|4}}{{Icon-SNK|b}} | |||
|data= | |||
{{AttackData-KOF02 | |||
|Damage=- | |||
|G. Damage= | |||
|Cancel= | |||
|Guard= Mid | |||
|Startup=4 | |||
|Active=5 | |||
|Recovery=3 | |||
|Total= | |||
|Hit Adv=- | |||
|Block Adv=- | |||
|Invul=- | |||
|description=Has three frames of additional landing recovery. Whiffs on most crouchers. | |||
}} | |||
}} | |||
=== Special Moves === | |||
===== <span class="invisible-header"></span> ===== | |||
<font style="visibility:hidden" size="0"></font> | |||
{{MoveData | |||
|image=Iori02_qcfP.png | |||
|caption= | |||
|name=108 Shiki~Yami Barai | |||
|input={{Motion|236}}[[File:P.png]] | |||
|data= | |||
{{AttackData-KOF02 | |||
|version={{Icon-SNK|a}} | |||
|Damage=- | |||
|G. Damage= | |||
|Cancel= | |||
|Guard= Mid | |||
|Startup=10 | |||
|Active=- | |||
|Recovery=39 | |||
|Total= | |||
|Hit Adv=-7 | |||
|Block Adv=-9 | |||
|Invul=- | |||
|description=* Iori throws a ground projectile | |||
}} | |||
{{AttackData-KOF02 | |||
|version={{Icon-SNK|c}} | |||
|Damage=- | |||
|G. Damage= | |||
|Cancel= | |||
|Guard= Mid | |||
|Startup=9 | |||
|Active=- | |||
|Recovery=40 | |||
|Total= | |||
|Hit Adv=-8 | |||
|Block Adv=-10 | |||
|Invul=- | |||
|description=* qcf+C travels alot faster than qcf+A, although both don't have good recovery | |||
}} | |||
}} | |||
===== <span class="invisible-header"></span> ===== | |||
<font style="visibility:hidden" size="0"></font> | |||
{{MoveData | |||
|image=Iori02_dpA1.png | |||
|image2=Iori02_dpA2.png | |||
|image3=Iori02_dpA3.png | |||
|caption3= A version | |||
|image4=Iori02_dpC1.png | |||
|image5=Iori02_dpC2.png | |||
|image6=Iori02_dpC3.png | |||
|image7=Iori02_dpC4.png | |||
|caption7= C version | |||
|name=100 Shiki~Oniyaki | |||
|input={{Motion|623}}[[File:P.png]] | |||
|data= | |||
{{AttackData-KOF02 | |||
|version={{Icon-SNK|a}} | |||
|Damage=- | |||
|G. Damage= | |||
|Cancel=Su | |||
|Guard= Mid | |||
|Startup=5 | |||
|Active=2*2*8 | |||
|Recovery=11+16 | |||
|Total= | |||
|Hit Adv=KD | |||
|Block Adv=-17 | |||
|Invul=- | |||
|description=* a decent fast, vertical anti-air but lacks much invincibility | |||
* free cancellable into | |||
* dp+A free cancellable out of, dp+C free cancellable out of on the first and second hit | |||
* dp+A is supercancellable, dp+C is supercancellable on the first and second hit while Iori is on the ground | |||
}} | |||
{{AttackData-KOF02 | |||
|version={{Icon-SNK|c}} | |||
|Damage=- | |||
|G. Damage= | |||
|Cancel=Su | |||
|Guard=Mid | |||
|Startup=5 | |||
|Active=2*3*7+6 | |||
|Recovery=22+19 | |||
|Total= | |||
|Hit Adv=KD | |||
|Block Adv=-36 | |||
|Invul=- | |||
|description= | |||
}} | |||
}} | |||
===== <span class="invisible-header"></span> ===== | |||
<font style="visibility:hidden" size="0"></font> | |||
{{MoveData | |||
|image=Iori02_qcbP1.png | |||
|image2=Iori02_qcbP2.png | |||
|image3=Iori02_qcbP3.png | |||
|caption= | |||
|name=127 Shiki~Aoi Hana | |||
|input={{Motion|214}}{{Icon-SNK|a}} x3 | |||
|data= | |||
{{AttackData-KOF02 | |||
|version=1st Rekka | |||
|Damage=- | |||
|G. Damage= | |||
|Cancel= | |||
|Guard=Mid | |||
|Startup=8 | |||
|Active=3 | |||
|Recovery=26 | |||
|Total= | |||
|Hit Adv=-9 | |||
|Block Adv=-11 | |||
|Invul=- | |||
|description=* Iori will do a punch, moving him forward. This can be done three times. For the third hit, Iori will jump into the air and hit them from above | |||
* the followups can be delayed to confuse the opponent | |||
* qcb+A comes out faster than qcb+C, | |||
* free cancellable into | |||
* free cancellable out of on the first and second hits | |||
}} | |||
{{AttackData-KOF02 | |||
|version=2nd Rekka | |||
|Damage=- | |||
|G. Damage= | |||
|Cancel= | |||
|Guard=Mid | |||
|Startup=7 | |||
|Active=3 | |||
|Recovery=28 | |||
|Total= | |||
|Hit Adv=KD | |||
|Block Adv=-13 | |||
|Invul=- | |||
|description= | |||
}} | |||
{{AttackData-KOF02 | |||
|version=3rd Rekka | |||
|Damage=- | |||
|G. Damage= | |||
|Cancel= | |||
|Guard=Mid | |||
|Startup=17 | |||
|Active=2 | |||
|Recovery=29 | |||
|Total= | |||
|Hit Adv=HKD | |||
|Block Adv=-13 | |||
|Invul=- | |||
|description= *the third hit is very punishable on block | |||
* third hit is an overhead and hard knockdown | |||
}} | |||
}} | |||
===== <span class="invisible-header"></span> ===== | |||
<font style="visibility:hidden" size="0"></font> | |||
{{MoveData | |||
|image= | |||
|caption= | |||
|name=127 Shiki~Aoi Hana | |||
|input={{Motion|214}}{{Icon-SNK|c}} x3 | |||
|data= | |||
{{AttackData-KOF02 | |||
|version=1st Rekka | |||
|Damage=- | |||
|G. Damage= | |||
|Cancel= | |||
|Guard=Mid | |||
|Startup=11 | |||
|Active=3 | |||
|Recovery=28 | |||
|Total= | |||
|Hit Adv=-11 | |||
|Block Adv=-13 | |||
|Invul=- | |||
|description=*qcb+C is slower, but covers more horizontal range than qcb+A | |||
}} | |||
{{AttackData-KOF02 | |||
|version=2nd Rekka | |||
|Damage=- | |||
|G. Damage= | |||
|Cancel= | |||
|Guard=Mid | |||
|Startup=11 | |||
|Active=3 | |||
|Recovery=29 | |||
|Total= | |||
|Hit Adv=KD | |||
|Block Adv=-14 | |||
|Invul=- | |||
|description= | |||
}} | |||
{{AttackData-KOF02 | |||
|version=3rd Rekka | |||
|Damage=- | |||
|G. Damage= | |||
|Cancel= | |||
|Guard=Mid | |||
|Startup=17 | |||
|Active=9 | |||
|Recovery=31 | |||
|Total= | |||
|Hit Adv=HKD | |||
|Block Adv=-22 | |||
|Invul=- | |||
|description= *the third hit is very punishable on block | |||
* third hit is an overhead and hard knockdown | |||
}} | |||
}} | |||
===== <span class="invisible-header"></span> ===== | |||
<font style="visibility:hidden" size="0"></font> | |||
{{MoveData | |||
|image=Iori02_hcbK.png | |||
|caption= | |||
|name=212 Shiki~Kototsuki In | |||
|input={{Motion|63214}}[[File:K.png]] | |||
|data= | |||
{{AttackData-KOF02 | |||
|version={{Icon-SNK|b}} | |||
|Damage=- | |||
|G. Damage= | |||
|Cancel= | |||
|Guard= Mid | |||
|Startup=6 | |||
|Active=16 | |||
|Recovery=14 | |||
|Total= | |||
|Hit Adv=- | |||
|Block Adv=- | |||
|Invul=- | |||
|description=* Iori runs forward, faster than his running speed. If he connects, he will grab the opponent and blast them in the face | |||
* hcb+B runs slightly more than half screen, while hcb+D will make him run full screen | |||
* he recovers quickly if he whiffs but has horrible recovery time if the opponent blocks the attack | |||
* hard knockdown | |||
* does alot of guardcrush damage on the first hit | |||
* free cancellable into | |||
* free cancellable out of on the first hit | |||
}} | |||
{{AttackData-KOF02 | |||
|version={{Icon-SNK|d}} | |||
|Damage=- | |||
|G. Damage= | |||
|Cancel= | |||
|Guard=Mid | |||
|Startup=6 | |||
|Active=24 | |||
|Recovery=14 | |||
|Total= | |||
|Hit Adv=- | |||
|Block Adv=- | |||
|Invul=- | |||
|description= | |||
}} | |||
}} | |||
===== <span class="invisible-header"></span> ===== | |||
<font style="visibility:hidden" size="0"></font> | |||
{{MoveData | |||
|image=Iori02_hcbfP.png | |||
|caption= | |||
|name=Kuzukaze | |||
|input={{Motion|63214}}{{Motion|6}}[[File:P.png]] | |||
|data= | |||
{{AttackData-KOF02 | |||
|Damage=- | |||
|G. Damage= | |||
|Cancel= | |||
|Guard= throw | |||
|Startup=11 | |||
|Active=1 | |||
|Recovery=31(16) | |||
|Total= | |||
|Hit Adv=+16 | |||
|Block Adv=- | |||
|Invul=- | |||
|description=* a delayed command throw with some startup invincibility | |||
* can be followed up by any combo, although running up to combo them before they recover requires some practice | |||
}} | |||
}} | |||
===Desperation Moves=== | |||
===== <span class="invisible-header"></span> ===== | |||
<font style="visibility:hidden" size="0"></font> | |||
{{MoveData | |||
|image=Iori02_DM1.png | |||
|image2=Iori02_DM2.png | |||
|caption= | |||
|name=Kin1211 Shiki~Ya Otome | |||
|input={{Motion|236}}{{Motion|63214}}[[File:P.png]] | |||
|data= | |||
{{AttackData-KOF02 | |||
|version={{Icon-SNK|a}} | |||
|Damage=- | |||
|G. Damage= | |||
|Cancel= | |||
|Guard= mid | |||
|Startup=1+5 | |||
|Active=4+12 | |||
|Recovery=42 | |||
|Total= | |||
|Hit Adv=HKD | |||
|Block Adv=-25 | |||
|Invul=- | |||
|description=* Iori dashes across the screen. If he connects, he does a combo on the opponent. Otherwise, he will do nothing and is very open to attack | |||
}} | |||
{{AttackData-KOF02 | |||
|version={{Icon-SNK|c}} | |||
|Damage=- | |||
|G. Damage= | |||
|Cancel= | |||
|Guard= Mid | |||
|Startup=1+5 | |||
|Active=4+20 | |||
|Recovery=44 | |||
|Total= | |||
|Hit Adv=HKD | |||
|Block Adv=-27 | |||
|Invul=- | |||
|description=* can be followed up by qcfx4+AC, which should be done the moment the explosion from the end of his qcf hcb+P begins | |||
}} | |||
}} | |||
===== <span class="invisible-header"></span> ===== | |||
<font style="visibility:hidden" size="0"></font> | |||
{{MoveData | |||
|image= | |||
|caption= | |||
|name=Ura316Shiki~Saika | |||
|input={{Motion|236}}{{Motion|63214}}[[File:P.png]] > {{Motion|236}}x4{{Icon-SNK|a}}+{{Icon-SNK|c}} | |||
|data= | |||
{{AttackData-KOF02 | |||
|Damage=- | |||
|G. Damage= | |||
|Cancel= | |||
|Guard= | |||
|Startup=1+7 | |||
|Active=- | |||
|Recovery=- | |||
|Total= | |||
|Hit Adv=- | |||
|Block Adv=- | |||
|Invul=- | |||
|description= | |||
* the opponent is lifted into the air, where Iori hits them with an attack | |||
* it is possible for this move to whiff if it was cancelled into a bit too late | |||
* in the corner, it can hit opponents off the ground and still not whiff even if cancelled late | |||
*requires one bar of meter in order to preform after maiden masher | |||
}} | |||
}} | |||
===Super Desperation Move=== | |||
===== <span class="invisible-header"></span> ===== | |||
<font style="visibility:hidden" size="0"></font> | |||
{{MoveData | |||
|image=Iori02_DM1.png | |||
|image2=Iori02_DM2.png | |||
|caption= | |||
|name=Kin 1211~Ya Otome | |||
|input={{Motion|236}}{{Motion|63214}}{{Icon-SNK|a}}+{{Icon-SNK|c}} | |||
|data= | |||
{{AttackData-KOF02 | |||
|Damage=- | |||
|G. Damage= | |||
|Cancel= | |||
|Guard= Mid | |||
|Startup=1+11 | |||
|Active=3+21 | |||
|Recovery=44 | |||
|Total= | |||
|Hit Adv=HKD | |||
|Block Adv=-27 | |||
|Invul=- | |||
|description=* Iori dashes forward full screen length. If he connects, he will do a series of attacks doing 50% damage to the opponent. Otherwise, he does nothing and is very open to attack | |||
}} | |||
}} | |||
===Hidden Super Desperation Move=== | |||
===== <span class="invisible-header"></span> ===== | |||
<font style="visibility:hidden" size="0"></font> | |||
{{MoveData | |||
|image=Iori02_HSDM.png | |||
|caption= | |||
|name=Ura 1219 Shiki~En'ou | |||
|input={{Motion|214}}{{Motion|41236}}{{Motion|4}}{{Motion|6}}{{Icon-SNK|a}}+{{Icon-SNK|c}} | |||
|data= | |||
{{AttackData-KOF02 | |||
|Damage=- | |||
|G. Damage= | |||
|Cancel= | |||
|Guard= Throw | |||
|Startup=1+18 | |||
|Active=1 | |||
|Recovery=38 | |||
|Total= | |||
|Hit Adv=- | |||
|Block Adv=- | |||
|Invul=- | |||
|description=* Iori jumps very quickly across the screen, grabbing the opponent | |||
* unblockable | |||
* Iori is invincible during the leap, and when he is recovering | |||
}} | |||
}} | |||
== Combos == | |||
===Basic Combos=== | |||
* cr.B, cr.A > | |||
** qcb + A x 3 {20-25%} | |||
** qcf + C (Point blank.) | |||
* cl.B, cl.C ... | |||
* Very close: cl.C > | |||
** hcb + K [30%] | |||
** dp + C [24%] | |||
** dp + C (2) >> | |||
*** DM qcf hcb + P > [48%] {2 stocks} | |||
**** DM qcf qcf qcf qcf + AC [65%] {3 stocks} | |||
* cl.C / st.C / (cl.B > f + A > A) > | |||
** qcb + C x 3 [24%/24%/36%] | |||
* cl.C / st.C | |||
** qcf + C | |||
* (cl.C > f + A) / st.C / (cl.B > f + A > A) / (cr.B, cr.A > f + A) | |||
** DM qcf hcb + P > [??%/32%/44%/??%] {1 stock} | |||
*** DM qcf qcf qcf qcf + AC [??%/49%/61%/??%] {2 stocks} | |||
===Corner=== | |||
* Iori in corner: cr.A > hcb f + P, cr.A > hcb f + P, any combo | |||
===Max Mode=== | |||
* cl.D >> BC, run, cl.C > | |||
** (hcb + K (1) >> dp + C (2)) x 3 >> | |||
*** DM qcf hcb + P > DM qcf qcf qcf qcf + AC {87%} | |||
** qcb + C >> | |||
*** (hcb + K (1) >> dp + C (2)) x 2 >> | |||
**** SDM qcf hcb + AC {90%} | |||
* Opponent about one screen away from corner: cl.D >> BC, run, cl.C > hcb + K (1) >> dp + C (2) >> qcb + C x 2 >> hcb + K (1) >> qcb + A > qcb + A (delayed), DM qcf hcb + P > DM qcf qcf qcf qcf + AC {85%} | |||
* Iori in corner: air b + B, cr.A > hcb f + P, cl.D >> BC, run, cr.A > hcb f + P, run, cl.C > f + A > HSDM qcb hcf b f + AC {75%} | |||
* air b + B, cl.B > f + A >> BC, run, cl.C > qcb+C >> dp + C (2) >> | |||
** (hcb + K (1) >> dp + C (2)) x 2 >> | |||
*** DM qcf hcb + P > DM qcf qcf qcf qcf + AC | |||
===Counterhit=== | |||
* Counterhit: CD >> BC, SDM qcf hcb + AC {55%} | |||
* Counterhit: j.CD, | |||
** hcb + K {32%} | |||
** DM qcf hcb + P > DM qcf qcf qcf qcf + AC {50%} | |||
==Strategies== | |||
* Iori has a solid pressure game. His options include crouch B, close B, f + A (two lows) and hcb f + P scum gale. He can also attempt to tick scum gale from a close B. The mindgames can be further increased by instead doing a close C after close B (which does actually combo), in the case that he thought you would scum gale after the close B. Iori also has his jump b + B crossup, although it is best done as a surprise attack by hyper hopping over the opponent. Most people however, use it in a very obvious manner, by running full speed before jumping over the opponent, which is useless against an experienced player. This crossup can be blocked low. Some characters can simply sweep Iori when he attempts this crossup. Hyper hopping over the opponent into the crossup makes it a far more dangerous tool | |||
* Using b + B during the beginning of a backdash will make him dashback nearly a full screen length. Use this to easily get away from rushdown, as well as baiting opponents (mainly on wakeup). This can be used to run up then backdash away for mindgames | |||
* sometimes attempt to do the jump b+B crossover (the trick to doing this is when jumping over your opponent hold the forward and hit the B reasonably late) | |||
* use jump C or jump A air to ground battles, early jump D or jump CD for air to air battles. If opponent is close, hopping up or back with D stops most jump attempts | |||
*if qcb + A is blocked, do it once more or stop, not a third time. You can use random delays between them, for mindgames. However, there are many pokes that can still punish this move even if it is not fully completed, such as Joe's far D | |||
* hcb f + P has some startup of invincibility and can grab people out of their jumpins, similar to Clark's dp + K frankensteiner | |||
*run up to opponent and do close C, as it will stop all jump attempts. Even better, if the opponent happens to jump behind you when the close C comes out, Iori automatically faces the correct side and will anti-air them | |||
* hcb + K on the first hit guardcrushes fairly well. If the opponent's guardcrush bar begins to flash, a close C/far C, hcb + K will guardcrush on the first hit of hcb + K | |||
{{Template:The King of Fighters 2002}} | |||
[[Category:The King of Fighters 2002]] | |||
[[Category:Iori Yagami]] | |||
Latest revision as of 00:56, 3 February 2024
General Info
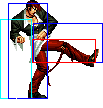
The second-handsomest man in Japan, Iori awakened his Orochi blood so that he could hunt down and kill the first-handsomest man, Kyo Kusanagi. He'd be doing a better job of it if his legs weren't tied together -- but Iori understands what's truly important.
Crouch height: Low
Jump: 4/31/1
Hop: 4/23/1
Dash: 3/10~∞/3
Backdash: 3/16/3
Wakeup: 28 frames
Recovery roll: 24 frames
| Stand | Crouch | Jump | Grab | Run |
|---|---|---|---|---|

|

|

|
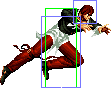
|
Colors:

|

|

|

|
| Strengths | Weaknesses |
|---|---|
|
|
Movelist
Normals
Far Normals
| Damage | Guard | Guard Damage | Cancel Properties | Startup | Active | Recovery | Total | Hit Advantage | Block Advantage | Invulnerability |
|---|---|---|---|---|---|---|---|---|---|---|
| - | Mid | - | - | 6 | 3 | 3 | - | +6 | +4 | - |
| Damage | Guard | Guard Damage | Cancel Properties | Startup | Active | Recovery | Total | Hit Advantage | Block Advantage | Invulnerability |
|---|---|---|---|---|---|---|---|---|---|---|
| - | Mid | - | - | 7 | 3 | 20 | - | -3 | -5 | - |
| Damage | Guard | Guard Damage | Cancel Properties | Startup | Active | Recovery | Total | Hit Advantage | Block Advantage | Invulnerability |
|---|---|---|---|---|---|---|---|---|---|---|
| - | Mid | - | K,C,S,Su | 7 | 3 | 20 | - | -3 | -5 | - |
| Damage | Guard | Guard Damage | Cancel Properties | Startup | Active | Recovery | Total | Hit Advantage | Block Advantage | Invulnerability |
|---|---|---|---|---|---|---|---|---|---|---|
| - | Mid | - | - | 10 | 8 | 20 | - | -8 | -10 | - |
Close Range Normals
| Damage | Guard | Guard Damage | Cancel Properties | Startup | Active | Recovery | Total | Hit Advantage | Block Advantage | Invulnerability |
|---|---|---|---|---|---|---|---|---|---|---|
| - | Mid | - | K,R,C,S,Su | 4 | 5 | 5 | - | +2 | 0 | - |
| Damage | Guard | Guard Damage | Cancel Properties | Startup | Active | Recovery | Total | Hit Advantage | Block Advantage | Invulnerability |
|---|---|---|---|---|---|---|---|---|---|---|
| - | Low | - | K,C,S,Su | 5 | 3 | 5 | - | +4 | +2 | - |
| Damage | Guard | Guard Damage | Cancel Properties | Startup | Active | Recovery | Total | Hit Advantage | Block Advantage | Invulnerability |
|---|---|---|---|---|---|---|---|---|---|---|
| - | Mid | - | C,S,Su | 2 | 2+5 | 11 | - | +2 | 0 | - |
| Damage | Guard | Guard Damage | Cancel Properties | Startup | Active | Recovery | Total | Hit Advantage | Block Advantage | Invulnerability |
|---|---|---|---|---|---|---|---|---|---|---|
| - | Mid | - | - | 5 | 6 | 13 | - | +1 | -1 | - |
Crouching Normals
| Damage | Guard | Guard Damage | Cancel Properties | Startup | Active | Recovery | Total | Hit Advantage | Block Advantage | Invulnerability |
|---|---|---|---|---|---|---|---|---|---|---|
| - | Mid | - | K,R,C,S,Su | 5 | 4 | 7 | - | +1 | -1 | - |
| Damage | Guard | Guard Damage | Cancel Properties | Startup | Active | Recovery | Total | Hit Advantage | Block Advantage | Invulnerability |
|---|---|---|---|---|---|---|---|---|---|---|
| - | Low | - | R | 5 | 5 | 5 | - | +2 | 0 | - |
| Damage | Guard | Guard Damage | Cancel Properties | Startup | Active | Recovery | Total | Hit Advantage | Block Advantage | Invulnerability |
|---|---|---|---|---|---|---|---|---|---|---|
| - | Mid | - | K,C,S,Su | 7 | 5 | 16 | - | -1 | -3 | - |
| Damage | Guard | Guard Damage | Cancel Properties | Startup | Active | Recovery | Total | Hit Advantage | Block Advantage | Invulnerability |
|---|---|---|---|---|---|---|---|---|---|---|
| - | Low | - | - | 5 | 6 | 31 | - | KD | -19 | - |
Neutral Jumping Normals
| Damage | Guard | Guard Damage | Cancel Properties | Startup | Active | Recovery | Total | Hit Advantage | Block Advantage | Invulnerability |
|---|---|---|---|---|---|---|---|---|---|---|
| - | Overhead | - | - | 3 | 9 | - | - | - | - | - |
| Damage | Guard | Guard Damage | Cancel Properties | Startup | Active | Recovery | Total | Hit Advantage | Block Advantage | Invulnerability |
|---|---|---|---|---|---|---|---|---|---|---|
| - | Overhead | - | - | 4 | 7 | - | - | - | - | - |
| Damage | Guard | Guard Damage | Cancel Properties | Startup | Active | Recovery | Total | Hit Advantage | Block Advantage | Invulnerability |
|---|---|---|---|---|---|---|---|---|---|---|
| - | Overhead | - | - | 8 | 3 | - | - | - | - | - |
| Damage | Guard | Guard Damage | Cancel Properties | Startup | Active | Recovery | Total | Hit Advantage | Block Advantage | Invulnerability |
|---|---|---|---|---|---|---|---|---|---|---|
| - | Overhead | - | - | 5 | 3+2 | - | - | - | - | - |
Diagonal Jump Normals
| Damage | Guard | Guard Damage | Cancel Properties | Startup | Active | Recovery | Total | Hit Advantage | Block Advantage | Invulnerability |
|---|---|---|---|---|---|---|---|---|---|---|
| - | Overhead | - | - | 3 | 9 | - | - | - | - | - |
| Damage | Guard | Guard Damage | Cancel Properties | Startup | Active | Recovery | Total | Hit Advantage | Block Advantage | Invulnerability |
|---|---|---|---|---|---|---|---|---|---|---|
| - | Overhead | - | - | 4 | 7 | - | - | - | - | - |
| Damage | Guard | Guard Damage | Cancel Properties | Startup | Active | Recovery | Total | Hit Advantage | Block Advantage | Invulnerability |
|---|---|---|---|---|---|---|---|---|---|---|
| - | Overhead | - | - | 8 | 3 | - | - | - | - | - |
| Damage | Guard | Guard Damage | Cancel Properties | Startup | Active | Recovery | Total | Hit Advantage | Block Advantage | Invulnerability |
|---|---|---|---|---|---|---|---|---|---|---|
| - | Overhead | - | - | 5 | 3+2 | - | - | - | - | - |
Hop Normals
| Damage | Guard | Guard Damage | Cancel Properties | Startup | Active | Recovery | Total | Hit Advantage | Block Advantage | Invulnerability |
|---|---|---|---|---|---|---|---|---|---|---|
| - | Overhead | - | - | 3 | 9 | - | - | - | - | - |
| Damage | Guard | Guard Damage | Cancel Properties | Startup | Active | Recovery | Total | Hit Advantage | Block Advantage | Invulnerability |
|---|---|---|---|---|---|---|---|---|---|---|
| - | Overhead | - | - | 4 | 7 | - | - | - | - | - |
| Damage | Guard | Guard Damage | Cancel Properties | Startup | Active | Recovery | Total | Hit Advantage | Block Advantage | Invulnerability |
|---|---|---|---|---|---|---|---|---|---|---|
| - | Overhead | - | - | 8 | 3 | - | - | - | - | - |
| Damage | Guard | Guard Damage | Cancel Properties | Startup | Active | Recovery | Total | Hit Advantage | Block Advantage | Invulnerability |
|---|---|---|---|---|---|---|---|---|---|---|
| - | Overhead | - | - | 5 | 3+2 | - | - | - | - | - |
Blowback Attack
| Damage | Guard | Guard Damage | Cancel Properties | Startup | Active | Recovery | Total | Hit Advantage | Block Advantage | Invulnerability |
|---|---|---|---|---|---|---|---|---|---|---|
| - | Mid | - | C,S,Su | 11 | 5 | 24 | - | KD | -7 | - |
| Damage | Guard | Guard Damage | Cancel Properties | Startup | Active | Recovery | Total | Hit Advantage | Block Advantage | Invulnerability |
|---|---|---|---|---|---|---|---|---|---|---|
| - | Mid | - | - | 12 | 4 | - | - | KD | - | - |
Throws
| Damage | Guard | Guard Damage | Cancel Properties | Startup | Active | Recovery | Total | Hit Advantage | Block Advantage | Invulnerability |
|---|---|---|---|---|---|---|---|---|---|---|
| - | - | - | - | - | - | - | - | - | - | - |
| Damage | Guard | Guard Damage | Cancel Properties | Startup | Active | Recovery | Total | Hit Advantage | Block Advantage | Invulnerability |
|---|---|---|---|---|---|---|---|---|---|---|
| - | - | - | - | - | - | - | - | - | - | - |
Command Normals
| Damage | Guard | Guard Damage | Cancel Properties | Startup | Active | Recovery | Total | Hit Advantage | Block Advantage | Invulnerability | |
|---|---|---|---|---|---|---|---|---|---|---|---|
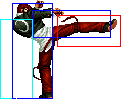
| - | Mid | - | - | 27 (23) | 3(3)3 (5(3) | 20 | - | -9 (-11) | -11 (-13) | - | |
| |||||||||||
| Damage | Guard | Guard Damage | Cancel Properties | Startup | Active | Recovery | Total | Hit Advantage | Block Advantage | Invulnerability | |
|---|---|---|---|---|---|---|---|---|---|---|---|
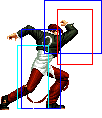
| - | Mid | - | - | 4 | 5 | 3 | - | - | - | - | |
Has three frames of additional landing recovery. Whiffs on most crouchers. | |||||||||||
Special Moves
| Version | Damage | Guard | Guard Damage | Cancel Properties | Startup | Active | Recovery | Total | Hit Advantage | Block Advantage | Invulnerability |
|---|---|---|---|---|---|---|---|---|---|---|---|
| 1st Rekka | - | Mid | - | - | 8 | 3 | 26 | - | -9 | -11 | - |
| |||||||||||
| Version | Damage | Guard | Guard Damage | Cancel Properties | Startup | Active | Recovery | Total | Hit Advantage | Block Advantage | Invulnerability |
| 2nd Rekka | - | Mid | - | - | 7 | 3 | 28 | - | KD | -13 | - |
| Version | Damage | Guard | Guard Damage | Cancel Properties | Startup | Active | Recovery | Total | Hit Advantage | Block Advantage | Invulnerability |
| 3rd Rekka | - | Mid | - | - | 17 | 2 | 29 | - | HKD | -13 | - |
| |||||||||||
| Version | Damage | Guard | Guard Damage | Cancel Properties | Startup | Active | Recovery | Total | Hit Advantage | Block Advantage | Invulnerability |
|---|---|---|---|---|---|---|---|---|---|---|---|
| 1st Rekka | - | Mid | - | - | 11 | 3 | 28 | - | -11 | -13 | - |
| |||||||||||
| Version | Damage | Guard | Guard Damage | Cancel Properties | Startup | Active | Recovery | Total | Hit Advantage | Block Advantage | Invulnerability |
| 2nd Rekka | - | Mid | - | - | 11 | 3 | 29 | - | KD | -14 | - |
| Version | Damage | Guard | Guard Damage | Cancel Properties | Startup | Active | Recovery | Total | Hit Advantage | Block Advantage | Invulnerability |
| 3rd Rekka | - | Mid | - | - | 17 | 9 | 31 | - | HKD | -22 | - |
| |||||||||||
| Damage | Guard | Guard Damage | Cancel Properties | Startup | Active | Recovery | Total | Hit Advantage | Block Advantage | Invulnerability | |
|---|---|---|---|---|---|---|---|---|---|---|---|
| - | throw | - | - | 11 | 1 | 31(16) | - | +16 | - | - | |
| |||||||||||
Desperation Moves
| Damage | Guard | Guard Damage | Cancel Properties | Startup | Active | Recovery | Total | Hit Advantage | Block Advantage | Invulnerability | |
|---|---|---|---|---|---|---|---|---|---|---|---|
| - | - | - | - | 1+7 | - | - | - | - | - | - | |
| |||||||||||
Super Desperation Move
| Damage | Guard | Guard Damage | Cancel Properties | Startup | Active | Recovery | Total | Hit Advantage | Block Advantage | Invulnerability | |
|---|---|---|---|---|---|---|---|---|---|---|---|
| - | Mid | - | - | 1+11 | 3+21 | 44 | - | HKD | -27 | - | |
| |||||||||||
Hidden Super Desperation Move
| Damage | Guard | Guard Damage | Cancel Properties | Startup | Active | Recovery | Total | Hit Advantage | Block Advantage | Invulnerability | |
|---|---|---|---|---|---|---|---|---|---|---|---|
| - | Throw | - | - | 1+18 | 1 | 38 | - | - | - | - | |
| |||||||||||
Combos
Basic Combos
- cr.B, cr.A >
- qcb + A x 3 {20-25%}
- qcf + C (Point blank.)
- cl.B, cl.C ...
- Very close: cl.C >
- hcb + K [30%]
- dp + C [24%]
- dp + C (2) >>
- DM qcf hcb + P > [48%] {2 stocks}
- DM qcf qcf qcf qcf + AC [65%] {3 stocks}
- DM qcf hcb + P > [48%] {2 stocks}
- cl.C / st.C / (cl.B > f + A > A) >
- qcb + C x 3 [24%/24%/36%]
- cl.C / st.C
- qcf + C
- (cl.C > f + A) / st.C / (cl.B > f + A > A) / (cr.B, cr.A > f + A)
- DM qcf hcb + P > [??%/32%/44%/??%] {1 stock}
- DM qcf qcf qcf qcf + AC [??%/49%/61%/??%] {2 stocks}
- DM qcf hcb + P > [??%/32%/44%/??%] {1 stock}
Corner
- Iori in corner: cr.A > hcb f + P, cr.A > hcb f + P, any combo
Max Mode
- cl.D >> BC, run, cl.C >
- (hcb + K (1) >> dp + C (2)) x 3 >>
- DM qcf hcb + P > DM qcf qcf qcf qcf + AC {87%}
- qcb + C >>
- (hcb + K (1) >> dp + C (2)) x 2 >>
- SDM qcf hcb + AC {90%}
- (hcb + K (1) >> dp + C (2)) x 2 >>
- (hcb + K (1) >> dp + C (2)) x 3 >>
- Opponent about one screen away from corner: cl.D >> BC, run, cl.C > hcb + K (1) >> dp + C (2) >> qcb + C x 2 >> hcb + K (1) >> qcb + A > qcb + A (delayed), DM qcf hcb + P > DM qcf qcf qcf qcf + AC {85%}
- Iori in corner: air b + B, cr.A > hcb f + P, cl.D >> BC, run, cr.A > hcb f + P, run, cl.C > f + A > HSDM qcb hcf b f + AC {75%}
- air b + B, cl.B > f + A >> BC, run, cl.C > qcb+C >> dp + C (2) >>
- (hcb + K (1) >> dp + C (2)) x 2 >>
- DM qcf hcb + P > DM qcf qcf qcf qcf + AC
- (hcb + K (1) >> dp + C (2)) x 2 >>
Counterhit
- Counterhit: CD >> BC, SDM qcf hcb + AC {55%}
- Counterhit: j.CD,
- hcb + K {32%}
- DM qcf hcb + P > DM qcf qcf qcf qcf + AC {50%}
Strategies
- Iori has a solid pressure game. His options include crouch B, close B, f + A (two lows) and hcb f + P scum gale. He can also attempt to tick scum gale from a close B. The mindgames can be further increased by instead doing a close C after close B (which does actually combo), in the case that he thought you would scum gale after the close B. Iori also has his jump b + B crossup, although it is best done as a surprise attack by hyper hopping over the opponent. Most people however, use it in a very obvious manner, by running full speed before jumping over the opponent, which is useless against an experienced player. This crossup can be blocked low. Some characters can simply sweep Iori when he attempts this crossup. Hyper hopping over the opponent into the crossup makes it a far more dangerous tool
- Using b + B during the beginning of a backdash will make him dashback nearly a full screen length. Use this to easily get away from rushdown, as well as baiting opponents (mainly on wakeup). This can be used to run up then backdash away for mindgames
- sometimes attempt to do the jump b+B crossover (the trick to doing this is when jumping over your opponent hold the forward and hit the B reasonably late)
- use jump C or jump A air to ground battles, early jump D or jump CD for air to air battles. If opponent is close, hopping up or back with D stops most jump attempts
- if qcb + A is blocked, do it once more or stop, not a third time. You can use random delays between them, for mindgames. However, there are many pokes that can still punish this move even if it is not fully completed, such as Joe's far D
- hcb f + P has some startup of invincibility and can grab people out of their jumpins, similar to Clark's dp + K frankensteiner
- run up to opponent and do close C, as it will stop all jump attempts. Even better, if the opponent happens to jump behind you when the close C comes out, Iori automatically faces the correct side and will anti-air them
- hcb + K on the first hit guardcrushes fairly well. If the opponent's guardcrush bar begins to flash, a close C/far C, hcb + K will guardcrush on the first hit of hcb + K
