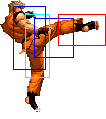
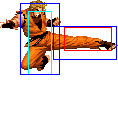
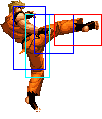
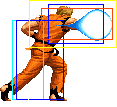
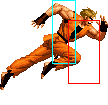
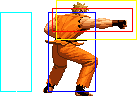
No edit summary |
|||
| (93 intermediate revisions by 8 users not shown) | |||
| Line 1: | Line 1: | ||
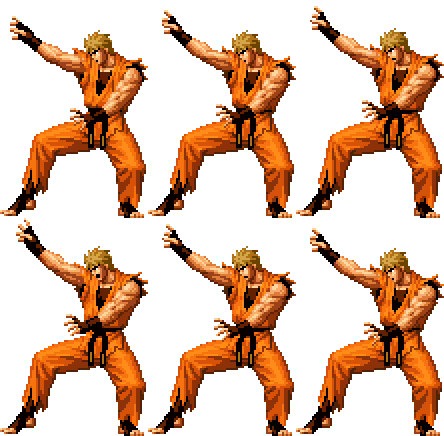
[[File:Ryo stance.gif|right|combat lamaze]] | |||
==General Info== | |||
Crouch height: Medium<br> | |||
1. | Jump: 4/33/1<br> | ||
Hop: 4/25/1<br> | |||
Dash: 3/10~∞/3<br> | |||
Backdash: 3/14/3<br> | |||
Wakeup: 21 frames<br> | |||
Recovery roll: 26 frames<br> | |||
{| | |||
! Stand | |||
! Crouch | |||
! Jump | |||
! Grab | |||
! Run | |||
|- | |||
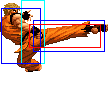
|valign="bottom"| [[image:Ryo02_stand.png]] | |||
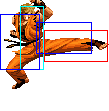
|valign="bottom"| [[image:Ryo02_crouch.png]] | |||
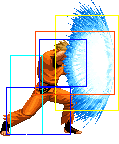
|valign="bottom"| [[image:Ryo02_jump.png]] | |||
|valign="bottom"| [[image:Ryo02_grab.png]] | |||
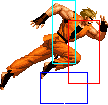
|valign="bottom"| [[image:Ryo02_run.png]] | |||
|} | |||
===Colors=== | |||
{| | |||
! [[image:snka.gif]] | |||
! [[image:snkb.gif]] | |||
! [[image:snkc.gif]] | |||
! [[image:snkd.gif]] | |||
|- | |||
| [[image:Ryo02_colorA.png]] | |||
| [[image:Ryo02_colorB.png]] | |||
| [[image:Ryo02_colorC.png]] | |||
| [[image:Ryo02_colorD.png]] | |||
|} | |||
''' | ==[[The_King_of_Fighters_2002/Normals_Guide|Movelist]]== | ||
- | {|border="1" | ||
- | ! width="9%"| | ||
! Frames | |||
! Advantage | |||
! Cancel | |||
! Block | |||
!colspan="4"| Hitbox | |||
! Notes | |||
|- | |||
|colspan="10" align="center"| '''Standing Close''' | |||
|- | |||
! [[image:snka.gif]] | |||
|align="center"| 3/4/9 | |||
|align="center"| -1/-3 | |||
|align="center"| R,C,S,Su | |||
|align="center"| HL | |||
|colspan="4" | [[image:Ryo02_clA.png|center]] | |||
| | |||
|- | |||
! [[image:snkb.gif]] | |||
|align="center"| 3/7/14 | |||
|align="center"| -9/-11 | |||
|align="center"| C,S,Su | |||
|align="center"| HL | |||
|colspan="4" | [[image:Ryo02_clB.png|center]] | |||
| | |||
|- | |||
! [[image:snkc.gif]] | |||
|align="center"| 2/10/13 | |||
|align="center"| -3/-5 | |||
|align="center"| C,S,Su | |||
|align="center"| HL | |||
|colspan="4" | [[image:Ryo02_clC.png|center]] | |||
| | |||
|- | |||
! [[image:snkd.gif]] | |||
|align="center"| 4/9/16 | |||
|align="center"| -5/-7 | |||
|align="center"| C,S,Su | |||
|align="center"| HL | |||
|colspan="4" | [[image:Ryo02_clD.png|center]] | |||
| | |||
|- | |||
|colspan="10" align="center"| '''Standing Far''' | |||
|- | |||
! [[image:snka.gif]] | |||
|align="center"| 3/3/8 | |||
|align="center"| +1/-1 | |||
|align="center"| R,C,S,Su | |||
|align="center"| HL | |||
|colspan="4" | [[image:Ryo02_stA.png|center]] | |||
| | |||
|- | |||
! [[image:snkb.gif]] | |||
|align="center"| 7/2/14 | |||
|align="center"| -4/-6 | |||
| | |||
|align="center"| HL | |||
|colspan="4" | [[image:Ryo02_stB.png|center]] | |||
| | |||
|- | |||
! [[image:snkc.gif]] | |||
|align="center"| 7/4/19 | |||
|align="center"| -3/-5 | |||
| | |||
|align="center"| HL | |||
|colspan="4" | [[image:Ryo02_stC.png|center]] | |||
| | |||
|- | |||
! [[image:snkd.gif]] | |||
|align="center"| 12/4+4/16 | |||
|align="center"| -4/-6 | |||
| | |||
|align="center"| HL | |||
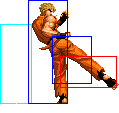
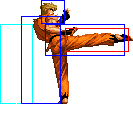
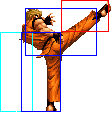
|colspan="2" valign="bottom" style="border-right:0px;"| [[image:Ryo02_stD1.png|center]] | |||
|colspan="2" valign="bottom" style="border-left:0px;"| [[image:Ryo02_stD2.png|center]] | |||
| | |||
|- | |||
! [[image:snkc.gif]] + [[image:snkd.gif]] | |||
|align="center"| 9/8/18 | |||
|align="center"| KD/-4 | |||
|align="center"| C,S,Su | |||
|align="center"| HL | |||
|colspan="4"| [[image:Ryo02_stCD.png|center]] | |||
| | |||
|- | |||
|colspan="10" align="center"| '''Crouching''' | |||
|- | |||
! [[image:snka.gif]] | |||
|align="center"| 3/5/5 | |||
|align="center"| +2/0 | |||
|align="center"| R,C,S,Su | |||
|align="center"| HL | |||
|colspan="4" | [[image:Ryo02_crA.png|center]] | |||
| | |||
|- | |||
! [[image:snkb.gif]] | |||
|align="center"| 3/3/5 | |||
|align="center"| +4/+2 | |||
|align="center"| R | |||
|align="center"| L | |||
|colspan="4" | [[image:Ryo02_crB.png|center]] | |||
| | |||
|- | |||
! [[image:snkc.gif]] | |||
|align="center"| 2/2+3/23 | |||
|align="center"| -8/-10 | |||
|align="center"| C,S,Su | |||
|align="center"| HL | |||
|colspan="2" valign="bottom" style="border-right:0px;"| [[image:Ryo02_crC1.png|center]] | |||
|colspan="2" valign="bottom" style="border-left:0px;"| [[image:Ryo02_crC2.png|center]] | |||
| | |||
|- | |||
! [[image:snkd.gif]] | |||
|align="center"| 8/5/18 | |||
|align="center"| KD/-5 | |||
|align="center"| C,S,Su | |||
|align="center"| L | |||
|colspan="4" | [[image:Ryo02_crD.png|center]] | |||
| | |||
|- | |||
|colspan="10" align="center"| '''Jump''' | |||
|- | |||
! [[image:snka.gif]] | |||
|align="center"| 5/6/- | |||
|align="center"| -/- | |||
| | |||
|align="center"| H | |||
|colspan="4" | [[image:Ryo02_jA.png|center]] | |||
| | |||
|- | |||
! [[image:snkb.gif]] | |||
|align="center"| 2/7/- | |||
|align="center"| -/- | |||
| | |||
|align="center"| H | |||
|colspan="4" | [[image:Ryo02_jB.png|center]] | |||
| | |||
|- | |||
! [[image:snkc.gif]] | |||
|align="center"| 5/6/- | |||
|align="center"| -/- | |||
| | |||
|align="center"| H | |||
|colspan="4" | [[image:Ryo02_jC.png|center]] | |||
| | |||
|- | |||
! [[image:snkd.gif]] | |||
|align="center"| 4/4/- | |||
|align="center"| -/- | |||
| | |||
|align="center"| H | |||
|colspan="4" | [[image:Ryo02_jD.png|center]] | |||
| | |||
|- | |||
! [[image:snkc.gif]] + [[image:snkd.gif]] | |||
|align="center"| 13/5/- | |||
|align="center"| KD/- | |||
| | |||
|align="center"| HL | |||
|colspan="4"| [[image:Ryo02_jCD.png|center]] | |||
| | |||
|- | |||
|colspan="10" align="center"| '''Neutral Jump''' | |||
|- | |||
! [[image:snka.gif]] | |||
|align="center"| 5/12/- | |||
|align="center"| -/- | |||
| | |||
|align="center"| H | |||
|colspan="4" | [[image:Ryo02_juA.png|center]] | |||
| | |||
|- | |||
! [[image:snkb.gif]] | |||
|align="center"| 2/14/- | |||
|align="center"| -/- | |||
| | |||
|align="center"| H | |||
|colspan="4" | [[image:Ryo02_juB.png|center]] | |||
| | |||
|- | |||
! [[image:snkc.gif]] | |||
|align="center"| 5/6/- | |||
|align="center"| -/- | |||
| | |||
|align="center"| H | |||
|colspan="4" | [[image:Ryo02_juC.png|center]] | |||
| | |||
|- | |||
! [[image:snkd.gif]] | |||
|align="center"| 11/3+3/- | |||
|align="center"| -/- | |||
| | |||
|align="center"| H | |||
|colspan="2" valign="bottom" style="border-right:0px;"| [[image:Ryo02_juD1.png|center]] | |||
|colspan="2" valign="bottom" style="border-left:0px;"| [[image:Ryo02_juD2.png|center]] | |||
| | |||
|- | |||
|colspan="10" align="center"| '''Hop''' | |||
|- | |||
! [[image:snka.gif]] | |||
|align="center"| 5/5/- | |||
|align="center"| -/- | |||
| | |||
|align="center"| H | |||
|colspan="4" | [[image:Ryo02_hA.png|center]] | |||
| | |||
|- | |||
! [[image:snkb.gif]] | |||
|align="center"| 2/5/- | |||
|align="center"| -/- | |||
| | |||
|align="center"| H | |||
|colspan="4" | [[image:Ryo02_hB.png|center]] | |||
| | |||
|- | |||
! [[image:snkc.gif]] | |||
|align="center"| 5/3/- | |||
|align="center"| -/- | |||
| | |||
|align="center"| H | |||
|colspan="4" | [[image:Ryo02_hC.png|center]] | |||
| | |||
|- | |||
! [[image:snkd.gif]] | |||
|align="center"| 11/3+3/- | |||
|align="center"| -/- | |||
| | |||
|align="center"| H | |||
|colspan="2" valign="bottom" style="border-right:0px;"| [[image:Ryo02_hD1.png|center]] | |||
|colspan="2" valign="bottom" style="border-left:0px;"| [[image:Ryo02_hD2.png|center]] | |||
| | |||
|- | |||
|colspan="10" align="center"| '''Command Normals''' | |||
|- | |||
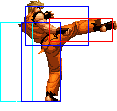
! <br>f + [[image:snka.gif]]<br><br> | |||
|align="center"| 17/9/11 | |||
|align="center"| 0/-2 | |||
| | |||
|align="center"| H | |||
|rowspan="2" colspan="4" | [[image:Ryo02_fA.png|center]] | |||
| | |||
|- | |||
! f + [[image:snka.gif]]<br>(cancel) | |||
|align="center"| 14/9/11 | |||
|align="center"| 0/-2 | |||
| | |||
|align="center"| HL | |||
| | |||
|- | |||
! f + [[image:snkb.gif]] | |||
|align="center"| 5/15/14 | |||
|align="center"| -/- | |||
|align="center"| S,Su | |||
| | |||
|colspan="4" | [[image:Ryo02_fB.png|center]] | |||
|align="center"|Guard point: Active period. Is not an attack. | |||
|- | |||
! df + [[image:snkb.gif]] | |||
|align="center"| 7/9/10 | |||
|align="center"| -/- | |||
|align="center"| S,Su | |||
| | |||
|colspan="4" | [[image:Ryo02_dfB.png|center]] | |||
|align="center"|Guard point: Active period. Is not an attack. | |||
|- | |||
|colspan="10" align="center"| '''Special Moves''' | |||
|- | |||
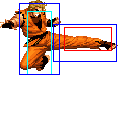
! <br>qcf + [[image:snka.gif]]<br><br> | |||
|align="center"| 12/3+6/29 | |||
|align="center"| KD/-9 | |||
| | |||
|align="center"| HL | |||
|rowspan="2" colspan="2" style="border-right:0px;"| [[image:Ryo02_QcfP1.png|center]] | |||
|rowspan="2" colspan="2" style="border-left:0px;"| [[image:Ryo02_QcfP2.png|center]] | |||
|rowspan="2" align="left"|'''Ko'ou Ken - qcf + P''' | |||
*Ryo releases a blast of energy from his hand. qcf + C travels a bit further than qcf + A, where qcf + A goes almost half screen<br> | |||
*qcf + C does a very slight amount of damage more than qcf + A, but has greater recovery time | |||
|- | |||
! qcf + [[image:snkc.gif]] | |||
|align="center"| 16/3+6/33 | |||
|align="center"| KD/-11 | |||
| | |||
|align="center"| HL | |||
|- | |||
! <br>qcf + [[image:snkb.gif]]<br><br> | |||
|align="center"| 25/3+3/17 | |||
|align="center"| KD/-5 | |||
| | |||
|align="center"| H | |||
|rowspan="2" colspan="2" style="border-right:0px;"| [[image:Ryo02_QcfK1.png|center]] | |||
|rowspan="2" colspan="2" style="border-left:0px;"| [[image:Ryo02_QcfK2.png|center]] | |||
|rowspan="2" align="left"|'''Mouko Rajin Setsu - qcf + K''' | |||
*Ryo jumps into the air, landing with an overhead chop. qcf + D goes higher and further (almost full screen) than qcf + B | |||
*Has very good priority and is almost always safe on block | |||
*Overhead | |||
*Sometimes hits as a hard knockdown, but not always | |||
*Free cancellable into | |||
|- | |||
! qcf + [[image:snkd.gif]] | |||
|align="center"| 27/3+3/21 | |||
|align="center"| KD/-9 | |||
| | |||
|align="center"| H | |||
|- | |||
! <br>f b f + [[image:snka.gif]]<br><br> | |||
|align="center"| 13/2(4)x8/21 | |||
|align="center"| KD/-35 | |||
| | |||
|align="center"| H | |||
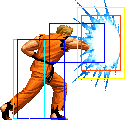
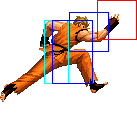
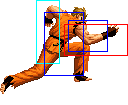
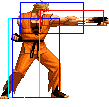
|rowspan="2" style="border-right:0px;"| [[image:Ryo02_fbfP1.png|center]] | |||
|rowspan="2" style="border-right:0px; border-left:0px;"| [[image:Ryo02_fbfP2.png|center]] | |||
|rowspan="2" style="border-right:0px; border-left:0px;"| [[image:Ryo02_fbfP3.png|center]] | |||
|rowspan="2" style="border-left:0px;"| [[image:Ryo02_fbfP4.png|center]] | |||
|rowspan="2" align="left"|'''Zanretsu Ken - f b f + P''' | |||
*Ryo repeatedly punches in front of him. This move has a "sucking" effect, in the sense that it can pull the opponent in if they are close. If the opponent gets sucked in, Ryo does a 13 hit combo punching them away | |||
*Has autoguard before Ryo begins punching rapidly (frames 3-8) | |||
*f b f + A is a hard knockdown | |||
*Free cancellable out of on the last hit. It is only possible to juggle the opponent after f b f + C | |||
|- | |||
! f b f + [[image:snkc.gif]] | |||
|align="center"| 13/2(4)x15/23 | |||
|align="center"| KD/-85 | |||
| | |||
|align="center"| HL | |||
|- | |||
! dp + [[image:snka.gif]] | |||
|align="center"| 5/3*12/11+16 | |||
|align="center"| KD/-21 | |||
|align="center"| Su | |||
|align="center"| HL | |||
|colspan="2" style="border-right:0px;" valign="bottom"| [[image:Ryo02_DpA1.png|center]] | |||
|colspan="2" style="border-left:0px;" valign="bottom"| [[image:Ryo02_DpA2.png|center]] | |||
|rowspan="2" align="left"|'''Kohou - dp + P''' | |||
*Ryo performs a rising uppercut that has great speed and priority. | |||
*dp + A does one hit, knocking down, while dp + C does two hits, where only the second hit knocks down. Usually, the second hit whiffs an opponent on the ground<br> | |||
*free cancellable into<br> | |||
*free cancellable out of on the first hit | |||
*Both versions are invincible for the full startup and the first three frames of the first active period | |||
|- | |||
! dp + [[image:snkc.gif]] | |||
|align="center"| 5/3*17/16+13 | |||
|align="center"| KD/-21 | |||
|align="center"| Su | |||
|align="center"| HL | |||
|colspan="2" style="border-right:0px;" valign="bottom"| [[image:Ryo2_DpC1.png|center]] | |||
|colspan="2" style="border-left:0px;" valign="bottom"| [[image:Ryo02_DpC1.png|center]] | |||
|- | |||
! hcb + [[image:snkb.gif]] | |||
|align="center"| 6/3*6/13+17 | |||
|align="center"| KD/-18 | |||
| | |||
|align="center"| HL | |||
|colspan="2" style="border-right:0px;" valign="bottom"| [[image:Ryo02_hcbB1.png|center]] | |||
|colspan="2" style="border-left:0px;" valign="bottom"| [[image:Ryo02_hcbB2.png|center]] | |||
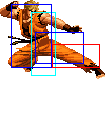
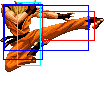
|rowspan="2" align="left"|'''Hien Shippuu Kyaku - hcb + K''' | |||
*Ryo jumps forward, kicking multiple times. hcb + B does two hits, going about 1/3 of the screen, while hcb + D does three hits, and goes full screen | |||
*both moves are severely punishable on block, especially hcb + D | |||
*free cancellable into | |||
*even if comboed into, his hcb + D will whiff on the third (and sometimes second) hits against a crouching opponent, giving them more than enough time to punish him | |||
|- | |||
! hcb + [[image:snkd.gif]] | |||
|align="center"| 9/4*5(9)6/8+19 | |||
|align="center"| KD/-15 | |||
| | |||
|align="center"| HL | |||
|colspan="2" style="border-right:0px;" valign="bottom"| [[image:Ryo02_hcbD1.png|center]] | |||
|style="border-right:0px; border-left:0px;" valign="bottom"| [[image:Ryo02_hcbD2.png|center]] | |||
|style="border-left:0px;" valign="bottom"| [[image:Ryo02_hcbD3.png|center]] | |||
|- | |||
|colspan="10" align="center"| '''DMs''' | |||
|- | |||
! <br>f hcf + [[image:snka.gif]]<br><br> | |||
|align="center"| 1+12/-/53 | |||
|align="center"| KD/-23 | |||
| | |||
|align="center"| HL | |||
|rowspan="2" colspan="4"| [[image:Ryo02_DM1.png|center]] | |||
|rowspan="2" align="left"|'''Haou Shoukou Ken - f hcf + P''' | |||
*Ryo releases a large fireball that does good damage | |||
*f hcf + A comes out faster but moves much slower than f hcf + C | |||
|- | |||
! f hcf + [[image:snkc.gif]] | |||
|align="center"| 1+17/-/55 | |||
|align="center"| KD/-25 | |||
| | |||
|align="center"| HL | |||
|- | |||
! <br>qcf,hcb + [[image:snka.gif]]<br><br> | |||
|align="center"| 1+10/13/38 | |||
|align="center"| KD/-21 | |||
| | |||
|align="center"| HL | |||
|rowspan="2" colspan="4"| [[image:Ryo02_DM2.png|center]] | |||
|rowspan="2" align="left"|'''Ryuuko Ranbu - qcf hcb + P''' | |||
*Ryo dashes across the screen. If he connects, he does a combo on the opponent. Otherwise, he stops and is open to attack | |||
*qcf hcb + A comes out slightly slower than qcf hcb + C. qcf hcb + A goes almost full screen, while qcf hcb + C goes full screen | |||
|- | |||
! qcf,hcb + [[image:snkc.gif]] | |||
|align="center"| 1+12/26/38 | |||
|align="center"| KD/-21 | |||
| | |||
|align="center"| HL | |||
|- | |||
|colspan="10" align="center"| '''SDM''' | |||
|- | |||
! qcf + [[image:snkc.gif]]~[[image:snka.gif]] | |||
|align="center"| 1+14/13/38 | |||
|align="center"| KD/-21 | |||
| | |||
|align="center"| HL | |||
|colspan="4"| [[image:Ryo02_SDM.png|center]] | |||
|align="left"|'''Ryuuko Ranbu - qcf + C~A''' | |||
*Ryo dashes forward. If he connects, he does a strong combo on the opponent | |||
*the range on this move is less than his qcf hcb + P DM version | |||
*unblockable | |||
|- | |||
|colspan="10" align="center"| '''HSDM''' | |||
|- | |||
!qcfx2+[[image:snka.gif]] + [[image:snkc.gif]] | |||
|align="center"| 1+6/9/34 | |||
|align="center"| KD/-25 | |||
| | |||
|align="center"| HL | |||
|colspan="4"| [[image:Ryo02_HSDM.png|center]] | |||
|align="left"|'''Tenchi Haou Ken - qcfx2+AC''' | |||
*Ryo does a fast punch forward. If it connects, the opponent is knocked down and dizzied, allowing you to followup with any combo | |||
*doesn't do much damage but makes up for it with the ability to followup with combos that would end up doing more damage than an HSDM can normally do | |||
|} | |||
==Short Movelist== | |||
* f + A (Overhead if not cancelled into.) | |||
* f + B (Parry) | |||
* df + B (Parry) | |||
-the f+B parry is a great move for countering predictable yet high priority and unpunishable moves, such as Robert's air qcb+K, May Lee's qcf+B in Hero Mode, Terry's qcb+P, etc. After parrying the move, cancel to dp+C or qcf hcb+P | * qcf + P | ||
* dp + P | |||
* hcb + K | |||
* qcf + K (Overhead.) | |||
* f b f + P | |||
* DM qcf hcb + P | |||
* DM f hcf + P | |||
* SDM qcf + C A (Unblockable.) | |||
* HSDM qcf qcf + AC (Causes dizzy.) | |||
==Notes== | |||
===Cancellable moves=== | |||
* Close: A, B, C, D | |||
* Far: A | |||
* Crouch: A, C, D | |||
* Whiff cancellable normals are: | |||
** Close: B, C, D | |||
** Far: - | |||
** Crouch: D | |||
* CD is cancellable into command moves, specials and DMs | |||
* f + B and df + B are cancellables if autoguard is triggered. | |||
===Super cancellable moves=== | |||
* dp + P (1) | |||
===Free cancellable into moves=== | |||
* '''dp + P''' | |||
* qcf + K | |||
* hcb + K | |||
=== Free cancellable out-of moves=== | |||
* f + A | |||
* '''dp + P (1)''' | |||
* f b f + P (Last hit.) | |||
===Moves with Invincibility=== | |||
* dp + P (Full: startup & active (1st part).) | |||
* DM qcf hcb + P (Projectile: dash.) | |||
=== Moves with autoguard=== | |||
* f b f + P (startup (middle).) | |||
===Other Notes=== | |||
====Ryo SDM Execution Tips==== | |||
* Doing Ryo's SDM (qcf C A) is nearly impossible, due to a glitch. The motion of the Ko'ou Ken qcf + C overlaps with this move. Thus, attempting to do it results in qcf + C coming out. The only reliable way to do it is to do the qcf + C part of the motion during a state where he is not able to do his Ko'ou Ken qcf + C. Such states are: | |||
** right before waking up | |||
** just as you land from a jump | |||
** just as you recover from a roll | |||
** recovering from a move that is not cancellable into qcf + C | |||
** supercancelling from his Kohou dp + C (1) | |||
** cancelling a CD attack (this is an exception) | |||
** activating maxmode | |||
** possibly some other ways | |||
*Other input theory is to make the qcf and then leave in neutral the stick to register the move and plinking C to A with a max range from 1 to 7 frames, you can cancel the Ko ho ken with qcf b+C or qcf df+C to register indirectly the neutral part of the move and the A plinking a bit easy, in the KOF 2001 official move strip the SDM means that you must register the Ko oh ken motion during the recovery frames of a special move(commonly supercancelling dp+C or after a hcb+B),and in 2001 the strong version of Ko oh Ken didn't exist and that is why is more easier than here. | |||
The main reason that the SDM motion is qcf neutral C plinking to A is because is an homage for the first motion version of the Ryuko Ranbu in Art of Fighting 1 who is executed with qcf, neutral, Strong Attack and Punch move. | |||
==Combos== | |||
===Basic Combos=== | |||
* cr.B, cr.C > ... | |||
* cr.C / cl.C > | |||
** '''dp + C (1) >> qcf hcb + A [53%] {2 stocks}''' | |||
** '''DM qcf hcb + A [44%] {1 stock}''' | |||
** DM f hcf + A [40.5%] {1 stock} | |||
** '''qcf + C [24%]''' | |||
** qcf + A [22%] | |||
** hcb + D (May miss some crouchers. Out of the corner 1st hit will whiff, but still combo.) [28%/24%] | |||
** hcb + B (Out of the corner 1st hit will whiff, but still combo.) [24.5%/21%] | |||
** dp + A [19%] | |||
** f + A [18%] | |||
** f b f + P (Point blank) [28%] | |||
* cr.B, cr.A > | |||
** '''dp + C (1) >> qcf hcb + A (Very close.) {2 stocks}''' | |||
** hcb + D (Point blank, because will not combo if 1st hit whiff.) | |||
** '''hcb + B (If not close 1st hit will whiff, but still combo.)''' | |||
** dp + A | |||
* '''cr.B x 3, st.A > hcb + B {28%}''' | |||
* f + A (early on opponent's wakeup), st.A / cl.A > hcb + B {22%} | |||
* f + A >> BC ~ DM qcf hcb + C [44%] {2 stocks} | |||
===Maxmode=== | |||
* cl.C > f + A >> BC, HSDM qcf qcf +AC (quickly), | |||
** j.C, cl.C > hcb + D {75%} | |||
** j.C, cr.B, cr.C > DM qcf hcb + A {88%} | |||
* (Already in maxmode) f + A >> dp + C (1) >> | |||
** DM qcf hcb + A {48%} | |||
** DM f hcf + A (Buffer: hcf + A) {42%} | |||
===Normal Links=== | |||
* cr.B, cl.C / cr.C | |||
* f + A (very early on the opponent's wakeup), st.A / cr.A | |||
==Attack Strings== | |||
* cr.D / CD > qcf + B / qcf + A | |||
* cr.B, cr.C > qcf + B / qcf + A | |||
* (cr.B, cl.C) / cl.D > f + A (delayed) | |||
==Strategies== | |||
*Since Ryo's f + A is an overhead and is not cancellable even if cancelled into, you should exploit the "glitch" which allows the command normals to not lose their properties if you cancel into them a bit late. Thus, you can do close C or close D, then late cancel the move into f + A if they blocked, making it hit as an overhead. The main disadvantage to doing this is that the opponent could do a very fast attack in between the cancel, such as Kim's _d u + B. Note that Ryo's crouch C cannot be cancelled late in it's animation, so doing crouch B, crouch C, delayed f + A will not work. Using crouch D instead of close C or close D also works, as his crouch D is late cancellable as well. This gives you an effective low into overhead attack string which is far less punishable than doing crouch D into qcf + B. | |||
*His f + A overhead is very meaty compared to most moves. If done very early on a waking up opponent, Ryo will recover fast enough to be able to land a far A, hcb + B/HSDM combo. Thus, Ryo has a good high/low game with his f + A, qcf + B, crouch B and crouch D. It is especially good to cancel his crouch D into a qcf + B overhead and mix this up with f + A and crouch B, crouch C mixups | |||
*The f + B parry is a great move for countering predictable yet high priority and unpunishable moves, such as Robert's air qcb + K, May Lee's qcf + B in Hero Mode, Terry's qcb + P, etc. After parrying the move, cancel to dp + C (if the opponent was airborne) or dp + A or qcf hcb + P if the opponent was parried on the ground. | |||
{{Template:The King of Fighters 2002}} | |||
[[Category:The King of Fighters 2002]] | |||
Latest revision as of 05:03, 21 September 2024
General Info
Crouch height: Medium
Jump: 4/33/1
Hop: 4/25/1
Dash: 3/10~∞/3
Backdash: 3/14/3
Wakeup: 21 frames
Recovery roll: 26 frames
| Stand | Crouch | Jump | Grab | Run |
|---|---|---|---|---|

|

|

|
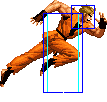
|
Colors

|

|

|

|
Movelist
Short Movelist
- f + A (Overhead if not cancelled into.)
- f + B (Parry)
- df + B (Parry)
- qcf + P
- dp + P
- hcb + K
- qcf + K (Overhead.)
- f b f + P
- DM qcf hcb + P
- DM f hcf + P
- SDM qcf + C A (Unblockable.)
- HSDM qcf qcf + AC (Causes dizzy.)
Notes
Cancellable moves
- Close: A, B, C, D
- Far: A
- Crouch: A, C, D
- Whiff cancellable normals are:
- Close: B, C, D
- Far: -
- Crouch: D
- CD is cancellable into command moves, specials and DMs
- f + B and df + B are cancellables if autoguard is triggered.
Super cancellable moves
- dp + P (1)
Free cancellable into moves
- dp + P
- qcf + K
- hcb + K
Free cancellable out-of moves
- f + A
- dp + P (1)
- f b f + P (Last hit.)
Moves with Invincibility
- dp + P (Full: startup & active (1st part).)
- DM qcf hcb + P (Projectile: dash.)
Moves with autoguard
- f b f + P (startup (middle).)
Other Notes
Ryo SDM Execution Tips
- Doing Ryo's SDM (qcf C A) is nearly impossible, due to a glitch. The motion of the Ko'ou Ken qcf + C overlaps with this move. Thus, attempting to do it results in qcf + C coming out. The only reliable way to do it is to do the qcf + C part of the motion during a state where he is not able to do his Ko'ou Ken qcf + C. Such states are:
- right before waking up
- just as you land from a jump
- just as you recover from a roll
- recovering from a move that is not cancellable into qcf + C
- supercancelling from his Kohou dp + C (1)
- cancelling a CD attack (this is an exception)
- activating maxmode
- possibly some other ways
- Other input theory is to make the qcf and then leave in neutral the stick to register the move and plinking C to A with a max range from 1 to 7 frames, you can cancel the Ko ho ken with qcf b+C or qcf df+C to register indirectly the neutral part of the move and the A plinking a bit easy, in the KOF 2001 official move strip the SDM means that you must register the Ko oh ken motion during the recovery frames of a special move(commonly supercancelling dp+C or after a hcb+B),and in 2001 the strong version of Ko oh Ken didn't exist and that is why is more easier than here.
The main reason that the SDM motion is qcf neutral C plinking to A is because is an homage for the first motion version of the Ryuko Ranbu in Art of Fighting 1 who is executed with qcf, neutral, Strong Attack and Punch move.
Combos
Basic Combos
- cr.B, cr.C > ...
- cr.C / cl.C >
- dp + C (1) >> qcf hcb + A [53%] {2 stocks}
- DM qcf hcb + A [44%] {1 stock}
- DM f hcf + A [40.5%] {1 stock}
- qcf + C [24%]
- qcf + A [22%]
- hcb + D (May miss some crouchers. Out of the corner 1st hit will whiff, but still combo.) [28%/24%]
- hcb + B (Out of the corner 1st hit will whiff, but still combo.) [24.5%/21%]
- dp + A [19%]
- f + A [18%]
- f b f + P (Point blank) [28%]
- cr.B, cr.A >
- dp + C (1) >> qcf hcb + A (Very close.) {2 stocks}
- hcb + D (Point blank, because will not combo if 1st hit whiff.)
- hcb + B (If not close 1st hit will whiff, but still combo.)
- dp + A
- cr.B x 3, st.A > hcb + B {28%}
- f + A (early on opponent's wakeup), st.A / cl.A > hcb + B {22%}
- f + A >> BC ~ DM qcf hcb + C [44%] {2 stocks}
Maxmode
- cl.C > f + A >> BC, HSDM qcf qcf +AC (quickly),
- j.C, cl.C > hcb + D {75%}
- j.C, cr.B, cr.C > DM qcf hcb + A {88%}
- (Already in maxmode) f + A >> dp + C (1) >>
- DM qcf hcb + A {48%}
- DM f hcf + A (Buffer: hcf + A) {42%}
Normal Links
- cr.B, cl.C / cr.C
- f + A (very early on the opponent's wakeup), st.A / cr.A
Attack Strings
- cr.D / CD > qcf + B / qcf + A
- cr.B, cr.C > qcf + B / qcf + A
- (cr.B, cl.C) / cl.D > f + A (delayed)
Strategies
- Since Ryo's f + A is an overhead and is not cancellable even if cancelled into, you should exploit the "glitch" which allows the command normals to not lose their properties if you cancel into them a bit late. Thus, you can do close C or close D, then late cancel the move into f + A if they blocked, making it hit as an overhead. The main disadvantage to doing this is that the opponent could do a very fast attack in between the cancel, such as Kim's _d u + B. Note that Ryo's crouch C cannot be cancelled late in it's animation, so doing crouch B, crouch C, delayed f + A will not work. Using crouch D instead of close C or close D also works, as his crouch D is late cancellable as well. This gives you an effective low into overhead attack string which is far less punishable than doing crouch D into qcf + B.
- His f + A overhead is very meaty compared to most moves. If done very early on a waking up opponent, Ryo will recover fast enough to be able to land a far A, hcb + B/HSDM combo. Thus, Ryo has a good high/low game with his f + A, qcf + B, crouch B and crouch D. It is especially good to cancel his crouch D into a qcf + B overhead and mix this up with f + A and crouch B, crouch C mixups
- The f + B parry is a great move for countering predictable yet high priority and unpunishable moves, such as Robert's air qcb + K, May Lee's qcf + B in Hero Mode, Terry's qcb + P, etc. After parrying the move, cancel to dp + C (if the opponent was airborne) or dp + A or qcf hcb + P if the opponent was parried on the ground.
