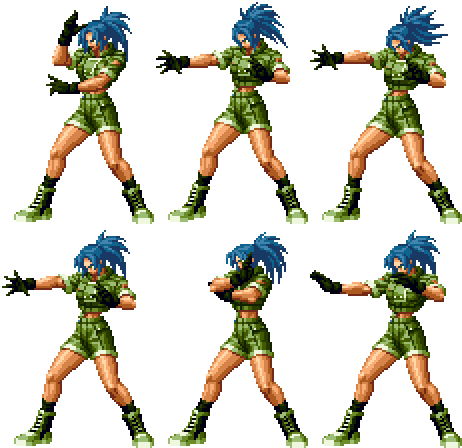
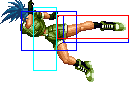
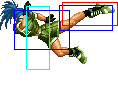
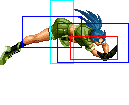
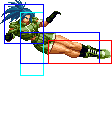
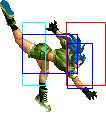
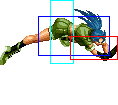
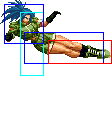
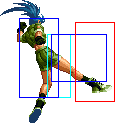
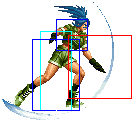
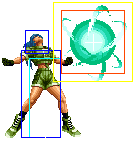
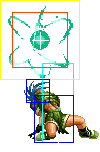
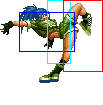
m (Scanman moved page Leona 02 to The King of Fighters 2002/Leona: moving 2002 Leona page to be a subpage) |
|||
| (59 intermediate revisions by 5 users not shown) | |||
| Line 1: | Line 1: | ||
[[image:Leona02_stance.gif|right]] | |||
==General Info== | |||
Crouch height: Low<br> | |||
Crouch height: Medium<br> | |||
Jump: 4/37/1<br> | |||
Hop: 4/25/1<br> | |||
Dash: 3/10~∞/3<br> | |||
Backdash: 3/10/5<br> | |||
Wakeup: 28 frames<br> | |||
Recovery roll: 22 frames<br> | |||
{| | |||
! Stand | |||
! Crouch | |||
! Jump | |||
! Backdash | |||
! Grab | |||
! Airthrow | |||
! Run | |||
|- | |||
|valign="bottom"| [[image:Leona02_stand.png]] | |||
|valign="bottom"| [[image:Leona02_crouch.png]] | |||
|valign="bottom"| [[image:Leona02_jump.png]] | |||
|valign="bottom"| [[image:Leona02_backdash.png]] | |||
|valign="bottom"| [[image:Leona02_grab.png]] | |||
|valign="bottom"| [[image:Leona02_airthrow.png]] | |||
|valign="bottom"| [[image:Leona02_run.png]] | |||
|} | |||
===Colors=== | |||
{| | |||
! [[image:snka.gif]] | |||
! [[image:snkb.gif]] | |||
! [[image:snkc.gif]] | |||
! [[image:snkd.gif]] | |||
|- | |||
| [[image:Leona02_colorA.png]] | |||
| [[image:Leona02_colorB.png]] | |||
| [[image:Leona02_colorC.png]] | |||
| [[image:Leona02_colorD.png]] | |||
|} | |||
==[[The_King_of_Fighters_2002/Normals_Guide|Movelist]]== | |||
{|border="1" | |||
! | |||
! Frames | |||
! Advantage | |||
! Cancel | |||
! Block | |||
!colspan="3"| Hitbox | |||
! Notes | |||
|- | |||
|colspan="9" align="center"| '''Standing Close''' | |||
|- | |||
! [[image:snka.gif]] | |||
|align="center"| 3/5/5 | |||
|align="center"| +2/0 | |||
|align="center"| R,C,S,Su | |||
|align="center"| HL | |||
|colspan="3" | [[image:Leona02_clA.png|center]] | |||
| | |||
|- | |||
! [[image:snkb.gif]] | |||
|align="center"| 5/7/4 | |||
|align="center"| +1/-1 | |||
|align="center"| C,S,Su | |||
|align="center"| HL | |||
|colspan="3" | [[image:Leona02_clB.png|center]] | |||
| | |||
|- | |||
! [[image:snkc.gif]] | |||
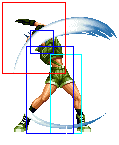
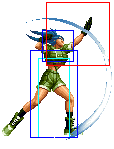
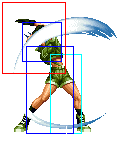
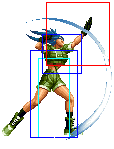
|align="center"| 7/2(2)8/14 | |||
|align="center"| -2/-4 | |||
|align="center"| C,S,Su | |||
|align="center"| HL | |||
|valign="bottom" style="border-right:0px;"| [[image:Leeona02_clC1.png|center]] | |||
|colspan="2" valign="bottom" style="border-left:0px;"| [[image:Leona02_clC2.png|center]] | |||
| | |||
|- | |||
! [[image:snkd.gif]] | |||
|align="center"| 6/3(4)7/14 | |||
|align="center"| -1/-3 | |||
|align="center"| C,S,Su | |||
|align="center"| HL | |||
|valign="bottom" style="border-right:0px;"| [[image:Leeona02_clD1.png|center]] | |||
|colspan="2" valign="bottom" style="border-left:0px;"| [[image:Leona02_clD2.png|center]] | |||
| | |||
|- | |||
|colspan="9" align="center"| '''Standing Far''' | |||
|- | |||
! [[image:snka.gif]] | |||
|align="center"| 3/5/5 | |||
|align="center"| +2/0 | |||
|align="center"| R | |||
|align="center"| HL | |||
|colspan="3" | [[image:Leona02_stA.png|center]] | |||
| | |||
|- | |||
! [[image:snkb.gif]] | |||
|align="center"| 4/5/11 | |||
|align="center"| -4/-6 | |||
| | |||
|align="center"| HL | |||
|colspan="3" | [[image:Leona02_stB.png|center]] | |||
| | |||
|- | |||
! [[image:snkc.gif]] | |||
|align="center"| 11/3/22 | |||
|align="center"| -5/-7 | |||
| | |||
|align="center"| HL | |||
|colspan="3" | [[image:Leona02_stC.png|center]] | |||
| | |||
|- | |||
! [[image:snkd.gif]] | |||
|align="center"| 14/4/24 | |||
|align="center"| -8/-10 | |||
| | |||
|align="center"| HL | |||
|colspan="3"| [[image:Leona02_stD.png|center]] | |||
| Goes over lows | |||
|- | |||
! [[image:snkc.gif]] + [[image:snkd.gif]] | |||
|align="center"| 18/2/27 | |||
|align="center"| KD/-7 | |||
|align="center"| S,Su | |||
|align="center"| HL | |||
|colspan="3"| [[image:Leona02_stCD.png|center]] | |||
| | |||
|- | |||
|colspan="9" align="center"| '''Crouching''' | |||
|- | |||
! [[image:snka.gif]] | |||
|align="center"| 4/3/13 | |||
|align="center"| -4/-6 | |||
|align="center"| R,C,S,Su | |||
|align="center"| HL | |||
|colspan="3" | [[image:Leona02_crA.png|center]] | |||
| | |||
|- | |||
! [[image:snkb.gif]] | |||
|align="center"| 3/3/10 | |||
|align="center"| -1/-3 | |||
|align="center"| R | |||
|align="center"| L | |||
|colspan="3" | [[image:Leona02_crB.png|center]] | |||
| | |||
|- | |||
! [[image:snkc.gif]] | |||
|align="center"| 3/3+3/28 | |||
|align="center"| -14/-16 | |||
|align="center"| C,S,Su | |||
|align="center"| HL | |||
|valign="bottom" style="border-right:0px;"| [[image:Leeona02_crC1.png|center]] | |||
|colspan="2" valign="bottom" style="border-left:0px;"| [[image:Leona02_crC2.png|center]] | |||
| | |||
|- | |||
! [[image:snkd.gif]] | |||
|align="center"| 7/6/23 | |||
|align="center"| KD/-11 | |||
| | |||
|align="center"| L | |||
|colspan="3" | [[image:Leona02_crD.png|center]] | |||
| | |||
|- | |||
|colspan="9" align="center"| '''Jump''' | |||
|- | |||
! [[image:snka.gif]] | |||
|align="center"| 5/5/- | |||
|align="center"| -/- | |||
| | |||
|align="center"| H | |||
|colspan="3" | [[image:Leona02_jA.png|center]] | |||
| | |||
|- | |||
! [[image:snkb.gif]] | |||
|align="center"| 2/3+5/- | |||
|align="center"| -/- | |||
| | |||
|align="center"| H | |||
|valign="bottom" style="border-right:0px;"| [[image:Leona02_jB1.png|center]] | |||
|colspan="2" valign="bottom" style="border-left:0px;"| [[image:Leona02_jB2.png|center]] | |||
| | |||
|- | |||
! [[image:snkc.gif]] | |||
|align="center"| 8/4/- | |||
|align="center"| -/- | |||
| | |||
|align="center"| H | |||
|colspan="3" | [[image:Leona02_jC.png|center]] | |||
| | |||
|- | |||
! [[image:snkd.gif]] | |||
|align="center"| 8/7/- | |||
|align="center"| -/- | |||
|align="center"| S,Su | |||
|align="center"| H | |||
|colspan="3" | [[image:Leona02_jD.png|center]] | |||
| | |||
|- | |||
! [[image:snkc.gif]] + [[image:snkd.gif]] | |||
|align="center"| 14/8/- | |||
|align="center"| KD/- | |||
|align="center"| S,Su | |||
|align="center"| HL | |||
|colspan="3"| [[image:Leona02_jCD.png|center]] | |||
| | |||
|- | |||
|colspan="9" align="center"| '''Neutral Jump''' | |||
|- | |||
! [[image:snka.gif]] | |||
|align="center"| 2/12/- | |||
|align="center"| -/- | |||
| | |||
|align="center"| H | |||
|colspan="3" | [[image:Leona02_juA.png|center]] | |||
| | |||
|- | |||
! [[image:snkb.gif]] | |||
|align="center"| 8/10/- | |||
|align="center"| -/- | |||
| | |||
|align="center"| H | |||
|colspan="3" | [[image:Leona02_juB.png|center]] | |||
| | |||
|- | |||
! [[image:snkc.gif]] | |||
|align="center"| 5/2+/- | |||
|align="center"| -/- | |||
| | |||
|align="center"| H | |||
|valign="bottom" style="border-right:0px;"| [[image:Leona02_juC1.png|center]] | |||
|colspan="2" valign="bottom" style="border-left:0px;"| [[image:Leona02_juC2.png|center]] | |||
| | |||
|- | |||
! [[image:snkd.gif]] | |||
|align="center"| 4/11/- | |||
|align="center"| -/- | |||
|align="center"| S,Su | |||
|align="center"| H | |||
|colspan="3" | [[image:Leona02_juD.png|center]] | |||
| | |||
|- | |||
|colspan="9" align="center"| '''Hop''' | |||
|- | |||
! [[image:snka.gif]] | |||
|align="center"| 5/5/- | |||
|align="center"| -/- | |||
|align="center"| S,Su | |||
|align="center"| H | |||
|colspan="3" | [[image:Leona02_hA.png|center]] | |||
| | |||
|- | |||
! [[image:snkb.gif]] | |||
|align="center"| 2/3+5/- | |||
|align="center"| -/- | |||
| | |||
|align="center"| H | |||
|valign="bottom" style="border-right:0px;"| [[image:Leona02_jB1.png|center]] | |||
|colspan="2" valign="bottom" style="border-left:0px;"| [[image:Leona02_jB2.png|center]] | |||
| | |||
|- | |||
! [[image:snkc.gif]] | |||
|align="center"| 2/4/- | |||
|align="center"| -/- | |||
| | |||
|align="center"| H | |||
|colspan="3" | [[image:Leona02_hC.png|center]] | |||
| | |||
|- | |||
! [[image:snkd.gif]] | |||
|align="center"| 3/12/- | |||
|align="center"| -/- | |||
|align="center"| S,Su | |||
|align="center"| H | |||
|colspan="3" | [[image:Leona02_hD.png|center]] | |||
| | |||
|- | |||
|colspan="9" align="center"| '''Command Normals''' | |||
|- | |||
! <br>f + [[image:snkb.gif]]<br><br> | |||
|align="center"| 25/1/20 | |||
|align="center"| KD/-3 | |||
| | |||
|align="center"| H | |||
|rowspan="2" colspan="3" | [[image:Leona02_fB.png|center]] | |||
|align="center"| Goes over lows | |||
|- | |||
! f + [[image:snkb.gif]]<br>(cancel) | |||
|align="center"| 14/6/15 | |||
|align="center"| -1/-3 | |||
|align="center"| S,Su | |||
|align="center"| HL | |||
|align="center"| Goes over lows. Considered airborne. | |||
|- | |||
|colspan="9" align="center"| '''Special Moves''' | |||
|- | |||
! _d,u + [[image:snka.gif]] | |||
|align="center"| 4/2+2+2/31 | |||
|align="center"| KD/-17 | |||
|align="center"| | |||
|align="center"| HL | |||
|valign="bottom" style="border-right:0px;"| [[image:Leona02_duA1.png|center]] | |||
|valign="bottom" style="border-right:0px; border-left:0px;"| [[image:Leona02_duA2.png|center]] | |||
|valign="bottom" style="border-left:0px;"| [[image:Leona02_duA3.png|center]] | |||
|rowspan="2"|'''Moon Slasher - charge d,u + P''' | |||
|- | |||
! _d,u + [[image:snkc.gif]] | |||
|align="center"| 6/2+2+2/34 | |||
|align="center"| KD/-20 | |||
|align="center"| | |||
|align="center"| HL | |||
|valign="bottom" style="border-right:0px;"| [[image:Leona02_duC1.png|center]] | |||
|valign="bottom" style="border-right:0px; border-left:0px;"| [[image:Leona02_duC2.png|center]] | |||
|valign="bottom" style="border-left:0px;"| [[image:Leona02_duC3.png|center]] | |||
|- | |||
! _b,f + [[image:snka.gif]] | |||
|align="center"| 24/-/33 | |||
|align="center"| KD/+8 | |||
| | |||
|align="center"| HL | |||
|colspan="3"| [[image:Leona02_bfA.png|center]] | |||
|rowspan="2"|'''Baltic Launcher - charge b,f + P | |||
*Framedata of projectile: A: 2*3*3*3*3*4 C: 2*3*3*3*3*4*2*3*3*3*3*4 | |||
*Advantage on block in the corner: A: +16 C: +22 | |||
|- | |||
! _b,f + [[image:snkc.gif]] | |||
|align="center"| 44/-/25+17 | |||
|align="center"| KD/-11 | |||
| | |||
|align="center"| HL | |||
|valign="bottom" style="border-right:0px;"| [[image:Leona02_bfC1.png|center]] | |||
|colspan="2" valign="bottom" style="border-left:0px;"| [[image:Leona02_bfC2.png|center]] | |||
|- | |||
! _b,f + [[image:snkb.gif]] | |||
|align="center"| 8/16/24 | |||
|align="center"| KD/+1 | |||
| | |||
|align="center"| HL | |||
|valign="bottom" style="border-right:0px;"| [[image:Leona02_bfB1.png|center]] | |||
|valign="bottom" style="border-right:0px; border-left:0px;"| [[image:Leona02_bfB2.png|center]] | |||
|valign="bottom" style="border-left:0px;"| [[image:Leona02_bfB3.png|center]] | |||
|rowspan="2"|'''Ground Saber - charge b,f + K''' | |||
*Active period represent the period that Leona can cancel to her slash. Slash framedata is: B: 11/-/19 D: 12/-/19. The attack counts as a fireball, the fireball active frames are 2+6. | |||
|- | |||
! _b,f + [[image:snkd.gif]] | |||
|align="center"| 8/26/27 | |||
|align="center"| KD/+2 | |||
|align="center"| f + D | |||
|align="center"| HL | |||
|valign="bottom" style="border-right:0px;"| [[image:Leona02_bfB1.png|center]] | |||
|colspan="2" valign="bottom" style="border-right:0px; border-left:0px;"| [[image:Leona02_bfB2.png|center]] | |||
|- | |||
! > f + [[image:snkd.gif]] | |||
|align="center"| 9/8*5/26+16 | |||
|align="center"| KD/-37 | |||
| | |||
|align="center"| HL | |||
|valign="bottom" style="border-right:0px;"| [[image:Leona02_bfDfD1.png|center]] | |||
|colspan="2" valign="bottom" style="border-left:0px;"| [[image:Leona02_bfDfD2.png|center]] | |||
| '''Gliding Buster - f + D after D Ground Saber (_b,f + D)''' | |||
|- | |||
! j.qcb + [[image:snka.gif]] | |||
|align="center"| 17/-/5+till land+7 | |||
|align="center"| KD/- | |||
| | |||
|align="center"| HL | |||
|colspan="3"| [[image:Leona02_jqcbA.png|center]] | |||
|rowspan="2"|'''X Calibur - qcb + P (in air)''' | |||
*Fireball active frames: A: 2 frames C: 5 frames. | |||
|- | |||
! j.qcb + [[image:snkc.gif]] | |||
|align="center"| 20/-/6+till land+10 | |||
|align="center"| KD/- | |||
| | |||
|align="center"| HL | |||
|colspan="3"| [[image:Leona02_jqcbC.png|center]] | |||
|- | |||
! qcb + [[image:snkb.gif]] | |||
|align="center"| 44/-/20 | |||
|align="center"| KD/+10 | |||
| | |||
|align="center"| HL/L | |||
|colspan="3"| [[image:Leona02_qcbB.png|center]] | |||
|rowspan="2"|'''Earring Bakudan 1 - qcb + K''' | |||
* Can hit low if spaced properly | |||
* Fireball framedata: 28 frames (1st arc), 23 frames (2nd arc), 9 frames (3rd arc) | |||
|- | |||
! qcb + [[image:snkd.gif]] | |||
|align="center"| 48/-/20 | |||
|align="center"| KD/+10 | |||
| | |||
|align="center"| HL/L | |||
|colspan="3"| [[image:Leona02_qcbD.png|center]] | |||
|- | |||
! <br>rdp + [[image:kick.gif]]<br><br> | |||
|align="center"| 13/2/13(whiff), 30(on block) 4 (on hit) | |||
|align="center"| +14/-14 | |||
| | |||
|align="center"| HL | |||
|colspan="3"| [[image:Leona02_rdpB.png|center]] | |||
|'''Earring Bakudan 2: Heart Attack - rdp + K''' | |||
*Places an earring on the opponent, which will explode after 177 frames. | |||
|- | |||
! <br>> rdp + [[image:kick.gif]]<br><br> | |||
|align="center"| 37/-/51 | |||
|align="center"| KD/KD | |||
| | |||
|align="center"| - | |||
|colspan="3"| | |||
| '''Kibaku - rdp + K after Earring Bakudan 2 (rdp + K)''' | |||
* Detonates earring | |||
* unblockable | |||
|- | |||
! u,d,u,d,u,d + [[image:snkb.gif]] + [[image:snkd.gif]] | |||
|align="center"| 11 | |||
| | |||
| | |||
|align="center"| - | |||
|valign="bottom" style="border-right:0px;"| [[image:Leona02_transform1.png|center]] | |||
|colspan="2" valign="bottom" style="border-left:0px;"| [[image:Leona02_transform2.png|center]] | |||
| '''Kakusei - u,d,u,d,u,d + BD''' | |||
* Leona transform into Orochi Leona. | |||
* Leona loses half her life to transform. | |||
* Complete animation lasts 10 frames and is fully invincible. | |||
* Leona's jump arc becomes much shorter, her run forward becomes really fast and low profile. Her walk backward is completely invincible. | |||
|- | |||
|colspan="9" align="center"| '''DMs''' | |||
|- | |||
! <br>j.qcf,hcb + [[image:snka.gif]]<br><br> | |||
|align="center"| 2/till land/32 | |||
|align="center"| KD/- | |||
| | |||
|align="center"| HL | |||
|rowspan="2" colspan="3"| [[image:Leona02_jqcfhcbP.png|center]] | |||
|rowspan="2"|'''V-Slasher - qcf,hcb + P (in air)''' | |||
*Full invincible during startup and active frames. | |||
|- | |||
! j.qcf,hcb + [[image:snkc.gif]] | |||
|align="center"| 2/till land/34 | |||
|align="center"| KD/- | |||
| | |||
|align="center"| HL | |||
|- | |||
! <br>qcb,hcf + [[image:snkb.gif]]<br><br> | |||
|align="center"| 10/16/24 | |||
|align="center"| KD/-25 | |||
| | |||
|align="center"| HL | |||
|rowspan="2" colspan="3"| [[image:Leona02_qcbhcfK.png|center]] | |||
|rowspan="2"|'''Rebel Spark - qcb,hcf + K''' | |||
* Normal Leona only. | |||
* Framedata is the run portion. On connect the attack framedata is: A version: 2/4/53 C version: 2/4/55. | |||
|- | |||
! qcb,hcf + [[image:snkd.gif]] | |||
|align="center"| 10/24/27 | |||
|align="center"| KD/-27 | |||
| | |||
|align="center"| HL | |||
|- | |||
|colspan="9" align="center"| '''SDM''' | |||
|- | |||
! j.qcf,hcb + [[image:snka.gif]] + [[image:snkc.gif]] | |||
|align="center"| 4/till land/38 | |||
|align="center"| KD/- | |||
|align="center"| | |||
|align="center"| HL | |||
|colspan="3" | [[image:Leona02_jqcfhcbAC.png|center]] | |||
|'''V-Slasher - qcf,hcb + AC (in air)''' | |||
*Invincibility: Complete startup and active frames. | |||
|- | |||
|colspan="9" align="center"| '''HSDM''' | |||
|- | |||
! qcb,hcf + [[image:snkb.gif]] + [[image:snkd.gif]] | |||
|align="center"| 11/24/35 | |||
|align="center"| KD/-22 | |||
|align="center"| | |||
|align="center"| HL | |||
|colspan="3" | [[image:Leona02_qcbhcfBD.png|center]] | |||
|'''Rebel Spark - qcb,hcf + BD''' | |||
* Orochi Leona only | |||
* Framedata is the run portion. On connect the attack framedata is: 2/4/39. | |||
* Invincibility: Complete startup, Frame 19-33 of recovery on block. | |||
|} | |||
==Short Movelist== | |||
* b / f +B (Overhead if not cancelled into.) | |||
* Air throw. | |||
* (b) f + P | |||
* (d) u + P | |||
* air qcb + P | |||
* (b) f + K | |||
** f + D (Only after D version.) | |||
* qcb + K (Low if hit below knee.) | |||
* rdp + K (On hit will place an earring on the opponent that explodes after a while; the explosion is unblockable and an "Anywhere jungle". If input the command while earring is still on the opponent, will do a pose, instead of an attack, and trigger the explosion.) | |||
* u d u d u d + BD (Transforms into "Orochi Leona" for the remainder of the round. Only once per round. You lose half of your current life.) | |||
* DM air qcf hcb + P | |||
* DM qcb hcf + K (Only as "Normal Leona".) | |||
* SDM air qcf hcb + AC | |||
* HSDM qcb hcf + BD (Only as "Orochi Leona".) | |||
==Notes== | |||
===Cancellable moves=== | |||
* Close: A, B, C (2), D (1-2) | |||
* Far: C | |||
* Crouch: A, C | |||
* Jump: A, B, D | |||
* CD is cancellable into specials and DMs. | |||
* b / f + B is cancellable (on air attacks) only when you cancel into it. | |||
===Super cancellable moves=== | |||
* (b) f + D > f + D | |||
===Free cancellable into moves=== | |||
?? | |||
=== Free cancellable out-of moves=== | |||
?? | |||
===Moves with Invincibility=== | |||
?? | |||
=== Moves with autoguard=== | |||
(none) | |||
===Other Notes=== | |||
* far D can evade low attacks. | |||
==Combos== | ==Combos== | ||
''' | ===Basic Combos=== | ||
1. | |||
* '''cr.B x 1-2, cr.A > (d) u + C {25%}''' | |||
* cr.C / cl.D (2) / st.C > | |||
** '''(d) u + C (Only after cr.C.) {25%}''' | |||
** f + B | |||
*** '''(S)DM air qcf hcb + C/AC {40%/??%} {1 stock/Max Mode + 1 stock}''' | |||
*** air qcb + A (Corner) | |||
** (HS)DM qcb hcf + K/BD {1 stock/Max Mode + 1 stock} | |||
''' | * '''cl.D (1) > rdp + K, any combo {+??% or +20% if earring explosion hit.}''' | ||
Both attacks cause no pushback. The explosion will deal no damage if you follow with a combo with (HS)DM qcb hcf + K/BD (The explosion will always happen during super animation...) | |||
* | * '''j.D / j.A > (S)DM air qcf hcb + C/AC (Instant overhead.) {35%/??%} {1 stock/Max Mode + 1 stock}''' | ||
* | |||
* | |||
* (b) f + P / j.CD (Counterhit) / qcb + K / (b) f + K, | |||
** hj.CD | |||
** (d) u + C (Close.) | |||
** '''DM air qcf hcb + C {40%/50%/40%/??%} {1 stock}''' | |||
** SDM air qcf hcb + AC {Max Mode + 1 stock} | |||
** (HS)DM qcb hcf + K/BD (Corner or very close.) {1 stock/Max Mode + 1 stock} | |||
* (b) f + D > f + D >> (S)DM air qcf hcb + C/AC {45%} {2 stocks/Max Mode + 2 stocks} | |||
===Max Mode=== | |||
* cl.D (2) >> BC, run, cl.D (1) > rdp + K, cl.D (2) > f + B > DM air qcf hcb + C {55%} | |||
* cl.D (1) > rdp + K, cl.D (2) >> BC, hh.D > DM air qcf hcb + C {50%} | |||
* cl.D (2) >> BC, run, cl.D (1) > rdp + K, cl.D (1) > (d) u + C >> (b) f + D > f + D >> DM qcf hcb + P {45%} | |||
In the corner, before (d) u + C, you can can use cl.C (2) or cr.B, cr.A. | |||
* cl.D (2) >> BC, run, cl.D (1) > rdp + K, | |||
** cl.D (2) > f + B > SDM air qcf hcb + AC {70%} | |||
** cl.D (1) > u d u d u d + BD, cl.D (2) > HSDM qcb hcf + BD {75%} (Buffer u d u d during rdp + K) | |||
==Strategies== | ==Strategies== | ||
* to do the V-Slasher (air qcf hcb + P), it's best to buffer the qcf hcb on the ground then follow the hcb with ub / u / uf + C, this should give you a jump forward and a V slasher very close to the ground. Another way is: qcf uf hcb + p | |||
* use the V-Slasher (air qcf hcb + P) to punish any whiff from half screen, any fireball, any laggy move that usually staggers too far to punish on block. It has total invincibility to most attacks, with the exception of Robert's f b f + K kicks (although this can be punished by doing a j.D > V-Slasher instead) | |||
* always jump around with Leona (usually straight up), and bait the opponent into attacking you (whether it is an anti-air, fireball, etc). Immediately cancel to V-Slasher (air qcf hcf + P) to punish. Leona can also use her (b) f + K to go through fireballs like Athena's | |||
* her jump D has excellent priority and comes out reasonably fast. Jumping backwards with D will stuff most people out of their attacks, or attempted jumpins. This jumpin is also very meaty, as one can do it early on a waking up opponent, and it will still connect as they are getting up | |||
* in the bomb combos with rdp + K, the bomb can usually be evaded with roll. Punish this by throwing them or using qcb hcf + K DM. If they roll, they will get hit by the DM or thrown, and if they block the DM, the bomb will explode on them | |||
* one trick Leona has is her qcb + B hair pin. The exploding pin will hit low further out from half screen. At max range you can actually throw the hair pin then super jump forward D. The j.D will hit overhead, and the bomb will hit low. Timed right, you can actually land both at the same time for an unblockable. This you can then cancel to super. Generally this only works against unknowledgable or sleepy opponents, as the best counter is to roll the pin. In this case you can hyper hop forward and throw the opponent during his roll. | |||
{{Template:The King of Fighters 2002}} | |||
[[Category:The King of Fighters 2002]] | [[Category:The King of Fighters 2002]] | ||
Latest revision as of 01:07, 24 July 2020
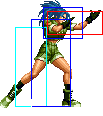
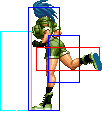
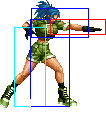
General Info
Crouch height: Low
Crouch height: Medium
Jump: 4/37/1
Hop: 4/25/1
Dash: 3/10~∞/3
Backdash: 3/10/5
Wakeup: 28 frames
Recovery roll: 22 frames
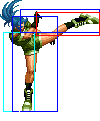
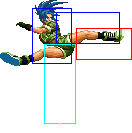
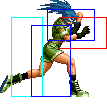
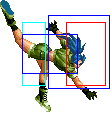
| Stand | Crouch | Jump | Backdash | Grab | Airthrow | Run |
|---|---|---|---|---|---|---|

|

|

|

|

|

|
Colors

|

|

|

|
Movelist
Short Movelist
- b / f +B (Overhead if not cancelled into.)
- Air throw.
- (b) f + P
- (d) u + P
- air qcb + P
- (b) f + K
- f + D (Only after D version.)
- qcb + K (Low if hit below knee.)
- rdp + K (On hit will place an earring on the opponent that explodes after a while; the explosion is unblockable and an "Anywhere jungle". If input the command while earring is still on the opponent, will do a pose, instead of an attack, and trigger the explosion.)
- u d u d u d + BD (Transforms into "Orochi Leona" for the remainder of the round. Only once per round. You lose half of your current life.)
- DM air qcf hcb + P
- DM qcb hcf + K (Only as "Normal Leona".)
- SDM air qcf hcb + AC
- HSDM qcb hcf + BD (Only as "Orochi Leona".)
Notes
Cancellable moves
- Close: A, B, C (2), D (1-2)
- Far: C
- Crouch: A, C
- Jump: A, B, D
- CD is cancellable into specials and DMs.
- b / f + B is cancellable (on air attacks) only when you cancel into it.
Super cancellable moves
- (b) f + D > f + D
Free cancellable into moves
??
Free cancellable out-of moves
??
Moves with Invincibility
??
Moves with autoguard
(none)
Other Notes
- far D can evade low attacks.
Combos
Basic Combos
- cr.B x 1-2, cr.A > (d) u + C {25%}
- cr.C / cl.D (2) / st.C >
- (d) u + C (Only after cr.C.) {25%}
- f + B
- (S)DM air qcf hcb + C/AC {40%/??%} {1 stock/Max Mode + 1 stock}
- air qcb + A (Corner)
- (HS)DM qcb hcf + K/BD {1 stock/Max Mode + 1 stock}
- cl.D (1) > rdp + K, any combo {+??% or +20% if earring explosion hit.}
Both attacks cause no pushback. The explosion will deal no damage if you follow with a combo with (HS)DM qcb hcf + K/BD (The explosion will always happen during super animation...)
- j.D / j.A > (S)DM air qcf hcb + C/AC (Instant overhead.) {35%/??%} {1 stock/Max Mode + 1 stock}
- (b) f + P / j.CD (Counterhit) / qcb + K / (b) f + K,
- hj.CD
- (d) u + C (Close.)
- DM air qcf hcb + C {40%/50%/40%/??%} {1 stock}
- SDM air qcf hcb + AC {Max Mode + 1 stock}
- (HS)DM qcb hcf + K/BD (Corner or very close.) {1 stock/Max Mode + 1 stock}
- (b) f + D > f + D >> (S)DM air qcf hcb + C/AC {45%} {2 stocks/Max Mode + 2 stocks}
Max Mode
- cl.D (2) >> BC, run, cl.D (1) > rdp + K, cl.D (2) > f + B > DM air qcf hcb + C {55%}
- cl.D (1) > rdp + K, cl.D (2) >> BC, hh.D > DM air qcf hcb + C {50%}
- cl.D (2) >> BC, run, cl.D (1) > rdp + K, cl.D (1) > (d) u + C >> (b) f + D > f + D >> DM qcf hcb + P {45%}
In the corner, before (d) u + C, you can can use cl.C (2) or cr.B, cr.A.
- cl.D (2) >> BC, run, cl.D (1) > rdp + K,
- cl.D (2) > f + B > SDM air qcf hcb + AC {70%}
- cl.D (1) > u d u d u d + BD, cl.D (2) > HSDM qcb hcf + BD {75%} (Buffer u d u d during rdp + K)
Strategies
- to do the V-Slasher (air qcf hcb + P), it's best to buffer the qcf hcb on the ground then follow the hcb with ub / u / uf + C, this should give you a jump forward and a V slasher very close to the ground. Another way is: qcf uf hcb + p
- use the V-Slasher (air qcf hcb + P) to punish any whiff from half screen, any fireball, any laggy move that usually staggers too far to punish on block. It has total invincibility to most attacks, with the exception of Robert's f b f + K kicks (although this can be punished by doing a j.D > V-Slasher instead)
- always jump around with Leona (usually straight up), and bait the opponent into attacking you (whether it is an anti-air, fireball, etc). Immediately cancel to V-Slasher (air qcf hcf + P) to punish. Leona can also use her (b) f + K to go through fireballs like Athena's
- her jump D has excellent priority and comes out reasonably fast. Jumping backwards with D will stuff most people out of their attacks, or attempted jumpins. This jumpin is also very meaty, as one can do it early on a waking up opponent, and it will still connect as they are getting up
- in the bomb combos with rdp + K, the bomb can usually be evaded with roll. Punish this by throwing them or using qcb hcf + K DM. If they roll, they will get hit by the DM or thrown, and if they block the DM, the bomb will explode on them
- one trick Leona has is her qcb + B hair pin. The exploding pin will hit low further out from half screen. At max range you can actually throw the hair pin then super jump forward D. The j.D will hit overhead, and the bomb will hit low. Timed right, you can actually land both at the same time for an unblockable. This you can then cancel to super. Generally this only works against unknowledgable or sleepy opponents, as the best counter is to roll the pin. In this case you can hyper hop forward and throw the opponent during his roll.
