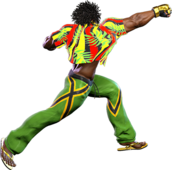
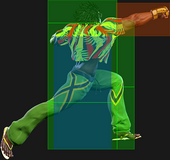
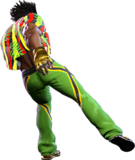
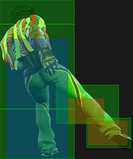
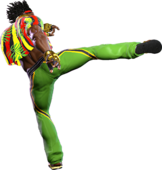
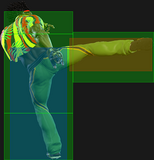
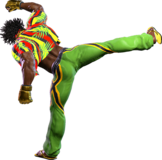
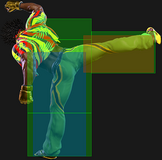
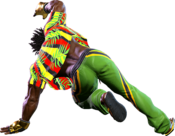
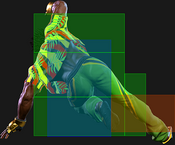
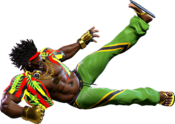
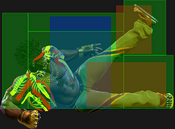
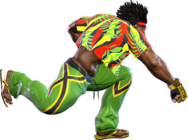
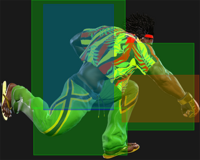
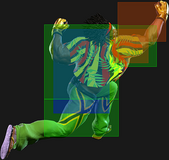
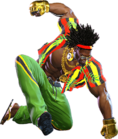
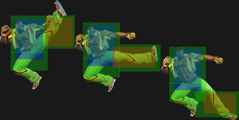
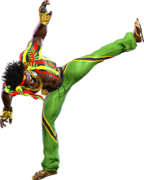
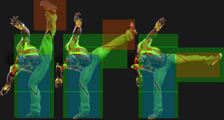
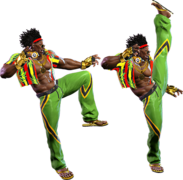
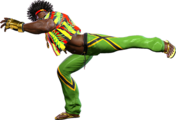
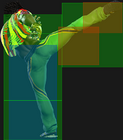
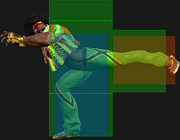
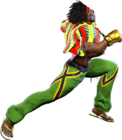
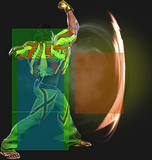
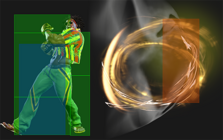
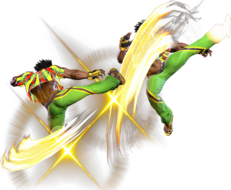
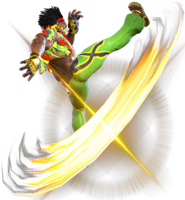
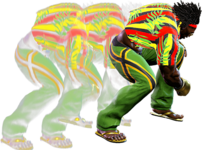
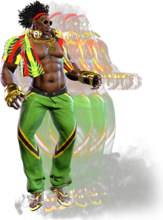
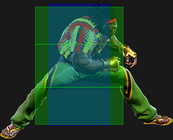
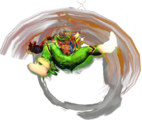
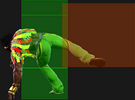
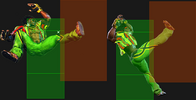
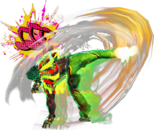
|
|
| (94 intermediate revisions by 3 users not shown) |
| Line 1: |
Line 1: |
| {{New Patch Warning SF6}}
| |
| {{Character Top SF6 | chara=Dee_Jay | tag=DeeJay }} | | {{Character Top SF6 | chara=Dee_Jay | tag=DeeJay }} |
|
| |
|
| Line 9: |
Line 8: |
| | title = Standing Light Punch | | | title = Standing Light Punch |
| | subtitle = | | | subtitle = |
| | input = 5LP | | | input = {{Classic_sf6}} 5LP<br>{{Modern_sf6}} 5L |
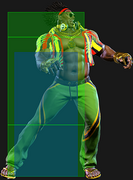
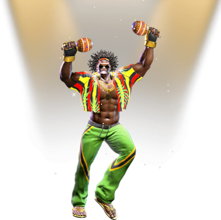
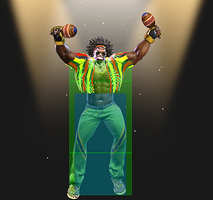
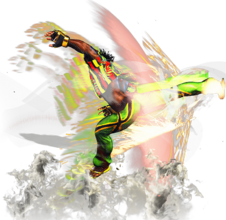
| | images = | | | images = |
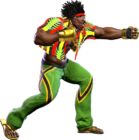
| {{MoveDataCargoImage|imageHeight=200px|dee_jay_5lp|caption=}} | | {{MoveDataCargoImage|imageHeight=200px|dee_jay_5lp|caption=}} |
| Line 18: |
Line 17: |
| * Chains into {{clr|L|5LP}}/{{clr|L|2LP}}/{{clr|L|2LK}} | | * Chains into {{clr|L|5LP}}/{{clr|L|2LP}}/{{clr|L|2LK}} |
| * '''Cancel Hitconfirm Window:''' 13f / 12f (TC) | | * '''Cancel Hitconfirm Window:''' 13f / 12f (TC) |
| * '''{{clr|4|Drive Rush}} cancel advantage:''' {{sf6-adv|P|+3}} oH / {{sf6-adv|M|-2}} oB | | * '''{{clr|DR|Drive Rush}} cancel advantage:''' {{sf6-adv|P|+3}} oH / {{sf6-adv|M|-2}} oB |
| * '''{{clr|L|[4]6LP}} cancel advantage:''' {{sf6-adv|VM|-9}} oH / {{sf6-adv|VM|-14}} oB | | * '''{{clr|L|[4]6LP}} cancel advantage:''' {{sf6-adv|VM|-9}} oH / {{sf6-adv|VM|-14}} oB |
| * '''{{clr|L|236LK}} cancel advantage:''' {{sf6-adv|VM|-14}} oH / {{sf6-adv|VM|-19}} oB | | * '''{{clr|L|236LK}} cancel advantage:''' {{sf6-adv|VM|-14}} oH / {{sf6-adv|VM|-19}} oB |
| Line 30: |
Line 29: |
| | title = Standing Medium Punch | | | title = Standing Medium Punch |
| | subtitle = | | | subtitle = |
| | input = 5MP | | | input = {{Classic_sf6}} 5MP<br>{{Modern_sf6}} 5M |
| | images = | | | images = |
| {{MoveDataCargoImage|imageHeight=160px|dee_jay_5mp|caption=}} | | {{MoveDataCargoImage|imageHeight=160px|dee_jay_5mp|caption=}} |
| Line 39: |
Line 38: |
| * '''Cancel Hitconfirm Window:''' 21f (~MP TC) / 17f (~HP TC) | | * '''Cancel Hitconfirm Window:''' 21f (~MP TC) / 17f (~HP TC) |
| <br> | | <br> |
| One of the biggest plus-on-block normals in the game, core to Dee Jay's devious pressure game. Even stronger when combined with his excellent {{clr|4|Drive Rush}} momentum. {{clr|M|5MP}} frame traps into any of Dee Jay's lights and has multiple target combo routes, giving your offense additional layers. | | One of the biggest plus-on-block normals in the game, core to Dee Jay's devious pressure game. Even stronger when combined with his excellent {{clr|DR|Drive Rush}} momentum. {{clr|M|5MP}} frame traps into any of Dee Jay's lights and has multiple target combo routes, giving your offense additional layers. Unfortunately leaves you just outside throw range on block, which means walking up for a throw will lose to mashing. |
| }} | | }} |
|
| |
|
| Line 46: |
Line 45: |
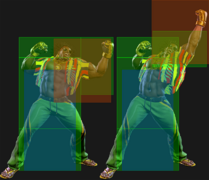
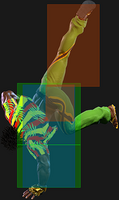
| | title = Standing Heavy Punch | | | title = Standing Heavy Punch |
| | subtitle = | | | subtitle = |
| | input = 5HP | | | input = {{Classic_sf6}} 5HP<br>{{Modern_sf6}} -- |
| | images = | | | images = |
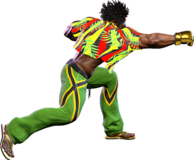
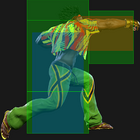
| {{MoveDataCargoImage|imageHeight=160px|dee_jay_5hp|caption=}} | | {{MoveDataCargoImage|imageHeight=160px|dee_jay_5hp|caption=}} |
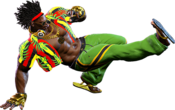
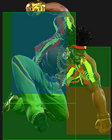
| | {{MoveDataCargoImage|imageHeight=170px|dee_jay_5hp|2|caption=}} |
| | hitboxes = | | | hitboxes = |
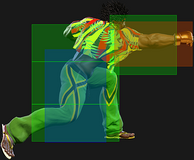
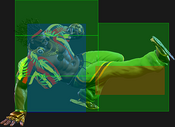
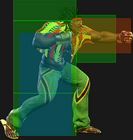
| {{MoveDataCargoImage|hitbox=yes|imageHeight=160px|dee_jay_5hp|caption=}} | | {{MoveDataCargoImage|hitbox=yes|imageHeight=160px|dee_jay_5hp|caption=}} |
| Line 56: |
Line 56: |
| {{AttackDataCargo-SF6/Query|dee_jay_5hp}} | | {{AttackDataCargo-SF6/Query|dee_jay_5hp}} |
| * Forces Stand on hit (active frames 1-2) | | * Forces Stand on hit (active frames 1-2) |
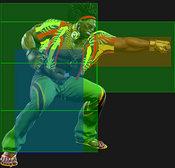
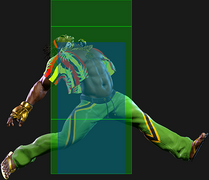
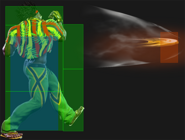
| * Active frames 3-6 deal 100 less damage and whiff on crouching opponents | | * Active frames 3-6 deal 100 less damage and whiff on crouching opponents unless they extend a vertical hurtbox |
| * '''Cancel Hitconfirm Window:''' 16f | | * '''Cancel Hitconfirm Window:''' 16f |
| * '''{{clr|4|Drive Rush}} cancel advantage:''' {{sf6-adv|VP|+17}} oH / {{sf6-adv|VP|+10}} oB | | * '''{{clr|DR|Drive Rush}} cancel advantage:''' {{sf6-adv|VP|+17}} oH / {{sf6-adv|VP|+10}} oB |
| * '''{{clr|L|[4]6LP}} cancel advantage:''' {{sf6-adv|VP|+5}} oH / {{sf6-adv|M|-2}} oB | | * '''{{clr|L|[4]6LP}} cancel advantage:''' {{sf6-adv|VP|+5}} oH / {{sf6-adv|M|-2}} oB |
| * '''{{clr|L|236LK}} cancel advantage:''' {{sf6-adv|E|0}} oH / {{sf6-adv|VM|-7}} oB | | * '''{{clr|L|236LK}} cancel advantage:''' {{sf6-adv|E|0}} oH / {{sf6-adv|VM|-7}} oB |
| * Applies 20% damage scaling to next hit when beginning a combo (100/80/70...) | | * Applies 20% damage scaling to next hit when beginning a combo (100/80/70...) |
| <br> | | <br> |
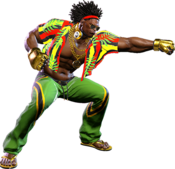
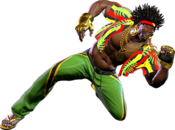
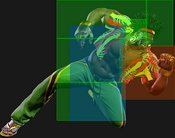
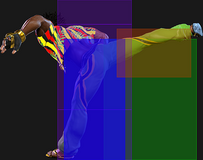
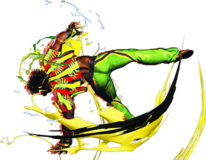
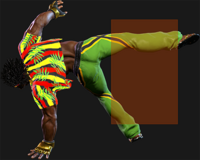
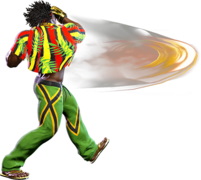
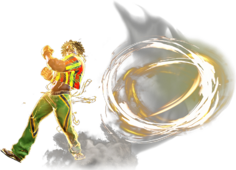
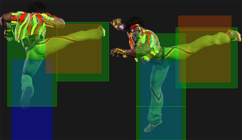
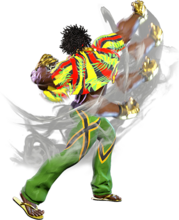
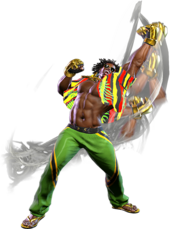
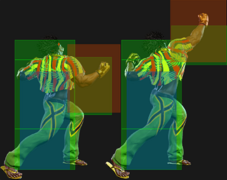
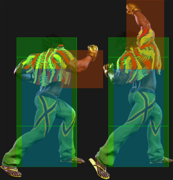
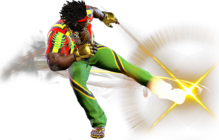
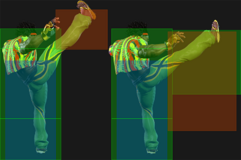
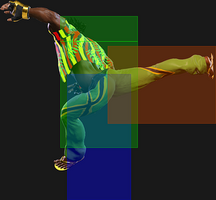
| A forward-lunging punch with good utility in combos. The first 2 active frames are cancelable and work against crouching opponents; this allows Dee Jay to combo into [[#Machine Gun Uppercut (214P)|214HP]] using {{clr|4|Drive Rush}} cancels or juggle routes. It also forces the opponent to stand, allowing extended combo routes into {{clr|H|[2]8HK}}. | | A forward-lunging punch with good utility in combos. The first 2 active frames are cancelable and work against crouching opponents; this allows Dee Jay to combo into [[#Machine Gun Uppercut (214P)|214HP]] using {{clr|DR|Drive Rush}} cancels or juggle routes. It also forces the opponent to stand, allowing extended combo routes into {{clr|H|[2]8HK}}. |
|
| |
|
| If spaced at farther ranges, {{clr|H|5HP}} can get much better frame advantage; it makes an excellent shimmy tool due to its frame advantage and forward movement. However, it loses 100 damage and can no longer cancel or hit crouching opponents. This makes it inherently risky as an approach tool, as a crouch blocking opponent can easily whiff punish the recovery. | | If spaced at farther ranges, {{clr|H|5HP}} can get much better frame advantage; it makes an excellent shimmy tool due to its frame advantage and forward movement. However, it loses 100 damage and can no longer cancel or hit crouching opponents. This makes it inherently risky as an approach tool, as a crouch blocking opponent can easily whiff punish the recovery. |
| Line 72: |
Line 72: |
| | title = Standing Light Kick | | | title = Standing Light Kick |
| | subtitle = | | | subtitle = |
| | input = 5LK | | | input = {{Classic_sf6}} 5LK<br>{{Modern_sf6}} A[L] |
| | images = | | | images = |
| {{MoveDataCargoImage|imageHeight=160px|dee_jay_5lk|caption=}} | | {{MoveDataCargoImage|imageHeight=160px|dee_jay_5lk|caption=}} |
| Line 80: |
Line 80: |
| {{AttackDataCargo-SF6/Query|dee_jay_5lk}} | | {{AttackDataCargo-SF6/Query|dee_jay_5lk}} |
| * '''Cancel Hitconfirm Window:''' 14f | | * '''Cancel Hitconfirm Window:''' 14f |
| ** {{clr|4|DR}} cancel is delayed until after 2nd active frame | | ** {{clr|DR|DR}} cancel is delayed until after 2nd active frame |
| * '''{{clr|4|Drive Rush}} cancel advantage:''' {{sf6-adv|VP|+5}} oH / {{sf6-adv|P|+1}} oB | | * '''{{clr|DR|Drive Rush}} cancel advantage:''' {{sf6-adv|VP|+5}} oH / {{sf6-adv|P|+1}} oB |
| * '''{{clr|L|[4]6LP}} cancel advantage:''' {{sf6-adv|VM|-6}} oH / {{sf6-adv|VM|-10}} oB | | * '''{{clr|L|[4]6LP}} cancel advantage:''' {{sf6-adv|VM|-6}} oH / {{sf6-adv|VM|-10}} oB |
| * '''{{clr|L|236LK}} cancel advantage:''' {{sf6-adv|VM|-11}} oH / {{sf6-adv|VM|-15}} oB | | * '''{{clr|L|236LK}} cancel advantage:''' {{sf6-adv|VM|-11}} oH / {{sf6-adv|VM|-15}} oB |
| * Applies 20% damage scaling to next hit when beginning a combo (100/80/70...) | | * Applies 20% damage scaling to next hit when beginning a combo (100/80/70...) |
| <br> | | <br> |
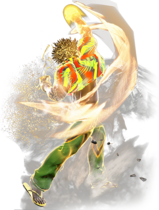
| A perfectly average {{clr|L|5LK}} that combos naturally from {{clr|M|5MP}}; he does not have any natural links from light starters, but it works well in his pressure strings. It can combo into {{clr|M|MK Sobat}} for a knockdown at any range. It has decent range for a 5f punish tool, allowing it to combo into {{clr|10|OD Sobat}} or get strong conversions on a {{sf6-adv|VP|+9}} {{clr|4|Drive Rush}} cancel. | | A perfectly average {{clr|L|5LK}} that combos naturally from {{clr|M|5MP}}; he does not have any natural links from light starters, but it works well in his pressure strings. It can combo into {{clr|M|MK Sobat}} for a knockdown at any range. It has decent range for a 5f punish tool, allowing it to combo into {{clr|OD|OD Sobat}} or get strong conversions on a {{sf6-adv|VP|+9}} {{clr|DR|Drive Rush}} cancel. |
| }} | | }} |
|
| |
|
| Line 93: |
Line 93: |
| | title = Standing Medium Kick | | | title = Standing Medium Kick |
| | subtitle = | | | subtitle = |
| | input = 5MK | | | input = {{Classic_sf6}} 5MK<br>{{Modern_sf6}} -- |
| | images = | | | images = |
| {{MoveDataCargoImage|imageHeight=170px|dee_jay_5mk|caption=}} | | {{MoveDataCargoImage|imageHeight=170px|dee_jay_5mk|caption=}} |
| Line 101: |
Line 101: |
| {{AttackDataCargo-SF6/Query|dee_jay_5mk}} | | {{AttackDataCargo-SF6/Query|dee_jay_5mk}} |
| <br> | | <br> |
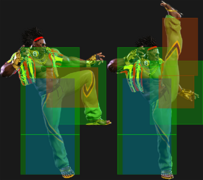
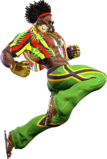
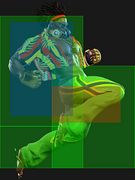
| One of Dee Jay's best pokes, with the great range and speed only being balanced by a lack of cancelability and how difficult it can be to confirm off of. Punish Counter allows a link into {{clr|H|5HP}} from further out, and {{clr|H|4HK}} when up close. Despite the low recovery, it still demands some care when hitting a {{clr|4|Drive Impact}}. | | One of Dee Jay's best pokes, with the great range and speed only being balanced by a lack of cancelability and how difficult it can be to confirm off of. {{clr|PC|Punish Counter}} allows a link into {{clr|H|5HP}} from further out, and {{clr|H|4HK}} when up close. Despite the low recovery, it still demands some care when hitting a {{clr|DR|Drive Impact}}. |
| }} | | }} |
|
| |
|
| Line 108: |
Line 108: |
| | title = Standing Heavy Kick | | | title = Standing Heavy Kick |
| | subtitle = | | | subtitle = |
| | input = 5HK | | | input = {{Classic_sf6}} 5HK<br>{{Modern_sf6}} 5H |
| | images = | | | images = |
| {{MoveDataCargoImage|imageHeight=160px|dee_jay_5hk|caption=}} | | {{MoveDataCargoImage|imageHeight=160px|dee_jay_5hk|caption=}} |
| Line 115: |
Line 115: |
| | info = | | | info = |
| {{AttackDataCargo-SF6/Query|dee_jay_5hk}} | | {{AttackDataCargo-SF6/Query|dee_jay_5hk}} |
| * Punish Counter: +18 Stagger | | * {{clr|PC|Punish Counter}}: {{sf6-adv|VP|+18 Stagger}} / {{sf6-jug|limited juggle}} state vs. airborne |
| * 4f extra recovery on whiff | | * 4f extra recovery on whiff |
| * Extends a hurtbox 1f before active that is vulnerable to projectiles | | * Extends a hurtbox 1f before active that is vulnerable to projectiles |
| * Applies 20% damage scaling to next hit when beginning a combo (100/80/70...) | | * Applies 20% damage scaling to next hit when beginning a combo (100/80/70...) |
| <br> | | <br> |
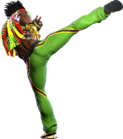
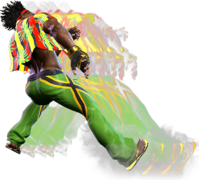
| An absolutely massive kick with great range and reward on Punish Counter, making it an excellent whiff punish and space control tool. The stagger effect allows a full {{clr|4|Drive Rush}} conversion at any range for great damage and corner carry. However, its long recovery and lack of cancelability makes it whiff punishable and susceptible to {{clr|4|Drive Impact}} in neutral. | | An absolutely massive kick with great range and reward on {{clr|PC|Punish Counter}}, making it an excellent whiff punish and space control tool. The stagger effect allows a full {{clr|DR|Drive Rush}} conversion at any range for great damage and corner carry. However, its long recovery and lack of cancelability makes it whiff punishable and susceptible to {{clr|DR|Drive Impact}} in neutral. |
| }} | | }} |
| <br> | | <br> |
| Line 129: |
Line 129: |
| | title = Crouching Light Punch | | | title = Crouching Light Punch |
| | subtitle = | | | subtitle = |
| | input = 2LP | | | input = {{Classic_sf6}} 2LP<br>{{Modern_sf6}} 5/2L~2L |
| | images = | | | images = |
| {{MoveDataCargoImage|dee_jay_2lp|caption=}} | | {{MoveDataCargoImage|dee_jay_2lp|caption=}} |
| Line 138: |
Line 138: |
| * Chains into {{clr|L|5LP}}/{{clr|L|2LP}}/{{clr|L|2LK}} | | * Chains into {{clr|L|5LP}}/{{clr|L|2LP}}/{{clr|L|2LK}} |
| * '''Cancel Hitconfirm Window:''' 13f | | * '''Cancel Hitconfirm Window:''' 13f |
| * '''{{clr|4|Drive Rush}} cancel advantage:''' {{sf6-adv|VP|+5}} oH / {{sf6-adv|E|0}} oB | | * '''{{clr|DR|Drive Rush}} cancel advantage:''' {{sf6-adv|VP|+5}} oH / {{sf6-adv|E|0}} oB |
| * '''{{clr|L|[4]6LP}} cancel advantage:''' {{sf6-adv|VM|-7}} oH / {{sf6-adv|VM|-12}} oB | | * '''{{clr|L|[4]6LP}} cancel advantage:''' {{sf6-adv|VM|-7}} oH / {{sf6-adv|VM|-12}} oB |
| * '''{{clr|L|236LK}} cancel advantage:''' {{sf6-adv|VM|-12}} oH / {{sf6-adv|VM|-17}} oB | | * '''{{clr|L|236LK}} cancel advantage:''' {{sf6-adv|VM|-12}} oH / {{sf6-adv|VM|-17}} oB |
| Line 151: |
Line 151: |
| | title = Crouching Medium Punch | | | title = Crouching Medium Punch |
| | subtitle = | | | subtitle = |
| | input = 2MP | | | input = {{Classic_sf6}} 2MP<br>{{Modern_sf6}} A[M] |
| | images = | | | images = |
| {{MoveDataCargoImage|dee_jay_2mp|caption=}} | | {{MoveDataCargoImage|dee_jay_2mp|caption=}} |
| Line 159: |
Line 159: |
| {{AttackDataCargo-SF6/Query|dee_jay_2mp}} | | {{AttackDataCargo-SF6/Query|dee_jay_2mp}} |
| * '''Cancel Hitconfirm Window:''' 19f (15f into 236KK) | | * '''Cancel Hitconfirm Window:''' 19f (15f into 236KK) |
| * '''{{clr|4|Drive Rush}} cancel advantage:''' {{sf6-adv|VP|+12}} oH / {{sf6-adv|VP|+7}} oB | | * '''{{clr|DR|Drive Rush}} cancel advantage:''' {{sf6-adv|VP|+12}} oH / {{sf6-adv|VP|+7}} oB |
| * '''{{clr|L|[4]6LP}} cancel advantage:''' {{sf6-adv|E|0}} oH / {{sf6-adv|VM|-5}} oB | | * '''{{clr|L|[4]6LP}} cancel advantage:''' {{sf6-adv|E|0}} oH / {{sf6-adv|VM|-5}} oB |
| * '''{{clr|L|236LK}} cancel advantage:''' {{sf6-adv|VM|-5}} oH / {{sf6-adv|VM|-10}} oB | | * '''{{clr|L|236LK}} cancel advantage:''' {{sf6-adv|VM|-5}} oH / {{sf6-adv|VM|-10}} oB |
| Line 170: |
Line 170: |
| | title = Crouching Heavy Punch | | | title = Crouching Heavy Punch |
| | subtitle = | | | subtitle = |
| | input = 2HP | | | input = {{Classic_sf6}} 2HP<br>{{Modern_sf6}} 2H |
| | images = | | | images = |
| {{MoveDataCargoImage|imageHeight=160px|dee_jay_2hp|caption=}} | | {{MoveDataCargoImage|imageHeight=160px|dee_jay_2hp|caption=}} |
| Line 177: |
Line 177: |
| | info = | | | info = |
| {{AttackDataCargo-SF6/Query|dee_jay_2hp}} | | {{AttackDataCargo-SF6/Query|dee_jay_2hp}} |
| * Punish Counter: +12 Stagger | | * {{clr|PC|Punish Counter}}: {{sf6-adv|VP|+12 Stagger}} / {{sf6-jug|limited juggle}} state Hard Knockdown vs. airborne |
| | ** Generally no follow-up juggle is possible |
| * Forces Stand on hit | | * Forces Stand on hit |
| <br> | | <br> |
| One of Dee Jay's more well-rounded buttons with decent range, speed, advantage, and punish reward. Links to {{clr|M|2MP}} naturally, and links into {{clr|H|5HP}} on Punish Counter, making it a great whiff punish option when speed is more important than range (e.g. PC {{clr|H|2HP}}, {{clr|H|5HP}}, {{clr|L|2LP}} > Special). Very important for comboing into Jackknife Maximum since it forces the crouching opponents to stand. It can be used as a poke and pressure tool, but may lose to an early {{clr|4|Drive Impact}} since it's not cancelable. | | One of Dee Jay's more well-rounded buttons with decent range, speed, advantage, and punish reward. Links to {{clr|M|2MP}} up close or {{clr|M|MK}}/{{clr|H|HK}} Jackknife from farther out. Links into {{clr|H|5HP}} on {{clr|PC|Punish Counter}}, making it a great whiff punish option when speed is more important than range (e.g. PC {{clr|H|2HP}}, {{clr|H|5HP}}, {{clr|L|2LP}} > Special). Very important for comboing into Jackknife since it forces the crouching opponents to stand. It can be used as a poke and pressure tool, but may lose to an early {{clr|DR|Drive Impact}} since it's not cancelable. |
| }} | | }} |
|
| |
|
| Line 187: |
Line 188: |
| | title = Crouching Light Kick | | | title = Crouching Light Kick |
| | subtitle = | | | subtitle = |
| | input = 2LK | | | input = {{Classic_sf6}} 2LK<br>{{Modern_sf6}} 2L |
| | images = | | | images = |
| {{MoveDataCargoImage|dee_jay_2lk|caption=}} | | {{MoveDataCargoImage|dee_jay_2lk|caption=}} |
| Line 197: |
Line 198: |
| * Applies 20% damage scaling to next hit when beginning a combo (100/80/70...) | | * Applies 20% damage scaling to next hit when beginning a combo (100/80/70...) |
| <br> | | <br> |
| Good range, but isn't cancelable. Mostly used in light chains and to trip up the opponent's guard. | | Good range, but isn't cancelable. Dee Jay's only low starter without counterhit, and thus very important for his mixups. Needs to hit pretty close to chain {{clr|L|2LP}} and continue a combo, so the utility is mostly limited to meaty and {{clr|DR|Drive Rush}} setups. After {{clr|DR|Drive Rush}} it becomes {{sf6-adv|VP|+6}} on hit, allowing links into {{clr|M|2MP}} or {{clr|L|5LK}}. |
| }} | | }} |
|
| |
|
| Line 204: |
Line 205: |
| | title = Crouching Medium Kick | | | title = Crouching Medium Kick |
| | subtitle = | | | subtitle = |
| | input = 2MK | | | input = {{Classic_sf6}} 2MK<br>{{Modern_sf6}} 2M |
| | images = | | | images = |
| {{MoveDataCargoImage|dee_jay_2mk|caption=}} | | {{MoveDataCargoImage|dee_jay_2mk|caption=}} |
| Line 211: |
Line 212: |
| | info = | | | info = |
| {{AttackDataCargo-SF6/Query|dee_jay_2mk}} | | {{AttackDataCargo-SF6/Query|dee_jay_2mk}} |
| * Punish Counter: HKD +29 | | * {{clr|PC|Punish Counter}}: HKD +29 |
| * Extends a hurtbox on whiff until end of recovery | | * Extends a hurtbox on whiff until end of recovery |
| <br> | | <br> |
| Line 221: |
Line 222: |
| | title = Crouching Heavy Kick | | | title = Crouching Heavy Kick |
| | subtitle = | | | subtitle = |
| | input = 2HK | | | input = {{Classic_sf6}} 2HK<br>{{Modern_sf6}} 3H |
| | images = | | | images = |
| {{MoveDataCargoImage|dee_jay_2hk|caption=}} | | {{MoveDataCargoImage|dee_jay_2hk|caption=}} |
| Line 229: |
Line 230: |
| {{AttackDataCargo-SF6/Query|dee_jay_2hk}} | | {{AttackDataCargo-SF6/Query|dee_jay_2hk}} |
| * '''Anti-Air Invuln (Legs/Upper Body):''' 12-23f | | * '''Anti-Air Invuln (Legs/Upper Body):''' 12-23f |
| * Counter-hit/Punish Counter: HKD +52~61 | | * {{clr|PC|Counter-hit/Punish Counter}}: HKD +52~61 |
| * Puts airborne opponents into {{sf6-jug|limited juggle}} state (better juggle on Counter-hit/Punish Counter) | | * Puts airborne opponents into {{sf6-jug|limited juggle}} state (better juggle on {{clr|PC|Counter-hit/Punish Counter}}) |
| * Not a Hard Knockdown vs. airborne opponents | | * Not a Hard Knockdown vs. airborne opponents |
| <br> | | <br> |
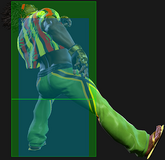
| {{clr|H|2HK}} is a slide rather than a traditional sweep. Unlike in previous games, it doesn't slide under fireballs. However, it does have a surprisingly large anti-air hitbox that works well against certain types of moves, like Ken's Dragonlash, Marisa's Phalanx, or Divekicks. Scoring a Forced Knockdown allows Dee Jay to maintain down charge and follow up with a Jackknife Maximum. Anti-airing with a counter-hit or Punish Counter floats the opponent higher for a more consistent juggle, even when there is no Forced Knockdown. | | {{clr|H|2HK}} is a slide rather than a traditional sweep. Unlike in previous games, it doesn't slide under fireballs. However, it does have a surprisingly large anti-air hitbox that works well against certain types of moves, like Ken's Dragonlash, Marisa's Phalanx, or Divekicks. Scoring a Forced Knockdown allows Dee Jay to maintain down charge and follow up with a Jackknife Maximum. Anti-airing with a {{clr|PC|Counter-hit}} or {{clr|PC|Punish Counter}} floats the opponent higher for a more consistent juggle, even when there is no Forced Knockdown. |
|
| |
|
| It is quite slow to startup, making it hard to use reactively. While unsafe on block, it can be spaced safely in neutral; this allows Dee Jay to mix up with a gimmicky Perfect Parry or invincible reversal attempt when the opponent takes their turn back, though this should only be used sparingly due to the high risk. | | It is quite slow to startup, making it hard to use reactively. While unsafe on block, it can be spaced safely in neutral; this allows Dee Jay to mix up with a gimmicky Perfect Parry or invincible reversal attempt when the opponent takes their turn back, though this should only be used sparingly due to the high risk. |
| Line 244: |
Line 245: |
| | title = Jumping Light Punch | | | title = Jumping Light Punch |
| | subtitle = | | | subtitle = |
| | input = j.LP | | | input = {{Classic_sf6}} j.LP<br>{{Modern_sf6}} j.L |
| | images = | | | images = |
| {{MoveDataCargoImage|imageHeight=140px|dee_jay_jlp|caption=}} | | {{MoveDataCargoImage|imageHeight=140px|dee_jay_jlp|caption=}} |
| Line 260: |
Line 261: |
| | title = Jumping Medium Punch | | | title = Jumping Medium Punch |
| | subtitle = | | | subtitle = |
| | input = j.MP | | | input = {{Classic_sf6}} j.MP<br>{{Modern_sf6}} j.M |
| | images = | | | images = |
| {{MoveDataCargoImage|imageHeight=160px|dee_jay_jmp|caption=}} | | {{MoveDataCargoImage|imageHeight=160px|dee_jay_jmp|caption=}} |
| Line 268: |
Line 269: |
| {{AttackDataCargo-SF6/Query|dee_jay_jmp}} | | {{AttackDataCargo-SF6/Query|dee_jay_jmp}} |
| * Puts airborne opponents into {{sf6-jug|limited juggle}} state | | * Puts airborne opponents into {{sf6-jug|limited juggle}} state |
| * Chains into j.HP Target Combo for a spike knockdown (lenient 25f cancel window) | | * Chains into {{clr|H|j.HP}} Target Combo for a spike knockdown (lenient 25f cancel window) |
| * Shifts Dee Jay's hurtbox upward during startup | | * Shifts Dee Jay's hurtbox upward during startup |
| <br> | | <br> |
| A useful air-to-air that hits above Dee Jay and knocks down. Not appropriate for all ranges due to the short horizontal reach. | | A useful air-to-air that hits above Dee Jay and knocks down. Not appropriate for all ranges due to the short horizontal reach. |
| | |
| | On hit, Dee Jay can choose between following up with the Target Combo or landing and continuing the combo grounded. The grounded combos are usually only available when hitting {{clr|M|j.MP}} around the apex of the jump, so for rising air-to-airs, stick to the Target Combo. |
| }} | | }} |
|
| |
|
| Line 278: |
Line 281: |
| | title = Jumping Heavy Punch | | | title = Jumping Heavy Punch |
| | subtitle = | | | subtitle = |
| | input = j.HP | | | input = {{Classic_sf6}} j.HP<br>{{Modern_sf6}} j.H |
| | images = | | | images = |
| {{MoveDataCargoImage|imageHeight=140px|dee_jay_jhp|caption=}} | | {{MoveDataCargoImage|imageHeight=140px|dee_jay_jhp|caption=}} |
| Line 294: |
Line 297: |
| | title = Jumping Light Kick | | | title = Jumping Light Kick |
| | subtitle = | | | subtitle = |
| | input = j.LK | | | input = {{Classic_sf6}} j.LK<br>{{Modern_sf6}} j.A[L] |
| | images = | | | images = |
| {{MoveDataCargoImage|imageHeight=150px|dee_jay_jlk|caption=}} | | {{MoveDataCargoImage|imageHeight=150px|dee_jay_jlk|caption=}} |
| Line 309: |
Line 312: |
| | title = Jumping Medium Kick | | | title = Jumping Medium Kick |
| | subtitle = | | | subtitle = |
| | input = j.MK | | | input = {{Classic_sf6}} j.MK<br>{{Modern_sf6}} j.A[M] |
| | images = | | | images = |
| {{MoveDataCargoImage|imageHeight=140px|dee_jay_jmk|caption=}} | | {{MoveDataCargoImage|imageHeight=140px|dee_jay_jmk|caption=}} |
| Line 325: |
Line 328: |
| | title = Jumping Heavy Kick | | | title = Jumping Heavy Kick |
| | subtitle = | | | subtitle = |
| | input = j.HK | | | input = {{Classic_sf6}} j.HK<br>{{Modern_sf6}} j.A[H] |
| | images = | | | images = |
| {{MoveDataCargoImage|imageHeight=140px|dee_jay_jhk|caption=}} | | {{MoveDataCargoImage|imageHeight=140px|dee_jay_jhk|caption=}} |
| Line 333: |
Line 336: |
| {{AttackDataCargo-SF6/Query|dee_jay_jhk}} | | {{AttackDataCargo-SF6/Query|dee_jay_jhk}} |
| <br> | | <br> |
| A decent all-purpose air normal that hits in front before swinging his leg downward. After a {{clr|4|Drive Impact}} crumple into neutral {{clr|H|j.HK}}, the opponent is in the perfect position for {{clr|4|Drive Rush}} {{clr|M|5MP}}~{{clr|M|MP}} juggle loops that can take the opponent to the corner from anywhere on screen. | | A decent all-purpose air normal that hits in front before swinging his leg downward. After a {{clr|DR|Drive Impact}} crumple into neutral {{clr|H|j.HK}}, the opponent is in the perfect position for {{clr|DR|Drive Rush}} {{clr|M|5MP}}~{{clr|M|MP}} juggle loops that can take the opponent to the corner from anywhere on screen. |
| }} | | }} |
| <br> | | <br> |
| Line 342: |
Line 345: |
| | title = Sunrise Heel | | | title = Sunrise Heel |
| | subtitle = | | | subtitle = |
| | input = 6MK | | | input = {{Classic_sf6}} 6MK<br>{{Modern_sf6}} 6M |
| | images = | | | images = |
| {{MoveDataCargoImage|imageHeight=180px|dee_jay_6mk|caption=Not an overhead}} | | {{MoveDataCargoImage|imageHeight=180px|dee_jay_6mk|caption=Not an overhead}} |
| Line 363: |
Line 366: |
| | title = Face Breaker | | | title = Face Breaker |
| | subtitle = | | | subtitle = |
| | input = 4HK | | | input = {{Classic_sf6}} 4HK<br>{{Modern_sf6}} 4H or A[H] |
| | images = | | | images = |
| {{MoveDataCargoImage|imageHeight=180px|dee_jay_4hk|caption=}} | | {{MoveDataCargoImage|imageHeight=180px|dee_jay_4hk|caption=}} |
| Line 371: |
Line 374: |
| {{AttackDataCargo-SF6/Query|dee_jay_4hk}} | | {{AttackDataCargo-SF6/Query|dee_jay_4hk}} |
| * '''Anti-Air Invuln (Head):''' 4-12f; cannot hit cross-up | | * '''Anti-Air Invuln (Head):''' 4-12f; cannot hit cross-up |
| * Forces stand; Counter-hit/Punish Counter bonus advantage carries through both hits | | * Forces stand; {{clr|PC|Counter-hit/Punish Counter}} bonus advantage carries through both hits |
| * 1st hit puts airborne opponents into {{sf6-jug|limited juggle}} state | | * 1st hit puts airborne opponents into {{sf6-jug|limited juggle}} state |
| * 2nd hit causes air reset vs. airborne opponents (juggles on Punish Counter) | | * 2nd hit causes air reset vs. airborne opponents (juggles on {{clr|PC|Punish Counter}}) |
| * '''Cancel Hitconfirm Window:''' 34f | | * '''Cancel Hitconfirm Window:''' 34f |
| ** Special/{{clr|4|DR}} cancel on 2nd hit is delayed until after active frames | | ** Special/{{clr|DR|DR}} cancel on 2nd hit is delayed until after active frames |
| * '''{{clr|4|Drive Rush}} cancel advantage:''' 1st hit {{sf6-adv|VP|+17}} oH / {{sf6-adv|VP|+7}} oB, 2nd hit {{sf6-adv|VP|+12}} oH / {{sf6-adv|VP|+6}} oB | | * '''{{clr|DR|Drive Rush}} cancel advantage:''' 1st hit {{sf6-adv|VP|+17}} oH / {{sf6-adv|VP|+7}} oB, 2nd hit {{sf6-adv|VP|+12}} oH / {{sf6-adv|VP|+6}} oB |
| * '''{{clr|L|[4]6LP}} cancel advantage:''' 1st hit {{sf6-adv|VP|+5}} oH / {{sf6-adv|VM|-5}} oB, 2nd hit {{sf6-adv|E|0}} oH / {{sf6-adv|VM|-6}} oB | | * '''{{clr|L|[4]6LP}} cancel advantage:''' 1st hit {{sf6-adv|VP|+5}} oH / {{sf6-adv|VM|-5}} oB, 2nd hit {{sf6-adv|E|0}} oH / {{sf6-adv|VM|-6}} oB |
| * '''{{clr|L|236LK}} cancel advantage:''' 1st hit {{sf6-adv|E|0}} oH / {{sf6-adv|VM|-10}} oB, 2nd hit {{sf6-adv|VM|-5}} oH / {{sf6-adv|VM|-11}} oB | | * '''{{clr|L|236LK}} cancel advantage:''' 1st hit {{sf6-adv|E|0}} oH / {{sf6-adv|VM|-10}} oB, 2nd hit {{sf6-adv|VM|-5}} oH / {{sf6-adv|VM|-11}} oB |
| <br> | | <br> |
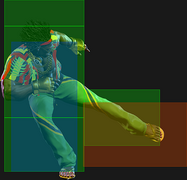
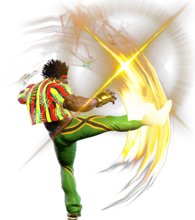
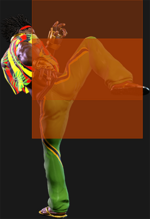
| A fast but unconventional two-hitting normal used in combos, juggles, and as an anti-air when charge is unavailable. The 2nd hit in particular has a great disjointed hitbox for anti-air purposes, and deals the entire 800 damage and full meter gain when it connects on its own. It has a tendency to whiff against close jumps, so air-to-airs may be preferable for dealing with cross-ups. The 2-hit animation makes it easily hitconfirmable in grounded combos. | | A fast but unconventional two-hitting normal used in combos, juggles, and as an anti-air when charge is unavailable. The 2-hit animation makes it easily hitconfirmable in grounded combos, while the fast startup makes it easy to combo into from many places. Any time Dee Jay is {{sf6-adv|P|+3}} (such as after the {{clr|L|5LP}} TC), {{clr|H|4HK}} will trade against 4 frame normals for massive frame advantage. |
| | |
| | This normal is Dee Jay's primary chargeless anti-air. The 2nd hit in particular has a great disjointed hitbox for anti-air purposes, and deals the entire 800 damage and full meter gain when it connects on its own. It has a tendency to whiff against close jumps, so air-to-airs may be preferable for dealing with cross-ups. While the hitbox will still beat far jumps fairly consistently, the short range makes it quite easy to bait with empty jumps from long range. |
| | |
| | On anti-air hit, cancelling into {{clr|L|236LK}} is generally recommended. Dee Jay will always be plus and very close after the recovery, as opposed to a forward dash which will almost always leave him minus, if not punishable. On anti-air {{clr|PC|Punish Counter}}, the opponent is launched into a juggle state, allowing for many strong followups. It's still possible to combo the {{clr|PC|Punish Counter}} after cancelling into {{clr|L|236LK}}, though the juggles are more restrictive. |
|
| |
|
| If the first hit connects on an airborne opponent, the resulting juggle state is quite low; this forces Dee Jay to use both hits in most juggle routes, which eats up more of his juggle potential. It also makes a conversion less likely when trading with air normals. If the first hit connects, the 2nd hit gains an additional point toward its Juggle Limit. | | If the first hit connects on an airborne opponent, the resulting juggle state is quite low; this forces Dee Jay to use both hits in most juggle routes, which eats up more of his juggle potential. It also makes a conversion less likely when trading with air normals. If the first hit connects, the 2nd hit gains an additional point toward its Juggle Limit. |
| Line 389: |
Line 396: |
| | title = Knee Shot | | | title = Knee Shot |
| | subtitle = | | | subtitle = |
| | input = j.2LK | | | input = {{Classic_sf6}} j.2LK<br>{{Modern_sf6}} j.2L |
| | images = | | | images = |
| {{MoveDataCargoImage|imageHeight=160px|dee_jay_j2lk|caption=}} | | {{MoveDataCargoImage|imageHeight=160px|dee_jay_j2lk|caption=}} |
| Line 396: |
Line 403: |
| | info = | | | info = |
| {{AttackDataCargo-SF6/Query|dee_jay_j2lk}} | | {{AttackDataCargo-SF6/Query|dee_jay_j2lk}} |
| * Forward jump only; Dee Jay is in a Punish Counter state from 2nd active frame until end of landing recovery | | * Forward jump only; Dee Jay is in a {{clr|PC|Punish Counter}} state from 2nd active frame until end of landing recovery |
| ** Does not count as a Forced Knockdown state | | ** Does not count as a Forced Knockdown state |
| * Alters jump trajectory; jump is up to 5f faster depending on timing | | * Alters jump trajectory; jump is up to 5f faster depending on timing |
| Line 412: |
Line 419: |
| | title = Threebeat Combo | | | title = Threebeat Combo |
| | subtitle = | | | subtitle = |
| | input = 5LP~MK~MK | | | input = {{Classic_sf6}} 5LP~MK~MK<br>{{Modern_sf6}} 5L~M~M |
| | images = | | | images = |
| {{MoveDataCargoImage|imageHeight=140px|dee_jay_5lp_mk|caption=}} | | {{MoveDataCargoImage|imageHeight=140px|dee_jay_5lp_mk|caption=}} |
| Line 423: |
Line 430: |
| | info = | | | info = |
| {{AttackDataCargo-SF6/Query|dee_jay_5lp_mk}} | | {{AttackDataCargo-SF6/Query|dee_jay_5lp_mk}} |
| * '''Cancel Hitconfirm Window:''' 15f (single hit) / 33-34f (full TC) | | * '''Cancel Hitconfirm Window:''' 17f (single hit) / 35-36f (full TC) |
| * 2-3f blockstring gap between hits | | * 2-3f blockstring gap between hits |
| * Can whiff on crouching opponents at max range (will not whiff if {{clr|L|5LP}} lands as a Punish Counter) | | * Can whiff on crouching opponents at max range (will not whiff if {{clr|L|5LP}} lands as a {{clr|PC|Punish Counter}}) |
| | * Applies 20% damage scaling to next hit when beginning a combo (after blocked {{clr|L|5LP}}) |
| * () refers to scaled damage from {{clr|L|5LP}} combo starter | | * () refers to scaled damage from {{clr|L|5LP}} combo starter |
| {{AttackDataCargo-SF6/Query|dee_jay_5lp_mk_mk}} | | {{AttackDataCargo-SF6/Query|dee_jay_5lp_mk_mk}} |
| * Always a true blockstring from {{clr|L|5LP}}~{{clr|M|MK}} | | * Always a true blockstring from {{clr|L|5LP}}~{{clr|M|MK}} |
| * () refers to scaled damage from {{clr|L|5LP}} combo starter | | * () refers to scaled damage from {{clr|L|5LP}} combo starter |
| | ** If the first {{clr|M|MK}} begins the combo, damage on this hit is scaled to 500 |
| <br> | | <br> |
| Generally, this Target Combo isn't very useful except from the absolute max range of {{clr|L|5LP}}, as it's Dee Jay's only reliable ender. The full sequence leaves Dee Jay plus on hit, allowing for some pressure; however, he is not quite within throw range, and must risk walking forward to land a throw.
| | A Target Combo that leaves the opponent grounded and within throw range for a mixup. While {{clr|M|MK Sobat}} is usually the preferred ender, this TC gives a safer hitconfirm option at longer ranges where only one light normal can connect. The 2nd hit is safe on block, and the small blockstring gap allows Dee Jay to frame trap with the 2nd hit, which can be hitconfirmed into the ender by itself with good reactions. |
| }} | | }} |
|
| |
|
| Line 438: |
Line 447: |
| | title = Dee Jay Special | | | title = Dee Jay Special |
| | subtitle = | | | subtitle = |
| | input = 5MP~HP~HK | | | input = {{Classic_sf6}} 5MP~HP~HK<br>{{Modern_sf6}} 5M~H~H |
| | images = | | | images = |
| {{MoveDataCargoImage|imageHeight=140px|dee_jay_5mp_hp|caption=}} | | {{MoveDataCargoImage|imageHeight=140px|dee_jay_5mp_hp|caption=}} |
| Line 450: |
Line 459: |
| {{AttackDataCargo-SF6/Query|dee_jay_5mp_hp}} | | {{AttackDataCargo-SF6/Query|dee_jay_5mp_hp}} |
| * '''Cancel Hitconfirm Window:''' 42-43f (TC) | | * '''Cancel Hitconfirm Window:''' 42-43f (TC) |
| * Continues limited juggle state if juggled into (from {{clr|4|DR}}, crumple, wall splat) | | * Continues limited juggle state if juggled into (from {{clr|DR|DR}}, crumple, wall splat) |
| * Always a true blockstring from {{clr|M|5MP}} | | * Always a true blockstring from {{clr|M|5MP}} |
| * At max range, {{clr|H|HP}} hits later for better advantage but can whiff on crouching opponents | | * At max range, {{clr|H|HP}} hits later for better advantage, but active frames 5-7 whiff on crouching opponents |
| {{AttackDataCargo-SF6/Query|dee_jay_5mp_hp_hk}} | | {{AttackDataCargo-SF6/Query|dee_jay_5mp_hp_hk}} |
| * '''Cancel Hitconfirm Window:''' 72-73f (Super) | | * '''Cancel Hitconfirm Window:''' 72-73f (Super) |
| Line 459: |
Line 468: |
| * () refers to scaled damage from {{clr|M|5MP}} combo starter | | * () refers to scaled damage from {{clr|M|5MP}} combo starter |
| <br> | | <br> |
| A Target Combo primarily used in juggles due to its ability to cancel into Super. Can be used as a whiff punish at certain ranges, but the {{clr|H|HP}} can whiff if too far away. The cancel window from {{clr|M|5MP}} is shorter than when canceling into {{clr|M|5MP}}~{{clr|M|MP}}, making it less practical as a raw hitconfirm option. | | A Target Combo primarily used in juggles due to its ability to cancel into Super. Can be used as a whiff punish at certain ranges, but the {{clr|H|HP}} can whiff if too far away just like a regular {{clr|H|5HP}}. The cancel window from {{clr|M|5MP}} is shorter than when canceling into {{clr|M|5MP}}~{{clr|M|MP}}, making it less practical as a raw hitconfirm option. |
| }} | | }} |
|
| |
|
| Line 466: |
Line 475: |
| | title = Funky Dance | | | title = Funky Dance |
| | subtitle = | | | subtitle = |
| | input = 5MP~MP~HP/4HP | | | input = {{Classic_sf6}} 5MP~MP~HP/4HP<br>{{Modern_sf6}} 5M~M~M/4M |
| | images = | | | images = |
| {{MoveDataCargoImage|imageHeight=140px|dee_jay_5mp_mp|caption=}} | | {{MoveDataCargoImage|imageHeight=140px|dee_jay_5mp_mp|caption=}} |
| Line 482: |
Line 491: |
| {{AttackDataCargo-SF6/Query|dee_jay_5mp_mp}} | | {{AttackDataCargo-SF6/Query|dee_jay_5mp_mp}} |
| * 2f extra recovery on block; true blockstring from {{clr|M|5MP}} but can be delayed (up to 4f gap) | | * 2f extra recovery on block; true blockstring from {{clr|M|5MP}} but can be delayed (up to 4f gap) |
| ** Leaving a gap makes it possible to counter-hit and combo into {{clr|H|HP}} ender | | ** Leaving a gap makes it possible to {{clr|PC|Counter-hit}} and combo into {{clr|H|HP}} ender |
| * Continues juggle state if juggled into; great for {{clr|4|Drive Rush}} corner carry routes | | * Continues juggle state if juggled into; great for {{clr|DR|Drive Rush}} corner carry routes |
| * '''Cancel Hitconfirm Window:''' 15f (~{{clr|H|HP}} TC) | | * '''Cancel Hitconfirm Window:''' 15f (~{{clr|H|HP}} TC) |
| | <br> |
| | Even before considering the followups, Dee Jay still gets a lot of use out of the {{clr|M|5MP}}~{{clr|M|MP}} TC. On block, the TC leaves him fairly close and {{sf6-adv|M|-2}}, which isn't bad considering you have frametrap and throw followups. On opponents in Burnout, it becomes {{sf6-adv|P|+2}}, making it quite an abusable option to push your way to the corner. The only issue is most blockstrings into {{clr|M|5MP}} will trade with 4 frame normals, but there is significant risk to mashing, and Dee Jay can combo off the trade anyway. |
| | |
| | {{clr|M|5MP}}~{{clr|M|MP}} is also situationally useful in combos. In juggles, the second {{clr|M|MP}} launches fairly high and does not increase the juggle count, allowing Dee Jay to loop {{clr|DR|Drive Rush}} {{clr|M|5MP}}~{{clr|M|MP}} as long as he has Drive. It can be somewhat challenging to set up and the damage isn't very high, but the corner carry is absurd, generally going corner to corner in only 3 reps. |
| {{AttackDataCargo-SF6/Query|dee_jay_5mp_mp_hp}} | | {{AttackDataCargo-SF6/Query|dee_jay_5mp_mp_hp}} |
| * Doesn't combo on grounded opponents unless {{clr|M|5MP}}~{{clr|M|MP}} 2nd hit lands as counter-hit | | * Doesn't combo on grounded opponents unless {{clr|M|5MP}}~{{clr|M|MP}} 2nd hit lands as {{clr|PC|Counter-hit}} |
| * Puts opponent into {{sf6-jug|limited juggle}} state | | * Puts opponent into {{sf6-jug|limited juggle}} state |
| * 3f blockstring gap between hits | | * 3f blockstring gap between hits |
| {{AttackDataCargo-SF6/Query|dee_jay_5mp_mp_4hp}} | | {{AttackDataCargo-SF6/Query|dee_jay_5mp_mp_4hp}} |
| * Similar animation to {{clr|M|5MP}}~{{clr|M|MP}}~{{clr|H|HP}} | | * Similar animation to {{clr|M|5MP}}~{{clr|M|MP}}~{{clr|H|HP}} |
| * Dee Jay is in a counter-hit state for entire feint duration | | * Dee Jay is in a {{clr|PC|Counter-hit}} state for entire feint duration |
| <br> | | <br> |
| This Target Combo is a canned mixup. On block, the {{clr|M|5MP}}~{{clr|M|MP}} starter leaves Dee Jay at a slight disadvantage, while ending with {{clr|H|HP}} or {{clr|H|4HP Feint}} is punishable. If the opponent tries to take their turn back, the {{clr|H|HP}} ender leaves only a small gap on block that will counter-hit a jab or throw attempt. This allows Dee Jay to enact "fake" pressure from an otherwise disadvantageous situation if you call out the opponent's defensive habits. | | This Target Combo is a canned mixup. While ending with {{clr|H|HP}} or {{clr|H|4HP Feint}} is punishable on block, if the opponent tries to take their turn back, the {{clr|H|HP}} ender leaves only a small gap on block that will {{clr|PC|Counter-hit}} a jab or throw attempt. This allows Dee Jay to enact "fake" pressure from an otherwise disadvantageous situation if you call out the opponent's defensive habits. |
|
| |
|
| If you successfully land the {{clr|H|HP}} ender, the opponent is launched; this can lead to significant corner damage, which is important to consider when balancing the risk and reward of attempting it. | | If you successfully land the {{clr|H|HP}} ender, the opponent is launched; this can lead to significant corner damage, which is important to consider when balancing the risk and reward of attempting it. |
| Line 502: |
Line 515: |
| | title = Party in the Air | | | title = Party in the Air |
| | subtitle = | | | subtitle = |
| | input = j.MP~j.HP | | | input = {{Classic_sf6}} j.MP~j.HP<br>{{Modern_sf6}} j.A[M~M] |
| | images = | | | images = |
| {{MoveDataCargoImage|imageHeight=140px|dee_jay_jhp|caption=}} | | {{MoveDataCargoImage|imageHeight=140px|dee_jay_jhp|caption=}} |
| Line 511: |
Line 524: |
| * Spike knockdown vs. airborne opponents | | * Spike knockdown vs. airborne opponents |
| <br> | | <br> |
| Simple air target combo which slams the opponent back to the ground. Adds some decent reward to your air-to-air hits and is useful to stop people from jumping out of the corner. | | Simple air target combo which slams the opponent back to the ground. Gives amazing oki on hit but is weaker than grounded followups. Mostly useful in situations where grounded options aren't available, such as hitting {{clr|M|j.MP}} while rising or from a back jump. |
| }} | | }} |
| <br> | | <br> |
| Line 520: |
Line 533: |
| | title = Forward Throw | | | title = Forward Throw |
| | subtitle = | | | subtitle = |
| | input = LPLK | | | input = {{Classic_sf6}} LPLK<br>{{Modern_sf6}} LM |
| | images = | | | images = |
| {{MoveDataCargoImage|imageHeight=180px|dee_jay_lplk|caption=}} | | {{MoveDataCargoImage|imageHeight=180px|dee_jay_lplk|caption=}} |
| Line 527: |
Line 540: |
| | info = | | | info = |
| {{AttackDataCargo-SF6/Query|dee_jay_lplk}} | | {{AttackDataCargo-SF6/Query|dee_jay_lplk}} |
| * Punish Counter: HKD +34 | | * {{clr|PC|Punish Counter}}: HKD +34 |
| * Applies 20% immediate damage scaling when comboed into (e.g. after Crumple) | | * Applies 20% immediate damage scaling when comboed into (e.g. after Crumple) |
| <br> | | <br> |
| Line 537: |
Line 550: |
| | title = Back Throw | | | title = Back Throw |
| | subtitle = | | | subtitle = |
| | input = 4LPLK | | | input = {{Classic_sf6}} 4LPLK<br>{{Modern_sf6}} 4LM |
| | images = | | | images = |
| {{MoveDataCargoImage|imageHeight=160px|dee_jay_4lplk|caption=}} | | {{MoveDataCargoImage|imageHeight=160px|dee_jay_4lplk|caption=}} |
| Line 545: |
Line 558: |
| {{AttackDataCargo-SF6/Query|dee_jay_4lplk}} | | {{AttackDataCargo-SF6/Query|dee_jay_4lplk}} |
| * Side switch | | * Side switch |
| * Punish Counter: HKD +22 | | * {{clr|PC|Punish Counter}}: HKD +22 |
| * Applies 20% immediate damage scaling when comboed into (e.g. after Crumple) | | * Applies 20% immediate damage scaling when comboed into (e.g. after Crumple) |
| <br> | | <br> |
| This throw is good for reversing pressure when cornered. After the corner side switch, Dee Jay can dash forward, becoming {{sf6-adv|P|+3}}. He is well out of throw range and can only beat wakeup buttons with a spaced normal like {{clr|M|2MP}}, which can be hitconfirmed directly into a special. For true strike/throw oki, a {{clr|4|Drive Rush}} is required. | | This throw is good for reversing pressure when cornered. After the corner side switch, Dee Jay can dash forward, becoming {{sf6-adv|P|+3}}. He is well out of throw range and can only beat wakeup buttons with a spaced normal like {{clr|M|2MP}}, which can be hitconfirmed directly into a special. For true strike/throw oki, a {{clr|DR|Drive Rush}} is required. |
| }} | | }} |
| <br> | | <br> |
| Line 557: |
Line 570: |
| | title = Drive Impact | | | title = Drive Impact |
| | subtitle = | | | subtitle = |
| | input = HPHK | | | input = {{Classic_sf6}} HPHK<br>{{Modern_sf6}} DI |
| | images = | | | images = |
| {{MoveDataCargoImage|imageHeight=160px|dee_jay_hphk|caption=}} | | {{MoveDataCargoImage|imageHeight=180px|dee_jay_hphk|caption=}} |
| | hitboxes = | | | hitboxes = |
| {{MoveDataCargoImage|hitbox=yes|imageHeight=160px|dee_jay_hphk|caption=}} | | {{MoveDataCargoImage|hitbox=yes|imageHeight=160px|dee_jay_hphk|caption=}} |
| | info = | | | info = |
| {{AttackDataCargo-SF6/Query|dee_jay_hphk}} | | {{AttackDataCargo-SF6/Query|dee_jay_hphk}} |
| * '''Armor (2-hit):''' 1-27f | | * '''Armor (2-hit):''' 1-27f; '''Range:''' 2.520 (1.480 movement + 1.04 hitbox) |
| * Applies 20% damage scaling to next hit when beginning a combo (including Wall Splat on block) | | * On Hit/PC: Applies 20% damage scaling to next hit when beginning a combo |
| * Combos when canceled from {{clr|H|5HP}}/{{clr|H|4HK (1st)}} or Punish Counter {{clr|H|4HK (2nd)}} (no corner wallsplat) | | * On Block: Applies 20% scaling multiplier to all follow-up hits after Wall Splat; the next attack can incur additional Starter Scaling |
| ** Useful for draining opponent's Drive gauge, especially after Perfect Parry | | * Combos when canceled from {{clr|H|5HP}}/{{clr|H|4HK (1st)}} (no corner wallsplat; useful for depleting Drive gauge, especially after Perfect Parry) |
| | * A blocked {{clr|DR|DI}} can combo into another {{clr|DR|DI}} if opponent is not fully cornered (Stuns if opponent has less than 1.5 Drive bars) |
| | ** This happens because a blocked {{clr|DR|DI}} is not considered a "hit" for combo purposes |
| | ** Causes both the 20% Starter and 20% Multiplier scaling to apply to the follow-up combo |
| See [[Street_Fighter_6/Gauges#Drive_Impact|Drive Impact]] on the Gauges page for more details. | | See [[Street_Fighter_6/Gauges#Drive_Impact|Drive Impact]] on the Gauges page for more details. |
|
| |
|
| When canceled from a normal, these are the important '''blockstring gaps'''; a gap of N will trade with an N-frame startup attack; [] = Burnout | | When canceled from a normal, these are the important '''blockstring gaps'''; a gap of N will trade with an N-frame startup attack; [] = Burnout |
| * {{clr|H|5HP}}: 6[2] | | * {{clr|H|5HP}}: 7[3] |
| * {{clr|M|2MP}}, {{clr|H|4HK(1)}}: 9[5] | | * {{clr|M|2MP}}, {{clr|H|4HK(1)}}: 10[6] |
| * {{clr|H|4HK(2)}}: 10[6] | | * {{clr|H|4HK(2)}}: 11[7] |
| * Note: A gap ≥ 6f can be thrown, and a gap ≥ 9f can be jumped out of by most characters | | * Note: A gap ≥ 6f can be thrown, and a gap ≥ 9f can be jumped out of by most characters |
|
| |
|
| Line 580: |
Line 596: |
| * '''Marisa (214K)''', frame 3 armor | | * '''Marisa (214K)''', frame 3 armor |
| * '''Zangief ({{clr|H|5[HP]}})''', frame 4 armor | | * '''Zangief ({{clr|H|5[HP]}})''', frame 4 armor |
| It's important to use a blockstring that cannot be absorbed by their armor/counter moves. Ideally, the string should also not be a true combo, or it will cause a Lock and prevent Stun. Note that if the opponent mashes buttons on wakeup, the counter-hit will cause {{clr|4|DI}} to Lock. | | |
| * {{clr|H|5HP}} > {{clr|4|DI}}: 2f blockstring gap prevents opponent from absorbing the hit (must be close enough to cancel) | | It's important to use a blockstring that cannot be absorbed by their armor/counter moves. Ideally, the string should also not be a true combo, or it will cause a Lock and prevent Stun.<br>{{clr|OD|*}} Denotes a move that causes Lock on {{clr|PC|Counter-hit}}, allowing the opponent to escape a Stun by mashing on wakeup. |
| * {{clr|4|DR~}}{{clr|M|2MP}} > {{clr|4|DI}}: 1f blockstring gap prevents opponent from absorbing the hit | | * {{clr|H|5HP}}{{clr|OD|*}} > {{clr|DR|DI}}: 3f blockstring gap will work vs. Zangief {{clr|H|5[HP]}} (must be close enough to cancel) |
| * {{clr|4|DR~}}{{clr|H|4HK(1)}} > {{clr|4|DI}}: 1f blockstring gap prevents opponent from absorbing the hit | | * {{clr|DR|DR~}}{{clr|M|2MP}}{{clr|OD|*}} > {{clr|DR|DI}}: 2f blockstring gap prevents opponent from absorbing the hit |
| * {{clr|4|DR~}}{{clr|H|4HK(2)}} > {{clr|4|DI}}: 2f blockstring gap prevents opponent from absorbing the hit | | * {{clr|DR|DR~}}{{clr|H|4HK(1)}}{{clr|OD|*}} > {{clr|DR|DI}}: 2f blockstring gap prevents opponent from absorbing the hit |
| | * {{clr|DR|DR~}}{{clr|H|4HK(2)}}{{clr|OD|*}} > {{clr|DR|DI}}: 3f blockstring gap will work vs. Zangief {{clr|H|5[HP]}} |
| }} | | }} |
|
| |
|
| Line 598: |
Line 615: |
| | info = | | | info = |
| {{AttackDataCargo-SF6/Query|dee_jay_6hphk}} | | {{AttackDataCargo-SF6/Query|dee_jay_6hphk}} |
| * '''Full Invuln:''' 1-22f; Armor Break | | * '''Full Invuln:''' 1-22f; '''Range:''' 1.66; Armor Break |
| * 5f extra recovery on hit; 4f screen freeze during startup | | * 5f extra recovery on hit; 4f screen freeze during startup |
| {{AttackDataCargo-SF6/Query|dee_jay_6hphk_recovery}} | | {{AttackDataCargo-SF6/Query|dee_jay_6hphk_recovery}} |
| * '''Full Invuln:''' 1-20f; Armor Break | | * '''Full Invuln:''' 1-20f; '''Range:''' 1.66; Armor Break |
| * 5f extra recovery on hit; no screen freeze | | * 5f extra recovery on hit; no screen freeze |
| See [[Street_Fighter_6/Gauges#Drive_Reversal|Drive Reversal]] on the Gauges page for more details. | | See [[Street_Fighter_6/Gauges#Drive_Reversal|Drive Reversal]] on the Gauges page for more details. |
| Line 610: |
Line 627: |
| | title = Drive Parry | | | title = Drive Parry |
| | subtitle = | | | subtitle = |
| | input = MPMK | | | input = {{Classic_sf6}} MPMK<br>{{Modern_sf6}} DP |
| | images = | | | images = |
| {{MoveDataCargoImage|imageHeight=200px|dee_jay_mpmk|caption=}} | | {{MoveDataCargoImage|imageHeight=200px|dee_jay_mpmk|caption=}} |
| Line 630: |
Line 647: |
| | input = {{Classic_sf6}} MPMK~66<br>{{Modern_sf6}} DP~66 | | | input = {{Classic_sf6}} MPMK~66<br>{{Modern_sf6}} DP~66 |
| | images = | | | images = |
| {{MoveDataCargoImage|imageHeight=160px|dee_jay_mpmk_66_pdr|caption=}} | | {{MoveDataCargoImage|imageHeight=130px|dee_jay_mpmk_66_pdr|caption=}} |
| | hitboxes = | | | hitboxes = |
| {{MoveDataCargoImage|hitbox=yes|imageHeight=180px|dee_jay_mpmk_66_pdr|caption=}} | | {{MoveDataCargoImage|hitbox=yes|imageHeight=180px|dee_jay_mpmk_66_pdr|caption=}} |
| Line 640: |
Line 657: |
| * 3-bar version performed on hit/block from a cancelable normal | | * 3-bar version performed on hit/block from a cancelable normal |
| ** Can also be performed from whiffed cancelable light normals | | ** Can also be performed from whiffed cancelable light normals |
| | |
| See [[Street_Fighter_6/Gauges#Drive_Rush|Drive Rush]] on the Gauges page for more details. See Strategy page for [[Street_Fighter_6/Dee_Jay/Strategy#Drive_Rush|Blockstring Gaps and Combo Routes]] | | See [[Street_Fighter_6/Gauges#Drive_Rush|Drive Rush]] on the Gauges page for more details. See Strategy page for [[Street_Fighter_6/Dee_Jay/Strategy#Drive_Rush|Blockstring Gaps and Combo Routes]] |
| * Startup refers to minimum time before an attack can cancel the {{clr|4|Drive Rush}} animation | | * Startup refers to minimum time before an attack can cancel the {{clr|DR|Drive Rush}} animation |
| * The first 15 recovery frames are cancelable into any attack | | * The first 15 recovery frames are cancelable into any attack |
| * The final 22 recovery frames are cancelable into any attack or movement option or blocking (except Parry) | | * The final 22 recovery frames are cancelable into any attack or movement option or blocking (except Parry) |
| * Only Normal and Command Normal attacks are enhanced with '''+4''' frame advantage and improved juggle properties | | * Only Normal and Command Normal attacks are enhanced with '''+4''' frame advantage and improved juggle properties |
| * Applies 15% damage scaling multiplier to any follow-up hits when used mid-combo | | * Applies 15% damage scaling multiplier to any follow-up hits when used mid-combo |
| ** Only applies scaling once per combo; does not apply when a {{clr|4|Drive Rush}} enhanced attack starts the combo | | ** Only applies scaling once per combo; does not apply when a {{clr|DR|Drive Rush}} enhanced attack starts the combo |
|
| |
|
| Distance: | | Distance: |
| * 0.763 (min, cancel into immediate Throw) | | * 0.763 (min, cancel into immediate Throw) |
| * 2.535 (min, earliest blocking/movement frame) | | * 2.535 (min, earliest blocking/movement frame) |
| * 2.713 (max, final {{clr|4|DR}} frame) | | * 2.713 (max, final {{clr|DR|DR}} frame) |
| }} | | }} |
| <br> | | <br> |
| Line 659: |
Line 677: |
| {{MoveDataCargo | | {{MoveDataCargo |
| | title = Air Slasher | | | title = Air Slasher |
| | subtitle = | | | subtitle = Fireball |
| | input = [4]6P | | | input = {{Classic_sf6}} [4]6P<br>{{Modern_sf6}} [4]6X or [4]S (M) |
| | images = | | | images = |
| {{MoveDataCargoImage|imageHeight=140px|dee_jay_46mp|caption=Light version feints and doesn't throw a fireball.}} | | {{MoveDataCargoImage|imageHeight=180px|dee_jay_46mp|caption=Light version feints and doesn't throw a fireball.}} |
| ---- | | ---- |
| {{MoveDataCargoImage|imageHeight=140px|dee_jay_46pp|caption=}} | | {{MoveDataCargoImage|imageHeight=170px|dee_jay_46pp|caption=}} |
| | hitboxes = | | | hitboxes = |
| {{MoveDataCargoImage|hitbox=yes|imageHeight=140px|dee_jay_46mp|caption=Light version feints and doesn't throw a fireball.}} | | {{MoveDataCargoImage|hitbox=yes|imageHeight=140px|dee_jay_46mp|caption=Light version feints and doesn't throw a fireball.}} |
| Line 676: |
Line 694: |
| {{AttackDataCargo-SF6/Query|dee_jay_46mp}} | | {{AttackDataCargo-SF6/Query|dee_jay_46mp}} |
| * 45f charge time; charge lasts up to 10f after releasing back direction | | * 45f charge time; charge lasts up to 10f after releasing back direction |
| * '''Cancel Hitconfirm Window:''' 4f (Super / 2PP) | | * '''Cancel Hitconfirm Window:''' 4f (Super / 22PP) |
| * '''Projectile Speed:''' 0.03 (1-2f) / 0.115 (3f~) | | * '''Projectile Speed:''' 0.03 (1-2f) / 0.115 (3f~) |
| A basic, single fireball that travels fairly quickly. The main reason to use this over the heavy version is its lower total frames of commitment, leaving you less vulnerable to things that beat fireballs like jump-ins and {{clr|4|Drive Impact}}. | | A basic, single fireball that travels fairly quickly. The main reason to use this over the {{clr|HP|HP}} version is its lower total frames of commitment, leaving you less vulnerable to things that beat fireballs like jump-ins and {{clr|DR|Drive Impact}}. Compared to a standard fireball, it has notably high startup but fairly short recovery. This makes Dee Jay more vulnerable to getting counterhit when using at midrange, but also keeps him slightly safer from jumps and other anti-projectile options. |
| {{AttackDataCargo-SF6/Query|dee_jay_46hp}} | | {{AttackDataCargo-SF6/Query|dee_jay_46hp}} |
| * 45f charge time; charge lasts up to 10f after releasing back direction | | * 45f charge time; charge lasts up to 10f after releasing back direction |
| * '''Cancel Hitconfirm Window:''' 21f (Super / 2PP) | | * '''Cancel Hitconfirm Window:''' 21f (Super / 22PP) |
| * '''Projectile Speed:''' 0.03 (1-2f) / 0.115/0.155 (3f~) | | * '''Projectile Speed:''' 0.03 (1-2f) / 0.115/0.155 (3f~) |
| Dee Jay throws two fireballs with a small gap in between. The two fireballs will outnumber and win a clash against a single normal fireball, but an OD fireball will beat out both of them and continue to move towards you. It may seem tempting to always use this version over MP at first, but the overall commitment and total frames of it actually make it much easier for an opponent to punish and thus should typically only be used to beat other fireballs or to chip an opponent in Burnout. The second fireball travels faster than the first, so they will hit closer together against fullscreen opponents. | | Dee Jay throws two fireballs with a small gap in between. The two fireballs will outnumber and win a clash against a single normal fireball, but an {{clr|OD|OD}} fireball will beat out both of them and continue to move towards you. It may seem tempting to always use this version over {{clr|MP|MP}} at first, but the enormous recovery makes it much easier to punish in general use. As such, this version is generally reserved for fireball wars, but the value it provides there cannot be understated. It allows Dee Jay to muscle through characters approaching behind slow fireballs or throwing fast fireballs from fullscreen, and most characters need to use an {{clr|OD|OD}} fireball to contest it. |
| | |
| | The {{clr|HP|HP}} version is also quite useful against opponents in Burnout. From fullscreen, the fireballs do fairly high chip and become somewhat challenging to jump over. Up close, it becomes {{sf6-adv|P|+1}} on block, which combined with the high chip and lack of pushback in the corner, makes it very strong at racking up damage against an opponent in Burnout. Being a fireball, it will also beat {{clr|SA|SA1}}s and give a combo after thanks to the {{clr|PC|Punish Counter}} advantage. |
| {{AttackDataCargo-SF6/Query|dee_jay_46pp}} | | {{AttackDataCargo-SF6/Query|dee_jay_46pp}} |
| * 45f charge time; charge lasts up to 10f after releasing back direction | | * 45f charge time; charge lasts up to 10f after releasing back direction |
| * '''Cancel Hitconfirm Window:''' 17f (Super / 2PP) | | * '''Cancel Hitconfirm Window:''' 17f (Super / 22PP) |
| * Applies 20% damage scaling to next hit when beginning a combo (100/80/70...) | | * Applies 20% damage scaling to next hit when beginning a combo (100/80/70...) |
| * '''Projectile Speed:''' 0.15 (22f~) | | * '''Projectile Speed:''' 0.15 (22f~) |
| Dee Jay quickly swings his arm twice, clashing fireballs with the first swing and creating one very large fireball that launches on hit with the second. If properly timed, the first swing can beat out an OD fireball while the second swing's fireball still goes through, giving it basically as much anti-fireball potential as HP Air Slasher. If the fireball hits, you can {{clr|4|Drive Rush}} in to get a combo about 3/4 screen away, though it will lose some damage due to scaling. The size of the fireball means it is harder to jump over and cannot be low profiled like the other versions of this move (and most other fireballs). | | Dee Jay quickly swings his arm twice, clashing fireballs with the first swing and creating one very large fireball that launches on hit with the second. If properly timed, the first swing can beat out an {{clr|OD|OD}} fireball while the second swing's fireball still goes through, giving it basically as much anti-fireball potential as {{clr|HP|HP}} Air Slasher. If the fireball hits, you can {{clr|DR|Drive Rush}} in to get a combo about 3/4 screen away, though it will lose some damage due to scaling. The size of the fireball means it is harder to jump over and cannot be low profiled like the other versions of this move (and most other fireballs). |
| | |
| | The {{clr|OD|OD}} version especially shines in the corner. By nature of being a plus on block fireball, he can use it as a meaty to counter {{clr|SA|SA1}}s and still be at advantage even if they blocked. On hit, Dee Jay can link {{clr|LP|2LP}} and continue a combo, though he generally has better routes for similar meter investment if he's already confirmed. The plus on block nature also lets it be used in blockstrings to safely confirm combos or force mixups for less cost than a {{clr|DR|Drive Rush}} cancel. Against an opponent in Burnout, it becomes {{sf6-adv|VP|+6}} on block, letting Dee Jay score guaranteed chip kills without fear of a reversal super. |
| }} | | }} |
|
| |
|
| Line 695: |
Line 717: |
| {{MoveDataCargo | | {{MoveDataCargo |
| | title = Jackknife Maximum | | | title = Jackknife Maximum |
| | subtitle = | | | subtitle = Upkicks |
| | input = [2]8K | | | input = {{Classic_sf6}} [2]8K<br>{{Modern_sf6}} [2]8X or [2]S (M) |
| | images = | | | images = |
| {{MoveDataCargoImage|imageHeight=180px|dee_jay_28mk|caption=}} | | {{MoveDataCargoImage|imageHeight=190px|dee_jay_28mk|caption=}} |
| ---- | | ---- |
| {{MoveDataCargoImage|imageHeight=180px|dee_jay_28kk|caption=}} | | {{MoveDataCargoImage|imageHeight=200px|dee_jay_28kk|caption=}} |
| | hitboxes = | | | hitboxes = |
| {{MoveDataCargoImage|hitbox=yes|imageHeight=160px|dee_jay_28mk|caption=Medium Kick}} | | {{MoveDataCargoImage|hitbox=yes|imageHeight=160px|dee_jay_28mk|caption=Medium Kick}} |
| ---- | | ---- |
| {{MoveDataCargoImage|hitbox=yes|imageHeight=140px|dee_jay_28hk|caption=Heavy Kick}} | | {{MoveDataCargoImage|hitbox=yes|imageHeight=100px|dee_jay_28hk|caption=Heavy Kick}} |
| ---- | | ---- |
| {{MoveDataCargoImage|hitbox=yes|imageHeight=150px|dee_jay_28kk|caption=OD Version}} | | {{MoveDataCargoImage|hitbox=yes|imageHeight=120px|dee_jay_28kk|caption=OD Version}} |
| | info = | | | info = |
| {{AttackDataCargo-SF6/Query|dee_jay_28lk}} | | {{AttackDataCargo-SF6/Query|dee_jay_28lk}} |
| Line 712: |
Line 734: |
| * 40f charge time; charge lasts up to 12f after releasing down direction | | * 40f charge time; charge lasts up to 12f after releasing down direction |
| * Startup refers to earliest air normal timing; 6f landing recovery only applies when no air attack is used | | * Startup refers to earliest air normal timing; 6f landing recovery only applies when no air attack is used |
| Dee Jay performs a unique feint that shoots him into the air, letting him quickly descend on his opponent with a jumping normal. Can act as a jump cancel of sorts, giving Dee Jay an altered trajectory to make anti-airs more difficult. A very strong pressure/mixup tool that can lead to cross-up and safe jump setups. | | Dee Jay performs a unique feint that shoots him into the air, letting him quickly descend on his opponent with a jumping normal. Can act as a jump cancel of sorts, giving Dee Jay an altered trajectory to make anti-airs more difficult. A very strong pressure/mixup tool that can lead to cross-up and safe jump setups. Also travels slightly lower than a regular forward jump which can technically make air buttons hit sooner, though this is rarely necessary outside of fringe cases like an anti-air {{clr|DR|Drive Impact}}. |
| {{AttackDataCargo-SF6/Query|dee_jay_28mk}} | | {{AttackDataCargo-SF6/Query|dee_jay_28mk}} |
| * '''Anti-Air Invuln:''' 1-5f (cannot hit cross-up); '''Airborne''' 5-44f ({{FKD}} state) | | * '''Anti-Air Invuln:''' 1-5f (cannot hit cross-up); '''Throw Invuln:''' 5-6f; '''Airborne''' 5-44f ({{FKD}} state) |
| * 40f charge time; charge lasts up to 12f after releasing down direction | | * 40f charge time; charge lasts up to 12f after releasing down direction |
| * Puts opponent into {{sf6-jug|limited juggle}} state; cannot hit crouching opponents unless they extend an upward hurtbox | | * Puts opponent into {{sf6-jug|limited juggle}} state; cannot hit crouching opponents unless they extend a vertical hurtbox |
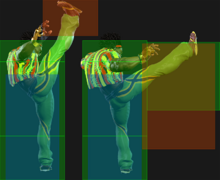
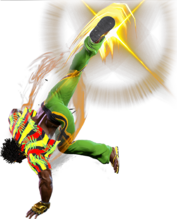
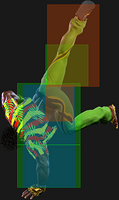
| Not a very good anti-air, as it loses anti-air invincibility on the first active frame of the move. Can follow up with HK/OD Jackknife or {{clr|10|SA1}} depending on screen position and distance from the opponent. | | Not a very good anti-air, as it loses anti-air invincibility on the first active frame of the move. Can follow up with {{clr|H|HK}}/{{clr|OD|OD}} Jackknife or {{clr|SA|SA1}} depending on screen position and distance from the opponent. Both are hard to get midscreen, but consistent in corner combos. Unfortunately this version has very low juggle potential, so it generally needs to hit against grounded opponents. Whiffs against crouching opponents, so ideally combo into {{clr|H|2HP}} before using this move. |
| {{AttackDataCargo-SF6/Query|dee_jay_28hk}} | | {{AttackDataCargo-SF6/Query|dee_jay_28hk}} |
| * '''Anti-Air Invuln:''' 1-9f (cannot hit cross-up); '''Airborne''' 5-51f ({{FKD}} state) | | * '''Anti-Air Invuln:''' 1-9f (cannot hit cross-up); '''Throw Invuln:''' 5-6f; '''Airborne''' 5-51f ({{FKD}} state) |
| * 40f charge time; charge lasts up to 12f after releasing down direction | | * 40f charge time; charge lasts up to 12f after releasing down direction |
| * Puts opponent into {{sf6-jug|limited juggle}} state; cannot hit crouching opponents unless they extend an upward hurtbox | | * Puts opponent into {{sf6-jug|limited juggle}} state; cannot hit crouching opponents unless they extend a vertical hurtbox |
| Very consistent anti-air, even somewhat good at sniping would-be cross-ups if done early enough. Can also be used as a combo ender for solid corner carry. Dee Jay can get a perfect safe jump setup whether it hits grounded (+42) or after a MK Jackknife juggle (+37 into immediate j.2LK). The last hit of HK Jackknife increases the opponent's juggle count by 100, making any further hits impossible regardless of their launch height. | | Very consistent anti-air, even somewhat good at sniping would-be cross-ups if done early enough. Dee Jay can get a perfect safe jump setup whether it hits grounded ({{sf6-adv|VP|+42}}) or after a {{clr|M|MK}} Jackknife juggle ({{sf6-adv|VP|+37}} into immediate {{clr|L|j.2LK}}). The last hit of HK Jackknife increases the opponent's juggle count by 100, making any further hits impossible regardless of their launch height. |
| | |
| | In combos, {{clr|H|HK}} Jackknife does less damage than Dee Jays other enders but gives amazing corner carry and good oki. Again, it whiffs on crouching opponents, so try and use {{clr|H|2HP}} beforehand. Its long range and 6f startup also give it niche uses at punishing certain attacks (such as Juri {{clr|M|214MK}}) or linking from long range {{clr|H|2HP}} hits. |
| {{AttackDataCargo-SF6/Query|dee_jay_28kk}} | | {{AttackDataCargo-SF6/Query|dee_jay_28kk}} |
| * '''Full Invuln:''' 1-11f (cannot hit cross-up); '''Airborne''' 5-62f ({{FKD}} state) | | * '''Full Invuln:''' 1-11f (cannot hit cross-up); '''Airborne''' 5-62f ({{FKD}} state) |
| * 40f charge time; charge lasts up to 12f after releasing down direction | | * 40f charge time; charge lasts up to 12f after releasing down direction |
| * Puts opponent into {{sf6-jug|limited juggle}} state; only 1st hit connects on crouching opponents | | * Puts opponent into {{sf6-jug|limited juggle}} state; 2nd/3rd hits whiff on crouching opponents unless they extend a vertical hurtbox |
| Dee Jay's main invincible reversal. Since {{clr|10|SA1}} isn't invincible and {{clr|10|SA2}} is fairly slow, this is your most important defensive tool. It is massively unsafe on whiff or block; it even gives enough time for moves like Kimberly's Spraycan or Lily's Condor Wind to be set up before punishing Dee Jay. Can also be used as an anti-air for slightly more damage and consistency than the HK version; keep in mind that only the first hit retains full invincibility, so an early anti-air attempt can get stuffed. Works well in juggles. | | Dee Jay's main invincible reversal. Since {{clr|SA|SA1}} isn't invincible and {{clr|SA|SA2}} is fairly slow, this is your most important defensive tool. It is massively unsafe on whiff or block; it even gives enough time for moves like Kimberly's Spraycan or Lily's Condor Wind to be set up before punishing Dee Jay. Can also be used as an anti-air for slightly more damage and consistency than the HK version; keep in mind that only the first hit retains full invincibility, so an early anti-air attempt can get stuffed. Works well in juggles. |
| }} | | }} |
|
| |
|
| Line 733: |
Line 757: |
| {{MoveDataCargo | | {{MoveDataCargo |
| | title = Rolling Sobat | | | title = Rolling Sobat |
| | subtitle = | | | subtitle = |
| | input = 236K | | | input = {{Classic_sf6}} 236K<br>{{Modern_sf6}} 236X or 6S (M) |
| | images = | | | images = |
| | {{MoveDataCargoImage|imageHeight=180px|dee_jay_236mk|2|caption=}} |
| {{MoveDataCargoImage|imageHeight=180px|dee_jay_236mk|caption=}} | | {{MoveDataCargoImage|imageHeight=180px|dee_jay_236mk|caption=}} |
| ---- | | ---- |
| {{MoveDataCargoImage|imageHeight=200px|dee_jay_236kk|caption=}} | | {{MoveDataCargoImage|imageHeight=130px|dee_jay_236kk|caption=}} |
| | hitboxes = | | | hitboxes = |
| {{MoveDataCargoImage|hitbox=yes|imageHeight=160px|dee_jay_236mk|caption=Medium Kick}} | | {{MoveDataCargoImage|hitbox=yes|imageHeight=160px|dee_jay_236mk|caption=Medium Kick}} |
| Line 751: |
Line 776: |
| {{AttackDataCargo-SF6/Query|dee_jay_236mk}} | | {{AttackDataCargo-SF6/Query|dee_jay_236mk}} |
| * '''Cancel Hitconfirm Window:''' 18f (Super) | | * '''Cancel Hitconfirm Window:''' 18f (Super) |
| This version has only one hit that applies a knockdown. Can be spaced to be safe on block against most pokes when used near the tip of its range. | | This version has only one hit that applies a knockdown. Dee Jays main ender from light normals, being consistent at all ranges and doing decent damage. In corner juggles, allows combos into {{clr|H|HK}} Jackknife or {{clr|SA|SA1}} after, and is stronger than {{clr|H|236HK}} for cancelling into {{clr|SA|SA3}}. Requires a {{clr|DR|Drive Rush}} to get oki midscreen, but lets you get a meaty {{clr|M|6MK}} there. |
| | |
| | In neutral, {{clr|M|236MK}} is a very effective poke. The range is amazing while also having high damage, decent startup, and a knockdown. On block, it can be punishable if poorly spaced, but from most ranges the opponents normals will whiff. When spaced perfectly, it becomes only {{sf6-adv|VM|-4}}, which is completely safe against every character. It does still have a lot of recovery, so random jumps or {{clr|DR|Drive Impacts}} will punish you very hard. |
| {{AttackDataCargo-SF6/Query|dee_jay_236hk}} | | {{AttackDataCargo-SF6/Query|dee_jay_236hk}} |
| * '''Cancel Hitconfirm Window:''' 16f (Super) | | * '''Cancel Hitconfirm Window:''' 16f (Super) |
| * Applies 25% damage scaling to next hit when beginning a combo (100/75/65...) | | * Applies 25% damage scaling to next hit when beginning a combo (100/75/65...) |
| This version has two hits and keeps a grounded opponent standing. Both hits gain the additional frame advantage from Punish Counter, so you can use this as a far reaching whiff punish and link to a combo afterwards. | | This version has two hits and keeps a grounded opponent standing in a {{sf6-adv|P|+2}} mixup. Combos from {{clr|MP|2MP}} and {{clr|L|5LK}}, as well as many places in Dee Jays juggles. Against grounded opponents, the damage and oki are worse than {{clr|L|214LP}}, but {{clr|H|236HK}} notably works from much farther out. The standing mixup it gives is also nice for denying wakeup {{clr|DR|Drive Reversal}} from characters without invincible specials. Does fairly good damage in juggles at the cost of having no oki midscreen, but the range it leaves Dee Jay at is very nice for zoning. |
| | |
| | Both hits will gain advantage from {{clr|PC|Counter-hits}}, making it {{sf6-adv|VP|+4}} on {{clr|PC|Counter-hit}} and {{sf6-adv|VP|+6}} on {{clr|PC|Punish Counter}}. The {{clr|PC|Counter-hit}} links are impractical as {{clr|H|236HK}} is unsafe on block, but the {{clr|PC|Punish Counter}} routes are nice as a whiff punish or punish against very unsafe attacks. The scaling on these routes is high, so ideally keep combos short from this starter. |
| {{AttackDataCargo-SF6/Query|dee_jay_236kk}} | | {{AttackDataCargo-SF6/Query|dee_jay_236kk}} |
| * '''Low Crush''' 14-28f (not airborne) | | * '''Low Crush''' 14-28f (not airborne) |
| * '''Cancel Hitconfirm Window:''' 45f (Super) | | * '''Cancel Hitconfirm Window:''' 45f (Super) |
| * Applies 20% damage scaling to next hit when beginning a combo; counts as 2 hits for damage scaling when comboed into (applies to next hit) | | * Applies 20% damage scaling to next hit when beginning a combo; counts as 2 hits for damage scaling when comboed into (applies to next hit) |
| This version has two hits, applies a knockdown, and makes Dee Jay leap forward to close gaps and go over some lows. | | This version has two hits and applies a knockdown. Mostly useful as Dee Jays best way to combo into {{clr|SA|SA2}}. Gives absurd conrer carry in combos, which combined with {{clr|SA|SA2}}, can easily corner opponents from even roundstart. In neutral, Dee Jay can easily use this version to close gaps while even dodging some low attacks like Terrys {{clr|L|LP}} Power Wave. He's only left {{sf6-adv|M|-2}} on block, and on hit, the two hits give an easy confirm into {{clr|SA|SA2}} or {{clr|SA|SA3}} for big damage. |
|
| |
|
| | Against opponents in Burnout, {{clr|OD|236KK}} becomes {{sf6-adv|P|+2}} on block while also having amazing corner carry and leaving Dee Jay very close. It's an expensive option, but it's a very effective way to push opponents to the corner, especially when combined with Dee Jays other options. |
| }} | | }} |
|
| |
|
| Line 767: |
Line 797: |
| {{MoveDataCargo | | {{MoveDataCargo |
| | title = Machine Gun Uppercut | | | title = Machine Gun Uppercut |
| | subtitle = | | | subtitle = |
| | input = 214P | | | input = {{Classic_sf6}} 214P<br>{{Modern_sf6}} 214X |
| | images = | | | images = |
| {{MoveDataCargoImage|imageHeight=180px|dee_jay_214lp|caption=}} | | {{MoveDataCargoImage|imageHeight=220px|dee_jay_214lp|caption=LP / MP Version}} |
| ---- | | ---- |
| {{MoveDataCargoImage|imageHeight=180px|dee_jay_214pp|caption=}} | | {{MoveDataCargoImage|imageHeight=230px|dee_jay_214pp|caption=HP / OD Version}} |
| | hitboxes = | | | hitboxes = |
| {{MoveDataCargoImage|hitbox=yes|imageHeight=180px|dee_jay_214lp|caption=LP / MP Version}} | | {{MoveDataCargoImage|hitbox=yes|imageHeight=180px|dee_jay_214lp|caption=LP / MP Version}} |
| Line 780: |
Line 810: |
| {{AttackDataCargo-SF6/Query|dee_jay_214lp}} | | {{AttackDataCargo-SF6/Query|dee_jay_214lp}} |
| * '''Cancel Hitconfirm Window:''' 48f hit / 10f block (Super) | | * '''Cancel Hitconfirm Window:''' 48f hit / 10f block (Super) |
| Slow but very high damaging special. Dee Jays highest damage combo ender by a good margin but is rather range dependent. Most commonly used from 2MP in combos but is difficult to use in whiff punishes due to the short range | | Slow but very highly damaging special with great oki. Dee Jays highest damage combo ender by a good margin but is rather range dependent. Most commonly used from {{clr|M|2MP}} in combos but can be inconsistent due to the short range. Can also technically be used after {{clr|L|5LK}} but it rarely connects due to the high pushback. |
| {{AttackDataCargo-SF6/Query|dee_jay_214mp}} | | {{AttackDataCargo-SF6/Query|dee_jay_214mp}} |
| * '''Cancel Hitconfirm Window:''' 57f hit / 10f block (Super) | | * '''Cancel Hitconfirm Window:''' 57f hit / 10f block (Super) |
| A bit of a middle ground of the Light and Heavy versions. Very similar to the other meterless versions. Combos from 5HP and 4HK(1) | | A bit of a middle ground of the Light and Heavy versions. Combos from {{clr|H|5HP}} and {{clr|H|4HK}}(1) while being much more consistent due to the range and pushback of these normals. Does really good damage in grounded combos, especially when cancelled into {{clr|SA|SA3}}, so it should almost always be your meterless ender when comboing from {{clr|H|5HP}}. From {{clr|H|4HK}}, however, cancelling the second hit into {{clr|L|214LP}} does slightly better damage. Also combos from {{clr|PC|Counter-hit}} or {{clr|PC|Punish Counter}} {{clr|M|2MP}}, which can be nice for punishing things like {{clr|DR|Drive Reversal}}. |
| {{AttackDataCargo-SF6/Query|dee_jay_214hp}} | | {{AttackDataCargo-SF6/Query|dee_jay_214hp}} |
| * '''Cancel Hitconfirm Window:''' 90f hit / 10f block (Super) | | * '''Cancel Hitconfirm Window:''' 90f hit / 10f block (Super) |
| Tied for the slowest version of Machine Gun Uppercut but very rewarding to land. Only works from Punish Counter or {{clr|4|Drive Rush}} 5HP and 4HK(1). Highest meterless combo ender but is very specific for moves that can actually combo into it. In the corner when juggled into allows for a juggle afterwards into '''Weekend Pleasure''' | | Tied for the slowest version of Machine Gun Uppercut but very rewarding to land. Only works from {{clr|PC|Punish Counter}} or {{clr|DR|Drive Rush}} {{clr|H|5HP}} and {{clr|H|4HK}}(1). Almost always comboed into from a juggled {{clr|H|5HP}}, and unfortunately most routes into it have high scaling, somewhat negating the high damage. Still useful in juggles as your most consistent route into {{clr|SA|SA3}} or for a solid balance of damage and oki. Loses about 800 damage when cancelled into {{clr|SA|SA3}}, but in the corner {{clr|SA|SA3}} can be juggled after without cancelling. |
| {{AttackDataCargo-SF6/Query|dee_jay_214pp}} | | {{AttackDataCargo-SF6/Query|dee_jay_214pp}} |
| * '''Cancel Hitconfirm Window:''' 116f hit / 10f block (Super) | | * '''Cancel Hitconfirm Window:''' 116f hit / 10f block (Super) |
| * Counts as 2 hits for damage scaling when comboed into (applies to next hit) | | * Counts as 2 hits for damage scaling when comboed into (applies to next hit) |
| A highly rewarding, range dependent combo tool. Similar to the HP version only combos from Punish Counter or {{clr|4|Drive Rush}} 5HP or 4HK(1) but is massively rewarding to use in combos. Offers the highest base damage of any of his specials. | | A highly rewarding, range dependent combo tool. Almost identical to the {{clr|H|HP}} version but adds a followup hit at the end. Does extremely high damage but is unfortunately difficult to use in combos. As mentioned before, it's difficult to find routes into it that don't have high scaling, so it generally does only slightly more damage than the {{clr|H|HP}} version. The followup hit actually gives ''worse'' oki than all other versions, and while Dee Jay can still get meaty normals, it's challenging to mix up with throws. The primary use is comboing into {{clr|SA|SA2}}, but even that won't work in juggles, which is the main place you can land it. Can be useful in specific meterdump combos, but in most you're better off saving the bar. |
| | |
| | One of the main flaws of {{clr|OD|214PP}} is the massive scaling it applies to followup supers. However, this won't apply if {{clr|OD|214PP}} is the combo starter itself. In this context, the super afterward is unscaled, leading to massive damage for minimal effort. To put this into context, doing raw {{clr|OD|214PP}} into {{clr|HP|HP}} {{clr|SA|SA2}} does almost as much damage as a standard 6 bar {{clr|SA|SA3}} combo while being significantly more meter efficient. Because of how slow it is, this is generally only possible after blocked reversals. |
| }} | | }} |
|
| |
|
| Line 796: |
Line 828: |
| {{MoveDataCargo | | {{MoveDataCargo |
| | title = Jus Cool | | | title = Jus Cool |
| | subtitle = | | | subtitle = Sway |
| | input = 214K | | | input = {{Classic_sf6}} 214K<br>{{Modern_sf6}} 5S |
| | images = | | | images = |
| {{MoveDataCargoImage|imageHeight=180px|dee_jay_214k|caption=}} | | {{MoveDataCargoImage|imageHeight=180px|dee_jay_214k|caption=}} |
| ---- | | ---- |
| {{MoveDataCargoImage|imageHeight=180px|dee_jay_214kk|caption=}} | | {{MoveDataCargoImage|imageHeight=210px|dee_jay_214kk|caption=}} |
| | hitboxes = | | | hitboxes = |
| {{MoveDataCargoImage|hitbox=yes|imageHeight=160px|dee_jay_214k|caption=}} | | {{MoveDataCargoImage|hitbox=yes|imageHeight=160px|dee_jay_214k|caption=}} |
| Line 809: |
Line 841: |
| {{AttackDataCargo-SF6/Query|dee_jay_214k}} | | {{AttackDataCargo-SF6/Query|dee_jay_214k}} |
| * Sway Distance: 0.602 backwards | | * Sway Distance: 0.602 backwards |
| Dee Jay's all new special move that heavily defines his new "sway" centric playstyle. Upon activation, Dee Jay will perform a backstep with 5 different follow-ups that he can go into to mix up opponents. Can be canceled into from {{clr|4|Drive Rush}} to bait whiffs, instantly ending your forward momentum. The startup of the sway combined with the follow-ups makes them fairly reactable and difficult to combo into, but in exchange all the follow-ups are safe on block. All follow-ups lose to {{clr|4|Drive Impact}}, forcing you to do nothing to beat it—a sway without follow-ups is very hard to punish, though, so it remains a very good tool to bait reactions in neutral. | | Dee Jay's all new special move that heavily defines his new "sway" centric playstyle. Upon activation, Dee Jay will perform a backstep with 5 different follow-ups that he can go into to mix up opponents. Can be canceled into from {{clr|DR|Drive Rush}} to bait whiffs, instantly ending your forward momentum. The startup of the sway combined with the follow-ups makes them fairly reactable and difficult to combo into, but in exchange all the follow-ups are safe on block. All follow-ups lose to {{clr|DR|Drive Impact}}, forcing you to do nothing to beat it—a sway without follow-ups is very hard to punish, though, so it remains a very good tool to bait reactions in neutral. |
| {{AttackDataCargo-SF6/Query|dee_jay_214kk}} | | {{AttackDataCargo-SF6/Query|dee_jay_214kk}} |
| * Sway Distance: 0.74 backwards | | * Sway Distance: 0.74 backwards |
| The Overdrive version of Jus Cool gains an initial launching hit at a blazing fast 8 frames startup, making it incredibly easy and rewarding to combo into if in range for the initial hit. Bear in mind the somewhat limited range can make it occasionally difficult to combo into it from further out. Additionally all the follow-ups have different frame data compared to the meterless versions | | The Overdrive version of Jus Cool gains an initial launching hit at a blazing fast 8 frames startup, making it incredibly easy to combo into if in range for the initial hit. This move alone gives Dee Jay incredibly high damage 2 bar combos, far higher than what most characters could hope to achieve. Bear in mind the somewhat limited range can make it occasionally difficult to combo into it from further out. |
| | |
| | Using {{clr|OD|214KK}} on block is a bit of a mixed bag. Dee Jay has a very pure high/low/throw mix in which all options are incredibly rewarding should he guess correctly. However, both the high and low options are susceptible to {{clr|DR|Drive Impact}}, making the risk/reward not always in his favour. Thankfully, doing no followup recovers just in time to counter {{clr|DR|DI}}, but this is still an expensive and risky read. |
| | |
| | Because all of the followups are either very unsafe or not a true blockstring, opponents can punish every potential followup with a decently ranged reversal 15f or faster. Most {{clr|OD|OD}} reversals will not have enough range to punish no followup, so most characters will need to use supers for a reliable punish. Notable examples are Luke, Kimberly, Cammy, or Guile {{clr|SA|SA1}}. |
| }} | | }} |
|
| |
|
| Line 818: |
Line 854: |
| {{MoveDataCargo | | {{MoveDataCargo |
| | title = Funky Slicer | | | title = Funky Slicer |
| | subtitle = | | | subtitle = Sway~Low |
| | input = 214K~LK | | | input = {{Classic_sf6}} 214K~LK<br>{{Modern_sf6}} 5S~L |
| | images = | | | images = |
| {{MoveDataCargoImage|imageHeight=200px|dee_jay_214k_lk|caption=}} | | {{MoveDataCargoImage|imageHeight=140px|dee_jay_214k_lk|caption=}} |
| ----
| |
| {{MoveDataCargoImage|imageHeight=200px|dee_jay_214kk_lk|caption=}}
| |
| | hitboxes = | | | hitboxes = |
| {{MoveDataCargoImage|hitbox=yes|imageHeight=180px|dee_jay_214k_lk|caption=}} | | {{MoveDataCargoImage|hitbox=yes|imageHeight=180px|dee_jay_214k_lk|caption=}} |
| Line 832: |
Line 866: |
| * Applies 20% damage scaling to next hit when beginning a combo (100/80/70...) | | * Applies 20% damage scaling to next hit when beginning a combo (100/80/70...) |
| {{AttackDataCargo-SF6/Query|dee_jay_214kk_lk}} | | {{AttackDataCargo-SF6/Query|dee_jay_214kk_lk}} |
| * Punish Counter: +16 | | * {{clr|PC|Punish Counter}}: +16 |
| * 5f extra recovery on whiff or vs. armor | | * 5f extra recovery on whiff or vs. armor |
| * '''Cancel Hitconfirm Window:''' 16f (Super) | | * '''Cancel Hitconfirm Window:''' 16f (Super) |
| Low kick from Jus Cool. The safest and most solid follow-up that is extremely good at beating low pokes thanks to its massive disjointed hitbox. It also converts into great damage on Counter-hit or Punish Counter for the normal version and obscene damage on the OD version. Many characters will be discouraged from using low pokes in fear of this move, and instead will be urged to choose riskier options in neutral. | | Low kick from Jus Cool. The safest and most solid follow-up that is extremely good at beating low pokes thanks to its massive disjointed hitbox. It also converts into great damage on {{clr|PC|Counter-hit}} or {{clr|PC|Punish Counter}} for the normal version and obscene damage on the OD version. Many characters will be discouraged from using low pokes in fear of this move, and instead will be urged to choose riskier options in neutral. |
| }} | | }} |
|
| |
|
| Line 841: |
Line 875: |
| {{MoveDataCargo | | {{MoveDataCargo |
| | title = Waning Moon | | | title = Waning Moon |
| | subtitle = | | | subtitle = Sway~Overhead |
| | input = 214K~MK | | | input = {{Classic_sf6}} 214K~MK<br>{{Modern_sf6}} 5S~M |
| | images = | | | images = |
| {{MoveDataCargoImage|imageHeight=200px|dee_jay_214k_mk|caption=}} | | {{MoveDataCargoImage|imageHeight=220px|dee_jay_214k_mk|caption=}} |
| ----
| |
| {{MoveDataCargoImage|imageHeight=200px|dee_jay_214kk_mk|caption=}}
| |
| | hitboxes = | | | hitboxes = |
| {{MoveDataCargoImage|hitbox=yes|imageHeight=160px|dee_jay_214k_mk|caption=}} | | {{MoveDataCargoImage|hitbox=yes|imageHeight=160px|dee_jay_214k_mk|caption=}} |
| Line 854: |
Line 886: |
| {{AttackDataCargo-SF6/Query|dee_jay_214k_mk}} | | {{AttackDataCargo-SF6/Query|dee_jay_214k_mk}} |
| * '''Low Crush''' 12-22f (not airborne) | | * '''Low Crush''' 12-22f (not airborne) |
| Dee Jays only grounded overhead, but a pretty good one. On hit it scores a knockdown and on block it leaves Dee Jay at frame advantage, though outside of throw range, which can set up for a quick and easy shimmy against tech-happy opponents. | | * {{clr|PC|Punish Counter}}: puts opponent into {{sf6-jug|limited juggle}} OTG state |
| | * Applies 30% damage scaling to next hit when beginning a combo (100/80/70...) |
| | Dee Jay's only grounded overhead, but a pretty good one. On hit, it scores a knockdown and on block it leaves Dee Jay at frame advantage, though outside of throw range, which can set up for a quick and easy shimmy against tech-happy opponents. If it hops over the opponents attack, he can convert the {{clr|PC|Punish Counter}} into a juggle; it has enough advantage to juggle into {{clr|H|HK Sobat}} if the 2nd active frame connects, which will always happen when hopping over a low poke. |
| {{AttackDataCargo-SF6/Query|dee_jay_214kk_mk}} | | {{AttackDataCargo-SF6/Query|dee_jay_214kk_mk}} |
| * '''Low Crush''' 12-22f (not airborne) | | * '''Low Crush''' 12-22f (not airborne) |
| The OD version of Dee Jays overhead is noticeably faster, but is minus on block rather than plus. In exchange it gives a link to 2MP on hit rather than knocking down, making it much more rewarding when it hits but less so when its blocked. | | * Puts airborne opponents into {{sf6-jug|limited juggle}} OTG state |
| | ** Airborne {{clr|PC|Punish Counter}} grants a more lenient juggle state |
| | The {{clr|OD|OD}} version of Dee Jay's overhead is noticeably faster, but is minus on block rather than plus. In exchange it gives a link to {{clr|M|2MP}} on hit rather than knocking down, making it much more rewarding when it hits but less so when its blocked. If the opponent tries to jump away after the initial blocked hit, the ground bounce allows Dee Jay to convert into a {{clr|SA|Super}}, {{clr|OD|OD Jackknife}}, or {{clr|M|MK}}/{{clr|H|HK}} Sobat. |
| }} | | }} |
|
| |
|
| Line 863: |
Line 899: |
| {{MoveDataCargo | | {{MoveDataCargo |
| | title = Maximum Strike | | | title = Maximum Strike |
| | subtitle = | | | subtitle = Sway~Launch |
| | input = 214K~HK | | | input = {{Classic_sf6}} 214K~HK<br>{{Modern_sf6}} 5S~H |
| | images = | | | images = |
| {{MoveDataCargoImage|imageHeight=200px|dee_jay_214k_hk|caption=}} | | {{MoveDataCargoImage|imageHeight=220px|dee_jay_214k_hk|caption=}} |
| ----
| |
| {{MoveDataCargoImage|imageHeight=200px|dee_jay_214kk_hk|caption=}}
| |
| | hitboxes = | | | hitboxes = |
| {{MoveDataCargoImage|hitbox=yes|imageHeight=200px|dee_jay_214k_hk|caption=}} | | {{MoveDataCargoImage|hitbox=yes|imageHeight=200px|dee_jay_214k_hk|caption=}} |
| Line 877: |
Line 911: |
| * '''Anti-Air Invuln (Upper Body):''' 15-19f; upper body hurtbox shrinks on frames 6-14 and 20-44 | | * '''Anti-Air Invuln (Upper Body):''' 15-19f; upper body hurtbox shrinks on frames 6-14 and 20-44 |
| * Puts opponents into {{sf6-jug|limited juggle}} state | | * Puts opponents into {{sf6-jug|limited juggle}} state |
| | * Upper hitbox whiffs on crouching opponents unless they extend a vertical hurtbox |
| * '''Cancel Hitconfirm Window:''' 20f (Super) | | * '''Cancel Hitconfirm Window:''' 20f (Super) |
| {{AttackDataCargo-SF6/Query|dee_jay_214kk_hk}} | | {{AttackDataCargo-SF6/Query|dee_jay_214kk_hk}} |
| * '''Anti-Air Invuln (Upper Body):''' 6-36f | | * '''Anti-Air Invuln (Upper Body):''' 6-36f |
| * Puts opponents into {{sf6-jug|limited juggle}} state | | * Puts opponents into {{sf6-jug|limited juggle}} state |
| * Punish Counter puts opponents into {{sf6-jug|free juggle}} state (requires initial 214KK to whiff) | | * {{clr|PC|Punish Counter}} puts opponents into {{sf6-jug|free juggle}} state (requires initial 214KK to whiff) |
| | * Upper hitbox whiffs on crouching opponents unless they extend a vertical hurtbox |
| * '''Cancel Hitconfirm Window:''' 20f (Super) | | * '''Cancel Hitconfirm Window:''' 20f (Super) |
| * Counts as 2 hits for damage scaling when comboed into (applies to next hit) | | * Counts as 2 hits for damage scaling when comboed into (applies to next hit) |
| Line 891: |
Line 927: |
| {{MoveDataCargo | | {{MoveDataCargo |
| | title = Juggling Dash/Sway | | | title = Juggling Dash/Sway |
| | subtitle = | | | subtitle = Sway~Dash/Feint |
| | input = 214K~6P~4P | | | input = {{Classic_sf6}} 214K~6P~4P<br>{{Modern_sf6}} 5S~6S~S |
| | images = | | | images = |
| {{MoveDataCargoImage|imageHeight=140px|dee_jay_214k_6p|caption=}} | | {{MoveDataCargoImage|imageHeight=150px|dee_jay_214k_6p|caption=}} |
| ---- | | ---- |
| {{MoveDataCargoImage|imageHeight=140px|dee_jay_214kk_6p|caption=}} | | {{MoveDataCargoImage|imageHeight=220px|dee_jay_214k_6p_4p|caption=}} |
| ----
| |
| {{MoveDataCargoImage|imageHeight=180px|dee_jay_214k_6p_4p|caption=}}
| |
| | hitboxes = | | | hitboxes = |
| {{MoveDataCargoImage|hitbox=yes|imageHeight=140px|dee_jay_214k_6p|caption=}} | | {{MoveDataCargoImage|hitbox=yes|imageHeight=140px|dee_jay_214k_6p|caption=}} |
| Line 923: |
Line 957: |
| {{MoveDataCargo | | {{MoveDataCargo |
| | title = Speedy Maracas | | | title = Speedy Maracas |
| | subtitle = | | | subtitle = Dance |
| | input = 22PP | | | input = {{Classic_sf6}} 22PP<br>{{Modern_sf6}} 22MH |
| | images = | | | images = |
| {{MoveDataCargoImage|imageHeight=200px|dee_jay_22pp|caption=}} | | {{MoveDataCargoImage|imageHeight=220px|dee_jay_22pp|caption=}} |
| | hitboxes = | | | hitboxes = |
| {{MoveDataCargoImage|hitbox=yes|imageHeight=200px|dee_jay_22pp|caption=}} | | {{MoveDataCargoImage|hitbox=yes|imageHeight=200px|dee_jay_22pp|caption=}} |
| Line 951: |
Line 985: |
| | title = The Greatest Sobat | | | title = The Greatest Sobat |
| | subtitle = Level 1 Super Art | | | subtitle = Level 1 Super Art |
| | input = 236236K | | | input = {{classic_sf6}} 236236K<br>{{Modern_sf6}} 236236L or 5HS or 6HS |
| | images = | | | images = |
| {{MoveDataCargoImage|imageHeight=200px|dee_jay_236236k|caption=}} | | {{MoveDataCargoImage|imageHeight=220px|dee_jay_236236k|caption=}} |
| | hitboxes = | | | hitboxes = |
| {{MoveDataCargoImage|hitbox=yes|imageHeight=200px|dee_jay_236236k|caption=}} | | {{MoveDataCargoImage|hitbox=yes|imageHeight=200px|dee_jay_236236k|caption=}} |
| Line 962: |
Line 996: |
| * 30% minimum damage scaling | | * 30% minimum damage scaling |
| * Applies 40% damage scaling to next hit when beginning a combo (100/60/50...) | | * Applies 40% damage scaling to next hit when beginning a combo (100/60/50...) |
| * Counter-hit: Crumple (HKD +66), {{sf6-adv|VP|+4}} before opponent goes airborne | | * Causes sliding Hard Knockdown vs. airborne opponents |
| * Punish Counter: Crumple (HKD +79), {{sf6-adv|VP|+6}} before opponent goes airborne | | * {{clr|PC|Counter-Hit}}: Crumple (HKD +66), {{sf6-adv|VP|+4}} before opponent goes airborne |
| | * {{clr|PC|Punish Counter}}: Crumple (HKD +79), {{sf6-adv|VP|+6}} before opponent goes airborne |
| ** Causes wall bounce vs. airborne ({{sf6-jug|free juggle}} state) | | ** Causes wall bounce vs. airborne ({{sf6-jug|free juggle}} state) |
| <br> | | <br> |
| An unusual Super that lacks invincibility, instead being used as a punish starter, counter-hit conversion tool, or a high-damage juggle ender. | | An unusual Super that lacks invincibility, instead being used as a punish starter, {{clr|PC|Counter-hit}} conversion tool, or a high-damage juggle ender. |
|
| |
|
| The crumple state on Punish Counter gives Dee Jay a full juggle combo on moves that are {{sf6-adv|VM|-7}} or worse, which is a great option when outside his {{clr|M|2MP}} range. A counter-hit also gives a similar crumple, which makes it a useful punish against installs like Ryu's Denjin Charge, or for canceling a poke against {{clr|4|Drive Impact}} armor. While it's possible to get a grounded combo after both crumple states, it's usually better to let the opponent go airborne and use a more optimal juggle route. | | The crumple state on {{clr|PC|Punish Counter}} gives Dee Jay a full juggle combo on moves that are {{sf6-adv|VM|-7}} or worse, which is a great option when outside his {{clr|M|2MP}} range. A {{clr|PC|Counter-hit}} also gives a similar crumple, which makes it a useful punish against installs like Ryu's Denjin Charge, or for canceling a poke against {{clr|DR|Drive Impact}} armor. While it's possible to get a grounded combo after both crumple states, it's usually better to let the opponent go airborne and use a more optimal juggle route. |
|
| |
|
| If the Punish Counter {{clr|10|SA1}} hits an airborne opponent, they will be slammed against the wall for a juggle. If the opponent is too close to the corner, they tend to fly over Dee Jay's head, making the follow-up juggle limited or impossible. Counter-hits do not cause this wall bounce, simply resulting in a knockdown. | | If the {{clr|PC|Punish Counter}} {{clr|SA|SA1}} hits an airborne opponent, they will be slammed against the wall for a juggle. If the opponent is too close to the corner, they tend to fly over Dee Jay's head, making the follow-up juggle limited or impossible. {{clr|PC|Counter-hits}} do not cause this wall bounce, resulting in the usual sliding Hard Knockdown. |
|
| |
|
| Dee Jay does not extend a hurtbox on his leg during the attack; combined with the Low Crush property, this gives him some "pseudo-invincibility" in specific scenarios. For example, it's possible to use {{clr|10|SA1}} on reaction to mid-range fireball to force a trade, allowing Dee Jay to follow up with a {{clr|4|Drive Rush}} juggle; this is much more practical against projectiles with slow movement speed and a wide extended hurtbox. | | Dee Jay does not extend a hurtbox on his leg during the attack; combined with the Low Crush property, this gives him some "pseudo-invincibility" in specific scenarios. For example, it's possible to use {{clr|SA|SA1}} on reaction to mid-range fireball to force a trade, allowing Dee Jay to follow up with a {{clr|DR|Drive Rush}} juggle; this is much more practical against projectiles with slow movement speed and a wide extended hurtbox. |
|
| |
|
| Due to the high pushback, this Super is relatively safe when spaced; other than some fast ranged Supers, most characters cannot punish it at midrange. This makes it less risky to fish for counter-hit {{clr|M|5MK}} > {{clr|10|SA1}} in neutral, as a dropped confirm will rarely be punished. | | Due to the high pushback, this Super is relatively safe when spaced; other than some fast ranged Supers, most characters cannot punish it at midrange. This makes it less risky to fish for {{clr|PC|Counter-hit}} {{clr|M|5MK}} > {{clr|SA|SA1}} in neutral, as a dropped confirm will rarely be punished. |
| }} | | }} |
|
| |
|
| Line 982: |
Line 1,017: |
| | title = Sunrise Festival (Start) | | | title = Sunrise Festival (Start) |
| | subtitle = Level 2 Super Art | | | subtitle = Level 2 Super Art |
| | input = 236236P | | | input = {{classic_sf6}} 236236P<br>{{Modern_sf6}} 236236M or 4HS |
| | images = | | | images = |
| {{MoveDataCargoImage|imageHeight=120px|dee_jay_236236hp|caption=}} | | {{MoveDataCargoImage|imageHeight=120px|dee_jay_236236hp|caption=}} |
| ---- | | ---- |
| {{MoveDataCargoImage|imageHeight=120px|dee_jay_236236lp|caption=}} | | {{MoveDataCargoImage|imageHeight=180px|dee_jay_236236lp|caption=}} |
| ---- | | ---- |
| {{MoveDataCargoImage|imageHeight=120px|dee_jay_236236mp|caption=MP/HP Rhythm starter}} | | {{MoveDataCargoImage|imageHeight=200px|dee_jay_236236mp|caption=MP/HP Rhythm starter}} |
| | hitboxes = | | | hitboxes = |
| {{MoveDataCargoImage|hitbox=yes|imageHeight=220px|dee_jay_236236lp|caption=}} | | {{MoveDataCargoImage|hitbox=yes|imageHeight=220px|dee_jay_236236lp|caption=}} |
| Line 998: |
Line 1,033: |
| * '''Drive Gauge Depletion:''' 1 bar (hit, full sequence) / 0.5 bars (block) | | * '''Drive Gauge Depletion:''' 1 bar (hit, full sequence) / 0.5 bars (block) |
| * 40% minimum damage scaling | | * 40% minimum damage scaling |
| * Applies 25% damage scaling to next hit when beginning a combo; counts as 3 hits for damage scaling when comboed into (applies to any hit after {{clr|10|SA2}} sequence) | | * Applies 25% damage scaling to next hit when beginning a combo; counts as 3 hits for damage scaling when comboed into (applies to any hit after {{clr|SA|SA2}} sequence) |
| * Applies 30% scaling to Dee Jay's Super Art gain until the end of the combo | | * Applies 30% scaling to Dee Jay's Super Art gain until the end of the combo |
| <br> | | <br> |
| Dee Jay lunges forward with a knee strike that can chain into a series of follow-up attack. The initial activation is nearly identical for all versions of {{clr|10|SA2}}, with the {{clr|H|HP}} starter doing only slightly less damage. This hit has great forward movement and invincibility. It's too slow for most reversal applications, but it's great at countering projectiles at mid-range (though it can be difficult to use against characters like Guile). | | Dee Jay lunges forward with a knee strike that can chain into a series of follow-up attack. The initial activation is nearly identical for all versions of {{clr|SA|SA2}}, with the {{clr|H|HP}} starter doing only slightly less damage. This hit has great forward movement and invincibility. It's too slow for most reversal applications, but it's great at countering projectiles at mid-range (though it can be difficult to use against characters like Guile). |
|
| |
|
| Regardless of which version is used, the follow-ups can only come out on hit; each hit causes no additional damage scaling, so linking out of the {{sf6-adv|VP|+6}} can still be useful. Dee Jay stops immediately if the initial attack whiffs or is blocked, and is unable to continue with follow-ups. | | Regardless of which version is used, the follow-ups can only come out on hit; each hit causes no additional damage scaling, so linking out of the {{sf6-adv|VP|+6}} can still be useful. Dee Jay stops immediately if the initial attack whiffs or is blocked, and is unable to continue with follow-ups. |
|
| |
|
| The timing of the follow-up sequence starts easy with {{clr|L|LP}} {{clr|10|Super}}, then increases in difficulty with each button strength. This allows players to choose between a safe, consistent combo or a risky but rewarding finisher. [https://www.youtube.com/watch?v=j0k8-2Qjq3g This video] is a good example for learning the button timing on the {{clr|M|MP}} and {{clr|H|HP}} follow-ups, with audio and visual cues to help practice. | | The timing of the follow-up sequence starts easy with {{clr|L|LP}} {{clr|SA|Super}}, then increases in difficulty with each button strength. This allows players to choose between a safe, consistent combo or a risky but rewarding finisher. [https://www.youtube.com/watch?v=j0k8-2Qjq3g This video] is a good example for learning the button timing on the {{clr|M|MP}} and {{clr|H|HP}} follow-ups, with audio and visual cues to help practice. |
| }} | | }} |
| |-| | | |-| |
| Line 1,013: |
Line 1,048: |
| | title = Lowkey Sunrise Festival | | | title = Lowkey Sunrise Festival |
| | subtitle = Level 2 Super Art | | | subtitle = Level 2 Super Art |
| | input = 236236LP | | | input = {{classic_sf6}} 236236LP<br>{{Modern_sf6}} 236236M + mash S |
| | images = | | | images = |
| {{MoveDataCargoImage|imageHeight=100px|dee_jay_236236lp_lp|caption=}} | | {{MoveDataCargoImage|imageHeight=120px|dee_jay_236236lp_lp|caption=}} |
| ---- | | ---- |
| {{MoveDataCargoImage|imageHeight=100px|dee_jay_236236lp_lp_mp|caption=}} | | {{MoveDataCargoImage|imageHeight=120px|dee_jay_236236lp_lp_mp|caption=}} |
| ---- | | ---- |
| {{MoveDataCargoImage|imageHeight=100px|dee_jay_236236lp_lp_mp_hp|caption=}} | | {{MoveDataCargoImage|imageHeight=120px|dee_jay_236236lp_lp_mp_hp|caption=}} |
| ---- | | ---- |
| {{MoveDataCargoImage|imageHeight=100px|dee_jay_236236lp_lp_mp_hp_lk|caption=}} | | {{MoveDataCargoImage|imageHeight=120px|dee_jay_236236lp_lp_mp_hp_lk|caption=}} |
| ---- | | ---- |
| {{MoveDataCargoImage|imageHeight=100px|dee_jay_236236lp_lp_mp_hp_lk_mk|caption=}} | | {{MoveDataCargoImage|imageHeight=120px|dee_jay_236236lp_lp_mp_hp_lk_mk|caption=}} |
| ---- | | ---- |
| {{MoveDataCargoImage|imageHeight=100px|dee_jay_236236lp_lp_mp_hp_lk_mk_hk|caption=}} | | {{MoveDataCargoImage|imageHeight=120px|dee_jay_236236lp_lp_mp_hp_lk_mk_hk|caption=}} |
| | hitboxes = | | | hitboxes = |
| {{MoveDataCargoImage|hitbox=yes|imageHeight=100px|dee_jay_236236lp_lp|caption=}} | | {{MoveDataCargoImage|hitbox=yes|imageHeight=100px|dee_jay_236236lp_lp|caption=}} |
| Line 1,052: |
Line 1,087: |
| * '''Projectile Invuln:''' 1-28f; Timing window: ?f after {{clr|L|236236LP}}~{{clr|L|LP}}~{{clr|M|MP}}~{{clr|H|HP}}~{{clr|L|LK}}~{{clr|M|MK}} | | * '''Projectile Invuln:''' 1-28f; Timing window: ?f after {{clr|L|236236LP}}~{{clr|L|LP}}~{{clr|M|MP}}~{{clr|H|HP}}~{{clr|L|LK}}~{{clr|M|MK}} |
| <br> | | <br> |
| The follow-ups to {{clr|L|LP}} {{clr|10|SA2}} require no particular rhythm on the hits; just mashing the buttons in sequence is enough to guarantee the full damage. Using this version guarantees a safe 2600 damage, which is only a reduction of 200 max damage from {{clr|M|MP}} {{clr|10|Super}}, or 400 from {{clr|H|HP}} {{clr|10|Super}}. There is no cinematic ender like on the {{clr|M|MP}} and {{clr|H|HP}} versions; as a result, Dee Jay cannot choose which direction to knock the opponent, and he cannot get oki after the knockdown unless he reaches the corner. | | The follow-ups to {{clr|L|LP}} {{clr|SA|SA2}} require no particular rhythm on the hits; just mashing the buttons in sequence is enough to guarantee the full damage. Using this version guarantees a safe 2600 damage, which is only a reduction of 200 max damage from {{clr|M|MP}} {{clr|SA|Super}}, or 400 from {{clr|H|HP}} {{clr|SA|Super}}. There is no cinematic ender like on the {{clr|M|MP}} and {{clr|H|HP}} versions; as a result, Dee Jay cannot choose which direction to knock the opponent, and he cannot get oki after the knockdown unless he reaches the corner. |
| }} | | }} |
| |-| | | |-| |
| Line 1,060: |
Line 1,095: |
| | title = Marvelous Sunrise Festival | | | title = Marvelous Sunrise Festival |
| | subtitle = Level 2 Super Art | | | subtitle = Level 2 Super Art |
| | input = 236236MP | | | input = {{classic_sf6}} 236236MP<br>{{Modern_sf6}} -- |
| | images = | | | images = |
| {{MoveDataCargoImage|imageHeight=100px|dee_jay_236236mp_lp|caption=}} | | {{MoveDataCargoImage|imageHeight=130px|dee_jay_236236mp_lp|caption=}} |
| ---- | | ---- |
| {{MoveDataCargoImage|imageHeight=100px|dee_jay_236236mp_lp_mp|caption=}} | | {{MoveDataCargoImage|imageHeight=130px|dee_jay_236236mp_lp_mp|caption=}} |
| ---- | | ---- |
| {{MoveDataCargoImage|imageHeight=100px|dee_jay_236236mp_lp_mp_hp|caption=}} | | {{MoveDataCargoImage|imageHeight=130px|dee_jay_236236mp_lp_mp_hp|caption=}} |
| ---- | | ---- |
| {{MoveDataCargoImage|imageHeight=100px|dee_jay_236236mp_lp_mp_hp_lk|caption=}} | | {{MoveDataCargoImage|imageHeight=130px|dee_jay_236236mp_lp_mp_hp_lk|caption=}} |
| ---- | | ---- |
| {{MoveDataCargoImage|imageHeight=100px|dee_jay_236236mp_lp_mp_hp_lk_mk|caption=}} | | {{MoveDataCargoImage|imageHeight=130px|dee_jay_236236mp_lp_mp_hp_lk_mk|caption=}} |
| ---- | | ---- |
| {{MoveDataCargoImage|imageHeight=100px|dee_jay_236236mp_lp_mp_hp_lk_mk_hk|caption=}} | | {{MoveDataCargoImage|imageHeight=130px|dee_jay_236236mp_lp_mp_hp_lk_mk_hk|caption=}} |
| ---- | | ---- |
| {{MoveDataCargoImage|imageHeight=120px|dee_jay_236236mp_lp_mp_hp_lk_mk_hk_hp|caption=HP ender (side switch)}} | | {{MoveDataCargoImage|imageHeight=120px|dee_jay_236236mp_lp_mp_hp_lk_mk_hk_hp|caption=HP ender (side switch)}} |
| Line 1,109: |
Line 1,144: |
| The {{clr|M|MP}} follow-ups allow for higher damage than the {{clr|L|LP}} version if the buttons are pressed in a particular rhythm. The key is to input each follow-up right as the previous one connects with the opponent. The hitstop of each hit is reduced compared to the {{clr|L|LP}} Super, so the full animation will feel a bit faster overall. If you drop the rhythm on any hit, you cannot get the rhythm bonus on any further hits in the sequence. | | The {{clr|M|MP}} follow-ups allow for higher damage than the {{clr|L|LP}} version if the buttons are pressed in a particular rhythm. The key is to input each follow-up right as the previous one connects with the opponent. The hitstop of each hit is reduced compared to the {{clr|L|LP}} Super, so the full animation will feel a bit faster overall. If you drop the rhythm on any hit, you cannot get the rhythm bonus on any further hits in the sequence. |
|
| |
|
| If you managed to get the full rhythm of each hit, you can end with a fully invincible cinematic finisher. {{clr|H|HP}} switches sides, allowing Dee Jay to regain corner control and even gives oki if he was close to the wall. {{clr|H|HK}} keeps Dee Jay on the same side and grants a Hard Knockdown, allowing for a forward dash into great oki. Choosing not to end in the cinematic hit after a full-rhythm connect will significantly reduce the Super's damage; it would actually be better to land a non-rhythm {{clr|H|HK}} at the end. If done perfectly all the way to the end, Dee Jay will do 200 more damage than {{clr|L|LP}} {{clr|10|SA2}}. | | If you managed to get the full rhythm of each hit, you can end with a fully invincible cinematic finisher. {{clr|H|HP}} switches sides, allowing Dee Jay to regain corner control and even gives oki if he was close to the wall. {{clr|H|HK}} keeps Dee Jay on the same side and grants a Hard Knockdown, allowing for a forward dash into great oki. Choosing not to end in the cinematic hit after a full-rhythm connect will significantly reduce the Super's damage; it would actually be better to land a non-rhythm {{clr|H|HK}} at the end. If done perfectly all the way to the end, Dee Jay will do 200 more damage than {{clr|L|LP}} {{clr|SA|SA2}}. |
| }} | | }} |
| |-| | | |-| |
| Line 1,117: |
Line 1,152: |
| | title = Headliner Sunrise Festival | | | title = Headliner Sunrise Festival |
| | subtitle = Level 2 Super Art | | | subtitle = Level 2 Super Art |
| | input = 236236HP | | | input = {{classic_sf6}} 236236HP<br>{{Modern_sf6}} -- |
| | images = | | | images = |
| {{MoveDataCargoImage|imageHeight=100px|dee_jay_236236hp_lp|caption=}} | | {{MoveDataCargoImage|imageHeight=130px|dee_jay_236236hp_lp|caption=}} |
| ---- | | ---- |
| {{MoveDataCargoImage|imageHeight=100px|dee_jay_236236hp_lp_mp|caption=}} | | {{MoveDataCargoImage|imageHeight=130px|dee_jay_236236hp_lp_mp|caption=}} |
| ---- | | ---- |
| {{MoveDataCargoImage|imageHeight=100px|dee_jay_236236hp_lp_mp_hp|caption=}} | | {{MoveDataCargoImage|imageHeight=130px|dee_jay_236236hp_lp_mp_hp|caption=}} |
| ---- | | ---- |
| {{MoveDataCargoImage|imageHeight=100px|dee_jay_236236hp_lp_mp_hp_lk|caption=}} | | {{MoveDataCargoImage|imageHeight=130px|dee_jay_236236hp_lp_mp_hp_lk|caption=}} |
| ---- | | ---- |
| {{MoveDataCargoImage|imageHeight=100px|dee_jay_236236hp_lp_mp_hp_lk_mk|caption=}} | | {{MoveDataCargoImage|imageHeight=130px|dee_jay_236236hp_lp_mp_hp_lk_mk|caption=}} |
| ---- | | ---- |
| {{MoveDataCargoImage|imageHeight=100px|dee_jay_236236hp_lp_mp_hp_lk_mk_hk|caption=}} | | {{MoveDataCargoImage|imageHeight=130px|dee_jay_236236hp_lp_mp_hp_lk_mk_hk|caption=}} |
| ---- | | ---- |
| {{MoveDataCargoImage|imageHeight=120px|dee_jay_236236hp_lp_mp_hp_lk_mk_hk_hp|caption=HP ender (side switch)}} | | {{MoveDataCargoImage|imageHeight=120px|dee_jay_236236hp_lp_mp_hp_lk_mk_hk_hp|caption=HP ender (side switch)}} |
| Line 1,164: |
Line 1,199: |
| * Remains on same side; requires perfect rhythm sequence to activate | | * Remains on same side; requires perfect rhythm sequence to activate |
| <br> | | <br> |
| The {{clr|H|HP}} version is essentially the same as the {{clr|M|MP}} version, but the proper rhythm timing is even harder. Each hit does even less hitstop than the {{clr|M|MP}} version, causing the full animation to move more quickly with less of an impact on each strike. If done perfectly all the way to the end, Dee Jay will do 400 more damage than {{clr|L|LP}} {{clr|10|SA2}}, and 200 more damage than {{clr|M|MP}} {{clr|10|SA2}}. | | The {{clr|H|HP}} version is essentially the same as the {{clr|M|MP}} version, but the proper rhythm timing is even harder. Each hit does even less hitstop than the {{clr|M|MP}} version, causing the full animation to move more quickly with less of an impact on each strike. If done perfectly all the way to the end, Dee Jay will do 400 more damage than {{clr|L|LP}} {{clr|SA|SA2}}, and 200 more damage than {{clr|M|MP}} {{clr|SA|SA2}}. |
| }} | | }} |
| </tabber> | | </tabber> |
| Line 1,172: |
Line 1,207: |
| | title = Weekend Pleasure | | | title = Weekend Pleasure |
| | subtitle = Level 3 Super Art | | | subtitle = Level 3 Super Art |
| | input = 214214P | | | input = {{classic_sf6}} 214214P<br>{{Modern_sf6}} 214214H or 2HS |
| | images = | | | images = |
| {{MoveDataCargoImage|imageHeight=120px|dee_jay_214214p|caption=}} | | {{MoveDataCargoImage|imageHeight=135px|dee_jay_214214p|caption=}} |
| ---- | | ---- |
| {{MoveDataCargoImage|imageHeight=120px|dee_jay_214214p(ca)|caption=CA version grants 500 extra damage}} | | {{MoveDataCargoImage|imageHeight=135px|dee_jay_214214p(ca)|caption=CA version grants 500 extra damage}} |
| | hitboxes = | | | hitboxes = |
| {{MoveDataCargoImage|hitbox=yes|imageHeight=200px|dee_jay_214214p|caption=}} | | {{MoveDataCargoImage|hitbox=yes|imageHeight=200px|dee_jay_214214p|caption=}} |
| Line 1,201: |
Line 1,236: |
| | title = Neutral Taunt | | | title = Neutral Taunt |
| | subtitle = | | | subtitle = |
| | input = 5PPPKKK | | | input = {{classic_sf6}} 5PPPKKK<br>{{Modern_sf6}} 5LMHS+DP+A |
| | images = | | | images = |
| {{MoveDataCargoImage|imageHeight=160px|dee_jay_5pppkkk|caption='' "Come on, let's dance!" ''}} | | {{MoveDataCargoImage|imageHeight=160px|dee_jay_5pppkkk|caption='' "Come on, let's dance!" ''}} |
| Line 1,212: |
Line 1,247: |
| | title = Forward Taunt | | | title = Forward Taunt |
| | subtitle = | | | subtitle = |
| | input = 6PPPKKK | | | input = {{classic_sf6}} 6PPPKKK<br>{{Modern_sf6}} 6LMHS+DP+A |
| | images = | | | images = |
| {{MoveDataCargoImage|imageHeight=140px|dee_jay_6pppkkk|caption='' "Seriously, your rhythm is not cool mon. *whistles*" ''}} | | {{MoveDataCargoImage|imageHeight=140px|dee_jay_6pppkkk|caption='' "Seriously, your rhythm is not cool mon. *whistles*" ''}} |
| Line 1,224: |
Line 1,259: |
| | title = Back Taunt | | | title = Back Taunt |
| | subtitle = | | | subtitle = |
| | input = 4PPPKKK | | | input = {{classic_sf6}} 4PPPKKK<br>{{Modern_sf6}} 4LMHS+DP+A |
| | images = | | | images = |
| {{MoveDataCargoImage|imageHeight=160px|dee_jay_4pppkkk|caption='' "Ey, wah gwan? Ya feelin' down?" ''}} | | {{MoveDataCargoImage|imageHeight=180px|dee_jay_4pppkkk|caption='' "Ey, wah gwan? Ya feelin' down?" ''}} |
| | info = | | | info = |
| {{AttackDataCargo-SF6/Query|dee_jay_4pppkkk}} | | {{AttackDataCargo-SF6/Query|dee_jay_4pppkkk}} |

