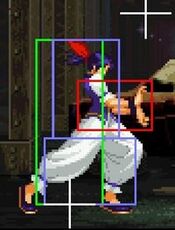
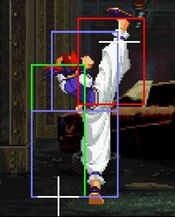
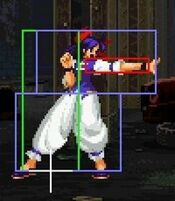
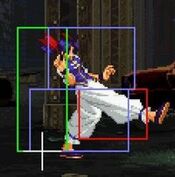
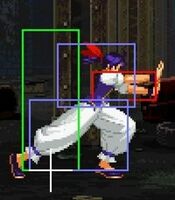
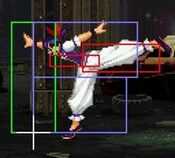
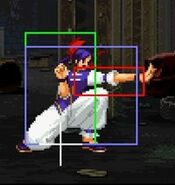
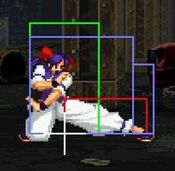
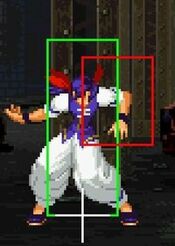
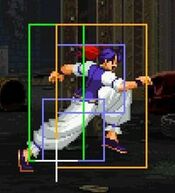
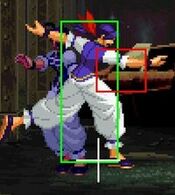
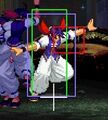
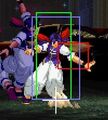
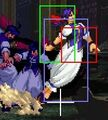
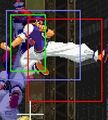
AnotherNoob (talk | contribs) |
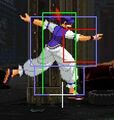
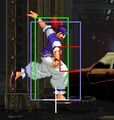
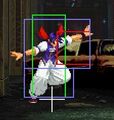
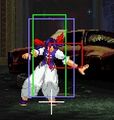
(→Move List: gallery tweaking) |
||
| (32 intermediate revisions by 8 users not shown) | |||
| Line 1: | Line 1: | ||
{{MOTW Character Intro|char=Hotaru |content= | |||
==Introduction== | |||
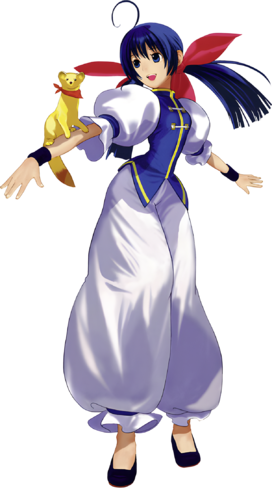
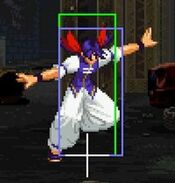
'''Hotaru''' is the daughter of a family of martial artists, but is not very fond of violence. She never wants to hurt others, which is the probable reason why her father taught her the lighter side of Chinese kenpo; the Juu-kei style, which suits her easygoing personality. However, after her mother's death, both her father and her older brother were missing from her home. She enters the "King of Fighters: Maximum Mayhem" tournament based on rumors that her brother is there. | |||
== | == Gameplay == | ||
{{Content Box|content= | |||
'''Hotaru's''' Main objective is something. | |||
{{ProConTable | |||
|pros= | |||
* '''Very good hit & run play''' | |||
* '''Good air-to-air capabilities''' | |||
* '''Good meter build''' | |||
* '''Has an air throw''' | |||
|cons= | |||
* '''Poor damage and conversions off of lows''' | |||
* '''Normals are slightly stubby and have mediocre range''' | |||
* '''Lower defense and guard crush gauge than average''' | |||
}} | |||
}} | |||
}} | |||
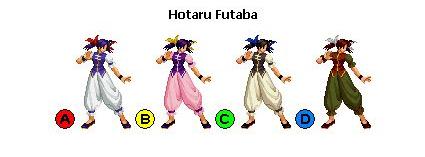
'''Character Colors''' | '''Character Colors''' | ||
| Line 21: | Line 26: | ||
==Move List== | ==Move List== | ||
Frame Data Source: https://w.atwiki.jp/garoumow/pages/23.html and https://w.atwiki.jp/garoumow/pages/78.html | |||
{{MOTW Legend}} | |||
* < | |||
Notes: | |||
* Special/Super moves with <span style="color:#ff0000;">"Guard" data in red text</span> are impossible to just defend at 0-pixel health bar. | |||
===Close Standing Normals=== | ===Close Standing Normals=== | ||
===== <span class="invisible-header"></span> ===== | |||
===== <span class="invisible-header">Close 5A</span> ===== | |||
<font style="visibility:hidden" size="0"></font> | <font style="visibility:hidden" size="0"></font> | ||
{{MoveData | {{MoveData | ||
|image=Hotaru_clA.jpg | |image=Hotaru_clA.jpg | ||
|name= | |name=c.5A | ||
|subtitle= | |subtitle= | ||
|caption= | |caption= | ||
| Line 65: | Line 59: | ||
|Block Adv=+5 | |Block Adv=+5 | ||
|Feint Cancel=◯ | |Feint Cancel=◯ | ||
|Cancel on Hit=◯ | |Cancel on Hit=◯ / ∞ | ||
|Cancel on Block=◯ | |Cancel on Block=◯ / ∞ | ||
|Guard Crush Value=4 | |Guard Crush Value=4 | ||
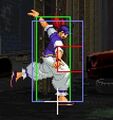
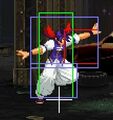
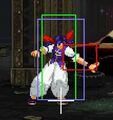
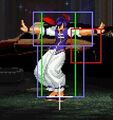
|description=Hotaru's fastest close normal, with good advantage on block. | |description=Hotaru's fastest close normal, with good advantage on block. | ||
| Line 72: | Line 66: | ||
}} | }} | ||
===== <span class="invisible-header"></span> ===== | |||
===== <span class="invisible-header">Close 5B</span> ===== | |||
<font style="visibility:hidden" size="0"></font> | <font style="visibility:hidden" size="0"></font> | ||
{{MoveData | {{MoveData | ||
|image=Hotaru_clB.jpg | |image=Hotaru_clB.jpg | ||
|name= | |name=c.5B | ||
|subtitle= | |subtitle= | ||
|caption= | |caption= | ||
| Line 97: | Line 93: | ||
}} | }} | ||
===== <span class="invisible-header"></span> ===== | |||
===== <span class="invisible-header">Close 5C</span> ===== | |||
<font style="visibility:hidden" size="0"></font> | <font style="visibility:hidden" size="0"></font> | ||
{{MoveData | {{MoveData | ||
|image=Hotaru_clC.jpg | |image=Hotaru_clC.jpg | ||
|name= | |name=c.5C | ||
|subtitle= | |subtitle= | ||
|caption= | |caption= | ||
| Line 122: | Line 120: | ||
}} | }} | ||
===== <span class="invisible-header"></span> ===== | |||
===== <span class="invisible-header">Close 5D</span> ===== | |||
<font style="visibility:hidden" size="0"></font> | <font style="visibility:hidden" size="0"></font> | ||
{{MoveData | {{MoveData | ||
|image=Hotaru_clD.jpg | |image=Hotaru_clD.jpg | ||
|name= | |name=c.5D | ||
|subtitle= | |subtitle= | ||
|caption= | |caption= | ||
| Line 146: | Line 146: | ||
}} | }} | ||
}} | }} | ||
===Far Standing Normals=== | ===Far Standing Normals=== | ||
===== <span class="invisible-header"></span> ===== | |||
===== <span class="invisible-header">Far 5A</span> ===== | |||
<font style="visibility:hidden" size="0"></font> | <font style="visibility:hidden" size="0"></font> | ||
{{MoveData | {{MoveData | ||
|image=Hotaru_sA.jpg | |image=Hotaru_sA.jpg | ||
|name= | |name=f.5A | ||
|subtitle= | |subtitle= | ||
|caption= | |caption= | ||
| Line 166: | Line 169: | ||
|Block Adv=+2 | |Block Adv=+2 | ||
|Feint Cancel=◯ | |Feint Cancel=◯ | ||
|Cancel on Hit=◯ | |Cancel on Hit=◯ / ∞ | ||
|Cancel on Block=◯ | |Cancel on Block=◯ / ∞ | ||
|Guard Crush Value=4 | |Guard Crush Value=4 | ||
|description=Unlike most characters, Hotaru's far A is quite weak, it extends her hurtbox a lot. Prefer far B to poke on the ground. | |description=Unlike most characters, Hotaru's far A is quite weak, it extends her hurtbox a lot. Prefer far B to poke on the ground. | ||
| Line 173: | Line 176: | ||
}} | }} | ||
===== <span class="invisible-header"></span> ===== | |||
===== <span class="invisible-header">Far 5B</span> ===== | |||
<font style="visibility:hidden" size="0"></font> | <font style="visibility:hidden" size="0"></font> | ||
{{MoveData | {{MoveData | ||
|image=Hotaru_sB.jpg | |image=Hotaru_sB.jpg | ||
|name= | |name=f.5B | ||
|subtitle= | |subtitle= | ||
|caption= | |caption= | ||
| Line 194: | Line 199: | ||
|Cancel on Block=◯ | |Cancel on Block=◯ | ||
|Guard Crush Value=4 | |Guard Crush Value=4 | ||
|description=* 3F | |description=* Last 3F of attack's recovery has full-body invincibility. | ||
* Her best ground poke, with decent speed/distance/hitbox. If it whiffs be ready to anti-air. Cancel it into fireball for a frametrap. Or forward feint cancel it to start an offense once they respect the fireball frametrap. | * Her best ground poke, with decent speed/distance/hitbox. If it whiffs be ready to anti-air. Cancel it into fireball for a frametrap. Or forward feint cancel it to start an offense once they respect the fireball frametrap. | ||
}} | }} | ||
}} | }} | ||
===== <span class="invisible-header"></span> ===== | |||
===== <span class="invisible-header">Far 5C</span> ===== | |||
<font style="visibility:hidden" size="0"></font> | <font style="visibility:hidden" size="0"></font> | ||
{{MoveData | {{MoveData | ||
|image=Hotaru_sC.jpg | |image=Hotaru_sC.jpg | ||
|name= | |name=f.5C | ||
|subtitle= | |subtitle= | ||
|caption= | |caption= | ||
| Line 216: | Line 223: | ||
|Hit Adv=+1 | |Hit Adv=+1 | ||
|Block Adv=+1 | |Block Adv=+1 | ||
|Feint Cancel= | |Feint Cancel=△ | ||
|Cancel on Hit=X | |Cancel on Hit=X | ||
|Cancel on Block=◯ | |Cancel on Block=◯ | ||
| Line 224: | Line 231: | ||
}} | }} | ||
===== <span class="invisible-header"></span> ===== | |||
===== <span class="invisible-header">Far 5D</span> ===== | |||
<font style="visibility:hidden" size="0"></font> | <font style="visibility:hidden" size="0"></font> | ||
{{MoveData | {{MoveData | ||
|image=Hotaru_sD.jpg | |image=Hotaru_sD.jpg | ||
|name= | |name=f.5D | ||
|subtitle= | |subtitle= | ||
|caption= | |caption= | ||
| Line 248: | Line 257: | ||
}} | }} | ||
}} | }} | ||
===Crouching Normals=== | ===Crouching Normals=== | ||
===== <span class="invisible-header"></span> ===== | |||
===== <span class="invisible-header">2A</span> ===== | |||
<font style="visibility:hidden" size="0"></font> | <font style="visibility:hidden" size="0"></font> | ||
{{MoveData | {{MoveData | ||
|image=Hotaru_crA.jpg | |image=Hotaru_crA.jpg | ||
|name= | |name=2A | ||
|subtitle= | |subtitle= | ||
|caption= | |caption= | ||
| Line 260: | Line 272: | ||
{{AttackData-Garou | {{AttackData-Garou | ||
|Damage=4 | |Damage=4 | ||
|Guard= | |Guard=Mid | ||
|Startup=4 | |Startup=4 | ||
|Active=4 | |Active=4 | ||
| Line 268: | Line 280: | ||
|Block Adv=+2 | |Block Adv=+2 | ||
|Feint Cancel=◯ | |Feint Cancel=◯ | ||
|Cancel on Hit=◯ | |Cancel on Hit=◯ / ∞ | ||
|Cancel on Block=◯ | |Cancel on Block=◯ / ∞ | ||
|Guard Crush Value=4 | |Guard Crush Value=4 | ||
|description=When used as meaty it prevents jumps as well as low profile attempts with 2AB. | |description=When used as meaty it prevents jumps as well as low profile attempts with 2AB. | ||
| Line 275: | Line 287: | ||
}} | }} | ||
===== <span class="invisible-header"></span> ===== | |||
===== <span class="invisible-header">2B</span> ===== | |||
<font style="visibility:hidden" size="0"></font> | <font style="visibility:hidden" size="0"></font> | ||
{{MoveData | {{MoveData | ||
|image=Hotaru_crB.jpg | |image=Hotaru_crB.jpg | ||
|name= | |name=2B | ||
|subtitle= | |subtitle= | ||
|caption= | |caption= | ||
|data= | |data= | ||
{{AttackData-Garou | {{AttackData-Garou | ||
|Damage= | |Damage=5 | ||
|Guard=Low | |Guard=Low | ||
|Startup=4 | |Startup=4 | ||
| Line 293: | Line 307: | ||
|Block Adv=+2 | |Block Adv=+2 | ||
|Feint Cancel=X | |Feint Cancel=X | ||
|Cancel on Hit=X | |Cancel on Hit=X / ∞ | ||
|Cancel on Block=X | |Cancel on Block=X / ∞ | ||
|Guard Crush Value=4 | |Guard Crush Value=4 | ||
|description=Hotaru is known for having no decent BNB starting with lows. Use this to remind your opponent that he has to block low, even if it doesn't deal much. Follow up with a frametrap for example. It can be combo'ed from if it hits meaty enough, with 2B(meaty)>2A xx reflect break fireball ... Keep in mind that, in MOTW, a meaty 2B can be escaped via wake-up jump. | |description=Hotaru is known for having no decent BNB starting with lows. Use this to remind your opponent that he has to block low, even if it doesn't deal much. Follow up with a frametrap for example. It can be combo'ed from if it hits meaty enough, with 2B(meaty)>2A xx reflect break fireball ... Keep in mind that, in MOTW, a meaty 2B can be escaped via wake-up jump. | ||
| Line 300: | Line 314: | ||
}} | }} | ||
===== <span class="invisible-header"></span> ===== | |||
===== <span class="invisible-header">2C</span> ===== | |||
<font style="visibility:hidden" size="0"></font> | <font style="visibility:hidden" size="0"></font> | ||
{{MoveData | {{MoveData | ||
|image=Hotaru_crC.jpg | |image=Hotaru_crC.jpg | ||
|name= | |name=2C | ||
|subtitle= | |subtitle= | ||
|caption= | |caption= | ||
| Line 310: | Line 326: | ||
{{AttackData-Garou | {{AttackData-Garou | ||
|Damage=9 | |Damage=9 | ||
|Guard= | |Guard=Mid | ||
|Startup=5 | |Startup=5 | ||
|Active=1 | |Active=1 | ||
| Line 327: | Line 343: | ||
}} | }} | ||
===== <span class="invisible-header"></span> ===== | |||
===== <span class="invisible-header">2D</span> ===== | |||
<font style="visibility:hidden" size="0"></font> | <font style="visibility:hidden" size="0"></font> | ||
{{MoveData | {{MoveData | ||
|image=Hotaru_crD.jpg | |image=Hotaru_crD.jpg | ||
|name= | |name=2D | ||
|subtitle= | |subtitle= | ||
|caption= | |caption= | ||
|data= | |data= | ||
{{AttackData-Garou | {{AttackData-Garou | ||
|Damage= | |Damage=9 | ||
|Guard=Low | |Guard=Low | ||
|Startup=7 | |Startup=7 | ||
| Line 351: | Line 369: | ||
}} | }} | ||
}} | }} | ||
===Jumping Normals=== | ===Jumping Normals=== | ||
===== <span class="invisible-header"></span> ===== | |||
===== <span class="invisible-header">jA</span> ===== | |||
<font style="visibility:hidden" size="0"></font> | <font style="visibility:hidden" size="0"></font> | ||
{{MoveData | {{MoveData | ||
|image=Hotaru_jA.jpg | |image=Hotaru_jA.jpg | ||
|name= | |name=j.A | ||
|subtitle= | |subtitle= | ||
|caption= | |caption= | ||
| Line 370: | Line 391: | ||
|Hit Adv= | |Hit Adv= | ||
|Block Adv= | |Block Adv= | ||
|Feint Cancel= | |Feint Cancel= | ||
|Cancel on Hit=◯ | |Cancel on Hit=◯ | ||
|Cancel on Block=◯ | |Cancel on Block=◯ | ||
|Guard Crush Value=4 | |Guard Crush Value=4 | ||
|description=Has long active frames, can target combo with jA>B or jA>C (whiff on crouchers). | |description=Has long active frames, can target combo with jA>B or jA>C (whiff on crouchers). | ||
Can beat out upper-body evasion attacks. | |||
}} | }} | ||
}} | }} | ||
===== <span class="invisible-header"></span> ===== | |||
===== <span class="invisible-header">jB</span> ===== | |||
<font style="visibility:hidden" size="0"></font> | <font style="visibility:hidden" size="0"></font> | ||
{{MoveData | {{MoveData | ||
|image=Hotaru_jB.jpg | |image=Hotaru_jB.jpg | ||
|name= | |name=j.B | ||
|subtitle= | |subtitle= | ||
|caption= | |caption= | ||
| Line 395: | Line 420: | ||
|Hit Adv= | |Hit Adv= | ||
|Block Adv= | |Block Adv= | ||
|Feint Cancel= | |Feint Cancel= | ||
|Cancel on Hit=◯ | |Cancel on Hit=◯ | ||
|Cancel on Block=◯ | |Cancel on Block=◯ | ||
|Guard Crush Value=4 | |Guard Crush Value=4 | ||
|description=Has the best horizontal reach out of all her air moves, however it doesn't stay active for long. | |description=Has the best horizontal reach out of all her air moves, however it doesn't stay active for long. | ||
Hop B has a startup of 5F, and is active for 8F. | |||
}} | }} | ||
}} | }} | ||
===== <span class="invisible-header"></span> ===== | |||
===== <span class="invisible-header">jC</span> ===== | |||
<font style="visibility:hidden" size="0"></font> | <font style="visibility:hidden" size="0"></font> | ||
{{MoveData | {{MoveData | ||
|image=Hotaru_jC.jpg | |image=Hotaru_jC.jpg | ||
|name= | |name=j.C | ||
|subtitle= | |subtitle= | ||
|caption= | |caption= | ||
| Line 420: | Line 449: | ||
|Hit Adv= | |Hit Adv= | ||
|Block Adv= | |Block Adv= | ||
|Feint Cancel= | |Feint Cancel= | ||
|Cancel on Hit=◯ | |Cancel on Hit=◯ | ||
|Cancel on Block=◯ | |Cancel on Block=◯ | ||
|Guard Crush Value=5 | |Guard Crush Value=5 | ||
|description=This is what comes out if you miss your air throw. It whiffs on crouching opponent. | |description=This is what comes out if you miss your air throw. It whiffs on crouching opponent. | ||
Hop C has a startup of 6F, and is active for 6F. | |||
}} | }} | ||
}} | }} | ||
===== <span class="invisible-header"></span> ===== | |||
===== <span class="invisible-header">jD</span> ===== | |||
<font style="visibility:hidden" size="0"></font> | <font style="visibility:hidden" size="0"></font> | ||
{{MoveData | {{MoveData | ||
|image=Hotaru_jD.jpg | |image=Hotaru_jD.jpg | ||
|name= | |name=j.D | ||
|subtitle= | |subtitle= | ||
|caption= | |caption= | ||
| Line 445: | Line 478: | ||
|Hit Adv= | |Hit Adv= | ||
|Block Adv= | |Block Adv= | ||
|Feint Cancel= | |Feint Cancel= | ||
|Cancel on Hit=◯ | |Cancel on Hit=◯ | ||
|Cancel on Block=◯ | |Cancel on Block=◯ | ||
|Guard Crush Value=5 | |Guard Crush Value=5 | ||
|description=When used deep enough, it can hit people trying to 2AB anti-air. | |description=When used deep enough, it can hit people trying to 2AB anti-air. | ||
Can beat out upper-body evasion attacks. | |||
}} | }} | ||
}} | }} | ||
===Command Normals=== | ===Command Normals=== | ||
===== <span class="invisible-header"></span> ===== | |||
===== <span class="invisible-header">Koushuu Da (j2B)</span> ===== | |||
<font style="visibility:hidden" size="0"></font> | |||
{{MoveData | |||
|image=Hotaru_j2B.jpg | |||
|name=Koushuu Da (Needle Kick) | |||
|input=j2B | |||
|subtitle= | |||
|caption= | |||
|data= | |||
{{AttackData-Garou | |||
|Damage=10 | |||
|Guard=High | |||
|Startup=5 | |||
|Active=∞ | |||
|Recovery= | |||
|Total= | |||
|Hit Adv= | |||
|Block Adv= | |||
|Feint Cancel= | |||
|Cancel on Hit=X | |||
|Cancel on Block=X | |||
|Guard Crush Value=9 | |||
|description=Stays active for the full duration of the jump. A very annoying | |||
tool (unsafe but hard to punish). | |||
Can beat out upper-body evasion attacks. | |||
Once Hotaru "step" on her opponent, she jumps again, and she is allowed to | |||
perform another air attack (or spin with CD before attacking). | |||
However she loses the ability to air JD, making her vulnerable to anti-airs. | |||
}} | |||
}} | |||
===== <span class="invisible-header">Kuuchuu Furi Muki (jCD)</span> ===== | |||
<font style="visibility:hidden" size="0"></font> | |||
{{MoveData | |||
|image= | |||
|name=Kuuchuu Furi Muki | |||
|input=jC+D | |||
|subtitle= | |||
|caption= | |||
|data= | |||
{{AttackData-Garou | |||
|Damage= | |||
|Guard= | |||
|Startup= | |||
|Active= | |||
|Recovery= | |||
|Total= | |||
|Hit Adv= | |||
|Block Adv= | |||
|Feint Cancel= | |||
|Cancel on Hit= | |||
|Cancel on Block= | |||
|Guard Crush Value= | |||
|description=The turn-around jump. | |||
}} | |||
}} | |||
===Universal Moves=== | |||
===== <span class="invisible-header">Lower-body Evasion Attack (5AB)</span> ===== | |||
<font style="visibility:hidden" size="0"></font> | <font style="visibility:hidden" size="0"></font> | ||
{{MoveData | {{MoveData | ||
|image=Hotaru_AB.jpg | |image=Hotaru_AB.jpg | ||
|name= | |name=5A+B | ||
|subtitle= | |subtitle=Lower-body evasion attack | ||
|caption= | |caption= | ||
|data= | |data= | ||
| Line 479: | Line 583: | ||
}} | }} | ||
===== <span class="invisible-header"></span> ===== | |||
===== <span class="invisible-header">Upper-body Evasion Attack (2AB)</span> ===== | |||
<font style="visibility:hidden" size="0"></font> | <font style="visibility:hidden" size="0"></font> | ||
{{MoveData | {{MoveData | ||
|image=Hotaru_2AB.jpg | |image=Hotaru_2AB.jpg | ||
|name= | |name=2A+B | ||
|subtitle= | |subtitle=Upper-body evasion attack | ||
|caption= | |caption= | ||
|data= | |data= | ||
| Line 496: | Line 602: | ||
|Hit Adv=-3 | |Hit Adv=-3 | ||
|Block Adv=+3 | |Block Adv=+3 | ||
|Feint Cancel= | |Feint Cancel=▽ | ||
|Cancel on Hit=◯ | |Cancel on Hit=◯ | ||
|Cancel on Block=X | |Cancel on Block=X | ||
|Guard Crush Value=6 | |Guard Crush Value=6 | ||
|description=* | |description=* 1~6F upper-body invincibility. | ||
* Not a very good 2AB, can be used to anti-air people landing not too close in front of you. | * Not a very good 2AB, can be used to anti-air people landing not too close in front of you. | ||
| Line 507: | Line 613: | ||
}} | }} | ||
===== <span class="invisible-header"></span> ===== | |||
===== <span class="invisible-header">T.O.P. Attack (CD)</span> ===== | |||
<font style="visibility:hidden" size="0"></font> | <font style="visibility:hidden" size="0"></font> | ||
{{MoveData | {{MoveData | ||
|image=Hotaru_CD-1.jpg | |image=Hotaru_CD-1.jpg | ||
|name=T.O.P Attack | |name=Senkai En (T.O.P. Attack) | ||
| | |input=C+D (T.O.P. Only) | ||
|subtitle= | |||
|caption= | |caption= | ||
|data= | |data= | ||
{{AttackData-Garou | {{AttackData-Garou | ||
|Damage= | |Damage=16 (base damage) | ||
|Guard=Mid | |Guard=Mid | ||
|Startup=9 | |Startup=9 | ||
|Active= | |Active= | ||
|Recovery= | |Recovery= | ||
|Total= | |Total= | ||
|Hit Adv=KD | |Hit Adv=KD | ||
|Block Adv=-24 | |Block Adv=-24 | ||
|Feint Cancel= | |Feint Cancel= | ||
|Cancel on Hit= | |Cancel on Hit= | ||
|Cancel on Block= | |Cancel on Block= | ||
|Guard Crush Value=25 | |Guard Crush Value=25 | ||
|description=Very unsafe on block, and | |description=Very unsafe on block, and leads into no combos from a guard crush. Can be used in counter hit juggle combos in the corner. | ||
< | <gallery class="mw-collapsible"> | ||
Hotaru_CD-1.jpg| | |||
Hotaru_CD-2.jpg | Hotaru_CD-2.jpg| | ||
</gallery> | |||
}} | }} | ||
}} | }} | ||
===== | ===Throws=== | ||
===== <span class="invisible-header">Ground Throw</span> ===== | |||
===== <span class="invisible-header"></span> ===== | |||
<font style="visibility:hidden" size="0"></font> | <font style="visibility:hidden" size="0"></font> | ||
{{MoveData | {{MoveData | ||
|image=Hotaru_Grab.jpg | |image=Hotaru_Grab.jpg | ||
|name= | |name=Ten Raku Tou | ||
| | |input='''Close''' 4/6C | ||
|subtitle= | |||
|caption= | |caption= | ||
|data= | |data= | ||
| Line 603: | Line 659: | ||
|Damage=14 | |Damage=14 | ||
|Guard= | |Guard= | ||
|Startup= | |Startup=0 | ||
|Active= | |Active= | ||
|Recovery= | |Recovery= | ||
| Line 613: | Line 669: | ||
|Cancel on Block= | |Cancel on Block= | ||
|Guard Crush Value= | |Guard Crush Value= | ||
|description=Hotaru's | |description=Hotaru's normal throw. | ||
* 6C side-switches you, unless the opponent is in the corner. | |||
* 4C lets you stay on the same side, unless you are in the corner and the back throw puts the opponent in the corner. | |||
}} | }} | ||
}} | }} | ||
===== <span class="invisible-header"></span> ===== | |||
===== <span class="invisible-header">Air Throw</span> ===== | |||
<font style="visibility:hidden" size="0"></font> | <font style="visibility:hidden" size="0"></font> | ||
{{MoveData | {{MoveData | ||
|image= | |image= | ||
|name= | |name=Han Ten Tou | ||
|subtitle= | |input='''Air Close''' 2C | ||
|subtitle= | |||
|caption= | |caption= | ||
|data= | |data= | ||
| Line 628: | Line 691: | ||
|Damage=14 | |Damage=14 | ||
|Guard= | |Guard= | ||
|Startup= | |Startup=0 | ||
|Active= | |Active= | ||
|Recovery= | |Recovery= | ||
| Line 642: | Line 705: | ||
}} | }} | ||
=== | ===Feints=== | ||
===== <span class="invisible-header"></span> ===== | |||
===== <span class="invisible-header">Forward Feint (6AC)</span> ===== | |||
<font style="visibility:hidden" size="0"></font> | <font style="visibility:hidden" size="0"></font> | ||
{{MoveData | {{MoveData | ||
|image=Hotaru_ForwardTaunt.jpg | |image=Hotaru_ForwardTaunt.jpg | ||
|name= | |name=6A+C | ||
|subtitle= | |subtitle=Forward Feint | ||
|caption= | |caption= | ||
|data= | |data= | ||
| Line 664: | Line 728: | ||
|Cancel on Block= | |Cancel on Block= | ||
|Guard Crush Value= | |Guard Crush Value= | ||
|description= | |description=Mimics the start of [[#Hakki Shou (236P) | Hakki Shou]]. | ||
}} | }} | ||
}} | }} | ||
===== <span class="invisible-header"></span> ===== | |||
===== <span class="invisible-header">Down Feint (2AC)</span> ===== | |||
<font style="visibility:hidden" size="0"></font> | <font style="visibility:hidden" size="0"></font> | ||
{{MoveData | {{MoveData | ||
|image=Hotaru_DownTaunt.jpg | |image=Hotaru_DownTaunt.jpg | ||
|name= | |name=2A+C | ||
|subtitle= | |subtitle=Down Feint | ||
|caption= | |caption= | ||
|data= | |data= | ||
| Line 689: | Line 755: | ||
|Cancel on Block= | |Cancel on Block= | ||
|Guard Crush Value= | |Guard Crush Value= | ||
|description= | |description=Mimics the start of [[#Soushou Shin (214P) | Soushou Shin]]. | ||
}} | }} | ||
}} | }} | ||
| Line 695: | Line 761: | ||
===Special Moves=== | ===Special Moves=== | ||
===== <span class="invisible-header"></span> ===== | ===== <span class="invisible-header">Hakki Shou (236P)</span> ===== | ||
{{MoveData | {{MoveData | ||
| name = Hakki | | name = Hakki Shou | ||
| input = | | input = 236A/C | ||
| subtitle = | | subtitle = | ||
| image = Hotaru_Projectile.jpg | | image = Hotaru_Projectile.jpg | ||
| Line 706: | Line 772: | ||
{{AttackData-Garou | {{AttackData-Garou | ||
| subtitle = | | subtitle = | ||
| version = | | version = A | ||
| Damage = 14 | | Damage = 14 | ||
| Guard = | | Guard =<span style="color:#ff0000;">Mid</span> | ||
| Startup = 10 | | Startup = 10 | ||
| Active = | | Active = | ||
| Line 720: | Line 786: | ||
| Guard Crush Value = 7 | | Guard Crush Value = 7 | ||
| description = | | description = | ||
}} | }} | ||
{{AttackData-Garou | {{AttackData-Garou | ||
| header = no | | header = no | ||
| version = | | version = C | ||
| subtitle = | | subtitle = | ||
| Damage = 16 | | Damage = 16 | ||
| Guard = | | Guard =<span style="color:#ff0000;">Mid</span> | ||
| Startup = 10 | | Startup = 10 | ||
| Active = | | Active = | ||
| Line 737: | Line 803: | ||
| Cancel on Block = | | Cancel on Block = | ||
| Guard Crush Value = 8 | | Guard Crush Value = 8 | ||
| description = Hotaru has a good fireball game, | | description = Hotaru has a good fireball game, startup and speed helps her compete. | ||
Just don't throw them | Just don't throw them full-screen , that's a free JD. | ||
Remember her forward feint that does the same motion as her fireball startup to mess with people's expectations. | |||
The C version has more damage so use C for combos. | The C version has more damage so use C for combos. | ||
}} | |||
}} | }} | ||
===== <span class="invisible-header">Soushou Shin (214P)</span> ===== | |||
===== <span class="invisible-header"></span> ===== | |||
{{MoveData | {{MoveData | ||
| name = | | name = Soushou Shin | ||
| input = | | input = 214A/C | ||
| subtitle = | | subtitle = | ||
| image = Hotaru_qcbA-1.jpg | | image = Hotaru_qcbA-1.jpg | ||
| caption = | | image2 = Hotaru_qcbC-1.jpg | ||
| caption = A | |||
| caption2 = C | |||
| linkname = | | linkname = | ||
| data = | | data = | ||
{{AttackData-Garou | {{AttackData-Garou | ||
| subtitle = | | subtitle = | ||
| version = | | version = A | ||
| Damage = | | Damage = 3×3, 4, 7 | ||
| Guard = | | Guard =<span style="color:#ff0000;">Mid</span> | ||
| Startup = 10 | | Startup = 10 | ||
| Active = | | Active = | ||
| Line 771: | Line 838: | ||
| Cancel on Hit = | | Cancel on Hit = | ||
| Cancel on Block = | | Cancel on Block = | ||
| Guard Crush Value = | | Guard Crush Value = 1×5 | ||
| description = Unsafe on block. If you combo into this you can probably combo into reflect>fireball for more damage; making this a pretty useless move. | | description = Unsafe on block. If you combo into this you can probably combo into reflect>fireball for more damage; making this a pretty useless move. | ||
<gallery class="mw-collapsible"> | |||
< | Hotaru_qcbA-1.jpg| | ||
Hotaru_qcbA-2.jpg| | |||
Hotaru_qcbA-3.jpg| | |||
Hotaru_qcbA-4.jpg| | |||
Hotaru_qcbA-5.jpg| | |||
</gallery> | |||
}} | |||
}} | |||
{{AttackData-Garou | {{AttackData-Garou | ||
| subtitle = | | subtitle = | ||
| version = | | version = C | ||
| Damage = | | Damage = 5×4, 7 | ||
| Guard = | | Guard = Mid | ||
| Startup = 18 | | Startup = 18 | ||
| Active = | | Active = | ||
| Line 797: | Line 862: | ||
| Cancel on Hit = | | Cancel on Hit = | ||
| Cancel on Block = | | Cancel on Block = | ||
| Guard Crush Value = | | Guard Crush Value = 2×5 | ||
| description = This one is -1 on block, so it is somewhat safe, since only punishable with 0F Supers if you try to block but there is a trick to escape this punish | | description = This one is -1 on block, so it is somewhat safe, since only punishable with 0F Supers if you try to block but there is a trick to escape this punish | ||
[[Garou:_Mark_of_the_Wolves/ | [[Garou:_Mark_of_the_Wolves/System#Ave_Maria | explained here ]] | ||
Being multi-hit, it can prevent random | Being multi-hit, it can prevent random guard cancels on wakeup, but the startup is so slow that good players will react to it with a full JD + GC at the end. | ||
<gallery class="mw-collapsible"> | |||
Hotaru_qcbC-1.jpg| | |||
Hotaru_qcbC-2.jpg| | |||
Hotaru_qcbC-3.jpg| | |||
Hotaru_qcbC-4.jpg| | |||
Hotaru_qcbC-5.jpg| | |||
</gallery> | |||
}} | |||
}} | |||
===== <span class="invisible-header"></span> ===== | ===== <span class="invisible-header">Kobi Kyaku (214K)</span> ===== | ||
{{MoveData | {{MoveData | ||
| name = Kobi | | name = Kobi Kyaku | ||
| input = | | input = 214B/D | ||
| subtitle = Reflect | | subtitle = Reflect | ||
| image = Hotaru_qcbB-1.jpg | | image = Hotaru_qcbB-1.jpg | ||
| Line 826: | Line 889: | ||
| linkname = | | linkname = | ||
| data = | | data = | ||
<gallery class="mw-collapsible"> | |||
Hotaru_qcbB-1.jpg| | |||
Hotaru_qcbB-2.jpg| | |||
</gallery> | |||
{{AttackData-Garou | {{AttackData-Garou | ||
| subtitle = | | subtitle = | ||
| version = | | version =B | ||
| Damage = 15 | | Damage = 15 | ||
| Guard = | | Guard = Mid | ||
| Startup = 13 | | Startup = 13 | ||
| Active = | | Active = | ||
| Line 840: | Line 907: | ||
| Cancel on Hit = | | Cancel on Hit = | ||
| Cancel on Block = | | Cancel on Block = | ||
| Guard Crush Value = | | Guard Crush Value = 7 | ||
| description = | | description = | ||
}} | }} | ||
{{AttackData-Garou | {{AttackData-Garou | ||
| header = no | | header = no | ||
| subtitle = | | subtitle = | ||
| version = | | version =B Break | ||
| Damage = 15 | | Damage = 15 | ||
| Guard = | | Guard = Mid | ||
| Startup = 13 | | Startup = 13 | ||
| Active = | | Active = | ||
| Line 855: | Line 921: | ||
| Total = | | Total = | ||
| Hit Adv =KD | | Hit Adv =KD | ||
| Block Adv =12 | | Block Adv =+12 | ||
| Feint Cancel = | | Feint Cancel = | ||
| Cancel on Hit = | | Cancel on Hit = | ||
| Cancel on Block = | | Cancel on Block = | ||
| Guard Crush Value = | | Guard Crush Value = 7 | ||
| description = Hotaru's breakable move (always break it). Use the B version whenever you are doing a combo or need the hitbox, because the B version has a greater hitbox. | | description = Hotaru's breakable move (always break it). Use the B version whenever you are doing a combo or need the hitbox, because the B version has a greater hitbox. | ||
It gives a huge +12 frame advantage on block, allowing to reapply pressure after a blocked reflect. | It gives a huge +12 frame advantage on block, allowing to reapply pressure after a blocked reflect. | ||
8~13F projectile reflection. | |||
}} | |||
{{AttackData-Garou | |||
| subtitle = | | subtitle = | ||
| version = | | version = D | ||
| Damage = 15 | | Damage = 15 | ||
| Guard = | | Guard = Mid | ||
| Startup = 13 | | Startup = 13 | ||
| Active = | | Active = | ||
| Line 897: | Line 946: | ||
| Cancel on Hit = | | Cancel on Hit = | ||
| Cancel on Block = | | Cancel on Block = | ||
| Guard Crush Value = | | Guard Crush Value = 8 | ||
| description = | | description = | ||
}} | }} | ||
{{AttackData-Garou | {{AttackData-Garou | ||
| header = no | | header = no | ||
| subtitle = | | subtitle = | ||
| version = | | version = D Break | ||
| Damage = 15 | | Damage = 15 | ||
| Guard = | | Guard = Mid | ||
| Startup = 13 | | Startup = 13 | ||
| Active = | | Active = | ||
| Line 912: | Line 960: | ||
| Total = | | Total = | ||
| Hit Adv =KD | | Hit Adv =KD | ||
| Block Adv =12 | | Block Adv =+12 | ||
| Feint Cancel = | | Feint Cancel = | ||
| Cancel on Hit = | | Cancel on Hit = | ||
| Cancel on Block = | | Cancel on Block = | ||
| Guard Crush Value = | | Guard Crush Value = 8 | ||
| description = This D version is used to reflect fireballs; it has a shorter hitbox, but a greater reflect box. Great meter building tool, use the D version as it gives slightly more meter than the B version. | | description = This D version is used to reflect fireballs; it has a shorter hitbox, but a greater reflect box. Great meter building tool, use the D version as it gives slightly more meter than the B version. | ||
There is a bug with the reflected fireball, if you input a fireball motion it will lose its hurtbox and goes through the opponent (not a very useful bug). | There is a bug with the reflected fireball, if you input a fireball motion it will lose its hurtbox and goes through the opponent (not a very useful bug). | ||
}} | |||
8~17F projectile reflection. | |||
}} | |||
}} | }} | ||
===== <span class="invisible-header">Rengeki Shuu (j214K)</span> ===== | |||
===== <span class="invisible-header"></span> ===== | <font style="visibility:hidden" size="1"></font> | ||
<font style="visibility:hidden" size=" | |||
{{MoveData | {{MoveData | ||
| name = Rengeki | | name = Rengeki Shuu | ||
| input = | | input = j214B/D | ||
| subtitle = Divekick | | subtitle = Divekick | ||
| image = Hotaru_AirTatsu.jpg | | image = Hotaru_AirTatsu.jpg | ||
| Line 936: | Line 985: | ||
{{AttackData-Garou | {{AttackData-Garou | ||
| subtitle = | | subtitle = | ||
| version = | | version = B | ||
| Damage = | | Damage = 8, 8 | ||
| Guard = | | Guard = <span style="color:#ff0000;">Mid</span> | ||
| Startup = 10 | | Startup = 10 | ||
| Active = | | Active = | ||
| Recovery = | | Recovery = | ||
| Total = | | Total = | ||
| Hit Adv =KD | | Hit Adv = KD | ||
| Block Adv =>=-8 | | Block Adv = >=-8 | ||
| Feint Cancel = | | Feint Cancel = | ||
| Cancel on Hit = | | Cancel on Hit = | ||
| Cancel on Block = | | Cancel on Block = | ||
| Guard Crush Value = | | Guard Crush Value = 3, 4 | ||
| description = | | description = | ||
}} | }} | ||
{{AttackData-Garou | {{AttackData-Garou | ||
| subtitle = | | subtitle = | ||
| header = no | | header = no | ||
| version = | | version = D | ||
| Damage = | | Damage = 8, 8 | ||
| Guard = | | Guard = <span style="color:#ff0000;">Mid</span> | ||
| Startup = 13 | | Startup = 13 | ||
| Active = | | Active = | ||
| Recovery = | | Recovery = | ||
| Total = | | Total = | ||
| Hit Adv =KD | | Hit Adv = KD | ||
| Block Adv =>=-9 | | Block Adv = >=-9 | ||
| Feint Cancel = | | Feint Cancel = | ||
| Cancel on Hit = | | Cancel on Hit = | ||
| Cancel on Block = | | Cancel on Block = | ||
| Guard Crush Value = | | Guard Crush Value = 4, 4 | ||
| description =Almost always unsafe on block... | | description =Almost always unsafe on block... | ||
| Line 973: | Line 1,022: | ||
Used in optimised corner combos, after reflect break. | Used in optimised corner combos, after reflect break. | ||
You can use the | You can use the Tiger Knee motion 2147B to perform a divekick low to the ground. | ||
}} | |||
}} | |||
}} | }} | ||
===== <span class="invisible-header">Tenshin Shou (623K)</span> ===== | |||
<font style="visibility:hidden" size="0"></font> | |||
===== <span class="invisible-header"></span> ===== | |||
{{MoveData | {{MoveData | ||
| | |image = Hotaru_DP-B-1.jpg | ||
|image2 = Hotaru_DP-D-1.jpg | |||
| | |caption = B | ||
|caption2 = D | |||
| caption = | |name = Tenshin Shou | ||
| | |subtitle = DP | ||
| data | |input = 623B/D | ||
|data= | |||
{{AttackData-Garou | |||
| version = B | |||
| Damage = 8, 6 | |||
| Guard = <span style="color:#ff0000;">Mid</span> | |||
| Startup = 2 | |||
| Active = | |||
| Recovery = | |||
| Total = | |||
| Hit Adv = KD | |||
| Block Adv = -12 | |||
| Feint Cancel = | |||
| Cancel on Hit = | |||
| Cancel on Block = | |||
| Guard Crush Value = 2, 2 | |||
| description = Can be used as an anti-air but is risky against a full air Just Defend. | |||
A much safer but harder version of this anti-air would be a 623 4 B/D motion, timed so that if they hit you will JD and guard cancel with your DP, but if they try to air JD, your DP will hits them at an height low enough where the JD won't proc. | A much safer but harder version of this anti-air would be a 623 4 B/D motion, timed so that if they hit you will JD and guard cancel with your DP, but if they try to air JD, your DP will hits them at an height low enough where the JD won't proc. | ||
1~4F full-body invincibility, so it can be used as a risky "get off me" tool. | |||
< | <gallery class="mw-collapsible"> | ||
Hotaru_DP-B-1.jpg| | |||
Hotaru_DP-B-2.jpg| | |||
Hotaru_DP-B-3.jpg| | |||
</gallery> | |||
}} | |||
{{AttackData-Garou | |||
| version =D | |||
| Damage = 12, 3×5 | |||
| Guard = Mid | |||
| Startup = 2 | |||
| Active = | |||
| Recovery = | |||
| Total = | |||
| Hit Adv =KD | |||
| Block Adv =-31 | |||
| Feint Cancel = | |||
| Cancel on Hit = | |||
| Cancel on Block = | |||
| Guard Crush Value = 3×5, 2 | |||
| description = Similar to DP B with more hits and a better anti-air hitbox. | |||
}} | 1~4F full-body invincibility, so it can be used as a risky "get off me" tool. | ||
<gallery class="mw-collapsible"> | |||
Hotaru_DP-D-1.jpg| | |||
Hotaru_DP-D-2.jpg| | |||
Hotaru_DP-D-3.jpg| | |||
Hotaru_DP-D-4.jpg| | |||
</gallery> | |||
}} | |||
}} | }} | ||
===== <span class="invisible-header"> | ===== <span class="invisible-header">Shajou Tai (41236D)</span> ===== | ||
<font style="visibility:hidden" size="0"></font> | <font style="visibility:hidden" size="0"></font> | ||
{{MoveData | {{MoveData | ||
| name = | | name = Shajou Tai | ||
| input = | | input = 41236D | ||
| subtitle = | | subtitle = Command Grab | ||
| image = Hotaru_CommandGrab.jpg | | image = Hotaru_CommandGrab.jpg | ||
| linkname = | | linkname = | ||
| data = | | data = | ||
{{AttackData-Garou | {{AttackData-Garou | ||
| subtitle = | | subtitle = | ||
| Damage = | | Damage = 8, 8, 8 | ||
| Guard = | | Guard = | ||
| Startup = 9 | | Startup = 9 | ||
| Line 1,085: | Line 1,119: | ||
===Super Moves=== | ===Super Moves=== | ||
===== <span class="invisible-header"></span> ===== | |||
===== <span class="invisible-header">Soushou Tenrenge (236236P)</span> ===== | |||
<font style="visibility:hidden" size="0"></font> | <font style="visibility:hidden" size="0"></font> | ||
{{MoveData | {{MoveData | ||
|image = | |image = Hotaru_Super2-1.jpg | ||
|name = | |name = Soushou Tenrenge | ||
|input = | |input = 236236A/C | ||
|caption= | |caption= | ||
|data= | |data= | ||
{{AttackData-Garou | {{AttackData-Garou | ||
|version = | |version = A | ||
|Damage= | |Damage=3×16, 7 | ||
|Guard= | |Guard=Mid | ||
|Startup= | |Startup=6 | ||
|Active= | |Active= | ||
|Recovery= | |Recovery= | ||
|Total= | |Total= | ||
|Hit Adv=KD | |Hit Adv=KD | ||
|Block Adv=- | |Block Adv=-51 | ||
|Feint Cancel= | |Feint Cancel= | ||
|Cancel on Hit= | |Cancel on Hit= | ||
|Cancel on Block= | |Cancel on Block= | ||
|Guard Crush Value= | |Guard Crush Value=1×17 | ||
|description= | |description=Last hit is in the air. | ||
1~8F full-body invincibility. | |||
<gallery class="mw-collapsible"> | |||
Hotaru_Super2-1.jpg| | |||
Hotaru_Super2-2.jpg| | |||
Hotaru_Super2-3.jpg| | |||
Hotaru_Super2-4.jpg| | |||
Hotaru_Super2-5.jpg| | |||
Hotaru_Super2-6.jpg| | |||
</gallery> | |||
}} | }} | ||
{{AttackData-Garou | {{AttackData-Garou | ||
| header = no | | header = no | ||
|version = | |version = C | ||
|Damage= | |Damage=3×8, 5×7, 20 | ||
|Guard= | |Guard=Mid (Last hit is High) | ||
|Startup= | |Startup=6 | ||
|Active= | |Active= | ||
|Recovery= | |Recovery= | ||
|Total= | |Total= | ||
|Hit Adv=KD | |Hit Adv=KD | ||
|Block Adv=- | |Block Adv=-14 | ||
|Feint Cancel= | |Feint Cancel= | ||
|Cancel on Hit= | |Cancel on Hit= | ||
|Cancel on Block= | |Cancel on Block= | ||
|Guard Crush Value= | |Guard Crush Value=2×15, 5 | ||
|description= | |description=1~10F full-body invincibility. | ||
<gallery class="mw-collapsible"> | |||
< | Hotaru_Super2-1.jpg| | ||
Hotaru_Super2-2.jpg| | |||
Hotaru_Super2-3.jpg| | |||
Hotaru_Super2-4.jpg| | |||
Hotaru_Super2-5.jpg| | |||
Hotaru_Super2-7.jpg| | |||
</gallery> | |||
}} | }} | ||
}} | }} | ||
| Line 1,164: | Line 1,185: | ||
===== <span class="invisible-header"></span> ===== | ===== <span class="invisible-header">Tenshou Ranki (236236K)</span> ===== | ||
<font style="visibility:hidden" size="0"></font> | <font style="visibility:hidden" size="0"></font> | ||
{{MoveData | {{MoveData | ||
|image = | |image = Hotaru_Super1-2.jpg | ||
|name = | |name = Tenshou Ranki | ||
|input = | |input = 236236B/D | ||
|caption= | |caption= | ||
|data= | |data= | ||
<gallery class="mw-collapsible"> | |||
Hotaru_Super1-2.jpg| | |||
Hotaru_Super1-3.jpg| | |||
Hotaru_Super1-4.jpg| | |||
Hotaru_Super1-5.jpg| | |||
Hotaru_Super1-6.jpg| | |||
</gallery> | |||
{{AttackData-Garou | {{AttackData-Garou | ||
|version = | |version =B | ||
|Damage= | |Damage= 6×3, 25 | ||
|Guard= | |Guard= Mid | ||
|Startup= | |Startup= 0 | ||
|Active= | |Active= | ||
|Recovery= | |Recovery= | ||
|Total= | |Total= | ||
|Hit Adv=KD | |Hit Adv= KD | ||
|Block Adv=- | |Block Adv= -33 | ||
|Feint Cancel= | |Feint Cancel= | ||
|Cancel on Hit= | |Cancel on Hit= | ||
|Cancel on Block= | |Cancel on Block= | ||
|Guard Crush Value= | |Guard Crush Value= 3×3, 0 | ||
|description= | |description=1~2F full-body invincibility. | ||
}} | }} | ||
{{AttackData-Garou | {{AttackData-Garou | ||
| header = no | | header = no | ||
|version = | |version = D | ||
|Damage= | |Damage=6×3, 3×8, 27 | ||
|Guard= | |Guard=Mid | ||
|Startup= | |Startup=0 | ||
|Active= | |Active= | ||
|Recovery= | |Recovery= | ||
|Total= | |Total= | ||
|Hit Adv=KD | |Hit Adv=KD | ||
|Block Adv=- | |Block Adv=-32 | ||
|Feint Cancel= | |Feint Cancel= | ||
|Cancel on Hit= | |Cancel on Hit= | ||
|Cancel on Block= | |Cancel on Block= | ||
|Guard Crush Value= | |Guard Crush Value=5×4 | ||
|description= | |description=1F full-body invincibility. | ||
}} | }} | ||
}} | }} | ||
{{Navbox-MOTW}} | {{Navbox-MOTW}} | ||
[[Category:Garou: Mark of the Wolves]] | [[Category:Garou: Mark of the Wolves]] | ||
[[Category:Hotaru Futaba]] | [[Category:Hotaru Futaba]] | ||
Latest revision as of 05:45, 14 February 2025
Introduction
Hotaru is the daughter of a family of martial artists, but is not very fond of violence. She never wants to hurt others, which is the probable reason why her father taught her the lighter side of Chinese kenpo; the Juu-kei style, which suits her easygoing personality. However, after her mother's death, both her father and her older brother were missing from her home. She enters the "King of Fighters: Maximum Mayhem" tournament based on rumors that her brother is there.
Gameplay
Hotaru's Main objective is something.
| Strengths | Weaknesses |
|---|---|
|
|
Character Colors
Move List
Frame Data Source: https://w.atwiki.jp/garoumow/pages/23.html and https://w.atwiki.jp/garoumow/pages/78.html
| Data Help | |
|---|---|
| Disclaimer: This is meant to teach basic terminology used when describing moves. | |
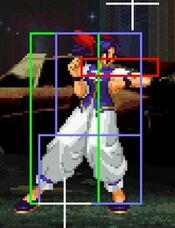
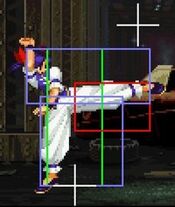
| Hitbox: | A predefined area (usually a rectangle or rectangles) that tells the game how any given attack can come in contact with a character. Hitboxes are invisible to the player when normally playing. |
| Hurtbox: | A predefined area (usually a group of rectangles) that tell the game how your character is allowed to get hit by any incoming attack. Specifically, you'll get hit by (or block) an attack if that attack's hitbox ever overlaps your hurtbox. |
| Throw Box/Range: | Active throw frames and range. Your opponent will be thrown in this field if not in block or hit stun. |
| Projectile Box: | Hitbox on a projectile attack. |
| Guard/Counter Box: | The Guard Box or Counter Box. This appears when blocking or using a counter move. |
| Push Box: | Has no bearing on hit/hurt boxes. Just prevents characters to not pass through each other. (Also known as "Collision Box".) |
| Startup | The number of frames before an attack can hit the opponent. Does not include the first active frame. |
| Guard | The way this move must be blocked.
High or H or Overhead (especially when from the ground) -- must be blocked standing. |
| Damage | "Basic" damage -- Unmodified damage values
"Correct" damage -- Damage values accounting for damage scaling, TOP multiplier, and defense rate |
| Guard Crush Value | Decreases the defender's guard durability gauge by this value. |
| +X | Attacker has X number of advantage frames. |
| -X | Attacker has X number of disadvantage frames. |
| KD | Short for "knockdown", knocks down opponent on hit. |
| ◯ | Cancelable on both hit and block. |
| ∞ | Chain cancelable with the same button (renda cancel). |
| ※ | Cancelable on the first hit/part only. |
| 《X》OR «X» OR <<X>> OR (X) | X number of inactive frames between hits of multihit moves. |
| △ | Only cancelable on block. |
| ▽ | Only cancelable on hit. |
| × OR X | Not cancelable. |
Notes:
- Special/Super moves with "Guard" data in red text are impossible to just defend at 0-pixel health bar.
Close Standing Normals
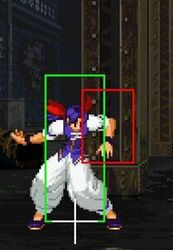
Close 5A
| Damage | Guard | Startup | Active | Recovery | Total |
|---|---|---|---|---|---|
| 4 | Mid | 3 | 3 | 7 | 13 |
| Hit Adv | Block Adv | Cancel on Hit | Cancel on Block | Guard Crush Value | |
| +5 | +5 | ◯ / ∞ | ◯ / ∞ | 4 | |
|
Hotaru's fastest close normal, with good advantage on block. | |||||
Close 5B
| Damage | Guard | Startup | Active | Recovery | Total |
|---|---|---|---|---|---|
| 6 | Mid | 4 | 3 | 11 | 18 |
| Hit Adv | Block Adv | Cancel on Hit | Cancel on Block | Guard Crush Value | |
| +1 | +1 | ◯ | ◯ | 4 |
Close 5C
| Damage | Guard | Startup | Active | Recovery | Total |
|---|---|---|---|---|---|
| 9 | Mid | 7 | 1 | 21 | 29 |
| Hit Adv | Block Adv | Cancel on Hit | Cancel on Block | Guard Crush Value | |
| -1 | -1 | ◯ | ◯ | 5 | |
|
In case the Throw fails, a 'cl. C' will come out instead. On hit/guard it can combo (via Cancel). However clC doesn't have vertical hitbox, a neutral jump to escape the tick throw will leave Hotaru vulnerable. | |||||
Close 5D
| Damage | Guard | Startup | Active | Recovery | Total |
|---|---|---|---|---|---|
| 9 | Mid | 6 | 1 | 28 | 35 |
| Hit Adv | Block Adv | Cancel on Hit | Cancel on Block | Guard Crush Value | |
| -8 | -8 | ◯ | ◯ | 5 | |
|
Hotaru's close D has a decent vertical hitbox, used as a frametrap it can prevent people from jumping out. Feint cancel it to avoid punishes. | |||||
Far Standing Normals
Far 5A
| Damage | Guard | Startup | Active | Recovery | Total |
|---|---|---|---|---|---|
| 4 | Mid | 5 | 3 | 10 | 18 |
| Hit Adv | Block Adv | Cancel on Hit | Cancel on Block | Guard Crush Value | |
| +2 | +2 | ◯ / ∞ | ◯ / ∞ | 4 | |
|
Unlike most characters, Hotaru's far A is quite weak, it extends her hurtbox a lot. Prefer far B to poke on the ground. | |||||
Far 5B
| Damage | Guard | Startup | Active | Recovery | Total |
|---|---|---|---|---|---|
| 7 | Mid | 6 | 2 | 11 | 19 |
| Hit Adv | Block Adv | Cancel on Hit | Cancel on Block | Guard Crush Value | |
| +2 | +2 | ◯ | ◯ | 4 | |
| |||||
Far 5C
| Damage | Guard | Startup | Active | Recovery | Total |
|---|---|---|---|---|---|
| 12 | Mid | 9 | 1 | 19 | 29 |
| Hit Adv | Block Adv | Cancel on Hit | Cancel on Block | Guard Crush Value | |
| +1 | +1 | X | ◯ | 5 |
Far 5D
| Damage | Guard | Startup | Active | Recovery | Total |
|---|---|---|---|---|---|
| 13 | Mid | 11 | 1 | 22 | 34 |
| Hit Adv | Block Adv | Cancel on Hit | Cancel on Block | Guard Crush Value | |
| -2 | -2 | X | X | 5 | |
|
Hotaru's far D is too slow to be used efficiently in the neutral game. Since it has a good range, it can be used as a frametrap, for example with 2C xx 6AC(feint) > far D; but the risk/reward is not really worth it. | |||||
Crouching Normals
2A
| Damage | Guard | Startup | Active | Recovery | Total |
|---|---|---|---|---|---|
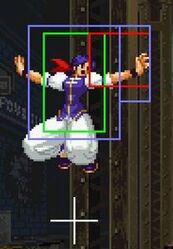
| 4 | Mid | 4 | 4 | 9 | 17 |
| Hit Adv | Block Adv | Cancel on Hit | Cancel on Block | Guard Crush Value | |
| +2 | +2 | ◯ / ∞ | ◯ / ∞ | 4 | |
|
When used as meaty it prevents jumps as well as low profile attempts with 2AB. | |||||
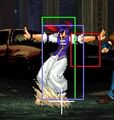
2B
| Damage | Guard | Startup | Active | Recovery | Total |
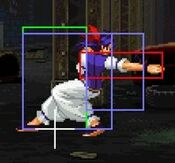
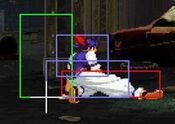
|---|---|---|---|---|---|
| 5 | Low | 4 | 4 | 9 | 17 |
| Hit Adv | Block Adv | Cancel on Hit | Cancel on Block | Guard Crush Value | |
| +2 | +2 | X / ∞ | X / ∞ | 4 | |
|
Hotaru is known for having no decent BNB starting with lows. Use this to remind your opponent that he has to block low, even if it doesn't deal much. Follow up with a frametrap for example. It can be combo'ed from if it hits meaty enough, with 2B(meaty)>2A xx reflect break fireball ... Keep in mind that, in MOTW, a meaty 2B can be escaped via wake-up jump. | |||||
2C
| Damage | Guard | Startup | Active | Recovery | Total |
|---|---|---|---|---|---|
| 9 | Mid | 5 | 1 | 25 | 31 |
| Hit Adv | Block Adv | Cancel on Hit | Cancel on Block | Guard Crush Value | |
| -5 | -5 | ◯ | ◯ | 5 | |
|
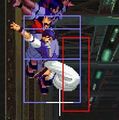
Amazing startup and range, allowing certain punishes from ranges other characters have trouble with. far B xx 6AC > 2C is a frametrap that prevents jumping. | |||||
2D
| Damage | Guard | Startup | Active | Recovery | Total |
|---|---|---|---|---|---|
| 9 | Low | 7 | 3 | 32 | 42 |
| Hit Adv | Block Adv | Cancel on Hit | Cancel on Block | Guard Crush Value | |
| KD | -14 | X | X | 5 |
Jumping Normals
jA
| Damage | Guard | Startup | Active | Recovery | Total |
|---|---|---|---|---|---|
| 6 | High | 4 | 8 | - | - |
| Hit Adv | Block Adv | Cancel on Hit | Cancel on Block | Guard Crush Value | |
| - | - | ◯ | ◯ | 4 | |
|
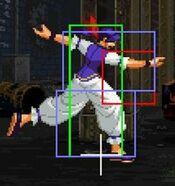
Has long active frames, can target combo with jA>B or jA>C (whiff on crouchers). Can beat out upper-body evasion attacks. | |||||
jB
| Damage | Guard | Startup | Active | Recovery | Total |
|---|---|---|---|---|---|
| 6 | High | 3 | 5 | - | - |
| Hit Adv | Block Adv | Cancel on Hit | Cancel on Block | Guard Crush Value | |
| - | - | ◯ | ◯ | 4 | |
|
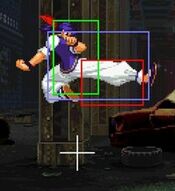
Has the best horizontal reach out of all her air moves, however it doesn't stay active for long. Hop B has a startup of 5F, and is active for 8F. | |||||
jC
| Damage | Guard | Startup | Active | Recovery | Total |
|---|---|---|---|---|---|
| 9 | High | 4 | 4 | - | - |
| Hit Adv | Block Adv | Cancel on Hit | Cancel on Block | Guard Crush Value | |
| - | - | ◯ | ◯ | 5 | |
|
This is what comes out if you miss your air throw. It whiffs on crouching opponent. Hop C has a startup of 6F, and is active for 6F. | |||||
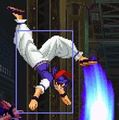
jD
| Damage | Guard | Startup | Active | Recovery | Total |
|---|---|---|---|---|---|
| 8 | High | 5 | 6 | - | - |
| Hit Adv | Block Adv | Cancel on Hit | Cancel on Block | Guard Crush Value | |
| - | - | ◯ | ◯ | 5 | |
|
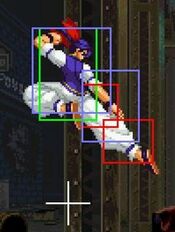
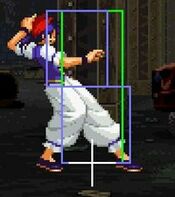
When used deep enough, it can hit people trying to 2AB anti-air. Can beat out upper-body evasion attacks. | |||||
Command Normals
Koushuu Da (j2B)
| Damage | Guard | Startup | Active | Recovery | Total |
|---|---|---|---|---|---|
| 10 | High | 5 | ∞ | - | - |
| Hit Adv | Block Adv | Cancel on Hit | Cancel on Block | Guard Crush Value | |
| - | - | X | X | 9 | |
|
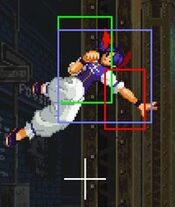
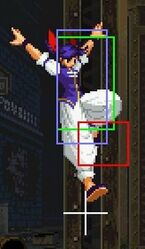
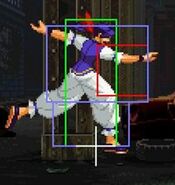
Stays active for the full duration of the jump. A very annoying tool (unsafe but hard to punish). Can beat out upper-body evasion attacks. Once Hotaru "step" on her opponent, she jumps again, and she is allowed to perform another air attack (or spin with CD before attacking). However she loses the ability to air JD, making her vulnerable to anti-airs. | |||||
Kuuchuu Furi Muki (jCD)
| Damage | Guard | Startup | Active | Recovery | Total |
|---|---|---|---|---|---|
| - | - | - | - | - | - |
| Hit Adv | Block Adv | Cancel on Hit | Cancel on Block | Guard Crush Value | |
| - | - | - | - | - | |
|
The turn-around jump. | |||||
Universal Moves
Lower-body Evasion Attack (5AB)
| Damage | Guard | Startup | Active | Recovery | Total |
|---|---|---|---|---|---|
| 10 | Overhead | 23 | 4 | 16 | 43 |
| Hit Adv | Block Adv | Cancel on Hit | Cancel on Block | Guard Crush Value | |
| -1 | +5 | X | X | 6 | |
|
Like about any other AB, way too slow to be efficient. It is +5 on guard so you can blockstring or frametrap for it. | |||||
Upper-body Evasion Attack (2AB)
| Damage | Guard | Startup | Active | Recovery | Total |
|---|---|---|---|---|---|
| 10 | Mid | 8 | 3 | 19 | 30 |
| Hit Adv | Block Adv | Cancel on Hit | Cancel on Block | Guard Crush Value | |
| -3 | +3 | ◯ | X | 6 | |
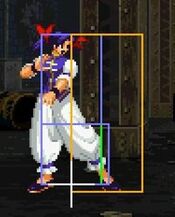
Can be used to low profile frametraps, or as a frametrap to fish for counterhits since it is positive on guard and cancellable on hit. | |||||
T.O.P. Attack (CD)
Throws
Ground Throw
| Damage | Guard | Startup | Active | Recovery | Total |
|---|---|---|---|---|---|
| 14 | - | 0 | - | - | 9 |
| Hit Adv | Block Adv | Cancel on Hit | Cancel on Block | Guard Crush Value | |
| - | - | - | - | - | |
|
Hotaru's normal throw.
| |||||
Air Throw
| Damage | Guard | Startup | Active | Recovery | Total |
|---|---|---|---|---|---|
| 14 | - | 0 | - | - | - |
| Hit Adv | Block Adv | Cancel on Hit | Cancel on Block | Guard Crush Value | |
| - | - | - | - | - | |
|
Hotaru's air throw. | |||||
Feints
Forward Feint (6AC)
| Damage | Guard | Startup | Active | Recovery | Total |
|---|---|---|---|---|---|
| - | - | - | - | - | 10 |
| Hit Adv | Block Adv | Cancel on Hit | Cancel on Block | Guard Crush Value | |
| - | - | - | - | - | |
|
Mimics the start of Hakki Shou. | |||||
Down Feint (2AC)
| Damage | Guard | Startup | Active | Recovery | Total |
|---|---|---|---|---|---|
| - | - | - | - | - | 14 |
| Hit Adv | Block Adv | Cancel on Hit | Cancel on Block | Guard Crush Value | |
| - | - | - | - | - | |
|
Mimics the start of Soushou Shin. | |||||
Special Moves
Hakki Shou (236P)
| A | Damage | Guard | Startup | Active | Recovery | Total |
|---|---|---|---|---|---|---|
| 14 | Mid | 10 | - | - | - | |
| Hit Adv | Block Adv | Cancel on Hit | Cancel on Block | Guard Crush Value | ||
| -5 | -5 | - | - | 7 | ||
| C | Damage | Guard | Startup | Active | Recovery | Total |
| 16 | Mid | 10 | - | - | - | |
| Hit Adv | Block Adv | Cancel on Hit | Cancel on Block | Guard Crush Value | ||
| -5 | -5 | - | - | 8 | ||
|
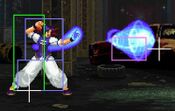
Hotaru has a good fireball game, startup and speed helps her compete. Just don't throw them full-screen , that's a free JD. Remember her forward feint that does the same motion as her fireball startup to mess with people's expectations. The C version has more damage so use C for combos. | ||||||
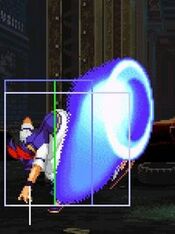
Soushou Shin (214P)
| A | Damage | Guard | Startup | Active | Recovery | Total |
|---|---|---|---|---|---|---|
| 3×3, 4, 7 | Mid | 10 | - | - | - | |
| Hit Adv | Block Adv | Cancel on Hit | Cancel on Block | Guard Crush Value | ||
| KD | -11 | - | - | 1×5 | ||
|
Unsafe on block. If you combo into this you can probably combo into reflect>fireball for more damage; making this a pretty useless move. | ||||||
| C | Damage | Guard | Startup | Active | Recovery | Total |
| 5×4, 7 | Mid | 18 | - | - | - | |
| Hit Adv | Block Adv | Cancel on Hit | Cancel on Block | Guard Crush Value | ||
| KD | -1 | - | - | 2×5 | ||
|
This one is -1 on block, so it is somewhat safe, since only punishable with 0F Supers if you try to block but there is a trick to escape this punish explained here Being multi-hit, it can prevent random guard cancels on wakeup, but the startup is so slow that good players will react to it with a full JD + GC at the end. | ||||||
Kobi Kyaku (214K)
| B | Damage | Guard | Startup | Active | Recovery | Total |
|---|---|---|---|---|---|---|
| 15 | Mid | 13 | - | - | - | |
| Hit Adv | Block Adv | Cancel on Hit | Cancel on Block | Guard Crush Value | ||
| KD | -19 | - | - | 7 | ||
| B Break | Damage | Guard | Startup | Active | Recovery | Total |
| 15 | Mid | 13 | - | - | - | |
| Hit Adv | Block Adv | Cancel on Hit | Cancel on Block | Guard Crush Value | ||
| KD | +12 | - | - | 7 | ||
|
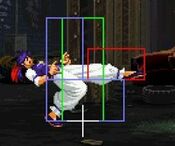
Hotaru's breakable move (always break it). Use the B version whenever you are doing a combo or need the hitbox, because the B version has a greater hitbox. It gives a huge +12 frame advantage on block, allowing to reapply pressure after a blocked reflect. 8~13F projectile reflection. | ||||||
| D | Damage | Guard | Startup | Active | Recovery | Total |
| 15 | Mid | 13 | - | - | - | |
| Hit Adv | Block Adv | Cancel on Hit | Cancel on Block | Guard Crush Value | ||
| KD | -19 | - | - | 8 | ||
| D Break | Damage | Guard | Startup | Active | Recovery | Total |
| 15 | Mid | 13 | - | - | - | |
| Hit Adv | Block Adv | Cancel on Hit | Cancel on Block | Guard Crush Value | ||
| KD | +12 | - | - | 8 | ||
|
This D version is used to reflect fireballs; it has a shorter hitbox, but a greater reflect box. Great meter building tool, use the D version as it gives slightly more meter than the B version. There is a bug with the reflected fireball, if you input a fireball motion it will lose its hurtbox and goes through the opponent (not a very useful bug). 8~17F projectile reflection. | ||||||
Rengeki Shuu (j214K)
| B | Damage | Guard | Startup | Active | Recovery | Total |
|---|---|---|---|---|---|---|
| 8, 8 | Mid | 10 | - | - | - | |
| Hit Adv | Block Adv | Cancel on Hit | Cancel on Block | Guard Crush Value | ||
| KD | >=-8 | - | - | 3, 4 | ||
| D | Damage | Guard | Startup | Active | Recovery | Total |
| 8, 8 | Mid | 13 | - | - | - | |
| Hit Adv | Block Adv | Cancel on Hit | Cancel on Block | Guard Crush Value | ||
| KD | >=-9 | - | - | 4, 4 | ||
|
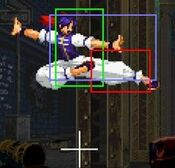
Almost always unsafe on block... Can be used as a nige-tatsu (to run away) via jump CD (spin in the air) > divekick in the opposite direction. Used in optimised corner combos, after reflect break. You can use the Tiger Knee motion 2147B to perform a divekick low to the ground. | ||||||
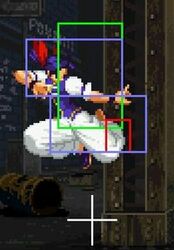
Tenshin Shou (623K)
| B | Damage | Guard | Startup | Active | Recovery | Total |
|---|---|---|---|---|---|---|
| 8, 6 | Mid | 2 | - | - | - | |
| Hit Adv | Block Adv | Cancel on Hit | Cancel on Block | Guard Crush Value | ||
| KD | -12 | - | - | 2, 2 | ||
|
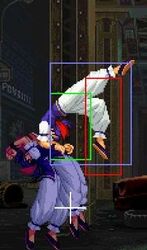
Can be used as an anti-air but is risky against a full air Just Defend. A much safer but harder version of this anti-air would be a 623 4 B/D motion, timed so that if they hit you will JD and guard cancel with your DP, but if they try to air JD, your DP will hits them at an height low enough where the JD won't proc. 1~4F full-body invincibility, so it can be used as a risky "get off me" tool. | ||||||
| D | Damage | Guard | Startup | Active | Recovery | Total |
| 12, 3×5 | Mid | 2 | - | - | - | |
| Hit Adv | Block Adv | Cancel on Hit | Cancel on Block | Guard Crush Value | ||
| KD | -31 | - | - | 3×5, 2 | ||
|
Similar to DP B with more hits and a better anti-air hitbox. 1~4F full-body invincibility, so it can be used as a risky "get off me" tool. | ||||||
Shajou Tai (41236D)
| Damage | Guard | Startup | Active | Recovery | Total |
|---|---|---|---|---|---|
| 8, 8, 8 | - | 9 | - | - | - |
| Hit Adv | Block Adv | Cancel on Hit | Cancel on Block | Guard Crush Value | |
| KD | - | - | - | - | |
|
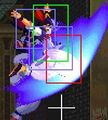
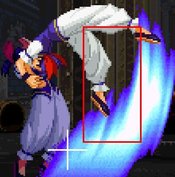
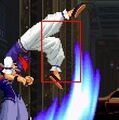
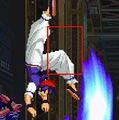
Doesn't lead to big damage, but it scores a hard knockdown, allowing for mix-ups. Corner setup showcase : https://www.youtube.com/watch?v=Eycf9BhE0xw | |||||
Super Moves
Soushou Tenrenge (236236P)
| A | Damage | Guard | Startup | Active | Recovery | Total |
|---|---|---|---|---|---|---|
| 3×16, 7 | Mid | 6 | - | - | - | |
| Hit Adv | Block Adv | Cancel on Hit | Cancel on Block | Guard Crush Value | ||
| KD | -51 | - | - | 1×17 | ||
|
Last hit is in the air. 1~8F full-body invincibility. | ||||||
| C | Damage | Guard | Startup | Active | Recovery | Total |
| 3×8, 5×7, 20 | Mid (Last hit is High) | 6 | - | - | - | |
| Hit Adv | Block Adv | Cancel on Hit | Cancel on Block | Guard Crush Value | ||
| KD | -14 | - | - | 2×15, 5 | ||
|
1~10F full-body invincibility. | ||||||
Tenshou Ranki (236236K)
| B | Damage | Guard | Startup | Active | Recovery | Total |
|---|---|---|---|---|---|---|
| 6×3, 25 | Mid | 0 | - | - | - | |
| Hit Adv | Block Adv | Cancel on Hit | Cancel on Block | Guard Crush Value | ||
| KD | -33 | - | - | 3×3, 0 | ||
|
1~2F full-body invincibility. | ||||||
| D | Damage | Guard | Startup | Active | Recovery | Total |
| 6×3, 3×8, 27 | Mid | 0 | - | - | - | |
| Hit Adv | Block Adv | Cancel on Hit | Cancel on Block | Guard Crush Value | ||
| KD | -32 | - | - | 5×4 | ||
|
1F full-body invincibility. | ||||||
