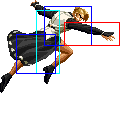
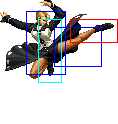
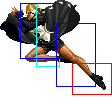
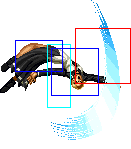
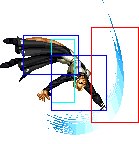
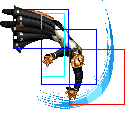
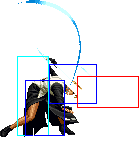
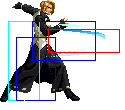
Lichmassacre (talk | contribs) m (→Overview: Added Pros/Cons table.) |
|||
| (21 intermediate revisions by 3 users not shown) | |||
| Line 8: | Line 8: | ||
Wakeup: 21 frames<br> | Wakeup: 21 frames<br> | ||
Recovery roll: 24 frames<br> | Recovery roll: 24 frames<br> | ||
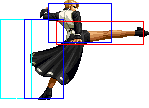
{| | |||
! Stand | |||
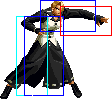
! Crouch | |||
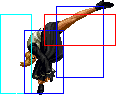
! Jump | |||
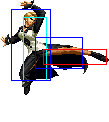
! Grab | |||
! Run | |||
|- | |||
|valign="bottom"| [[image:Mature02_stand.png]] | |||
|valign="bottom"| [[image:Mature02_crouch.png]] | |||
|valign="bottom"| [[image:Mature02_jump.png]] | |||
|valign="bottom"| [[image:Mature02_grab.png]] | |||
|valign="bottom"| [[image:Mature02_run.png]] | |||
|} | |||
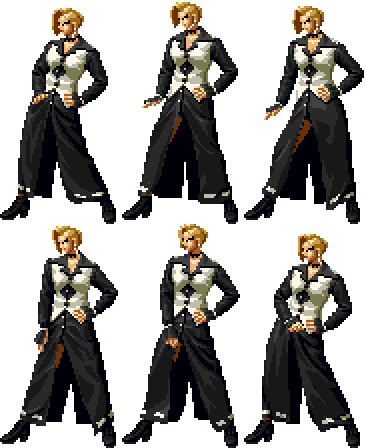
Colors: | Colors: | ||
{| | {| | ||
| Line 104: | Line 119: | ||
| | | | ||
|- | |- | ||
! [[image:snkc.gif]]+[[image:snkd.gif]] | ! [[image:snkc.gif]] + [[image:snkd.gif]] | ||
|align="center"| 15/5/20 | |align="center"| 15/5/20 | ||
|align="center"| KD/-3 | |align="center"| KD/-3 | ||
| Line 182: | Line 197: | ||
| | | | ||
|- | |- | ||
! [[image:snkc.gif]]+[[image:snkd.gif]] | ! [[image:snkc.gif]] + [[image:snkd.gif]] | ||
|align="center"| 17/4/- | |align="center"| 17/4/- | ||
|align="center"| KD/- | |align="center"| KD/- | ||
| Line 262: | Line 277: | ||
|colspan="9" align="center"| '''Special Moves''' | |colspan="9" align="center"| '''Special Moves''' | ||
|- | |- | ||
! qcf+[[image:snka.gif]] | ! qcf + [[image:snka.gif]] | ||
|align="center"| 18/3+3+3/14+6 | |align="center"| 18/3+3+3/14+6 | ||
|align="center"| -6/-8 | |align="center"| -6/-8 | ||
| Line 270: | Line 285: | ||
|rowspan="2" valign="bottom" style="border-left:0px; border-right:0px;"|[[image:Mature02_qcfP2.png|center]] | |rowspan="2" valign="bottom" style="border-left:0px; border-right:0px;"|[[image:Mature02_qcfP2.png|center]] | ||
|rowspan="2" valign="bottom" style="border-left:0px;"|[[image:Mature02_qcfP3.png|center]] | |rowspan="2" valign="bottom" style="border-left:0px;"|[[image:Mature02_qcfP3.png|center]] | ||
|rowspan="2" align="left"|'''Despair - qcf+P''' | |rowspan="2" align="left"|'''Despair - qcf + P''' | ||
* Mature jumps into the air and slashes, knocking the opponent down | * Mature jumps into the air and slashes, knocking the opponent down | ||
* qcf+C goes further and higher than qcf+A | * qcf + C goes further and higher than qcf + A | ||
* it is possible to crossup the opponent at some distances with this move | * it is possible to crossup the opponent at some distances with this move | ||
* free cancellable into | * free cancellable into | ||
* overall, quite punishable on block and not particularly useful even for going over fireballs | * overall, quite punishable on block and not particularly useful even for going over fireballs | ||
|- | |- | ||
! qcf+[[image:snkc.gif]] | ! qcf + [[image:snkc.gif]] | ||
|align="center"| 24/4+4+4/9+12 | |align="center"| 24/4+4+4/9+12 | ||
|align="center"| -9/-11 | |align="center"| -9/-11 | ||
| Line 283: | Line 298: | ||
|align="center"| HL | |align="center"| HL | ||
|- | |- | ||
! hcf+[[image:snkb.gif]] | ! hcf + [[image:snkb.gif]] | ||
|align="center"| 19/3/36 | |align="center"| 19/3/36 | ||
|align="center"| KD/-21 | |align="center"| KD/-21 | ||
| Line 289: | Line 304: | ||
|align="center"| HL | |align="center"| HL | ||
|rowspan="2" colspan="3" valign="bottom" |[[image:Mature02_hcfK.png|center]] | |rowspan="2" colspan="3" valign="bottom" |[[image:Mature02_hcfK.png|center]] | ||
|rowspan="2" align="left"|'''Deicide - hcf+K''' | |rowspan="2" align="left"|'''Deicide - hcf + K''' | ||
* Mature swings her arm and creates a shadow which reaches about half screen length and grabs the opponent if it isn't blocked | * Mature swings her arm and creates a shadow which reaches about half screen length and grabs the opponent if it isn't blocked | ||
* very similar to Vice's hcf+K but Mature's cannot be comboed into normally since it comes out very slow. hcf+B comes out faster but doesn't reach as far as hcf+D | * very similar to Vice's hcf + K but Mature's cannot be comboed into normally since it comes out very slow. hcf + B comes out faster but doesn't reach as far as hcf + D | ||
* hard knockdown | * hard knockdown | ||
|- | |- | ||
! hcf+[[image:snkd.gif]] | ! hcf + [[image:snkd.gif]] | ||
|align="center"| 21/3/38 | |align="center"| 21/3/38 | ||
|align="center"| KD/-23 | |align="center"| KD/-23 | ||
| Line 300: | Line 315: | ||
|align="center"| HL | |align="center"| HL | ||
|- | |- | ||
! qcb+[[image:snka.gif]] | ! qcb + [[image:snka.gif]] | ||
|align="center"| 10/2*2*2/34 | |align="center"| 10/2*2*2/34 | ||
|align="center"| -16/-18 | |align="center"| -16/-18 | ||
| Line 308: | Line 323: | ||
|rowspan="6" valign="bottom" style="border-left:0px; border-right:0px;"|[[image:Mature02_qcbP2.png|center]] | |rowspan="6" valign="bottom" style="border-left:0px; border-right:0px;"|[[image:Mature02_qcbP2.png|center]] | ||
|rowspan="6" valign="bottom" style="border-left:0px;"|[[image:Mature02_qcbP3.png|center]] | |rowspan="6" valign="bottom" style="border-left:0px;"|[[image:Mature02_qcbP3.png|center]] | ||
|rowspan="6" align="left"|'''Death Row - qcb+P(up to 3 times)''' | |rowspan="6" align="left"|'''Death Row - qcb + P(up to 3 times)''' | ||
* Mature performs a 3 hit slash at close range. She can chain a series of 3 qcb+P's for a total of 9 hits which does good chip damage (assuming they have no stock to guard roll) | * Mature performs a 3 hit slash at close range. She can chain a series of 3 qcb + P's for a total of 9 hits which does good chip damage (assuming they have no stock to guard roll) | ||
* qcb+C goes slightly further than qcb+A, making it slightly easier to combo all the hits | * qcb + C goes slightly further than qcb + A, making it slightly easier to combo all the hits | ||
* free cancellable into | * free cancellable into | ||
* free cancellable out of on all hits | * free cancellable out of on all hits | ||
|- | |- | ||
! qcb+[[image:snka.gif]] (2) | ! qcb + [[image:snka.gif]] (2) | ||
|align="center"| 10/2*2*2/29 | |align="center"| 10/2*2*2/29 | ||
|align="center"| -11/-13 | |align="center"| -11/-13 | ||
| Line 320: | Line 335: | ||
|align="center"| HL | |align="center"| HL | ||
|- | |- | ||
! qcb+[[image:snka.gif]] (3) | ! qcb + [[image:snka.gif]] (3) | ||
|align="center"| 15/2*2*2/32 | |align="center"| 15/2*2*2/32 | ||
|align="center"| -14/-16 | |align="center"| -14/-16 | ||
| Line 326: | Line 341: | ||
|align="center"| HL | |align="center"| HL | ||
|- | |- | ||
! qcb+[[image:snkc.gif]] | ! qcb + [[image:snkc.gif]] | ||
|align="center"| 10/2*2*2/36 | |align="center"| 10/2*2*2/36 | ||
|align="center"| -18/-20 | |align="center"| -18/-20 | ||
| Line 332: | Line 347: | ||
|align="center"| HL | |align="center"| HL | ||
|- | |- | ||
! qcb+[[image:snkc.gif]] (2) | ! qcb + [[image:snkc.gif]] (2) | ||
|align="center"| 13/2*2*2/31 | |align="center"| 13/2*2*2/31 | ||
|align="center"| -13/-15 | |align="center"| -13/-15 | ||
| Line 338: | Line 353: | ||
|align="center"| HL | |align="center"| HL | ||
|- | |- | ||
! qcb+[[image:snkc.gif]] (3) | ! qcb + [[image:snkc.gif]] (3) | ||
|align="center"| 16/2*2*2/39 | |align="center"| 16/2*2*2/39 | ||
|align="center"| -21/-23 | |align="center"| -21/-23 | ||
| Line 344: | Line 359: | ||
|align="center"| HL | |align="center"| HL | ||
|- | |- | ||
! qcb+[[image:snkb.gif]] | ! qcb + [[image:snkb.gif]] | ||
|align="center"| 3+0~4+11/1*1*1/23 | |align="center"| 3+0~4+11/1*1*1/23 | ||
|align="center"| -4/-6 | |align="center"| -4/-6 | ||
| Line 350: | Line 365: | ||
|align="center"| HL | |align="center"| HL | ||
|rowspan="2" colspan="3" valign="bottom" |[[image:Mature02_qcbK.png|center]] | |rowspan="2" colspan="3" valign="bottom" |[[image:Mature02_qcbK.png|center]] | ||
|rowspan="2" align="left"|'''Metal Massacre - qcb+K''' | |rowspan="2" align="left"|'''Metal Massacre - qcb + K''' | ||
* Mature dashes forward and performs a 3 hit slash attack that has very good recovery | * Mature dashes forward and performs a 3 hit slash attack that has very good recovery | ||
* qcb+B travels about 1/3 screen while qcb+D travels 2/3 screen length | * qcb + B travels about 1/3 screen while qcb + D travels 2/3 screen length | ||
* qcb+D does a slight bit more damage than qcb+B and can combo at all the ranges that qcb+B comboes at. Since it also seems to have the same recovery time, there doesn't seem any reason to use qcb+B over qcb+D in combos | * qcb + D does a slight bit more damage than qcb + B and can combo at all the ranges that qcb + B comboes at. Since it also seems to have the same recovery time, there doesn't seem any reason to use qcb + B over qcb + D in combos | ||
* free cancellable into | * free cancellable into | ||
* free cancellable out of on all hits | * free cancellable out of on all hits | ||
|- | |- | ||
! qcb+[[image:snkd.gif]] | ! qcb + [[image:snkd.gif]] | ||
|align="center"| 3+0~8+12/1*1*1/25 | |align="center"| 3+0~8+12/1*1*1/25 | ||
|align="center"| -6/-8 | |align="center"| -6/-8 | ||
| Line 363: | Line 378: | ||
|align="center"| HL | |align="center"| HL | ||
|- | |- | ||
! dp+[[image:snka.gif]] | ! dp + [[image:snka.gif]] | ||
|align="center"| 8/3*4*2(3)3(3)3(3)3(3)3/6+18 | |align="center"| 8/3*4*2(3)3(3)3(3)3(3)3/6+18 | ||
|align="center"| -7/-9 | |align="center"| -7/-9 | ||
| Line 371: | Line 386: | ||
|valign="bottom" style="border-left:0px; border-right:0px;"|[[image:Mature02_dpA2.png|center]] | |valign="bottom" style="border-left:0px; border-right:0px;"|[[image:Mature02_dpA2.png|center]] | ||
|valign="bottom" style="border-left:0px;"|[[image:Mature02_dpA3.png|center]] | |valign="bottom" style="border-left:0px;"|[[image:Mature02_dpA3.png|center]] | ||
|rowspan="2" align="left"|'''Sacrilege - dp+P''' | |rowspan="2" align="left"|'''Sacrilege - dp + P''' | ||
* Mature performs a rising uppercut attack that travels quite far horizontally doing many hits | * Mature performs a rising uppercut attack that travels quite far horizontally doing many hits | ||
* for dp+A, the second hit (and onwards) lifts the opponent into the air while for dp+C, the third hit (and onwards) lifts them into air | * for dp + A, the second hit (and onwards) lifts the opponent into the air while for dp + C, the third hit (and onwards) lifts them into air | ||
* dp+A free cancellable out of on the first two hits, dp+C free cancellable out of on the first three hits | * dp + A free cancellable out of on the first two hits, dp + C free cancellable out of on the first three hits | ||
* comes out fast and useful in combos (dp+C does more hits and more damage than dp+A), but is not fast enough and not invincible to be used as a wakeup reversal | * comes out fast and useful in combos (dp + C does more hits and more damage than dp + A), but is not fast enough and not invincible to be used as a wakeup reversal | ||
|- | |- | ||
! dp+[[image:snkc.gif]] | ! dp + [[image:snkc.gif]] | ||
|align="center"| 8/3*3*4*2(3)3(3)3(3)3(3)3/12+18 | |align="center"| 8/3*3*4*2(3)3(3)3(3)3(3)3/12+18 | ||
|align="center"| -13/-15 | |align="center"| -13/-15 | ||
| Line 386: | Line 401: | ||
|valign="bottom" style="border-left:0px;"|[[image:Mature02_dpC3.png|center]] | |valign="bottom" style="border-left:0px;"|[[image:Mature02_dpC3.png|center]] | ||
|- | |- | ||
! qcf hcb+[[image:snka.gif]] | ! qcf hcb + [[image:snka.gif]] | ||
|align="center"| 26/-/25 | |align="center"| 26/-/25 | ||
|align="center"| KD/+5 | |align="center"| KD/+5 | ||
| Line 392: | Line 407: | ||
|align="center"| HL | |align="center"| HL | ||
|rowspan="2" colspan="3" valign="bottom" |[[image:Mature02_qcfhcbP.png|center]] | |rowspan="2" colspan="3" valign="bottom" |[[image:Mature02_qcfhcbP.png|center]] | ||
|rowspan="2" align="left"|'''Ebony Tears - qcf hcb+P''' | |rowspan="2" align="left"|'''Ebony Tears - qcf hcb + P''' | ||
* Mature throws a projectile that has a very large vertical hitbox, but has some startup delay | * Mature throws a projectile that has a very large vertical hitbox, but has some startup delay | ||
* A version travels slower and recovers better | * A version travels slower and recovers better | ||
* difficult to jump over, especially the A version which travels slower | * difficult to jump over, especially the A version which travels slower | ||
|- | |- | ||
! qcf hcb+[[image:snkc.gif]] | ! qcf hcb + [[image:snkc.gif]] | ||
|align="center"| 26/-/27 | |align="center"| 26/-/27 | ||
|align="center"| KD/+3 | |align="center"| KD/+3 | ||
| Line 405: | Line 420: | ||
|colspan="9" align="center"| '''DMs''' | |colspan="9" align="center"| '''DMs''' | ||
|- | |- | ||
! 2xqcf+[[image:snka.gif]] | ! 2xqcf + [[image:snka.gif]] | ||
|align="center"| 1+4/2(14)2(14)2(15)2/30 | |align="center"| 1+4/2(14)2(14)2(15)2/30 | ||
|align="center"| KD/-14 | |align="center"| KD/-14 | ||
| Line 417: | Line 432: | ||
* invincible for frames 1-4 | * invincible for frames 1-4 | ||
|- | |- | ||
! 2xqcf+[[image:snkc.gif]] | ! 2xqcf + [[image:snkc.gif]] | ||
|align="center"| 1+7/1(14)2(14)2(15)2/34 | |align="center"| 1+7/1(14)2(14)2(15)2/34 | ||
|align="center"| KD/-18 | |align="center"| KD/-18 | ||
| Line 423: | Line 438: | ||
|align="center"| HL | |align="center"| HL | ||
|- | |- | ||
! qcb hcf+[[image:snkb.gif]] | ! qcb hcf + [[image:snkb.gif]] | ||
|align="center"| 1+10/16/30 | |align="center"| 1+10/16/30 | ||
|align="center"| KD/- | |align="center"| KD/- | ||
| Line 429: | Line 444: | ||
|align="center"| HL | |align="center"| HL | ||
|rowspan="4" colspan="3" valign="bottom" |[[image:Mature02_qcbhcfK.png|center]] | |rowspan="4" colspan="3" valign="bottom" |[[image:Mature02_qcbhcfK.png|center]] | ||
|rowspan="4" align="left"|'''Heaven's Gate - qcb hcf+K''' | |rowspan="4" align="left"|'''Heaven's Gate - qcb hcf + K''' | ||
* Mature dashes forward. If she connects, she grabs the opponent and slams them into the corner | * Mature dashes forward. If she connects, she grabs the opponent and slams them into the corner | ||
* B version goes about 3/4 screen while D version goes full screen | * B version goes about 3/4 screen while D version goes full screen | ||
| Line 435: | Line 450: | ||
* hard knockdown | * hard knockdown | ||
|- | |- | ||
! qcb hcf+[[image:snkb.gif]] (blocked) | ! qcb hcf + [[image:snkb.gif]] (blocked) | ||
|align="center"| - /2*4/40 | |align="center"| - /2*4/40 | ||
|align="center"| KD/-26 | |align="center"| KD/-26 | ||
| Line 441: | Line 456: | ||
|align="center"| HL | |align="center"| HL | ||
|- | |- | ||
! qcb hcf+[[image:snkd.gif]] | ! qcb hcf + [[image:snkd.gif]] | ||
|align="center"| 1+10/24/33 | |align="center"| 1+10/24/33 | ||
|align="center"| KD/- | |align="center"| KD/- | ||
| Line 447: | Line 462: | ||
|align="center"| HL | |align="center"| HL | ||
|- | |- | ||
! qcb hcf+[[image:snkd.gif]] (blocked) | ! qcb hcf + [[image:snkd.gif]] (blocked) | ||
|align="center"| - /2*4/44 | |align="center"| - /2*4/44 | ||
|align="center"| KD/-30 | |align="center"| KD/-30 | ||
| Line 455: | Line 470: | ||
|colspan="9" align="center"| '''SDMs''' | |colspan="9" align="center"| '''SDMs''' | ||
|- | |- | ||
! 2xqcf+[[image:snka.gif]]+[[image:snkc.gif]] | ! 2xqcf + [[image:snka.gif]] + [[image:snkc.gif]] | ||
|align="center"| 1+4/2(14)2(14)2(15)3/30 | |align="center"| 1+4/2(14)2(14)2(15)3/30 | ||
|align="center"| KD/-15 | |align="center"| KD/-15 | ||
| Line 466: | Line 481: | ||
* Invincible for frames 1-4 | * Invincible for frames 1-4 | ||
|- | |- | ||
! qcb hcf+[[image:snkb.gif]]+[[image:snkd.gif]] | ! qcb hcf + [[image:snkb.gif]] + [[image:snkd.gif]] | ||
|align="center"| 1+10/24/30 | |align="center"| 1+10/24/30 | ||
|align="center"| KD/- | |align="center"| KD/- | ||
| Line 472: | Line 487: | ||
|align="center"| HL | |align="center"| HL | ||
|rowspan="2" colspan="3" valign="bottom" |[[image:Mature02_qcbhcfK.png|center]] | |rowspan="2" colspan="3" valign="bottom" |[[image:Mature02_qcbhcfK.png|center]] | ||
|rowspan="2" align="left"|'''Heaven's Gate - qcb hcf+K''' | |rowspan="2" align="left"|'''Heaven's Gate - qcb hcf + K''' | ||
* works the same as the normal DM but does more damage | * works the same as the normal DM but does more damage | ||
* generally not worth using as the damage increase isn't worth the meter used | * generally not worth using as the damage increase isn't worth the meter used | ||
|- | |- | ||
! qcb hcf+[[image:snkb.gif]]+[[image:snkd.gif]] (blocked) | ! qcb hcf + [[image:snkb.gif]] + [[image:snkd.gif]] (blocked) | ||
|align="center"| - /2*4/40 | |align="center"| - /2*4/40 | ||
|align="center"| KD/-26 | |align="center"| KD/-26 | ||
| Line 491: | Line 506: | ||
|colspan="3" valign="bottom" |[[image:Mature02_HSDM.png|center]] | |colspan="3" valign="bottom" |[[image:Mature02_HSDM.png|center]] | ||
|align="left"|'''Ecstasy 816 - f D C B f''' | |align="left"|'''Ecstasy 816 - f D C B f''' | ||
* Mature jumps forward similar to her qcf+P. If she connects, she will perform on them followed by an explosive kiss | * Mature jumps forward similar to her qcf + P. If she connects, she will perform on them followed by an explosive kiss | ||
* relatively low damage move for an HSDM and no practical ways of connecting it | * relatively low damage move for an HSDM and no practical ways of connecting it | ||
* quite punishable on block | * quite punishable on block | ||
| Line 497: | Line 512: | ||
|} | |} | ||
=== Notes === | ==Short Movelist== | ||
* qcf + P | |||
* dp + P | |||
* qcb + P | |||
** qcb + P | |||
*** qcb + P | |||
* qcf hcb + P | |||
* hcf + K | |||
* qcb + K | |||
* DM qcf qcf + P | |||
* DM qcb hcf + K | |||
* SDM qcf qcf + AC | |||
* SDM qcb hcf + BD | |||
* HSDM f D C B f | |||
== Notes == | |||
===Cancellable moves=== | |||
* Close: A, B (2), C, D (2) | |||
* Far: A | |||
* Crouch: A, C, D | |||
===Super cancellable moves=== | |||
(none) | |||
===Free cancellable into moves=== | |||
* qcf + P | |||
* '''qcb + P''' | |||
* '''qcb + K''' | |||
* qcf hcb + P | |||
=== Free cancellable out-of moves=== | |||
* '''qcb + P x 1-3''' | |||
* '''qcb + K''' | |||
* dp + A (1-2) | |||
* dp + C (1-3) | |||
===Moves with Invincibility=== | |||
* DM qcf qcf + P (Full: startup (1st part).) | |||
* DM qcb hcf + K (Full: startup.) | |||
* SDM qcf qcf + AC (Full: startup (1st part).) | |||
* (S)DM qcb hcf + BD (Full: startup.) | |||
=== Moves with autoguard=== | |||
(none) | |||
===Other Notes=== | |||
* cl.B (1) is a low attack. | |||
* st.B does the same hit/block stun of a hard attack. (Curiosity, it has the same animation of his old command attack f + B from KOF 98.) | |||
* D throw is a back-turned hard knockdown | * D throw is a back-turned hard knockdown | ||
| Line 503: | Line 589: | ||
== Combos == | == Combos == | ||
=== | === Basic Combos=== | ||
* cl.C / cr.C / cl.D (2) | |||
** SDM qcf qcf + AC [46%] {Max Mode + 1 stock} | |||
** SDM qcb hcf + BD [42%] {Max Mode + 1 stock} | |||
** DM qcb hcf + K [37%] {1 stock} | |||
** DM qcf qcf + P [34%] {1 stock} | |||
** qcb + D [23%] | |||
** dp + C (Very close.) [23%] | |||
** qcb + C x 3 [23%] | |||
** dp + A [22%] | |||
* cl.B (2) | |||
** SDM qcf qcf + AC {Max Mode + 1 stock} | |||
** DM qcf qcf + P {1 stock} | |||
** dp + C | |||
** qcb + C x 3 | |||
** dp + A | |||
May do a cr.B before on point blank. | |||
* cr.B x 1-3, cr.A / st.A > | |||
** SDM qcf qcf + AC {Max Mode + 1 stock} | |||
** DM qcf qcf + P {1 stock} | |||
** qcb + C x 3 | |||
* cr.A x 2, st.B (2) >> BC, DM qcb hcf + K {38%} | |||
Buffer as: st.B (2) >> qcb hcf + BC | |||
=== Max Mode === | |||
* cr.A x 1-3 > st.B (2) >> BC, hop B, (Timing Required.) | |||
** cl.B (2) > | |||
*** SDM qcf qcf + AC {53%} {3 stocks} | |||
*** dp + C >> qcb + C x 2 >> qcb + B >> qcb + C >> qcb + B >> qcf + A | |||
** cr.A x 1-3 > st.B (2) >> qcb + C x 2 >> qcb + B >> qcb + C >> qcb + B >> qcb + C x 3 | |||
=== Combos Notes === | |||
* cl.B (2) / cr.C > | |||
** dp + C | |||
** qcb + C x 3 | |||
This is | This is Mature's basic no-meter combo. If using cr.C, make sure it doesn't hit too far away of the qcb + C x 3 won't combo after. Using dp + C doesn't give you enough space between you and the opponent after the combo, to set up a fireball trap. | ||
* cl.B (2) > DM qcf qcf + P | |||
This is a combo you'll be using a lot, especially after a j.B or empty jump. Decent damage from a one stock low combo that is also easy to hit confirm. | |||
* cr.B x 1-3, cr.A > DM qcf qcf + P | |||
This is your dash in combo and depending on how close you are to the opponent, you will have forced to omit some crouch B's. Comboing the 4 weak attacks before the super is very hard even if you are pointblank in front of the opponent, so I wouldn't recommend trying it. | |||
* cr.C / cl.D (2) > | |||
** DM qcb hcf + K | |||
Her most damaging one stock combo, use this off a hit confirm from a jump attack right before, or to punish moves with lots of recovery | |||
* cr.A x 2 > st.B (2) >> BC, hop B, cl.B (2) > SDM qcf qcf + AC | |||
The Max Mode activation into hyper hop B makes this combo difficult to execute. It also best works against standing characters, or crouching characters that don't have low crouches (such as Athena's low crouch), otherwise the first hit of hop B won't connect and the combo will fail. | |||
* cr.A x 2, st.B (2) >> BC, DM qcb hcf + K | |||
Buffer as: st.B (2) >> qcb hcf + BC | |||
This is mainly a flashy combo and there isn't much reason to perform it. st.B stuns just like a strong attack, allowing you to combo the DM qcb hcf + K. Far B isn't cancellable so you have to use Max Mode bypass by executing the DM with BC. This takes two stocks and so isn't really worth it for the damage. | |||
Note: Mature has more Max Mode combos that are for the most part, not that practical. This section will be updated later. | |||
== Strategies == | |||
=== Overview === | |||
Mature isn't a particularly strong character, many tierlists placing her at lower-mid or mid at best. She suffers from a syndrome that is common with many characters in Kof2002 - she has too many moves that have no useful application outside of combos (or even in combos). The core of her game centers around a select few normals and special moves, those being her qcf hcb + P projectile, weak attack pokes, jump B and a few other ground/jumping normals to handle some specific situations. | |||
{{ ProConTable | |||
| pros= | |||
* Strong zoning game | |||
* Good high/low offensive game using hop B and close B/crouch B | |||
* Decent damage one stock combos | |||
| cons= | |||
* No practical high damage combos | |||
* Difficult Max Mode combos | |||
* Zero stock BnB combos do low damage | |||
* No fast reversal moves on wakeup so she is forced to either block or take risks with a slow but invincible super | |||
* No reliable crossups | |||
}} | |||
=== Zoning === | === Zoning === | ||
Mature's zoning game is primarily based on the usage of her qcf hcb+A projectile. It's great mainly because it's slow, with a very tall vertical hitbox, making it difficult for many characters to jump over it. It also has good recovery time, making it safe at most distances from punishes. You can usually throw it out and be able to recover fast enough to anti-air jump attacks with crouch C, intercept jump attacks with superjump or vertical jump C, or run forward and punish rolls with crouch C. | Mature's zoning game is primarily based on the usage of her qcf hcb + A projectile. It's great mainly because it's slow, with a very tall vertical hitbox, making it difficult for many characters to jump over it. It also has good recovery time, making it safe at most distances from punishes. You can usually throw it out and be able to recover fast enough to anti-air jump attacks with crouch C, intercept jump attacks with superjump or vertical jump C, or run forward and punish rolls with crouch C. | ||
After releasing the projectile, if they haven't made an action until you have recovered from throwing the projectile, then you can run after it. Depending on how far away the opponent was, you may be able to run after it such that you can go for a high/low mixup involving hop B and close B(with a possible empty jump) while they are blocking the projectile. | After releasing the projectile, if they haven't made an action until you have recovered from throwing the projectile, then you can run after it. Depending on how far away the opponent was, you may be able to run after it such that you can go for a high/low mixup involving hop B and close B(with a possible empty jump) while they are blocking the projectile. | ||
You can alternatively decide to position yourself to be able to punish any actions the opponent makes, and if they block the projectile, immediately release another one. There's a couple of things to consider here. Firstly, note that Mature cannot have two projectiles on screen at the same time, which is why you are waiting for the first one to get blocked. If you try to throw out a second one while the first is on screen, you will get qcb+P coming out instead, which is a very bad move to whiff. Secondly if the opponent has meter, they can guard roll the first projectile and punish the second one. | You can alternatively decide to position yourself to be able to punish any actions the opponent makes, and if they block the projectile, immediately release another one. There's a couple of things to consider here. Firstly, note that Mature cannot have two projectiles on screen at the same time, which is why you are waiting for the first one to get blocked. If you try to throw out a second one while the first is on screen, you will get qcb + P coming out instead, which is a very bad move to whiff. Secondly if the opponent has meter, they can guard roll the first projectile and punish the second one. | ||
{{Template:The King of Fighters 2002}} | {{Template:The King of Fighters 2002}} | ||
[[Category:The King of Fighters 2002]] | [[Category:The King of Fighters 2002]] | ||
Latest revision as of 23:02, 23 January 2024
General Info
Crouch height: Low
Jump: 5/34/1
Hop: 5/25/1
Dash: 3/10~∞/3
Backdash: 3/18/4
Wakeup: 21 frames
Recovery roll: 24 frames
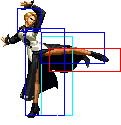
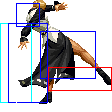
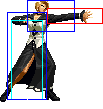
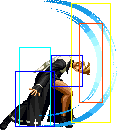
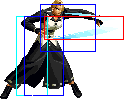
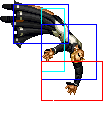
| Stand | Crouch | Jump | Grab | Run |
|---|---|---|---|---|

|

|

|

|
Colors:

|

|

|

|
Movelist
Normals
Short Movelist
- qcf + P
- dp + P
- qcb + P
- qcb + P
- qcb + P
- qcb + P
- qcf hcb + P
- hcf + K
- qcb + K
- DM qcf qcf + P
- DM qcb hcf + K
- SDM qcf qcf + AC
- SDM qcb hcf + BD
- HSDM f D C B f
Notes
Cancellable moves
- Close: A, B (2), C, D (2)
- Far: A
- Crouch: A, C, D
Super cancellable moves
(none)
Free cancellable into moves
- qcf + P
- qcb + P
- qcb + K
- qcf hcb + P
Free cancellable out-of moves
- qcb + P x 1-3
- qcb + K
- dp + A (1-2)
- dp + C (1-3)
Moves with Invincibility
- DM qcf qcf + P (Full: startup (1st part).)
- DM qcb hcf + K (Full: startup.)
- SDM qcf qcf + AC (Full: startup (1st part).)
- (S)DM qcb hcf + BD (Full: startup.)
Moves with autoguard
(none)
Other Notes
- cl.B (1) is a low attack.
- st.B does the same hit/block stun of a hard attack. (Curiosity, it has the same animation of his old command attack f + B from KOF 98.)
- D throw is a back-turned hard knockdown
Combos
Basic Combos
- cl.C / cr.C / cl.D (2)
- SDM qcf qcf + AC [46%] {Max Mode + 1 stock}
- SDM qcb hcf + BD [42%] {Max Mode + 1 stock}
- DM qcb hcf + K [37%] {1 stock}
- DM qcf qcf + P [34%] {1 stock}
- qcb + D [23%]
- dp + C (Very close.) [23%]
- qcb + C x 3 [23%]
- dp + A [22%]
- cl.B (2)
- SDM qcf qcf + AC {Max Mode + 1 stock}
- DM qcf qcf + P {1 stock}
- dp + C
- qcb + C x 3
- dp + A
May do a cr.B before on point blank.
- cr.B x 1-3, cr.A / st.A >
- SDM qcf qcf + AC {Max Mode + 1 stock}
- DM qcf qcf + P {1 stock}
- qcb + C x 3
- cr.A x 2, st.B (2) >> BC, DM qcb hcf + K {38%}
Buffer as: st.B (2) >> qcb hcf + BC
Max Mode
- cr.A x 1-3 > st.B (2) >> BC, hop B, (Timing Required.)
- cl.B (2) >
- SDM qcf qcf + AC {53%} {3 stocks}
- dp + C >> qcb + C x 2 >> qcb + B >> qcb + C >> qcb + B >> qcf + A
- cr.A x 1-3 > st.B (2) >> qcb + C x 2 >> qcb + B >> qcb + C >> qcb + B >> qcb + C x 3
- cl.B (2) >
Combos Notes
- cl.B (2) / cr.C >
- dp + C
- qcb + C x 3
This is Mature's basic no-meter combo. If using cr.C, make sure it doesn't hit too far away of the qcb + C x 3 won't combo after. Using dp + C doesn't give you enough space between you and the opponent after the combo, to set up a fireball trap.
- cl.B (2) > DM qcf qcf + P
This is a combo you'll be using a lot, especially after a j.B or empty jump. Decent damage from a one stock low combo that is also easy to hit confirm.
- cr.B x 1-3, cr.A > DM qcf qcf + P
This is your dash in combo and depending on how close you are to the opponent, you will have forced to omit some crouch B's. Comboing the 4 weak attacks before the super is very hard even if you are pointblank in front of the opponent, so I wouldn't recommend trying it.
- cr.C / cl.D (2) >
- DM qcb hcf + K
Her most damaging one stock combo, use this off a hit confirm from a jump attack right before, or to punish moves with lots of recovery
- cr.A x 2 > st.B (2) >> BC, hop B, cl.B (2) > SDM qcf qcf + AC
The Max Mode activation into hyper hop B makes this combo difficult to execute. It also best works against standing characters, or crouching characters that don't have low crouches (such as Athena's low crouch), otherwise the first hit of hop B won't connect and the combo will fail.
- cr.A x 2, st.B (2) >> BC, DM qcb hcf + K
Buffer as: st.B (2) >> qcb hcf + BC
This is mainly a flashy combo and there isn't much reason to perform it. st.B stuns just like a strong attack, allowing you to combo the DM qcb hcf + K. Far B isn't cancellable so you have to use Max Mode bypass by executing the DM with BC. This takes two stocks and so isn't really worth it for the damage.
Note: Mature has more Max Mode combos that are for the most part, not that practical. This section will be updated later.
Strategies
Overview
Mature isn't a particularly strong character, many tierlists placing her at lower-mid or mid at best. She suffers from a syndrome that is common with many characters in Kof2002 - she has too many moves that have no useful application outside of combos (or even in combos). The core of her game centers around a select few normals and special moves, those being her qcf hcb + P projectile, weak attack pokes, jump B and a few other ground/jumping normals to handle some specific situations.
| Strengths | Weaknesses |
|---|---|
|
|
Zoning
Mature's zoning game is primarily based on the usage of her qcf hcb + A projectile. It's great mainly because it's slow, with a very tall vertical hitbox, making it difficult for many characters to jump over it. It also has good recovery time, making it safe at most distances from punishes. You can usually throw it out and be able to recover fast enough to anti-air jump attacks with crouch C, intercept jump attacks with superjump or vertical jump C, or run forward and punish rolls with crouch C.
After releasing the projectile, if they haven't made an action until you have recovered from throwing the projectile, then you can run after it. Depending on how far away the opponent was, you may be able to run after it such that you can go for a high/low mixup involving hop B and close B(with a possible empty jump) while they are blocking the projectile.
You can alternatively decide to position yourself to be able to punish any actions the opponent makes, and if they block the projectile, immediately release another one. There's a couple of things to consider here. Firstly, note that Mature cannot have two projectiles on screen at the same time, which is why you are waiting for the first one to get blocked. If you try to throw out a second one while the first is on screen, you will get qcb + P coming out instead, which is a very bad move to whiff. Secondly if the opponent has meter, they can guard roll the first projectile and punish the second one.
