| Line 21: | Line 21: | ||
! Cancel | ! Cancel | ||
! Block | ! Block | ||
!colspan=" | !colspan="3"| Hitbox | ||
! Notes | ! Notes | ||
|- | |- | ||
| Line 408: | Line 408: | ||
|valign="bottom" style="border-right:0px;"| [[image:Chris02_hcbA1.png|center]] | |valign="bottom" style="border-right:0px;"| [[image:Chris02_hcbA1.png|center]] | ||
|colspan="2" valign="bottom" style="border-left:0px;"| [[image:Chris02_hcbC2.png|center]] | |colspan="2" valign="bottom" style="border-left:0px;"| [[image:Chris02_hcbC2.png|center]] | ||
|- | |||
! hcb+[[image:snkb.gif]] | |||
|align="center"| | |||
|align="center"| | |||
|align="center"| | |||
|align="center"| HL | |||
|valign="bottom" style="border-right:0px;"| [[image:Chris02_hcbB1.png|center]] | |||
|colspan="2" valign="bottom" style="border-left:0px;"| [[image:Chris02_hcbB2.png|center]] | |||
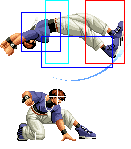
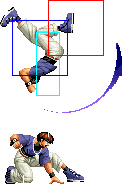
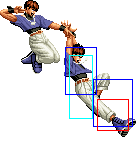
|rowspan="2"| '''Shooting Dancer: Step - hcb+K''' | |||
* Chris performs a dashing attack forward and follows up with a stomping attack | |||
* hcb+B makes him bounce forwards after the second hit, hcb+D makes him bounce backwards | |||
* can followup the second hit with an air qcf+K while falling back | |||
* free cancellable into | |||
* free cancellable out of on both hits (ground attacks on first hit, qcf+K on the second hit) | |||
* hard knockdown on the second hit | |||
* supercancellable on the first hit | |||
|- | |||
! hcb+[[image:snkd.gif]] | |||
|align="center"| | |||
|align="center"| | |||
|align="center"| | |||
|align="center"| HL | |||
|valign="bottom" style="border-right:0px;"| [[image:Chris02_hcbD1.png|center]] | |||
|colspan="2" valign="bottom" style="border-left:0px;"| [[image:Chris02_hcbD2.png|center]] | |||
|} | |} | ||
=== Special Moves === | === Special Moves === | ||
Revision as of 16:20, 4 October 2013
General Info
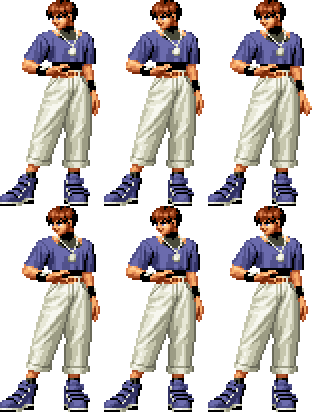
Crouch height: Medium
Colors

|

|

|

|
Movelist
Special Moves
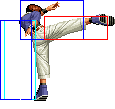
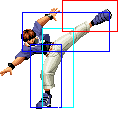
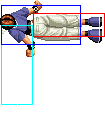
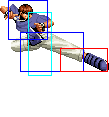
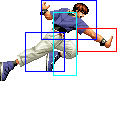
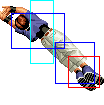
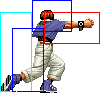
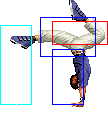
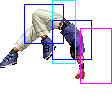
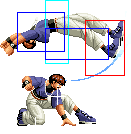
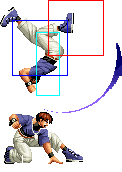
7. Shooting Dancer: Step - hcb+K
- Chris performs a dashing attack forward and follows up with a stomping attack
- hcb+B makes him bounce forwards after the second hit, hcb+D makes him bounce backwards
- can followup the second hit with an air qcf+K while falling back
- free cancellable into
- free cancellable out of on both hits (ground attacks on first hit, qcf+K on the second hit)
- hard knockdown on the second hit
- supercancellable on the first hit
8. Leading High - f+D,B(one frame after)
- Chris goes into an invincible stance, then does a shortranged kick afterwards
- unpunishable on block and useful for going through CD counters
- supercancellable
9. Leading Low - d+D,B(one frame after)
- Chris goes into an invincible stance, then does a crouch B
- unpunishable on block and useful for going through CD counters
- supercancellable
DMs
1. Chain Slide Touch - qcfx2+P
- Chris performs a series of horizontal strikes that travel about half screen distance
- has some reasonably good recovery, making it difficult (though still possible) to punish on block
2. Twister Drive - qcbx2+K
- Chris performs a series of rising spin kicks that come out quickly
- due to hitbox issues, using it as an anti-air will make very few of the hits connect, doing very low damage
- very punishable if blocked, can whiff easily against crouching opponents is misspaced
SDMs
1. Chain Slide Touch - qcfx2+AC
- Acts similar to his DM version except it travels a full screen length, doing more damage, and has a bigger hitbox making it easier to combo into
2. Twister Drive - qcbx2+BD
- similar to his normal DM version except does more damage, has better startup invincibility and doesn't suffer from the hitbox issues
HSDMs
1. Honoo no Sadame no Chris - hcbx2+AC
- Chris taunts and then transforms into Orochi Chris for the remainder of the round
- Chris is invincible during his taunt
Notes
- cancellable normals are close A, far A, crouch A, close B, close C, far C(1), crouch C, close D(special and DMs only), jump C
- CD is cancellable into specials and DMs
- D throw is a backturned hard knockdown
Combos
Anywhere
1. [Jump attack] (Crouch B, Crouch A)/Crouch C, f+A, hcb+A - 18%
This is Chris' basic no meter combo, started from either crouch C, or crouch B->crouch A. Going from crouch A to f+A could give you an accidental qcf+A unless you input that part as d+B, df+A, f+A. Also keep in mind that doing a non-crossup jump attack into the crouch B->crouch A will most likely not connect due to spacing (though sometimes it does). Omit the crouch B just in case.
2. [Jump attack] Crouch BBB, Far B - 9%
Not particularly useful due to low damage but some reasons to use it would be if you can't combo crouch B into crouch A due to spacing or you want to push your opponent back safely.
3. [Jump crossup D] (Crouch B, Crouch A)/Close C/Crouch C, f+A, qcfx2+P (recommended against standing opponents) - 25-28%
Does decent damage for one meter of stock used. If you're going to be using crouch C, make sure it hits close or else the super will not combo and you will have to use the supercancel version below. Don't do this combo on crouching opponents unless it is after a crossup jump D.
4. [Jump attack] (Crouch B, Crouch A)/Close C/Crouch C, f+A, hcb+P(1), (S)qcfx2+P/qcbx2+K - 30-33%
Does just a slight bit more damage than the combo above. The damage may not seem to justify the extra stock used but in this combo, the super will connect at any distance because hcb+P travels forward.
5. [Jump attack] (Crouch B, Crouch A)/Close C/Crouch C, f+A, BC, run up Close C/Crouch C, df+B, (C)hcb+P, (S)qcfx2+AC - 50%
One of Chris' most damaging combos. Against crouching characters in which crouch C whiffs, this combo will have to be replaced with close C making it much harder to execute since you have to run up closer. 50% damage(not counting the jump attack damage) for 4 bars of stock is not much compared to what other characters can do but unfortunately it's the most you're going to be seeing from Chris.
Strategies
Pressuring
High/Low Lockdown Mixup
Chris has a useful high/low mixup that involves late cancelling his close C or crouch C, into his f+B high attack or df+B low. It's difficult to react and if the opponent has no stocks, they are forced to block the mixup. The only way to punish it is using a guard roll right after the C but even then, it's not that easy and since the cancel is delayed, you can react to whether they guard rolled and not do the followup if they did.
Generally it's best to do this mixup from a crouch C, since it can come out from further away than a close C would, it acts as a better anti-air and you don't have to be afraid of his (bad) far C coming out in case you were out of range for close C to come out. However, the following characters can crouch under his crouch C:
K', Andy, Joe, Athena, Kensou, Chin, Benimaru, Mai, Yuri, Yashiro, Iori, Mature, Vice, Yamazaki, Billy, Leona, Kim, Choi, Kula, Angel
