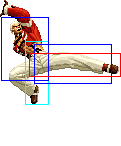
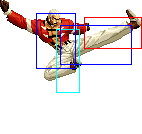
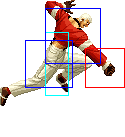
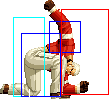
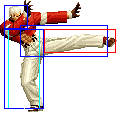
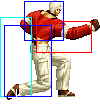
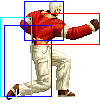
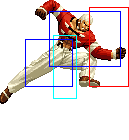
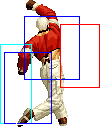
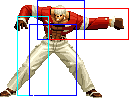
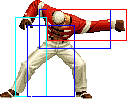
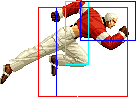
(→Corner) |
|||
| Line 275: | Line 275: | ||
|- | |- | ||
! dp+[[image:snka.gif]] | ! dp+[[image:snka.gif]] | ||
|align="center"| | |align="center"| 9/3/32 | ||
|align="center"| | |align="center"| KD/-22 | ||
|align="center"| | |align="center"| Fi,Fo | ||
|align="center"| HL | |align="center"| HL | ||
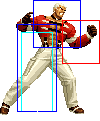
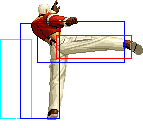
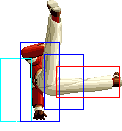
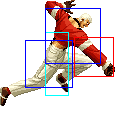
|valign="bottom" style="border-right:0px;"| [[image:Yashiro02_dpA1.png|center]] | |valign="bottom" style="border-right:0px;"| [[image:Yashiro02_dpA1.png|center]] | ||
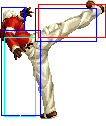
|valign="bottom" style="border-left:0px;"| [[image:Yashiro02_dpA2.png|center]] | |valign="bottom" style="border-left:0px;"| [[image:Yashiro02_dpA2.png|center]] | ||
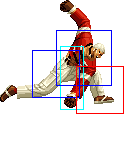
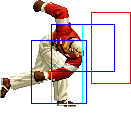
|rowspan="2"| '''Upper Duel - dp+P''' | |rowspan="2"| '''Upper Duel - dp+P''' | ||
* | * Invincibility: Frame 1. Guard point: A: Frame 2-5 C: Frame 2-7. | ||
* if the first hit whiffs, then the rest of the move does not complete - if it does hit, then Yashiro will rise into the air for another hit if dp+A was used and two hits if dp+C was used | * if the first hit whiffs, then the rest of the move does not complete - if it does hit, then Yashiro will rise into the air for another hit if dp+A was used and two hits if dp+C was used. | ||
* The framedata of the follow-up on hit/block are: A: 3/2(3)12/11+17 C: 3/2(3)17/16+14 | |||
* dp+A free cancellable out of on the first hit, dp+C free cancellable out of on the first two hits | * dp+A free cancellable out of on the first hit, dp+C free cancellable out of on the first two hits | ||
* free cancellable into | * free cancellable into | ||
|- | |- | ||
! dp+[[image:snkc.gif]] | ! dp+[[image:snkc.gif]] | ||
|align="center"| | |align="center"| 13/3/33 | ||
|align="center"| | |align="center"| KD/-29 | ||
|align="center"| | |align="center"| Fi,Fo | ||
|align="center"| HL | |align="center"| HL | ||
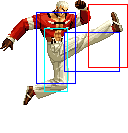
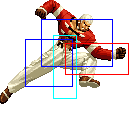
|valign="bottom" style="border-right:0px;"| [[image:Yashiro02_dpC1.png|center]] | |valign="bottom" style="border-right:0px;"| [[image:Yashiro02_dpC1.png|center]] | ||
| Line 296: | Line 297: | ||
|- | |- | ||
! <br>qcb+[[image:snkb.gif]]<br><br> | ! <br>qcb+[[image:snkb.gif]]<br><br> | ||
|align="center"| | |align="center"| 22/3+3/1+22 | ||
|align="center"| | |align="center"| KD/-11 | ||
|align="center"| | |align="center"| Fi | ||
|align="center"| HL | |align="center"| HL | ||
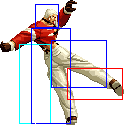
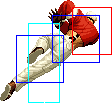
|rowspan="2" valign="bottom" style="border-right:0px;"| [[image:Yashiro02_qcbK1.png|center]] | |rowspan="2" valign="bottom" style="border-right:0px;"| [[image:Yashiro02_qcbK1.png|center]] | ||
| Line 305: | Line 306: | ||
* Yashiro leaps into the air and smashes the ground with his fists | * Yashiro leaps into the air and smashes the ground with his fists | ||
* qcb+D travels further and higher than qcb+B | * qcb+D travels further and higher than qcb+B | ||
* | * Invincibility: B: Frame 1-8, D: Frame 1-13. | ||
* hard knockdown | * hard knockdown | ||
* free cancellable into | * free cancellable into | ||
|- | |- | ||
! qcb+[[image:snkd.gif]] | ! qcb+[[image:snkd.gif]] | ||
|align="center"| | |align="center"| 27/3+3/1+26 | ||
|align="center"| | |align="center"| KD/-15 | ||
|align="center"| | |align="center"| Fi | ||
|align="center"| HL | |align="center"| HL | ||
|- | |- | ||
! hcf+[[image:snka.gif]] | ! hcf+[[image:snka.gif]] | ||
|align="center"| | |align="center"| 16/8/17 | ||
|align="center"| | |align="center"| -5/-7 | ||
|align="center"| qcf+A | |align="center"| Fi,Fo,>qcf+A | ||
|align="center"| HL | |align="center"| HL | ||
|valign="bottom" style="border-right:0px;"| [[image:Yashiro02_hcfA1.png|center]] | |valign="bottom" style="border-right:0px;"| [[image:Yashiro02_hcfA1.png|center]] | ||
| Line 327: | Line 328: | ||
* hcf+C is an overhead | * hcf+C is an overhead | ||
* hcf+A can be followed up with qcf+A, while hcf+C can be followed up with qcf+C. However, there is a glitch in which, executing hcf+AC will result in hcf+A coming out, yet allow you to use a qcf+C followup. This followup isn't the same as his qcf+C followup after hcf+C, it has a faster recovery which allows you to juggle with qcfx2+P | * hcf+A can be followed up with qcf+A, while hcf+C can be followed up with qcf+C. However, there is a glitch in which, executing hcf+AC will result in hcf+A coming out, yet allow you to use a qcf+C followup. This followup isn't the same as his qcf+C followup after hcf+C, it has a faster recovery which allows you to juggle with qcfx2+P | ||
* Invincibility: A/A+C: Frame 10-12 C: Frame 10-15. Feet invincibility: Frame 7-9. | |||
* free cancellable into | * free cancellable into | ||
* free cancellable out of | * free cancellable out of | ||
|- | |- | ||
! hcf+[[image:snkc.gif]] | ! hcf+[[image:snkc.gif]] | ||
|align="center"| | |align="center"| 24/7/18 | ||
|align="center"| | |align="center"| -5/-7 | ||
|align="center"| qcf+C | |align="center"| Fi,Fo,>qcf+C | ||
|align="center"| H | |align="center"| H | ||
|colspan="2"| [[image:Yashiro02_hcfC.png|center]] | |colspan="2"| [[image:Yashiro02_hcfC.png|center]] | ||
|- | |- | ||
! hcf+[[image:snka.gif]]+[[image:snkc.gif]] | ! hcf+[[image:snka.gif]]+[[image:snkc.gif]] | ||
|align="center"| | |align="center"| 24/7/18 | ||
|align="center"| | |align="center"| -5/-7 | ||
|align="center"| qcf+A,qcf+C | |align="center"| >qcf+A,>qcf+C | ||
|align="center"| HL | |align="center"| HL | ||
|valign="bottom" style="border-right:0px;"| [[image:Yashiro02_hcfA1.png|center]] | |valign="bottom" style="border-right:0px;"| [[image:Yashiro02_hcfA1.png|center]] | ||
| Line 346: | Line 348: | ||
|- | |- | ||
! > qcf+[[image:snka.gif]]<br>(after hcf+A) | ! > qcf+[[image:snka.gif]]<br>(after hcf+A) | ||
|align="center"| | |align="center"| 13/4/24 | ||
|align="center"| | |align="center"| -8/-10 | ||
|align="center"| | |align="center"| | ||
|align="center"| HL | |align="center"| HL | ||
| Line 358: | Line 360: | ||
|- | |- | ||
! > qcf+[[image:snka.gif]]<br>(after hcf+AC) | ! > qcf+[[image:snka.gif]]<br>(after hcf+AC) | ||
|align="center"| | |align="center"| 13/4/24 | ||
|align="center"| | |align="center"| -8/-10 | ||
|align="center"| | |align="center"| | ||
|align="center"| HL | |align="center"| HL | ||
|- | |- | ||
! > qcf+[[image:snkc.gif]]<br>(after hcf+C) | ! > qcf+[[image:snkc.gif]]<br>(after hcf+C) | ||
|align="center"| | |align="center"| 11/4/37 | ||
|align="center"| | |align="center"| KD/-23 | ||
|align="center"| Su | |align="center"| Su | ||
|align="center"| HL | |align="center"| HL | ||
| Line 371: | Line 373: | ||
|- | |- | ||
! > qcf+[[image:snkc.gif]]<br>(after hcf+AC) | ! > qcf+[[image:snkc.gif]]<br>(after hcf+AC) | ||
|align="center"| | |align="center"| 12/4/27 | ||
|align="center"| | |align="center"| KD/-13 | ||
|align="center"| Su | |align="center"| Su | ||
|align="center"| HL | |align="center"| HL | ||
| Line 380: | Line 382: | ||
|- | |- | ||
! <br>qcfx2+[[image:snka.gif]]<br><br> | ! <br>qcfx2+[[image:snka.gif]]<br><br> | ||
|align="center"| 1+[0~27~55~85~86]+4 (7 final level)/6/37(43 final level) | |||
|align="center"| KD/-25 | |||
|align="center"| | |align="center"| | ||
|align="center"| HL (- final level) | |||
|align="center"| HL | |||
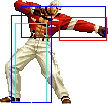
|rowspan="2" valign="bottom" style="border-right:0px;"| [[image:Yashiro02_qcfx2P1.png|center]] | |rowspan="2" valign="bottom" style="border-right:0px;"| [[image:Yashiro02_qcfx2P1.png|center]] | ||
|rowspan="2" valign="bottom" style="border-left:0px;"| [[image:Yashiro02_qcfx2P2.png|center]] | |rowspan="2" valign="bottom" style="border-left:0px;"| [[image:Yashiro02_qcfx2P2.png|center]] | ||
| Line 389: | Line 391: | ||
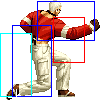
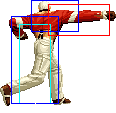
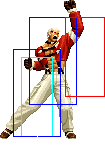
* Yashiro does a very quick forward punch that has good range. If blocked, he can be punished unless it was blocked from max distance | * Yashiro does a very quick forward punch that has good range. If blocked, he can be punished unless it was blocked from max distance | ||
* comes out extremely quick, allowing you to punish many moves on block that would seem unpunishable by most characters | * comes out extremely quick, allowing you to punish many moves on block that would seem unpunishable by most characters | ||
* Can be held | * Invincibility: Frame 1. | ||
* Can be held, becomes unblockable at the highest charge. | |||
|- | |- | ||
! qcfx2+[[image:snkc.gif]] | ! qcfx2+[[image:snkc.gif]] | ||
|align="center"| 1+[0~27~55~85~86]+7/6/39 (43 final level) | |||
|align="center"| KD/-27 | |||
|align="center"| | |align="center"| | ||
|align="center"| HL (- final level) | |||
|align="center"| HL | |||
|- | |- | ||
|colspan="8" align="center"| '''SDM''' | |colspan="8" align="center"| '''SDM''' | ||
|- | |- | ||
! qcfx2+[[image:snka.gif]]+[[image:snkc.gif]] | ! qcfx2+[[image:snka.gif]]+[[image:snkc.gif]] | ||
|align="center"| | |align="center"| 1+[0~19~39~61~62]+4 (7 final level)/6/37 (43 final level) | ||
|align="center"| | |align="center"| KD/-25 | ||
|align="center"| | |align="center"| | ||
|align="center"| HL | |align="center"| HL | ||
| Line 408: | Line 411: | ||
| '''Final Impact - qcfx2+AC''' | | '''Final Impact - qcfx2+AC''' | ||
* acts just like his normal DM version but with a little extra damage | * acts just like his normal DM version but with a little extra damage | ||
* Invincibility: Frame 1 | |||
* Can be held, becomes unblockable at the highest charge. | |||
|- | |- | ||
|colspan="8" align="center"| '''HSDM''' | |colspan="8" align="center"| '''HSDM''' | ||
|- | |- | ||
! qcb,hcf+[[image:snkb.gif]]+[[image:snkd.gif]] | ! qcb,hcf+[[image:snkb.gif]]+[[image:snkd.gif]] | ||
|align="center"| | |align="center"| 12/13/24 | ||
|align="center"| | |align="center"| KD/-19 | ||
| | | | ||
|align="center"| HL | |align="center"| HL | ||
Revision as of 07:45, 30 September 2013
General Info
Crouch height: Low
Colors

|

|

|

|
Movelist
Notes
- cancellable normals are close A, far A, crouch A, close B, close C, crouch C, close D, crouch D(1)
- CD is cancellable into specials and DMs
- D throw is a backturned hard knockdown
Combos
Anywhere
- cr.B/A cr.AA st.B
- cr.B/A cr.AA qcfx2+P
- cl.D/cl.C f+A, hcf+AC qcf+C, juggle with qcfx2+P/sj.D
- f+B hcf+AC qcf+A/[qcf+C, juggle with qcfx2+P/sj.D]
- qcf+C will whiff at some ranges
- hcf+C qcf+C xx qcfx2+P
- You must charge the super for a bit or it will whiff
Corner
- cl.D/cl.C f+A hcf+AC qcf+C, juggle with dp+A/cl.C/any jump normal
Counterhit
- st.CD (counterhit) qcb+K
Max Mode
- cr.B/A cr.A st.B BC qcfx2+P/qcfx2+AC
- Because of the speed of Yashiro's DM it is possible to BC cancel many of his light normals and immediately link DM afterwards. This combo is merely an example. In order to get the DM out in time, buffer like so: cr.A qcf+B BC qcf+P
- cl.C f+A BC run up cl.C f+A hcf+AC (C)dp+P(1) (C)hcf+AC (C)dp+P(1) (C)hcf+AC qcf+C qcfx2+P/qcfx2+AC (80%/90%)
- you must run up very close if you do this outside the corner
- (Already in maxmode) hcf+C (C)dp+P(1) (C)hcf+AC (C)dp+P(1) (C)hcf+AC qcf+C qcfx2+P/qcfx2+AC
