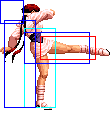
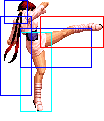
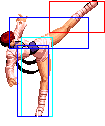
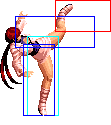
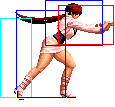
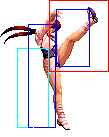
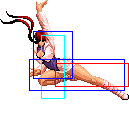
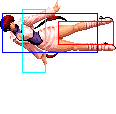
The King of Fighters 2002/Shermie: Difference between revisions

From SuperCombo Wiki
Line 374: Line 374:
|align="center"| -
|align="center"| -
|colspan="4" | [[image:Shermie02_qcfK.png|center]]
|colspan="4" | [[image:Shermie02_qcfK.png|center]]
| '''Shermie Cute - qcf+K (after qcb+P, hcf+P or dp+K)
| '''Shermie Cute - qcf+K (after qcb+P, hcf+P or dp+K)'''
* while the opponent is knocked down from the previous attack, Shermie runs forward and performs a knee drop doing low damage
* after doing this move, she usually doesn't have enough time to run forward and be in position to do a mixup before they wakeup. Because of that, sometimes this followup move is not used in favor of the better positioning
* hard knockdown
* hard knockdown
* free cancellable out of, though the only reason to cancel it is to reduce the recovery time'''
* free cancellable out of, though the only reason to cancel it is to reduce the recovery time
|-
|colspan="10" align="center"| '''DMs'''
|-
! hcbx2+[[image:punch.gif]]
|align="center"|
|align="center"|
|align="center"|
|align="center"| -
|colspan="4" | [[image:Shermie02_hcbx2P.png|center]]
| '''Shermie Flash - hcbx2+P'''
|-
! hcfx2+[[image:punch.gif]]
|align="center"|
|align="center"|
|align="center"|
|align="center"| -
|colspan="4" | [[image:Shermie02_hcfx2P.png|center]]
| '''Shermie Carnival - hcfx2+P'''
|-
|colspan="10" align="center"| '''SDMs'''
|-
! hcbx2+[[image:snka.gif]]+[[image:snkc.gif]]
|align="center"|
|align="center"|
|align="center"|
|align="center"| -
|colspan="4" | [[image:Shermie02_hcbx2P.png|center]]
| '''Shermie Flash - hcbx2+AC'''
|-
! hcfx2+[[image:snka.gif]]+[[image:snkc.gif]]
|align="center"|
|align="center"|
|align="center"|
|align="center"| -
|colspan="4" | [[image:Shermie02_hcfx2P.png|center]]
| '''Shermie Carnival - hcfx2+AC'''
|-
|colspan="10" align="center"| '''HSDM'''
|-
|}
|}
=== DMs ===
1. Shermie Flash - hcbx2+P
2. Shermie Carnival - hcfx2+P
=== SDMs ===
1. Shermie Flash - hcbx2+AC
2. Shermie Carnival - hcfx2+AC
=== HSDMs ===
=== HSDMs ===


Revision as of 04:22, 22 September 2013

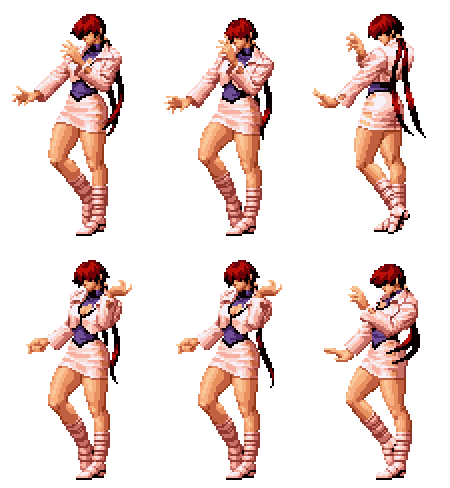
the longest idle for the worst character

General Info

Crouch height: Medium

Colors

Snka.gif Snkb.gif Snkc.gif Snkd.gif
Shermie02 colorA.png Shermie02 colorB.png Shermie02 colorC.png Shermie02 colorD.png

Movelist

Frames Advantage Cancel Block Hitbox Notes
Standing Close
Snka.gif 5/2/6 +4/+2 R,C,S,Su HL
Shermie02 clA.png
Snkb.gif 5/3(5)9/5 -2/-4 C,S,Su HL
Shermie02 clB1.png
Shermie02 clB2.png
Snkc.gif 5/3/19 -2/-4 C,S,Su HL
Shermie02 clC.png
Snkd.gif 8/5*5/26 -11/-13 HL
Shermie02 clD1.png
Shermie02 clD2.png
Standing Far
Snka.gif 5/2/6 +4/+2 R,C,S,Su HL
Shermie02 stA.png
Snkb.gif 5/3(5)9/5 -2/-4 C,S,Su HL
Shermie02 clB1.png
Shermie02 clB2.png
Snkc.gif 14/6/19 -5/-7 HL
Shermie02 stC.png
Snkd.gif 8/5/30 -15/-17 HL
Shermie02 clD1.png
Snkc.gif+Snkd.gif 15/8/14 KD/0 C,S,Su HL
Shermie02 stCD.png
Crouching
Snka.gif 5/2/6 +4/+2 R,S,Su HL
Shermie02 crA.png
Snkb.gif 8/5/14 -7/-9 C,S,Su L
Shermie02 crB.png
Snkc.gif 6/5+5/29 -19/-21 C,S,Su HL
Shermie02 crC1.png
Shermie02 crC2.png
Snkd.gif 18/8/19 KD/-9 L
Shermie02 crD.png
Jump
Snka.gif 5/2+3/- -/- H
Shermie02 jA1.png
Shermie02 jA2.png
Snkb.gif 5/6/- -/- H
Shermie02 jB.png
Snkc.gif 5/6/- -/- H
Shermie02 jC.png
Snkd.gif 8/8/- -/- H
Shermie02 jD.png
Snkc.gif+Snkd.gif 12/4/- KD/- HL
Shermie02 jCD.png
Neutral Jump
Snka.gif 5/2+3+3/- -/- H
Shermie02 juA1.png
Shermie02 juA2.png
Shermie02 juA3.png
Snkb.gif 5/6/- -/- H
Shermie02 jB.png
Snkc.gif 5/4/- -/- H
Shermie02 juC.png
Snkd.gif 5/10/- -/- H
Shermie02 juD.png
Hop
Snka.gif 5/8/- -/- H
Shermie02 juA3.png
Snkb.gif 5/6/- -/- H
Shermie02 jB.png
Snkc.gif 5/3/- -/- H
Shermie02 jC.png
Snkd.gif 8/4/- -/- H
Shermie02 jD.png
Command Normals
f+Snka.gif 14/5/49 KD/-36 H
Shermie02 fA.png

f+Snkb.gif

15/4(4)4+4+4/11 -3/-5 HL,H
Shermie02 fB1.png
Shermie02 fB2.png
f+Snkb.gif
(cancel)
15/4(4)4+4+4/11 -3/-5 S,Su HL
Shermie02 fB3.png
Shermie02 fB4.png
Snka.gif+Snkb.gif+Snkc.gif -
Shermie02 ABC1.png
Shermie02 ABC2.png
Special Moves
hcf+Punch.gif Grab
Shermie02 hcfP.png
Shermie Spiral - hcf+P
  • Shermie does a one frame instant throw on the opponent, causing them to switch sides afterwards
  • can be followed up by qcf+K, but not following up gives Shermie more time to run forward and set up a mixup on their wakeup
  • hard knockdown and opponent gets up with their back turned
  • free cancellable into
hcf+Kick.gif Grab
Shermie02 hcfK.png
Diamond Bust - hcf+K
qcb+Snka.gif HL
Shermie02 qcbA.png
Shermie Whip - qcb+P
qcb+Snkc.gif HL
Shermie02 qcbC.png

qcb+Snkb.gif

HL
Shermie02 qcbK.png
Axle Spin Kick - qcb+K
qcb+Snkd.gif HL

hcb,f+Snka.gif

-
Shermie02 hcbfP.png
F-Captured - hcb,f+P
hcb,f+Snkc.gif -

dp+Snkb.gif

Grab
Shermie02 dpK.png
Shermie Clutch - dp+K
dp+Snkd.gif Grab
qcf+Kick.gif -
Shermie02 qcfK.png
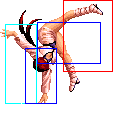
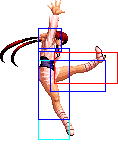
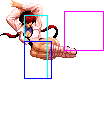
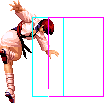
Shermie Cute - qcf+K (after qcb+P, hcf+P or dp+K)
  • while the opponent is knocked down from the previous attack, Shermie runs forward and performs a knee drop doing low damage
  • after doing this move, she usually doesn't have enough time to run forward and be in position to do a mixup before they wakeup. Because of that, sometimes this followup move is not used in favor of the better positioning
  • hard knockdown
  • free cancellable out of, though the only reason to cancel it is to reduce the recovery time
DMs
hcbx2+Punch.gif -
Shermie02 hcbx2P.png
Shermie Flash - hcbx2+P
hcfx2+Punch.gif -
Shermie02 hcfx2P.png
Shermie Carnival - hcfx2+P
SDMs
hcbx2+Snka.gif+Snkc.gif -
Shermie02 hcbx2P.png
Shermie Flash - hcbx2+AC
hcfx2+Snka.gif+Snkc.gif -
Shermie02 hcfx2P.png
Shermie Carnival - hcfx2+AC
HSDM

HSDMs

1. Inazuma Leg Lariat - qcfx2+BD


Notes

  • cancellable normals are close A, far A, crouch A, close B, far B, crouch B, close C, crouch C
  • CD is cancellable into specials and DMs
Strategies

Game Navigation