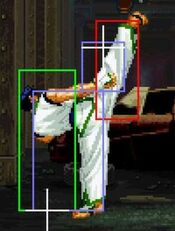
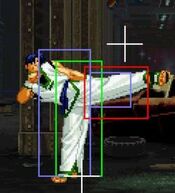
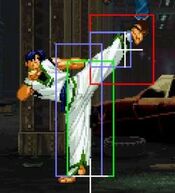
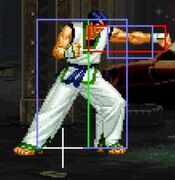
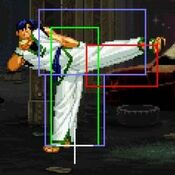
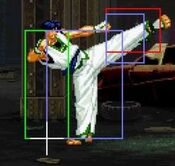
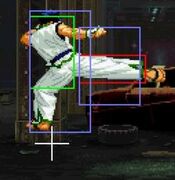
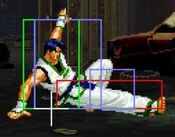
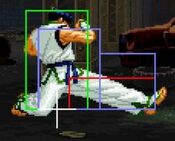
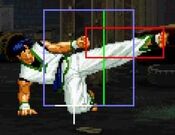
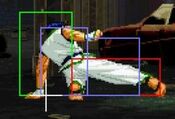
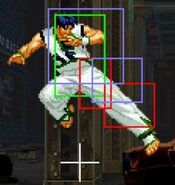
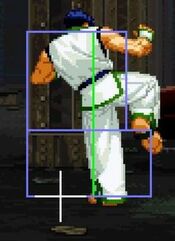
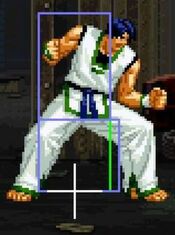
m (→Move List) |
(Cleaned up page. Conforms with other pages. Other small modifications done.) |
||
| Line 1: | Line 1: | ||
{{MOTW Character Intro|char=Jae |content= | {{MOTW Character Intro|char=Jae |content= | ||
==Introduction== | ==Introduction== | ||
| Line 34: | Line 32: | ||
==Move List== | ==Move List== | ||
Frame Data Source : https://w.atwiki.jp/garoumow/pages/82.html and https://w.atwiki.jp/garoumow/pages/22.html | Frame Data Source : https://w.atwiki.jp/garoumow/pages/82.html and https://w.atwiki.jp/garoumow/pages/22.html | ||
{{MOTW Legend}} | {{MOTW Legend}} | ||
===Close Standing Normals=== | ===Close Standing Normals=== | ||
===== <span class="invisible-header"></span> ===== | ===== <span class="invisible-header"></span> ===== | ||
<font style="visibility:hidden" size="0"></font> | <font style="visibility:hidden" size="0"></font> | ||
| Line 49: | Line 50: | ||
{{AttackData-Garou | {{AttackData-Garou | ||
|Damage=4 | |Damage=4 | ||
|Guard= | |Guard=Mid | ||
|Startup=3 | |Startup=3 | ||
|Active=4 | |Active=4 | ||
| Line 60: | Line 61: | ||
|Cancel on Block=Yes/chainable | |Cancel on Block=Yes/chainable | ||
|Guard Crush Value=4 | |Guard Crush Value=4 | ||
|description=Pretty much the same as far A, but in proximity form - which means | |description=Pretty much the same as far A, but in proximity form -- which means it's great, and a primary tool for pressure, combos and poking | ||
}} | }} | ||
}} | }} | ||
===== <span class="invisible-header"></span> ===== | ===== <span class="invisible-header"></span> ===== | ||
| Line 74: | Line 77: | ||
{{AttackData-Garou | {{AttackData-Garou | ||
|Damage=6 | |Damage=6 | ||
|Guard= | |Guard=Mid | ||
|Startup=4 | |Startup=4 | ||
|Active=4 | |Active=4 | ||
| Line 88: | Line 91: | ||
}} | }} | ||
}} | }} | ||
===== <span class="invisible-header"></span> ===== | ===== <span class="invisible-header"></span> ===== | ||
| Line 100: | Line 105: | ||
{{AttackData-Garou | {{AttackData-Garou | ||
|Damage=5, 5 | |Damage=5, 5 | ||
|Guard= | |Guard=Mid | ||
|Startup=5 | |Startup=5 | ||
|Active=1, 4 | |Active=1, 4 | ||
| Line 114: | Line 119: | ||
}} | }} | ||
}} | }} | ||
<!-- cl.5C damage seems to be 5, 5, even though the JPN wiki says it is 6, 6. --> | |||
===== <span class="invisible-header"></span> ===== | ===== <span class="invisible-header"></span> ===== | ||
| Line 126: | Line 134: | ||
{{AttackData-Garou | {{AttackData-Garou | ||
|Damage=6, 6 | |Damage=6, 6 | ||
|Guard= | |Guard=Mid | ||
|Startup=4 | |Startup=4 | ||
|Active=1, «5», 3 | |Active=1, «5», 3 | ||
| Line 137: | Line 145: | ||
|Cancel on Block=Yes (1st hit) | |Cancel on Block=Yes (1st hit) | ||
|Guard Crush Value=3, 3 | |Guard Crush Value=3, 3 | ||
|description=You can insert the first hit in some punish combos, its best used is in his corner infinite using its big advantage on FC. | |description=You can insert the first hit in some punish combos, its best used is in his corner infinite using its big advantage on FC. | ||
Can't be JDed crouching. The 2nd hit whiffs when crouching. | |||
}} | }} | ||
}} | }} | ||
===Far Standing Normals=== | ===Far Standing Normals=== | ||
===== <span class="invisible-header"></span> ===== | ===== <span class="invisible-header"></span> ===== | ||
<font style="visibility:hidden" size="0"></font> | <font style="visibility:hidden" size="0"></font> | ||
| Line 152: | Line 164: | ||
{{AttackData-Garou | {{AttackData-Garou | ||
|Damage=5 | |Damage=5 | ||
|Guard= | |Guard=Mid | ||
|Startup=3 | |Startup=3 | ||
|Active=4 | |Active=4 | ||
| Line 166: | Line 178: | ||
}} | }} | ||
}} | }} | ||
===== <span class="invisible-header"></span> ===== | ===== <span class="invisible-header"></span> ===== | ||
| Line 177: | Line 191: | ||
{{AttackData-Garou | {{AttackData-Garou | ||
|Damage=7 | |Damage=7 | ||
|Guard= | |Guard=Mid | ||
|Startup=4 | |Startup=4 | ||
|Active=3 | |Active=3 | ||
| Line 191: | Line 205: | ||
}} | }} | ||
}} | }} | ||
===== <span class="invisible-header"></span> ===== | ===== <span class="invisible-header"></span> ===== | ||
| Line 202: | Line 218: | ||
{{AttackData-Garou | {{AttackData-Garou | ||
|Damage=14 | |Damage=14 | ||
|Guard= | |Guard=Mid | ||
|Startup=12 | |Startup=12 | ||
|Active=3 | |Active=3 | ||
| Line 216: | Line 232: | ||
}} | }} | ||
}} | }} | ||
===== <span class="invisible-header"></span> ===== | ===== <span class="invisible-header"></span> ===== | ||
| Line 227: | Line 245: | ||
{{AttackData-Garou | {{AttackData-Garou | ||
|Damage=14 | |Damage=14 | ||
|Guard= | |Guard=Mid | ||
|Startup=13 | |Startup=13 | ||
|Active=2 | |Active=2 | ||
| Line 243: | Line 261: | ||
}} | }} | ||
}} | }} | ||
===Crouching Normals=== | ===Crouching Normals=== | ||
===== <span class="invisible-header"></span> ===== | ===== <span class="invisible-header"></span> ===== | ||
<font style="visibility:hidden" size="0"></font> | <font style="visibility:hidden" size="0"></font> | ||
| Line 255: | Line 276: | ||
{{AttackData-Garou | {{AttackData-Garou | ||
|Damage=4 | |Damage=4 | ||
|Guard= | |Guard=Low | ||
|Startup=5 | |Startup=5 | ||
|Active=4 | |Active=4 | ||
| Line 269: | Line 290: | ||
}} | }} | ||
}} | }} | ||
===== <span class="invisible-header"></span> ===== | ===== <span class="invisible-header"></span> ===== | ||
| Line 280: | Line 303: | ||
{{AttackData-Garou | {{AttackData-Garou | ||
|Damage=6 | |Damage=6 | ||
|Guard= | |Guard=Low | ||
|Startup=4 | |Startup=4 | ||
|Active=4 | |Active=4 | ||
| Line 294: | Line 317: | ||
}} | }} | ||
}} | }} | ||
===== <span class="invisible-header"></span> ===== | ===== <span class="invisible-header"></span> ===== | ||
| Line 305: | Line 330: | ||
{{AttackData-Garou | {{AttackData-Garou | ||
|Damage=10 | |Damage=10 | ||
|Guard= | |Guard=Mid | ||
|Startup=5 | |Startup=5 | ||
|Active=3 | |Active=3 | ||
| Line 319: | Line 344: | ||
}} | }} | ||
}} | }} | ||
===== <span class="invisible-header"></span> ===== | ===== <span class="invisible-header"></span> ===== | ||
| Line 330: | Line 357: | ||
{{AttackData-Garou | {{AttackData-Garou | ||
|Damage=10 | |Damage=10 | ||
|Guard= | |Guard=Low | ||
|Startup=7 | |Startup=7 | ||
|Active=4 | |Active=4 | ||
| Line 344: | Line 371: | ||
}} | }} | ||
}} | }} | ||
===Jumping Normals=== | ===Jumping Normals=== | ||
===== <span class="invisible-header"></span> ===== | ===== <span class="invisible-header"></span> ===== | ||
<font style="visibility:hidden" size="0"></font> | <font style="visibility:hidden" size="0"></font> | ||
| Line 356: | Line 386: | ||
{{AttackData-Garou | {{AttackData-Garou | ||
|Damage=5 | |Damage=5 | ||
|Guard= | |Guard=High | ||
|Startup=6 | |Startup=6 | ||
|Active=5 | |Active=5 | ||
| Line 369: | Line 399: | ||
|description= Probably your best jump in due to its good active frames, great speed and hitbox. the hitstun aint that long so its hard to get significany advantage after, the key is to hit it right before landing. Also your only crossup. | |description= Probably your best jump in due to its good active frames, great speed and hitbox. the hitstun aint that long so its hard to get significany advantage after, the key is to hit it right before landing. Also your only crossup. | ||
If done deep enough, the j.A can beat upper-body evasion attacks. | |||
}} | }} | ||
}} | }} | ||
===== <span class="invisible-header"></span> ===== | ===== <span class="invisible-header"></span> ===== | ||
| Line 383: | Line 415: | ||
{{AttackData-Garou | {{AttackData-Garou | ||
|Damage=6 | |Damage=6 | ||
|Guard= | |Guard=High | ||
|Startup=6 | |Startup=6 | ||
|Active=8 | |Active=8 | ||
| Line 398: | Line 430: | ||
}} | }} | ||
}} | }} | ||
===== <span class="invisible-header"></span> ===== | ===== <span class="invisible-header"></span> ===== | ||
| Line 409: | Line 443: | ||
{{AttackData-Garou | {{AttackData-Garou | ||
|Damage=9 | |Damage=9 | ||
|Guard= | |Guard=High | ||
|Startup=6 | |Startup=6 | ||
|Active=6 | |Active=6 | ||
| Line 425: | Line 459: | ||
}} | }} | ||
}} | }} | ||
===== <span class="invisible-header"></span> ===== | ===== <span class="invisible-header"></span> ===== | ||
| Line 436: | Line 472: | ||
{{AttackData-Garou | {{AttackData-Garou | ||
|Damage=10 | |Damage=10 | ||
|Guard= | |Guard=High | ||
|Startup=8 | |Startup=8 | ||
|Active=6 | |Active=6 | ||
| Line 450: | Line 486: | ||
}} | }} | ||
}} | }} | ||
===Command Normals=== | ===Command Normals=== | ||
===== <span class="invisible-header"></span> ===== | |||
<font style="visibility:hidden" size="0"></font> | |||
{{MoveData | |||
|image=Garou_Kim_bbB.jpg | |||
|name=Shou-Kyaku Hou | |||
|input= {{Motion|4}},{{Motion|4}}+{{Icon-SNK|B}} | |||
|subtitle= | |||
|caption= | |||
|data= | |||
{{AttackData-Garou | |||
|Damage=12 | |||
|Guard=Mid | |||
|Startup=23 | |||
|Active=5 | |||
|Recovery=25 | |||
|Total=53 | |||
|Hit Adv=KD | |||
|Block Adv=-9 | |||
|Feint Cancel=Yes | |||
|Cancel on Hit=Yes | |||
|Cancel on Block=Yes | |||
|Guard Crush Value=9 | |||
|description=Weird move -- you backdash, then lunge forward with a launching kick. rewarding on hit and the backdash might let you dodge some shit but its too slow, stubby and unsafe to be useful. | |||
* B can be inputted anytime during the backdash frames (comes out the earliest after invincible frames end). | |||
* Launches opponent into the air on hit. | |||
* You can kara cancel the startup, (1) when the move starts after the backdash, and (2) after the lunge and before move come out, usually done with Hienzan D break or Ryusei Raku. | |||
}} | |||
}} | |||
===Universal Moves=== | |||
===== <span class="invisible-header"></span> ===== | ===== <span class="invisible-header"></span> ===== | ||
<font style="visibility:hidden" size="0"></font> | <font style="visibility:hidden" size="0"></font> | ||
| Line 457: | Line 530: | ||
|image=Garou_Kim_AB.jpg | |image=Garou_Kim_AB.jpg | ||
|name=St. {{Icon-SNK|A}}{{Icon-SNK|B}} | |name=St. {{Icon-SNK|A}}{{Icon-SNK|B}} | ||
|subtitle= | |subtitle=Lower-body evasion attack | ||
|caption= | |caption= | ||
|data= | |data= | ||
{{AttackData-Garou | {{AttackData-Garou | ||
|Damage=10 | |Damage=10 | ||
|Guard= | |Guard=Overhead | ||
|Startup=25 | |Startup=25 | ||
|Active=1 | |Active=1 | ||
| Line 478: | Line 551: | ||
}} | }} | ||
}} | }} | ||
===== <span class="invisible-header"></span> ===== | ===== <span class="invisible-header"></span> ===== | ||
| Line 487: | Line 562: | ||
|image4=Garou_Kim_2AB-4.jpg | |image4=Garou_Kim_2AB-4.jpg | ||
|name=Cr. {{Icon-SNK|A}}{{Icon-SNK|B}} | |name=Cr. {{Icon-SNK|A}}{{Icon-SNK|B}} | ||
|subtitle= | |subtitle=Upper-body evasion attack | ||
|caption= | |caption= | ||
|data= | |data= | ||
{{AttackData-Garou | {{AttackData-Garou | ||
|Damage=10 | |Damage=10 | ||
|Guard= | |Guard=Mid | ||
|Startup=11 | |Startup=11 | ||
|Active=2 | |Active=2 | ||
| Line 504: | Line 579: | ||
|Guard Crush Value=6 | |Guard Crush Value=6 | ||
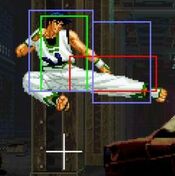
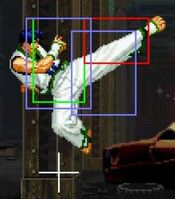
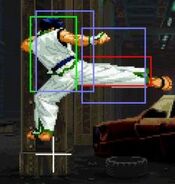
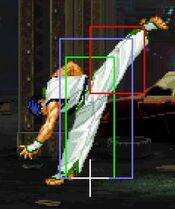
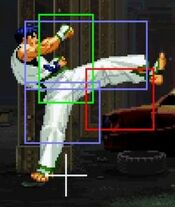
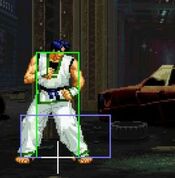
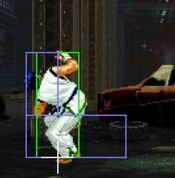
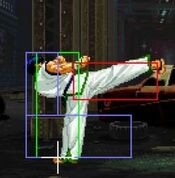
|description= Decent range and its cancelable, along with its excellent hitbox. Decent for occasional poking and you get a combo with ease. | |description= Decent range and its cancelable, along with its excellent hitbox. Decent for occasional poking and you get a combo with ease. | ||
* | * 1~5F upper-body invincibility. | ||
* 18F hitstun | * 18F hitstun, 24F blockstun. | ||
}} | }} | ||
}} | }} | ||
===== <span class="invisible-header"></span> ===== | ===== <span class="invisible-header"></span> ===== | ||
<font style="visibility:hidden" size="0"></font> | <font style="visibility:hidden" size="0"></font> | ||
{{MoveData | {{MoveData | ||
|image=Garou_Kim_CD.jpg | |image=Garou_Kim_CD-1.jpg | ||
|name=T.O.P. Attack | |image2=Garou_Kim_CD-2.jpg | ||
| | |name=High Angle Neri Chagi (T.O.P. Attack) | ||
| | |input={{Icon-SNK|C}}{{Icon-SNK|D}} | ||
|subtitle=Axe Kick | |||
|caption= | |||
|data= | |data= | ||
{{AttackData-Garou | {{AttackData-Garou | ||
|Damage=17 | |Damage=17 | ||
|Guard= | |Guard=Overhead | ||
|Startup=30 | |Startup=30 | ||
|Active= | |Active= | ||
| Line 531: | Line 610: | ||
|Guard Crush Value=25 | |Guard Crush Value=25 | ||
|description=Very slow startup overhead, but nearly instant recovery. However it doesn't hit overhead if canceled into and might not knockdown at further ranges. Bad. | |description=Very slow startup overhead, but nearly instant recovery. However it doesn't hit overhead if canceled into and might not knockdown at further ranges. Bad. | ||
}} | }} | ||
}} | }} | ||
===Throws=== | ===Throws=== | ||
| Line 575: | Line 622: | ||
{{MoveData | {{MoveData | ||
|image=Garou_Kim_Grab.jpg | |image=Garou_Kim_Grab.jpg | ||
|name=Close {{Motion|4}}/{{Motion|6}}+{{Icon-SNK|C}} | |name=Karada Otoshi | ||
|subtitle= | |input='''Close''' {{Motion|4}}/{{Motion|6}}+{{Icon-SNK|C}} | ||
|caption= | |subtitle=Body Throw | ||
|caption= | |||
|data= | |data= | ||
{{AttackData-Garou | {{AttackData-Garou | ||
| Line 592: | Line 640: | ||
|Cancel on Block= | |Cancel on Block= | ||
|Guard Crush Value= | |Guard Crush Value= | ||
|description=Basic throw damage, but the sdvantage and distance let Jae | |description=Basic throw damage, but the sdvantage and distance let Jae Hoon set solid left right mixups midscreen with jump a (microwalk slightly more to get a crossup), and very ambiguous ones in the corner (microwalk j.a will crossup, microwalk j.b wont). | ||
}} | }} | ||
}} | }} | ||
===Feints=== | ===Feints=== | ||
| Line 619: | Line 669: | ||
|Cancel on Block= | |Cancel on Block= | ||
|Guard Crush Value= | |Guard Crush Value= | ||
|description= | |description= Mimics the start of Shakka-shuu being held briefly. You can use the threat of a fake Shakka-shuu to move forward. | ||
Mimics the start of | |||
}} | }} | ||
}} | }} | ||
===== <span class="invisible-header"></span> ===== | ===== <span class="invisible-header"></span> ===== | ||
| Line 655: | Line 697: | ||
|Cancel on Block= | |Cancel on Block= | ||
|Guard Crush Value= | |Guard Crush Value= | ||
|description= | |description= Mimics the start of the super Hou'ou-kyaku. Down feint cancel makes it easier to go into down direction attacks or go straight to charging hienzan. | ||
}} | }} | ||
}} | }} | ||
===Special Moves=== | ===Special Moves=== | ||
===== <span class="invisible-header"></span> ===== | ===== <span class="invisible-header"></span> ===== | ||
<font style="visibility:hidden" size="0"></font> | <font style="visibility:hidden" size="0"></font> | ||
| Line 680: | Line 716: | ||
|data= | |data= | ||
{{AttackData-Garou | {{AttackData-Garou | ||
|version={{Motion|236}}+{{Icon-SNK|A}} | |version={{Motion|236}}+{{Icon-SNK|A}} <br>(Can Hold {{Icon-SNK|A}}) | ||
|Damage= | |Damage=5, 5, 5, 8 | ||
|Guard= | |Guard=Mid | ||
|Startup=19 | |Startup=19 | ||
|Active= | |Active= | ||
|Recovery= | |Recovery= | ||
|Total= | |Total= | ||
|Hit Adv=KD | |Hit Adv=KD | ||
|Block Adv=-16 | |Block Adv=-16 | ||
| Line 692: | Line 728: | ||
|Cancel on Hit= | |Cancel on Hit= | ||
|Cancel on Block= | |Cancel on Block= | ||
|Guard Crush Value= | |Guard Crush Value=1×3, 2 | ||
|description= | |description= | ||
}} | }} | ||
{{AttackData-Garou | {{AttackData-Garou | ||
|version={{Motion|236}}+{{Icon-SNK|C}} | |version={{Motion|236}}+{{Icon-SNK|C}} <br>(Can Hold {{Icon-SNK|C}}) | ||
|Damage= | |Damage=5, 5, 5, 8 | ||
|Guard= | |Guard=Mid | ||
|Startup=19 | |Startup=19 | ||
|Active= | |Active= | ||
|Recovery= | |Recovery= | ||
|Total= | |Total= | ||
|Hit Adv=KD | |Hit Adv=KD | ||
|Block Adv=-16 | |Block Adv=-16 | ||
| Line 708: | Line 744: | ||
|Cancel on Hit= | |Cancel on Hit= | ||
|Cancel on Block= | |Cancel on Block= | ||
|Guard Crush Value= | |Guard Crush Value=1×3, 2 | ||
|description=Kick flurry series. Slow, so they don't combo from lights, but are an okay combo finisher. | |description= | ||
Kick flurry series. C Version travels further. Slow, so they don't combo from lights, but are an okay combo finisher. Offers much more corner carry but you get no mixups. Unsafe on block. | |||
There is upper-body guard point at 11~12F that absorbs mids and highs. When the button is held, Jae's leg is fully raised and the GP can be extended. The total startup can be nearly 60F at maximum length: | |||
* Shakka-shu [A] -- extended GP at 13~44F (max 32 frames), then goes through remaining 7F of startup. | |||
* Shakka-shu [C] -- extended GP at 13~50F (max 38 frames), then goes through remaining 7F of startup. | |||
If you want to JD this, there are only 2 hits to JD, but it is -3 afterwards. | |||
Aside from prioritizing corner carry and GCing fireballs, dont use this. | |||
}} | |||
Aside from prioritizing corner carry | }} | ||
===== <span class="invisible-header"></span> ===== | ===== <span class="invisible-header"></span> ===== | ||
| Line 738: | Line 764: | ||
{{MoveData | {{MoveData | ||
|image= | |image= | ||
|name=Ryusei Raku | |name=Ryusei-Raku | ||
|input= {{Motion|236}}+{{Icon-SNK|B}}/{{Icon-SNK|D}} | |input= {{Motion|236}}+{{Icon-SNK|B}}/{{Icon-SNK|D}} | ||
|subtitle= | |subtitle= | ||
| Line 745: | Line 771: | ||
{{AttackData-Garou | {{AttackData-Garou | ||
|version={{Motion|236}}+{{Icon-SNK|B}} | |version={{Motion|236}}+{{Icon-SNK|B}} | ||
|Damage= | |Damage=11, 12 | ||
|Guard= | |Guard=Low, Mid | ||
|Startup=14 | |Startup=14 | ||
|Active= | |Active= | ||
|Recovery= | |Recovery= | ||
|Total= | |Total= | ||
| Line 757: | Line 783: | ||
|Cancel on Block= | |Cancel on Block= | ||
|Guard Crush Value=3, 4 | |Guard Crush Value=3, 4 | ||
|description=The initial kick in the B version is extremely stubby, its very hard to make it land. never use this | |description=The initial kick in the B version is extremely stubby, its very hard to make it land. never use this. | ||
}} | }} | ||
{{AttackData-Garou | {{AttackData-Garou | ||
|version={{Motion|236}}+{{Icon-SNK|D}} | |version={{Motion|236}}+{{Icon-SNK|D}} | ||
|Damage= | |Damage=11, 15 | ||
|Guard= | |Guard=Low, Mid | ||
|Startup=16 | |Startup=16 | ||
|Active= | |Active= | ||
|Recovery= | |Recovery= | ||
|Total= | |Total= | ||
| Line 773: | Line 799: | ||
|Cancel on Block= | |Cancel on Block= | ||
|Guard Crush Value=4, 4 | |Guard Crush Value=4, 4 | ||
|description=Sweep forward, then an overhead (visually, | |description=Sweep forward, then an overhead (visually, it's a mid) flame kick. Your most damaging ender and almost always your best way to finish combos on the ground, meterlessly. Gives you decent oki as well. Best used in combos. | ||
If you guard the first hit, both versions have the same gap between the end of blockstun and the 2nd hit. But the gap depends on when the 2nd hit reaches you (between 7-10F). | |||
}} | }} | ||
}} | }} | ||
<!-- 236D seems to have 16F startup, even though the JPN wiki says it is 15F. --> | <!-- 236D seems to have 16F startup, even though the JPN wiki says it is 15F. --> | ||
===== <span class="invisible-header"></span> ===== | ===== <span class="invisible-header"></span> ===== | ||
| Line 787: | Line 817: | ||
|caption= | |caption= | ||
|data= | |data= | ||
Both versions are impossible to just defend at 0-pixel health bar. <br> | |||
{{AttackData-Garou | {{AttackData-Garou | ||
|version={{Motion|214}}+{{Icon-SNK|B}} | |version={{Motion|214}}+{{Icon-SNK|B}} | ||
|Damage= | |Damage=9, 9, 9 | ||
|Guard= | |Guard=Mid | ||
|Startup=14 | |Startup=14 | ||
|Active= | |Active= | ||
| Line 802: | Line 834: | ||
|Guard Crush Value=2, 2, 4 | |Guard Crush Value=2, 2, 4 | ||
|description=Your shittiest ground combo ender. Very inconsistent at range due to the first hit being very vertical and not comboing from range. the second hit may sometimes connect but only if you do a single normal point blank first. No other use for this move. | |description=Your shittiest ground combo ender. Very inconsistent at range due to the first hit being very vertical and not comboing from range. the second hit may sometimes connect but only if you do a single normal point blank first. No other use for this move. | ||
}} | }} | ||
{{AttackData-Garou | {{AttackData-Garou | ||
|version={{Motion|214}}+{{Icon-SNK|D}} | |version={{Motion|214}}+{{Icon-SNK|D}} | ||
|Damage= | |Damage=9, 9, 9 | ||
|Guard= | |Guard=Mid | ||
|Startup=22 | |Startup=22 | ||
|Active= | |Active= | ||
| Line 820: | Line 850: | ||
|Guard Crush Value=3, 3, 5 | |Guard Crush Value=3, 3, 5 | ||
|description=Even slower and with not much utility otherwise. | |description=Even slower and with not much utility otherwise. | ||
}} | }} | ||
}} | }} | ||
===== <span class="invisible-header"></span> ===== | ===== <span class="invisible-header"></span> ===== | ||
| Line 836: | Line 866: | ||
{{AttackData-Garou | {{AttackData-Garou | ||
|version=Air {{Motion|2}}+{{Icon-SNK|B}} | |version=Air {{Motion|2}}+{{Icon-SNK|B}} | ||
|Damage=5 | |Damage=5, 6, 6, 6 | ||
|Guard= | |Guard=Mid | ||
|Startup=9 | |Startup=9 | ||
|Active= | |Active= | ||
| Line 847: | Line 877: | ||
|Cancel on Hit= | |Cancel on Hit= | ||
|Cancel on Block= | |Cancel on Block= | ||
|Guard Crush Value= | |Guard Crush Value=2×4 | ||
|description= | |description= | ||
}} | }} | ||
{{AttackData-Garou | {{AttackData-Garou | ||
|version=Air {{Motion|2}}+{{Icon-SNK|D}} | |version=Air {{Motion|2}}+{{Icon-SNK|D}} | ||
|Damage=5 | |Damage=5, 6, 6, 6 | ||
|Guard= | |Guard=Mid | ||
|Startup=10 | |Startup=10 | ||
|Active= | |Active= | ||
| Line 870: | Line 893: | ||
|Cancel on Hit= | |Cancel on Hit= | ||
|Cancel on Block= | |Cancel on Block= | ||
|Guard Crush Value= | |Guard Crush Value=2×4 | ||
|description= | |description= | ||
The divekick. does up to 4 kicks in a row while diving forward. comboable from all air normals. punishable on hit at best, and can be even worse depending on how it hits. Pretty bad. | |||
Done high enough on a taller character, it might reach 5 kicks. | |||
D version travels further and faster at a slightly wider angle. | |||
Both versions are impossible to just defend at 0-pixel health bar. (But not follow-ups.) | |||
Both versions can beat out upper-body evasion attacks. | |||
The button of follow-up must be the same as the one used for the divekick's. | |||
}} | }} | ||
{{AttackData-Garou | {{AttackData-Garou | ||
|version=Air {{Motion|214}}+{{Icon-SNK|B}}/{{Icon-SNK|D}} | |subtitle=Overhead Divekick Follow-up | ||
|Damage= | |version= --- Air {{Motion|214}}+{{Icon-SNK|B}}/{{Icon-SNK|D}} | ||
|Guard= | |Damage=10 | ||
|Guard=High | |||
|Startup= | |Startup= | ||
|Active= | |Active= | ||
| Line 904: | Line 923: | ||
|Cancel on Block= | |Cancel on Block= | ||
|Guard Crush Value=7 | |Guard Crush Value=7 | ||
|description= | |description= Each hit of the divekick can be canceled into this follow-up. | ||
It's too slow to combo and insanely unsafe in block. Don't use this. | |||
}} | }} | ||
{{AttackData-Garou | {{AttackData-Garou | ||
|version=Air {{Motion|3}}+{{Icon-SNK|B}}/{{Icon-SNK|D}} | |subtitle= Low Divekick Follow-up | ||
|Damage= | |version= --- Air {{Motion|3}}+{{Icon-SNK|B}}/{{Icon-SNK|D}} | ||
|Guard= | |Damage=15 | ||
|Guard=Low | |||
|Startup= | |Startup= | ||
|Active= | |Active= | ||
| Line 920: | Line 941: | ||
|Cancel on Block= | |Cancel on Block= | ||
|Guard Crush Value=2 | |Guard Crush Value=2 | ||
|description=Hold 3 and spam D during divekick | |description=Hold 3 and spam D during divekick. Combos from the dive and knocks down, but insanely unsafe. Dont use this. | ||
}} | }} | ||
}} | }} | ||
===== <span class="invisible-header"></span> ===== | ===== <span class="invisible-header"></span> ===== | ||
| Line 932: | Line 954: | ||
|input= Charge {{Motion|2}} ~ {{Motion|8}} + {{Icon-SNK|B}} | |input= Charge {{Motion|2}} ~ {{Motion|8}} + {{Icon-SNK|B}} | ||
|subtitle= | |subtitle= | ||
|caption= | |caption= | ||
|data= | |data= | ||
1~2F full-body invincibility. <br> | |||
Impossible to just defend at 0-pixel health bar. <br> | |||
{{AttackData-Garou | {{AttackData-Garou | ||
|version={{Motion|2}} ~ {{Motion|8}} + {{Icon-SNK|B}} | |version={{Motion|2}} ~ {{Motion|8}} + {{Icon-SNK|B}} | ||
|Damage= | |Damage=9, 8 | ||
|Guard= | |Guard=Mid | ||
|Startup=4 | |Startup=4 | ||
|Active= | |Active= | ||
| Line 948: | Line 974: | ||
|Cancel on Block= | |Cancel on Block= | ||
|Guard Crush Value=4, 4 | |Guard Crush Value=4, 4 | ||
|description= | |description= | ||
}} | }} | ||
{{AttackData-Garou | {{AttackData-Garou | ||
|version={{Motion|2}} ~ {{Motion|8}} + {{Icon-SNK|B}} Break | |version={{Motion|2}} ~ {{Motion|8}} + {{Icon-SNK|B}} Break | ||
|Damage=9 | |Damage=9 | ||
|Guard= | |Guard=Mid | ||
|Startup=4 | |Startup=4 | ||
|Active= | |Active= | ||
| Line 966: | Line 990: | ||
|Cancel on Block= | |Cancel on Block= | ||
|Guard Crush Value=4 | |Guard Crush Value=4 | ||
|description= | |description=Leads to juggles more consistently then [2]8D (BR) and is safer on block, though still just as small and not invul all the way through startup. Used in some optimal punishes, more than D DP, and is your best move for passive meter building, also slowish snd hard to spam. | ||
}} | }} | ||
}} | }} | ||
===== <span class="invisible-header"></span> ===== | ===== <span class="invisible-header"></span> ===== | ||
| Line 977: | Line 1,003: | ||
|input= Charge {{Motion|2}} ~ {{Motion|8}} + {{Icon-SNK|D}} | |input= Charge {{Motion|2}} ~ {{Motion|8}} + {{Icon-SNK|D}} | ||
|subtitle= | |subtitle= | ||
|caption= | |caption= | ||
|data= | |data= | ||
1~4F full-body invincibility. <br> | |||
Impossible to just defend at 0-pixel health bar. <br> | |||
{{AttackData-Garou | {{AttackData-Garou | ||
|version={{Motion|2}} ~ {{Motion|8}} + {{Icon-SNK|D}} | |version={{Motion|2}} ~ {{Motion|8}} + {{Icon-SNK|D}} | ||
|Damage= | |Damage=9, 7, 7 | ||
|Guard= | |Guard=Mid | ||
|Startup=4 | |Startup=4 | ||
|Active= | |Active= | ||
| Line 993: | Line 1,022: | ||
|Cancel on Block= | |Cancel on Block= | ||
|Guard Crush Value=4, 4 | |Guard Crush Value=4, 4 | ||
|description= | |description=Very fast and deals decent damage. The only issue is that its bad at anti airing and the hitbox is so small it whiffs beyond point blank on the ground. Still better of a reversal than B version, though you have no reason to just do a raw reversal. | ||
}} | |||
{{AttackData-Garou | |||
|subtitle= (Follow-up) | |||
|version= --- Air {{Motion|2}} + {{Icon-SNK|D}} | |||
|Damage=7 | |||
|Guard=Mid | |||
|Startup= | |||
|Active= | |||
|Recovery= | |||
|Total= | |||
|Hit Adv= | |||
|Block Adv= | |||
|Feint Cancel= | |||
|Cancel on Hit= | |||
|Cancel on Block= | |||
|Guard Crush Value= | |||
|description= | |||
}} | }} | ||
{{AttackData-Garou | {{AttackData-Garou | ||
|version={{Motion|2}} ~ {{Motion|8}} + {{Icon-SNK|D}} Break | |version={{Motion|2}} ~ {{Motion|8}} + {{Icon-SNK|D}} Break | ||
|Damage=9 | |Damage=9 | ||
|Guard= | |Guard=Mid | ||
|Startup=4 | |Startup=4 | ||
|Active=2 | |Active=2 | ||
| Line 1,013: | Line 1,056: | ||
|Cancel on Block= | |Cancel on Block= | ||
|Guard Crush Value=4 | |Guard Crush Value=4 | ||
|description= | |description=0 on block and leads to a juggle into super or another flashkick on hit, while still being a true reversal. the only limitation is the small hitbox which is bad for anti airing and is stubby, but this move is still neat to have. can be used for some optimal punishes and your guard cancel of choice. | ||
Empty break must be done during | Empty break must be done during 2~7F. | ||
12F of hitstop/blockstop. 24F blockstun on block. | 12F of hitstop/blockstop. 24F blockstun on block. | ||
}} | }} | ||
}} | }} | ||
===Super Moves=== | ===Super Moves=== | ||
===== <span class="invisible-header"></span> ===== | |||
<font style="visibility:hidden" size="0"></font> | |||
{{MoveData | {{MoveData | ||
|image = | |image = | ||
| Line 1,030: | Line 1,078: | ||
{{AttackData-Garou | {{AttackData-Garou | ||
|version = {{Motion|236}},{{Motion|236}} + {{Icon-SNK|A}} | |version = {{Motion|236}},{{Motion|236}} + {{Icon-SNK|A}} | ||
|Damage= | |Damage=10, 8, 5×5 | ||
|Guard= | |Guard=Overhead | ||
|Startup=11 | |Startup=11 | ||
|Active= | |Active= | ||
| Line 1,041: | Line 1,089: | ||
|Cancel on Hit= | |Cancel on Hit= | ||
|Cancel on Block= | |Cancel on Block= | ||
|Guard Crush Value= | |Guard Crush Value=5×7 | ||
|description= | |description=1~11F full-body invincibility. Stubby range and slow startup time, can make this a very inconsistent and risky reversal and combo tool. | ||
Generally it would be useless, but it does have one utility -- you can juggle into | Generally it would be useless, but it does have one utility -- you can juggle into Hou'ou-kyaku B anywhere on screen afterwards, massive damage for 2 bars. | ||
Used in optimal punishes when you have the meter -- just make sure you're close. | Used in optimal punishes when you have the meter -- just make sure you're close. | ||
}} | }} | ||
{{AttackData-Garou | {{AttackData-Garou | ||
| header = | | header = | ||
|version ={{Motion|236}},{{Motion|236}} + {{Icon-SNK|C}} | |version ={{Motion|236}},{{Motion|236}} + {{Icon-SNK|C}} | ||
|Damage= | |Damage=6×10 | ||
|Guard= | |Guard=Overhead | ||
|Startup=11 | |Startup=11 | ||
|Active= | |Active= | ||
| Line 1,064: | Line 1,110: | ||
|Cancel on Hit= | |Cancel on Hit= | ||
|Cancel on Block= | |Cancel on Block= | ||
|Guard Crush Value= | |Guard Crush Value=10×10 | ||
|description= | |description=1~14F full-body invincibility. Deals more damage, obviously. Still a very inconsistent move, though its oddly enough nearly twice as safer as the A version (still -26 on block). You do get a juggle after this as well, but its usually into something like [2]8D. | ||
No real reason to ever use this, except for the full charge version | No real reason to ever use this, except for the full charge version. | ||
}} | |||
{{AttackData-Garou | |||
| header = | |||
|version = --- {{Motion|236}},{{Motion|236}} + Hold {{Icon-SNK|C}} | |||
|subtitle= (Follow-up) | |||
|Damage=27 | |||
|Guard= | |||
|Startup= | |||
|Active= | |||
|Recovery= | |||
|Total= | |||
|Hit Adv=KD | |||
|Block Adv= | |||
|Feint Cancel= | |||
|Cancel on Hit= | |||
|Cancel on Block= | |||
|Guard Crush Value= | |||
|description=The full charge version gives you a follow-up on hit. It's done by holding C at the beginning and releasing as the opponent nears the ground. | |||
}} | }} | ||
}} | }} | ||
===== <span class="invisible-header"></span> ===== | |||
<font style="visibility:hidden" size="0"></font> | |||
{{MoveData | {{MoveData | ||
|image = | |image = | ||
| Line 1,084: | Line 1,149: | ||
{{AttackData-Garou | {{AttackData-Garou | ||
|version = {{Motion|236}},{{Motion|236}} + {{Icon-SNK|B}} | |version = {{Motion|236}},{{Motion|236}} + {{Icon-SNK|B}} | ||
|Damage= | |Damage=13, 3×3, 5, 13×3 | ||
|Guard= | |Guard=Mid | ||
|Startup=0 | |Startup=0 | ||
|Active= | |Active= | ||
| Line 1,100: | Line 1,165: | ||
Also great for punishing anything minus, though keep in mind it doesn't travel too far in an instant. | Also great for punishing anything minus, though keep in mind it doesn't travel too far in an instant. | ||
}} | }} | ||
{{AttackData-Garou | {{AttackData-Garou | ||
| header = | | header = | ||
|version ={{Motion|236}},{{Motion|236}} + {{Icon-SNK|D}} | |version ={{Motion|236}},{{Motion|236}} + {{Icon-SNK|D}} | ||
|Damage= | |Damage=18, 4×9, 5×7, 18 | ||
|Guard=HL | |Guard=HL | ||
|Startup=0 | |Startup=0 | ||
| Line 1,121: | Line 1,185: | ||
Overloads and slows the game hilariously, though this has no real practical implication. Goes further faster and reaches fullscreen. | Overloads and slows the game hilariously, though this has no real practical implication. Goes further faster and reaches fullscreen. | ||
}} | }} | ||
}} | }} | ||
Revision as of 12:27, 24 March 2023
Introduction
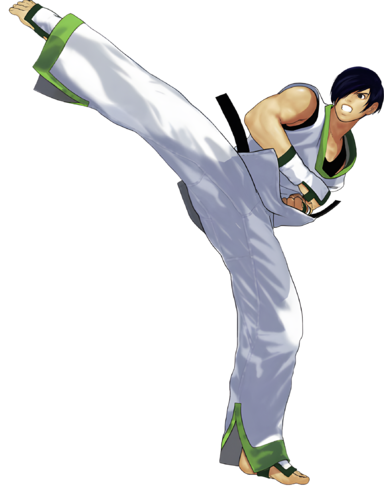
Kim Jae Hoon is the younger brother of Kim Dong Hwan, both of them together are the sons of Taekwondo Master, Kim Kaphwan. Unlike his older brother, Kim Jae Hoon is much more serious with Taekwondo and believes firmly in his fathers ideals of justice. Jae Hoon uses many of the same techniques his father before him used, such has the Hangetsu Zan and Hou'ou Kyaku, with a bit of an original spin of his own, adding his element of fire to his attacks to amplify the power behind his blows.
Jae Hoon enters the Maximum Mayhem tournament with his older brother Dong Hwan after their father, whom was visiting the newly re-built Second South, was attacked by an very strong oppenent and was injured. Jae Hoon swears to avenge his fathers defeat, and so, dragging Dong Hwan with him, the two compete in the Maximum Mayhem tournament with hope that one of them will be able to face the monster that defeated their father.
Gameplay
Jae is an "honest" type of character. His main gameplan is to pressure the opponent with his great normals and hit confirm into damaging combos. His secondary gameplan is to use his great normals pressure to threaten with basic mix: high/low mix with jump/hop attacks; cross-up; throw; hienzan break; or even his other unsafe and risky moves.
| Strengths | Weaknesses |
|---|---|
|
|
Character Colors
Move List
Frame Data Source : https://w.atwiki.jp/garoumow/pages/82.html and https://w.atwiki.jp/garoumow/pages/22.html
| Data Help | |
|---|---|
| Disclaimer: This is meant to teach basic terminology used when describing moves. | |
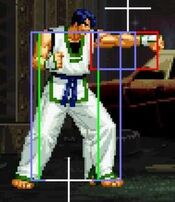
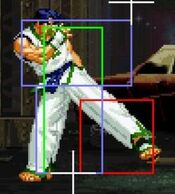
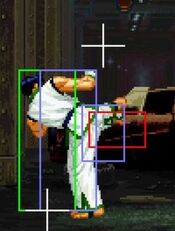
| Hitbox: | A predefined area (usually a rectangle or rectangles) that tells the game how any given attack can come in contact with a character. Hitboxes are invisible to the player when normally playing. |
| Hurtbox: | A predefined area (usually a group of rectangles) that tell the game how your character is allowed to get hit by any incoming attack. Specifically, you'll get hit by (or block) an attack if that attack's hitbox ever overlaps your hurtbox. |
| Throw Box/Range: | Active throw frames and range. Your opponent will be thrown in this field if not in block or hit stun. |
| Projectile Box: | Hitbox on a projectile attack. |
| Guard/Counter Box: | The Guard Box or Counter Box. This appears when blocking or using a counter move. |
| Push Box: | Has no bearing on hit/hurt boxes. Just prevents characters to not pass through each other. (Also known as "Collision Box".) |
| Startup | The number of frames before an attack can hit the opponent. Does not include the first active frame. |
| Guard | The way this move must be blocked.
High or H or Overhead (especially when from the ground) -- must be blocked standing. |
| Damage | "Basic" damage -- Unmodified damage values
"Correct" damage -- Damage values accounting for damage scaling, TOP multiplier, and defense rate |
| Guard Crush Value | Decreases the defender's guard durability gauge by this value. |
| +X | Attacker has X number of advantage frames. |
| -X | Attacker has X number of disadvantage frames. |
| KD | Short for "knockdown", knocks down opponent on hit. |
| ◯ | Cancelable on both hit and block. |
| ∞ | Chain cancelable with the same button (renda cancel). |
| ※ | Cancelable on the first hit/part only. |
| 《X》OR «X» OR <<X>> OR (X) | X number of inactive frames between hits of multihit moves. |
| △ | Only cancelable on block. |
| ▽ | Only cancelable on hit. |
| × OR X | Not cancelable. |
Close Standing Normals
| Damage | Guard | Startup | Active | Recovery | Total |
|---|---|---|---|---|---|
| 4 | Mid | 3 | 4 | 5 | 12 |
| Hit Adv | Block Adv | Cancel on Hit | Cancel on Block | Guard Crush Value | |
| +6 | +6 | Yes/chainable | Yes/chainable | 4 | |
|
Pretty much the same as far A, but in proximity form -- which means it's great, and a primary tool for pressure, combos and poking | |||||
| Damage | Guard | Startup | Active | Recovery | Total |
|---|---|---|---|---|---|
| 6 | Mid | 4 | 4 | 7 | 15 |
| Hit Adv | Block Adv | Cancel on Hit | Cancel on Block | Guard Crush Value | |
| +4 | +4 | Yes | Yes | 4 | |
|
outdone by cl.A in most situation, but in the corner you could link into standing A and get a combo after | |||||
| Damage | Guard | Startup | Active | Recovery | Total |
|---|---|---|---|---|---|
| 5, 5 | Mid | 5 | 1, 4 | 22 | 32 |
| Hit Adv | Block Adv | Cancel on Hit | Cancel on Block | Guard Crush Value | |
| -5 | -5 | Yes (1st hit) | Yes (1st hit) | 3, 3 | |
|
Solid move for pressure after FCing it, mostly in the corner | |||||
| Damage | Guard | Startup | Active | Recovery | Total |
|---|---|---|---|---|---|
| 6, 6 | Mid | 4 | 1, «5», 3 | 24 | 37 |
| Hit Adv | Block Adv | Cancel on Hit | Cancel on Block | Guard Crush Value | |
| -6 | -6 | Yes (1st hit) | Yes (1st hit) | 3, 3 | |
|
You can insert the first hit in some punish combos, its best used is in his corner infinite using its big advantage on FC. Can't be JDed crouching. The 2nd hit whiffs when crouching. | |||||
Far Standing Normals
| Damage | Guard | Startup | Active | Recovery | Total |
|---|---|---|---|---|---|
| 5 | Mid | 3 | 4 | 5 | 12 |
| Hit Adv | Block Adv | Cancel on Hit | Cancel on Block | Guard Crush Value | |
| +6 | +6 | Yes/chainable | Yes/chainable | 4 | |
|
Very big hitbox for a jab, amazing speed and advantage on block, its good for pressure and basic antiairing/jabbing. Used a lot for safe poking and pressure - its so plus on block you can microwalk in the corner after hitting this move and still link a second one as a true combo. | |||||
| Damage | Guard | Startup | Active | Recovery | Total |
|---|---|---|---|---|---|
| 7 | Mid | 4 | 3 | 12 | 19 |
| Hit Adv | Block Adv | Cancel on Hit | Cancel on Block | Guard Crush Value | |
| 0 | 0 | Yes | Yes | 4 | |
|
An okay poke at far range | |||||
| Damage | Guard | Startup | Active | Recovery | Total |
|---|---|---|---|---|---|
| 14 | Mid | 12 | 3 | 28 | 43 |
| Hit Adv | Block Adv | Cancel on Hit | Cancel on Block | Guard Crush Value | |
| -10 | -10 | No | Yes | 5 | |
|
Too slow to be a reliable anti air, despite the hitbox. don't use this move | |||||
| Damage | Guard | Startup | Active | Recovery | Total |
|---|---|---|---|---|---|
| 14 | Mid | 13 | 2 | 22 | 37 |
| Hit Adv | Block Adv | Cancel on Hit | Cancel on Block | Guard Crush Value | |
| -3 | -3 | No | No | 5 | |
|
Will go over low pokes but its not rewarding and very slow. Note: It's possible to reduce the move's overall recovery by canceling its landing recovery. | |||||
Crouching Normals
| Damage | Guard | Startup | Active | Recovery | Total |
|---|---|---|---|---|---|
| 4 | Low | 5 | 4 | 8 | 17 |
| Hit Adv | Block Adv | Cancel on Hit | Cancel on Block | Guard Crush Value | |
| +3 | +3 | No/chainable | No/chainable | 4 | |
|
Would be so good if you could cancel. you can chain 3 of these midscreen and it's plus on block. thanks to its plus frames and how fast your kick super is, though, you can still potentially link it afterwards for a combo. Even without the cancel its just generally a crazy poke that stacks up damage over time. | |||||
| Damage | Guard | Startup | Active | Recovery | Total |
|---|---|---|---|---|---|
| 6 | Low | 4 | 4 | 5 | 13 |
| Hit Adv | Block Adv | Cancel on Hit | Cancel on Block | Guard Crush Value | |
| +6 | +6 | Yes/chainable | Yes/chainable | 4 | |
|
The core of your pressure, poking and many combos. Low, fast, self chains and links into many normals including 2c, 5a and 5b | |||||
| Damage | Guard | Startup | Active | Recovery | Total |
|---|---|---|---|---|---|
| 10 | Mid | 5 | 3 | 17 | 25 |
| Hit Adv | Block Adv | Cancel on Hit | Cancel on Block | Guard Crush Value | |
| +1 | +1 | Yes | Yes | 5 | |
|
Great normal, as its fast, damaging, plus on block, and has decent range. used in many combos, poking, pressure (very plus if FCed), etc. | |||||
| Damage | Guard | Startup | Active | Recovery | Total |
|---|---|---|---|---|---|
| 10 | Low | 7 | 4 | 25 | 36 |
| Hit Adv | Block Adv | Cancel on Hit | Cancel on Block | Guard Crush Value | |
| KD | -8 | No | No | 5 | |
|
Typical sweep, which means it aint that good. heavy knockdown is nice and the range is nice but its quite unsafe on block with no cancel options | |||||
Jumping Normals
| Damage | Guard | Startup | Active | Recovery | Total |
|---|---|---|---|---|---|
| 5 | High | 6 | 5 | - | - |
| Hit Adv | Block Adv | Cancel on Hit | Cancel on Block | Guard Crush Value | |
| - | - | Yes | Yes | 4 | |
|
Probably your best jump in due to its good active frames, great speed and hitbox. the hitstun aint that long so its hard to get significany advantage after, the key is to hit it right before landing. Also your only crossup. If done deep enough, the j.A can beat upper-body evasion attacks. | |||||
| Damage | Guard | Startup | Active | Recovery | Total |
|---|---|---|---|---|---|
| 6 | High | 6 | 8 | - | - |
| Hit Adv | Block Adv | Cancel on Hit | Cancel on Block | Guard Crush Value | |
| - | - | Yes | Yes | 4 | |
|
An alternative option, has a worse hitbox for jumping ins but instead is very active and reaches further. also a great air to air potentially, and is also a crossup option, albeit a harder one
| |||||
| Damage | Guard | Startup | Active | Recovery | Total |
|---|---|---|---|---|---|
| 9 | High | 6 | 6 | - | - |
| Hit Adv | Block Adv | Cancel on Hit | Cancel on Block | Guard Crush Value | |
| - | - | Yes | Yes | 5 | |
|
Hits above Jae Hoon.
| |||||
| Damage | Guard | Startup | Active | Recovery | Total |
|---|---|---|---|---|---|
| 10 | High | 8 | 6 | - | - |
| Hit Adv | Block Adv | Cancel on Hit | Cancel on Block | Guard Crush Value | |
| - | - | Yes | Yes | 5 | |
|
Your best heavy jump in and with massive range and an exceptional air poke. Hopped j.D compliments his ground low pokes really well | |||||
Command Normals
| Damage | Guard | Startup | Active | Recovery | Total |
|---|---|---|---|---|---|
| 12 | Mid | 23 | 5 | 25 | 53 |
| Hit Adv | Block Adv | Cancel on Hit | Cancel on Block | Guard Crush Value | |
| KD | -9 | Yes | Yes | 9 | |
|
Weird move -- you backdash, then lunge forward with a launching kick. rewarding on hit and the backdash might let you dodge some shit but its too slow, stubby and unsafe to be useful.
| |||||
Universal Moves
| Damage | Guard | Startup | Active | Recovery | Total |
|---|---|---|---|---|---|
| 10 | Overhead | 25 | 1 | 19 | 45 |
| Hit Adv | Block Adv | Cancel on Hit | Cancel on Block | Guard Crush Value | |
| -1 | +5 | No | No | 6 | |
| |||||
| Damage | Guard | Startup | Active | Recovery | Total |
|---|---|---|---|---|---|
| 10 | Mid | 11 | 2 | 20 | 33 |
| Hit Adv | Block Adv | Cancel on Hit | Cancel on Block | Guard Crush Value | |
| -3 | +3 | Yes | No | 6 | |
|
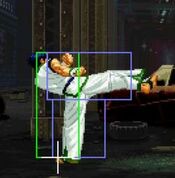
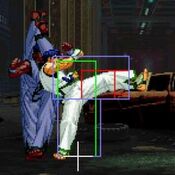
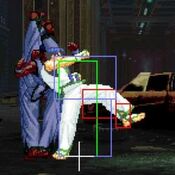
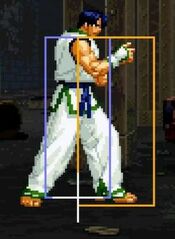
Decent range and its cancelable, along with its excellent hitbox. Decent for occasional poking and you get a combo with ease.
| |||||
| Damage | Guard | Startup | Active | Recovery | Total |
|---|---|---|---|---|---|
| 17 | Overhead | 30 | - | - | - |
| Hit Adv | Block Adv | Cancel on Hit | Cancel on Block | Guard Crush Value | |
| KD | -1 | - | - | 25 | |
|
Very slow startup overhead, but nearly instant recovery. However it doesn't hit overhead if canceled into and might not knockdown at further ranges. Bad. | |||||
Throws
| Damage | Guard | Startup | Active | Recovery | Total |
|---|---|---|---|---|---|
| 14 | - | 1 | - | - | - |
| Hit Adv | Block Adv | Cancel on Hit | Cancel on Block | Guard Crush Value | |
| 34 | - | - | - | - | |
|
Basic throw damage, but the sdvantage and distance let Jae Hoon set solid left right mixups midscreen with jump a (microwalk slightly more to get a crossup), and very ambiguous ones in the corner (microwalk j.a will crossup, microwalk j.b wont). | |||||
Feints
| Damage | Guard | Startup | Active | Recovery | Total |
|---|---|---|---|---|---|
| - | - | - | - | - | 10 |
| Hit Adv | Block Adv | Cancel on Hit | Cancel on Block | Guard Crush Value | |
| - | - | - | - | - | |
|
Mimics the start of Shakka-shuu being held briefly. You can use the threat of a fake Shakka-shuu to move forward. | |||||
| Damage | Guard | Startup | Active | Recovery | Total |
|---|---|---|---|---|---|
| - | - | - | - | - | 10 |
| Hit Adv | Block Adv | Cancel on Hit | Cancel on Block | Guard Crush Value | |
| - | - | - | - | - | |
|
Mimics the start of the super Hou'ou-kyaku. Down feint cancel makes it easier to go into down direction attacks or go straight to charging hienzan. | |||||
Special Moves
Impossible to just defend at 0-pixel health bar.
Impossible to just defend at 0-pixel health bar.
Super Moves
