m (→Special Moves) |
mNo edit summary |
||
| (11 intermediate revisions by the same user not shown) | |||
| Line 65: | Line 65: | ||
|Stun= 3 | |Stun= 3 | ||
|Startup= 2 | |Startup= 2 | ||
|Frame Adv= | |||
|Block=[[File:High.png]] | |||
|Properties= | |||
|description= | |||
}} | |||
}} | |||
{{MoveData | |||
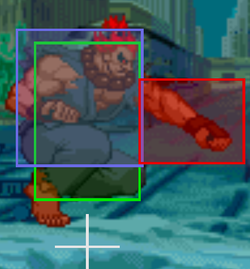
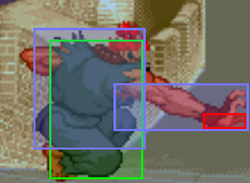
|image=A1 Shoto Nj.Lp.png | |||
|imageSize=250px | |||
|caption= | |||
|name=Nj.[[File:Lp.png]] | |||
|data= | |||
{{AttackData-Alpha2 | |||
|Damage= 8 | |||
|Stun= 3 | |||
|Startup= | |||
|Frame Adv= | |Frame Adv= | ||
|Block=[[File:High.png]] | |Block=[[File:High.png]] | ||
| Line 503: | Line 520: | ||
|Stun= 8 | |Stun= 8 | ||
|Startup= 6 | |Startup= 6 | ||
|Frame Adv= | |Frame Adv= -8 to +22 depending on how long it travels,-9 to +18 on block depending on how long it travels | ||
|Block=[[File:Mid.png]] | |Block=[[File:Mid.png]] | ||
|Properties=[[File:Proj.png]] | |Properties=[[File:Proj.png]] | ||
|description=Its worth noting Akumas fireball is 1 frame faster startup for fireball wars compared to Ryu | |description=Its worth noting Akumas fireball is 1 frame faster startup for fireball wars compared to Ryu. its also worth nothing all versions of akumas Hadou knock down up close instead of just his Hp even though thats the main version used for stun/damage anyway | ||
}} | }} | ||
{{AttackData-Alpha2 | {{AttackData-Alpha2 | ||
| Line 514: | Line 531: | ||
|Stun= 10 | |Stun= 10 | ||
|Startup= 6 | |Startup= 6 | ||
|Frame Adv= | |Frame Adv= -9 to +22 depending on how long it travels,-10 to +18 on block depending on how long it travels | ||
|Block=[[File:Mid.png]] | |Block=[[File:Mid.png]] | ||
|Properties=[[File:Proj.png]] | |Properties=[[File:Proj.png]] | ||
| Line 525: | Line 542: | ||
|Stun= 12 | |Stun= 12 | ||
|Startup= 6 | |Startup= 6 | ||
|Frame Adv= | |Frame Adv= -10 to +23 depending on how long it travels,-11 to +18 on block depending on how long it travels | ||
|Block=[[File:Mid.png]] | |Block=[[File:Mid.png]] | ||
|Properties=[[File:Proj.png]] | |Properties=[[File:Proj.png]] | ||
| Line 570: | Line 587: | ||
|Properties=[[File:Proj.png]] | |Properties=[[File:Proj.png]] | ||
|description= | |description= | ||
}} | |||
}} | }} | ||
| Line 591: | Line 608: | ||
|Stun= | |Stun= | ||
|Startup= | |Startup= | ||
|Frame Adv= | |Frame Adv= +2(block) | ||
|Block=[[File:Mid.png]] | |Block=[[File:Mid.png]] | ||
|Properties= | |Properties= | ||
|description= Starts a rollable Juggle | |description= Starts a rollable Juggle,+ on block But can be crouched under | ||
}} | }} | ||
{{AttackData-Alpha2 | {{AttackData-Alpha2 | ||
| Line 602: | Line 619: | ||
|Stun= | |Stun= | ||
|Startup= | |Startup= | ||
|Frame Adv= | |Frame Adv= -10(block) | ||
|Block=[[File:Mid.png]] | |Block=[[File:Mid.png]] | ||
|Properties= | |Properties= | ||
|description= | |description= Hits do not jail on block therefore the enemy can crouch after blocking the first one | ||
}} | }} | ||
{{AttackData-Alpha2 | {{AttackData-Alpha2 | ||
| Line 613: | Line 630: | ||
|Stun= | |Stun= | ||
|Startup= | |Startup= | ||
|Frame Adv= | |Frame Adv= -23(block) | ||
|Block=[[File:Mid.png]] | |Block=[[File:Mid.png]] | ||
|Properties= | |Properties= | ||
|description= Works the same as above on Block | |||
}} | |||
}} | |||
{{MoveData | |||
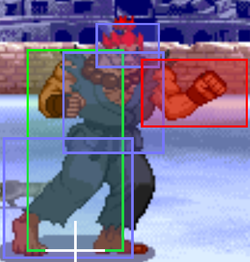
|image=A1_Akuma_Red_fireball.png | |||
|imageSize=250px | |||
|caption= | |||
|name=Shakunetsu Hadou Ken | |||
|data= | |||
{{AttackData-Alpha2 | |||
|version=[[File:Hcf.png]] + [[File:Lp.png]] | |||
|Damage= | |||
|Stun= | |||
|Startup= 17 | |||
|Frame Adv= | |||
|Block=[[File:mid.png]] | |||
|Properties=[[File:Proj.png]] | |||
|description= | |||
}} | |||
{{AttackData-Alpha2 | |||
|header= no | |||
|version=[[File:Hcf.png]] + [[File:Mp.png]] | |||
|Damage= | |||
|Stun= | |||
|Startup= 17 | |||
|Frame Adv= | |||
|Block=[[File:mid.png]] | |||
|Properties= [[File:Proj.png]] | |||
|description= | |||
}} | |||
{{AttackData-Alpha2 | |||
|header= | |||
|version=[[File:Hcf.png]] + [[File:Hp.png]] | |||
|Damage= | |||
|Stun= | |||
|Startup= 17 | |||
|Frame Adv= | |||
|Block=[[File:mid.png]] | |||
|Properties=[[File:Proj.png]] | |||
|description= | |description= | ||
}} | }} | ||
}} | }} | ||
{{MoveData | {{MoveData | ||
| Line 641: | Line 696: | ||
|Stun= | |Stun= | ||
|Startup= 2 | |Startup= 2 | ||
|Frame Adv= | |Frame Adv= -16 | ||
|Block=[[File:mid.png]] | |Block=[[File:mid.png]] | ||
|Properties= [[File:Startupinv.png]]<br>[[File:Upperbodyinv.png]][[File:Lowerbodyinv.png]] | |Properties= [[File:Startupinv.png]]<br>[[File:Upperbodyinv.png]][[File:Lowerbodyinv.png]] | ||
| Line 652: | Line 707: | ||
|Stun= | |Stun= | ||
|Startup= 2 | |Startup= 2 | ||
|Frame Adv= | |Frame Adv= -21 | ||
|Block=[[File:mid.png]] | |Block=[[File:mid.png]] | ||
|Properties= [[File:Startupinv.png]]<br>[[File:Upperbodyinv.png]][[File:Lowerbodyinv.png]] | |Properties= [[File:Startupinv.png]]<br>[[File:Upperbodyinv.png]][[File:Lowerbodyinv.png]] | ||
| Line 663: | Line 718: | ||
|Stun= | |Stun= | ||
|Startup= 2 | |Startup= 2 | ||
|Frame Adv= | |Frame Adv= -30 | ||
|Block=[[File:mid.png]] | |Block=[[File:mid.png]] | ||
|Properties= [[File:Startupinv.png]]<br>[[File:Upperbodyinv.png]][[File:Lowerbodyinv.png]] | |Properties= [[File:Startupinv.png]]<br>[[File:Upperbodyinv.png]][[File:Lowerbodyinv.png]] | ||
| Line 720: | Line 775: | ||
Zenpou Tenshin <br> | Zenpou Tenshin <br> | ||
qcb+P <br><br> | qcb+P <br><br> | ||
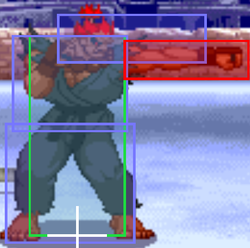
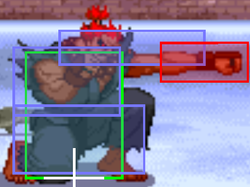
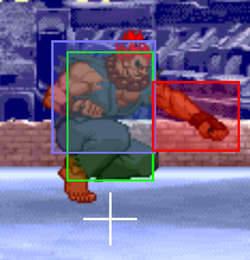
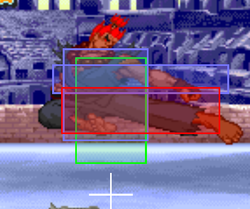
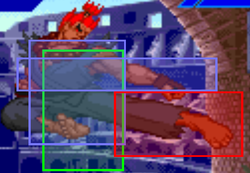
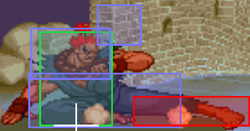
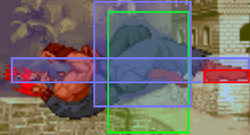
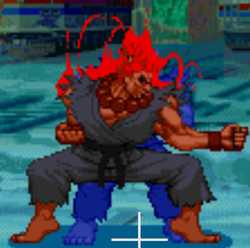
Akumas Roll is nothing like kens and Always goes a huge distance with pretty terrible recovery,This and red fireball should be avoided at all costs. | |||
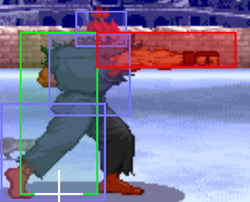
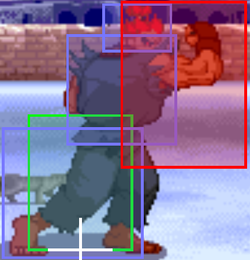
{{MoveData | |||
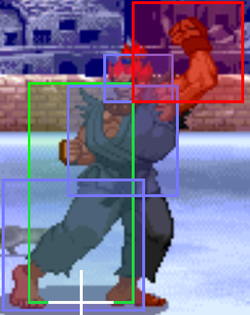
|image=A1 Akuma forward Teleport.png | |||
|imageSize=250px | |||
|image2=A1 Akuma Forward Teleport 2.png | |||
|imageSize2=250px | |||
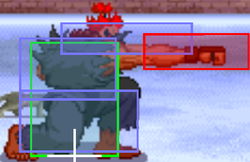
|image3=A1 Akuma forward teleport 3.png | |||
|imageSize3=250px | |||
|caption= | |||
|name= [[File:Dp.png]] + [[File:3p.png]] Or [[File:3k.png]] | |||
|data= | |||
{{AttackData-Alpha2 | |||
|Damage= | |||
|Stun= | |||
|Startup= 1? | |||
|Frame Adv= | |||
|Block= | |||
|Properties= | |||
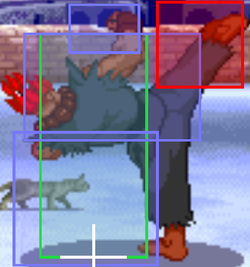
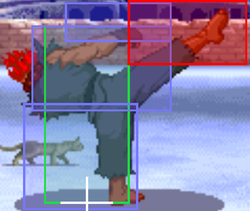
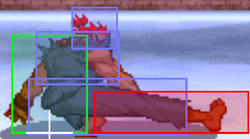
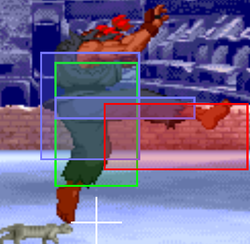
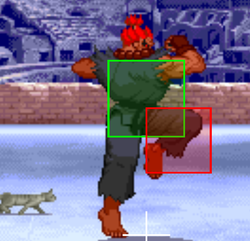
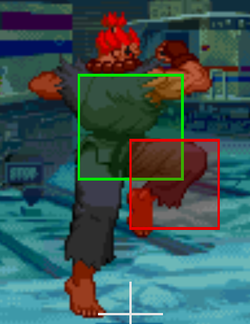
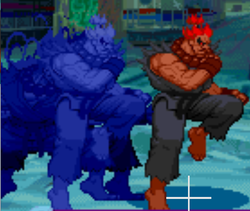
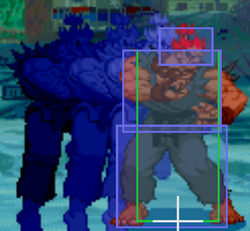
|description=makes Your hurtbox disappear entirely the frame you do the move but is vulnerable at the very end,punches Makes you go a far distance and kicks a small distance. | |||
}} | |||
}} | |||
{{MoveData | |||
|image= | |||
|imageSize=250px | |||
|caption= | |||
|name= [[File:Rdp.png]] + [[File:3p.png]] Or [[File:3k.png]] | |||
|data= | |||
{{AttackData-Alpha2 | |||
|Damage= | |||
|Stun= | |||
|Startup= 1? | |||
|Frame Adv= | |||
|Block= | |||
|Properties= | |||
|description=makes Your hurtbox disappear entirely the frame you do the move but is vulnerable at the very end. punches Makes you go a far distance and kicks a small distance. Since this one goes backwards you can use it for cheeky meter gain stuff in the corner | |||
}} | |||
}} | |||
==Super Combos== | ==Super Combos== | ||
Messatsu Gou Shouryuu <br> | Messatsu Gou Shouryuu <br> | ||
qcf,qcf+P <br><br> | qcf,qcf+P <br><br> | ||
Kind of like a slightly weaker Shoryu reppa Which means its a great confirm tool sometimes but be wary of rolling. | |||
Messatsu Gou Hadou <br> | Messatsu Gou Hadou <br> | ||
hcb,hcb+P <br><br> | hcb,hcb+P <br><br> | ||
Just Like Sagat and Ryu akuma can Punish the quick dizzy mashout the game Has due to this super. | |||
Tenma Gou Zankuu <br> | Tenma Gou Zankuu <br> | ||
air qcf,qcf+P <br><br> | air qcf,qcf+P <br><br> | ||
This can be useful Sometimes but your meter is usually Saved for Sgs | |||
Shun Goku Satsu <br> | Shun Goku Satsu <br> | ||
Latest revision as of 02:13, 11 December 2022
Introduction
US Name: Akuma (アクマ)
JPN Name: Gouki (豪鬼; "Great Demon")
Height: 178cm (5'10")
Weight: 80kg (176lbs.)
Blood type: Unknown
Birthplace: Unknown (Presumed to be Japan)
Special Skill: Unknown
Likes: Unknown
Dislikes: Unknown
Fighting Style: Goutetsu-ryuu Ansatsuken
Akuma is the brother of Gouken (who taught Ryu, Ken, and Dan) and learned Ansatsuken along with his brother under Goutetsu. While Gouken adopted a non-lethal form of the art, Akuma felt its lethal nature held the true potential for victory. Feeling he had mastered Ansatsuken, Akuma challenged and killed both Goutetsu and Gouken. Akuma now seeks powerful challengers worthy of his time.
-Krendall
How to Unlock
Moves List
Normal Moves
Throws
Seoi Nage
b/f+[MP/HP]
Tomoe Nage
b/f+[MK/HK]
Command Moves
Alpha Counter
Crouch Strong Kick
block b,db,d+K
Special Moves
^!Hyakki Gou Sai close b/f+P
^!Hyakki Gou Tsui close foe in air b/f+K
Zenpou Tenshin
qcb+P
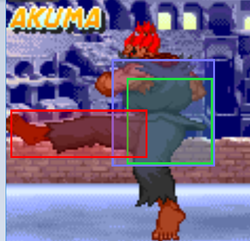
Akumas Roll is nothing like kens and Always goes a huge distance with pretty terrible recovery,This and red fireball should be avoided at all costs.
| Damage | Stun | Startup | Active | Frame Adv | Meter | Block | Properties | |
|---|---|---|---|---|---|---|---|---|
| - | - | 1? | - | - | - | - | - | |
|
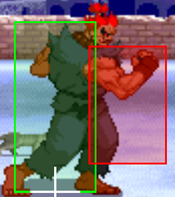
makes Your hurtbox disappear entirely the frame you do the move but is vulnerable at the very end,punches Makes you go a far distance and kicks a small distance. | ||||||||
| Damage | Stun | Startup | Active | Frame Adv | Meter | Block | Properties | |
|---|---|---|---|---|---|---|---|---|
| - | - | 1? | - | - | - | - | - | |
|
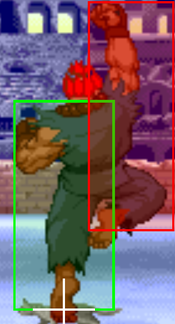
makes Your hurtbox disappear entirely the frame you do the move but is vulnerable at the very end. punches Makes you go a far distance and kicks a small distance. Since this one goes backwards you can use it for cheeky meter gain stuff in the corner | ||||||||
Super Combos
Messatsu Gou Shouryuu
qcf,qcf+P
Kind of like a slightly weaker Shoryu reppa Which means its a great confirm tool sometimes but be wary of rolling.
Messatsu Gou Hadou
hcb,hcb+P
Just Like Sagat and Ryu akuma can Punish the quick dizzy mashout the game Has due to this super.
Tenma Gou Zankuu
air qcf,qcf+P
This can be useful Sometimes but your meter is usually Saved for Sgs
Shun Goku Satsu
(Lv3)LP,LP,f,LK
SGS is the Second best super in the game For multiple reasons
1.The only Hard knockdown in the game and its VERY long so akuma can setup whatever mixup he wants
2.Multiple Slow cancel setups aside from just Duck mk and Hopkick These are: Divekick,J.Lp(Buffers the input),J.Mk,J.Hk,J.Hp,Cr.mp,S.lp(Must be done very quickly and only works vs birdie and sodom)
Combos
-j.HK,c.LK,c.MK,c.HK
-j.HK,c.LP,c.LK,c.MP,HP GHDK
-j.HP,s.HK,HP GSRK
-TKK,c.LK,c.MK,c.HK,HK TSK
-c.HK,LK TSK,MGSR Lvl1
-cross up j.HK,c.HP,MHDK Lvl3
-C.lkx3.,St.hp.,Hp GHDK
-C.lkx3,C.mk,hp GHDK
The Basics
Akuma has many combos.... Akuma has many rollable combos.....But Akuma baits and punishes rolls very strongly. A quick example to demonstrate this fact would be... If you akuma sweeps you, and you rolled....
You lost the match. Any knock down akuma lands besides throw, if the opponent rolls akuma can punish with a duck lk, stand mp, duck hp, fireball for a instant dizzy. Then for a combo to finish off the opponent. You can also use a stand hp if you are not confident in the duck hp timing. Akuma has many of ryus high dizzying fireball combos, but with the added fact to note that akumas stand mp does 8 stun instead of 6, his duck hp does 10 stun instead of 8. And the chain into each other unlike other shotos. In general because of this its very dangerous to roll vs akuma almost ever. Although sweep hurricane kick is rollable, you recover with plenty of time to punish with his dizzy combo basically ending the match right there. If you must roll vs akuma its better to throw it in where the dp comes.
Note that akuma can throw loop with his 2369+hp, hp vs guy, chun li, adon, and sodom(if you dont include his back roll). They must take damage in some form or waste a super to escape, which in many cases akuma can still punish them. Note that akumas throw loop is much more specific then guys as his range is not as forgiving. But the basic is knock down, meaty demon flip hp throw. Land walk foward wiff duck lk(if they rolled combo), then hp demon flip hp throw as a meaty again. The before mentioned characters cannot escape this regularly as it ethier grabs there normal reversals or there reversal will miss.
Advanced Strategy
Akuma's Standing/Crouching WP,WK,MP, and Crouching MK can all chain into stronger attacks. His Standing/Crouching WP and Crouching WK can chain into another WP or WK.
If you attempt to sweep or knock down the opponent and do the Shun Goku Satsu as they get up, the opponent CAN jump to avoid it.
- Birdie and Sodom can NOT jump after being knocked down to avoid raging demon.
A hop kick, and a duck mk slow cancel are also not jumpable by EVERY character in the game hit or block. However you can still reversal.
