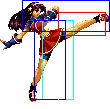
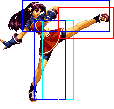
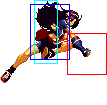
m (→Basic Combos) |
|||
| (76 intermediate revisions by 5 users not shown) | |||
| Line 2: | Line 2: | ||
==General Info== | ==General Info== | ||
Crouch height: Low<br> | Crouch height: Low<br> | ||
Jump: 4/43/1<br> | |||
Hop: 4/32/1<br> | |||
Dash: 3/10~∞/3<br> | |||
Backdash: 3/16/3<br> | |||
Wakeup: 15 frames<br> | |||
Recovery roll: 23 frames<br> | |||
{| | {| | ||
! Stand | ! Stand | ||
| Line 27: | Line 33: | ||
| [[image:Athena02_colorD.png]] | | [[image:Athena02_colorD.png]] | ||
|} | |} | ||
==[[The_King_of_Fighters_2002/Normals_Guide|Movelist]]== | ==[[The_King_of_Fighters_2002/Normals_Guide|Movelist]]== | ||
{|border="1" | {|border="1" | ||
! | !width="9%"| | ||
! Frames | ! Frames | ||
! Advantage | ! Advantage | ||
| Line 105: | Line 112: | ||
|align="center"| Feet invincible: F8~End | |align="center"| Feet invincible: F8~End | ||
|- | |- | ||
! [[image:snkc.gif]]+[[image:snkd.gif]] | ! [[image:snkc.gif]] + [[image:snkd.gif]] | ||
|align="center"| 9/4/25 | |align="center"| 9/4/25 | ||
|align="center"| KD/-7 | |align="center"| KD/-7 | ||
| Line 182: | Line 189: | ||
| | | | ||
|- | |- | ||
! [[image:snkc.gif]]+[[image:snkd.gif]] | ! [[image:snkc.gif]] + [[image:snkd.gif]] | ||
|align="center"| 13/7/- | |align="center"| 13/7/- | ||
|align="center"| KD/- | |align="center"| KD/- | ||
| Line 260: | Line 267: | ||
|colspan="9" align="center"| '''Command Normals''' | |colspan="9" align="center"| '''Command Normals''' | ||
|- | |- | ||
! f+[[image:snkb.gif]] | ! f + [[image:snkb.gif]] | ||
|align="center"| 6/2(6)4/13 | |align="center"| 6/2(6)4/13 | ||
|align="center"| +3/+1 | |align="center"| +3/+1 | ||
| Line 269: | Line 276: | ||
| Considered airborne. Cancellable into air moves on second hit. | | Considered airborne. Cancellable into air moves on second hit. | ||
|- | |- | ||
! j.d+[[image:snkb.gif]] | ! j.d + [[image:snkb.gif]] | ||
|align="center"| 5/12/2 | |align="center"| 5/12/2 | ||
|align="center"| KD/- | |align="center"| KD/- | ||
| Line 279: | Line 286: | ||
|colspan="9" align="center"| '''Special Moves''' | |colspan="9" align="center"| '''Special Moves''' | ||
|- | |- | ||
! qcb+[[image:snka.gif]] | ! qcb + [[image:snka.gif]] | ||
|align="center"| | |align="center"| 14/-/32 | ||
|align="center"| | |align="center"| 0/-2 | ||
|align="center"| | |align="center"| | ||
|align="center"| HL | |align="center"| HL | ||
|valign="bottom" style="border-right:0px;"| [[image:Athena02_qcbA1.png|center]] | |valign="bottom" style="border-right:0px;"| [[image:Athena02_qcbA1.png|center]] | ||
|colspan="2" valign="bottom" style="border-left:0px;"| [[image:Athena02_qcbA2.png|center]] | |colspan="2" valign="bottom" style="border-left:0px;"| [[image:Athena02_qcbA2.png|center]] | ||
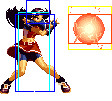
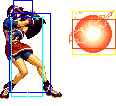
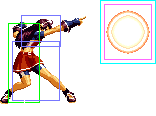
|rowspan="2"| '''Psycho Ball - qcb+P''' | |rowspan="2"| '''Psycho Ball - qcb + P''' | ||
* Athena throws a projectile that hovers above ground | * Athena throws a projectile that hovers above ground | ||
* qcb+A travels slower and recovers much faster than qcb+C | * qcb + A travels slower and recovers much faster than qcb + C | ||
|- | |- | ||
! qcb+[[image:snkc.gif]] | ! qcb + [[image:snkc.gif]] | ||
|align="center"| | |align="center"| 13/-/45 | ||
|align="center"| | |align="center"| -13/-15 | ||
|align="center"| | |align="center"| | ||
|align="center"| HL | |align="center"| HL | ||
| Line 298: | Line 305: | ||
|colspan="2" valign="bottom" style="border-left:0px;"| [[image:Athena02_qcbC2.png|center]] | |colspan="2" valign="bottom" style="border-left:0px;"| [[image:Athena02_qcbC2.png|center]] | ||
|- | |- | ||
! dp+[[image:snka.gif]] | ! dp + [[image:snka.gif]] | ||
|align="center"| | |align="center"| 1/2(1)3(1)18/20+11 | ||
|align="center"| | |align="center"| KD/-31 | ||
|align="center"| | |align="center"| Su, Fi, Fo | ||
|align="center"| HL | |align="center"| HL | ||
|valign="bottom" style="border-right:0px;"| [[image:Athena02_dpA1.png|center]] | |valign="bottom" style="border-right:0px;"| [[image:Athena02_dpA1.png|center]] | ||
|valign="bottom" style="border-left:0px; border-right:0px;"| [[image:Athena02_dpA2.png|center]] | |valign="bottom" style="border-left:0px; border-right:0px;"| [[image:Athena02_dpA2.png|center]] | ||
|valign="bottom" style="border-left:0px;"| [[image:Athena02_dpA3.png|center]] | |valign="bottom" style="border-left:0px;"| [[image:Athena02_dpA3.png|center]] | ||
|rowspan="6"| '''Psycho Sword - dp+P(ground,air)''' | |rowspan="6"| '''Psycho Sword - dp + P(ground,air)''' | ||
* Athena does a vertical rising attack that comes out quickly | * Athena does a vertical rising attack that comes out quickly | ||
* A version comes out faster but does less hits and doesn't rise as high as the C version | * A version comes out faster but does less hits and doesn't rise as high as the C version | ||
* supercancellable on all hits, but supercancelling on the last hit will result in the DM whiffing | * supercancellable on all hits, but supercancelling on the last hit will result in the DM whiffing | ||
* | * Invincibility: A: Upperbody 1f; C: 1f, Upperbody 2-3f. | ||
|- | |- | ||
! j.dp+[[image:snka.gif]] | ! j.dp + [[image:snka.gif]] | ||
|align="center"| | |align="center"| 1/2(1)3(1)18/until land + 11 | ||
|align="center"| | |align="center"| KD/- | ||
|align="center"| | |align="center"| Su, Fi, Fo | ||
|align="center"| HL | |align="center"| HL | ||
|valign="bottom" style="border-right:0px;"| [[image:Athena02_jdpA1.png|center]] | |valign="bottom" style="border-right:0px;"| [[image:Athena02_jdpA1.png|center]] | ||
| Line 322: | Line 328: | ||
|valign="bottom" style="border-left:0px;"| [[image:Athena02_dpA3.png|center]] | |valign="bottom" style="border-left:0px;"| [[image:Athena02_dpA3.png|center]] | ||
|- | |- | ||
!rowspan="2"| dp+[[image:snkc.gif]] | !rowspan="2"| dp + [[image:snkc.gif]] | ||
|rowspan="2" align="center"| | |rowspan="2" align="center"| 3/2*2*3*22/23+15 | ||
|rowspan="2" align="center"| | |rowspan="2" align="center"| KD/-42 | ||
|rowspan="2" align="center"| | |rowspan="2" align="center"| Su, Fi, Fo | ||
|rowspan="2" align="center"| HL | |rowspan="2" align="center"| HL | ||
|valign="bottom" style="border-right:0px; border-bottom:0px;"| [[image:Athena02_dpC1.png|center]] | |valign="bottom" style="border-right:0px; border-bottom:0px;"| [[image:Athena02_dpC1.png|center]] | ||
| Line 333: | Line 339: | ||
|colspan="2" valign="bottom" style="border-left:0px; border-top:0px;"| [[image:Athena02_dpC4.png|center]] | |colspan="2" valign="bottom" style="border-left:0px; border-top:0px;"| [[image:Athena02_dpC4.png|center]] | ||
|- | |- | ||
!rowspan="2"| j.dp+[[image:snkc.gif]] | !rowspan="2"| j.dp + [[image:snkc.gif]] | ||
|rowspan="2" align="center"| | |rowspan="2" align="center"| 3/2*2*3*22/until land + 15 | ||
|rowspan="2" align="center"| | |rowspan="2" align="center"| KD/- | ||
|rowspan="2" align="center"| | |rowspan="2" align="center"| Su, Fi, Fo | ||
|rowspan="2" align="center"| HL | |rowspan="2" align="center"| HL | ||
|valign="bottom" style="border-right:0px; border-bottom:0px;"| [[image:Athena02_jdpC1.png|center]] | |valign="bottom" style="border-right:0px; border-bottom:0px;"| [[image:Athena02_jdpC1.png|center]] | ||
| Line 343: | Line 349: | ||
|valign="bottom" style="border-right:0px; border-top:0px;"| [[image:Athena02_dpC3.png|center]] | |valign="bottom" style="border-right:0px; border-top:0px;"| [[image:Athena02_dpC3.png|center]] | ||
|colspan="2" valign="bottom" style="border-left:0px; border-top:0px;"| [[image:Athena02_dpC4.png|center]] | |colspan="2" valign="bottom" style="border-left:0px; border-top:0px;"| [[image:Athena02_dpC4.png|center]] | ||
| | |- | ||
=== | ! <br>qcf + [[image:snkb.gif]]<br><br> | ||
|align="center"| 12/11/4 | |||
3. Psycho Teleport - qcf+K | |align="center"| | ||
* Athena teleports forward, where qcf+B goes a bit less than half screen while qcf+D goes full screen | |align="center"| Fi | ||
|align="center"| - | |||
|rowspan="2" colspan="3" | [[image:Athena02_qcfK.png|center]] | |||
|rowspan="2"| '''Psycho Teleport - qcf + K''' | |||
* Athena teleports forward, where qcf + B goes a bit less than half screen while qcf + D goes full screen | |||
* has a long startup, where she can easily be hit out of it. The image of where she was standing when she chose to teleport, can be attack | * has a long startup, where she can easily be hit out of it. The image of where she was standing when she chose to teleport, can be attack | ||
* | * All but last active frame are feet invicible. Last frame is fully invincible. | ||
|- | |||
! qcf + [[image:snkd.gif]] | |||
4. Psycho Reflector - qcb+B | |align="center"| 12/21/4 | ||
|align="center"| | |||
|align="center"| Fi | |||
|align="center"| - | |||
|- | |||
! qcb + [[image:snkb.gif]] | |||
|align="center"| 12/[1(1)]x11,1/27 (Reflector: 11/24/27) | |||
|align="center"| KD/0 | |||
|align="center"| Fi | |||
|align="center"| HL | |||
|colspan="3" | [[image:Athena02_qcbB.png|center]] | |||
| '''Psycho Reflector - qcb + B''' | |||
* Athena creates a barrier in front of her that reflects normal and DM projectiles | * Athena creates a barrier in front of her that reflects normal and DM projectiles | ||
* | * The reflector is cancelled straight to recovery if it connects or reflects, giving it very fast recovery on block. | ||
|- | |||
! j.qcb + [[image:snkb.gif]] | |||
|align="center"| 6/1(2)[2(2)]x∞/17 | |||
|align="center"| +1/-1 | |||
|align="center"| Su, Fi, Fo | |||
|align="center"| HL | |||
|colspan="3" | [[image:Athena02_jqcbB.png|center]] | |||
|rowspan="2"| '''Phoenix Arrow - qcb + K(air)''' | |||
* Athena performs a diagonal rolling attack from the air, with the B version going down at a steep 30% angle while D version is a 45% angle | * Athena performs a diagonal rolling attack from the air, with the B version going down at a steep 30% angle while D version is a 45% angle | ||
* D version does more hits and ends in a somewhat punishable (on block) high priority kick. This kick will change directions in case the opponent switched sides before it came out | * D version does more hits and ends in a somewhat punishable (on block) high priority kick. This kick will change directions in case the opponent switched sides before it came out | ||
* supercancellable on all hits, though easiest to supercancel is the last hit of the D version | * supercancellable on all hits, though easiest to supercancel is the last hit of the D version | ||
|- | |||
! j.qcb + [[image:snkd.gif]] | |||
|align="center"| 9/1(2)[2(2)]x∞(13)21/12 | |||
|align="center"| KD/-15 | |||
===DMs=== | |align="center"| Su, Fi, Fo | ||
|align="center"| HL | |||
|valign="bottom" style="border-right:0px;"| [[image:Athena02_jqcbD1.png|center]] | |||
|colspan="2" valign="bottom" style="border-left:0px;"| [[image:Athena02_jqcbD2.png|center]] | |||
|- | |||
|colspan="9" align="center"| '''DMs''' | |||
|- | |||
! j.qcfx2+[[image:snkb.gif]] | |||
|align="center"| 9/ - (9+3+14) - (9+3+12) - (12) [2(2)x∞]*1/18 (Projectile: [2(2)]x∞/1) | |||
|align="center"| KD/-1 | |||
|align="center"| | |||
|align="center"| HL | |||
|valign="top" style="border-right:0px;"| [[image:Athena02_jqcfx2B1.png|center]] | |||
|valign="bottom" style="border-right:0px; border-left:0px;"| [[image:Athena02_jqcfx2B2.png|center]] | |||
|valign="bottom" style="border-left:0px;"| [[image:Athena02_jqcfx2B3.png|center]] | |||
|rowspan="2"| Phoenix Fang Arrow - qcfx2+K(air) | |||
* Athena fires a few projectiles diagonally, then comes down with a B phoenix arrow | * Athena fires a few projectiles diagonally, then comes down with a B phoenix arrow | ||
* qcfx2+B fires projectiles in a slightly more vertical angle than qcfx2+D, which is at a 45 degree angle. In combos, qcfx2+D is more likely to combo | * qcfx2+B fires projectiles in a slightly more vertical angle than qcfx2+D, which is at a 45 degree angle. In combos, qcfx2+D is more likely to combo | ||
| Line 375: | Line 412: | ||
* has no recovery time after the last hit | * has no recovery time after the last hit | ||
* the opponent can easily do a fast vertical reversal on reaction, before her first projectile makes contact with you. Hitting Athena's projectiles (even with fireballs) will hurt Athena for some reason. If the DM whiffs, rush DMs can easily hit her as well | * the opponent can easily do a fast vertical reversal on reaction, before her first projectile makes contact with you. Hitting Athena's projectiles (even with fireballs) will hurt Athena for some reason. If the DM whiffs, rush DMs can easily hit her as well | ||
* Invincibility: A: 1-8f. C: 1-6; 3 frames between each projectile, 14 frames before project is released. | |||
|- | |||
2. Shining Crystal Bit - hcbx2+P(ground,air) (cancellable with ABCD) | ! j.qcfx2+[[image:snkd.gif]] | ||
|align="center"| 9/-(9+3+14)-(9+4+12)-(12) [2(2)x∞]*1/5 (Projectile: [2(2)]x∞/1) | |||
|align="center"| KD/+12 | |||
|align="center"| | |||
|align="center"| HL | |||
|valign="top" style="border-right:0px;"| [[image:Athena02_jqcfx2D1.png|center]] | |||
|valign="bottom" style="border-right:0px; border-left:0px;"| [[image:Athena02_jqcfx2D2.png|center]] | |||
|valign="bottom" style="border-left:0px;"| [[image:Athena02_jqcfx2D3.png|center]] | |||
|- | |||
! <br>hcbx2+[[image:snka.gif]]<br><br> | |||
|align="center"| 2/182/27 (Projectiles: 62*61*28*31) (ABCD: 58f) | |||
|align="center"| KD/- | |||
|align="center"| > qcb + A, > qcb + C, > ABCD | |||
|align="center"| HL | |||
|rowspan="2" colspan="3" | [[image:Athena02_hcbx2P.png|center]] | |||
|rowspan="2"| '''Shining Crystal Bit - hcbx2+P(ground,air) (cancellable with ABCD)''' | |||
* two balls of energy rotated around Athena diagonally for a few seconds or until cancelled | * two balls of energy rotated around Athena diagonally for a few seconds or until cancelled | ||
* can be cancelled with ABCD or you can throw the ball with qcb+P | * can be cancelled with ABCD or you can throw the ball with qcb + P | ||
* the cancel with ABCD has | * the cancel with ABCD has 58f (A ver.) or 64f (C ver.) of recovery and can be punished easily, though not as easily as just not cancelling at all | ||
* has startup invincibility, one of the best anti-airs in the game<br> | * has startup invincibility, one of the best anti-airs in the game<br> | ||
* can hit low sometimes | * can hit low sometimes | ||
* Invincibility: A: 1-11f, C: 1-14f. | |||
|- | |||
! hcbx2+[[image:snkc.gif]] | |||
|align="center"| 2/212/36 (Projectiles: 62*61*61*28) (ABCD: 64f) | |||
|align="center"| KD/- | |||
|align="center"| > qcb + A, > qcb + C, > ABCD | |||
|align="center"| HL | |||
|- | |||
! <br>> qcb + [[image:snka.gif]]<br><br> | |||
|align="center"| 30+0~120/-/53 | |||
|align="center"| KD/-20 | |||
|align="center"| | |||
|align="center"| HL | |||
|rowspan="2" colspan="3" | [[image:Athena02_hcbx2PqcbP.png|center]] | |||
|rowspan="2"| '''Crystal Shoot - qcb + P (can be held) (after hcbx2+P)''' | |||
* the balls of energy surrounding Athena concentrate into her hand | * the balls of energy surrounding Athena concentrate into her hand | ||
* can be delayed before thrown by holding the P button | * can be delayed before thrown by holding the P button | ||
* qcb+A throws the ball horizontally, while qcb+C makes it curve upwards | * qcb + A throws the ball horizontally, while qcb + C makes it curve upwards | ||
* if the opponent rolls behind her when she is holding it, they will get hit if she releases it then | * if the opponent rolls behind her when she is holding it, they will get hit if she releases it then | ||
|- | |||
! > qcb + [[image:snkc.gif]] | |||
|align="center"| 30+0~120/-/55 | |||
|align="center"| KD/-22 | |||
|align="center"| | |||
|align="center"| HL | |||
|- | |||
|colspan="9" align="center"| '''SDMs''' | |||
|- | |||
! hcbx2+[[image:snka.gif]] + [[image:snkc.gif]] | |||
|align="center"| 2/-(11)[1(1)1(2)]x34/24 (Projectile: 120*28*34) (ABCD: 58) | |||
|align="center"| KD/- | |||
|align="center"| > qcb + A, > qcb + C, > ABCD | |||
|align="center"| HL | |||
|colspan="3" | [[image:Athena02_hcbx2AC.png|center]] | |||
| '''Shining Crystal Bit - hcbx2+AC(ground,air) (cancellable with ABCD)''' | |||
* same properties as the DM version, except slightly more damage and less vulnerable hitbox due to the energy surronding her body | |||
* Invincibility: 1-11f. | |||
|- | |||
! <br>> qcb + [[image:snka.gif]]<br><br> | |||
|align="center"| 30+0~120/-/53 (Projectile hits 3 times) | |||
|align="center"| KD/-19 | |||
|align="center"| | |||
|align="center"| HL | |||
|rowspan="2" colspan="3" | [[image:Athena02_hcbx2ACqcbP.png|center]] | |||
|rowspan="2"| '''Crystal Shoot - qcb + P (after Shining Crystal Bit SDM)''' | |||
* same properties as the DM version of Crystal Shoot, except the ball thrown is bigger, does 3 hits, and a bit more damage | |||
|- | |||
! > qcb + [[image:snkc.gif]] | |||
|align="center"| 30+0~120/-/55 | |||
|align="center"| KD/-21 | |||
|align="center"| | |||
|align="center"| HL | |||
|- | |||
! hcb,f + [[image:snka.gif]] + [[image:snkc.gif]] | |||
|align="center"| 7/13/14+40 | |||
|align="center"| KD/-49 | |||
|align="center"| | |||
|align="center"| HL | |||
|colspan="3" | [[image:Athena02_hcbfAC.png|center]] | |||
| '''Psychic 9 - hcb,f + AC''' | |||
* Athena dashes forward. If the attack is blocked or the distance she dashed is too great, she will fall, leaving her wide open for a combo | |||
* if she connects, you must input a sequence of button presses every time she attacks the opponent. The input should be started after the second hit: A, B, C, A, B, C, D, followup | |||
* Invincibility: Complete startup, first 14 frames of recovery. | |||
|- | |||
! qcf + [[image:punch.gif]] | |||
|align="center"| | |||
|align="center"| | |||
|align="center"| | |||
|align="center"| HL | |||
|colspan="3"| | |||
| '''Sailor Finish - qcf + P (after hcb,f + AC)''' | |||
* hard knockdown | |||
* does the same amount of damage as Fire Sword Finish | |||
|- | |||
! hcb + [[image:kick.gif]] | |||
|align="center"| | |||
|align="center"| | |||
|align="center"| | |||
|align="center"| HL | |||
|colspan="3"| | |||
| '''Fire Sword Finish - hcb + K (after hcb,f + AC)''' | |||
* does the same amount of damage as Sailor Finish | |||
|- | |||
! dp + [[image:punch.gif]] | |||
|align="center"| | |||
|align="center"| | |||
|align="center"| | |||
|align="center"| HL | |||
|colspan="3"| | |||
| '''Psycho Finish - dp + P (after hcb,f + AC)''' | |||
* does more damage than Sailor Finish or Fire Sword Finish | |||
|- | |||
|colspan="9" align="center"| '''HSDM''' | |||
|- | |||
! qcf + [[image:snka.gif]] + [[image:snkb.gif]] + [[image:snkc.gif]] + [[image:snkd.gif]] | |||
|align="center"| 7/13/14+40 | |||
|align="center"| KD/-49 | |||
|align="center"| | |||
|align="center"| HL | |||
|colspan="3" | [[image:Athena02_hcbfAC.png|center]] | |||
| '''Psycho Medley - qcf + ABCD''' | |||
* same properties as Psychic 9, except different sequences need to be input for her followups: D, C, B, D, C, B, A, followup | |||
* Invincibility: Complete startup, first 14 frames of recovery. | |||
|- | |||
! > qcf + [[image:snka.gif]] + [[image:snkb.gif]] | |||
|align="center"| | |||
|align="center"| | |||
|align="center"| | |||
|align="center"| HL | |||
|colspan="3"| | |||
| '''Healing Athena - qcf + AB (after qcf + ABCD)''' | |||
* recovers about 1/3 of a life bar of health, but does no damage | |||
* hard knockdown | |||
|- | |||
! > qcf + [[image:snkb.gif]] + [[image:snkc.gif]] | |||
|align="center"| | |||
|align="center"| | |||
|align="center"| | |||
|align="center"| HL | |||
|colspan="3"| | |||
| '''Momoiro Gatame - qcf + BC (after Psycho Medley)''' | |||
* does about the same damage as a crouch D would, so unless this is going to kill the opponent, it is probably a better idea to use Healing Athena instead | |||
|} | |||
==Short Movelis== | |||
* f + B | |||
* air d + B (Overhead.) | |||
* Air throw. | |||
* Triangle jump. | |||
* dp + P | |||
* air dp + P | |||
* qcb + P | |||
* qcf + K (Teleport.) | |||
* qcb + B (Reflect projectiles.) | |||
* air qcb + K | |||
* DM air qcf qcf + K | |||
* DM hcb hcb + P (May be done in the air.) | |||
** ABCD (Cancel.) | |||
** qcb + P (May charge.) | |||
* SDM hcb hcb + AC (May be done in the air.) | |||
** ABCD (Cancel.) | |||
** qcb + P (May charge.) | |||
* SDM hcb f + AC | |||
** A B C A B C D | |||
*** dp + P | |||
**** Any special. (But nothing will combo.) | |||
*** hcb + K | |||
*** qcf + P | |||
* HSDM qcf + ABCD | |||
** D C B D C B A | |||
*** qcf + AB | |||
*** qcf + BC (Does zero damage, but heals Athena.) | |||
==Notes== | |||
* | ===Cancellable moves=== | ||
* | * Close: A, B, C, D | ||
* Far: A, B | |||
* Crouch: A, B, C | |||
* Jump: A (Not vertical high jump.), C (Only high.) | |||
* CD is cancellable into specials and DMs. | |||
* | * j.CD is cancellable into command moves, specials and DMs. | ||
* f + B (2) is cancellable (on air attacks). | |||
* air d + B is cancellable (on air attacks). But as it causes knockdown, you can only combo on a counterhit. | |||
===Super cancellable moves=== | |||
* dp + P | |||
* air dp + P | |||
* air qcb + K | |||
===Free cancellable into moves=== | |||
* | * '''dp + P''' | ||
* | * '''air dp + P''' | ||
* qcf + K | |||
* qcb + B | |||
* '''air qcb + K''' | |||
=== Free cancellable out-of moves=== | |||
* f + B (1) | |||
* '''dp + P''' | |||
* '''air dp + P''' | |||
* '''air qcb + K''' | |||
===Moves with Invincibility=== | |||
* | * st.D (Feet: startup (last part) & active & recovery.) | ||
* j.C (Full: recovery.) | |||
* dp + A (Upper: startup.) | |||
* dp + C (Full: startup (1st part). Upper: startup.) | |||
* air dp + A (Upper: startup.) | |||
* air dp + C (Full: startup (1st part). Upper: startup.) | |||
* qcf + K (Full: active (last part). Feet: active.) | |||
* DM air qcf qcf + P (Full: startup (1st part).) | |||
* DM hcb hcb + P (Full: startup & active (1st part).) | |||
* DM air hcb hcb + P (Full: startup & active (1st part).) | |||
* SDM hcb hcb + AC (Full: startup & active (1st part).) | |||
* SDM air hcb hcb + AC (Full: startup & active (1st part).) | |||
* SDM hcb f + AC (Full: startup & recovery (1st part).) | |||
* HSDM qcf + ABCD (Full: startup & recovery (1st part).) | |||
=== Moves with autoguard=== | |||
(none) | |||
===Notes=== | ===Other Notes=== | ||
* Air throw is a hard knockdown | * Air throw is a hard knockdown | ||
==Combos== | ==Combos== | ||
=== | ===Basic Combos=== | ||
* cl.C / cr.C > | |||
** f + B (2) | |||
*** (S)DM air hcb hcb + P/AC (Corner) [32%/??%] {1 stock/Max Mode + 1 stock} | |||
*** '''air dp + A [28%]''' >> | |||
**** '''(S)DM hcb hcb + P/AC {2 stocks/Max Mode + 2 stocks}''' | |||
*** air dp + C (Corner) [30%] >> | |||
**** (S)DM air hcb hcb + P/AC {2 stocks/Max Mode + 2 stocks} | |||
*** '''air qcb + D (Corner) [31%] >>''' | |||
**** '''(S)DM hcb hcb + P/AC [55%/??%] {2 stocks/Max Mode + 2 stocks}''' | |||
** qcb + C [20%] | |||
** dp + C [23%] | |||
** SDM hcb f + AC > [followup] {Max Mode + 1 stock} | |||
** HSDM qcf + ABCD > [followup] {Max Mode + 1 stock} | |||
* cr.B x 2 > | |||
** dp + C | |||
** SDM hcb f + AC > [followup] {Max Mode + 1 stock} | |||
** HSDM qcf + ABCD > [followup] {Max Mode + 1 stock} | |||
* cr.B > | |||
** '''f + B > ...''' | |||
** (S)DM hcb hcb + P/AC (Point blank.) {1 stock/Max Mode + 1 stock} | |||
* Very close or corner: ... dp + C (1-6) >> (S)DM air hcb hcb + P/AC [+17%/+??%] {2 stocks/Max Mode + 2 stocks} | |||
* j.A > | |||
** air qcb + B {15%} | |||
** DM air qcf qcf + D {30%} {1 stock} | |||
===Max Mode=== | |||
* st.D >> BC, run, st.D >> | |||
** SDM hcb f + AC > [followup] {50+%} | |||
** HSDM qcf + ABCD > [followup] | |||
* cr.B, cr.A >> BC, cr.C > | |||
** SDM hcb f + AC > [followup] {50+%} | |||
** HSDM qcf + ABCD > [followup] {50-70%} | |||
===Combos Notes=== | |||
* The dp + P finisher of SDM hcb f + AC, deals more damage than the other two. | |||
* Weak attack > f + B will combo only if you are very close and the first hit of f + B connect. | |||
* On hard attack > f + B, the first hit of f + B will almost always miss, but the second hit will combo (even if you are not very close). | |||
==Strategies== | |||
* Use your Psycho Ball (qcb + P) at far distance and your teleport (qcf + K) if your opponent if close | |||
* Psycho Sword (dp + P) is an excellent anti air, also its an aereal optional move, you can make instant air move with uf dp + P | |||
* B Phoenix Arrow (air qcb + B) is a great follow up after f + B (2). D version its riskful. | |||
* Psycho Reflector (qcb + B) its useful for reflect projectiles. | |||
* Psychic 9 (SDM hcb f + AC) and Psycho Medley (HSDM qcf + ABCD) are strictful timming DMs, don't use it if you don't dominate it, well, a good timming trick its to bring the sequence after the first hit of those DMs. | |||
{{Template:The King of Fighters 2002}} | {{Template:The King of Fighters 2002}} | ||
[[Category:The King of Fighters 2002]] | [[Category:The King of Fighters 2002]] | ||
Latest revision as of 22:07, 24 October 2021
General Info
Crouch height: Low
Jump: 4/43/1
Hop: 4/32/1
Dash: 3/10~∞/3
Backdash: 3/16/3
Wakeup: 15 frames
Recovery roll: 23 frames
| Stand | Crouch | Jump | Grab | Run |
|---|---|---|---|---|

|

|

|

|

|
Colors

|

|

|

|
Movelist
Short Movelis
- f + B
- air d + B (Overhead.)
- Air throw.
- Triangle jump.
- dp + P
- air dp + P
- qcb + P
- qcf + K (Teleport.)
- qcb + B (Reflect projectiles.)
- air qcb + K
- DM air qcf qcf + K
- DM hcb hcb + P (May be done in the air.)
- ABCD (Cancel.)
- qcb + P (May charge.)
- SDM hcb hcb + AC (May be done in the air.)
- ABCD (Cancel.)
- qcb + P (May charge.)
- SDM hcb f + AC
- A B C A B C D
- dp + P
- Any special. (But nothing will combo.)
- hcb + K
- qcf + P
- dp + P
- A B C A B C D
- HSDM qcf + ABCD
- D C B D C B A
- qcf + AB
- qcf + BC (Does zero damage, but heals Athena.)
- D C B D C B A
Notes
Cancellable moves
- Close: A, B, C, D
- Far: A, B
- Crouch: A, B, C
- Jump: A (Not vertical high jump.), C (Only high.)
- CD is cancellable into specials and DMs.
- j.CD is cancellable into command moves, specials and DMs.
- f + B (2) is cancellable (on air attacks).
- air d + B is cancellable (on air attacks). But as it causes knockdown, you can only combo on a counterhit.
Super cancellable moves
- dp + P
- air dp + P
- air qcb + K
Free cancellable into moves
- dp + P
- air dp + P
- qcf + K
- qcb + B
- air qcb + K
Free cancellable out-of moves
- f + B (1)
- dp + P
- air dp + P
- air qcb + K
Moves with Invincibility
- st.D (Feet: startup (last part) & active & recovery.)
- j.C (Full: recovery.)
- dp + A (Upper: startup.)
- dp + C (Full: startup (1st part). Upper: startup.)
- air dp + A (Upper: startup.)
- air dp + C (Full: startup (1st part). Upper: startup.)
- qcf + K (Full: active (last part). Feet: active.)
- DM air qcf qcf + P (Full: startup (1st part).)
- DM hcb hcb + P (Full: startup & active (1st part).)
- DM air hcb hcb + P (Full: startup & active (1st part).)
- SDM hcb hcb + AC (Full: startup & active (1st part).)
- SDM air hcb hcb + AC (Full: startup & active (1st part).)
- SDM hcb f + AC (Full: startup & recovery (1st part).)
- HSDM qcf + ABCD (Full: startup & recovery (1st part).)
Moves with autoguard
(none)
Other Notes
- Air throw is a hard knockdown
Combos
Basic Combos
- cl.C / cr.C >
- f + B (2)
- (S)DM air hcb hcb + P/AC (Corner) [32%/??%] {1 stock/Max Mode + 1 stock}
- air dp + A [28%] >>
- (S)DM hcb hcb + P/AC {2 stocks/Max Mode + 2 stocks}
- air dp + C (Corner) [30%] >>
- (S)DM air hcb hcb + P/AC {2 stocks/Max Mode + 2 stocks}
- air qcb + D (Corner) [31%] >>
- (S)DM hcb hcb + P/AC [55%/??%] {2 stocks/Max Mode + 2 stocks}
- qcb + C [20%]
- dp + C [23%]
- SDM hcb f + AC > [followup] {Max Mode + 1 stock}
- HSDM qcf + ABCD > [followup] {Max Mode + 1 stock}
- f + B (2)
- cr.B x 2 >
- dp + C
- SDM hcb f + AC > [followup] {Max Mode + 1 stock}
- HSDM qcf + ABCD > [followup] {Max Mode + 1 stock}
- cr.B >
- f + B > ...
- (S)DM hcb hcb + P/AC (Point blank.) {1 stock/Max Mode + 1 stock}
- Very close or corner: ... dp + C (1-6) >> (S)DM air hcb hcb + P/AC [+17%/+??%] {2 stocks/Max Mode + 2 stocks}
- j.A >
- air qcb + B {15%}
- DM air qcf qcf + D {30%} {1 stock}
Max Mode
- st.D >> BC, run, st.D >>
- SDM hcb f + AC > [followup] {50+%}
- HSDM qcf + ABCD > [followup]
- cr.B, cr.A >> BC, cr.C >
- SDM hcb f + AC > [followup] {50+%}
- HSDM qcf + ABCD > [followup] {50-70%}
Combos Notes
- The dp + P finisher of SDM hcb f + AC, deals more damage than the other two.
- Weak attack > f + B will combo only if you are very close and the first hit of f + B connect.
- On hard attack > f + B, the first hit of f + B will almost always miss, but the second hit will combo (even if you are not very close).
Strategies
- Use your Psycho Ball (qcb + P) at far distance and your teleport (qcf + K) if your opponent if close
- Psycho Sword (dp + P) is an excellent anti air, also its an aereal optional move, you can make instant air move with uf dp + P
- B Phoenix Arrow (air qcb + B) is a great follow up after f + B (2). D version its riskful.
- Psycho Reflector (qcb + B) its useful for reflect projectiles.
- Psychic 9 (SDM hcb f + AC) and Psycho Medley (HSDM qcf + ABCD) are strictful timming DMs, don't use it if you don't dominate it, well, a good timming trick its to bring the sequence after the first hit of those DMs.
