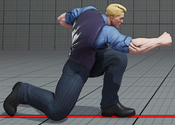
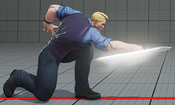
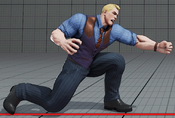
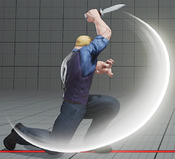
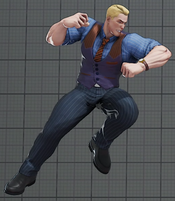
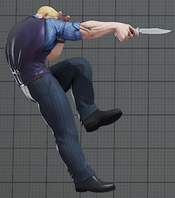
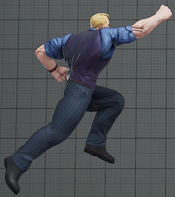
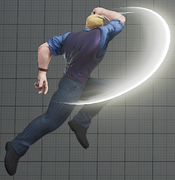
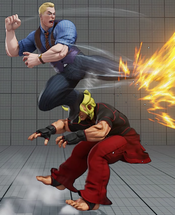
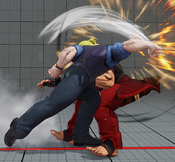
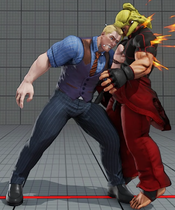
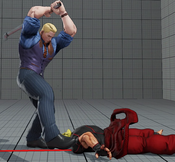
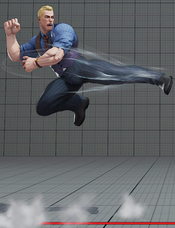
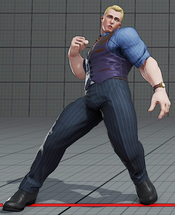
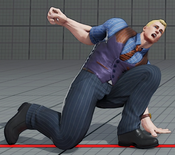
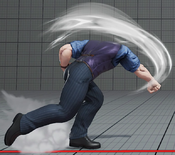
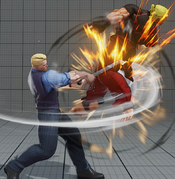
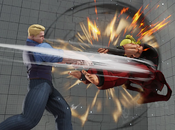
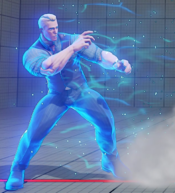
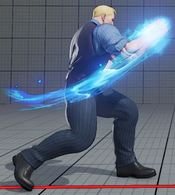
Tag: Undo |
No edit summary |
||
| Line 5: | Line 5: | ||
|hp=1025 | |hp=1025 | ||
|stun=1050 | |stun=1050 | ||
|vt1= | |vt1=2 Bars | ||
|vt2= | |vt2=2 Bars | ||
|movef=0.047 | |movef=0.047 | ||
|moveb=0.0289 | |moveb=0.0289 | ||
| Line 51: | Line 51: | ||
|description= | |description= | ||
* Chains into st.LP / cr.LP / cr.LK | * Chains into st.LP / cr.LP / cr.LK | ||
{{SFV Button FAT|link=https://fullmeter.com/fatonline/#/framedata/movedetail/SFV/Cody/normal/Stand%20LP}} | |||
}} | }} | ||
{{AttackData-SFV | {{AttackData-SFV | ||
|version= | |version=VT1 | ||
|startup=<nowiki>4</nowiki> | |startup=<nowiki>4</nowiki> | ||
|active=<nowiki>3</nowiki> | |active=<nowiki>3</nowiki> | ||
| Line 98: | Line 99: | ||
* Decent range and good to convert into specials for far range whiff punish scenarios | * Decent range and good to convert into specials for far range whiff punish scenarios | ||
* Arm and leg hurtboxes are projectile invincible on frame 6 only | * Arm and leg hurtboxes are projectile invincible on frame 6 only | ||
{{SFV Button FAT|link=https://fullmeter.com/fatonline/#/framedata/movedetail/SFV/Cody/normal/Stand%20MP}} | |||
}} | }} | ||
{{AttackData-SFV | {{AttackData-SFV | ||
|version= | |version=VT1 | ||
|startup=<nowiki>8</nowiki> | |startup=<nowiki>8</nowiki> | ||
|active=<nowiki>3</nowiki> | |active=<nowiki>3</nowiki> | ||
| Line 152: | Line 154: | ||
* Cody gets better frame advantage if canceled into V-Triggers on the 1st hit | * Cody gets better frame advantage if canceled into V-Triggers on the 1st hit | ||
* Can hit cross-up (behind Cody) | * Can hit cross-up (behind Cody) | ||
{{SFV Button FAT|link=https://fullmeter.com/fatonline/#/framedata/movedetail/SFV/Cody/normal/Stand%20HP}} | |||
}} | }} | ||
{{AttackData-SFV | {{AttackData-SFV | ||
|version= | |version=VT1 | ||
|startup=<nowiki>13</nowiki> | |startup=<nowiki>13</nowiki> | ||
|active=<nowiki>3</nowiki> | |active=<nowiki>3</nowiki> | ||
| Line 174: | Line 177: | ||
}} | }} | ||
{{AttackData-SFV | {{AttackData-SFV | ||
|version= | |version=VT2 | ||
|startup=<nowiki>14</nowiki> | |startup=<nowiki>14</nowiki> | ||
|active=<nowiki>2</nowiki> | |active=<nowiki>2</nowiki> | ||
| Line 217: | Line 220: | ||
* The go-to poke / buffer tool in neutral / footsies | * The go-to poke / buffer tool in neutral / footsies | ||
* Decent frametrap tool | * Decent frametrap tool | ||
{{SFV Button FAT|link=https://fullmeter.com/fatonline/#/framedata/movedetail/SFV/Cody/normal/Stand%20LK}} | |||
}} | }} | ||
}} | }} | ||
| Line 243: | Line 247: | ||
* Good combo starter and frametrap tool | * Good combo starter and frametrap tool | ||
* No hurtbox extensions during startup and decent hitbox priority makes for a decent poke tool | * No hurtbox extensions during startup and decent hitbox priority makes for a decent poke tool | ||
{{SFV Button FAT|link=https://fullmeter.com/fatonline/#/framedata/movedetail/SFV/Cody/normal/Stand%20MK}} | |||
}} | }} | ||
}} | }} | ||
| Line 269: | Line 274: | ||
* No hurtbox extension on Cody's leg before active frames | * No hurtbox extension on Cody's leg before active frames | ||
* Has almost half-screen range | * Has almost half-screen range | ||
{{SFV Button FAT|link=https://fullmeter.com/fatonline/#/framedata/movedetail/SFV/Cody/normal/Stand%20HK}} | |||
}} | }} | ||
}} | }} | ||
| Line 299: | Line 305: | ||
* Can tick throw with this | * Can tick throw with this | ||
* Not as large hurtbox vertically as most cr.LPs since all the other jabs have been nerfed anti-air wise (maybe Capcom forgot to adjust Cody accordingly) | * Not as large hurtbox vertically as most cr.LPs since all the other jabs have been nerfed anti-air wise (maybe Capcom forgot to adjust Cody accordingly) | ||
{{SFV Button FAT|link=https://fullmeter.com/fatonline/#/framedata/movedetail/SFV/Cody/normal/Crouch%20LP}} | |||
}} | }} | ||
{{AttackData-SFV | {{AttackData-SFV | ||
|version= | |version=VT1 | ||
|startup=<nowiki>5</nowiki> | |startup=<nowiki>5</nowiki> | ||
|active=<nowiki>3</nowiki> | |active=<nowiki>3</nowiki> | ||
| Line 346: | Line 353: | ||
* Combo / Frametrap / Footsies tool | * Combo / Frametrap / Footsies tool | ||
* 2 extra recovery frames on whiff (15F) | * 2 extra recovery frames on whiff (15F) | ||
{{SFV Button FAT|link=https://fullmeter.com/fatonline/#/framedata/movedetail/SFV/Cody/normal/Crouch%20MP}} | |||
}} | }} | ||
{{AttackData-SFV | {{AttackData-SFV | ||
|version= | |version=VT1 | ||
|startup=<nowiki>6</nowiki> | |startup=<nowiki>6</nowiki> | ||
|active=<nowiki>2</nowiki> | |active=<nowiki>2</nowiki> | ||
| Line 395: | Line 403: | ||
|description= | |description= | ||
* Decent range and whiff punish tool (albeit pretty slow) | * Decent range and whiff punish tool (albeit pretty slow) | ||
{{SFV Button FAT|link=https://fullmeter.com/fatonline/#/framedata/movedetail/SFV/Cody/normal/Crouch%20HP}} | |||
}} | }} | ||
{{AttackData-SFV | {{AttackData-SFV | ||
|version= | |version=VT1 | ||
|startup=<nowiki>11</nowiki> | |startup=<nowiki>11</nowiki> | ||
|active=<nowiki>5</nowiki> | |active=<nowiki>5</nowiki> | ||
| Line 415: | Line 424: | ||
}} | }} | ||
{{AttackData-SFV | {{AttackData-SFV | ||
|version= | |version=VT2 | ||
|startup=<nowiki>9</nowiki> | |startup=<nowiki>9</nowiki> | ||
|active=<nowiki>4</nowiki> | |active=<nowiki>4</nowiki> | ||
| Line 456: | Line 465: | ||
* Chains into cr.LP / st.LP (knife versions as well) | * Chains into cr.LP / st.LP (knife versions as well) | ||
* Less pushback on rapid canceled version | * Less pushback on rapid canceled version | ||
{{SFV Button FAT|link=https://fullmeter.com/fatonline/#/framedata/movedetail/SFV/Cody/normal/Crouch%20LK}} | |||
}} | }} | ||
}} | }} | ||
| Line 481: | Line 491: | ||
* Hit Confirm notes: *VT2 specials only, **VT1, ***VT2 | * Hit Confirm notes: *VT2 specials only, **VT1, ***VT2 | ||
* Minimal hurtbox extension during startup frames and good priority hitbox makes this a pretty good Low hitting poke tool | * Minimal hurtbox extension during startup frames and good priority hitbox makes this a pretty good Low hitting poke tool | ||
{{SFV Button FAT|link=https://fullmeter.com/fatonline/#/framedata/movedetail/SFV/Cody/normal/Crouch%20MK}} | |||
}} | }} | ||
}} | }} | ||
| Line 509: | Line 520: | ||
* 2 extra recovery frames on whiff (23F) | * 2 extra recovery frames on whiff (23F) | ||
* KDA when canceled into V-Trigger 2 Pipe Swings (HP+HK | d+HP+HK) on hit: +50/1/6 | +47/-2/3 | * KDA when canceled into V-Trigger 2 Pipe Swings (HP+HK | d+HP+HK) on hit: +50/1/6 | +47/-2/3 | ||
{{SFV Button FAT|link=https://fullmeter.com/fatonline/#/framedata/movedetail/SFV/Cody/normal/Crouch%20HK}} | |||
}} | }} | ||
}} | }} | ||
| Line 514: | Line 526: | ||
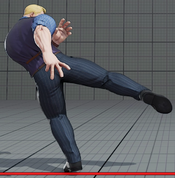
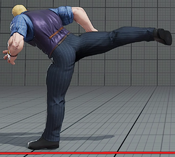
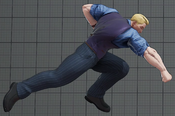
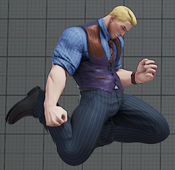
=====<font style="visibility:hidden; float:right">Jump LP</font>===== | =====<font style="visibility:hidden; float:right">Jump LP</font>===== | ||
{{MoveData | {{MoveData | ||
|image= | |image=SFV_Cody_8LP.png | ||
|caption=Normal | |caption=Normal | ||
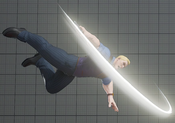
|image2= | |image2=SFV_Cody_8LP_vt1.png | ||
|caption2=V-Trigger 1 | |caption2=V-Trigger 1 | ||
|name=Jump LP | |name=Jump LP | ||
|input= | |input=8LP | ||
|data= | |data= | ||
{{AttackData-SFV | {{AttackData-SFV | ||
| Line 536: | Line 548: | ||
|confirm=<nowiki>- / - / -</nowiki> | |confirm=<nowiki>- / - / -</nowiki> | ||
|description= | |description= | ||
{{SFV Button FAT|link=https://fullmeter.com/fatonline/#/framedata/movedetail/SFV/Cody/normal/Jump%20LP}} | |||
}} | }} | ||
{{AttackData-SFV | {{AttackData-SFV | ||
|version= | |version=VT1 | ||
|startup=<nowiki>4</nowiki> | |startup=<nowiki>4</nowiki> | ||
|active=<nowiki>5</nowiki> | |active=<nowiki>5</nowiki> | ||
| Line 558: | Line 571: | ||
=====<font style="visibility:hidden; float:right">Jump MP</font>===== | =====<font style="visibility:hidden; float:right">Jump MP</font>===== | ||
{{MoveData | {{MoveData | ||
|image= | |image=SFV_Cody_8MP.png | ||
|caption=Normal | |caption=Normal | ||
|image2= | |image2=SFV_Cody_8MP_vt1.png | ||
|caption2=V-Trigger 1 | |caption2=V-Trigger 1 | ||
|name=Jump MP | |name=Jump MP | ||
|input= | |input=8MP | ||
|data= | |data= | ||
{{AttackData-SFV | {{AttackData-SFV | ||
| Line 582: | Line 595: | ||
* Puts airborne opponents into a limited juggle state | * Puts airborne opponents into a limited juggle state | ||
* Solid air-to-air | * Solid air-to-air | ||
{{SFV Button FAT|link=https://fullmeter.com/fatonline/#/framedata/movedetail/SFV/Cody/normal/Jump%20MP}} | |||
}} | }} | ||
{{AttackData-SFV | {{AttackData-SFV | ||
|version= | |version=VT1 | ||
|startup=<nowiki>6</nowiki> | |startup=<nowiki>6</nowiki> | ||
|active=<nowiki>4</nowiki> | |active=<nowiki>4</nowiki> | ||
| Line 605: | Line 619: | ||
=====<font style="visibility:hidden; float:right">Jump HP</font>===== | =====<font style="visibility:hidden; float:right">Jump HP</font>===== | ||
{{MoveData | {{MoveData | ||
|image= | |image=SFV_Cody_8HP.png | ||
|caption=Normal | |caption=Normal | ||
|image2= | |image2=SFV_Cody_8HP_vt1.png | ||
|caption2=V-Trigger 1 | |caption2=V-Trigger 1 | ||
|image3= | |image3=SFV_Cody_8HP_vt2.png | ||
|caption3=V-Trigger 2 | |caption3=V-Trigger 2 | ||
|name=Jump HP | |name=Jump HP | ||
|input= | |input=8HP | ||
|data= | |data= | ||
{{AttackData-SFV | {{AttackData-SFV | ||
| Line 629: | Line 643: | ||
|confirm=<nowiki>- / - / -</nowiki> | |confirm=<nowiki>- / - / -</nowiki> | ||
|description= | |description= | ||
{{SFV Button FAT|link=https://fullmeter.com/fatonline/#/framedata/movedetail/SFV/Cody/normal/Jump%20HP}} | |||
}} | }} | ||
{{AttackData-SFV | {{AttackData-SFV | ||
|version= | |version=VT1 | ||
|startup=<nowiki>9</nowiki> | |startup=<nowiki>9</nowiki> | ||
|active=<nowiki>3</nowiki> | |active=<nowiki>3</nowiki> | ||
| Line 649: | Line 664: | ||
}} | }} | ||
{{AttackData-SFV | {{AttackData-SFV | ||
|version= | |version=VT2 | ||
|startup=<nowiki>10</nowiki> | |startup=<nowiki>10</nowiki> | ||
|active=<nowiki>3</nowiki> | |active=<nowiki>3</nowiki> | ||
| Line 670: | Line 685: | ||
=====<font style="visibility:hidden; float:right">Jump LK</font>===== | =====<font style="visibility:hidden; float:right">Jump LK</font>===== | ||
{{MoveData | {{MoveData | ||
|image= | |image=SFV_Cody_8LK.png | ||
|name=Jump LK | |name=Jump LK | ||
|input= | |input=8LK | ||
|data= | |data= | ||
{{AttackData-SFV | {{AttackData-SFV | ||
| Line 689: | Line 704: | ||
|description= | |description= | ||
* Good air-to-air | * Good air-to-air | ||
{{SFV Button FAT|link=https://fullmeter.com/fatonline/#/framedata/movedetail/SFV/Cody/normal/Jump%20LK}} | |||
}} | }} | ||
}} | }} | ||
| Line 694: | Line 710: | ||
=====<font style="visibility:hidden; float:right">Jump MK</font>===== | =====<font style="visibility:hidden; float:right">Jump MK</font>===== | ||
{{MoveData | {{MoveData | ||
|image= | |image=SFV_Cody_8MK.png | ||
|name=Jump MK | |name=Jump MK | ||
|input= | |input=8MK | ||
|data= | |data= | ||
{{AttackData-SFV | {{AttackData-SFV | ||
| Line 713: | Line 729: | ||
|description= | |description= | ||
* Cross-up | * Cross-up | ||
{{SFV Button FAT|link=https://fullmeter.com/fatonline/#/framedata/movedetail/SFV/Cody/normal/Jump%20MK}} | |||
}} | }} | ||
}} | }} | ||
| Line 718: | Line 735: | ||
=====<font style="visibility:hidden; float:right">Jump HK</font>===== | =====<font style="visibility:hidden; float:right">Jump HK</font>===== | ||
{{MoveData | {{MoveData | ||
|image= | |image=SFV_Cody_8HK.png | ||
|name=Jump HK | |name=Jump HK | ||
|input= | |input=8HK | ||
|data= | |data= | ||
{{AttackData-SFV | {{AttackData-SFV | ||
| Line 736: | Line 753: | ||
|confirm=<nowiki>- / - / -</nowiki> | |confirm=<nowiki>- / - / -</nowiki> | ||
|description= | |description= | ||
{{SFV Button FAT|link=https://fullmeter.com/fatonline/#/framedata/movedetail/SFV/Cody/normal/Jump%20HK}} | |||
}} | }} | ||
}} | }} | ||
| Line 768: | Line 786: | ||
* Can't combo into anything even if counter-hit and meaty | * Can't combo into anything even if counter-hit and meaty | ||
* Gains extra range and 1 more active frame with the Pipe equipped (V-Trigger 2) | * Gains extra range and 1 more active frame with the Pipe equipped (V-Trigger 2) | ||
{{SFV Button FAT|link=https://fullmeter.com/fatonline/#/framedata/movedetail/SFV/Cody/normal/Axel%20Knuckle}} | |||
}} | }} | ||
{{AttackData-SFV | {{AttackData-SFV | ||
|version= | |version=VT2 | ||
|startup=<nowiki>25</nowiki> | |startup=<nowiki>25</nowiki> | ||
|active=<nowiki>3</nowiki> | |active=<nowiki>3</nowiki> | ||
| Line 813: | Line 832: | ||
* Second hit is only cancelable into the V-Skill target combo follow-up | * Second hit is only cancelable into the V-Skill target combo follow-up | ||
* CH bonus applies to both hits | * CH bonus applies to both hits | ||
{{SFV Button FAT|link=https://fullmeter.com/fatonline/#/framedata/movedetail/SFV/Cody/normal/Axel%20Knuckle}} | |||
}} | }} | ||
}} | }} | ||
| Line 836: | Line 856: | ||
|confirm=<nowiki>- / - / -</nowiki> | |confirm=<nowiki>- / - / -</nowiki> | ||
|description= | |description= | ||
* Effectively functions as a 3F heavy attack (subject to the priority system of normals) | * Can only be performed from a Quick-Rise | ||
* Effectively functions as a 3F heavy attack (subject to the priority system of normals) | |||
* Crouching state during the entire duration | * Crouching state during the entire duration | ||
* Strike hitbox | * Strike hitbox | ||
| Line 844: | Line 865: | ||
* Juggle Limit: 1 | * Juggle Limit: 1 | ||
* As made famous by Dale Gribble | * As made famous by Dale Gribble | ||
{{SFV Button FAT|link=https://fullmeter.com/fatonline/#/framedata/movedetail/SFV/Cody/normal/Axel%20Knuckle}} | |||
}} | }} | ||
}} | }} | ||
| Line 851: | Line 873: | ||
=====<font style="visibility:hidden; float:right">Air Raid Punch</font>===== | =====<font style="visibility:hidden; float:right">Air Raid Punch</font>===== | ||
{{MoveData | {{MoveData | ||
|image= | |image=SFV_Cody_8MP 8HP.png | ||
|name=Air Raid Punch | |name=Air Raid Punch | ||
|input= | |input=8MP > 8HP | ||
|data= | |data= | ||
{{AttackData-SFV | {{AttackData-SFV | ||
| Line 871: | Line 893: | ||
* KDA varies greatly depending on how early / late into the jump this connects (better KDA the later into Cody's jump it hits) | * KDA varies greatly depending on how early / late into the jump this connects (better KDA the later into Cody's jump it hits) | ||
* Dunks the opponent pretty far back into the ground (decent corner carry) | * Dunks the opponent pretty far back into the ground (decent corner carry) | ||
{{SFV Button FAT|link=https://fullmeter.com/fatonline/#/framedata/movedetail/SFV/Cody/normal/Air%20Raid%20Punch}} | |||
}} | }} | ||
}} | }} | ||
| Line 876: | Line 899: | ||
=====<font style="visibility:hidden; float:right">Air Raid Kick</font>===== | =====<font style="visibility:hidden; float:right">Air Raid Kick</font>===== | ||
{{MoveData | {{MoveData | ||
|image= | |image=SFV_Cody_8MK 8LK.png | ||
|name=Air Raid Kick | |name=Air Raid Kick | ||
|input= | |input=8MK > 8LK | ||
|data= | |data= | ||
{{AttackData-SFV | {{AttackData-SFV | ||
| Line 895: | Line 918: | ||
|description= | |description= | ||
* Body hitbox Can hit cross-up (behind Cody) | * Body hitbox Can hit cross-up (behind Cody) | ||
{{SFV Button FAT|link=https://fullmeter.com/fatonline/#/framedata/movedetail/SFV/Cody/normal/Air%20Raid%20Kick}} | |||
}} | }} | ||
}} | }} | ||
| Line 918: | Line 942: | ||
|confirm=<nowiki>- / - / 13</nowiki> | |confirm=<nowiki>- / - / 13</nowiki> | ||
|description= | |description= | ||
{{SFV Button FAT|link=https://fullmeter.com/fatonline/#/framedata/movedetail/SFV/Cody/normal/Slip%20Jab}} | |||
}} | }} | ||
}} | }} | ||
| Line 941: | Line 966: | ||
|confirm=<nowiki>- / - / 13</nowiki> | |confirm=<nowiki>- / - / 13</nowiki> | ||
|description= | |description= | ||
{{SFV Button FAT|link=https://fullmeter.com/fatonline/#/framedata/movedetail/SFV/Cody/normal/Crime%20Blow}} | |||
}} | }} | ||
}} | }} | ||
| Line 967: | Line 993: | ||
* Launches the opponent into a limited juggle state | * Launches the opponent into a limited juggle state | ||
* Only part of the Target Combo that is cancelable into V-Trigger | * Only part of the Target Combo that is cancelable into V-Trigger | ||
{{SFV Button FAT|link=https://fullmeter.com/fatonline/#/framedata/movedetail/SFV/Cody/normal/Final%20Combination}} | |||
}} | }} | ||
}} | }} | ||
| Line 991: | Line 1,018: | ||
|description= | |description= | ||
* Same KDA as Cody's regular Back Throw | * Same KDA as Cody's regular Back Throw | ||
{{SFV Button FAT|link=https://fullmeter.com/fatonline/#/framedata/movedetail/SFV/Cody/normal/Final%20Combo%20Throw}} | |||
}} | }} | ||
}} | }} | ||
| Line 1,017: | Line 1,045: | ||
* Airborne on frames 2-31 of the follow-up V-Skill | * Airborne on frames 2-31 of the follow-up V-Skill | ||
* Builds 90 / 45 V-Meter on Hit / Block | * Builds 90 / 45 V-Meter on Hit / Block | ||
{{SFV Button FAT|link=https://fullmeter.com/fatonline/#/framedata/movedetail/SFV/Cody/normal/Crack%20Combination%20(V-Skill%201)}} | |||
}} | }} | ||
}} | }} | ||
| Line 1,041: | Line 1,070: | ||
|description= | |description= | ||
* Builds 72 / 36 V-Gauge on Hit / Block | * Builds 72 / 36 V-Gauge on Hit / Block | ||
{{SFV Button FAT|link=https://fullmeter.com/fatonline/#/framedata/movedetail/SFV/Cody/normal/Crime%20Combination%20(V-Skill%202)}} | |||
}} | }} | ||
}} | }} | ||
| Line 1,072: | Line 1,102: | ||
|description= | |description= | ||
* Increased damage / stun / KDA while in V-Trigger 2 | * Increased damage / stun / KDA while in V-Trigger 2 | ||
{{SFV Button FAT|link=https://fullmeter.com/fatonline/#/framedata/movedetail/SFV/Cody/normal/Trash%20Out}} | |||
}} | }} | ||
{{AttackData-SFV | {{AttackData-SFV | ||
|version= | |version=VT2 | ||
|startup=<nowiki>5</nowiki> | |startup=<nowiki>5</nowiki> | ||
|active=<nowiki>3</nowiki> | |active=<nowiki>3</nowiki> | ||
| Line 1,115: | Line 1,146: | ||
|description= | |description= | ||
* Same KDA as Cody's Final Fight chain throw finisher | * Same KDA as Cody's Final Fight chain throw finisher | ||
{{SFV Button FAT|link=https://fullmeter.com/fatonline/#/framedata/movedetail/SFV/Cody/normal/Crime%20Throw}} | |||
}} | }} | ||
}} | }} | ||
| Line 1,148: | Line 1,180: | ||
* Can be canceled into Knife Reload on whiff | * Can be canceled into Knife Reload on whiff | ||
* Juggle Limit / Increase / Start: 1 / 5 / 1 | * Juggle Limit / Increase / Start: 1 / 5 / 1 | ||
{{SFV Button FAT|link=https://fullmeter.com/fatonline/#/framedata/movedetail/SFV/Cody/normal/LP%20Tornado%20Sweep}} | |||
}} | }} | ||
}} | }} | ||
| Line 1,179: | Line 1,212: | ||
* Can be canceled into Knife Reload on whiff | * Can be canceled into Knife Reload on whiff | ||
* Juggle Limit / Increase / Start: 1 / 5 / 1 | * Juggle Limit / Increase / Start: 1 / 5 / 1 | ||
{{SFV Button FAT|link=https://fullmeter.com/fatonline/#/framedata/movedetail/SFV/Cody/normal/MP%20Tornado%20Sweep}} | |||
}} | }} | ||
}} | }} | ||
| Line 1,211: | Line 1,245: | ||
* Can be canceled into Knife Reload on whiff | * Can be canceled into Knife Reload on whiff | ||
* Juggle Limit / Increase / Start: 1 / 5 / 1 | * Juggle Limit / Increase / Start: 1 / 5 / 1 | ||
{{SFV Button FAT|link=https://fullmeter.com/fatonline/#/framedata/movedetail/SFV/Cody/normal/HP%20Tornado%20Sweep}} | |||
}} | }} | ||
}} | }} | ||
| Line 1,242: | Line 1,277: | ||
* Can be canceled into Knife Reload on whiff | * Can be canceled into Knife Reload on whiff | ||
* Juggle Limit / Increase / Start: 1*1 / 0*1 / 1*1 | * Juggle Limit / Increase / Start: 1*1 / 0*1 / 1*1 | ||
{{SFV Button FAT|link=https://fullmeter.com/fatonline/#/framedata/movedetail/SFV/Cody/normal/EX%20Tornado%20Sweep}} | |||
}} | }} | ||
}} | }} | ||
| Line 1,270: | Line 1,306: | ||
* KDA when canceled into V-Trigger 2 Pipe Swings (HP+HK | d+HP+HK) on whiff: +54/5/10 | * KDA when canceled into V-Trigger 2 Pipe Swings (HP+HK | d+HP+HK) on whiff: +54/5/10 | ||
* Juggle Limit: 5 | * Juggle Limit: 5 | ||
{{SFV Button FAT|link=https://fullmeter.com/fatonline/#/framedata/movedetail/SFV/Cody/normal/LK%20Ruffian%20Kick}} | |||
}} | }} | ||
}} | }} | ||
| Line 1,299: | Line 1,336: | ||
* KDA when canceled into V-Trigger 2 Pipe Swings (HP+HK | d+HP+HK) on whiff: +67/8/13 (on hit: +85/26/31) | * KDA when canceled into V-Trigger 2 Pipe Swings (HP+HK | d+HP+HK) on whiff: +67/8/13 (on hit: +85/26/31) | ||
* Juggle Limit: 5 | * Juggle Limit: 5 | ||
{{SFV Button FAT|link=https://fullmeter.com/fatonline/#/framedata/movedetail/SFV/Cody/normal/MK%20Ruffian%20Kick}} | |||
}} | }} | ||
}} | }} | ||
| Line 1,329: | Line 1,367: | ||
* KDA when canceled into V-Trigger 2 Pipe Swings (HP+HK | d+HP+HK) on whiff: +71/12/17 (on hit: +86/27/32) | * KDA when canceled into V-Trigger 2 Pipe Swings (HP+HK | d+HP+HK) on whiff: +71/12/17 (on hit: +86/27/32) | ||
* Juggle Limit: 2 | * Juggle Limit: 2 | ||
{{SFV Button FAT|link=https://fullmeter.com/fatonline/#/framedata/movedetail/SFV/Cody/normal/HK%20Ruffian%20Kick}} | |||
}} | }} | ||
}} | }} | ||
| Line 1,354: | Line 1,393: | ||
* 1st attack hits Low | * 1st attack hits Low | ||
* The active / recovery frames framedata shown here is the on-whiff version (transitions into another version on hit) | * The active / recovery frames framedata shown here is the on-whiff version (transitions into another version on hit) | ||
{{SFV Button FAT|link=https://fullmeter.com/fatonline/#/framedata/movedetail/SFV/Cody/normal/EX%20Ruffian%20Kick}} | |||
}} | }} | ||
}} | }} | ||
| Line 1,359: | Line 1,399: | ||
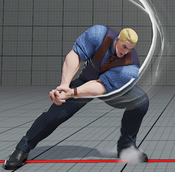
=====<font style="visibility:hidden; float:right">Zonk Knuckle</font>===== | =====<font style="visibility:hidden; float:right">Zonk Knuckle</font>===== | ||
{{MoveData | {{MoveData | ||
|image=SFV_Cody_hold any punch button | |image=SFV_Cody_hold any punch button release.png | ||
|name=Zonk Knuckle | |name=Zonk Knuckle | ||
|input=hold any punch button, release | |input=hold any punch button, release | ||
| Line 1,377: | Line 1,417: | ||
|confirm=<nowiki>- / - / -</nowiki> | |confirm=<nowiki>- / - / -</nowiki> | ||
|description= | |description= | ||
* Charges in 45 frames | * Charges in 45 frames ONLY with punch buttons | ||
* Can change which punch is charging Zonk by holding a new button before letting go of the original button | |||
* Slightly lower hurtbox on frames 7-17 | * Slightly lower hurtbox on frames 7-17 | ||
* 1 extra recovery frames on whiff (21F) | * 1 extra recovery frames on whiff (21F) | ||
* KDA if juggled after EX Ruffian Kick: +89/30/35 | * KDA if juggled after EX Ruffian Kick: +89/30/35 | ||
{{SFV Button FAT|link=https://fullmeter.com/fatonline/#/framedata/movedetail/SFV/Cody/normal/Zonk%20Knuckle}} | |||
}} | }} | ||
}} | }} | ||
| Line 1,386: | Line 1,428: | ||
=====<font style="visibility:hidden; float:right">Zonk Knuckle Level 2</font>===== | =====<font style="visibility:hidden; float:right">Zonk Knuckle Level 2</font>===== | ||
{{MoveData | {{MoveData | ||
|image=SFV_Cody_hold any punch button | |image=SFV_Cody_hold any punch button release.png | ||
|name=Zonk Knuckle Level 2 | |name=Zonk Knuckle Level 2 | ||
|input=hold any punch button, release | |input=hold any punch button, release | ||
| Line 1,404: | Line 1,446: | ||
|confirm=<nowiki>- / - / -</nowiki> | |confirm=<nowiki>- / - / -</nowiki> | ||
|description= | |description= | ||
* Charges in 300 frames | * Charges in 300 frames ONLY with punch buttons | ||
* Can change which punch is charging Zonk by holding a new button before letting go of the original button | |||
* Slightly lower hurtbox on frames 3-17 | * Slightly lower hurtbox on frames 3-17 | ||
* Causes limited juggle spin state on air opponents | * Causes limited juggle spin state on air opponents | ||
* KDA if juggled after EX Ruffian Kick: +93/34/39 | * KDA if juggled after EX Ruffian Kick: +93/34/39 | ||
{{SFV Button FAT|link=https://fullmeter.com/fatonline/#/framedata/movedetail/SFV/Cody/normal/Zonk%20Knuckle%20Level%202}} | |||
}} | }} | ||
}} | }} | ||
| Line 1,413: | Line 1,457: | ||
=====<font style="visibility:hidden; float:right">EX Zonk Knuckle</font>===== | =====<font style="visibility:hidden; float:right">EX Zonk Knuckle</font>===== | ||
{{MoveData | {{MoveData | ||
|image=SFV_Cody_hold any 2 punch buttons | |image=SFV_Cody_hold any 2 punch buttons release.png | ||
|name=EX Zonk Knuckle | |name=EX Zonk Knuckle | ||
|input=hold any 2 punch buttons, release | |input=hold any 2 punch buttons, release | ||
| Line 1,431: | Line 1,475: | ||
|confirm=<nowiki>- / - / -</nowiki> | |confirm=<nowiki>- / - / -</nowiki> | ||
|description= | |description= | ||
* Charges in 45 frames | * Charges in 45 frames ONLY with punch buttons | ||
* Can change which punch is charging Zonk by holding a new button before letting go of the original button | |||
* Only cancelable into V-Trigger the 1st hit | * Only cancelable into V-Trigger the 1st hit | ||
* Slightly lower hurtbox on frames 1-13 | * Slightly lower hurtbox on frames 1-13 | ||
* Takes longer to recover on whiff | * Takes longer to recover on whiff | ||
{{SFV Button FAT|link=https://fullmeter.com/fatonline/#/framedata/movedetail/SFV/Cody/normal/EX%20Zonk%20Knuckle}} | |||
}} | }} | ||
}} | }} | ||
| Line 1,440: | Line 1,486: | ||
=====<font style="visibility:hidden; float:right">EX Zonk Knuckle Level 2</font>===== | =====<font style="visibility:hidden; float:right">EX Zonk Knuckle Level 2</font>===== | ||
{{MoveData | {{MoveData | ||
|image=SFV_Cody_hold any 2 punch buttons | |image=SFV_Cody_hold any 2 punch buttons release.png | ||
|name=EX Zonk Knuckle Level 2 | |name=EX Zonk Knuckle Level 2 | ||
|input=hold any 2 punch buttons, release | |input=hold any 2 punch buttons, release | ||
| Line 1,458: | Line 1,504: | ||
|confirm=<nowiki>- / - / -</nowiki> | |confirm=<nowiki>- / - / -</nowiki> | ||
|description= | |description= | ||
* Charges in 300 frames | * Charges in 300 frames ONLY with punch buttons | ||
* Can change which punch is charging Zonk by holding a new button before letting go of the original button | |||
* Denies back-roll on wake-up | * Denies back-roll on wake-up | ||
* Causes wallbounce | * Causes wallbounce | ||
| Line 1,464: | Line 1,511: | ||
* The KDA data outside the parantheses refers to when using the move when mid-screen | * The KDA data outside the parantheses refers to when using the move when mid-screen | ||
* The KDA data inside the parantheses (x~y) refers to the varying KDA data depending on how close / far away the wall is (less KDA the closer the wall is) | * The KDA data inside the parantheses (x~y) refers to the varying KDA data depending on how close / far away the wall is (less KDA the closer the wall is) | ||
{{SFV Button FAT|link=https://fullmeter.com/fatonline/#/framedata/movedetail/SFV/Cody/normal/EX%20Zonk%20Knuckle%20Level%202}} | |||
}} | }} | ||
}} | }} | ||
== Critical | == Critical Art == | ||
=====<font style="visibility:hidden; float:right">Criminal Punisher</font>===== | =====<font style="visibility:hidden; float:right">Criminal Punisher</font>===== | ||
| Line 1,492: | Line 1,540: | ||
* Projectile invincible on frames 1-42 | * Projectile invincible on frames 1-42 | ||
* Spawns a huge pillar of projectile hitboxes in-front of Cody (27 active frames) - but also has a strike hitbox component (13 active frames) further away from Cody (which drags the opponent inwards towards Cody on hit) | * Spawns a huge pillar of projectile hitboxes in-front of Cody (27 active frames) - but also has a strike hitbox component (13 active frames) further away from Cody (which drags the opponent inwards towards Cody on hit) | ||
{{SFV Button FAT|link=https://fullmeter.com/fatonline/#/framedata/movedetail/SFV/Cody/normal/Criminal%20Punisher}} | |||
}} | }} | ||
}} | }} | ||
| Line 1,517: | Line 1,566: | ||
|confirm=<nowiki>- / - / -</nowiki> | |confirm=<nowiki>- / - / -</nowiki> | ||
|description= | |description= | ||
{{SFV Button FAT|link=https://fullmeter.com/fatonline/#/framedata/movedetail/SFV/Cody/normal/Taunt}} | |||
}} | }} | ||
}} | }} | ||
| Line 1,550: | Line 1,600: | ||
* Causes 40 grey health damage to Cody upon use which also builds 100 / 75 / 50 V-Meter on Hit / Block / Whiff | * Causes 40 grey health damage to Cody upon use which also builds 100 / 75 / 50 V-Meter on Hit / Block / Whiff | ||
* Cody is in counterhit state during move duration | * Cody is in counterhit state during move duration | ||
{{SFV Button FAT|link=https://fullmeter.com/fatonline/#/framedata/movedetail/SFV/Cody/normal/Double%20Kick}} | |||
}} | }} | ||
}} | }} | ||
| Line 1,579: | Line 1,630: | ||
* Follow-up (Wrench Fist) can be delayed up to 14 frames | * Follow-up (Wrench Fist) can be delayed up to 14 frames | ||
* Counterhit state during move duration | * Counterhit state during move duration | ||
{{SFV Button FAT|link=https://fullmeter.com/fatonline/#/framedata/movedetail/SFV/Cody/normal/Crime%20Sway%20(High)}} | |||
}} | }} | ||
}} | }} | ||
| Line 1,606: | Line 1,658: | ||
* Follow-up (Lumber Sweep) can be delayed up to 12 frames | * Follow-up (Lumber Sweep) can be delayed up to 12 frames | ||
* Counterhit state during move duration | * Counterhit state during move duration | ||
{{SFV Button FAT|link=https://fullmeter.com/fatonline/#/framedata/movedetail/SFV/Cody/normal/Crime%20Sway%20(Low)}} | |||
}} | }} | ||
}} | }} | ||
| Line 1,632: | Line 1,685: | ||
* Builds 80 / 40 V-Gauge on Hit / Block | * Builds 80 / 40 V-Gauge on Hit / Block | ||
* Cannot cancel into specials, super, or V-Trigger 1 specials on block | * Cannot cancel into specials, super, or V-Trigger 1 specials on block | ||
{{SFV Button FAT|link=https://fullmeter.com/fatonline/#/framedata/movedetail/SFV/Cody/normal/Wrench%20Fist}} | |||
}} | }} | ||
}} | }} | ||
| Line 1,658: | Line 1,712: | ||
* Builds 80 / 40 V-Gauge on Hit / Block | * Builds 80 / 40 V-Gauge on Hit / Block | ||
* Cannot cancel into V-Trigger 1 specials on block | * Cannot cancel into V-Trigger 1 specials on block | ||
{{SFV Button FAT|link=https://fullmeter.com/fatonline/#/framedata/movedetail/SFV/Cody/normal/Lumber%20Sweep}} | |||
}} | }} | ||
}} | }} | ||
| Line 1,688: | Line 1,743: | ||
* Gains access to new Knife specials but also loses the use of Tornado Sweep (Fireball) while Knife is currently in-hand | * Gains access to new Knife specials but also loses the use of Tornado Sweep (Fireball) while Knife is currently in-hand | ||
* Cannot activate V-Trigger 1 from Knife st. MP or cr. MP | * Cannot activate V-Trigger 1 from Knife st. MP or cr. MP | ||
{{SFV Button FAT|link=https://fullmeter.com/fatonline/#/framedata/movedetail/SFV/Cody/normal/Side%20Arm}} | |||
}} | }} | ||
}} | }} | ||
| Line 1,714: | Line 1,770: | ||
* Usually Cody can't special cancel from st.MP (Knife) but can with this Target Combo follow-up | * Usually Cody can't special cancel from st.MP (Knife) but can with this Target Combo follow-up | ||
* Consumes 300 / 150 V-Meter on Hit / Block | * Consumes 300 / 150 V-Meter on Hit / Block | ||
{{SFV Button FAT|link=https://fullmeter.com/fatonline/#/framedata/movedetail/SFV/Cody/vtOne/Burst%20Shot}} | |||
}} | }} | ||
}} | }} | ||
| Line 1,741: | Line 1,798: | ||
* Knife has a hurtbox and 1 point of durability on it (can be swatted out of the air with a strike attack) | * Knife has a hurtbox and 1 point of durability on it (can be swatted out of the air with a strike attack) | ||
* Frame advantage when canceling this into Knife Reload differs wildly depending on timing | * Frame advantage when canceling this into Knife Reload differs wildly depending on timing | ||
{{SFV Button FAT|link=https://fullmeter.com/fatonline/#/framedata/movedetail/SFV/Cody/vtOne/Snipe%20Shot}} | |||
}} | }} | ||
}} | }} | ||
| Line 1,768: | Line 1,826: | ||
* Knife has a hurtbox and 1 point of durability on it (can be swatted out of the air with a strike attack) | * Knife has a hurtbox and 1 point of durability on it (can be swatted out of the air with a strike attack) | ||
* Frame advantage when canceling this into Knife Reload differs wildly depending on timing | * Frame advantage when canceling this into Knife Reload differs wildly depending on timing | ||
{{SFV Button FAT|link=https://fullmeter.com/fatonline/#/framedata/movedetail/SFV/Cody/vtOne/Anti-Air%20Snipe%20Shot}} | |||
}} | }} | ||
}} | }} | ||
| Line 1,793: | Line 1,852: | ||
* Pulling out more knives to shank baddies | * Pulling out more knives to shank baddies | ||
* Spends 300 V-Meter (15% of V-Timer) | * Spends 300 V-Meter (15% of V-Timer) | ||
{{SFV Button FAT|link=https://fullmeter.com/fatonline/#/framedata/movedetail/SFV/Cody/vtOne/Reload}} | |||
}} | }} | ||
}} | }} | ||
| Line 1,818: | Line 1,878: | ||
* Has a different animation and increased KDA (+6 extra) if using it depletes the rest of the V-Timer | * Has a different animation and increased KDA (+6 extra) if using it depletes the rest of the V-Timer | ||
* Spends 600 V-Meter (30% of V-Timer) | * Spends 600 V-Meter (30% of V-Timer) | ||
{{SFV Button FAT|link=https://fullmeter.com/fatonline/#/framedata/movedetail/SFV/Cody/vtOne/Rapid%20Fire}} | |||
}} | }} | ||
}} | }} | ||
| Line 1,848: | Line 1,909: | ||
* Gains access to new Pipe special moves but also loses the use of Tornado Sweep (Fireball) while the Pipe is currently in-hand | * Gains access to new Pipe special moves but also loses the use of Tornado Sweep (Fireball) while the Pipe is currently in-hand | ||
* Cannot activate V-Trigger 2 if the Pipe is currently in-hand | * Cannot activate V-Trigger 2 if the Pipe is currently in-hand | ||
{{SFV Button FAT|link=https://fullmeter.com/fatonline/#/framedata/movedetail/SFV/Cody/normal/Dirty%20Coach}} | |||
}} | }} | ||
}} | }} | ||
| Line 1,876: | Line 1,938: | ||
* Spends about 25% V-Timer if the pipe swing hitbox connects with the opponent on hit/block (does not spend V-Timer on whiff or when batting the rocks) | * Spends about 25% V-Timer if the pipe swing hitbox connects with the opponent on hit/block (does not spend V-Timer on whiff or when batting the rocks) | ||
* Knockdown advantage and other properties change drastically when canceled into from Bean Ball (see: Present Delivery (High/Mid/Low) / Bad Stone (High/Just Frame/Low) data) | * Knockdown advantage and other properties change drastically when canceled into from Bean Ball (see: Present Delivery (High/Mid/Low) / Bad Stone (High/Just Frame/Low) data) | ||
{{SFV Button FAT|link=https://fullmeter.com/fatonline/#/framedata/movedetail/SFV/Cody/vtTwo/Gentle%20Swing}} | |||
}} | }} | ||
}} | }} | ||
| Line 1,905: | Line 1,968: | ||
* Spends about 25% V-Timer if the pipe swing hitbox connects with the opponent on hit/block (does not spend V-Timer on whiff or when batting the rocks) | * Spends about 25% V-Timer if the pipe swing hitbox connects with the opponent on hit/block (does not spend V-Timer on whiff or when batting the rocks) | ||
* Knockdown, cancel and block advantage properties change drastically when canceled into from Bean Ball (see: Unluck Gift / Bad Stone (Air) data) | * Knockdown, cancel and block advantage properties change drastically when canceled into from Bean Ball (see: Unluck Gift / Bad Stone (Air) data) | ||
{{SFV Button FAT|link=https://fullmeter.com/fatonline/#/framedata/movedetail/SFV/Cody/vtTwo/Gentle%20Upper%20Swing}} | |||
}} | }} | ||
}} | }} | ||
| Line 1,929: | Line 1,993: | ||
|description= | |description= | ||
* The follow-up Bean Ball (rock toss) has all the same properties as it normally does (see: Bean Ball / Bad Stone (empty) data) | * The follow-up Bean Ball (rock toss) has all the same properties as it normally does (see: Bean Ball / Bad Stone (empty) data) | ||
{{SFV Button FAT|link=https://fullmeter.com/fatonline/#/framedata/movedetail/SFV/Cody/vtTwo/Gentle%20Swing%20%3E%20Bean%20Ball}} | |||
}} | }} | ||
}} | }} | ||
| Line 1,954: | Line 2,019: | ||
* The follow-up Bean Ball (rock toss) has all the same properties as it normally does (see: Bean Ball / Bad Stone (empty) data) | * The follow-up Bean Ball (rock toss) has all the same properties as it normally does (see: Bean Ball / Bad Stone (empty) data) | ||
* Increased KDA (as shown on the KDA data inside the parenthesess) if the Bean Ball hits them on the way-up after canceling into it from Gentle Upper Swing | * Increased KDA (as shown on the KDA data inside the parenthesess) if the Bean Ball hits them on the way-up after canceling into it from Gentle Upper Swing | ||
{{SFV Button FAT|link=https://fullmeter.com/fatonline/#/framedata/movedetail/SFV/Cody/vtTwo/Gentle%20Upper%20Swing%20%3E%20Bean%20Ball}} | |||
}} | }} | ||
}} | }} | ||
| Line 1,983: | Line 2,049: | ||
* Cancel frames 35-37 result in Just-Frame follow-up (see: Present Delivery (Mid) data) | * Cancel frames 35-37 result in Just-Frame follow-up (see: Present Delivery (Mid) data) | ||
* Cancel frames 38-47 result in Low follow-up (see: Present Delivery (Low) data) - although the pipe swing won't connect for the Low follow-up unless canceled into on frames 38-39 (Which is an even tighter window than the Just-Frame version) | * Cancel frames 38-47 result in Low follow-up (see: Present Delivery (Low) data) - although the pipe swing won't connect for the Low follow-up unless canceled into on frames 38-39 (Which is an even tighter window than the Just-Frame version) | ||
{{SFV Button FAT|link=https://fullmeter.com/fatonline/#/framedata/movedetail/SFV/Cody/vtTwo/Bean%20Ball}} | |||
}} | }} | ||
}} | }} | ||
| Line 2,012: | Line 2,079: | ||
* The -3 on block advantage refers to if the rock whiffs and only the pipe swing is blocked | * The -3 on block advantage refers to if the rock whiffs and only the pipe swing is blocked | ||
* KDA data shown refers to if the rock whiffs and only the follow-up pipe swing connects (if the rock juggles after the pipe swing then the KDA is more advantageous but very variable) | * KDA data shown refers to if the rock whiffs and only the follow-up pipe swing connects (if the rock juggles after the pipe swing then the KDA is more advantageous but very variable) | ||
{{SFV Button FAT|link=https://fullmeter.com/fatonline/#/framedata/movedetail/SFV/Cody/vtTwo/Present%20Delivery%20(High)}} | |||
}} | }} | ||
}} | }} | ||
| Line 2,040: | Line 2,108: | ||
* KDA data shown goes from worst to best; close range -> (full-screen) - close range refers to if the pipe swing hits up close (the KDA shown in the parantheses refers to when the Just Frame rock hits from full-screen away) | * KDA data shown goes from worst to best; close range -> (full-screen) - close range refers to if the pipe swing hits up close (the KDA shown in the parantheses refers to when the Just Frame rock hits from full-screen away) | ||
* Try using visual cues to help with the Just Frame timing (like when Cody moves his hand that just tossed the rock in front of his face) | * Try using visual cues to help with the Just Frame timing (like when Cody moves his hand that just tossed the rock in front of his face) | ||
{{SFV Button FAT|link=https://fullmeter.com/fatonline/#/framedata/movedetail/SFV/Cody/vtTwo/Present%20Delivery%20(Mid)}} | |||
}} | }} | ||
}} | }} | ||
| Line 2,069: | Line 2,138: | ||
* The -3 on block advantage refers to if the rock whiffs and only the pipe swing is blocked | * The -3 on block advantage refers to if the rock whiffs and only the pipe swing is blocked | ||
* KDA data shown refers to if the rock whiffs and only the follow-up pipe swing connects (slightly higher KDA if the rock and pipe hit a the same time (+1-3 extra KDA depending on spacing / timing) | * KDA data shown refers to if the rock whiffs and only the follow-up pipe swing connects (slightly higher KDA if the rock and pipe hit a the same time (+1-3 extra KDA depending on spacing / timing) | ||
{{SFV Button FAT|link=https://fullmeter.com/fatonline/#/framedata/movedetail/SFV/Cody/vtTwo/Present%20Delivery%20(Low)}} | |||
}} | }} | ||
}} | }} | ||
| Line 2,098: | Line 2,168: | ||
* The off-screen rock does 80 damage / 150 stun if it falls on-top of the opponent (60 damage / 100 stun if the bounces off the ground into the opponent) | * The off-screen rock does 80 damage / 150 stun if it falls on-top of the opponent (60 damage / 100 stun if the bounces off the ground into the opponent) | ||
* The rock projectile is active the whole time (even while off-screen) and can thus clash off-screen with opposing rock projectiles | * The rock projectile is active the whole time (even while off-screen) and can thus clash off-screen with opposing rock projectiles | ||
{{SFV Button FAT|link=https://fullmeter.com/fatonline/#/framedata/movedetail/SFV/Cody/vtTwo/Unluck%20Gift}} | |||
}} | }} | ||
}} | }} | ||
| Line 2,129: | Line 2,200: | ||
* Recovery frames listed refer to the version on whiff (less recovery on hit) | * Recovery frames listed refer to the version on whiff (less recovery on hit) | ||
* Spends 700 V-Meter (23% of V-Timer) | * Spends 700 V-Meter (23% of V-Timer) | ||
{{SFV Button FAT|link=https://fullmeter.com/fatonline/#/framedata/movedetail/SFV/Cody/vtTwo/Toss%20&%20Smash}} | |||
}} | }} | ||
}} | }} | ||
| Line 2,160: | Line 2,232: | ||
* Recovery frames listed refer to the version on whiff (much less recovery on hit) | * Recovery frames listed refer to the version on whiff (much less recovery on hit) | ||
* Spends 700 V-Meter (23% of V-Timer) | * Spends 700 V-Meter (23% of V-Timer) | ||
{{SFV Button FAT|link=https://fullmeter.com/fatonline/#/framedata/movedetail/SFV/Cody/vtTwo/Toss%20&%20Smash%20(Just%20Frame)}} | |||
}} | }} | ||
}} | }} | ||
| Line 2,189: | Line 2,262: | ||
* KDA varies depending on timing of the follow-up pipe swing prior to canceling into this Bean Ball version (+5 on QR/BR being the worst and only happens if no follow-up punch button is pressed) | * KDA varies depending on timing of the follow-up pipe swing prior to canceling into this Bean Ball version (+5 on QR/BR being the worst and only happens if no follow-up punch button is pressed) | ||
* Spends 700 V-Meter (23% of V-Timer) | * Spends 700 V-Meter (23% of V-Timer) | ||
{{SFV Button FAT|link=https://fullmeter.com/fatonline/#/framedata/movedetail/SFV/Cody/vtTwo/Toss%20&%20Smash%20%3E%20Bean%20Ball}} | |||
}} | }} | ||
}} | }} | ||
| Line 2,219: | Line 2,293: | ||
* The KDA data inside the parantheses (x~y) refers to the varying KDA data depending on how close / far away the wall is (less KDA the closer the wall is) | * The KDA data inside the parantheses (x~y) refers to the varying KDA data depending on how close / far away the wall is (less KDA the closer the wall is) | ||
* Spends 700 V-Meter (23% of V-Timer) | * Spends 700 V-Meter (23% of V-Timer) | ||
{{SFV Button FAT|link=https://fullmeter.com/fatonline/#/framedata/movedetail/SFV/Cody/vtTwo/Toss%20&%20Smash%20(JF)%20%3E%20Bean%20Ball}} | |||
}} | }} | ||
}} | }} | ||
| Line 2,248: | Line 2,323: | ||
* All properties other than KDA it shares with Present Deliver (High) / Bad Stone (High) - Read those notes for more information | * All properties other than KDA it shares with Present Deliver (High) / Bad Stone (High) - Read those notes for more information | ||
* Spends 700 V-Meter (23% of V-Timer) | * Spends 700 V-Meter (23% of V-Timer) | ||
{{SFV Button FAT|link=https://fullmeter.com/fatonline/#/framedata/movedetail/SFV/Cody/vtTwo/Toss%20&%20Smash%20%3E%20Present%20Delivery%20(H)}} | |||
}} | }} | ||
}} | }} | ||
| Line 2,277: | Line 2,353: | ||
* All properties other than KDA it shares with Present Deliver (Mid) / Bad Stone (Just Frame) - Read those notes for more information | * All properties other than KDA it shares with Present Deliver (Mid) / Bad Stone (Just Frame) - Read those notes for more information | ||
* Spends 700 V-Meter (23% of V-Timer) | * Spends 700 V-Meter (23% of V-Timer) | ||
{{SFV Button FAT|link=https://fullmeter.com/fatonline/#/framedata/movedetail/SFV/Cody/vtTwo/Toss%20&%20Smash%20%3E%20Present%20Delivery%20(M)}} | |||
}} | }} | ||
}} | }} | ||
| Line 2,306: | Line 2,383: | ||
* All properties other than KDA it shares with Present Deliver (Low) / Bad Stone (Low) - Read those notes for more information | * All properties other than KDA it shares with Present Deliver (Low) / Bad Stone (Low) - Read those notes for more information | ||
* Spends 700 V-Meter (23% of V-Timer) | * Spends 700 V-Meter (23% of V-Timer) | ||
{{SFV Button FAT|link=https://fullmeter.com/fatonline/#/framedata/movedetail/SFV/Cody/vtTwo/Toss%20&%20Smash%20%3E%20Present%20Delivery%20(L)}} | |||
}} | }} | ||
}} | }} | ||
| Line 2,335: | Line 2,413: | ||
* All properties other than KDA it shares with Unluck Gift / Bad Stone (Air) - Read those notes for more information | * All properties other than KDA it shares with Unluck Gift / Bad Stone (Air) - Read those notes for more information | ||
* Spends 700 V-Meter (23% of V-Timer) | * Spends 700 V-Meter (23% of V-Timer) | ||
{{SFV Button FAT|link=https://fullmeter.com/fatonline/#/framedata/movedetail/SFV/Cody/vtTwo/Toss%20&%20Smash%20%3E%20Unluck%20Gift}} | |||
}} | }} | ||
}} | }} | ||
| Line 2,366: | Line 2,445: | ||
* The KDA data inside the parantheses (x~y) refers to the varying KDA data depending on how close / far away the wall is (less KDA the closer the wall is) | * The KDA data inside the parantheses (x~y) refers to the varying KDA data depending on how close / far away the wall is (less KDA the closer the wall is) | ||
* Spends 700 V-Meter (23% of V-Timer) | * Spends 700 V-Meter (23% of V-Timer) | ||
{{SFV Button FAT|link=https://fullmeter.com/fatonline/#/framedata/movedetail/SFV/Cody/vtTwo/Toss%20&%20Smash%20(JF)%20%3E%20Present%20Delivery%20(H)}} | |||
}} | }} | ||
}} | }} | ||
| Line 2,397: | Line 2,477: | ||
* The KDA data inside the parantheses (x~y) refers to the varying KDA data depending on how close / far away the wall is (less KDA the closer the wall is) | * The KDA data inside the parantheses (x~y) refers to the varying KDA data depending on how close / far away the wall is (less KDA the closer the wall is) | ||
* Spends 700 V-Meter (23% of V-Timer) | * Spends 700 V-Meter (23% of V-Timer) | ||
{{SFV Button FAT|link=https://fullmeter.com/fatonline/#/framedata/movedetail/SFV/Cody/vtTwo/Toss%20&%20Smash%20(JF)%20%3E%20Present%20Delivery%20(M)}} | |||
}} | }} | ||
}} | }} | ||
| Line 2,428: | Line 2,509: | ||
* The KDA data inside the parantheses (x~y) refers to the varying KDA data depending on how close / far away the wall is (less KDA the closer the wall is) | * The KDA data inside the parantheses (x~y) refers to the varying KDA data depending on how close / far away the wall is (less KDA the closer the wall is) | ||
* Spends 700 V-Meter (23% of V-Timer) | * Spends 700 V-Meter (23% of V-Timer) | ||
{{SFV Button FAT|link=https://fullmeter.com/fatonline/#/framedata/movedetail/SFV/Cody/vtTwo/Toss%20&%20Smash%20(JF)%20%3E%20Present%20Delivery%20(L)}} | |||
}} | }} | ||
}} | }} | ||
| Line 2,459: | Line 2,541: | ||
* The KDA data inside the parantheses (x~y) refers to the varying KDA data depending on how close / far away the wall is (less KDA the closer the wall is) | * The KDA data inside the parantheses (x~y) refers to the varying KDA data depending on how close / far away the wall is (less KDA the closer the wall is) | ||
* Spends 700 V-Meter (23% of V-Timer) | * Spends 700 V-Meter (23% of V-Timer) | ||
{{SFV Button FAT|link=https://fullmeter.com/fatonline/#/framedata/movedetail/SFV/Cody/vtTwo/Toss%20&%20Smash%20(JF)%20%3E%20Unluck%20Gift}} | |||
}} | }} | ||
}} | }} | ||
| Line 2,466: | Line 2,549: | ||
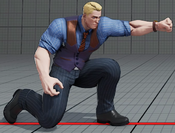
=====<font style="visibility:hidden; float:right">V-Shift</font>===== | =====<font style="visibility:hidden; float:right">V-Shift</font>===== | ||
{{MoveData | {{MoveData | ||
|image= | |image=SFV_Cody_5MKHP.png | ||
|name=V-Shift | |name=V-Shift | ||
|input= | |input=5MKHP | ||
|data= | |data= | ||
{{AttackData-SFV | {{AttackData-SFV | ||
| Line 2,492: | Line 2,575: | ||
* Costs 300 V-Gauge (1 bar) to use and refunds 150 V-Gauge back (1/2 bar) on a successful V-Shift if the slow-mo is triggered | * Costs 300 V-Gauge (1 bar) to use and refunds 150 V-Gauge back (1/2 bar) on a successful V-Shift if the slow-mo is triggered | ||
* If the V-Shift is successful you can cancel it into a follow-up attack (see V-Shift Break) that's fully invincible and knocks the opponent down on hit | * If the V-Shift is successful you can cancel it into a follow-up attack (see V-Shift Break) that's fully invincible and knocks the opponent down on hit | ||
{{SFV Button FAT|link=https://fullmeter.com/fatonline/#/framedata/movedetail/SFV/Cody/normal/V-Shift}} | |||
}} | }} | ||
}} | }} | ||
| Line 2,499: | Line 2,583: | ||
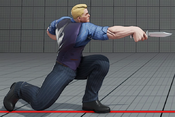
=====<font style="visibility:hidden; float:right">Payback</font>===== | =====<font style="visibility:hidden; float:right">Payback</font>===== | ||
{{MoveData | {{MoveData | ||
|image= | |image=SFV_Cody_5MKHP_break.png | ||
|name=Payback | |name=Payback | ||
|input= | |input=5MKHP | ||
|data= | |data= | ||
{{AttackData-SFV | {{AttackData-SFV | ||
| Line 2,510: | Line 2,594: | ||
|crush=<nowiki>- / - / -</nowiki> | |crush=<nowiki>- / - / -</nowiki> | ||
|block=<nowiki>-2</nowiki> | |block=<nowiki>-2</nowiki> | ||
|knockdown=<nowiki> | |knockdown=<nowiki>74 / 15 / 20</nowiki> | ||
|damage=<nowiki>60</nowiki> | |damage=<nowiki>60</nowiki> | ||
|stun=<nowiki>0</nowiki> | |stun=<nowiki>0</nowiki> | ||
| Line 2,518: | Line 2,602: | ||
|description= | |description= | ||
* Fully invincible during startup and active frames | * Fully invincible during startup and active frames | ||
{{SFV Button FAT|link=https://fullmeter.com/fatonline/#/framedata/movedetail/SFV/Cody/normal/Payback}} | |||
}} | }} | ||
}} | }} | ||
| Line 2,545: | Line 2,630: | ||
* Strike and Projectile invincible on frames 1-31 | * Strike and Projectile invincible on frames 1-31 | ||
* 10 frames less recovery on hit | * 10 frames less recovery on hit | ||
{{SFV Button FAT|link=https://fullmeter.com/fatonline/#/framedata/movedetail/SFV/Cody/normal/Prison%20Breaker}} | |||
}} | }} | ||
}} | }} | ||
Revision as of 17:32, 13 April 2021
Introduction
About Cody
First appearing in Final Fight, Cody Travers was once a hero of Metro City. But after he saved the day, his life took a dark turn, as he started getting in street fights just for fun. He was eventually arrested for his crimes, but would regularly break out to have some fun. In SFV, Mike Haggar exonerates Cody of his crimes, which leads to him becoming the new mayor of Metro City. Although he has a big responsibility to take care of, he always finds time to relive the glory days and get in some much more casual street brawls.
On surface level, Cody is a basic brawler with a decent projectile, anti air options, and setups. However, going beyond the surface reveals the dirty tricks behind this otherwise honest fighter. Cody has his fair share of weaknesses, as he struggles against projectiles, doesn't have great defense, and doesn't have amazing pressure, but Cody makes up for this by utilizing sneaky tactics like in days of old. Utilizing moves like EX Tornado Sweep and Zonk Knuckle to get in, two versatile V-Skills to keep your opponent guessing, and huge robbery factor with one of the strongest V-Triggers in the game, Cody has little trouble closing the gap between him and his target, and once he does, he dishes out damage and stun with great meaties and VT2 setups to take the round in a moment's notice. If you're ok with a character who lacks a bit in neutral and defense but can dish out damage and rob the game in the blink of an eye, give Cody a try.
| Strengths | Weaknesses |
|---|---|
|
|
Final Patch
Players to Watch
- Frost
- Hoji
- Kiske
- O.Crippler
- Packz
- Poifuru
- Rumours
- Shazyy
- Soundboi
- Shine
- Momochi
| Cody | |
|---|---|
| Vitals | |
| Life Points | 1025 |
| Stun Points | 1050 |
| V-Gauge Points | |
| V-Trigger 1 | 2 Bars |
| V-Trigger 2 | 2 Bars |
| Ground Movement | |
| Forward Walk Speed | 0.047 |
| Backward Walk Speed | 0.0289 |
| Forward Dash Speed | 17 |
| Backward Dash Speed | 23 |
| Forward Dash Distance | 1.279 |
| Backward Dash Distance | 0.842 |
| Backdash CH Frames | 3-13 |
| Jumping | |
| Back Jump Speed | 46(4+38+4) |
| Neutral Jump Speed | 46(4+38+4) |
| Forward Jump Speed | 45(3+38+4) |
| Forward Jump Distance | 2.128 |
| Backward Jump Distance | 1.824 |
| Throws | |
| Throw Hurtbox | 0.25 |
| Throw Range | 0.8 |
Frame Data & Descriptions are provided by FATOnline.
|
| SFV Frame Data Glossary | |
|---|---|
| Active |
How many frames a move remains active (can hurt opponents) for. |
| Attack |
Attack level is L for low attacks (must be blocked crouching), H is for High attacks (which can be blocked high or low) and M for overhead (must be blocked standing). T is for throw attacks (which cannot be blocked). |
| Cancel options |
Available cancel options.
|
| Confirm windows |
Hit confirm windows written as Specials & CAs/Target Combos/V-Trigger. Notation may denote V-Skill only cancel windows in Specials.
|
| Crush Counter |
Crush Counter hit advantage written as opponent state, frame advantage, and v-gauge gain on hit. |
| Damage |
Attack damage on hit. Notation may denote multi-hit or "sweet spot" damage values on certain frames. |
| Hit/Block |
These are frame advantage values when the attack hits or is blocked. If the number is positive, then the move will end before the defender can act again. If the number is negative, the defender will be able to act before the attacker and maybe even punish. KD refers to knockdown on hit.
|
| Knockdown |
Knockdown advantage against Normal, Quick Rise and Back Rise wake up options. |
| Recovery |
How many frames it takes for a move to finish after it's been active. |
| Startup |
How many frames it takes before the move becomes 'active' or have a hit box. The last startup frame and the first active frame are the same frame, meaning all values are written as Startup + 1. |
| Stun |
Amount of stun added to the opponent's stun bar on hit. |
Normals
Stand LP
Stand MP
Stand HP
Stand LK
Stand MK
Stand HK
Crouch LP
Crouch MP
Crouch HP
Crouch LK
Crouch MK
Crouch HK
| Startup | Active | Recovery | Hit | ||
|---|---|---|---|---|---|
| 9 | 4 | 21(23) | KD | ||
| Damage | Stun | Attack | Block | ||
| 90 | 150 | L | -14 | ||
| |||||
Jump LP
Jump MP
Jump HP
Jump LK
Jump MK
Jump HK
Command Normals
Axel Knuckle
Hammer Kick
Bad Spray
Target Combos
Air Raid Punch
Air Raid Kick
Slip Jab
Crime Blow
Final Combination
Final Combo Throw
Crack Combination (V-Skill 1)
Crime Combination (V-Skill 2)
Throws
Trash Out
Crime Throw
Special Moves
LP Tornado Sweep
MP Tornado Sweep
HP Tornado Sweep
EX Tornado Sweep
LK Ruffian Kick
| Startup | Active | Recovery | Hit | ||
|---|---|---|---|---|---|
| 18 | 5 | 23 | KD | ||
| Damage | Stun | Attack | Block | ||
| 100 | 150 | L | -8 | ||
| |||||
MK Ruffian Kick
| Startup | Active | Recovery | Hit | ||
|---|---|---|---|---|---|
| 12 | 5 | 27 | KD | ||
| Damage | Stun | Attack | Block | ||
| 120 | 150 | H | -8 | ||
| |||||
HK Ruffian Kick
| Startup | Active | Recovery | Hit | ||
|---|---|---|---|---|---|
| 10 | 7 | 23 | KD | ||
| Damage | Stun | Attack | Block | ||
| 130 | 150 | H | -10 | ||
| |||||
EX Ruffian Kick
Zonk Knuckle
Zonk Knuckle Level 2
EX Zonk Knuckle
EX Zonk Knuckle Level 2
Critical Art
Criminal Punisher
Taunts
Taunt
V-System
V-Skill 1
Double Kick
V-Skill 2
Crime Sway (High)
Crime Sway (Low)
Wrench Fist
Lumber Sweep
V-Trigger 1
Side Arm
Burst Shot
Snipe Shot
Anti-Air Snipe Shot
Reload
Rapid Fire
V-Trigger 2
Dirty Coach
Gentle Swing
Gentle Upper Swing
Gentle Swing > Bean Ball
Gentle Upper Swing > Bean Ball
Bean Ball
| Startup | Active | Recovery | Hit | ||
|---|---|---|---|---|---|
| 19 | - | 30 | -8(~) | ||
| Damage | Stun | Attack | Block | ||
| 40 | 50 | H | -11(~) | ||
| |||||
Present Delivery (High)
Present Delivery (Mid)
Present Delivery (Low)
Unluck Gift
Toss & Smash
Toss & Smash (Just Frame)
Toss & Smash > Bean Ball
Toss & Smash (JF) > Bean Ball
Toss & Smash > Present Delivery (H)
Toss & Smash > Present Delivery (M)
Toss & Smash > Present Delivery (L)
Toss & Smash > Unluck Gift
Toss & Smash (JF) > Present Delivery (H)
Toss & Smash (JF) > Present Delivery (M)
Toss & Smash (JF) > Present Delivery (L)
Toss & Smash (JF) > Unluck Gift
V-Shift
V-Shift
V-Shift Break
Payback
V-Reversal
Prison Breaker

