Street Fighter V/Cody: Difference between revisions

From SuperCombo Wiki
No edit summary
No edit summary
Line 7: Line 7:
|vt1=600
|vt1=600
|vt2=600
|vt2=600
|movef=4.7
|movef=0.047
|moveb=2.89
|moveb=0.0289
|dashf=17
|dashf=17
|dashb=23
|dashb=23
|dashfd=127.9
|dashfd=1.279
|dashbd=84.2
|dashbd=0.842
|dashch=3-13
|dashch=3-13
|jumpb=46(4+38+4)
|jumpb=46(4+38+4)
|jumpn=46(4+38+4)
|jumpn=46(4+38+4)
|jumpf=45(3+38+4)
|jumpf=45(3+38+4)
|jumpbd=182.4
|jumpbd=1.824
|jumpfd=212.8
|jumpfd=2.128
|throwh=0.25
|throwh=0.25
|throwr=0.8
|throwr=0.8
Line 894: Line 894:
|confirm=<nowiki>- / - / -</nowiki>
|confirm=<nowiki>- / - / -</nowiki>
|description=
|description=
* Body hitbox can hit crossup
* Body hitbox Can hit cross-up (behind Cody)
}}
}}
}}
}}

Revision as of 01:30, 14 March 2021

Introduction

About Cody

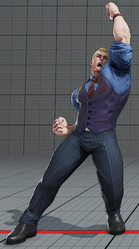
First appearing in Final Fight, Cody Travers was once a hero of Metro City. But after he saved the day, his life took a dark turn, as he started getting in street fights just for fun. He was eventually arrested for his crimes, but would regularly break out to have some fun. In SFV, Mike Haggar exonerates Cody of his crimes, which leads to him becoming the new mayor of Metro City. Although he has a big responsibility to take care of, he always finds time to relive the glory days and get in some much more casual street brawls.

On surface level, Cody is a basic brawler with a decent projectile, anti air options, and setups. However, going beyond the surface reveals the dirty tricks behind this otherwise honest fighter. Cody has his fair share of weaknesses, as he struggles against projectiles, doesn't have great defense, and doesn't have amazing pressure, but Cody makes up for this by utilizing sneaky tactics like in days of old. Utilizing moves like EX Tornado Sweep and Zonk Knuckle to get in, two versatile V-Skills to keep your opponent guessing, and huge robbery factor with one of the strongest V-Triggers in the game, Cody has little trouble closing the gap between him and his target, and once he does, he dishes out damage and stun with great meaties and VT2 setups to take the round in a moment's notice. If you're ok with a character who lacks a bit in neutral and defense but can dish out damage and rob the game in the blink of an eye, give Cody a try.

Strengths Weaknesses
  • Some of the highest damage and stun output in the game
  • Forward advancing specials allow him to get in easily and offer great corner carry
  • Great use of meter thanks to his incredible EX moves
  • A plethora of strong normals that provide Cody strong pokes, frame traps, and combos
  • V-Skill 2 works as a combo extender and allows Cody to bypass fireballs in neutral as well as many frame traps, which can turn a matchup on it's head
  • V-Trigger 2 turns Cody into a scarier grappler than the actual grapplers in this game
  • Terrible back walk speed makes it difficult to shimmy and walk out of pressure
  • Lacking reliable defensive options with no 3 frame or reversal
  • No reliable low confirms from a range
  • Anti-air deadzone behind his dead makes it difficult for him to avoid cross-ups
  • Although his normals have great frame data on hit or block, they often have noticeable more recovery on whiff than others

Final Patch

Players to Watch

  • Frost
  • Hoji
  • Kiske
  • O.Crippler
  • Packz
  • Poifuru
  • Rumours
  • Shazyy
  • Soundboi
  • Shine
  • Momochi
Cody
SFV-Cody Portrait.jpg
Vitals
Life Points 1025
Stun Points 1050
V-Gauge Points
V-Trigger 1 600
V-Trigger 2 600
Ground Movement
Forward Walk Speed 0.047
Backward Walk Speed 0.0289
Forward Dash Speed 17
Backward Dash Speed 23
Forward Dash Distance 1.279
Backward Dash Distance 0.842
Backdash CH Frames 3-13
Jumping
Back Jump Speed 46(4+38+4)
Neutral Jump Speed 46(4+38+4)
Forward Jump Speed 45(3+38+4)
Forward Jump Distance 2.128
Backward Jump Distance 1.824
Throws
Throw Hurtbox 0.25
Throw Range 0.8
SFV Frame Data Glossary
Active

How many frames a move remains active (can hurt opponents) for.

Attack

Attack level is L for low attacks (must be blocked crouching), H is for High attacks (which can be blocked high or low) and M for overhead (must be blocked standing). T is for throw attacks (which cannot be blocked).

Cancel options

Available cancel options.

  • "ch": Chain cancel, refer to description for options.
  • "sp": Special move.
  • "su": Critical art.
  • "vs[1/2]": V-Skill 1 or 2.
  • "vt[1/2]": V-Trigger 1 or 2 activation.
Confirm windows

Hit confirm windows written as Specials & CAs/Target Combos/V-Trigger. Notation may denote V-Skill only cancel windows in Specials.

  • Refers to the amount of time (in frames) you have to cancel into another move from the moment the attack connects with the opponent.
Crush Counter

Crush Counter hit advantage written as opponent state, frame advantage, and v-gauge gain on hit.

Damage

Attack damage on hit. Notation may denote multi-hit or "sweet spot" damage values on certain frames.

Hit/Block

These are frame advantage values when the attack hits or is blocked. If the number is positive, then the move will end before the defender can act again. If the number is negative, the defender will be able to act before the attacker and maybe even punish. KD refers to knockdown on hit.

  • Note that generally, normal counter hits add an additional +2 to hit advantage in SFV.
Knockdown

Knockdown advantage against Normal, Quick Rise and Back Rise wake up options.

Recovery

How many frames it takes for a move to finish after it's been active.

Startup

How many frames it takes before the move becomes 'active' or have a hit box. The last startup frame and the first active frame are the same frame, meaning all values are written as Startup + 1.

Stun

Amount of stun added to the opponent's stun bar on hit.

Normals

Stand LP
Stand LP
5LP
SFV Cody 5LP.png
Normal
SFV Cody 5LP vt1.png
V-Trigger 1
Normal Startup Active Recovery Hit
4 3 7 3
Damage Stun Attack Block
30 70 H 1
  • Cancel options: ch sp su vt1 vt2
  • Chains into st.LP / cr.LP / cr.LK
V-Trigger 1 Startup Active Recovery Hit
4 3 8 6
Damage Stun Attack Block
30 70 H 2
  • Cancel options: ch sp su
  • Chains into st.LP / cr.LP / cr.LK
  • Consumes 50 / 25 V-Meter on Hit / Block
Stand MP
Stand MP
5MP
SFV Cody 5MP.png
Normal
SFV Cody 5MP vt1.png
V-Trigger 1
Normal Startup Active Recovery Hit
7 2 16 4
Damage Stun Attack Block
60 100 H 0
  • Cancel options: sp su vt1 vt2
  • Decent range and good to convert into specials for far range whiff punish scenarios
  • Arm and leg hurtboxes are projectile invincible on frame 6 only
V-Trigger 1 Startup Active Recovery Hit
8 3 15 5
Damage Stun Attack Block
60 100 H 4
  • Cancel options: -
  • Hit Confirm notes: *Knife specials only, **Knife MP > HP
  • Fantastic poke tool and very + on block
  • Slightly further range than cr.MP (Knife)
  • Consumes 80 V-Meter on Hit / Block
Stand HP
Stand HP
5HP
SFV Cody 5HP.png
Normal
SFV Cody 5HP vt1.png
V-Trigger 1
SFV Cody 5HP vt2.png
V-Trigger 2
Normal Startup Active Recovery Hit
6 2*3 21 4*3(1)
Damage Stun Attack Block
90*30 120*50 H -9*-10
  • Cancel options: sp su vt1 vt2
  • Cody's head hurtbox is invincible to airborne strikes on startup frames 1-8
  • Forces stand
  • Changed Damage (70) / Stun (120) / Frame Advantage (+1/-7) if the 1st hit whiffs
  • Cody gets better frame advantage if canceled into V-Triggers on the 1st hit
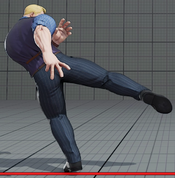
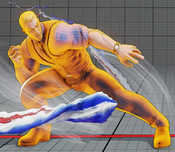
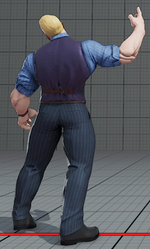
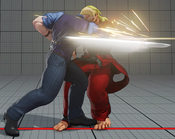
  • Can hit cross-up (behind Cody)
V-Trigger 1 Startup Active Recovery Hit
13 3 19(20) 7
Damage Stun Attack Block
90 150 H -2
  • Cancel options: sp su
  • Slightly smaller head hurtbox on frames 4-32
  • Half-screen range
  • 1 extra recovery frame on whiff (20F)
  • Consumes 150 / 75 V-Meter on Hit / Block
V-Trigger 2 Startup Active Recovery Hit
14 2 21 4
Damage Stun Attack Block
100 150 H -5
  • Cancel options: -
  • Hit Confirm notes: *VT2 specials only
  • Has a Crush Counter effect (Spinning Knockdown) that st.HP doesn't normally have outside of V-Trigger 2
  • Builds a bit of V-Timer on a successful Crush Counter while V-Trigger 2 is active
  • Huge range and great priorty for a heavy button
Stand LK
Stand LK
5LK
SFV Cody 5LK.png
Startup Active Recovery Hit
5 3 10 4
Damage Stun Attack Block
40 70 H 3
  • Cancel options: sp su vt1 vt2
  • The go-to poke / buffer tool in neutral / footsies
  • Decent frametrap tool
Stand MK
Stand MK
5MK
SFV Cody 5MK.png
Startup Active Recovery Hit
7 3 12 7
Damage Stun Attack Block
60 100 H 3
  • Cancel options: vt1 vt2
  • Hit Confirm notes: *VT2 specials only
  • Good combo starter and frametrap tool
  • No hurtbox extensions during startup and decent hitbox priority makes for a decent poke tool
Stand HK
Stand HK
5HK
SFV Cody 5HK.png
Startup Active Recovery Hit
15 3 21 2
Damage Stun Attack Block
80 150 H -4
  • Cancel options: vt1 vt2
  • Hit Confirm notes: *VT2 specials only
  • No hurtbox extension on Cody's leg before active frames
  • Has almost half-screen range
Crouch LP
Crouch LP
2LP
SFV Cody 2LP.png
Normal
SFV Cody 2LP vt1.png
V-Trigger 1
Normal Startup Active Recovery Hit
4 2 10 4
Damage Stun Attack Block
30 70 H 2
  • Cancel options: ch sp su vt1 vt2
  • Chains into st.LP / cr.LP / cr.LK
  • Can tick throw with this
  • Not as large hurtbox vertically as most cr.LPs since all the other jabs have been nerfed anti-air wise (maybe Capcom forgot to adjust Cody accordingly)
V-Trigger 1 Startup Active Recovery Hit
5 3 7 5
Damage Stun Attack Block
30 70 H 3
  • Cancel options: ch sp su
  • Chains into st.LP / cr.LP / cr.LK
  • Consumes 50 / 25 V-Meter on Hit / Block
Crouch MP
Crouch MP
2MP
SFV Cody 2MP.png
Normal
SFV Cody 2MP vt1.png
V-Trigger 1
Normal Startup Active Recovery Hit
6 3 13(15) 5
Damage Stun Attack Block
60 100 H 2
  • Cancel options: sp su vt1 vt2
  • Combo / Frametrap / Footsies tool
  • 2 extra recovery frames on whiff (15F)
V-Trigger 1 Startup Active Recovery Hit
6 2 13 5
Damage Stun Attack Block
60 100 H 4
  • Cancel options: -
  • Hit Confirm notes: *Knife specials only
  • Really good for pokes / frametraps / tick throw / counter-hit cr.LP conversions
  • Consumes 80 / 40 V-Meter on Hit / Block
Crouch HP
Crouch HP
2HP
SFV Cody 2HP.png
Normal
SFV Cody 2HP vt1.png
V-Trigger 1
SFV Cody 2HP vt2.png
V-Trigger 2
Normal Startup Active Recovery Hit
9 2 21 0
Damage Stun Attack Block
90 150 H -4
  • Cancel options: sp su vt1 vt2
  • Decent range and whiff punish tool (albeit pretty slow)
V-Trigger 1 Startup Active Recovery Hit
11 5 20 4
Damage Stun Attack Block
90 150 H -5
  • Cancel options: sp su
  • Decent anti-air on later active frames (pretty slow though)
  • Consumes 150 V-Meter on Hit / Block
V-Trigger 2 Startup Active Recovery Hit
9 4 21 2
Damage Stun Attack Block
90 150 H -7
  • Cancel options: sp su
  • Hit Confirm notes: *VT2 specials
  • Strong vertical anti-air on later active frames (but pretty slow)
Crouch LK
Crouch LK
2LK
SFV Cody 2LK.png
Startup Active Recovery Hit
4 3 8 3
Damage Stun Attack Block
20 70 L 1
  • Cancel options: ch vt1 vt2
  • Chains into cr.LP / st.LP (knife versions as well)
  • Less pushback on rapid canceled version
Crouch MK
Crouch MK
2MK
SFV Cody 2MK.png
Startup Active Recovery Hit
7 3 15 3
Damage Stun Attack Block
60 100 L 1
  • Cancel options: vt1 vt2
  • Hit Confirm notes: *VT2 specials only, **VT1, ***VT2
  • Minimal hurtbox extension during startup frames and good priority hitbox makes this a pretty good Low hitting poke tool
Crouch HK
Crouch HK
2HK
SFV Cody 2HK.png
Startup Active Recovery Hit
9 4 21(23) KD
Damage Stun Attack Block
90 150 L -14
  • Cancel options: vt1 vt2
  • Hit Confirm notes: *VT2 specials only
  • With the hitbox positioned high up on Cody's leg and not having that much hurtbox above it makes this a decent anti-air from further away
  • Due to the shape of the hitbox/hurtbox on this sweep it becomes a great counter-poke and footsie tool against some high-hitting poke moves on much of the roster (such as the high-hitting st.MKs)
  • 2 extra recovery frames on whiff (23F)
  • KDA when canceled into V-Trigger 2 Pipe Swings (HP+HK
Jump LP
Jump LP
j.LP
Normal Startup Active Recovery Hit
4 5 - -
Damage Stun Attack Block
40 70 M -
V-Trigger 1 Startup Active Recovery Hit
4 5 - -
Damage Stun Attack Block
40 70 M -
  • Cancel options: -
  • Consumes 50 / 25 V-Timer on Hit / Block
Jump MP
Jump MP
j.MP
Normal Startup Active Recovery Hit
7 5 - KD
Damage Stun Attack Block
70 100 M -
  • Cancel options: -
  • Puts airborne opponents into a limited juggle state
  • Solid air-to-air
V-Trigger 1 Startup Active Recovery Hit
6 4 - -
Damage Stun Attack Block
70 100 M -
  • Cancel options: -
  • Puts airborne opponents into a free juggle state
  • Consumes 80 / 40 V-Meter on Hit / Block
Jump HP
Normal Startup Active Recovery Hit
9 5 - -
Damage Stun Attack Block
90 150 M -
V-Trigger 1 Startup Active Recovery Hit
9 3 - -
Damage Stun Attack Block
90 150 M -
  • Cancel options: -
  • Extremely strong jump-in priority hitbox if used at an angle
  • Consumes 150 / 75 V-Meter on Hit / Block
V-Trigger 2 Startup Active Recovery Hit
10 3 - -
Damage Stun Attack Block
100 150 M -
  • Cancel options: -
  • Huge horizontal range and priority for a jump-in attack
  • Can definitely be used for a neutral jump safe-jump while still avoiding 3F reversals via distance (up to the Cody players to find a KD setup for that)
Jump LK
Startup Active Recovery Hit
5 5 - -
Damage Stun Attack Block
40 70 M -
  • Cancel options: -
  • Good air-to-air
Jump MK
Startup Active Recovery Hit
7 5 - -
Damage Stun Attack Block
60 100 M -
  • Cancel options: -
  • Cross-up
Jump HK
Startup Active Recovery Hit
10 5 - -
Damage Stun Attack Block
90 150 M -

Command Normals

Axel Knuckle
Axel Knuckle
6HP
SFV Cody 6HP.png
Normal
SFV Cody 6HP vt2.png
V-Trigger 2
Normal Startup Active Recovery Hit
25 2 21 1
Damage Stun Attack Block
80 150 M -7
  • Cancel options: -
  • Pretty good range for an Overhead but very slow and punishable
  • Can't combo into anything even if counter-hit and meaty
  • Gains extra range and 1 more active frame with the Pipe equipped (V-Trigger 2)
V-Trigger 2 Startup Active Recovery Hit
25 3 20 0
Damage Stun Attack Block
90 180 M -7
  • Cancel options: -
  • Pretty good range for an overhead but very slow and punishable
  • Has 1 extra active frame so last active frame counter-hit is +4 and can link into jab follow-ups
Hammer Kick
Hammer Kick
6HK
SFV Cody 6HK.png
Startup Active Recovery Hit
19 1*2 20 5*2
Damage Stun Attack Block
60*40 100*50 H*H -4*-2
  • Cancel options: sp su vs1 vs2 vt1 vt2
  • Hit Confirm notes: *TC into V-Skill
  • Only the 1st hit is cancelable into specials / super / V-Trigger
  • Second hit is only cancelable into the V-Skill target combo follow-up
  • CH bonus applies to both hits
Bad Spray
Bad Spray
8P (wake-up)
SFV Cody 8P (wake-up).png
Startup Active Recovery Hit
3(20~25) 4 14 5
Damage Stun Attack Block
- - H -2
  • Cancel options: -
  • Effectively functions as a 3F heavy attack (subject to the priority system of normals) on Quick-Rise
  • Crouching state during the entire duration
  • Strike hitbox
  • Startup depends on which version is used (from a face-up or face-down knockdown)
  • Face-up version (the more common one) is 25F startup and fully invincible on frames 1-22
  • Face-down version (after crumples / wall bounces) is 20F startup and fully invincible on frames 1-17
  • Juggle Limit: 1
  • As made famous by Dale Gribble

Target Combos

Air Raid Punch
Air Raid Punch
j.MP > j.HP
Startup Active Recovery Hit
7+9 5 - KD
Damage Stun Attack Block
70*63 100*108 M*M -
  • Cancel options: -
  • KDA varies greatly depending on how early / late into the jump this connects (better KDA the later into Cody's jump it hits)
  • Dunks the opponent pretty far back into the ground (decent corner carry)
Air Raid Kick
Air Raid Kick
j.MK > j.LK
Startup Active Recovery Hit
7+3 5 - -
Damage Stun Attack Block
60*36 100*63 M*M -
  • Cancel options: -
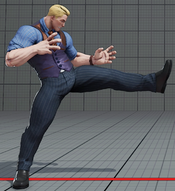
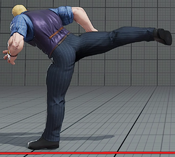
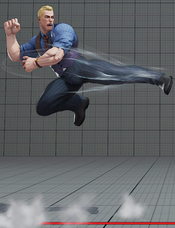
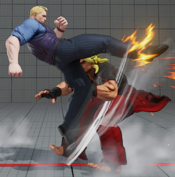
  • Body hitbox Can hit cross-up (behind Cody)
Slip Jab
Slip Jab
5LP > 5LP
SFV Cody 5LP 5LP.png
Startup Active Recovery Hit
4+4 2 17 -2
Damage Stun Attack Block
30*27 70*45 H*H -6
Crime Blow
Crime Blow
5LP > 5LP > 5LP
SFV Cody 5LP 5LP 5LP.png
Startup Active Recovery Hit
4+4+6 3 26 -4
Damage Stun Attack Block
30*27*40 (97) 70*45*64 (179) H*H*H -7
Final Combination
Final Combination
5LP > 5LP > 5LP > 5LP
SFV Cody 5LP 5LP 5LP 5LP.png
Startup Active Recovery Hit
4+4+6+9 2 33 KD
Damage Stun Attack Block
30*27*40*49 (146) 70*45*64*84 (263) H*H*H*H -13
  • Cancel options: vt1 vt2
  • Hit Confirm notes: *CA or Rock Toss, **VT2 Pipe Swings
  • Launches the opponent into a limited juggle state
  • Only part of the Target Combo that is cancelable into V-Trigger
Final Combo Throw
Final Combo Throw
5LP > 5LP > 5LP > 2LP
SFV Cody 5LP 5LP 5LP 2LP.png
Startup Active Recovery Hit
4+4+6+5 3 - KD
Damage Stun Attack Block
30*27*40*14x2*49 (179) 70*45*64*105 (284) H*H*H*T -
  • Cancel options: -
  • Same KDA as Cody's regular Back Throw
Crack Combination (V-Skill 1)
6HK > MPMK (VS1)
SFV Cody 6HK MPMK (VS1).png
Startup Active Recovery Hit
19+9 3(8)3 10+15 KD
Damage Stun Attack Block
60*40*72 (172) 100*50*63 (213) H*H -18
  • Cancel options: -
  • Fully invincible on frames 2-10 on the follow-up V-Skill
  • Airborne on frames 2-31 of the follow-up V-Skill
  • Builds 90 / 45 V-Meter on Hit / Block
Crime Combination (V-Skill 2)
6HK > MPMK (VS2)
SFV Cody 6HK MPMK (VS2).png
Startup Active Recovery Hit
19+16 3 26 KD
Damage Stun Attack Block
60*40*72 (172) 100*50*135 (285) - -11
  • Cancel options: -
  • Builds 72 / 36 V-Gauge on Hit / Block

Throws

Trash Out
Trash Out
Throw
LPLK
SFV Cody LPLK.png
Normal
SFV Cody LPLK vt2.png
V-Trigger 2
Normal Startup Active Recovery Hit
5 3 17 KD
Damage Stun Attack Block
120 150 T -
  • Cancel options: -
  • Increased damage / stun / KDA while in V-Trigger 2
V-Trigger 2 Startup Active Recovery Hit
5 3 17 KD
Damage Stun Attack Block
130 200 T -
  • Cancel options: -
  • Increased damage / stun / KDA while in V-Trigger 2
  • This V-Trigger 2 throw version is actually named 'Secret Work' - but for the sake of FAT functionality it uses the same name as the regular version of the throw
Crime Throw
Crime Throw
Back Throw
4LPLK
SFV Cody 4LPLK.png
Startup Active Recovery Hit
5 3 17 KD
Damage Stun Attack Block
150 200 T -
  • Cancel options: -
  • Same KDA as Cody's Final Fight chain throw finisher

Special Moves

LP Tornado Sweep
LP Tornado Sweep
236LP
SFV Cody 236LP.png
Startup Active Recovery Hit
18 65 31 2
Damage Stun Attack Block
50 100 H -7
  • Cancel options: su
  • 1-hit projectile
  • Projectile lasts on screen for 50 frames
  • Projectile Speed: 0.055
  • Travels at the fastest speed of the non-EX fireballs but also the furthest distance
  • Projectile invincible on extended limb hurtboxes on frames 14-49
  • Not possible to do while the Knife (V-Trigger 1) or Pipe (V-Trigger 2) are equipped
  • Can be canceled into Knife Reload on whiff
  • Juggle Limit / Increase / Start: 1 / 5 / 1
MP Tornado Sweep
MP Tornado Sweep
236MP
SFV Cody 236MP.png
Startup Active Recovery Hit
18 52 31 2
Damage Stun Attack Block
50 100 H -7
  • Cancel options: su
  • 1-hit projectile
  • Projectile lasts on screen for 70 frames
  • Projectile Speed: 0.045
  • Travels a medium distance at medium speed
  • Projectile invincible on extended limb hurtboxes on frames 14-49
  • Not possible to do while the Knife (V-Trigger 1) or Pipe (V-Trigger 2) are equipped
  • Can be canceled into Knife Reload on whiff
  • Juggle Limit / Increase / Start: 1 / 5 / 1
HP Tornado Sweep
HP Tornado Sweep
236HP
SFV Cody 236HP.png
Startup Active Recovery Hit
18 39 31 2
Damage Stun Attack Block
50 100 H -7
  • Cancel options: su
  • 1-hit projectile
  • Projectile lasts on screen for 55 frames
  • Projectile Speed: 0.04
  • Travels at the slowest speed of the non-EX fireballs but also the shortest distance
  • Projectile invincible on extended limb hurtboxes on frames 14-49
  • Can be spaced out to be more advantageous allowing for some new combos and follow-ups
  • Not possible to do while the Knife (V-Trigger 1) or Pipe (V-Trigger 2) are equipped
  • Can be canceled into Knife Reload on whiff
  • Juggle Limit / Increase / Start: 1 / 5 / 1
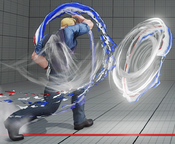
EX Tornado Sweep
EX Tornado Sweep
236PP
SFV Cody 236PP.png
Startup Active Recovery Hit
18 - 27 4
Damage Stun Attack Block
40*40 60*60 H*H 2
  • Cancel options: -
  • 2-hit projectile but can nullify up to 3 projectile hits
  • Projectile Speed: 0.035
  • No limited duration on the projectile like the non-ex versions
  • Projectile invincible on extended limb hurtboxes on frames 14-45
  • Can be spaced out to be more advantageous allowing for some new combos and follow-ups
  • Not possible to do while the Knife (V-Trigger 1) or Pipe (V-Trigger 2) are equipped
  • Can be canceled into Knife Reload on whiff
  • Juggle Limit / Increase / Start: 1*1 / 0*1 / 1*1
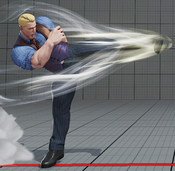
LK Ruffian Kick
LK Ruffian Kick
236LK
SFV Cody 236LK.png
Startup Active Recovery Hit
18 5 23 KD
Damage Stun Attack Block
100 150 L -8
  • Cancel options: su
  • Hits Low
  • KDA varies depending on how early / late into the active frames the move hits (lower KDA the later it hits)
  • KDA if juggled after EX Ruffian Kick: +70/21/26
  • KDA when canceled into V-Trigger 2 Pipe Swings (HP+HK
MK Ruffian Kick
MK Ruffian Kick
236MK
SFV Cody 236MK.png
Startup Active Recovery Hit
12 5 27 KD
Damage Stun Attack Block
120 150 H -8
  • Cancel options: su
  • Great buffer tool for whiff punishing
  • Can also be a good punish tool
  • KDA if juggled after EX Ruffian Kick: +81/22/27
  • KDA varies depending on how early / late into the active frames the move hits (lower KDA the later it hits)
  • KDA when canceled into V-Trigger 2 Pipe Swings (HP+HK
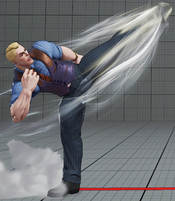
HK Ruffian Kick
HK Ruffian Kick
236HK
SFV Cody 236HK.png
Startup Active Recovery Hit
10 7 23 KD
Damage Stun Attack Block
130 150 H -10
  • Cancel options: su
  • Cannot hit crouching
  • Cody's head hurtbox is invincible to airborne strikes during startup frames 1-9
  • Decent horizontal anti-air if you can react in time
  • KDA if juggled after EX Ruffian Kick: +96/37/42
  • KDA varies depending on how early / late into the active frames the move hits (lower KDA the later it hits)
  • KDA when canceled into V-Trigger 2 Pipe Swings (HP+HK
EX Ruffian Kick
EX Ruffian Kick
236KK
SFV Cody 236KK.png
Startup Active Recovery Hit
16 5 25 KD
Damage Stun Attack Block
30*50 50*100 L*H -12
  • Cancel options: -
  • 1st attack hits Low
  • The active / recovery frames framedata shown here is the on-whiff version (transitions into another version on hit)
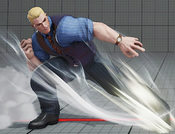
Zonk Knuckle
Zonk Knuckle
hold any punch button, release
Startup Active Recovery Hit
20 3 20(21) 3
Damage Stun Attack Block
80 150 H -2
  • Cancel options: su
  • Charges in 45 frames
  • Slightly lower hurtbox on frames 7-17
  • 1 extra recovery frames on whiff (21F)
  • KDA if juggled after EX Ruffian Kick: +89/30/35
Zonk Knuckle Level 2
hold any punch button, release
Startup Active Recovery Hit
20 3 20 5
Damage Stun Attack Block
80 150 H -2
  • Cancel options: su
  • Charges in 300 frames
  • Slightly lower hurtbox on frames 3-17
  • Causes limited juggle spin state on air opponents
  • KDA if juggled after EX Ruffian Kick: +93/34/39
EX Zonk Knuckle
EX Zonk Knuckle
hold any 2 punch buttons, release
Startup Active Recovery Hit
15 3(19)2 13(18) KD
Damage Stun Attack Block
80*50 100*100 H*H 3
  • Cancel options: vt1 vt2
  • Charges in 45 frames
  • Only cancelable into V-Trigger the 1st hit
  • Slightly lower hurtbox on frames 1-13
  • Takes longer to recover on whiff
EX Zonk Knuckle Level 2
hold any 2 punch buttons, release
Startup Active Recovery Hit
15 3(19)2 13(18) KD
Damage Stun Attack Block
80*50 100*100 H*H 5
  • Cancel options: vt1 vt2
  • Charges in 300 frames
  • Denies back-roll on wake-up
  • Causes wallbounce
  • Cancelable into Bean Ball after the follow-up hits
  • The KDA data outside the parantheses refers to when using the move when mid-screen
  • The KDA data inside the parantheses (x~y) refers to the varying KDA data depending on how close / far away the wall is (less KDA the closer the wall is)

Critical Arts

Criminal Punisher
Criminal Punisher
236236P
Startup Active Recovery Hit
7 13(27) 73 KD
Damage Stun Attack Block
330 0 H -35
  • Cancel options: -
  • Fully invincible on frames 1-11
  • Projectile invincible on frames 1-42
  • Spawns a huge pillar of projectile hitboxes in-front of Cody (27 active frames) - but also has a strike hitbox component (13 active frames) further away from Cody (which drags the opponent inwards towards Cody on hit)

Taunts

Taunt
Taunt
5PPPKKK
SFV Cody 5PPPKKK.png
Startup Active Recovery Hit
- - 61 -
Damage Stun Attack Block
- - - -

V-System

V-Skill 1

Double Kick
Double Kick
MPMK (VS1)
SFV Cody MPMK (VS1).png
Startup Active Recovery Hit
14 3(7)3 10+15 KD
Damage Stun Attack Block
80 70 H -18
  • Cancel options: -
  • Fully invincible on frames 3-26
  • Airborne on frames 7-36
  • Upper-body invincible (crouch sized hurtbox but not considered in a crouching state) on the first 2 vulnerable startup frames
  • Hits once on both sides (first front and then behind)
  • Causes 40 grey health damage to Cody upon use which also builds 100 / 75 / 50 V-Meter on Hit / Block / Whiff
  • Cody is in counterhit state during move duration

V-Skill 2

Crime Sway (High)
Crime Sway (High)
MPMK (VS2)
SFV Cody MPMK (VS2).png
Startup Active Recovery Hit
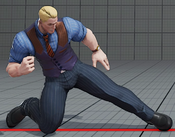
- - 36 -
Damage Stun Attack Block
- - - -
  • Cancel options: -
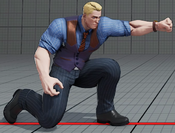
  • Invincible to standing and airborne strikes and projectiles on frames 2-25
  • Follow-up (Wrench Fist) cancels begin on 12th frame
  • Follow-up (Wrench Fist) can be delayed up to 14 frames
  • Counterhit state during move duration
Crime Sway (Low)
Crime Sway (Low)
2MPMK (VS2)
SFV Cody 2MPMK (VS2).png
Startup Active Recovery Hit
- - 36 -
Damage Stun Attack Block
- - - -
  • Cancel options: -
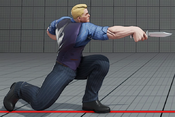
  • Invincible to crouching strikes and projectiles on frames 2-25
  • Follow-up (Lumber Sweep) cancels begin on 14th frame
  • Follow-up (Lumber Sweep) can be delayed up to 12 frames
  • Counterhit state during move duration
Wrench Fist
Wrench Fist
MPMK (VS2) > P
SFV Cody MPMK (VS2) P.png
Startup Active Recovery Hit
12+9 2 23 KD
Damage Stun Attack Block
80 150 H -7
  • Cancel options: sp su vt1 vt2
  • Projectile invincible on frames 1-8 (frames 1-20 overall if canceled into from Crime Sway (V-Skill 2) asap)
  • Builds 80 / 40 V-Gauge on Hit / Block
  • Cannot cancel into specials, super, or V-Trigger 1 specials on block
Lumber Sweep
Lumber Sweep
2MPMK (VS2) > K
SFV Cody 2MPMK (VS2) K.png
Startup Active Recovery Hit
14+11 2 22 KD
Damage Stun Attack Block
80 150 L -6
  • Cancel options: vt1 vt2
  • Projectile invincible on frames 1-10 (frames 1-24 overall if canceled into from Crime Sway (V-Skill 2) asap)
  • Builds 80 / 40 V-Gauge on Hit / Block
  • Cannot cancel into V-Trigger 1 specials on block

V-Trigger 1

Side Arm
Side Arm
HPHK (VT1)
SFV Cody HPHK (VT1).png
Startup Active Recovery Hit
1 - 4 -
Damage Stun Attack Block
- - - -
  • Cancel options: -
  • 2 bar V-Trigger
  • Duration of 2000 frames (~33 seconds)
  • Changes all punch normals (except Overhead) to a Knife version
  • Gains access to new Knife specials but also loses the use of Tornado Sweep (Fireball) while Knife is currently in-hand
  • Cannot activate V-Trigger 1 from Knife st. MP or cr. MP
Burst Shot
Burst Shot
5MP > 5HP
SFV Cody 5MP 5HP.png
Startup Active Recovery Hit
10+13 4 27 -3
Damage Stun Attack Block
60*72 100*108 H -14
  • Cancel options: sp su
  • Follow-up HP still combos from max range st.MP
  • Usually Cody can't special cancel from st.MP (Knife) but can with this Target Combo follow-up
  • Consumes 300 / 150 V-Meter on Hit / Block
Snipe Shot
Snipe Shot
5HPHK
Startup Active Recovery Hit
14 - 22 KD
Damage Stun Attack Block
60 100 H 3
  • Cancel options: su
  • Strike hitbox but also nullifies 1 hit of projectiles
  • Launches opponent into a limited juggle state
  • Knife has a hurtbox and 1 point of durability on it (can be swatted out of the air with a strike attack)
  • Frame advantage when canceling this into Knife Reload differs wildly depending on timing
Anti-Air Snipe Shot
Anti-Air Snipe Shot
2HPHK
SFV Cody 2HPHK.png
Startup Active Recovery Hit
14 - 21 KD
Damage Stun Attack Block
60 100 H 0
  • Cancel options: su
  • Strike hitbox but also nullifies 1 hit of projectiles
  • Launches opponent into a limited juggle state
  • Knife has a hurtbox and 1 point of durability on it (can be swatted out of the air with a strike attack)
  • Frame advantage when canceling this into Knife Reload differs wildly depending on timing
Reload
Startup Active Recovery Hit
- - 29 -
Damage Stun Attack Block
- - - -
  • Cancel options: -
  • Pulling out more knives to shank baddies
  • Spends 300 V-Meter (15% of V-Timer)
Rapid Fire
Rapid Fire
214P
SFV Cody 214P.png
Startup Active Recovery Hit
13 2 20 KD
Damage Stun Attack Block
10x6*80 (140) 180 H 3
  • Cancel options: su
  • Has a different animation and increased KDA (+6 extra) if using it depletes the rest of the V-Timer
  • Spends 600 V-Meter (30% of V-Timer)

V-Trigger 2

Dirty Coach
Dirty Coach
HPHK (VT2)
SFV Cody HPHK (VT2).png
Startup Active Recovery Hit
1 - 7 -
Damage Stun Attack Block
- - - -
  • Cancel options: -
  • 2 bar V-Trigger
  • Duration of 3000 frames (50 seconds)
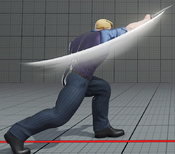
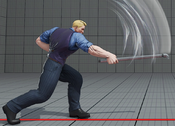
  • Changes all HP punch normals (including Overhead) to a Pipe version
  • Gains access to new Pipe special moves but also loses the use of Tornado Sweep (Fireball) while the Pipe is currently in-hand
  • Cannot activate V-Trigger 2 if the Pipe is currently in-hand
Gentle Swing
Gentle Swing
HPHK
SFV Cody HPHK.png
Startup Active Recovery Hit
16 3 25 KD
Damage Stun Attack Block
100 150 H -2
  • Cancel options: su
  • Reflects projectiles (including: multi-hit fireballs / EX fireballs / V-Triggers)
  • Can be canceled into from all normals and specials (specials only cancel on hit)
  • Can be canceled into Bean Ball (rock toss) on hit
  • Spends about 25% V-Timer if the pipe swing hitbox connects with the opponent on hit/block (does not spend V-Timer on whiff or when batting the rocks)
  • Knockdown advantage and other properties change drastically when canceled into from Bean Ball (see: Present Delivery (High/Mid/Low) / Bad Stone (High/Just Frame/Low) data)
Gentle Upper Swing
Gentle Upper Swing
2HPHK
SFV Cody 2HPHK.png
Startup Active Recovery Hit
12 3 28 KD
Damage Stun Attack Block
100 150 H -6
  • Cancel options: su vt2
  • Reflects projectiles (including: multi-hit fireballs / EX fireballs / V-Triggers)
  • Can be canceled into from all normals and specials (specials only cancel on hit)
  • Can be canceled into Bean Ball (rock toss) or Gentle Swing on hit
  • Launches the opponent into a free juggle state if this move started the juggle state
  • Spends about 25% V-Timer if the pipe swing hitbox connects with the opponent on hit/block (does not spend V-Timer on whiff or when batting the rocks)
  • Knockdown, cancel and block advantage properties change drastically when canceled into from Bean Ball (see: Unluck Gift / Bad Stone (Air) data)
Gentle Swing > Bean Ball
HPHK > 214P
Startup Active Recovery Hit
16+19 2(~) 30 KD
Damage Stun Attack Block
100(40) 150(50) H*H -26
  • Cancel options: -
  • The follow-up Bean Ball (rock toss) has all the same properties as it normally does (see: Bean Ball / Bad Stone (empty) data)
Gentle Upper Swing > Bean Ball
2HPHK > 214P
Startup Active Recovery Hit
15+19 3(~) 30 KD
Damage Stun Attack Block
100(40) 150(50) H*H -25
  • Cancel options: -
  • The follow-up Bean Ball (rock toss) has all the same properties as it normally does (see: Bean Ball / Bad Stone (empty) data)
  • Increased KDA (as shown on the KDA data inside the parenthesess) if the Bean Ball hits them on the way-up after canceling into it from Gentle Upper Swing
Bean Ball
Bean Ball
214P
SFV Cody 214P.png
Startup Active Recovery Hit
19 - 30 -8(~)
Damage Stun Attack Block
40 50 H -11(~)
  • Cancel options: -
  • 1-hit projectile that travels vertically upwards and down again
  • Different button strengths result in slightly different trajectories of the rock
  • Recovery frames can be canceled into follow-up pipe swings (HP+HK
Present Delivery (High)
214P > HPHK
Startup Active Recovery Hit
19+34 2(~) 25 ~(KD)
Damage Stun Attack Block
100(100) 120(150) H ~(-3)
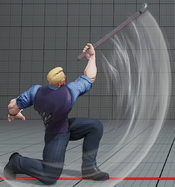
  • Cancel options: -
  • High version results in a 1-hit projectile that travels full-screen in an upwards slope
  • Puts airborne opponents into a limited juggle state
  • If the follow-up pipe swing hits the opponent and the rock at the same time (even if the rock hits them later in the air after the pipe launches them) it results in combined damage / stun (200 damage / 270 stun) which only counts as a single move for the purpose of damage scaling
  • The frame advantage varies greatly on the rock launched (usually very + on hit / block) - but if the pipe swing and rock are blocked by the opponent at the same time in close range then it becomes very punishable on block (up to -15 on block)
  • The -3 on block advantage refers to if the rock whiffs and only the pipe swing is blocked
  • KDA data shown refers to if the rock whiffs and only the follow-up pipe swing connects (if the rock juggles after the pipe swing then the KDA is more advantageous but very variable)
Present Delivery (Mid)
214P > HPHK
Startup Active Recovery Hit
19+36 2(~) 25 KD
Damage Stun Attack Block
150(100) 150(150) H ~(-3)
  • Cancel options: -
  • Just Frame version results in 3-hit projectile that travels full-screen very fast and cannot be reflected or absorbed
  • Both the pipe and rock can hit the opponent on the same frame up close resulting combined damage / stun (250 damage / 300 stun) which only counts as a single move for the purpose of damage scaling
  • +3 on block if the rock and and pipe swing are used in close range (-3 on block if only the pipe swing is blocked)
  • KDA data shown goes from worst to best; close range -> (full-screen) - close range refers to if the pipe swing hits up close (the KDA shown in the parantheses refers to when the Just Frame rock hits from full-screen away)
  • Try using visual cues to help with the Just Frame timing (like when Cody moves his hand that just tossed the rock in front of his face)
Present Delivery (Low)
214P > HPHK
Startup Active Recovery Hit
19+39 2(~) 25 ~(KD)
Damage Stun Attack Block
80(100) 100(150) H ~(-3)
  • Cancel options: -
  • Low version results in a 1-hit projectile that travels full-screen across the ground
  • Does NOT actually hit Low as the name would indicate
  • Both the pipe and rock can hit the opponent on the same frame up close resulting in combined damage / stun (180 damage / 250 stun) which only counts as a single move for the purpose of damage scaling
  • The frame advantage varies greatly on the rock launched (usually very + on hit / block) - but if the pipe swing and rock are blocked by the opponent at the same time in close range then it becomes very punishable on block (up to -15 on block)
  • The -3 on block advantage refers to if the rock whiffs and only the pipe swing is blocked
  • KDA data shown refers to if the rock whiffs and only the follow-up pipe swing connects (slightly higher KDA if the rock and pipe hit a the same time (+1-3 extra KDA depending on spacing / timing)
Unluck Gift
Unluck Gift
214P > 2HPHK
SFV Cody 214P 2HPHK.png
Startup Active Recovery Hit
19+33 3(~) 13 ~(KD)
Damage Stun Attack Block
80(100) 150(150) H ~(9)
  • Cancel options: -
  • The follow-up pipe swing is a lot more advantageous on block (+9 instead of the regular -6) if it connects to the opponent after the rock is blocked
  • KDA data shown referst to if the follow-up upper pipe swing connects without any other move messing with the juggle
  • If the initial Bean Ball lands on the opponent just after the Pipe Swing hits them, it will result in worse KDA (+90/+31/+36)
  • Launches the opponent into a free juggle state if this move started the juggle state
  • The off-screen rock does 80 damage / 150 stun if it falls on-top of the opponent (60 damage / 100 stun if the bounces off the ground into the opponent)
  • The rock projectile is active the whole time (even while off-screen) and can thus clash off-screen with opposing rock projectiles
Toss & Smash
Toss & Smash
63214K > P
SFV Cody 63214K P.png
Startup Active Recovery Hit
5 3 60 KD
Damage Stun Attack Block
150 (160) 150 T -
  • Cancel options: -
  • Denies back-roll on wake-up
  • Cancelable into Bean Ball after the follow-up hits
  • The follow-up smash depends on timing of a following punch button
  • This move covers 2 of the 3 versions of the follow-ups (the improperly ones)
  • Damage differs between 150 or 160 depending on how close the timing is to the Just Frame (properly timed) version
  • KDA varies depending on timing of the follow-up pipe swing (+2 on QR/BR being the worst and only happens if no follow-up punch button is pressed)
  • Recovery frames listed refer to the version on whiff (less recovery on hit)
  • Spends 700 V-Meter (23% of V-Timer)
Toss & Smash (Just Frame)
63214K > P (Just Frame)
SFV Cody 63214K P (Just Frame).png
Startup Active Recovery Hit
5 3 60 KD
Damage Stun Attack Block
230 300 T -
  • Cancel options: -
  • Denies back-roll on wake-up
  • Cancelable into Bean Ball after the follow-up hits
  • This Just Frame follow-up requires the player to press the punch button follow-up during a 3-frame cancel window which results in this improved version of the move
  • Try using visual cues to help with the Just Frame timing (like when Cody lifts up the front leg and bends his knee)
  • The KDA data outside the parantheses refers to when using the move when mid-screen
  • The KDA data inside the parantheses (x~y) refers to the varying KDA data depending on how close / far away the wall is (less KDA the closer the wall is)
  • Recovery frames listed refer to the version on whiff (much less recovery on hit)
  • Spends 700 V-Meter (23% of V-Timer)
Toss & Smash > Bean Ball
63214K > 214P
Startup Active Recovery Hit
5+19 - 30 KD
Damage Stun Attack Block
140(150) 150 T*H -
  • Cancel options: -
  • Denies back-roll on wake-up
  • This version of the move covers the KDA data for: Toss & Smash (improperly timed) > Bean Ball
  • This move covers 2 of the 3 versions of the follow-ups (the improperly ones)
  • Damage differs between 140 or 150 depending on how close the timing is to the Just Frame (properly timed) version
  • KDA varies depending on timing of the follow-up pipe swing prior to canceling into this Bean Ball version (+5 on QR/BR being the worst and only happens if no follow-up punch button is pressed)
  • Spends 700 V-Meter (23% of V-Timer)
Toss & Smash (JF) > Bean Ball
63214K > P (JF) > 214P
Startup Active Recovery Hit
5+19 - 30 KD
Damage Stun Attack Block
230 300 T*H -
  • Cancel options: -
  • Denies back-roll on wake-up
  • This version of the move covers the KDA data for: Toss & Smash (Just Frame) > Bean Ball
  • This Just Frame follow-up requires the player to press the punch button follow-up during a 3-frame cancel window which results in this improved version of the move
  • Try using visual cues to help with the Just Frame timing (like when Cody lifts up the front leg and bends his knee)
  • The KDA data outside the parantheses refers to when using the move when mid-screen
  • The KDA data inside the parantheses (x~y) refers to the varying KDA data depending on how close / far away the wall is (less KDA the closer the wall is)
  • Spends 700 V-Meter (23% of V-Timer)
Toss & Smash > Present Delivery (H)
63214K > P > 214P > HPHK
Startup Active Recovery Hit
5+19+34 - 25 KD
Damage Stun Attack Block
140~150(100) 150(120) T*H -
  • Cancel options: su
  • Denies back-roll on wake-up
  • This version of the move covers the KDA data for: Toss & Smash (improperly timed) > Bean Ball > Present Delivery (High)
  • Damage / Stun numbers in the parentheses refer to the Bean Ball itself after being swung by the pipe swing follow-up
  • KDA varies depending on timing of the prior follow-up swing to the Toss & Smash (lower KDA the worse the timing was)
  • All properties other than KDA it shares with Present Deliver (High) / Bad Stone (High) - Read those notes for more information
  • Spends 700 V-Meter (23% of V-Timer)
Toss & Smash > Present Delivery (M)
63214K > P > 214P > HPHK
Startup Active Recovery Hit
5+19+36 - 25 KD
Damage Stun Attack Block
140~150(100) 150(150) T*H -
  • Cancel options: su
  • Denies back-roll on wake-up
  • This version of the move covers the KDA data for: Toss & Smash (improperly timed) > Bean Ball > Present Delivery (Mid)
  • Damage / Stun numbers in the parentheses refer to the Bean Ball itself after being swung by the pipe swing follow-up
  • KDA varies depending on timing of the prior follow-up swing to the Toss & Smash (lower KDA the worse the timing was)
  • All properties other than KDA it shares with Present Deliver (Mid) / Bad Stone (Just Frame) - Read those notes for more information
  • Spends 700 V-Meter (23% of V-Timer)
Toss & Smash > Present Delivery (L)
63214K > P > 214P > HPHK
Startup Active Recovery Hit
5+19+39 - 25 KD
Damage Stun Attack Block
140~150(80) 150/100) T*H -
  • Cancel options: su
  • Denies back-roll on wake-up
  • This version of the move covers the KDA data for: Toss & Smash (improperly timed) > Bean Ball > Present Delivery (Low)
  • Damage / Stun numbers in the parentheses refer to the Bean Ball itself after being swung by the pipe swing follow-up
  • KDA varies depending on timing of the prior follow-up swing to the Toss & Smash (lower KDA the worse the timing was)
  • All properties other than KDA it shares with Present Deliver (Low) / Bad Stone (Low) - Read those notes for more information
  • Spends 700 V-Meter (23% of V-Timer)
Toss & Smash > Unluck Gift
63214K > P > 214P > 2HPHK
Startup Active Recovery Hit
5+19+33 - 13 KD
Damage Stun Attack Block
140~150(80) 150(150) T*H -
  • Cancel options: su
  • Denies back-roll on wake-up
  • This version of the move covers the KDA data for: Toss & Smash (improperly timed) > Bean Ball > Unluck Gift (Upper Pipe Swing)
  • Damage / Stun numbers in the parentheses refer to the Bean Ball itself after being swung by the pipe swing follow-up
  • KDA varies depending on timing of the prior follow-up swing to the Toss & Smash (lower KDA the worse the timing was)
  • All properties other than KDA it shares with Unluck Gift / Bad Stone (Air) - Read those notes for more information
  • Spends 700 V-Meter (23% of V-Timer)
Toss & Smash (JF) > Present Delivery (H)
63214K > P (JF) > 214P > HPHK
Startup Active Recovery Hit
5+19+34 - 25 KD
Damage Stun Attack Block
230(100) 300(120) T*H -
  • Cancel options: su
  • Denies back-roll on wake-up
  • This version of the move covers the KDA for: Toss & Smash (Just Frame) > Bean Ball > Present Delivery (High)
  • Damage / Stun numbers in the parentheses refer to the Bean Ball itself after being swung by the pipe swing follow-up
  • This Just Frame follow-up requires the player to press the punch button follow-up during a 3-frame cancel window which results in this improved version of the move
  • Try using visual cues to help with the Just Frame timing (like when Cody lifts up the front leg and bends his knee)
  • The KDA data outside the parantheses refers to when using the move when mid-screen
  • The KDA data inside the parantheses (x~y) refers to the varying KDA data depending on how close / far away the wall is (less KDA the closer the wall is)
  • Spends 700 V-Meter (23% of V-Timer)
Toss & Smash (JF) > Present Delivery (M)
63214K > P (JF) > 214P > HPHK
Startup Active Recovery Hit
5+19+36 - 25 KD
Damage Stun Attack Block
230(150) 300(150) T*H -
  • Cancel options: su
  • Denies back-roll on wake-up
  • This version of the move covers the KDA for: Toss & Smash (Just Frame) > Bean Ball > Present Delivery (Mid)
  • Damage / Stun numbers in the parentheses refer to the Bean Ball itself after being swung by the pipe swing follow-up
  • This Just Frame follow-up requires the player to press the punch button follow-up during a 3-frame cancel window which results in this improved version of the move
  • Try using visual cues to help with the Just Frame timing (like when Cody lifts up the front leg and bends his knee)
  • The KDA data outside the parantheses refers to when using the move when mid-screen
  • The KDA data inside the parantheses (x~y) refers to the varying KDA data depending on how close / far away the wall is (less KDA the closer the wall is)
  • Spends 700 V-Meter (23% of V-Timer)
Toss & Smash (JF) > Present Delivery (L)
63214K > P (JF) > 214P > HPHK
Startup Active Recovery Hit
5+19+39 - 25 KD
Damage Stun Attack Block
230(80) 300(100) T*H -
  • Cancel options: su
  • Denies back-roll on wake-up
  • This version of the move covers the KDA for: Toss & Smash (Just Frame) > Bean Ball > Present Delivery (Low)
  • Damage / Stun numbers in the parentheses refer to the Bean Ball itself after being swung by the pipe swing follow-up
  • This Just Frame follow-up requires the player to press the punch button follow-up during a 3-frame cancel window which results in this improved version of the move
  • Try using visual cues to help with the Just Frame timing (like when Cody lifts up the front leg and bends his knee)
  • The KDA data outside the parantheses refers to when using the move when mid-screen
  • The KDA data inside the parantheses (x~y) refers to the varying KDA data depending on how close / far away the wall is (less KDA the closer the wall is)
  • Spends 700 V-Meter (23% of V-Timer)
Toss & Smash (JF) > Unluck Gift
63214K > P (JF) > 214P > 2HPHK
Startup Active Recovery Hit
5+19+33 - 13 KD
Damage Stun Attack Block
230(80) 300(150) T*H -
  • Cancel options: su
  • Denies back-roll on wake-up
  • This version of the move covers the KDA data for: Toss & Smash (Just Frame) > Bean Ball > Unluck Gift (Upper Pipe Swing)
  • Damage / Stun numbers in the parentheses refer to the Bean Ball itself after being swung by the pipe swing follow-up
  • This Just Frame follow-up requires the player to press the punch button follow-up during a 3-frame cancel window which results in this improved version of the move
  • Try using visual cues to help with the Just Frame timing (like when Cody lifts up the front leg and bends his knee)
  • The KDA data outside the parantheses refers to when using the move when mid-screen
  • The KDA data inside the parantheses (x~y) refers to the varying KDA data depending on how close / far away the wall is (less KDA the closer the wall is)
  • Spends 700 V-Meter (23% of V-Timer)

V-Shift

V-Shift
Startup Active Recovery Hit
1 9 22 -
Damage Stun Attack Block
- - - -
  • Cancel options: -
  • Shifts back 1.21 range
  • Fully invincible on frames 1-9 during which time any strike or projectile evaded will trigger a slow-motion effect on frame 11 for both players
  • Immediately gains full invincibility for the full duration of V-Shift if you successfully evade a strike or projectile on start-up frames 1-9
  • Throw invincible on frames 1-16 on an empty / raw V-Shift
  • Counter-Hit state on frames 10-31 on an empty / raw V-Shift
  • Opponent can still cancel the attack that was V-Shifted as if it had connected (this allows for a lot of shenanigans)
  • Costs 300 V-Gauge (1 bar) to use and refunds 150 V-Gauge back (1/2 bar) on a successful V-Shift if the slow-mo is triggered
  • If the V-Shift is successful you can cancel it into a follow-up attack (see V-Shift Break) that's fully invincible and knocks the opponent down on hit

V-Shift Break

Payback
Startup Active Recovery Hit
? 3 ? KD
Damage Stun Attack Block
60 0 H -2
  • Cancel options: -
  • Fully invincible during startup and active frames

V-Reversal

Prison Breaker
Prison Breaker
6KKK
SFV Cody 6KKK.png
Startup Active Recovery Hit
17 2 23(13) KD
Damage Stun Attack Block
60 - H -2
  • Cancel options: -
  • Strike and Projectile invincible on frames 1-31
  • 10 frames less recovery on hit


SFV Navigation

General
FAQ
Controls
HUD
Glossary
Movement
Offense
Defense
Combos
V-System
Advanced
Game Data
Changelist
Links
Characters
Abigail
Akira
Akuma
Alex
Balrog
Birdie
Blanka
Cammy
Chun-Li
Cody
Dan
Dhalsim
Ed
E.Honda
Falke
F.A.N.G
G
Gill
Guile
Ibuki
Juri
Kage
Karin
Ken
Kolin
Laura
Lucia
Luke
M.Bison
Menat
Nash
Necalli
Oro
Poison
Rashid
Rose
R.Mika
Ryu
Sagat
Sakura
Seth
Urien
Vega
Zangief
Zeku (Old)
Zeku (Young)
Eleven