No edit summary |
(cleanup) |
||
| (One intermediate revision by the same user not shown) | |||
| Line 1: | Line 1: | ||
== Basic Movement == | == Basic Movement == | ||
Compared to many fighting games, the movement options in Street Fighter V are simple. Hold forward to walk forward, back to walk backwards or block. Press down to crouch, up to jump, up forward to jump forward, up back to jump back. Pressing forward twice quickly will perform a dash, pressing back twice quickly will perform a backdash. Each of these have different speeds, distances, and properties per character. | Compared to many fighting games, the movement options in Street Fighter V are simple. Hold forward to walk forward, back to walk backwards or block. Press down to crouch, up to jump, up forward to jump forward, up back to jump back. Pressing forward twice quickly will perform a dash, pressing back twice quickly will perform a backdash. Each of these have different speeds, distances, and properties per character. | ||
== Forward Dash == | == Forward Dash == | ||
[[Image:SFV_ForwardDash.jpg|thumb|Ryu's 16f forward dash]] | |||
Forward dashes are performed by pressing forward twice, causing the character to dash forward. During the dash they are unable to perform any other action, making them a risky but quick option to close the distance. Dash speeds and distance covered varies greatly for each character, with Ken and Chun-Li's being the fastest at 15f total and Zangief and Abigail's being the slowest at 25f total. | Forward dashes are performed by pressing forward twice, causing the character to dash forward. During the dash they are unable to perform any other action, making them a risky but quick option to close the distance. Dash speeds and distance covered varies greatly for each character, with Ken and Chun-Li's being the fastest at 15f total and Zangief and Abigail's being the slowest at 25f total. | ||
== Back Dash == | == Back Dash == | ||
[[Image:SFV_BackDash.jpg|thumb|Ryu's 21f backdash]] | |||
Back dashes are performed by pressing back twice. During the entire backdash characters are throw invincible, making it a great option for escaping throws or creating space between the opponent. 3 frames into a backdash a character is considered to be airborne, meaning many regular attacks hit during them will cause a flip out state preventing a combo opportunity. A common example is against Alex; after his Lariat which is +3 on block it is sometimes worth it to perform a backdash to escape the command throw or MP xx Flash Chop setup; if the MP hits it will cause the opponent to flip out making the Flash Chop completely whiff and giving you the advantage for just spending a bit of HP, and if Alex tried to go for a command grab it will whiff due to the throw invincibility, allowing for a punish. | Back dashes are performed by pressing back twice. During the entire backdash characters are throw invincible, making it a great option for escaping throws or creating space between the opponent. 3 frames into a backdash a character is considered to be airborne, meaning many regular attacks hit during them will cause a flip out state preventing a combo opportunity. A common example is against Alex; after his Lariat which is +3 on block it is sometimes worth it to perform a backdash to escape the command throw or MP xx Flash Chop setup; if the MP hits it will cause the opponent to flip out making the Flash Chop completely whiff and giving you the advantage for just spending a bit of HP, and if Alex tried to go for a command grab it will whiff due to the throw invincibility, allowing for a punish. | ||
One special thing to note about backdashes however is while airborne a character is in a counter hit state; meaning crush counter moves are especially deadly in these scenarios. This begins on frame 3 for all characters, while the ending frame is different for each character. | One special thing to note about backdashes however is while airborne a character is in a counter hit state; meaning crush counter moves are especially deadly in these scenarios. This begins on frame 3 for all characters, while the ending frame is different for each character. | ||
== Pre-Jump Frames == | == Pre-Jump Frames == | ||
| Line 191: | Line 27: | ||
Empty Jump is the term for not inputting any move in the air. If not action was taking in the air, then the landing frames can immediately be canceling into an attack, throw, or blocking (they cannot be canceled into any movement option however, meaning there is no way to escape from a perfectly timed command grab). This is especially useful for empty jump lows; by jumping the opponent tries to block high anticipating an air attack. Instead you do not press any button and hit them with a low attack upon landing. If a button was hit in the air the low would be delayed by the landing frames making it more likely the opponent could block in time or even interrupt the low with their own moves. | Empty Jump is the term for not inputting any move in the air. If not action was taking in the air, then the landing frames can immediately be canceling into an attack, throw, or blocking (they cannot be canceled into any movement option however, meaning there is no way to escape from a perfectly timed command grab). This is especially useful for empty jump lows; by jumping the opponent tries to block high anticipating an air attack. Instead you do not press any button and hit them with a low attack upon landing. If a button was hit in the air the low would be delayed by the landing frames making it more likely the opponent could block in time or even interrupt the low with their own moves. | ||
[[Category: Street Fighter V]] | {{Navbox-SFV}} | ||
[[Category:Street Fighter V]] | |||
Latest revision as of 23:29, 23 February 2021
Basic Movement
Compared to many fighting games, the movement options in Street Fighter V are simple. Hold forward to walk forward, back to walk backwards or block. Press down to crouch, up to jump, up forward to jump forward, up back to jump back. Pressing forward twice quickly will perform a dash, pressing back twice quickly will perform a backdash. Each of these have different speeds, distances, and properties per character.
Forward Dash
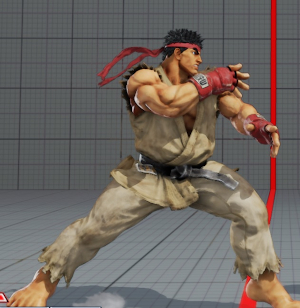
Forward dashes are performed by pressing forward twice, causing the character to dash forward. During the dash they are unable to perform any other action, making them a risky but quick option to close the distance. Dash speeds and distance covered varies greatly for each character, with Ken and Chun-Li's being the fastest at 15f total and Zangief and Abigail's being the slowest at 25f total.
Back Dash
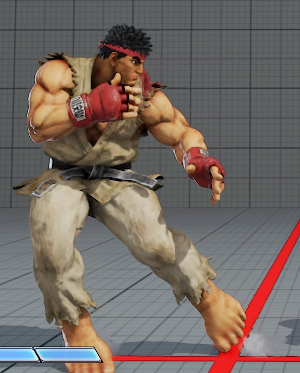
Back dashes are performed by pressing back twice. During the entire backdash characters are throw invincible, making it a great option for escaping throws or creating space between the opponent. 3 frames into a backdash a character is considered to be airborne, meaning many regular attacks hit during them will cause a flip out state preventing a combo opportunity. A common example is against Alex; after his Lariat which is +3 on block it is sometimes worth it to perform a backdash to escape the command throw or MP xx Flash Chop setup; if the MP hits it will cause the opponent to flip out making the Flash Chop completely whiff and giving you the advantage for just spending a bit of HP, and if Alex tried to go for a command grab it will whiff due to the throw invincibility, allowing for a punish.
One special thing to note about backdashes however is while airborne a character is in a counter hit state; meaning crush counter moves are especially deadly in these scenarios. This begins on frame 3 for all characters, while the ending frame is different for each character.
Pre-Jump Frames
After pressing up, a character will begin to jump however it actually takes a few frames (3 for most characters except Abigail, Birdie, Zangief, Honda, and Poison) before they become airborne. These are called "pre-jump frames". During pre-jump frames the opponent cannot be thrown, however if hit during them they will still be counted as grounded for a full combo instead of flipping out or being knocked backwards like most air hits.
Landing Recovery
Trip Guard
Trip guard is the ability to guard immediately upon landing from a jump attack. Notably it is NOT attacking an opponent who is unable to guard; this term is commonly used wrong. The ability to trip guard is determined by if an attack was used during the jump. If a button was pressed, then the player will be unable to block during the landing frames.
Landing Frames
If a move was used during a jump, then upon landing there are a few frames (4 for characters except for Abigail and Zangief) where you are unable to do anything. If a move whiffed and the opponent times it properly, they will be able to get a sweep or worse a combo for free during the landing frames where you cannot block. However, landing frames only happen if you inputted a move; if you do not you are able to block immediately upon landing.
Notably, you cannot move including jump or backdash during landing frames. This means a command grabbed timed to hit right as the opponent is landing is guaranteed unless the opponent does a throw invincible move, as they are unable to move to avoid it. This situation does not happen often, but for some situations such as Zangief's CA it is important to be aware of.
Empty Jump
Empty Jump is the term for not inputting any move in the air. If not action was taking in the air, then the landing frames can immediately be canceling into an attack, throw, or blocking (they cannot be canceled into any movement option however, meaning there is no way to escape from a perfectly timed command grab). This is especially useful for empty jump lows; by jumping the opponent tries to block high anticipating an air attack. Instead you do not press any button and hit them with a low attack upon landing. If a button was hit in the air the low would be delayed by the landing frames making it more likely the opponent could block in time or even interrupt the low with their own moves.


