m (Scanman moved page Yashiro 02 to The King of Fighters 2002/Yashiro: moving 2002 Yashiro page to be a subpage) |
|||
| (41 intermediate revisions by 4 users not shown) | |||
| Line 2: | Line 2: | ||
==General Info== | ==General Info== | ||
Crouch height: Low<br> | Crouch height: Low<br> | ||
Jump: 4/31/1<br> | |||
Hop: 4/23/1<br> | |||
Dash: 3/10~∞/3<br> | |||
Backdash: 3/16/3<br> | |||
Wakeup: 24 frames<br> | |||
Recovery roll: 27 frames<br> | |||
{| | |||
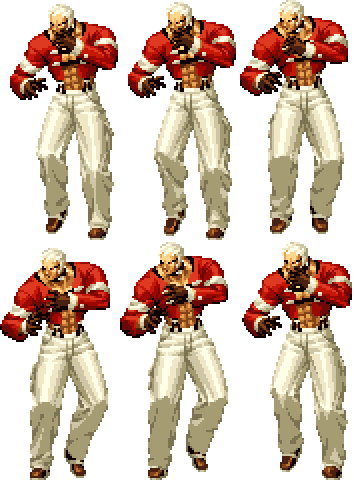
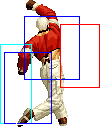
! Stand | |||
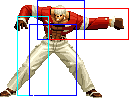
! Crouch | |||
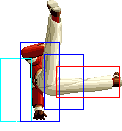
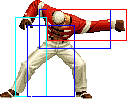
! Jump | |||
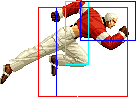
! Backdash | |||
! Grab | |||
! Run | |||
|- | |||
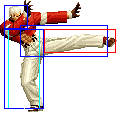
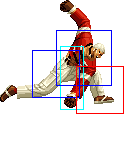
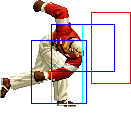
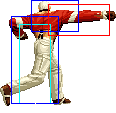
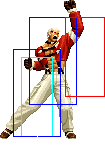
|valign="bottom"| [[image:Yashiro02_stand.png]] | |||
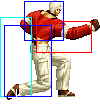
|valign="bottom"| [[image:Yashiro02_crouch.png]] | |||
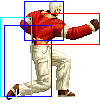
|valign="bottom"| [[image:Yashiro02_jump.png]] | |||
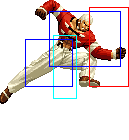
|valign="bottom"| [[image:Yashiro02_backdash.png]] | |||
|valign="bottom"| [[image:Yashiro02_grab.png]] | |||
|valign="bottom"| [[image:Yashiro02_run.png]] | |||
|} | |||
===Colors=== | ===Colors=== | ||
{| | {| | ||
| Line 14: | Line 36: | ||
| [[image:Yashiro02_colorD.png]] | | [[image:Yashiro02_colorD.png]] | ||
|} | |} | ||
==[[The_King_of_Fighters_2002/Normals_Guide|Movelist]]== | ==[[The_King_of_Fighters_2002/Normals_Guide|Movelist]]== | ||
{|border="1" | {|border="1" | ||
| Line 93: | Line 116: | ||
| | | | ||
|- | |- | ||
! [[image:snkc.gif]]+[[image:snkd.gif]] | ! [[image:snkc.gif]] + [[image:snkd.gif]] | ||
|align="center"| 15/5/24 | |align="center"| 15/5/24 | ||
|align="center"| KD/-7 | |align="center"| KD/-7 | ||
| Line 131: | Line 154: | ||
|align="center"| 9/3(5)5/22 | |align="center"| 9/3(5)5/22 | ||
|align="center"| -7/-9 | |align="center"| -7/-9 | ||
|align="center"| C,S,Su | |align="center"| C,S,Su,K | ||
|align="center"| L | |align="center"| L | ||
|valign="bottom" style="border-right:0px;"| [[image:Yashiro02_crD1.png|center]] | |valign="bottom" style="border-right:0px;"| [[image:Yashiro02_crD1.png|center]] | ||
| Line 171: | Line 194: | ||
| | | | ||
|- | |- | ||
! [[image:snkc.gif]]+[[image:snkd.gif]] | ! [[image:snkc.gif]] + [[image:snkd.gif]] | ||
|align="center"| 10/4/- | |align="center"| 10/4/- | ||
|align="center"| KD/- | |align="center"| KD/- | ||
| Line 249: | Line 272: | ||
|colspan="8" align="center"| '''Command Normals''' | |colspan="8" align="center"| '''Command Normals''' | ||
|- | |- | ||
! <br>f+[[image:snka.gif]]<br><br> | ! <br>f + [[image:snka.gif]]<br><br> | ||
|align="center"| 22/3/24 | |align="center"| 22/3/24 | ||
|align="center"| KD/-9 | |align="center"| KD/-9 | ||
| Line 257: | Line 280: | ||
| Hard knockdown | | Hard knockdown | ||
|- | |- | ||
! f+[[image:snka.gif]] (cancel) | ! f + [[image:snka.gif]] (cancel) | ||
|align="center"| 12/3/24 | |align="center"| 12/3/24 | ||
|align="center"| -7/-9 | |align="center"| -7/-9 | ||
|align="center"| S,Su | |align="center"| S,Su | ||
|align="center"| HL | |align="center"| HL | ||
| Moves Yashiro forward, making combos more likely to land than if using the more damaging f+B | | Moves Yashiro forward, making combos more likely to land than if using the more damaging f + B | ||
|- | |- | ||
! f+[[image:snkb.gif]] | ! f + [[image:snkb.gif]] | ||
|align="center"| 11/5/28 | |align="center"| 11/5/28 | ||
|align="center"| -13/-15 | |align="center"| -13/-15 | ||
| Line 274: | Line 297: | ||
|colspan="8" align="center"| '''Special Moves''' | |colspan="8" align="center"| '''Special Moves''' | ||
|- | |- | ||
! dp+[[image:snka.gif]] | ! dp + [[image:snka.gif]] | ||
|align="center"| | |align="center"| 9/3/32 | ||
|align="center"| | |align="center"| KD/-22 | ||
|align="center"| | |align="center"| Fi,Fo | ||
|align="center"| HL | |align="center"| HL | ||
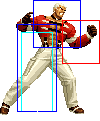
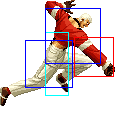
|valign="bottom" style="border-right:0px;"| [[image:Yashiro02_dpA1.png|center]] | |valign="bottom" style="border-right:0px;"| [[image:Yashiro02_dpA1.png|center]] | ||
|valign="bottom" style="border-left:0px;"| [[image:Yashiro02_dpA2.png|center]] | |valign="bottom" style="border-left:0px;"| [[image:Yashiro02_dpA2.png|center]] | ||
|rowspan="2"| '''Upper Duel - dp+P''' | |rowspan="2"| '''Upper Duel - dp + P''' | ||
* | * Invincibility: Frame 1. Guard point: A: Frame 2-5 C: Frame 2-7. | ||
* if the first hit whiffs, then the rest of the move does not complete - if it does hit, then Yashiro will rise into the air for another hit if dp+A was used and two hits if dp+C was used | * if the first hit whiffs, then the rest of the move does not complete - if it does hit, then Yashiro will rise into the air for another hit if dp + A was used and two hits if dp + C was used. | ||
* dp+A free cancellable out of on the first hit, dp+C free cancellable out of on the first two hits | * The framedata of the follow-up on hit/block are: A: 3/2(3)12/11+17 C: 3/2(3)17/16+14 | ||
* dp + A free cancellable out of on the first hit, dp + C free cancellable out of on the first two hits | |||
* free cancellable into | * free cancellable into | ||
|- | |- | ||
! dp+[[image:snkc.gif]] | ! dp + [[image:snkc.gif]] | ||
|align="center"| | |align="center"| 13/3/33 | ||
|align="center"| | |align="center"| KD/-29 | ||
|align="center"| | |align="center"| Fi,Fo | ||
|align="center"| HL | |align="center"| HL | ||
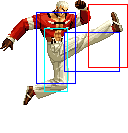
|valign="bottom" style="border-right:0px;"| [[image:Yashiro02_dpC1.png|center]] | |valign="bottom" style="border-right:0px;"| [[image:Yashiro02_dpC1.png|center]] | ||
|valign="bottom" style="border-left:0px;"| [[image:Yashiro02_dpC2.png|center]] | |valign="bottom" style="border-left:0px;"| [[image:Yashiro02_dpC2.png|center]] | ||
|- | |- | ||
! <br>qcb+[[image:snkb.gif]]<br><br> | ! <br>qcb + [[image:snkb.gif]]<br><br> | ||
|align="center"| | |align="center"| 22/3+3/1+22 | ||
|align="center"| | |align="center"| KD/-11 | ||
|align="center"| | |align="center"| Fi | ||
|align="center"| | |align="center"| H | ||
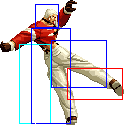
|rowspan="2" valign="bottom" style="border-right:0px;"| [[image:Yashiro02_qcbK1.png|center]] | |rowspan="2" valign="bottom" style="border-right:0px;"| [[image:Yashiro02_qcbK1.png|center]] | ||
|rowspan="2" valign="bottom" style="border-left:0px;"| [[image:Yashiro02_qcbK2.png|center]] | |rowspan="2" valign="bottom" style="border-left:0px;"| [[image:Yashiro02_qcbK2.png|center]] | ||
|rowspan="2"| '''Sledgehammer - qcb+K''' | |rowspan="2"| '''Sledgehammer - qcb + K''' | ||
* Yashiro leaps into the air and smashes the ground with his fists | * Yashiro leaps into the air and smashes the ground with his fists | ||
* qcb+D travels further and higher than qcb+B | * Hits overhead | ||
* | * qcb + D travels further and higher than qcb + B | ||
* Invincibility: B: Frame 1-8, D: Frame 1-13. | |||
* hard knockdown | * hard knockdown | ||
* free cancellable into | * free cancellable into | ||
|- | |- | ||
! qcb+[[image:snkd.gif]] | ! qcb + [[image:snkd.gif]] | ||
|align="center"| | |align="center"| 27/3+3/1+26 | ||
|align="center"| | |align="center"| KD/-15 | ||
|align="center"| | |align="center"| Fi | ||
|align="center"| | |align="center"| H | ||
|- | |- | ||
! hcf+[[image:snka.gif]] | ! hcf + [[image:snka.gif]] | ||
|align="center"| | |align="center"| 16/8/17 | ||
|align="center"| | |align="center"| -5/-7 | ||
|align="center"| qcf+A | |align="center"| Fi,Fo,>qcf + A | ||
|align="center"| HL | |align="center"| HL | ||
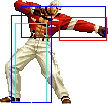
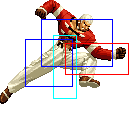
|valign="bottom" style="border-right:0px;"| [[image:Yashiro02_hcfA1.png|center]] | |valign="bottom" style="border-right:0px;"| [[image:Yashiro02_hcfA1.png|center]] | ||
|valign="bottom" style="border-left:0px;"| [[image:Yashiro02_hcfA2.png|center]] | |valign="bottom" style="border-left:0px;"| [[image:Yashiro02_hcfA2.png|center]] | ||
| rowspan="3"| '''Jet Counter - hcf+P''' | | rowspan="3"| '''Jet Counter - hcf + P''' | ||
* Yashiro does a dashing punch forward that does not knockdown the opponent if it hits | * Yashiro does a dashing punch forward that does not knockdown the opponent if it hits | ||
* hcf+A comes out quicker, travels shorter than qcf+C and is safe on block | * hcf + A comes out quicker, travels shorter than qcf + C and is safe on block | ||
* hcf+C is an overhead | * hcf + C is an overhead | ||
* hcf+A can be followed up with qcf+A, while hcf+C can be followed up with qcf+C. However, there is a glitch in which, executing hcf+AC will result in hcf+A coming out, yet allow you to use a qcf+C followup. This followup isn't the same as his qcf+C followup after hcf+C, it has a faster recovery which allows you to juggle with qcfx2+P | * hcf + A can be followed up with qcf + A, while hcf + C can be followed up with qcf + C. However, there is a glitch in which, executing hcf + AC will result in hcf + A coming out, yet allow you to use a qcf + C followup. This followup isn't the same as his qcf + C followup after hcf + C, it has a faster recovery which allows you to juggle with qcfx2+P | ||
* Invincibility: A/A + C: Frame 10-12 C: Frame 10-15. Feet invincibility: Frame 7-9. | |||
* free cancellable into | * free cancellable into | ||
* free cancellable out of | * free cancellable out of | ||
|- | |- | ||
! hcf+[[image:snkc.gif]] | ! hcf + [[image:snkc.gif]] | ||
|align="center"| | |align="center"| 24/7/18 | ||
|align="center"| | |align="center"| -5/-7 | ||
|align="center"| qcf+C | |align="center"| Fi,Fo,>qcf + C | ||
|align="center"| H | |align="center"| H | ||
|colspan="2"| [[image:Yashiro02_hcfC.png|center]] | |colspan="2"| [[image:Yashiro02_hcfC.png|center]] | ||
|- | |- | ||
! hcf+[[image:snka.gif]]+[[image:snkc.gif]] | ! hcf + [[image:snka.gif]] + [[image:snkc.gif]] | ||
|align="center"| | |align="center"| 24/7/18 | ||
|align="center"| | |align="center"| -5/-7 | ||
|align="center"| qcf+A,qcf+C | |align="center"| >qcf + A,>qcf + C | ||
|align="center"| HL | |align="center"| HL | ||
|valign="bottom" style="border-right:0px;"| [[image:Yashiro02_hcfA1.png|center]] | |valign="bottom" style="border-right:0px;"| [[image:Yashiro02_hcfA1.png|center]] | ||
|valign="bottom" style="border-left:0px;"| [[image:Yashiro02_hcfA2.png|center]] | |valign="bottom" style="border-left:0px;"| [[image:Yashiro02_hcfA2.png|center]] | ||
|- | |- | ||
! > qcf+[[image:snka.gif]]<br>(after hcf+A) | ! > qcf + [[image:snka.gif]]<br>(after hcf + A) | ||
|align="center"| | |align="center"| 13/4/24 | ||
|align="center"| | |align="center"| -8/-10 | ||
|align="center"| | |align="center"| | ||
|align="center"| HL | |align="center"| HL | ||
|rowspan="2" colspan="2" | [[image:Yashiro02_hcfAqcfA.png|center]] | |rowspan="2" colspan="2" | [[image:Yashiro02_hcfAqcfA.png|center]] | ||
|rowspan="4"| '''Jet Counter: Still - qcf+P (after hcf+P)''' | |rowspan="4"| '''Jet Counter: Still - qcf + P (after hcf + P)''' | ||
* after hcf+AC, qcf+A does a simple punch that pushes him back safely and does not knock down the opponent. qcf+C knocks the opponent into the air where they can be juggled | * after hcf + AC, qcf + A does a simple punch that pushes him back safely and does not knock down the opponent. qcf + C knocks the opponent into the air where they can be juggled | ||
* after hcf+C, qcf+C does an uppercut punch that launches them into the air where they can be juggled. However, Yashiro recovers when the opponent hits the ground, so he can only juggle if qcf+C is cancelled out of | * after hcf + C, qcf + C does an uppercut punch that launches them into the air where they can be juggled. However, Yashiro recovers when the opponent hits the ground, so he can only juggle if qcf + C is cancelled out of | ||
* all followups whether after hcf+A, hcf+AC or hcf+C, can be free cancellabled out of | * all followups whether after hcf + A, hcf + AC or hcf + C, can be free cancellabled out of | ||
* qcf+C is supercancellable | * qcf + C is supercancellable | ||
|- | |- | ||
! > qcf+[[image:snka.gif]]<br>(after hcf+AC) | ! > qcf + [[image:snka.gif]]<br>(after hcf + AC) | ||
|align="center"| | |align="center"| 13/4/24 | ||
|align="center"| | |align="center"| -8/-10 | ||
|align="center"| | |align="center"| | ||
|align="center"| HL | |align="center"| HL | ||
|- | |- | ||
! > qcf+[[image:snkc.gif]]<br>(after hcf+C) | ! > qcf + [[image:snkc.gif]]<br>(after hcf + C) | ||
|align="center"| | |align="center"| 11/4/37 | ||
|align="center"| | |align="center"| KD/-23 | ||
|align="center"| Su | |align="center"| Su | ||
|align="center"| HL | |align="center"| HL | ||
|colspan="2" | [[image:Yashiro02_hcfCqcfC.png|center]] | |colspan="2" | [[image:Yashiro02_hcfCqcfC.png|center]] | ||
|- | |- | ||
! > qcf+[[image:snkc.gif]]<br>(after hcf+AC) | ! > qcf + [[image:snkc.gif]]<br>(after hcf + AC) | ||
|align="center"| | |align="center"| 12/4/27 | ||
|align="center"| | |align="center"| KD/-13 | ||
|align="center"| Su | |align="center"| Su | ||
|align="center"| HL | |align="center"| HL | ||
| Line 380: | Line 406: | ||
|- | |- | ||
! <br>qcfx2+[[image:snka.gif]]<br><br> | ! <br>qcfx2+[[image:snka.gif]]<br><br> | ||
|align="center"| | |align="center"| 1+[0~27~55~85]+4/2+4/37 | ||
|align="center"| | |align="center"| KD/-25 | ||
|align="center"| | |align="center"| | ||
|align="center"| HL | |align="center"| HL | ||
|rowspan=" | |rowspan="3" valign="bottom" style="border-right:0px;"| [[image:Yashiro02_qcfx2P1.png|center]] | ||
|rowspan=" | |rowspan="3" valign="bottom" style="border-left:0px;"| [[image:Yashiro02_qcfx2P2.png|center]] | ||
|rowspan=" | |rowspan="3"| '''Final Impact - qcfx2+P''' | ||
* Yashiro does a very quick forward punch that has good range. If blocked, he can be punished unless it was blocked from max distance | * Yashiro does a very quick forward punch that has good range. If blocked, he can be punished unless it was blocked from max distance | ||
* comes out extremely quick, allowing you to punish many moves on block that would seem unpunishable by most characters | * comes out extremely quick, allowing you to punish many moves on block that would seem unpunishable by most characters | ||
* Can be held | * Invincibility: Frame 1. | ||
* Can be held, becomes unblockable at the highest charge. | |||
|- | |- | ||
! qcfx2+[[image:snkc.gif]] | ! <br>qcfx2+[[image:snkc.gif]]<br><br> | ||
|align="center"| 1+[0~27~55~85]+7/2+4/39 | |||
|align="center"| KD/-27 | |||
|align="center"| | |align="center"| | ||
|align="center"| HL | |||
|- | |||
! qcfx2+[[image:punch.gif]]<br>(full charge) | |||
|align="center"| 1+86+7/2+4/43 | |||
|align="center"| KD/- | |||
|align="center"| | |align="center"| | ||
|align="center"| | |align="center"| - | ||
|- | |- | ||
|colspan="8" align="center"| '''SDM''' | |colspan="8" align="center"| '''SDM''' | ||
|- | |- | ||
! qcfx2+[[image:snka.gif]]+[[image:snkc.gif]] | ! <br>qcfx2+[[image:snka.gif]] + [[image:snkc.gif]]<br><br> | ||
|align="center"| | |align="center"| 1+[0~19~39~61]+4/2+4/37 | ||
|align="center"| | |align="center"| KD/-25 | ||
|align="center"| | |align="center"| | ||
|align="center"| HL | |align="center"| HL | ||
|valign="bottom" style="border-right:0px;"| [[image:Yashiro02_qcfx2P1.png|center]] | |rowspan="2" valign="bottom" style="border-right:0px;"| [[image:Yashiro02_qcfx2P1.png|center]] | ||
|valign="bottom" style="border-left:0px;"| [[image:Yashiro02_qcfx2P2.png|center]] | |rowspan="2" valign="bottom" style="border-left:0px;"| [[image:Yashiro02_qcfx2P2.png|center]] | ||
| '''Final Impact - qcfx2+AC''' | |rowspan="2"| '''Final Impact - qcfx2+AC''' | ||
* acts just like his normal DM version but with a little extra damage | * acts just like his normal DM version but with a little extra damage | ||
* Invincibility: Frame 1 | |||
* Can be held, becomes unblockable at the highest charge. | |||
|- | |||
! qcfx2+[[image:snka.gif]] + [[image:snkc.gif]]<br>(full charge) | |||
|align="center"| 1+62+7/2+4/43 | |||
|align="center"| KD/- | |||
|align="center"| | |||
|align="center"| - | |||
|- | |- | ||
|colspan="8" align="center"| '''HSDM''' | |colspan="8" align="center"| '''HSDM''' | ||
|- | |- | ||
! qcb,hcf+[[image:snkb.gif]]+[[image:snkd.gif]] | ! qcb,hcf + [[image:snkb.gif]] + [[image:snkd.gif]] | ||
|align="center"| | |align="center"| 12/13/24 | ||
|align="center"| | |align="center"| KD/-19 | ||
| | | | ||
|align="center"| HL | |align="center"| HL | ||
|colspan="2" | [[image:Yashiro02_HSDM.png|center]] | |colspan="2" | [[image:Yashiro02_HSDM.png|center]] | ||
| '''[ERROR] CODE 2002 - qcb hcf+BD''' | | '''[ERROR] CODE 2002 - qcb hcf + BD''' | ||
* Yashiro dashes towards the opponent quickly. If he connects, he will perform a series of attacks | * Yashiro dashes towards the opponent quickly. If he connects, he will perform a series of attacks | ||
* if blocked, Yashiro does not perform the rest of the attacks, but recovers quickly | * if blocked, Yashiro does not perform the rest of the attacks, but recovers quickly | ||
* there's no point in using this move except for some flashy combos | * there's no point in using this move except for some flashy combos | ||
|} | |} | ||
=== Notes === | ==Short Movelist== | ||
* f + A (Overhead if not cancelled into.) | |||
* f + B | |||
* hcf + A/AC | |||
** qcf + A | |||
** qcf + C (Only after AC version.) | |||
* hcf + C (Overhead.) | |||
** qcf + C | |||
* dp + P | |||
* qcb + K (Overhead.) | |||
* DM qcf qcf + P (May charge. Unblockable when fully charged.) | |||
* SDM qcf qcf + AC (May charge. Unblockable when fully charged. | |||
* HSDM qcb hcf + BD | |||
== Notes == | |||
===Cancellable moves=== | |||
* Close: A, B, C, D | |||
* Far: A | |||
* Crouch: A, C, D (1) | |||
* CD is cancellable into specials and DMs. | |||
* f + B is cancellable. | |||
* cancellable | * f + A is cancellable only when you cancel into it. | ||
* | |||
* D throw is a backturned hard knockdown | ===Super cancellable moves=== | ||
* hcf + C > qcf + C | |||
===Free cancellable into moves=== | |||
* '''dp + P''' | |||
* '''hcf + A/AC''' | |||
* '''hcf + C''' | |||
* qcb + K | |||
=== Free cancellable out-of moves=== | |||
* f + A | |||
* '''dp + A (1)''' | |||
* '''dp + C (1-2)''' | |||
* '''hcf + A/AC | |||
* '''hcf + C''' | |||
* '''hcf + A/AC > qcf + A''' | |||
* '''hcf + AC > qcf + C''' | |||
* '''hcf + C > qcf + C''' | |||
===Moves with Invincibility=== | |||
** hcf + A/AC (Feet: startup (middle). Full: startup (middle, just after feet invincibility ends).) | |||
** hcf + C (Feet: startup (middle). Full: startup (middle, just after feet invincibility ends).) | |||
** dp + P (Full: startup (1st part).) | |||
** qcb + K (Full: startup (1st part).) | |||
** DM qcf qcf + P (Full: startup (1st part).) | |||
** SDM qcf qcf + AC (Full: startup (1st part).) | |||
=== Moves with autoguard=== | |||
* dp + P (startup (middle, just after invincibility ends)). | |||
===Other Notes=== | |||
* D throw is a backturned hard knockdown. | |||
* f + A makes Yashiro move forward, making combos more likely to land than if using the more damaging f + B. | |||
==Combos== | ==Combos== | ||
=== | ===Basic Combos=== | ||
* cr. | * cr.C / cl.D / cl.C > | ||
* | ** f + A > dp + A/C {20%/25%} | ||
* | ** f + A / f + B > | ||
* | *** hcf + A/AC > qcf + A {25%} | ||
* | *** '''hcf + AC > qcf + C, [29%]''' | ||
* hcf+C qcf+C | **** hh.D (Timing required.) [37%] | ||
**** st.D {30%} | |||
**** dp + A (Corner.) {40%} | |||
**** '''(S)DM qcf qcf + P/AC [54%/??%} {1 stock/Max Mode + 1 stock}''' | |||
*** (S)DM qcf qcf + P/AC [39%/45%} {1 stock/Max Mode + 1 stock} | |||
*** HSDM qcb hcf BD {50%} {Max Mode + 1 stock} | |||
* cr.B / cr.A, cr.A, | |||
** cr.A / st.A, st.B {15%} | |||
** st.A > | |||
*** (S)DM qcf qcf + P/AC {1 stock/Max Mode + 1 stock} | |||
* cr.A x 2 > dp + A {15%} | |||
* hcf + C > qcf + C >> (S)DM qcf qcf + P/AC {2 stocks/Max Mode + 2 stocks} | |||
Must charge DM a little. | |||
===Counterhit=== | |||
* Counterhit: CD > qcb + K | |||
===Max Mode=== | ===Max Mode=== | ||
* cr.B/A cr.A st.B BC | |||
* cr.B / cr.A, cr.A, st.B >> BC, (S)DM qcf qcf + P/AC | |||
* cl.C f+A BC run | Because of the speed of Yashiro's DM it is possible to BC cancel many of his light normals and immediately link DM afterwards. This combo is merely an example. In order to get the DM out in time, buffer like so: cr.A, qcf + B, BC, qcf + P | ||
* | |||
* cl.C > f + A >> BC, run, cl.C > f + A > | |||
** (hcf + AC >> dp + P (1)) x 2 >> | |||
*** hcf + AC > qcf + C, (S)DM qcf qcf + P/AC {80%/90%} | |||
You must run up very close if you do this outside the corner | |||
* Already in Max Mode: hcf + C >> dp + P (1) >> hcf + AC >> dp + P (1) >> hcf + AC > qcf + C, (S)DM qcf qcf + P/AC | |||
{{Template:The King of Fighters 2002}} | {{Template:The King of Fighters 2002}} | ||
[[Category:The King of Fighters 2002]] | [[Category:The King of Fighters 2002]] | ||
Latest revision as of 01:15, 24 July 2020
General Info
Crouch height: Low
Jump: 4/31/1
Hop: 4/23/1
Dash: 3/10~∞/3
Backdash: 3/16/3
Wakeup: 24 frames
Recovery roll: 27 frames
| Stand | Crouch | Jump | Backdash | Grab | Run |
|---|---|---|---|---|---|

|

|

|

|

|

|
Colors

|

|

|

|
Movelist
Short Movelist
- f + A (Overhead if not cancelled into.)
- f + B
- hcf + A/AC
- qcf + A
- qcf + C (Only after AC version.)
- hcf + C (Overhead.)
- qcf + C
- dp + P
- qcb + K (Overhead.)
- DM qcf qcf + P (May charge. Unblockable when fully charged.)
- SDM qcf qcf + AC (May charge. Unblockable when fully charged.
- HSDM qcb hcf + BD
Notes
Cancellable moves
- Close: A, B, C, D
- Far: A
- Crouch: A, C, D (1)
- CD is cancellable into specials and DMs.
- f + B is cancellable.
- f + A is cancellable only when you cancel into it.
Super cancellable moves
- hcf + C > qcf + C
Free cancellable into moves
- dp + P
- hcf + A/AC
- hcf + C
- qcb + K
Free cancellable out-of moves
- f + A
- dp + A (1)
- dp + C (1-2)
- hcf + A/AC
- hcf + C
- hcf + A/AC > qcf + A
- hcf + AC > qcf + C
- hcf + C > qcf + C
Moves with Invincibility
- hcf + A/AC (Feet: startup (middle). Full: startup (middle, just after feet invincibility ends).)
- hcf + C (Feet: startup (middle). Full: startup (middle, just after feet invincibility ends).)
- dp + P (Full: startup (1st part).)
- qcb + K (Full: startup (1st part).)
- DM qcf qcf + P (Full: startup (1st part).)
- SDM qcf qcf + AC (Full: startup (1st part).)
Moves with autoguard
- dp + P (startup (middle, just after invincibility ends)).
Other Notes
- D throw is a backturned hard knockdown.
- f + A makes Yashiro move forward, making combos more likely to land than if using the more damaging f + B.
Combos
Basic Combos
- cr.C / cl.D / cl.C >
- f + A > dp + A/C {20%/25%}
- f + A / f + B >
- hcf + A/AC > qcf + A {25%}
- hcf + AC > qcf + C, [29%]
- hh.D (Timing required.) [37%]
- st.D {30%}
- dp + A (Corner.) {40%}
- (S)DM qcf qcf + P/AC [54%/??%} {1 stock/Max Mode + 1 stock}
- (S)DM qcf qcf + P/AC [39%/45%} {1 stock/Max Mode + 1 stock}
- HSDM qcb hcf BD {50%} {Max Mode + 1 stock}
- cr.B / cr.A, cr.A,
- cr.A / st.A, st.B {15%}
- st.A >
- (S)DM qcf qcf + P/AC {1 stock/Max Mode + 1 stock}
- cr.A x 2 > dp + A {15%}
- hcf + C > qcf + C >> (S)DM qcf qcf + P/AC {2 stocks/Max Mode + 2 stocks}
Must charge DM a little.
Counterhit
- Counterhit: CD > qcb + K
Max Mode
- cr.B / cr.A, cr.A, st.B >> BC, (S)DM qcf qcf + P/AC
Because of the speed of Yashiro's DM it is possible to BC cancel many of his light normals and immediately link DM afterwards. This combo is merely an example. In order to get the DM out in time, buffer like so: cr.A, qcf + B, BC, qcf + P
- cl.C > f + A >> BC, run, cl.C > f + A >
- (hcf + AC >> dp + P (1)) x 2 >>
- hcf + AC > qcf + C, (S)DM qcf qcf + P/AC {80%/90%}
- (hcf + AC >> dp + P (1)) x 2 >>
You must run up very close if you do this outside the corner
- Already in Max Mode: hcf + C >> dp + P (1) >> hcf + AC >> dp + P (1) >> hcf + AC > qcf + C, (S)DM qcf qcf + P/AC
