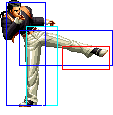
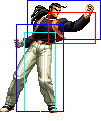
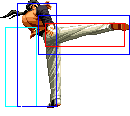
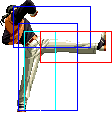
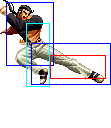
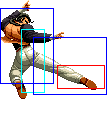
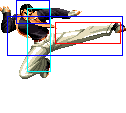
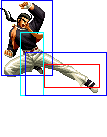
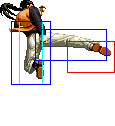
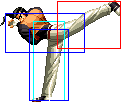
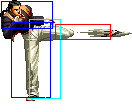
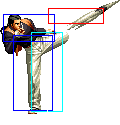
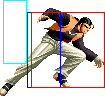
m (→Corner: updated notation) |
m (Scanman moved page Robert 02 to The King of Fighters 2002/Robert: moving 2002 Robert page to be a subpage) |
||
| (65 intermediate revisions by 4 users not shown) | |||
| Line 1: | Line 1: | ||
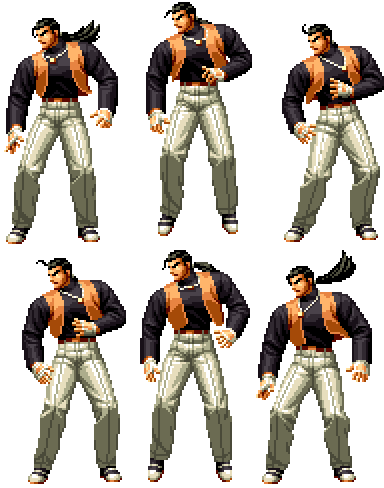
= | [[image:Robert02_stance.gif|right]] | ||
==General Info== | |||
Crouch height: Medium<br> | |||
Jump: 4/36/1<br> | |||
Hop: 4/27/1<br> | |||
Dash: 3/10~∞/3<br> | |||
Backdash: 3/18/3<br> | |||
Wakeup: 20 frames<br> | |||
Recovery roll: 27 frames<br> | |||
== | {| | ||
! Stand | |||
! Crouch | |||
! Jump | |||
! Grab | |||
! Run | |||
|- | |||
|valign="bottom"| [[image:Robert02_stand.png]] | |||
|valign="bottom"| [[image:Robert02_crouch.png]] | |||
|valign="bottom"| [[image:Robert02_jump.png]] | |||
|valign="bottom"| [[image:Robert02_grab.png]] | |||
|valign="bottom"| [[image:Robert02_run.png]] | |||
|} | |||
===Colors=== | |||
{| | |||
! [[image:snka.gif]] | |||
! [[image:snkb.gif]] | |||
! [[image:snkc.gif]] | |||
! [[image:snkd.gif]] | |||
|- | |||
| [[image:Robert02_colorA.png]] | |||
| [[image:Robert02_colorB.png]] | |||
| [[image:Robert02_colorC.png]] | |||
| [[image:Robert02_colorD.png]] | |||
|} | |||
1. | ==[[The_King_of_Fighters_2002/Normals_Guide|Movelist]]== | ||
* Robert | {|border="1" | ||
!width="9%"| | |||
! Frames | |||
! Advantage | |||
! Cancel | |||
! Block | |||
!colspan="3"| Hitbox | |||
! Notes | |||
|- | |||
|colspan="9" align="center"| '''Standing Close''' | |||
|- | |||
! [[image:snka.gif]] | |||
|align="center"| 6/6/3 | |||
|align="center"| +3/+1 | |||
|align="center"| R,C,S,Su | |||
|align="center"| HL | |||
|colspan="3" | [[image:Robert02_clA.png|center]] | |||
| | |||
|- | |||
! [[image:snkb.gif]] | |||
|align="center"| 3/6/6 | |||
|align="center"| 0/-2 | |||
|align="center"| C,S,Su | |||
|align="center"| L | |||
|colspan="3" | [[image:Robert02_clB.png|center]] | |||
| | |||
|- | |||
! [[image:snkc.gif]] | |||
|align="center"| 5/5/13 | |||
|align="center"| +2/0 | |||
|align="center"| C,S,Su | |||
|align="center"| HL | |||
|colspan="3"| [[image:Robert02_clC.png|center]] | |||
| | |||
|- | |||
! [[image:snkd.gif]] | |||
|align="center"| 5/8*6/13 | |||
|align="center"| +1/-1 | |||
|align="center"| C,S,Su | |||
|align="center"| HL | |||
|valign="bottom" style="border-right:0px;"| [[image:Robert02_clD1.png|center]] | |||
|colspan="2" valign="bottom" style="border-left:0px;"| [[image:Robert02_clD2.png|center]] | |||
|Cancellable on first hit only | |||
|- | |||
|colspan="9" align="center"| '''Standing Far''' | |||
|- | |||
! [[image:snka.gif]] | |||
|align="center"| 3/6/5 | |||
|align="center"| +1/-1 | |||
|align="center"| R | |||
|align="center"| HL | |||
|colspan="3" | [[image:Robert02_stA.png|center]] | |||
| | |||
|- | |||
! [[image:snkb.gif]] | |||
|align="center"| 5/7/7 | |||
|align="center"| -2/-4 | |||
| | |||
|align="center"| HL | |||
|colspan="3" | [[image:Robert02_stB.png|center]] | |||
| | |||
|- | |||
! [[image:snkc.gif]] | |||
|align="center"| 8/7/13 | |||
|align="center"| 0/-2 | |||
| | |||
|align="center"| HL | |||
|colspan="3" | [[image:Robert02_stC.png|center]] | |||
| | |||
|- | |||
! [[image:snkd.gif]] | |||
|align="center"| 10/4/25 | |||
|align="center"| -9/-11 | |||
| | |||
|align="center"| HL | |||
|colspan="3"| [[image:Robert02_stD.png|center]] | |||
| | |||
|- | |||
! [[image:snkc.gif]] + [[image:snkd.gif]] | |||
|align="center"| 14/4/18 | |||
|align="center"| KD/0 | |||
|align="center"| S,Su | |||
|align="center"| HL | |||
|colspan="3"| [[image:Robert02_stCD.png|center]] | |||
| | |||
|- | |||
|colspan="9" align="center"| '''Crouching''' | |||
|- | |||
! [[image:snka.gif]] | |||
|align="center"| 4/4/6 | |||
|align="center"| +2/0 | |||
|align="center"| R,C,S,Su | |||
|align="center"| HL | |||
|colspan="3"| [[image:Robert02_crA.png|center]] | |||
| | |||
|- | |||
! [[image:snkb.gif]] | |||
|align="center"| 3/6/5 | |||
|align="center"| +1/-1 | |||
|align="center"| R,C,S,Su | |||
|align="center"| L | |||
|colspan="3" | [[image:Robert02_crB.png|center]] | |||
| | |||
|- | |||
! [[image:snkc.gif]] | |||
|align="center"| 4/2+3/25 | |||
|align="center"| -10/-12 | |||
|align="center"| C,S,Su | |||
|align="center"| HL | |||
|valign="bottom" style="border-right:0px;"| [[image:Robert02_crC1.png|center]] | |||
|colspan="2" valign="bottom" style="border-left:0px;"| [[image:Robert02_crC2.png|center]] | |||
| | |||
|- | |||
! [[image:snkd.gif]] | |||
|align="center"| 7/5/24 | |||
|align="center"| KD/-11 | |||
| | |||
|align="center"| L | |||
|colspan="3"| [[image:Robert02_crD.png|center]] | |||
| | |||
|- | |||
|colspan="9" align="center"| '''Jump''' | |||
|- | |||
! [[image:snka.gif]] | |||
|align="center"| 3/7/- | |||
|align="center"| -/- | |||
| | |||
|align="center"| H | |||
|colspan="3" | [[image:Robert02_jA.png|center]] | |||
| | |||
|- | |||
! [[image:snkb.gif]] | |||
|align="center"| 3/6/- | |||
|align="center"| -/- | |||
| | |||
|align="center"| H | |||
|colspan="3" | [[image:Robert02_jB.png|center]] | |||
| | |||
|- | |||
! [[image:snkc.gif]] | |||
|align="center"| 6/6/- | |||
|align="center"| -/- | |||
|align="center"| S | |||
|align="center"| H | |||
|colspan="3" | [[image:Robert02_jC.png|center]] | |||
| | |||
|- | |||
! [[image:snkd.gif]] | |||
|align="center"| 7/4/- | |||
|align="center"| -/- | |||
|align="center"| S | |||
|align="center"| H | |||
|colspan="3" | [[image:Robert02_jD.png|center]] | |||
| | |||
|- | |||
! [[image:snkc.gif]] + [[image:snkd.gif]] | |||
|align="center"| 16/5/- | |||
|align="center"| KD/- | |||
| | |||
|align="center"| HL | |||
|colspan="3"| [[image:Robert02_jCD.png|center]] | |||
| | |||
|- | |||
|colspan="9" align="center"| '''Neutral Jump''' | |||
|- | |||
! [[image:snka.gif]] | |||
|align="center"| 3/6/- | |||
|align="center"| -/- | |||
| | |||
|align="center"| H | |||
|colspan="3" | [[image:Robert02_juA.png|center]] | |||
| | |||
|- | |||
! [[image:snkb.gif]] | |||
|align="center"| 3/9/- | |||
|align="center"| -/- | |||
| | |||
|align="center"| H | |||
|colspan="3" | [[image:Robert02_juB.png|center]] | |||
| | |||
|- | |||
! [[image:snkc.gif]] | |||
|align="center"| 5/7/- | |||
|align="center"| -/- | |||
|align="center"| S | |||
|align="center"| H | |||
|colspan="3" | [[image:Robert02_juC.png|center]] | |||
| | |||
|- | |||
! [[image:snkd.gif]] | |||
|align="center"| 8/5/- | |||
|align="center"| -/- | |||
|align="center"| S | |||
|align="center"| H | |||
|colspan="3" | [[image:Robert02_juD.png|center]] | |||
| | |||
|- | |||
|colspan="9" align="center"| '''Hop''' | |||
|- | |||
! [[image:snka.gif]] | |||
|align="center"| 4/5/- | |||
|align="center"| -/- | |||
| | |||
|align="center"| H | |||
|colspan="3" | [[image:Robert02_hA.png|center]] | |||
| | |||
|- | |||
! [[image:snkb.gif]] | |||
|align="center"| 3/7/- | |||
|align="center"| -/- | |||
| | |||
|align="center"| H | |||
|colspan="3" | [[image:Robert02_hB.png|center]] | |||
| | |||
|- | |||
! [[image:snkc.gif]] | |||
|align="center"| 3/4/- | |||
|align="center"| -/- | |||
|align="center"| S | |||
|align="center"| H | |||
|colspan="3" | [[image:Robert02_hC.png|center]] | |||
| | |||
|- | |||
! [[image:snkd.gif]] | |||
|align="center"| 7/4/- | |||
|align="center"| -/- | |||
| | |||
|align="center"| H | |||
|colspan="3" | [[image:Robert02_hD.png|center]] | |||
| | |||
|- | |||
! [[image:snkc.gif]] + [[image:snkd.gif]] | |||
|align="center"| 11/5/- | |||
|align="center"| KD/- | |||
| | |||
|align="center"| HL | |||
|colspan="3"| [[image:Robert02_jCD.png|center]] | |||
| | |||
|- | |||
|colspan="9" align="center"| '''Command Normals''' | |||
|- | |||
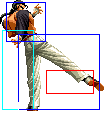
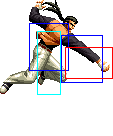
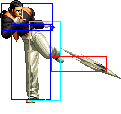
! <br>f + [[image:snka.gif]]<br><br> | |||
|align="center"| 17/4/12 | |||
|align="center"| +4/+2 | |||
| | |||
|align="center"| H | |||
|rowspan="2" colspan="3"| [[image:Robert02_fA.png|center]] | |||
|rowspan="2"|'''Kouryuu Koukyaku Geri - f + A''' | |||
* Robert does a hopping kick, making him move forward in the process | |||
* overhead | |||
* cancellable into qcb + K(air) if cancelled into | |||
* has frame advantage if not cancelled into, allowing you to link other moves after | |||
* possibly Robert's best move, it plays an important part in his game | |||
|- | |||
! f + [[image:snka.gif]]<br>(cancel) | |||
|align="center"| 13/5/15 | |||
|align="center"| 0/-2 | |||
|align="center"| S | |||
|align="center"| HL | |||
|- | |||
! b + [[image:snka.gif]] | |||
|align="center"| 13/3+4/20 | |||
|align="center"| KD/-9 | |||
| | |||
|align="center"| HL | |||
|valign="bottom" style="border-right:0px;"| [[image:Robert02_bA1.png|center]] | |||
|colspan="2" valign="bottom" style="border-left:0px;"| [[image:Robert02_bA2.png|center]] | |||
|'''Uraken - b + A''' | |||
* Robert performs a backhand move, which comes out quite slow | |||
* if it connects, opponent is launched into the air and can be juggled after | |||
* not practical to use this move in a match due to the speed it comes out and the height which it connects | |||
|- | |||
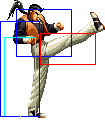
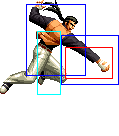
! f + [[image:snkb.gif]] | |||
|align="center"| 14/3/30 | |||
|align="center"| -13/-15 | |||
|align="center"| S,Su | |||
|align="center"| HL | |||
|colspan="3"| [[image:Robert02_fB.png|center]] | |||
|'''Ryuu Hanshuu - b/f + B''' | |||
* Robert does a forward kick | |||
* cancellable | |||
* keeps the opponent in a juggle state if it hits an airborne opponent | |||
|- | |||
|colspan="9" align="center"| '''Special Moves''' | |||
|- | |||
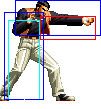
! <br>qcf + [[image:snka.gif]]<br><br> | |||
|align="center"| 17/-/30 | |||
|align="center"| +2/0 | |||
| | |||
|align="center"| HL | |||
|colspan="3" | [[image:Robert02_qcfA.png|center]] | |||
|rowspan="2"|'''Ryuugeki Ken - qcf + P | |||
* Robert winds up and releases a fireball that travels above ground | |||
* qcf + A has faster startup and recovery time but travels slower | |||
* qcf + C travels higher above ground than qcf + A, making it easier to duck under by many characters | |||
|- | |||
! qcf + [[image:snkc.gif]] | |||
|align="center"| 24/-/28 | |||
|align="center"| +4/+2 | |||
| | |||
|align="center"| HL | |||
|colspan="3" | [[image:Robert02_qcfC.png|center]] | |||
|- | |||
! dp + [[image:snka.gif]] | |||
|align="center"| 3/3*12/11+13 | |||
|align="center"| KD/-21 | |||
|align="center"| Su,Fi | |||
|align="center"| HL | |||
|valign="bottom" style="border-right:0px;"| [[image:Robert02_dpA1.png|center]] | |||
|colspan="2" valign="bottom" style="border-left:0px;"| [[image:Robert02_dpA2.png|center]] | |||
|rowspan="2"|'''Ryuuga - dp + P''' | |||
* Robert performs a rising uppercut that comes out very fast | |||
* dp + A does one hit and knocks down(two hits if it was a counterhit), while dp + C does two hits, in which only the second knocks down | |||
* dp + A supercancellable(though nothing will connect), dp + C supercancellable on the first hit | |||
* dp + C is free cancellable out of on the second hit into qcb + K(air). | |||
* dp + C is invincible for the last three frames of startup, and the complete first active period. | |||
* free cancellable into | |||
|- | |||
! dp + [[image:snkc.gif]] | |||
|align="center"| 4/3*17/16+11 | |||
|align="center"| KD/-26 | |||
|align="center"| Su,Fi | |||
|align="center"| HL | |||
|valign="bottom" style="border-right:0px;"| [[image:Robert02_dpC1.png|center]] | |||
|colspan="2" valign="bottom" style="border-left:0px;"| [[image:Robert02_dpC2.png|center]] | |||
|- | |||
! f,b,f + [[image:snkb.gif]] | |||
|align="center"| 11/[2(4)]x9,2/13 | |||
|align="center"| KD/-51 | |||
|align="center"| Fo | |||
|align="center"| HL | |||
|rowspan="2" valign="bottom" style="border-right:0px;"| [[image:Robert02_fbfK1.png|center]] | |||
|rowspan="2" valign="bottom" style="border-right:0px; border-left:0px;"| [[image:Robert02_fbfK2.png|center]] | |||
|rowspan="2" valign="bottom" style="border-left:0px;"| [[image:Robert02_fbfK3.png|center]] | |||
|rowspan="2"|'''Gen'ei Kyaku - f b f + K''' | |||
* Robert does a series of stationary rapid kicks. If the opponent is hit, they are sucked into a 13 hit combo that knocks back doing good damage | |||
* f b f + B makes Robert kick for a shorter time than f b f + D, though the damage is the same when the opponent is sucked in | |||
* free cancellable out of on the last hit, though useless since nothing will connect after | |||
|- | |||
! f,b,f + [[image:snkd.gif]] | |||
|align="center"| 11/[2(4)]x19,2/13 | |||
|align="center"| KD/-111 | |||
|align="center"| Fo | |||
|align="center"| HL | |||
|- | |||
! <br>hcf + [[image:kick.gif]]<br><br> | |||
|align="center"| 11/2(12)2(14)2(11)3/16 | |||
|align="center"| KD | |||
|align="center"| Fo | |||
|align="center"| Grab | |||
|colspan="3"| [[image:Robert02_hcfK.png|center]] | |||
|'''Kyokugen-ryuu Renbu Kyaku - hcf + K''' | |||
* This is a proximity unblockable - Robert will execute an unblockable attack if they are in range, otherwise it won't come out | |||
* The move does 4 hits but only the first is unblockable. It's possible for the first one to whiff and the rest to be blocked | |||
* Opponent can be juggled after this move | |||
* Free cancellable out of on the last hit | |||
* Invincible: Frame 1-8. | |||
|- | |||
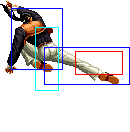
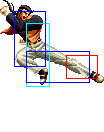
! j.qcb + [[image:snkb.gif]] | |||
|align="center"| 16/Until land/13 | |||
|align="center"| KD/- | |||
| | |||
|align="center"| HL | |||
|colspan="3"| [[image:Robert02_jqcbB.png|center]] | |||
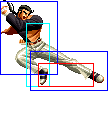
|rowspan="2"|'''Hien Ryuujin Kyaku - qcb + K(air)''' | |||
* Robert does a diagonal kick downwards, where qcb + B goes down at a steeper angle than qcb + D (which is at about 45 degrees) | |||
* has good recovery and is generally punishable on block as long as it isn't done too deep | |||
|- | |||
! j.qcb + [[image:snkd.gif]] | |||
|align="center"| 17/Until land/16 | |||
|align="center"| KD/- | |||
| | |||
|align="center"| HL | |||
|colspan="3"| [[image:Robert02_jqcbD.png|center]] | |||
|- | |||
|colspan="9" align="center"| '''DMs''' | |||
|- | |||
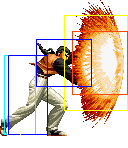
! <br>f,hcf + [[image:snka.gif]]<br><br> | |||
|align="center"| 18/-/50 | |||
|align="center"| KD/-20 | |||
| | |||
|align="center"| HL | |||
|rowspan="2" colspan="3"| [[image:Robert02_fhcfP.png|center]] | |||
|rowspan="2"|'''Haou Shoukou Ken - f hcf + P''' | |||
* Fires a large fireball across the screen | |||
* has fairly long startup and recovery, can't be comboed into and is very unsafe to throw out | |||
* Invincible: A: Frame 1, C: Frame 1-5. | |||
|- | |||
! f,hcf + [[image:snkc.gif]] | |||
|align="center"| 23/-/52 | |||
|align="center"| KD/-22 | |||
| | |||
|align="center"| HL | |||
|- | |||
! <br>qcfx2+[[image:kick.gif]]<br><br> | |||
|align="center"| 10/7/32 | |||
|align="center"| KD/-15 | |||
| | |||
|align="center"| HL | |||
|colspan="3"| [[image:Robert02_qcfx2K.png|center]] | |||
|'''Haiga Ryuu - qcfx2+K''' | |||
* Robert performs a backhand that looks exactly like b + A, though it has a lower hitbox and doesn't whiff crouchers | |||
* If it connects, he performs a combo on them doing moderate damage for a DM. Otherwise, he does nothing and recovers relatively fast | |||
* Invincible: Frame 1-3. | |||
* 23 frames of blockstun. | |||
|- | |||
! <br>qcf,hcb + [[image:snka.gif]]<br><br> | |||
|align="center"| 18/13/35 | |||
|align="center"| KD/-18 | |||
| | |||
|align="center"| HL | |||
|rowspan="2" colspan="3"| [[image:Robert02_qcfhcbP.png|center]] | |||
|rowspan="2"|'''Ryuuko Ranbu - qcf hcb + P''' | |||
* Robert rushes forward. If he connects, he performs an combo doing decent damage | |||
* if blocked, he is very open to attack | |||
* A version travels 3/4 screen while C version goes a full screen length, but C version comes out faster | |||
* Invincible: Complete startup. Lower body invincible: Complete active period. | |||
* Active period is ended as soon as the move connects (on hit or block). | |||
|- | |||
! qcf,hcb + [[image:snkc.gif]] | |||
|align="center"| 12/26/39 | |||
|align="center"| KD/-22 | |||
| | |||
|align="center"| HL | |||
|- | |||
|colspan="9" align="center"| '''SDM''' | |||
|- | |||
! qcf,hcb + [[image:snka.gif]] + [[image:snkc.gif]] | |||
|align="center"| 14/13/41 | |||
|align="center"| KD/-24 | |||
| | |||
|align="center"| HL | |||
|colspan="3"| [[image:Robert02_SDM.png|center]] | |||
|'''Ryuuko Ranbu - qcf hcb + AC''' | |||
* Same properties as his normal DM version but does more damage | |||
* Travels the same length as qcf hcb + A | |||
* Invincible: Complete startup. Lower body invincible: Complete active period. | |||
|- | |||
|colspan="9" align="center"| '''HSDM''' | |||
|- | |||
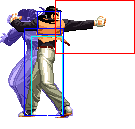
! qcf,hcb + [[image:snkb.gif]] + [[image:snkd.gif]] | |||
|align="center"| 42/13/41 | |||
|align="center"| KD/-24 | |||
| | |||
|align="center"| - | |||
|colspan="3"| [[image:Robert02_HSDM.png|center]] | |||
|'''Zetsu!! Ryuuko Ranbu - qcf hcb + BD''' | |||
* Robert goes into a stance in which he is invincible to everything except throws. He'll then dash forward about 3/4 screen and perform an unblockable combo that does about 50% | |||
* Invincible: Complete startup. | |||
|} | |||
==Short Movelist== | |||
* f + A (Overhead if not cancelled into.) | |||
* b + A | |||
* b / f + B | |||
* qcf + P | |||
* dp + P | |||
* Close, hcf + K (Proximity unblockable.) | |||
* f b f + K | |||
* air qcb + K | |||
* | |||
* DM qcf hcb + P | |||
* DM f hcf + P | |||
* DM qcf qcf + K | |||
* SDM qcf hcb + AC | |||
* HSDM qcf hcb + BD (Unblockable.) | |||
==Notes== | |||
* | ===Cancellable moves=== | ||
* | * Close: A, B, C, D (1) | ||
* | * Far: - | ||
* | * Crouch: A, B, C, D | ||
* Jump: C, D | |||
* CD is cancellable into command moves, specials and DMs | |||
* | |||
* b / f + B is cancellable. | |||
* f + A is cancellable (on air attacks) only when you cancel into it. | |||
===Super cancellable moves=== | |||
* | * dp + P (1) | ||
===Free cancellable into moves=== | |||
* '''dp + P''' | |||
* air qcb + K | |||
=== Free cancellable out-of moves=== | |||
* | * f + A | ||
* | * b + A (When you cancel into it) | ||
* | * '''dp + C (2)''' | ||
* Close, hcf + K (1-3) | |||
* f b f + K (Last hit.) | |||
===Moves with Invincibility=== | |||
* dp + C (Full: startup (last part) & active (1st part).) | |||
* hcf + K (Full: startup (1st part).) | |||
* DM f hcf + P (Full: startup (1st part).) | |||
* DM qcf qcf + K (Full: startup (1st part).) | |||
* DM qcf hcb + P (Full: startup. Lower: active.) | |||
* SDM qcf hcb + AC (Full: startup. Lower: active.) | |||
* HSDM qcf hcb + BD (Full: startup.) | |||
== | === Moves with autoguard=== | ||
(none) | |||
===Other Notes=== | |||
* | * D throw is a backturned hard knockdown | ||
==Combos== | |||
== | ===Basic Combos=== | ||
1 | * cr.B, cl.B > | ||
** '''dp + A {20%}''' | |||
** dp + C (1) >> DM qcf hcb + C {50%} | |||
* cl.D (1) / cl.C > | |||
** hcf + K, | |||
*** b / f + B > (Out of the corner: must walk a little.) | |||
**** DM qcf qcf + B | |||
**** dp + C | |||
**** f b f + K (Corner) {45%} | |||
*** '''f b f + K (Out of the corner: must walk a little & timming required.)''' | |||
*** '''CD''' | |||
** b / f + B | |||
*** '''DM qcf hcb + C {45-50%}''' | |||
*** SDM qcf hcb + AC (Point blank. From cl.C only in the corner.) | |||
** dp + C (1) >> DM qcf hcb + C {50%} | |||
** (S)DM qcf hcb + C/AC | |||
** DM f hcf + A (Point blank.) | |||
** f b f + K (Point blank.) | |||
** f + A > qcb + K (Corner) {20%} | |||
* Corner: f + A, dp + A {15%} | |||
* Corner: cl.D (1) > f + A (delayed cancel), | |||
** dp + A {22%} (less chance of messing up than combo below) | |||
** cl.B > dp + C (1) >> DM qcf hcb + C {55%} | |||
* Corner & counterhit: air qcb + K, | |||
** f b f + K {30%} | |||
** dp + C (1) >> DM qcf qcf +K (Buffer: qcf + K) {40%} | |||
= Strategies = | ==Strategies== | ||
{{Template:The King of Fighters 2002}} | |||
[[Category:The King of Fighters 2002]] | [[Category:The King of Fighters 2002]] | ||
Latest revision as of 22:31, 23 July 2020
General Info
Crouch height: Medium
Jump: 4/36/1
Hop: 4/27/1
Dash: 3/10~∞/3
Backdash: 3/18/3
Wakeup: 20 frames
Recovery roll: 27 frames
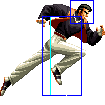
| Stand | Crouch | Jump | Grab | Run |
|---|---|---|---|---|

|

|

|
|
Colors

|

|

|

|
Movelist
Short Movelist
- f + A (Overhead if not cancelled into.)
- b + A
- b / f + B
- qcf + P
- dp + P
- Close, hcf + K (Proximity unblockable.)
- f b f + K
- air qcb + K
- DM qcf hcb + P
- DM f hcf + P
- DM qcf qcf + K
- SDM qcf hcb + AC
- HSDM qcf hcb + BD (Unblockable.)
Notes
Cancellable moves
- Close: A, B, C, D (1)
- Far: -
- Crouch: A, B, C, D
- Jump: C, D
- CD is cancellable into command moves, specials and DMs
- b / f + B is cancellable.
- f + A is cancellable (on air attacks) only when you cancel into it.
Super cancellable moves
- dp + P (1)
Free cancellable into moves
- dp + P
- air qcb + K
Free cancellable out-of moves
- f + A
- b + A (When you cancel into it)
- dp + C (2)
- Close, hcf + K (1-3)
- f b f + K (Last hit.)
Moves with Invincibility
- dp + C (Full: startup (last part) & active (1st part).)
- hcf + K (Full: startup (1st part).)
- DM f hcf + P (Full: startup (1st part).)
- DM qcf qcf + K (Full: startup (1st part).)
- DM qcf hcb + P (Full: startup. Lower: active.)
- SDM qcf hcb + AC (Full: startup. Lower: active.)
- HSDM qcf hcb + BD (Full: startup.)
Moves with autoguard
(none)
Other Notes
- D throw is a backturned hard knockdown
Combos
Basic Combos
- cr.B, cl.B >
- dp + A {20%}
- dp + C (1) >> DM qcf hcb + C {50%}
- cl.D (1) / cl.C >
- hcf + K,
- b / f + B > (Out of the corner: must walk a little.)
- DM qcf qcf + B
- dp + C
- f b f + K (Corner) {45%}
- f b f + K (Out of the corner: must walk a little & timming required.)
- CD
- b / f + B > (Out of the corner: must walk a little.)
- b / f + B
- DM qcf hcb + C {45-50%}
- SDM qcf hcb + AC (Point blank. From cl.C only in the corner.)
- dp + C (1) >> DM qcf hcb + C {50%}
- (S)DM qcf hcb + C/AC
- DM f hcf + A (Point blank.)
- f b f + K (Point blank.)
- f + A > qcb + K (Corner) {20%}
- hcf + K,
- Corner: f + A, dp + A {15%}
- Corner: cl.D (1) > f + A (delayed cancel),
- dp + A {22%} (less chance of messing up than combo below)
- cl.B > dp + C (1) >> DM qcf hcb + C {55%}
- Corner & counterhit: air qcb + K,
- f b f + K {30%}
- dp + C (1) >> DM qcf qcf +K (Buffer: qcf + K) {40%}
