m (→Anywhere) |
mNo edit summary |
||
| Line 117: | Line 117: | ||
| | | | ||
|- | |- | ||
! [[image:snkc.gif]]+[[image:snkd.gif]] | ! [[image:snkc.gif]] + [[image:snkd.gif]] | ||
|align="center"| 15/8/14 | |align="center"| 15/8/14 | ||
|align="center"| KD/0 | |align="center"| KD/0 | ||
| Line 195: | Line 195: | ||
| | | | ||
|- | |- | ||
! [[image:snkc.gif]]+[[image:snkd.gif]] | ! [[image:snkc.gif]] + [[image:snkd.gif]] | ||
|align="center"| 12/4/- | |align="center"| 12/4/- | ||
|align="center"| KD/- | |align="center"| KD/- | ||
| Line 275: | Line 275: | ||
|colspan="10" align="center"| '''Command Normals''' | |colspan="10" align="center"| '''Command Normals''' | ||
|- | |- | ||
! f+[[image:snka.gif]] | ! f + [[image:snka.gif]] | ||
|align="center"| 14/5/49 | |align="center"| 14/5/49 | ||
|align="center"| KD/-36 | |align="center"| KD/-36 | ||
| Line 283: | Line 283: | ||
| | | | ||
|- | |- | ||
! <br>f+[[image:snkb.gif]]<br><br> | ! <br>f + [[image:snkb.gif]]<br><br> | ||
|align="center"| 15/4(4)4+4+4/11 | |align="center"| 15/4(4)4+4+4/11 | ||
|align="center"| -3/-5 | |align="center"| -3/-5 | ||
| Line 292: | Line 292: | ||
| | | | ||
|- | |- | ||
! f+[[image:snkb.gif]]<br>(cancel) | ! f + [[image:snkb.gif]]<br>(cancel) | ||
|align="center"| 15/4(4)4+4+4/11 | |align="center"| 15/4(4)4+4+4/11 | ||
|align="center"| -3/-5 | |align="center"| -3/-5 | ||
| Line 303: | Line 303: | ||
|colspan="10" align="center"| '''Special Moves''' | |colspan="10" align="center"| '''Special Moves''' | ||
|- | |- | ||
! hcf+[[image:snka.gif]] | ! hcf + [[image:snka.gif]] | ||
|align="center"| 26/23/33 | |align="center"| 26/23/33 | ||
|align="center"| | |align="center"| | ||
| Line 313: | Line 313: | ||
*The button used determines the attack's location (A is close, D is furthest away). | *The button used determines the attack's location (A is close, D is furthest away). | ||
|- | |- | ||
! hcf+[[image:snkb.gif]] | ! hcf + [[image:snkb.gif]] | ||
|align="center"| 30/23/33 | |align="center"| 30/23/33 | ||
|align="center"| | |align="center"| | ||
| Line 320: | Line 320: | ||
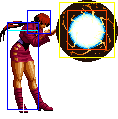
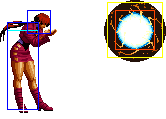
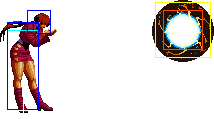
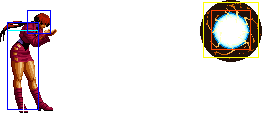
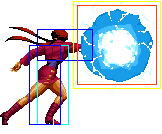
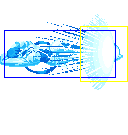
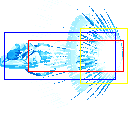
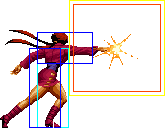
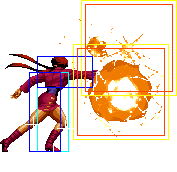
|colspan="4" | [[image:OShermie02_hcfB.png|center]] | |colspan="4" | [[image:OShermie02_hcfB.png|center]] | ||
|- | |- | ||
! hcf+[[image:snkc.gif]] | ! hcf + [[image:snkc.gif]] | ||
|align="center"| 34/23/33 | |align="center"| 34/23/33 | ||
|align="center"| | |align="center"| | ||
| Line 327: | Line 327: | ||
|colspan="4" | [[image:OShermie02_hcfC.png|center]] | |colspan="4" | [[image:OShermie02_hcfC.png|center]] | ||
|- | |- | ||
! hcf+[[image:snkd.gif]] | ! hcf + [[image:snkd.gif]] | ||
|align="center"| 38/23/33 | |align="center"| 38/23/33 | ||
|align="center"| | |align="center"| | ||
| Line 334: | Line 334: | ||
|colspan="4" | [[image:OShermie02_hcfD.png|center]] | |colspan="4" | [[image:OShermie02_hcfD.png|center]] | ||
|- | |- | ||
! qcb+[[image:snka.gif]] | ! qcb + [[image:snka.gif]] | ||
|align="center"| 14/8/4/16/18 | |align="center"| 14/8/4/16/18 | ||
|align="center"| | |align="center"| | ||
| Line 342: | Line 342: | ||
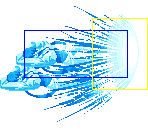
|valign="bottom" style="border-right:0px; border-left:0px;"| [[image:OShermie02_qcbA2.png|center]] | |valign="bottom" style="border-right:0px; border-left:0px;"| [[image:OShermie02_qcbA2.png|center]] | ||
|colspan="2" valign="bottom" style="border-left:0px;"| [[image:OShermie02_qcbA3.png|center]] | |colspan="2" valign="bottom" style="border-left:0px;"| [[image:OShermie02_qcbA3.png|center]] | ||
|rowspan="2"| '''Yatanagi no Muchi - qcb+P''' | |rowspan="2"| '''Yatanagi no Muchi - qcb + P''' | ||
*Your main combo ender for standing opponents | *Your main combo ender for standing opponents | ||
*Whifss at crouching opponents | *Whifss at crouching opponents | ||
| Line 348: | Line 348: | ||
*A version travels shorts and C version travels long | *A version travels shorts and C version travels long | ||
|- | |- | ||
! qcb+[[image:snkc.gif]] | ! qcb + [[image:snkc.gif]] | ||
|align="center"| 16/8/4/16/22 | |align="center"| 16/8/4/16/22 | ||
|align="center"| | |align="center"| | ||
| Line 357: | Line 357: | ||
|colspan="2" valign="bottom" style="border-left:0px;"| [[image:OShermie02_qcbC3.png|center]] | |colspan="2" valign="bottom" style="border-left:0px;"| [[image:OShermie02_qcbC3.png|center]] | ||
|- | |- | ||
! <br>qcb+[[image:snkb.gif]]<br><br> | ! <br>qcb + [[image:snkb.gif]]<br><br> | ||
|align="center"| 5[全身M] + 7+2, 3, 3, 3, 3, 3, 3, 3, 3, 3, 3+2+13 | |align="center"| 5[全身M] + 7+2, 3, 3, 3, 3, 3, 3, 3, 3, 3, 3+2+13 | ||
|align="center"| | |align="center"| | ||
| Line 363: | Line 363: | ||
|align="center"| HL | |align="center"| HL | ||
|rowspan="2" colspan="4" | [[image:OShermie02_qcbK.png|center]] | |rowspan="2" colspan="4" | [[image:OShermie02_qcbK.png|center]] | ||
|rowspan="2"| '''Shajitsu no Odori - qcb+K''' | |rowspan="2"| '''Shajitsu no Odori - qcb + K''' | ||
*Overhead | *Overhead | ||
*Slow Startup and Recovery, use it only for crouching opponents mind games | *Slow Startup and Recovery, use it only for crouching opponents mind games | ||
*Hits 5 times | *Hits 5 times | ||
|- | |- | ||
! qcb+[[image:snkd.gif]] | ! qcb + [[image:snkd.gif]] | ||
|align="center"| 9[全身M] + 9+2, 3, 3, 3, 3, 3, 3, 3, 3, 3, 2+2+15 | |align="center"| 9[全身M] + 9+2, 3, 3, 3, 3, 3, 3, 3, 3, 3, 2+2+15 | ||
|align="center"| | |align="center"| | ||
| Line 374: | Line 374: | ||
|align="center"| HL | |align="center"| HL | ||
|- | |- | ||
! j.qcf+[[image:snkb.gif]] | ! j.qcf + [[image:snkb.gif]] | ||
|align="center"| 26/7/11 | |align="center"| 26/7/11 | ||
|align="center"| | |align="center"| | ||
| Line 380: | Line 380: | ||
|align="center"| H | |align="center"| H | ||
|colspan="4" | [[image:OShermie02_jqcfB.png|center]] | |colspan="4" | [[image:OShermie02_jqcfB.png|center]] | ||
|rowspan="2"| '''Raijin no Tsue - qcf+K (in air)''' | |rowspan="2"| '''Raijin no Tsue - qcf + K (in air)''' | ||
*An excellent slow and powerful overhead | *An excellent slow and powerful overhead | ||
*Pushes back Shermie and its safe block | *Pushes back Shermie and its safe block | ||
*Can be used in backdashes | *Can be used in backdashes | ||
|- | |- | ||
! j.qcf+[[image:snkd.gif]] | ! j.qcf + [[image:snkd.gif]] | ||
|align="center"| 32/7/13 | |align="center"| 32/7/13 | ||
|align="center"| | |align="center"| | ||
| Line 400: | Line 400: | ||
|align="center"| HL | |align="center"| HL | ||
|rowspan="2" colspan="4" | [[image:OShermie02_qcfx2P.png|center]] | |rowspan="2" colspan="4" | [[image:OShermie02_qcfx2P.png|center]] | ||
|rowspan="2"| '''Ankoku Raikou Ken - qcf,qcf+P''' | |rowspan="2"| '''Ankoku Raikou Ken - qcf,qcf + P''' | ||
*Shermie forms an electric sphere and shocks the opponent doing five hits, comes out quick making easy to combo into from just about anything, links from the majority of her normals, her Kourai command normal, and No Mugetsu Raiun depending on which version you use to hit them, either way you have to be close in order for it to connect. | *Shermie forms an electric sphere and shocks the opponent doing five hits, comes out quick making easy to combo into from just about anything, links from the majority of her normals, her Kourai command normal, and No Mugetsu Raiun depending on which version you use to hit them, either way you have to be close in order for it to connect. | ||
|- | |- | ||
| Line 416: | Line 416: | ||
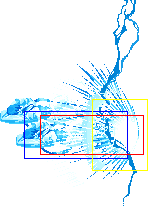
|rowspan="2" colspan="2" valign="bottom" style="border-right:0px;"| [[image:OShermie02_qcfx2K1.png|center]] | |rowspan="2" colspan="2" valign="bottom" style="border-right:0px;"| [[image:OShermie02_qcfx2K1.png|center]] | ||
|rowspan="2" colspan="2" valign="bottom" style="border-left:0px;"| [[image:OShermie02_qcfx2K2.png|center]] | |rowspan="2" colspan="2" valign="bottom" style="border-left:0px;"| [[image:OShermie02_qcfx2K2.png|center]] | ||
|rowspan="2"| '''Shukumei, Gen'ei, Shinshi - qcf,qcf+K''' | |rowspan="2"| '''Shukumei, Gen'ei, Shinshi - qcf,qcf + K''' | ||
*Shermie jumps forward and torpedoes through the opponent with lightening at her feet. | *Shermie jumps forward and torpedoes through the opponent with lightening at her feet. | ||
*B version comes out very quickly making it very easy for it to combo from most of her normals and command normal, the D version has a slower start-up which makes it next to impossible to combo into it | *B version comes out very quickly making it very easy for it to combo from most of her normals and command normal, the D version has a slower start-up which makes it next to impossible to combo into it | ||
| Line 428: | Line 428: | ||
|colspan="10" align="center"| '''SDMs''' | |colspan="10" align="center"| '''SDMs''' | ||
|- | |- | ||
! qcfx2+[[image:snka.gif]]+[[image:snkc.gif]] | ! qcfx2+[[image:snka.gif]] + [[image:snkc.gif]] | ||
|align="center"| ( {1 + 28[暗転]}[全身M] + 4, {[1](0, 1+6), [2](4, 1+6), [3](8, 1+6), [4](12, 1+6), [5](16, 1+6), [6](20, 1+6), [7](24, 1+6), [8](28, 1+6)}, 25+27) | |align="center"| ( {1 + 28[暗転]}[全身M] + 4, {[1](0, 1+6), [2](4, 1+6), [3](8, 1+6), [4](12, 1+6), [5](16, 1+6), [6](20, 1+6), [7](24, 1+6), [8](28, 1+6)}, 25+27) | ||
|align="center"| | |align="center"| | ||
| Line 435: | Line 435: | ||
|colspan="2" valign="bottom" style="border-right:0px;"| [[image:OShermie02_qcfx2AC1.png|center]] | |colspan="2" valign="bottom" style="border-right:0px;"| [[image:OShermie02_qcfx2AC1.png|center]] | ||
|colspan="2" valign="bottom" style="border-left:0px;"| [[image:OShermie02_qcfx2AC2.png|center]] | |colspan="2" valign="bottom" style="border-left:0px;"| [[image:OShermie02_qcfx2AC2.png|center]] | ||
| '''Ankoku Raikou Ken - qcf,qcf+AC''' | | '''Ankoku Raikou Ken - qcf,qcf + AC''' | ||
|- | |- | ||
! qcfx2+[[image:snkb.gif]]+[[image:snkd.gif]] | ! qcfx2+[[image:snkb.gif]] + [[image:snkd.gif]] | ||
|align="center"| ( {1 + 28[暗転] + 11}[全身M] + 3, 1, 3, 1, 3, 1, 3, 1, 3, 1, 3, 1, 3, 1, 3, 1, 3, 1, 11+32) | |align="center"| ( {1 + 28[暗転] + 11}[全身M] + 3, 1, 3, 1, 3, 1, 3, 1, 3, 1, 3, 1, 3, 1, 3, 1, 3, 1, 11+32) | ||
|align="center"| | |align="center"| | ||
| Line 444: | Line 444: | ||
|colspan="2" valign="bottom" style="border-right:0px;"| [[image:OShermie02_qcfx2BD1.png|center]] | |colspan="2" valign="bottom" style="border-right:0px;"| [[image:OShermie02_qcfx2BD1.png|center]] | ||
|colspan="2" valign="bottom" style="border-left:0px;"| [[image:OShermie02_qcfx2BD2.png|center]] | |colspan="2" valign="bottom" style="border-left:0px;"| [[image:OShermie02_qcfx2BD2.png|center]] | ||
| '''Shukumei, Gen'ei, Shinshi - qcf,qcf+BD''' | | '''Shukumei, Gen'ei, Shinshi - qcf,qcf + BD''' | ||
|- | |- | ||
|colspan="10" align="center"| '''HSDM''' | |colspan="10" align="center"| '''HSDM''' | ||
| Line 500: | Line 500: | ||
===Attack Strings=== | ===Attack Strings=== | ||
1. Crouch B/C, f+B, qcb+B/(hcf+A, backdash qcf+B)<br> | 1. Crouch B/C, f + B, qcb + B/(hcf + A, backdash qcf + B)<br> | ||
2. CD, hcf+A/qcb+B<br> | 2. CD, hcf + A/qcb + B<br> | ||
3. f+B, (C)qcb+B, (C)qcf+K (maxmode) | 3. f + B, (C)qcb + B, (C)qcf + K (maxmode) | ||
Revision as of 13:36, 8 February 2020
General Info
Crouch height: Medium
Jump: 4/34/1
Hop: 4/25/1
Dash: 3/10~∞/3
Backdash: 3/18/3
Wakeup: 31 frames
Recovery roll: 22 frames
| Stand | Crouch | Jump | Grab | Run |
|---|---|---|---|---|

|

|

|
Colors
Movelist
Notes
Combos
Anywhere
- cl.C >
- qcb + C
- DM qcf qcf + A
- DM qcf qcf + B {40%}
- f + B (2)
- qcb + C {25%}
- DM qcf qcf + A {40%} (except Mai, K9999, Shermie, ...)
- cr.B / (cl.A x 2), st.B (2) > DM qcf qcf + A
- hcf + A (on wakeup), cl.A x 2 st.B (2) > DM qcf qcf + A {45%}
- hcf + A, DM qcf qcf + P {33%}
Attack Strings
1. Crouch B/C, f + B, qcb + B/(hcf + A, backdash qcf + B)
2. CD, hcf + A/qcb + B
3. f + B, (C)qcb + B, (C)qcf + K (maxmode)
Strategies
There ins't notourious changes about KOF 98 version outside of the thunnder DM and LDM trajectory, you must keep fighting as a zoning and poking character, your Special Overhead can be slow but more dangerous than other overhead specials in the game.
