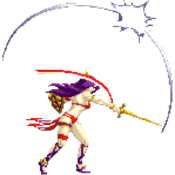
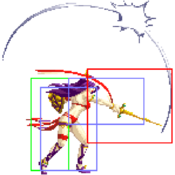
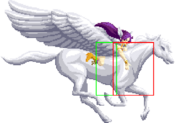
| アテナ姫, Princess Athena | |
|---|---|
| Category | Final (Secret) Boss |
| Playstyle | Unorthodox Zoning/Rushdown |
| Difficulty | Easy |
| Max Mode Needed? | Almost Useless |
| Tier Placement | Non-Threat (D) |
| Standing Hitbox | Short |
| Crouching Hitbox | Short |
| Defense Modifier | 239? (Player) / 239 (CPU) |
| Wall Jump | No |
Introduction
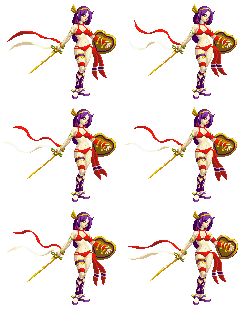
Are you here because you thought that this was the Athena from KOF? Those two could be the same person, but this Athena is based on the first Athena game, an arcade platformer released in 1987. She is, without a doubt, the weakest boss in the game (besides Dan, of course), but she is pretty strong compared to some of the non-boss characters, and against the low tiers, gives them a lot of trouble. She may appear impossible, but it takes little work to figure out how to deal with her.
How to select Athena (Outside of Super Plus)
- You want to play with Athena, but cannot select her? If you're with the Arcade version, you can only select her by cheating, or with the bootleg hacked roms. If you're using a console (XBOX and PS2 only), you can unlock her in the Survival Mode along with RA. Just defeat her or Red Arremer in the 36th fight.
| Strengths | Weaknesses |
|---|---|
|
|
| SVC Chaos: SNK VS Capcom Frame Data Glossary | |
|---|---|
| Damage |
How much damage the attack does. This takes into account no defense modifiers, so the damage assumes a 0% damage modifier, or in other words the average defense modifier of 223 against characters like Kyo and Ryu.
|
| Counter Damage |
How much damage the attack does on a counter hit, or when it connects with an opponent while they're performing an attack. Counter damage values listed are pulled from the SVC Chaos Enterbrain Mook, save Athena, Red Arremer, Serious Mr. Karate and Shin Akuma. |
| Guard |
Where the attack hits, and thus where it must be blocked.
|
| Guard Crush |
How much guard meter damage the attack does to the green Guard Gauge. |
| Stun |
How many points of stun the attack adds to the opponent's invisible Stun Gauge. |
| Meter |
How much meter is gained for performing/landing the attack. Special moves earn meter both when activated and when they connect with the opponent, whether it hits them or they block it. |
| Cancel |
The type of cancel the attack can perform.
|
| Startup |
How many frames it takes before the move becomes 'active' or has a hitbox. The SVC Chaos wiki uses classic startup notation, which does not include the first active frame. A move with 3 startup becomes active on frame 4. Super and Exceed startup will calculate both the frames before and after the super flash animation as such: X+Y, with X being the startup frames before the flash animation and Y being the startup frames after the flash animation.
|
| Active |
How many frames a move remains active (can hurt opponents) for. Consecutive sets of active frames on a multi-hit move are separated by a comma. (Example: 3, 4 - The attack has its first hitbox for 3 frames, then the second hitbox for 4 frames)
|
| Recovery |
How many frames it takes for a move to finish after it's been active. |
| Total |
The total number of frames the attack lasts on screen for. This adds up the startup, active, and recovery frames into one number. |
| Hit/Block Adv |
These are frame advantage values when the attack hits or is blocked. If the number is positive, then the move will end before the defender can act again. If the number is negative, the defender will be able to act before the attacker and maybe even punish.
|
| Invulnerability |
Indicates whether there's any frames of invulnerability during the attack. |
Move List
Normal Moves
Far/Close Normals
Since Athena has no standing proximity normals, she only has 4 standing normals. Regardless if you're far or close to the opponent, the attack for the corresponding button doesn't change.
| Damage | Counter Dmg | Guard | G. Crush | Stun | Meter | Cancel | Startup | Active | Recovery | Total | Hit Adv | Block Adv | Invulnerability | |
|---|---|---|---|---|---|---|---|---|---|---|---|---|---|---|
| - | - | Mid | - | - | - | - | 2 | 2 | 6 | 10 | +4 | +2 | - | |
| ||||||||||||||
| Damage | Counter Dmg | Guard | G. Crush | Stun | Meter | Cancel | Startup | Active | Recovery | Total | Hit Adv | Block Adv | Invulnerability | |
|---|---|---|---|---|---|---|---|---|---|---|---|---|---|---|
| - | - | Mid | - | - | - | - | 6 | 5 | 13 | 24 | -6 | -8 | - | |
| ||||||||||||||
| Damage | Counter Dmg | Guard | G. Crush | Stun | Meter | Cancel | Startup | Active | Recovery | Total | Hit Adv | Block Adv | Invulnerability | |
|---|---|---|---|---|---|---|---|---|---|---|---|---|---|---|
| - | - | Mid | - | - | - | - | 14 | 2 | 21 | 37 | -3 | -5 | - | |
| ||||||||||||||
| Damage | Counter Dmg | Guard | G. Crush | Stun | Meter | Cancel | Startup | Active | Recovery | Total | Hit Adv | Block Adv | Invulnerability | |
|---|---|---|---|---|---|---|---|---|---|---|---|---|---|---|
| - | - | Mid | - | - | - | - | 6 | 6 | 18 | 30 | -4 | -6 | - | |
| ||||||||||||||
Crouch Normals
| Damage | Counter Dmg | Guard | G. Crush | Stun | Meter | Cancel | Startup | Active | Recovery | Total | Hit Adv | Block Adv | Invulnerability | |
|---|---|---|---|---|---|---|---|---|---|---|---|---|---|---|
| - | - | Low | - | - | - | - | 2 | 5 | 7 | 14 | A/B= +0 ; C= +8 | A/B= -2 ; C= +6 | - | |
| ||||||||||||||
| Damage | Counter Dmg | Guard | G. Crush | Stun | Meter | Cancel | Startup | Active | Recovery | Total | Hit Adv | Block Adv | Invulnerability | |
|---|---|---|---|---|---|---|---|---|---|---|---|---|---|---|
| - | - | Low | - | - | - | - | 17 | 3 | 3 | 23 | SKD | +12 | - | |
| ||||||||||||||
Jumping Normals
Like her standing normals, Athena has no differentiation between neutral and diagonal jumping normals, so again, the attack only matters based on what button is pressed.
| Damage | Counter Dmg | Guard | G. Crush | Stun | Meter | Cancel | Startup | Active | Recovery | Total | Hit Adv | Block Adv | Invulnerability | |
|---|---|---|---|---|---|---|---|---|---|---|---|---|---|---|
| - | - | Overhead | - | - | - | - | 4 | 27 | - | - | - | - | - | |
| ||||||||||||||
| Damage | Counter Dmg | Guard | G. Crush | Stun | Meter | Cancel | Startup | Active | Recovery | Total | Hit Adv | Block Adv | Invulnerability | |
|---|---|---|---|---|---|---|---|---|---|---|---|---|---|---|
| - | - | Overhead | - | - | - | - | 9 | 3 | - | - | - | - | - | |
| ||||||||||||||
| Damage | Counter Dmg | Guard | G. Crush | Stun | Meter | Cancel | Startup | Active | Recovery | Total | Hit Adv | Block Adv | Invulnerability | |
|---|---|---|---|---|---|---|---|---|---|---|---|---|---|---|
| - | - | Overhead | - | - | - | - | 5 | 10 | - | - | - | - | - | |
| ||||||||||||||
Command Normals
| Damage | Counter Dmg | Guard | G. Crush | Stun | Meter | Cancel | Startup | Active | Recovery | Total | Hit Adv | Block Adv | Invulnerability | |
|---|---|---|---|---|---|---|---|---|---|---|---|---|---|---|
| - | - | Low | - | - | - | - | 7 | 13 | 14 | 34 | SKD | -9 | - | |
|
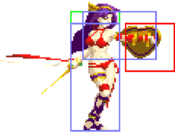
Athena's slide. The damage is very high, it knocks down, and it's great as a finisher for her short combos. You can use it to go under certain projectiles, too. Keep in mind this is punishable on block, however, and that there are frame differences between slide and Athena's normal cr.D, most notably the higher recovery and lower frame advantage. | ||||||||||||||
Throws
| Damage | Counter Dmg | Guard | G. Crush | Stun | Meter | Cancel | Startup | Active | Recovery | Total | Hit Adv | Block Adv | Invulnerability | |
|---|---|---|---|---|---|---|---|---|---|---|---|---|---|---|
| 24 | 24 | Throw | 0 | 0 | 0 | X | - | - | - | - | - | - | - | |
|
| ||||||||||||||
| Damage | Counter Dmg | Guard | G. Crush | Stun | Meter | Cancel | Startup | Active | Recovery | Total | Hit Adv | Block Adv | Invulnerability | |
|---|---|---|---|---|---|---|---|---|---|---|---|---|---|---|
| 0 | 0 | Mid | 0 | 0 | 0 | X | - | - | - | - | - | - | - | |
|
| ||||||||||||||
Special Moves
Some of her Special Moves are really easy to block due to many of them having predictable patterns or for having very long startup. This doesn't make all of them completely useless, though using them wisely is very tricky to get the hang of.
| Version | Damage | Counter Dmg | Guard | G. Crush | Stun | Meter | Cancel | Startup | Active | Recovery | Total | Hit Adv | Block Adv | Invulnerability |
|---|---|---|---|---|---|---|---|---|---|---|---|---|---|---|
| qcf A | - | - | Mid | - | - | - | - | - | - | - | - | - | - | - |
|
Athena summons a Lion and it throws some fast fireballs that can negate normal projectiles. In the A version, the lion throws 2 fireballs, and in the C version, it throws 3 fireballs or more. Athena can be hit while she is getting up in the lion. The mouth of the lion can hit your opponent too, and you can max cancel this move if this happens (No, you can't combo). This move is very bad due to the slow startup (Where she jumps on the lion), and the opponent can GCFS it with ease, but Athena is totally invincible after she jumps. When she recovers though, if the opponent is able to dash in, it's pretty much a free punish due to the awful recovery of it. It can be used to force chip damage to close out a round though, force a guard break, or even force a time out. If Athena is in Max Mode, she can also Max Cancel the recovery into her Wave Attack as a mixup, that leaves her invincible during the transition, thus punishing players for getting cocky. This too though, can be read and if the Wave is blocked, either way Athena is getting punished. | ||||||||||||||
| Version | Damage | Counter Dmg | Guard | G. Crush | Stun | Meter | Cancel | Startup | Active | Recovery | Total | Hit Adv | Block Adv | Invulnerability |
| qcf C | - | - | Mid | - | - | - | - | - | - | - | - | - | - | - |
| Damage | Counter Dmg | Guard | G. Crush | Stun | Meter | Cancel | Startup | Active | Recovery | Total | Hit Adv | Block Adv | Invulnerability | |
|---|---|---|---|---|---|---|---|---|---|---|---|---|---|---|
| - | - | Mid | - | - | - | - | - | - | - | - | - | - | - | |
|
Athena's "Animal Summon" move with the best startup. She will become a mermaid, and will slap the opponent 9 times if it wasn't blocked. There's no difference between the two versions. Good to use on the opponent's wakeup, as an anti-air or even as an invincible reversal, but just like any of her other moves, it's easy to GCFS, and leaves her wide open for a punish on block. Great damage. While you can Max Cancel from the lion into this move, you cannot Max Cancel this move at any point, so be careful about using it. | ||||||||||||||
| Damage | Counter Dmg | Guard | G. Crush | Stun | Meter | Cancel | Startup | Active | Recovery | Total | Hit Adv | Block Adv | Invulnerability | |
|---|---|---|---|---|---|---|---|---|---|---|---|---|---|---|
| - | - | Mid | - | - | - | - | - | - | - | - | - | - | - | |
| ||||||||||||||
| Damage | Counter Dmg | Guard | G. Crush | Stun | Meter | Cancel | Startup | Active | Recovery | Total | Hit Adv | Block Adv | Invulnerability | |
|---|---|---|---|---|---|---|---|---|---|---|---|---|---|---|
| - | - | Mid | - | - | - | - | - | - | - | - | - | - | - | |
|
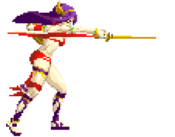
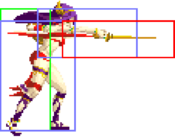
Great move against tall crouching hurtbox characters like Demitri and Red Arremer. But even as a punish tool against anyone else, the damage is amazing, and is practically impossible to GCFS. There's no difference between the two versions. It's very fast and good for punishing most projectiles, but Athena is not at all invincible during the move. Forced trades can happen or just a well timed attack because of carelessness from the Athena player. The usefulness of this move is also reduced against characters with low crouching hitboxes because it will completely whiff against them. The move is in fact an unblockable move... but only if the opponent blocks standing. If the opponent is Demitri and they block low, while they will still get hit by the arrow, it will only deal chip damage instead. In other words there is zero reason to block high. | ||||||||||||||
| Damage | Counter Dmg | Guard | G. Crush | Stun | Meter | Cancel | Startup | Active | Recovery | Total | Hit Adv | Block Adv | Invulnerability | |
|---|---|---|---|---|---|---|---|---|---|---|---|---|---|---|
| - | - | Mid | - | - | - | - | - | - | - | - | - | - | - | |
| ||||||||||||||
Exceed
| Damage | Counter Dmg | Guard | G. Crush | Stun | Meter | Cancel | Startup | Active | Recovery | Total | Hit Adv | Block Adv | Invulnerability | |
|---|---|---|---|---|---|---|---|---|---|---|---|---|---|---|
| 108? | 108? | Mid | 0 | 0 | 0 | X | - | - | - | - | HKD | - | - | |
| ||||||||||||||
Strategy
Basic Strategy
Athena's Gameplan
Athough Athena has damaging normals, she is a zoning glass cannon. Her Summon Specials can make her almost invincible, unless the opponent blocks it and, in some cases, they can quite easily punish her with a GCFS that's not difficult to time. If you need an anti-air, just do a cl.C or qcf K. If you need to punish, all she really has are her anti-airs or her very basic combos. While her Exceed also makes for a great punish, especially as an anti-air, you need to be careful not to do it too late or else it will whiff/be blocked, and thus you have just lost it. When it comes to characters with large crouching hitboxes like Demitri, Genjuro and Red Arremer, her arrow charge special is quite useful as although it's not unblockable, their crouch height means they'll still be stuffed by it for some pretty good chip damage, aside from being a good punish tool in some situations. Do be careful still though, since she's not invincible during the move, so it is possible to fight back against it. Of the summons Athena has, the Lion is not as threatening as he appears. The startup is almost completely invincible and has its own hitbox, but the recovery is pretty lengthy giving the opponent enough time to approach. The only real mixup you have is changing how many fireballs the lion throws out, but anyone with an ounce of patience will see through it. It's useful for forcing a guard break though, and if you need the emergency chip damage to close out the round. The lion is hard to use otherwise. Athena's qcf K is a great anti-air to catch jump ins, and you can Max Cancel from the lion into it to make lion recovery safe, but if blocked, Athena is wide open for any sort of punish, so never use it willy nilly. Her beetle charge lets her be fully invincible, but it's not terribly useful. Mostly just there to shrug people off since they likely won't expect it. Whatever you do, don't summon the parakeet. It is arguably the worst special move in the game, and is extremely easy to punish. Against anyone who knows the matchup, they will never fall for it. Otherwise, when just moving about in neutral, her C buttons are useful for midranged pokes, her D buttons are useful for getting her BnB combos going. Her A and B buttons are pretty forgettable, unless you need cr.B to shrug people off. Lastly, since Athena hardly ever uses her meter, this is one character where Blowback is very useful. She has nothing else to spend it on, so why not? It'll give her breathing room to try and be annoying again, at least.
A glitch with EQ
Yeah, a glitch for one character. It's a little easy to do in a real match, it just depends of your opponent. Just wait for him to do a Fat Copy (That move where he warps and goes above you). Now, time well, and do a QCF+K when he's near from you. He will stop in a hitstun animation, and he'll be open for ANY combo after it, or you can even use it to confirm the Exceed! (And the combo counter will say "02 hits" forever. Oh yeah, you can just wait for a time over if you're with a life advantage too, which will probably make him ragequit). A video with an example is here (Just jump to 0:15, but in the beginning of the video, you'll see two more Athena glitches). (Note: The glitch works while EQ is on the corner, and Athena near from him, but I'm sure that it works on midscreen too, I just need to prove it.)
Advanced Strategy
While Athena may be easy to play and learn, actually getting a grasp of what you should be doing with her is another story. As mentioned in the basics, her parakeet is useless, and her beetle summon is just kinda there. All that leaves you with is her lion, wave attack and her arrows for specials, and her heavy buttons. The only optimal zone to use Athena's lion is from fullscreen as that makes it significantly harder for the opponent to punish it, but even from midscreen they will have just enough time to punish Athena upon recovery, assuming they do a successful GCFS followed by some extra dashing. It can punish hard reads, but it's unlikely to happen. Her wave attack is to never be used point blank range or even on the ground unless you have a hard read. Only use it for when the opponent is in the air otherwise, albeit it is invincible. Ideally, you should also never use her arrows unless those too are from fullscreen, due to being unsafe. So what does that leave Athena with in neutral if there's no good chance for her to use her specials? Her heavy buttons. Jump C and Jump D are her only meaningful jump-ins, but even these are risky since the range is quite short for jump-ins. It doesn't take much for the opponent to at the least force a trade. For the rare instances she actually needs to use GCFS herself, she can punish many things with her st.D > df.D combo, which is way safer than any of her summons are while still doing good enough damage. Standing C and Crouching C are useful if you need the quick midrange poke to keep the opponent in check.
Athena, as you probably already know, is a knowledge check character. Either she blows up the other player, or they blow her up. Even if you're better than the other player while using Athena, her average damage output still requires you poke at the opponent several times, unlike most of the other characters who, even with basic combos, can mop Athena's health away. For example, say Athena is against Kyo, and he does a successful GCFS against her, then he has plenty of time to do a very simple combo: st.C > QCF + DD > QCB~HCF + P, thus removing a little more than a third of Athena's health. For Athena, it would take 2-4 hits for the same result against Kyo. The problem most Athena players have is the lack of patience, or carelessness. Especially if they fight someone and they win from spamming her summons, they get the idea that this is all Athena is and thus, she's a win button for little work. This is not at all the case. Competent players will call Athena out for anything unsafe she does, and if they have the life lead, they are effectively in control since now Athena is the one who has to approach them to open them up, not the other way around. Being able to huard break with her lion summon can help a little as it'll eventually force the opponent to start acting again, because otherwise they're sitting there and eating both chip and guard damage. It's still risky, though. Against rushdown/close up characters, Blowback is a very useful resource for Athena to spend by helping her knock the opponent across the screen and allowing her to potentially reassert her screen presence. Against zoners, Athena is definitely fighting an uphill battle, being that many zoners can force trades or setups that Athena doesn't have much of an answer for. That, or they can force her to jump which leaves her with few options she can use.
Overall, Athena is a zoner who you must play with a hit and run mindset. She's absolutely not designed for close combat, but sitting in one spot and repeating the same moves over and over is also a death sentence for her in most matchups. Athena players need to be very deliberate about when they use each of her specials and how they approach the opponent, because one mistake can lead to her losing all of her momentum. It's hard to fight back though if the Athena player knows their matchups very well.
Match-Ups
Red Arremer
It doesn't look like it, but this matchup is actually in Athena's favor. There are three main reasons: First, Athena can always exploit the fact that RA cannot crouch with arrows. While he can still low block, it doesn't change the fact that he will always be hit by arrows on the ground and can only truly avoid them if he jumps. Even then, he's wide open during his summons so eating an arrow is not that difficult. Second, Athena's Exceed can effectively shut out RA from ever summoning bats at the risk of getting half his life bar deleted. Third, RA can's approach all that safely since Athena's Wave attack will anti-air him if he tries to jump in, on top of completely bypassing his minions. Her lion summon will be nullified by RA's zombie minion, making the lion significantly less useful, though. RA can also still force trades with smartly timed summons, and if all else fails he has his fireballs. Though with Athena still being quite effective even from fullscreen away, RA has practically zero chance of setting up a combo on Athena unless the planets align. The RA player will have to force Athena into opening herself up, either by forcing Athena to approach or approaching Athena himself. But unlike RA, Athena has at least a couple more useful normals, so RA still has to try and fight from a distance, or wait very patiently for poking opportunities.
Combos
| SVC Chaos: SNK VS Capcom Quick Combo Notation Guide | |
|---|---|
May change to numpad notation much later down the road. | |
| Combo | Position | Damage | Stun | Difficulty | Notes |
|---|---|---|---|---|---|
| (j.X,) cl.D, df.D | TBA | TBA | TBA | TBA | Athena's BnB, and the only combo you'll probably ever use. Her best combo punish off of a GCFS, and it does pretty nice damage with a knockdown, but the rest of her combos are pretty much just for show. |
| cl.A x2, st.B | TBA | TBA | TBA | TBA | A simple and damaging Light Attack combo. Good if you're having trouble with the other combos. If you add a jump attack after the combo, the st.B will still hit the opponent, but the stab will not connect with the other moves. It can combo in the corner. (Someone please verify this English doesn't make sense, cannot tell what is trying to be said about "after the combo?" Also st.B is 6 frames startup, st.A is only +4, how is it a combo?) |
| (j.X,) cl.A, cr.C, df.D | TBA | TBA | TBA | TBA | Interesting combo. This is your main combo to punish your opponent too. It's very easy to do, the damage is very high, and you can followup with a Charge b, f+P if the opponent isn't a low crouching char on his/her wakeup, but the arrow setup is too risky to justify attempting it, plus if they know to block low, it's an easy punish for them. |
| (Earthquake only) cr.C, cl.D, df.D | TBA | TBA | TBA | TBA | This combo works against some characters while they are crouching and on the corner, and they are: Shiki and Hugo. The df.D part can hit the opponent, but cannot connect in: standing/crouching Genjuro, and crouching Tessa. If you're against EQ/other tall crouching characters, you can followup with a Charge b, f+P on wakeup, but you probably won't hit this if they attempt a reversal, or they know to just block low instead. |
| cl.D (Guard Crush), Exceed | TBA | TBA | TBA | TBA | Not a real combo, but it's a way to confirm the Exceed. |
