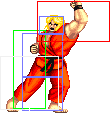
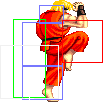
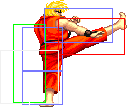
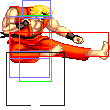
Street Fighter 2: Champion Edition/Ken

From SuperCombo Wiki
Street Fighter 2: Champion EditionSf2ce-logo.png
Street Fighter 2: Champion Edition#Game ElementsStreet Fighter 2: Champion Edition#Game ElementsStreet Fighter 2: Champion Edition#CharactersStreet Fighter 2: Champion Edition#System InfoStreet Fighter 2: Champion Edition#MiscellaneousStreet Fighter 2: Champion Edition#Basic StrategyMvC3HeaderButtons.png

Sf2ceKen.gif Attack me if you dare, I will crush you.

Introduction

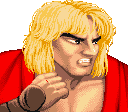
Ken is Ryu's best friend and rival. They trained in the same dojo under the same master's guidance so both have similar fighting techniques. However, while Ken and Ryu were pretty much the same in the World Warrior version, they're very different in Champion Edition and have distinct gameplay.

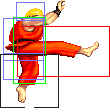
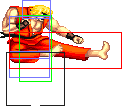
Compared to Ryu, Ken has a slower fireball, a faster and more efficient Shoryuken and a weaker Hurricane Kick. There are some differences regarding hitboxes, as for example the Hurricane Kick start up that has no invincibility. But the most interesting is the diagonal jumping HP, that has a smaller hurtbox making this one of the most important normal attacks on Ken's arsenal, with high priority. His Back Roll is good for putting adversaries on the corner from far distances. Also, due to his Shoryuken nature, Ken can't be safe jumped.

Color Options

Start Default
Ken-mp.gif Ken-old1.gif

Moves List

Normal Moves

  • Axe Kick: close, Hard Kick
  • Drop Knee: Light Kick in air
  • Arm Throw (Seoi Nage): close, b or f + Medium or Hard Punch
  • Back Roll (Tomoe Nage): close, b or f + Medium or Hard Kick

Special Moves

  • Fireball (Hadouken): d, df, f + Punch (slower than Ryu's)
  • Dragon Punch (Shoryuken): f, d, df + Punch (wider range than Ryu's)
  • Hurricane Kick (Tatsumaki Senpuu Kyaku): d, db, b + Kick

The Basics

  • Anti-Airs: Shoryuken, crouching High Punch, standing Hard Kick
  • High Pokes: standing Medium Punch
  • Low Pokes: crouching Medium Kick

Pros

  • Good Anti Air Special
  • Damaging 2-in-1s

Cons

  • Tatsumaki varies on revision
  • Bad projectile

Combos

  • cr.MK xx Hadouken or Shoryuken
  • s.HP xx Shoryuken (the third hit whiffs on Honda and Chun Li)
  • Diagonal Jumping HK s.HP xx Shoryuken (a.k.a. Touch of Dead or simply ToD)
  • cr.LP CPS1 Chain s.HP xx Shoryuken

Hitboxes

Standing Normals

  • Standing LP:
Damage 6 Sf2ce-ken-lp-s1.png Sf2ce-ken-lp-a.png Sf2ce-ken-lp-s1.png Sf2ce-ken-lp-r1.png
Stun 1~7
Stun Timer 40
Chain Cancel Yes
Special Cancel Yes
Frame Advantage +6
Frame Count 2 4 4 1
Simplified 1+2 4 5
  • Standing MP:
Damage 16 Sf2ce-ken-mp-s1.png Sf2ce-ken-mp-s2.png Sf2ce-ken-mp-a.png Sf2ce-ken-mp-s2.png Sf2ce-ken-mp-s1.png Sf2ce-ken-lp-r1.png
Stun 5~11
Stun Timer 60
Chain Cancel No
Special Cancel Yes
Frame Advantage +10
Frame Count 1 2 4 3 3 1
Simplified 1+3 4 7
  • Standing HP:
Damage 26 Sf2ce-ken-mp-s1.png Sf2ce-ken-mp-s2.png Sf2ce-ken-hp-a.png Sf2ce-ken-mp-s2.png Sf2ce-ken-mp-s1.png Sf2ce-ken-lp-r1.png
Stun 11~17
Stun Timer 80
Chain Cancel No
Special Cancel No
Frame Advantage -6
Frame Count 3 2 6 10 12 1
Simplified 1+5 6 23
  • Standing LK:
Damage 8 Sf2ce-ken-lp-s1.png Sf2ce-ken-lk-s1.png Sf2ce-ken-lk-a.png Sf2ce-ken-lk-s1.png Sf2ce-ken-mp-s1.png
Stun 1~7
Stun Timer 40
Chain Cancel Yes
Special Cancel No
Frame Advantage +3
Frame Count 3 3 8 4 1
Simplified 1+6 8 5
  • Standing MK:
Damage 16 Sf2ce-ken-lp-s1.png Sf2ce-ken-lk-s1.png Sf2ce-ken-mk-a.png Sf2ce-ken-lk-s1.png Sf2ce-ken-mp-s1.png
Stun 5~11
Stun Timer 60
Chain Cancel No
Special Cancel No
Frame Advantage +1
Frame Count 5 6 12 6 1
Simplified 1+11 12 7
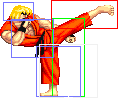
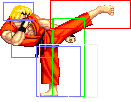
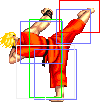
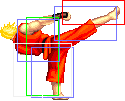
  • Standing HK:
Damage 22 Sf2ce-ken-hk-s1.png Sf2ce-ken-hk-a1.png Sf2ce-ken-hk-a2.png Sf2ce-ken-hk-r1.png Sf2ce-ken-hk-r2.png
Stun 11~17
Stun Timer 80
Chain Cancel No
Special Cancel No
Frame Advantage -2
Frame Count 2 4 8 10 7
Simplified 2+1 12 17

Close Standing Normals

  • Close Standing LP:
Damage 6 Sf2ce-ken-mp-s1.png Sf2ce-ken-cllp-a.png Sf2ce-ken-mp-s1.png
Stun 1~7
Stun Timer 40
Chain Cancel Yes
Special Cancel Yes
Frame Advantage +6
Frame Count 1+2 4 5
  • Close Standing MP:
Damage 16 Sf2ce-ken-mp-s1.png Sf2ce-ken-clmp-s.png Sf2ce-ken-clmp-a.png Sf2ce-ken-clmp-r1.png Sf2ce-ken-clmp-r2.png Sf2ce-ken-clmp-s.png Sf2ce-ken-mp-s1.png
Stun 5~11
Stun Timer 60
Chain Cancel No
Special Cancel Yes
Frame Advantage +2
Frame Count 1 2 2 6 4 3 4
Simplified 1+3 2 17
  • Close Standing HP:
Damage 26 Sf2ce-ken-clhp-s.png Sf2ce-ken-clhp-a1.png Sf2ce-ken-clhp-a2.png Sf2ce-ken-clhp-r.png Sf2ce-ken-mp-s1.png
Stun 11~17
Stun Timer 80
Chain Cancel No
Special Cancel Yes
Frame Advantage -8
Frame Count 3 2 6 10 13
Simplified 1+3 8 23
  • Close Standing LK:
Damage 8 Sf2ce-ken-mp-s1.png Sf2ce-ken-cllk-s1.png Sf2ce-ken-cllk-a1.png Sf2ce-ken-cllk-s1.png Sf2ce-ken-mp-s1.png
Stun 1~7
Stun Timer 40
Chain Cancel Yes
Special Cancel No
Frame Advantage +5
Frame Count 2 3 6 3 1
Simplified 1+5 6 4


  • Close Standing MK:
Damage 16 Sf2ce-ken-clmk-s1.png Sf2ce-ken-clmk-s2.png Sf2ce-ken-clmk-a.png Sf2ce-ken-clmk-s2.png Sf2ce-ken-clmk-s1.png Sf2ce-ken-mk-r1.png
Stun 5~11
Stun Timer 60
Chain Cancel No
Special Cancel No
Frame Advantage +6
Frame Count 2 1 6 4 4 1
Simplified 1+3 6 9
  • Close Standing HK:
Damage 24,6 Sf2ce-ken-mp-s1.png Sf2ce-ken-clhk-s1.png Sf2ce-ken-clhk-a1.png Sf2ce-ken-clhk-a2.png Sf2ce-ken-clhk-s1.png Sf2ce-ken-mp-s1.png
Stun 11~17
Stun Timer 80
Chain Cancel No
Special Cancel Yes/No
Frame Advantage +8
Frame Count 3 4 8 4 10 1
Simplified 1+7 12 11

Crouching Normals

  • Crouching LP:
Damage 6 Sf2ce-ken-crlp-s1.png Sf2ce-ken-crlp-a.png Sf2ce-ken-crlp-s1.png Sf2ce-ken-crlp-r1.png
Stun 1~7
Stun Timer 40
Chain Cancel Yes
Special Cancel Yes
Frame Advantage +6
Frame Count 2 4 4 1
Simplified 1+2 4 5
  • Crouching MP:
Damage 14 Sf2ce-ken-crmp-s1.png Sf2ce-ken-crmp-s2.png Sf2ce-ken-crmp-a.png Sf2ce-ken-crmp-s2.png Sf2ce-ken-crmp-s1.png Sf2ce-ken-crlp-r1.png
Stun 5~11
Stun Timer 60
Chain Cancel No
Special Cancel Yes
Frame Advantage +10
Frame Count 1 2 4 3 3 1
Simplified 1+3 4 7
  • Crouching HP:
Damage 22 Sf2ce-ken-crhp-s1.png Sf2ce-ken-crhp-a1.png Sf2ce-ken-crhp-a2.png Sf2ce-ken-crhp-r1.png Sf2ce-ken-crhp-s1.png Sf2ce-ken-crhp-r2.png
Stun 11~17
Stun Timer 80
Chain Cancel No
Special Cancel Yes,No
Frame Advantage -11
Frame Count 3 3 8 10 12 1
Simplified 1+3 11 23
  • Crouching LK:
Damage 6 Sf2ce-ken-crlk-s1.png Sf2ce-ken-crlk-a.png Sf2ce-ken-crlk-s1.png Sf2ce-ken-crlp-r1.png
Stun 1~7
Stun Timer 40
Chain Cancel Yes
Special Cancel Yes
Frame Advantage +6
Frame Count 2 4 4 1
Simplified 1+2 4 5
  • Crouching MK:
Damage 14 Sf2ce-ken-crlk-s1.png Sf2ce-ken-crmk-s1.png Sf2ce-ken-crmk-a.png Sf2ce-ken-crmk-s1.png Sf2ce-ken-crlk-s1.png Sf2ce-ken-crlp-r1.png
Stun 5~11
Stun Timer 60
Chain Cancel No
Special Cancel Yes
Frame Advantage +6
Frame Count 1 2 6 4 4 1
Simplified 1+3 6 9
  • Crouching HK:
Damage 22 Sf2ce-ken-crhk-s1.png Sf2ce-ken-crhk-a.png Sf2ce-ken-crhk-r1.png Sf2ce-ken-crhk-r2.png Sf2ce-ken-crhk-r3.png
Stun 11~17
Stun Timer 80
Chain Cancel No
Special Cancel Yes
Frame Advantage +2
Frame Count 3 6 6 8 11
Simplified 1+3 6 25

Aerial Normals

  • Neutral Jumping LP:
Damage 10 Sf2ce-ken-njlp-s1.png Sf2ce-ken-njlp-a.png
Stun 1~7
Stun Timer 40
Frame Count 2
  • Diagonal Jumping LP:
Damage 8 Sf2ce-ken-njlp-s1.png Sf2ce-ken-djlp-a.png
Stun 1~7
Stun Timer 40
Frame Count 2
  • Neutral/Diagonal Jumping MP:
Damage 16 Sf2ce-ken-jmp-s1.png Sf2ce-ken-jmp-s2.png Sf2ce-ken-jmp-a.png Sf2ce-ken-jmp-s2.png Sf2ce-ken-jmp-r1.png Sf2ce-ken-jmp-r2.png Sf2ce-ken-jmp-r3.png
Stun 5~11
Stun Timer 50
Frame Count 2 2 20 4 4 4
Simplified 4 20
  • Neutral Jumping HP:
Damage 24 Sf2ce-ken-jmp-s1.png Sf2ce-ken-jmp-s2.png Sf2ce-ken-njhp-a.png Sf2ce-ken-jmp-s2.png Sf2ce-ken-jmp-r1.png Sf2ce-ken-jmp-r2.png Sf2ce-ken-jmp-r3.png
Stun 11~17
Stun Timer 60
Frame Count 2 2 20 4 4 4
Simplified 4 20
  • Diagonal Jumping HP:
Damage 22 Sf2ce-ken-jmp-s1.png Sf2ce-ken-jmp-s2.png Sf2ce-ken-djhp-a.png Sf2ce-ken-jmp-s2.png Sf2ce-ken-jmp-r1.png Sf2ce-ken-jmp-r2.png Sf2ce-ken-jmp-r3.png
Stun 11~17
Stun Timer 60
Frame Count 2 2 8 4 4 4
Simplified 4 8
  • Neutral Jumping LK:
Damage 10 Sf2ce-ken-njlk-s1.png Sf2ce-ken-njlk-a.png Sf2ce-ken-jmp-r1.png
Stun 1~7
Stun Timer 40
Frame Count 3 40
  • Diagonal Jumping LK:
Damage 8 Sf2ce-ken-djlk-s1.png Sf2ce-ken-djlk-s2.png Sf2ce-ken-djlk-a.png
Stun 1~7
Stun Timer 40
Frame Count 2 3
Simplified 5
  • Neutral Jumping MK:
Damage 16 Sf2ce-ken-njlk-s1.png Sf2ce-ken-njmk-a.png Sf2ce-ken-jmp-r1.png Sf2ce-ken-jmp-r2.png Sf2ce-ken-jmp-r3.png
Stun 5~11
Stun Timer 50
Frame Count 5 13 6 6
Simplified 5 13
  • Diagonal Jumping MK:
Damage 16 Sf2ce-ken-djlk-s1.png Sf2ce-ken-djmk-s2.png Sf2ce-ken-djmk-a.png Sf2ce-ken-djmk-s2.png Sf2ce-ken-jmp-r1.png Sf2ce-ken-jmp-r2.png Sf2ce-ken-jmp-r3.png
Stun 5~11
Stun Timer 50
Frame Count 2 3 13 3 3 3
Simplified 5 13
  • Neutral Jumping HK:
Damage 24 Sf2ce-ken-njhk-s1.png Sf2ce-ken-njhk-a1.png Sf2ce-ken-njhk-a2.png Sf2ce-ken-njhk-r1.png Sf2ce-ken-njhk-r2.png Sf2ce-ken-jmp-r1.png Sf2ce-ken-jmp-r2.png
Stun 11~17
Stun Timer 60
Frame Count 2 4 4 3 3 3
Simplified 2 8
  • Diagonal Jumping HK:
Damage 22 Sf2ce-ken-djlk-s1.png Sf2ce-ken-djmk-s2.png Sf2ce-ken-djhk-a.png Sf2ce-ken-djmk-s2.png Sf2ce-ken-jmp-r1.png Sf2ce-ken-jmp-r2.png Sf2ce-ken-jmp-r3.png
Stun 11~17
Stun Timer 60
Frame Count 2 3 7 3 3 3
Simplified 5 7

Throws

  • Normal Throw Boxes (←/→ + HP) and (←/→ + HK)
Damage 32 Sf2ce-ken-throw.png
Duration 130
Stun 7~13
Stun Timer 100
Range (from axis) 48
Range advantage 19

Special Moves

  • Hadoken: (↓↘→ + P)

Startup:

Sf2ce-ken-hdk-s1.png Sf2ce-ken-hdk-s2.png Sf2ce-ken-hdk-s3.png Sf2ce-ken-hdk-s4.png
Frame Count 2 7 2 1

Active:

LP version:

Damage 12 Sf2ce-ken-hdk-lp-a1.png Sf2ce-ken-hdk-lp-a2.png Sf2ce-ken-hdk-lp-a3.png Sf2ce-ken-hdk-lp-a4.png
Stun 13~19
Stun Timer 120
Frame Advantage -
Frame Count 1 1 2 2..
Simplified 40

MP version:

Damage 12 Sf2ce-ken-hdk-mp-a1.png Sf2ce-ken-hdk-mp-a2.png Sf2ce-ken-hdk-mp-a3.png Sf2ce-ken-hdk-mp-a4.png
Stun 13~19
Stun Timer 120
Frame Advantage -
Frame Count 1 1 2 2..
Simplified 40


HP version:

Damage 12 Sf2ce-ken-hdk-hp-a1.png Sf2ce-ken-hdk-hp-a2.png Sf2ce-ken-hdk-hp-a3.png Sf2ce-ken-hdk-hp-a4.png
Stun 13~19
Stun Timer 120
Frame Advantage -
Frame Count 1 1 2 2..
Simplified 40

Compared to Ryu's one, your Hadoken its nerfed cause it had the same damage from World Warrior, anyway still a good medium-large distance basic tool.

  • Shoryuken: →↓↘ + Punch

Startup:

Damage 32/32,16 Sf2ce-ken-srk-s1.png Sf2ce-ken-srk-a1.png Sf2ce-ken-srk-a2.png Sf2ce-ken-srk-r1.png Sf2ce-ken-srk-r2.png Sf2ce-ken-srk-r3.png
Stun 13~19
Stun Timer 120
Frame Advantage -11/-22/-33
Jab 4 4 14 6 11 5
Strong 4 4 22 6 14 5
Fierce 4 4 26 6 21 5

Ryu's one it still had the same vertical trajectory, now your Fierce version had a diagonal forward one that it had better anti air hitbox, its the 3rd best best anti air special after Guile's Flash Kick and Sagat's Tiger Uppercut, the only reason is the recovery frames and vulnerabilty.

Fortunately your 2-in-1 with a close Fierce along with a Jab Shoryuken one are an after a high stun probability for a redizzy

  • Tatsumaki Senpuu Kyaku: ↓↙← + Kick

Startup:

Damage 10 Sf2ce-ken-tsk-s1.png Sf2ce-ken-tsk-s2.png Sf2ce-ken-tsk-s3.png
Stun 13~19
Stun Timer 120
Frame Advantage -1
Frame Count 4 4 3

Active:

Sf2ce-ken-tsk-a1.png Sf2ce-ken-tsk-m1.png Sf2ce-ken-tsk-a2.png Sf2ce-ken-tsk-m2.png
Frame Count 1 1 2 2

Short: 2 Times
Foward: 3 Times
Rounhouse: 4 Times

Recovery:

Sf2ce-ken-tsk-r1.png Sf2ce-ken-tsk-r2.png Sf2ce-ken-tsk-r3.png Sf2ce-ken-tsk-r4.png
Frame Count 4 4 4 0

Buffed compared to Ryu's one, Ken Tatsumaki Senpuu Kyaku can multi hit and is a button dependant one, in the American first revision its an excellent knockdown mixup tool for crossover thanks for the corrupted hurtboxes, commonly is a strategy against Zangief and Sagat, but that is fixed in the Japanese and later revisions of the game,it's a good projectile spam punisher thanks for the invincible frames at startup as Ryu's one, it can be punished with a crouching medium body hit attack of course, but compared to Ryu's Ken is less riskful thanks for the long trajectory

Misc Animations

Walk back Neutral Walk Fwd Crouch
Sf2ce-ken-bwd.png Sf2ce-ken-cllp-n.png Sf2ce-ken-fwd.png Sf2ce-ken-cr-n.png
  • Standing reel:
Sf2ce-ken-reel1.png Sf2ce-ken-reel2.png Sf2ce-ken-reel3.png Sf2ce-ken-reel4.png
  • Standing gut reel:
Sf2ce-ken-gutreel1.png Sf2ce-ken-gutreel2.png Sf2ce-ken-gutreel3.png Sf2ce-ken-gutreel4.png
  • Crouching reel:
Sf2ce-ken-creel1.png Sf2ce-ken-creel2.png Sf2ce-ken-creel3.png
  • Dizzy:
Sf2ce-ken-dizzy1.png Sf2ce-ken-dizzy2.png Sf2ce-ken-dizzy3.png

Advanced Strategy

Ken isn't meant to be played defensively. The very nature of his moves doesn't allow him to sit on the corner and wait his opponent to make a mistake. Ken's ideal play area is the middle of the battle arena, half screen to close to his adversary. Ken will lose most of the fireball wars so don't engage them unless you're planning to get closer soon. Ken gameplay involves a lot of risk takings and most of time you'll try something that won't work at all. But remember: Ken has the most deadly combo in the game (the ToD) and it's easy to turn the tide once you connect it. Summing up: a ToD means a win, in most cases. Or, at least, an advantage that it's hard for your opponent to revert. Other good techniques are his footsies, pokes and cross ups. And don't be ashamed of being dirty because Ken has some tough adversaries like Ryu, Dhalsim, Blanka, Sagat and M.Bison (Dictator). Abuse the tick throws whenever possible.

It worths to mention that according the game version, Ken's Hurricane Kick works in different manners. USA and World have the "egg beater" Tatsu and catches the opponent on a whirlwind of kicks that can reach up to 9 hits if timed right. The Japanese version, however, doesn't have this feature, making Ken a slightly weaker char than his USA/World counterpart.

Match-Ups

Ken's match-ups according the "official" SF2CE Tier List:

  • against Ryu: 4
  • against Ken: 5
  • against Chun Li: 7
  • against E. Honda: 8
  • against Zangief: 5
  • against Blanka: 4
  • against Dhalsim: 3
  • against Guile: 4
  • against Balrog: 8
  • against Vega: 3
  • against Sagat: 3
  • against M. Bison: 4


Vs. Ryu

According to the Ryu player's style, this match can be more or less difficult for Ken. Ryu's Hurricane Kick can be used to trade hits with Ken's fireball for Ryu's advantage, so avoid throwing fireballs at short range. Work you way with footsies, jump Ryu's short ranged fireballs and punish with combos (jumping HP + LP/MP Shoryuken is a good option). Ken isn't as efficient as Ryu regarding fireball traps but with the right distance and pokes, you can corner Ryu and inflict chip damage until Ryu try to get away with his nasty Hurricane Kick. Tick throws and safe jumps can be used but with moderation.

Vs. Ken

Ken's slower fireball is an invitation for jump in and punish. But do it fast because the lightspeed Shoryuken may frustrate your plans. As against Ryu, be clever with your footsies and mixups, the LK Hurricane Kick being a good one. At the right range, it can trick your opponent into whiffed counter attacks. Punish dizzies with a ToD.

Vs. E.Honda

Not much of a problem, unless Honda corners you. So, don't allow this to happen. CE Honda has difficult avoiding fireballs, so make good use of them. Punish jump ins with MP or HP Shoryukens and you'll be fine. If cornered, try to counter throw (unlikely) or reversal. Honda's One Hundred Slaps can be countered with crouching LP or MP. The Sumo Headbutt is slow and doesn't offer much problem, being easily handled with fireballs, Shoryukens, standing MP/HP or even jumped if you're feeling utter lazy or compassionate.

Vs. Chun Li

Not much of a problem too, but the Ken player must be careful. Chun Li's speed and jumping throws can surprise you, so work your spacing. Chun Li don't have a huge attack arsenal but the jumping LK and MK have great priority and can trick Ken when she falls at the "wrong" side. Throw fireballs at medium distance until Chun jumps in, then counter with a Shoryuken (the HP one is the better option). Also, cross up attacks are a good option and you can choose between a combo or a throw, but beware: Chun Li's throws have good priority and you can be surprised with a counter throw. If cornered (gosh...) try a reversal. And one last advice: remember this Street Fighter version has a nasty "corner bug" so if Chun Li jumps at you when you're cornered, it may be necessary to block moving the joystick to the inverse direction.

Vs. Blanka

Ken must be defensive against Blanka, since Blanka's attacks are fast and have long reaching. Most of time, any jump in attack will be countered with a standing HP, since it has good priority. The best way to slay Blanka is knocking him down. Once he's laying on the ground, you can think about your next move which could be a meaty cross up or a tick throw. A cross up jump kick followed by a throw has a good chance of success, but don't abuse it. Also, Blanka is good for trying cross up combos, but remember: Blanka's Rolling Attack has reversal properties so you're always at a trade risk. Same for his Electric Thunder: a half-second jump delay and you'll land on 50.000 Volts. At far range, throw fireballs and wait until Blanka jumps in, so you can quickly jump with HK kick and counter his advance. The Electric Thunder can be stopped with a crouching HK sweep, but it won't work if you're too close. And if you absolutely need to jump towards him point blank, use the HP instead of HK, so at least you can get a trade. Fireball traps may be very effective against Blanka, but keep yourself at a safe distance since his limbs are far-reaching. As always, avoid being cornered.

Vs. Zangief

Keep yourself away from him, due to his SPD. Throw fireballs to induce Lariats, so you can jump at Zangief and pressure him with flying kicks or block strings. If you're fast enough, you can even try to sweep Zangief with crouching HK, but be warned that the Lariat range increases at each spinning. Eventually Zangief will try to jump at you. If you're feeling confident, Shoryuken him. If not, use the ordinary standing HK. It may trade hits, but you'll keep Zangief away, which is very important. As with Blanka, you can try some cross ups, but beware with reversal Lariats. When working your zoning, poke with standing/crouching MP and crouching MK. Zangief players love to tick throw with LPs and SPDs so learn to pull off your reversals right.

Vs. Guile

This is a tough one for Ken. Your better chance to win is avoiding being cornered (damn corner bug!) and work your spacing. Keep the fight at the middle of the battle field and don't engage in fireball wars with him. At good range, throw fireballs, wait until Guile jumps in and then HP Shoryuken him. At far range you'll whiff but at the "right" range, it will knock Guile down. Once he's laying on the ground, you can try cross ups but if the Guile player is good at reversals, you'll mostly fail. However, Guile is specially vulnerable to safe jumps so it's a good bet to pull off some. If you hit, combo. If you block his reversal Flash Kick, go for a crouching HK sweep, throw or Shoryuken, according the distance and/or range of the Flash Kick. In general, jumping at Guile is a bad idea but it can be done if you do it right after he throws a Sonic Boom, just remember to use the HP since Guile's crouching HP has absurd anti-air priority, reducing the chance of being hit or even trading. This match is a hit-and-miss game, so be prepared to some nasty surprises.

Vs. Dhalsim

The worst Ken match-up. Period. Every Dhalsim move seem to be programmed to counter Ken's ones. At far range, it's difficult to get closer to Dhalsim, so you may try to just walk towards him and, if you get lucky, hit his limbs with a jab Shoryuken, but it's a guessing game. Once you knocked Dhalsim down, go to the basic cross ups but be aware of Dhalsim's slides since they have anti-air properties. Practice your timing because it's hard to cross up Dhalsim (he may slide and catch you) but not impossible. Tick throw Dhalsim is a PITA, but it can be done. Use LP for ticking, since it seems to work better than LK (as stated on the ST wiki, don't be affraid of being cheap because you simply don't have too many choices against the Yoga Master). Poke him with crouching MK + fireballs and LP Shoryukens sparingly but again, it's a guessing game. When poking, beware of his Drill Kick because it's fast, has cross-up properties and is an annoying starter for thick throws and dizzying combos. Forget the Hurricane Kick: contrary to Ryu's case, it's pretty useless here. Fortunately, Dhalsim is not good at punishment, so you won't be in serious trouble in case you whiff an attack. And it worths to mention that Dhalsim has a high damage rate and "generous" hurtboxes which makes him a good candidate for ToD combos. In other words, dizzying him is almost synonym of victory.

Vs. Balrog (Boxer)

Boxer is one of the lower tiers in the game but it doesn't means it's an easy fight. His moves are fast and takes lots of energy. His TAP is a powerful attack and most of Boxer's punches can be comboed and have absurd dizzy/redizzy properties. For a start, wait until Boxer does something so you can work a counter attack. Most of time Balrog starts with a TAP (Turn Around Punch) so Shoryuken it (use the MP version). Also, you can jump backwards because it's a good idea to fight Balrog from distance but don't give him too much space. Don't be ashamed to throw fireballs since Balrog has difficult jumping them. Another Balrog tactic is induce the player to throw a fireball when he's near, so he can jump and start a combo that may define the round. So, when Boxer is near, stay tuned. Avoid fireball patterns and MP Shoryuken if he jumps. If he try to knock you down with crouching HK you can counter with crouching MP but don't abuse: at certain range, it will trade hits and you'll take more damage. Again, pay attention to TAPs and, if possible, jump away from Boxer's range. Use crouching HK sweeps to counter Dash Punches/Uppercuts (note: it won't work if you're playing the japanese CE version) but beware if the move starts from far away the screen, otherwise you'll whiff and be punished. Fireball traps works a lot against Balrog. If done right, he simply can't escape. If cornered, you must wait the right moment to throw a fireball and push him away. If you wait too long there's a good chance Balrog will just walk up and grab you or even worse: he may apply a Dash Uppercut that will purposely whiffs and grabs you in a fraction of second. Try to keep him away with crouching MPs and work your way out the corner. And don't try to cross up him: it's difficult to find the right distance and it's an invitation to Balrog to walk up and headbutt you.

Vs. Vega (Claw)

The problem here is Claw's speed. He walks and jumps very fast so Ken must be always ready for a Shoryuken or another counter measure. Shoryuken a jumping Claw isn't always possible but still it's your best bet. Pressure him with block strings until breaking his claw, which makes your life a lot easier. Jump at him always with HP (good priority against Claw) and continue to a ToD if possible. The Rolling C. Flash can always be countered with a well timed crouching HK or a reversal Shoryuken but don't abuse it, since it requires good timing for the move and a whiff mostly means a dizzy. And the Flying Barcelona Attack can be countered with a Shoryuken (if Claw is coming from far range) or standing HP (if Claw is right above you, often when fighting next to the corners). And speaking about corners: Avoid being trapped at them.

Vs. Sagat

Rule number one on fighting Sagat: don't be cornered. Rule number two on fighting Sagat: don't be cornered. Rule number three on fighting Sagat: If you're cornered, you're DEAD. Jokes aside, this is the golden rule about Sagat: if you're cornered, there's a 99% chance you won't be able to escape. A smart Sagat knows exactly how to set up a fireball trap that's almost no escape. So again, your ideal play zone is the middle of the stage. Don't even try to engage in fireball wars because it's a lost cause. And you can't jump at Sagat point blank, in case you didn't deduced it yourself. So, what to do? Simple! YOU must corner him. It's not that easy but most Sagats can't handle close combats. Sagat is tall and slow, so you must explore these elements. Pressure him with fireballs, wait until he jumps and punish him with a Shoryuken. If he keeps blocking, abuse the ship damage as long as you can. Alternate it with some MP and crouching MK pokes so the opponent will get caught in a guessing game. In case you knock Sagat down you can continue to pressure him with Hadoukens and chip damage but you can also show your enemy you're not feared of him walking towards Sagat and applying a string of crouching LK. If he blocks, continue and throw a fireball or even walk up and throws him. Repeat, but don't be repetitive. Mixup your resources and don't forget your Hadouken isn't as fast as Ryu's one so the fireball trap can be broken at any time.

The low Tiger Shot can't be jumped unless you jump before Sagat starts to throw the projectile. Otherwise you'll be punished with a Tiger Uppercut to a huge damage. At middle arena, work your pokes with crouching MK and fireballs but beware his Tiger Knee: it's fast and will mostly result in Sagat throwing you. Go for a crouching HK or if you have fast reflexes, throw him instead. If you're at a good energy advantage, just stay away, avoid his fireballs and wait until Sagat tries to come closer thus getting more exposed to your attacks.

Vs. M. Bison (Dictator)

Unlike Ryu, he is a bit fair air-to-air match up, Dictador commonly will wait your Hadoken to Super Stomp you, but you can punish his follow up with Shoryuken. Hurricane Kick is risky against him and can be beaten by Psycho Crusher, use it to approach him only wisley. You can punish Scicross Kicks with a simple crouching Jab and if Dictador slides and miss, its the best moment to punish him with your ToD Combo.

Shoryuken is your best special against Dictador, since you can start a round to get the first hit, and its useful against Psycho Crusher startup at close combat and also you need to be zoning at midscreen and don't beign cornered with block hits that can push you to the corner trap.

At long range combat is ok to spam some Hadokens randomly to keep him away, if Dictador use Psycho Crusher at that distance you can neutral jump or block as soon as possible and then use a Jab Shoryuken to punish it.


Game Navigation

General
Controls
Notation
HUD
Glossary
System
FAQ
Characters
Balrog (boxer)
Blanka
Chun-li
Dhalsim
E Honda
Guile
Ken
M. Bison (dictator)
Ryu
Sagat
Vega (claw)
Zangief