

Story
At the age of 5, Chun-Li saw her first Beijing opera, planting images of actors moving elegantly across the stage in her mind. Upon witnessing her father one day practicing his martial arts, those very same images came back to her, and she begged her father to teach her. Chun-Li's father would teach her a variety of Chinese martial arts, teaching her a style revolving around kicks with his renowned legs. These teachings would go on until his sudden disappearance.
Chun-Li would become a narcotics investigator at the age of 18 to both find her father and follow his footsteps. Despite hopes of reuniting with him, Chun-Li would learn of the worst possible outcome: Her father was dead, and the leader of the crime ring Shadaloo was responsible. After more investigation on her part, she would ultimately receive a direct invitation to the World Warrior tournament, hosted by Shadaloo, the ones responsible for her father's demise. Seeking revenge, Chun-Li gets ready to fight her way through the tournament...
Overview
Chun-Li was hit with a lot of nerfs, some fair and some unfair, in CE compared to her WW version, with not enough buffs or new tools to properly offset it. She already did less damage than the other chars in WW, but now her moves have "proper" hitboxes making them beatable by many characters, and the combo-oriented damage scaling of CE hurts her badly as she doesn't get her damage in through combos often. With poor anti-air moves (one of them is broken!), no Kikoken and a bad reversal, this turns her into what was likely meant to be a "hit and run" character into a low tier, only above Boxer. Fortunately, Chun-Li does have some useful tools that can be used in the same way as they are in ST (like Neck Breaker) that can make her annoying to deal with, and her throw game is very good. One bad mistake can cost you the round, but she does have a chance against the entire cast, provided you make the right decisions in a match.
Color Options
| Start | Default |
 |

|
Moves List
Normal Moves
- Heel Stomp: d + MK in the air
- Throw: close, b or f + MP or HP
- Air Throw: close, b or f + MP or HP in the air
- Chest Flip Kick: f + MK (close)
- Flipping Neck Breaker: f + HK (close)
Special Moves
- Lightning Kick: Kick button rapidly
- Spinning Bird Kick (a.k.a. SBK): d~u + Kick
The Basics
- Anti-Air: standing MP, MK or HK (very limited)
- High Pokes: standing MP, standing HP, standing MK
- Mid pokes: standing MP and HP.
- Low Pokes: crouching MK, crouching HK.
Pros
- Great Air normals, and strong low pokes.
- Some good ground normals, although not great damage
- Lightning Legs are great in neutral, stuffs pokes good
Cons
- Poor Anti Air Options
- Bad reversal
Combos
- j.HK, s.MP, s.HP or cr.HK or cr.MK
- j.MK, MK Lightning Kicks
- j.HP, HK Lightning Kicks
- j.MK/HP, cr.MK, s.MP
- j.HP, cl.HP, LK Lightning Kicks
Hitboxes
Standing Normals
- Standing LP:
| Damage | 4 |  |
 |
 |
 |

|
| Stun | 1~7 | |||||
| Stun Timer | 40 | |||||
| Chain Cancel | No | |||||
| Special Cancel | Yes | |||||
| Frame Advantage | +7 | |||||
| Frame Count | 2 | 2 | 4 | 3 | 1 | |
| Simplified | 1+4 | 4 | 4 | |||
A rapid-fire slap. It has good priority for dealing with moves like Honda's headbutt and Blanka's Roll, and even as a far-away anti-air.
- Standing MP:
| Damage | 12 |  |
 |
 |
 |

|
| Stun | 5~11 | |||||
| Stun Timer | 60 | |||||
| Chain Cancel | No | |||||
| Special Cancel | No | |||||
| Frame Advantage | +11 | |||||
| Frame Count | 2 | 2 | 4 | 3 | 1 | |
| Simplified | 1+4 | 4 | 4 | |||
It has awesome frame advantage and reach but unfortunately it only hits a ducking Dhalsim. Still a good high poke, it starts up faster than st.MK so you could use it for stuffing fireball startup or something.
- Standing HP:
| Damage | 16 |  |
 |
 |
 |
 |

|
| Stun | 11~17 | ||||||
| Stun Timer | 80 | ||||||
| Chain Cancel | No | ||||||
| Special Cancel | No | ||||||
| Frame Advantage | -1 | ||||||
| Frame Count | 2 | 3 | 6 | 10 | 7 | 1 | |
| Simplified | 1+5 | 6 | 18 | ||||
Chun-Li does a high-power punch. This is a key move because it's a good anti-air, has good startup, and is great at punishing things or stuffing/trading with high pokes. If you're feeling frisky, try stuffing fireballs with this.
- Standing LK:
| Damage | 8 |  |
 |
 |
 |

|
| Stun | 1~7 | |||||
| Stun Timer | 40 | |||||
| Chain Cancel | No | |||||
| Special Cancel | Yes | |||||
| Frame Advantage | +5 | |||||
| Frame Count | 3 | 3 | 5 | 4 | 1 | |
| Simplified | 1+6 | 5 | 5 | |||
Like st.MP, this too whiffs on most crouching opponents. In contrast, this move doesn't project her lowest hurtbox toward the opponent, which means it's less risky in footsies against characters with good sweeps. Useful for setting up frame traps. Because her hurtbox is where her leg is but the hitbox is not, sometimes you might want to try stuffing a poke with this kick and not st.MK.
- Standing MK:
| Damage | 12 |  |
 |
 |
 |

|
| Stun | 5~11 | |||||
| Stun Timer | 60 | |||||
| Chain Cancel | No | |||||
| Special Cancel | No | |||||
| Frame Advantage | +7 | |||||
| Frame Count | 3 | 3 | 5 | 4 | 4 | |
| Simplified | 1+6 | 5 | 8 | |||
A kick straight to the face. A mediocre anti-air, ok to counter some jumping attacks. Deceptively good range, making it useful to stuff fireball startups. It's a less risky move for stuffing them too than st.HP, because if they do a low poke when you expect a fireball, you'll avoid the poke due to your lower hitbox not shifting.
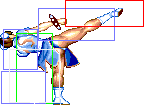
- Standing HK:
| Damage | 16 |  |
 |
 |
 |
 |

|
| Stun | 11~17 | ||||||
| Stun Timer | 80 | ||||||
| Chain Cancel | No | ||||||
| Special Cancel | No | ||||||
| Frame Advantage | +3 | ||||||
| Frame Count | 3 | 3 | 4 | 8 | 7 | 7 | |
| Simplified | 1+10 | 8 | 14 | ||||
A heavy kick to the face. Good anti-air, but takes a while to come out. Requires fast reactions. It's a risky but strong poke in footsies.
Close Standing Normals
- Close Standing LP:
| Damage | 8 |  |
 |
 |
 |

|
| Stun | 1~7 | |||||
| Stun Timer | 40 | |||||
| Chain Cancel | Yes | |||||
| Special Cancel | Yes | |||||
| Frame Advantage | +7 | |||||
| Frame Count | 3 | 2 | 3 | 4 | 3 | |
| Simplified | 1+2 | 3 | 7 | |||
A quick rapid-fire jab. Mainly used for combos and as a tick for characters who can't duck it. It does alright damage for a close jab, and sometimes this can trade as an anti-air in Chun's favor.
- Close Standing MP:
| Damage | 12 |  |
 |
 |
 |

|
| Stun | 5~11 | |||||
| Stun Timer | 60 | |||||
| Chain Cancel | No | |||||
| Special Cancel | No | |||||
| Frame Advantage | +13 | |||||
| Frame Count | 2 | 2 | 4 | 3 | 1 | |
| Simplified | 1+4 | 4 | 4 | |||
A punch with huge frame advantage. The huge frame advantage coupled with Chun's walking speed allows you to apply some nasty pressure. Mix them up with a throw or a low. You can also link into just about anything for combos. Also OK as a trade anti-air. Only Blanka can crouch under this, use Close Short for him instead.
- Close Standing HP:
| Damage | 16 |  |
 |

|
| Stun | 11~17 | |||
| Stun Timer | 80 | |||
| Chain Cancel | No | |||
| Special Cancel | Yes | |||
| Frame Advantage | -8 | |||
| Frame Count | 3 | 20 | 11 | |
A double open palmed strike. Cancels into Lightning Legs for awesome damage. You can also use this as a meaty for massive frame advantage, or for setting up frame traps. Otherwise, this move is pretty unsafe. This can usually work as a ground crossup if you're behind your opponent, but it's not very useful in that aspect.
- Close Standing LK:
| Damage | 8 |  |
 |
 |
 |

|
| Stun | 1~7 | |||||
| Stun Timer | 40 | |||||
| Chain Cancel | No | |||||
| Special Cancel | No | |||||
| Frame Advantage | +5 | |||||
| Frame Count | 3 | 3 | 5 | 4 | 1 | |
| Simplified | 1+6 | 4 | 5 | |||
A knee strike. Ok for ticking into throws, but you'd only want to use this against Blanka, for the other 11 characters Chun-Li has cl.LP for that. Does ok damage for a light.
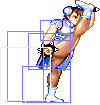
- Close Standing MK:
| Damage | 12 |  |
 |
 |
 |
 |
 |

|
| Stun | 5~11 | |||||||
| Stun Timer | 60 | |||||||
| Chain Cancel | No | |||||||
| Special Cancel | No | |||||||
| Frame Advantage | +6 | |||||||
| Frame Count | 3 | 3 | 3 | 6 | 3 | 4 | 1 | |
| Simplified | 1+6 | 9 | 8 | |||||
CAPCOM were geniuses and didn't realize the 4th frame was broken like in WW during development. So this move is trash and seemingly has no use, unlike HF, S, and X Chun who can use this normal as an anti-air, and for X Chun's case as a special cancel normal. The move being broken really hurts her anti-air game, as she has no good move to deal with jump-ins right above her.
- Close Standing HK:
| Damage | 16 |  |
 |
 |
 |

|
| Stun | 11~17 | |||||
| Stun Timer | 80 | |||||
| Chain Cancel | No | |||||
| Special Cancel | No | |||||
| Frame Advantage | -2 | |||||
| Frame Count | 3 | 3 | 6 | 8 | 11 | |
| Simplified | 1+6 | 6 | 19 | |||
Born2SPD wasn't in the dev room, so this move is trash and has no use just like in HF. Close Standing HP does the same damage but can special cancel into Lightning Legs letting it do far more damage than linking to this move ever will, and don't even bother trying to anti-air with this move, it can't be used for that purpose unlike S and X Chun who received a new normal. AVOID!!!
Crouching Normals
- Crouching LP:
| Damage | 6 |  |
 |
 |
 |

|
| Stun | 1~7 | |||||
| Stun Timer | 40 | |||||
| Chain Cancel | No | |||||
| Special Cancel | No | |||||
| Frame Advantage | +6 | |||||
| Frame Count | 2 | 2 | 4 | 4 | 1 | |
| Simplified | 1+4 | 4 | 5 | |||
A crouching punch with good priority, but it can't be mashed. As a tick, it's outclassed by Standing Strong and Crouching Forward, and against Blanka it's better to use Close Short instead. I struggle to think of a good use case off the top of my head, but this isn't really a BAD normal, maybe try throwing it out here and there in footsies. Just to let them know it's there.
- Crouching MP:
| Damage | 10 |  |
 |
 |
 |

|
| Stun | 5~11 | |||||
| Stun Timer | 60 | |||||
| Chain Cancel | No | |||||
| Special Cancel | No | |||||
| Frame Advantage | +11 | |||||
| Frame Count | 2 | 2 | 4 | 4 | 1 | |
| Simplified | 1+4 | 4 | 5 | |||
Far Standing Strong but crouching. Ok range and frame advantage, but the priority is much worse than Crouching Jab. It's not special cancellable either. Again, just throw it out here and there to try and stuff moves. Just to let them know you have it.
- Crouching HP:
| Damage | 16 |  |
 |
 |
 |

|
| Stun | 11~17 | |||||
| Stun Timer | 80 | |||||
| Chain Cancel | No | |||||
| Special Cancel | No | |||||
| Frame Advantage | -2/-1 | |||||
| Frame Count | 3 | 3 | 6 | 8 | 11 | |
| Simplified | 1+6 | 6 | 19 | |||
Crouching Strong but bigger. Good range and decent priority, but it's sluggish, you are very punishable if whiffed. Great for her combos, because unlike Crouching Roundhouse this will be enough to dizzy in her 3-piece combos if it hits, and also good as a mid poke. Use carefully.
- Crouching LK:
| Damage | 8 |  |
 |
 |
 |

|
| Stun | 1~7 | |||||
| Stun Timer | 40 | |||||
| Chain Cancel | No | |||||
| Special Cancel | No | |||||
| Frame Advantage | +7 | |||||
| Frame Count | 3 | 3 | 4 | 4 | 1 | |
| Simplified | 6 | 4 | 5 | |||
A low split kick. Good priority, and ok reach for a Crouching Short, but pretty slow, it's no shoto duck short. Works ok as an occasional tick. Does more damage than her crouching jab.
- Crouching MK:
| Damage | 10 |  |
 |

|
| Stun | 5~11 | |||
| Stun Timer | 60 | |||
| Chain Cancel | No | |||
| Special Cancel | Yes | |||
| Frame Advantage | +12 | |||
| Frame Count | 1+4 | 5 | 4 | |
Gives Guile's cr.MK a run for its money. One of the main reasons it's annoying playing against a competent Chun. Very spammable move. It has fast startup and recovery and good priority while active. Also, it has no pre-projected hurtboxes during startup or recovery, making it very hard to be beaten cleanly when playing footsies. Gives excellent frame advantage and can be linked into itself. Not sure how good it'd be as an anti-air though.
- Crouching HK:
| Damage | 14 |  |
 |
 |
 |

|
| Stun | 5~11 | |||||
| Stun Timer | 130 | |||||
| Chain Cancel | No | |||||
| Special Cancel | No | |||||
| Frame Advantage | -2 | |||||
| Frame Count | 3 | 3 | 6 | 8 | 11 | |
| Simplified | 1+6 | 6 | 19 | |||
Chun's sweep. Good range, useful for beating/trading with fireballs or even some lows, and a good punish in general. Just try not to whiff it, as it leaves Chun quite open. It also sets up a built-in safe jump against Sagat, and it will randomly also be a safe jump against Claw (sometimes Chun will land without hitting him).
Aerial Normals
- Neutral Jumping LP:
| Damage | 10 |  |
 |
 |

|
| Stun | 1~7 | ||||
| Stun Timer | 40 | ||||
| Frame Count | 3 | 3 | 2 | ∞ | |
| Simplified | 8 | ∞ | |||
It's alright to shield yourself from lower-priority attacks, but it's better to use nj.LK most of the time.
- Diagonal Jumping LP:
| Damage | 10 |  |
 |

|
| Stun | 1~7 | |||
| Stun Timer | 40 | |||
| Frame Count | 3 | 3 | ∞ | |
| Simplified | 6 | ∞ | ||
Aside from safe jumping, this move has no real use, I'd say it's outclassed by dj.LK.
- Neutral Jumping MP:
| Damage | 14 |  |
 |
 |
 |
 |
 |
 |

|
| Stun | 5~11 | ||||||||
| Stun Timer | 50 | ||||||||
| Frame Count | 3 | 3 | 2 | 16 | 2 | 3 | 4 | ∞ | |
| Simplified | 8 | 16 | ∞ | ||||||
Good priority, but aside from having double the active frames, Neutral Jump Fierce outclasses this if you want more damage, and Neutral Jump Forward outclasses this if you want active frames but with better priority. Not much use, again.
- Diagonal Jumping MP:
| Damage | 14 |  |
 |
 |
 |
 |

|
| Stun | 5~11 | ||||||
| Stun Timer | 50 | ||||||
| Frame Count | 3 | 3 | 8 | 3 | 4 | ∞ | |
| Simplified | 6 | 8 | ∞ | ||||
Good air to air, and good jump-in from the right range. Though Chun Li generally has better options.
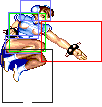
- Neutral Jumping HP:
| Damage | 16 |  |
 |
 |
 |
 |
 |
 |

|
| Stun | 11~17 | ||||||||
| Stun Timer | 60 | ||||||||
| Frame Count | 3 | 3 | 2 | 8 | 2 | 3 | 4 | ∞ | |
| Simplified | 8 | 8 | ∞ | ||||||
Great horizontal priority and reach, fantastic air to air, and works as an anti air in some situations if you react in time.
- Diagonal Jumping HP:
| Damage | 16 |  |
 |
 |
 |
 |

|
| Stun | 11~17 | ||||||
| Stun Timer | 60 | ||||||
| Frame Count | 3 | 3 | 8 | 3 | 4 | ∞ | |
| Simplified | 6 | 8 | ∞ | ||||
Like Diagonal Jumping Strong but with a better hitbox. Use this if you're going for her 3-piece dizzy jump-in combo. The hitbox means you can land behind the opponent, if you attack from the right angle, which can be useful.
- Neutral Jumping LK:
| Damage | 10 |  |
 |

|
| Stun | 1~7 | |||
| Stun Timer | 40 | |||
| Frame Count | 3 | 3 | ∞ | |
| 5 | 6 | ∞ | ||
Good priority, active until you land, beats a handful of moves, and is a great defensive tool.
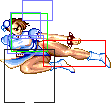
- Diagonal Jumping LK:
| Damage | 10 |  |
 |
|
| Stun | 1~7 | |||
| Stun Timer | 40 | |||
| Frame Count | 3 | 3 | ∞ | |
| 5 | 6 | ∞ | ||
Awesome priority for a jump in that's active until landing, Beats a ton of anti-airs, and good to bait DPs out of inexperienced shoots. Also good to use when jumping back for defense, or as an air-to-air
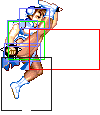
- Neutral Jumping MK:
| Damage | 12 |  |
 |
 |
 |

|
| Stun | 5~11 | |||||
| Stun Timer | 50 | |||||
| Frame Count | 3 | 3 | 16 | 3 | ∞ | |
| Simplified | 6 | 16 | ∞ | |||
Although it's not active until you land, it has awesome recovery. Beats a good amount of moves clean, and is a great air-to-air.
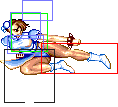
- Diagonal Jumping MK:
| Damage | 12 |  |
 |
 |
 |

|
| Stun | 5~11 | |||||
| Stun Timer | 50 | |||||
| Frame Count | 3 | 3 | 16 | 3 | ∞ | |
| Simplified | 6 | 16 | ∞ | |||
Has great priority, will beat pretty much any other air to air it'll encounter, even some anti-airs.
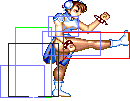
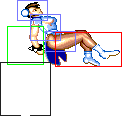
- Neutral Jumping HK:
| Damage | 16 |  |
 |
 |
 |
 |
 |
 |

|
| Stun | 11~17 | ||||||||
| Stun Timer | 60 | ||||||||
| Frame Count | 1 | 2 | 5 | 4 | 4 | 4 | 6 | ∞ | |
| Simplified | 3 | 13 | ∞ | ||||||
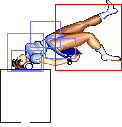
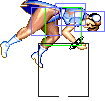
Hard KDs if it hits a grounded opponent. Essentially a jumping version of Chun's Flip Kick. This has a good horizontal range, and trades with or even beats most attacks if you time it right. It can also be used against grounded opponents on the way up. This doesn't require the opponent to be standing to be blocked, which is unique for an air normal (and bad for Chun). Awesome air-to-air normal too.
- Diagonal Jumping HK:
| Damage | 16 |  |
 |
 |
 |
 |
 |

|
| Stun | 11~17 | |||||||
| Stun Timer | 60 | |||||||
| Frame Count | 3 | 3 | 6 | 4 | 6 | 6 | ∞ | |
| Simplified | 6 | 6 | 4 | 6 | ∞ | |||
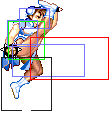
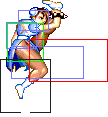
Can be a decent air-to-air or jump-in in some situations, just be careful as it leaves you quite vulnerable to the other player's air to airs, and their anti airs. Like dj.HP, you can angle it just right and end up on the other side as the opponent.
Unique Moves
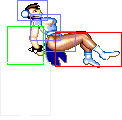
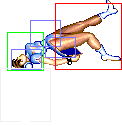
- Flip Kick: (On ground and close, ←/→ + MK)
| Damage | 14 |  |
 |
 |
 |
 |
 |
 |

|
| Stun | 5~11 | ||||||||
| Stun Timer | 40 | ||||||||
| Chain Cancel | No | ||||||||
| Special Cancel | No | ||||||||
| Frame Advantage | ? | ||||||||
| Frame Count | 2 | 2 | 5 | 4 | 4 | 4 | 6 | 29 | |
| Simplified | 1+4 | 13 | 39 | ||||||
Knocks down on hit. Haven't seen many CE Chuns use it, but it's not a bad move, just one you won't often find the opportunity to use. At least it works properly unlike X Chun.
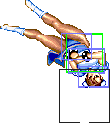
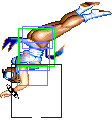
- Neck Breaker: (Close, ←/→ + HK)
| Damage | 14 |  |
 |
 |
 |
 |
 |
 |

|
| Stun | 5~11 | ||||||||
| Stun Timer | 40 | ||||||||
| Chain Cancel | No | ||||||||
| Special Cancel | No | ||||||||
| Frame Advantage | ? | ||||||||
| Frame Count | 4 | 4 | 5 | 6 | 7 | 8 | 2 | 14 | |
| Simplified | 1+36 | 14 | |||||||
This move is good for shenanigans, or to simply force the enemy to block on wake-up, as it can avoid many moves in that situation or even safe jump their reversal. It does high stun, but the timer bonus is very short, so odds are it will hit and dizzy, or the enemy will recover from any dizzy damage by the time he gets up again. It hits crossup depending on the timing, so you can use it as a loop as long as your opponent does not guard it. Despite Chun being airborne for the active part, it is treated like a ground normal, thus, in addition to standing block, it can also be crouch blocked, if chun lands the active part deep enough, then it has to be blocked low. This can also evade tick throws, since it puts Chun in an airborne state right from the first startup frame.
- Head Stomp: (On air, ↙/↓/↘ + MK)
| Damage | ? |  |
 |
 |
 |
 |
 |

|
| Stun | 5~11 | |||||||
| Stun Timer | 40 | |||||||
| Chain Cancel | No | |||||||
| Special Cancel | ? | |||||||
| Frame Advantage | ? | |||||||
| Frame Count | 1 | 2 | 16 | 8 | 4 | 5 | ∞ | |
| Simplified | 3 | 16 | ∞ | |||||
It is possible to use this move as an instant overhead. Simply jump and immediately do a head stomp, and the enemy will have to block high to avoid getting hit. You can use another headstomp after landing one, or throw out a different air normal. Do whatever is best in the situation. The move has "tripguard" as well.
Throws
- Koshuu Tou: (←/→ + MP or HP)
| Damage | 20+(4*n) | 
| |
| Duration | 130 | ||
| Stun | 5~11 | ||
| Stun Timer | 100 | ||
| Range (from axis) | 48 | ||
| Range advantage | 23 | ||
Her classic throw. There's nothing special to note about it in this game.
- Ryuusei Raku: (On Air ←/→ + MP or HP)
| Damage | 20+(4*n) | 
| |
| Duration | 130 | ||
| Stun | 7~13 | ||
| Stun Timer | 100 | ||
| Range (from axis) | 58 | ||
| Range advantage | 33 | ||
You normally get this on accident (unless you read your opponent well), but when you do get it it's a great air throw with good range.
Special Moves
- Hyakurretsu Kyaku: press any single Kick repeatedly
Startup:
 |

| |
| Short | 1 | 3 |
| Foward | 3 | 4 |
| Roundhouse | 4 | 6 |
Cycle:
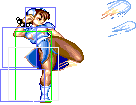
| Damage | 22/24/26 | 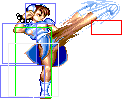 |
 |
 |
 |
 |
 |
 |

|
| Stun | 13~19 | ||||||||
| Stun Timer | 120 | ||||||||
| Frame Advantage | -7/-5/-6 | ||||||||
| Short | 4 | 4 | 4 | 4 | 4 | 4 | 4 | 4 | |
| Foward | 2 | 2 | 2 | 2 | 2 | 2 | 2 | 2 | |
| Roundhouse | 1 | 1 | 1 | 1 | 1 | 1 | 1 | 1 | |
Recovery:
 |

| |
| Short | 2 | 2 |
| Foward | 4 | 4 |
| Roundhouse | 6 | 6 |
Chun-Li unleashes her famous flurry of kicks at lightning speed. Continuing to mash the button after the move comes out will keep the move going indefinitely. Will never combo into itself. Once this attack hits, subsequent hitboxes will whiff until your opponent can block. Chun's legs are fully invulnerable, giving the move excellent priority, even able to beat Psycho Crusher if you're lucky. This move looks like Honda's Hundred Hands Slap but it works differently. The main advantage is that Chun Li's legs are fully invulnerable, thus giving the move priority over any attack that does not have a very long range. However, it has two disadvantages: it cannot be steered horizontally (as E.Honda can), and it demands five presses to come out, instead of just four. This makes it much harder to use in combos.
General Strategies Since your legs are invulnerable and your hurtboxes are moved backwards, this move will beat most other attacks in melee range. An important strategy is to use Lightning Legs to whiff punish attacks from afar, when your opponent is worried about throws, Strong punches, and Forward kicks. This move also works great as an okizeme option, provided you space your move properly to avoid a reversal. +9 on block if is blocked 3 times (point blank). +4 for 2 blocks.
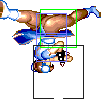
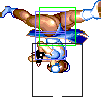
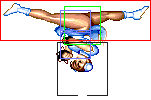
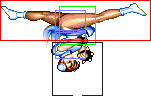
- Spinning Bird Kick: charge ↓, ↑ + Kick (charge 60f)
Startup:
| Damage | 24 |  |
 |
 |
 |
 |

| |
| Stun | 13~19 | |||||||
| Stun Timer | 120 | |||||||
| Frame Advantage | -6/-9/-11 | |||||||
| Frame Count | 1 | 4 | 3 | 2 | 3 | 4 | 6 | |
Active:
LK version :
 |
 |
 |
 |
 |
 |
 |
|
| 4 | 3 | 2 | 1 | 1 | 1 | 1 | 1 |
 |
 |
 |
 |
 |
 |
 |

|
| 2 | 1 | 2 | 2 | 3 | 4 | 4 | 2 |
MK version :
 |
 |
 |
 |
 |
 |
 |

|
| 4 | 4 | 3 | 3 | 2 | 2 | 1 | 1 |
 |
 |
 |
 |
 |
 |
 |

|
| 1 | 1 | 1 | 1 | 1 | 1 | 1 | 1 |
 |
 |
 |
 |
 |
 |
 |

|
| 2 | 1 | 1 | 2 | 2 | 3 | 3 | 4 |

|
| 2 |
HK version :
 |
 |
 |
 |
 |
 |
 |

|
| 5 | 4 | 4 | 3 | 3 | 2 | 2 | 2 |
 |
 |
 |
 |
 |
 |
 |

|
| 1 | 1 | 1 | 1 | 1 | 1 | 1 | 1 |
 |
 |
 |
 |
 |
 |
 |

|
| 1 | 1 | 1 | 1 | 1 | 1 | 1 | 1 |
 |
 |
 |
 |
 |
 |
 |

|
| 1 | 1 | 1 | 1 | 1 | 2 | 1 | 1 |
 |
 |
 |
 |
 |

|
| 2 | 2 | 3 | 3 | 3 | 3 |
Recovery:
Short:
 |
 |
 |
 |
 |
 |
|
| 2 | 3 | 2 | 2 | 3 | 3 | 1 |
Foward:
 |
 |
 |
 |
 |
 |
|
| 2 | 3 | 2 | 2 | 3 | 3 | 1 |
Roundhouse:
 |
 |
 |
 |
 |
 |
|
| 2 | 3 | 2 | 2 | 3 | 3 | 1 |
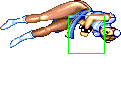
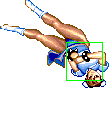
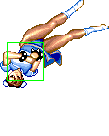
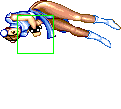
It's not a good reversal. You could throw this out at a far or medium distance option, but it's risky. Can be used for corner traps or as an anti crossups, and as an anti-air too if you read your opponent. Also possible to use as an anti-tick throw special since the startup is invincible, but not generally that good at being one. Also, because there's no hitbox for quite a while, you can be easily safejumped.
Misc Animations
| Walk back | Neutral | Walk Fwd | Crouch |
 |
 |
 |

|
- Standing reel:
 |
 |
 |

|
- Standing gut reel:
 |
 |
 |

|
- Crouching reel:
 |
 |
 |

|
- Dizzy:
 |
 |
 |

|
Advanced Strategy
Chun Li's game plan is about ground poking and air pressure. Her high jump arc doesn't afford her a good way to land in her devastating dizzy combo, so the best strategy for her is picking away the enemy life bar bit by bit, and punishing the opponent's mistakes. But this quickly becomes an issue when you realize the other characters in CE have much better reward for punishing your own mistakes, than you do for punishing theirs. If Chun Li unwisely tries to anti-air Ken's dj.HP, Ken could then TOD Chun Li easily and steal the round. If Chun-Li does a bad jump-in, Ryu and Ken can do a deep DP, taking off a massive chunk of her life, and hard KDing her allowing the Ryu/Ken good time to apply oki of their own (general oki in Ryu's case, or even Eggbeater Tatsu shenanigans for Ken's case). Chun-Li punishing a bad Ryu jump-in in comparison will dish out a small chunk of health, and not KD him. To make things worse, Chun Li's design has some critical flaws. She struggles with anti-airing on occasion, it's a bit difficult with her normal moves and specials (like her broken close st.MK, and bad SBK) and most of her moves have ridiculous random damage. For example: the crouching HK sweep can inflict "normal" roundhouse damage or can barely scrap the opponent's lifebar. Finally, Chun-Li is a fireball-less character in a game where fireballs are exceptionally strong, so she HAS to use her normals and speed to get in the hard way to have a chance at victory, there's no fireball to keep out characters or poke from afar. A good Chun-Li player has to be crafty and take calculated risks to win. If you play Cammy in Super Turbo, some of Chun-Li's struggles in SF2CE may feel familiar.
Her throw is pretty good and has average to long reach. And like Guile and Vega, she has an aerial version of the move, that can be used to surprise airborne enemies. Chun Li has one of the higher jumps in the game and this gives her an edge in air battles, not to mention she can bounce on the screen corner, a move that, if used wisely, can free her from corner traps. On the ground, her best bet is using medium attacks, especially cr.MK as a rudimentary zoning tool. This works against some foes, especially fireballers, because when timed right, the sweep can interrupt the fireball move. Same for cr.HK, although it exposes her to trades or counterattacks since it's a slow move and has a huge hurt box. Both moves allows "buffering" the Lightning Kicks and it's a good option select case. Her jumps are also a good way to surprise fireball chars because Chun Li can be really fast in her hops and may easily fall behind enemies which prompts a free throw most of times. And speaking about this: whiffs must be punished with throws. Trust Chun Li's speed and there you go. And since you're feeling confident, why not just walk up and throw your opponent point-blank? (but don't abuse it!)
The Lightning Kicks can be used to dissuade body attacks like Honda's Sumo Torpedo and Blanka's Rolling Ball Attack, or even low pokes like Guile's Cr.MK. Strangely, it can't reliably counter M.Bison's Psycho Crusher and trading hits are not rare. Also, the move is good to try and chip out opponents safely, especially ones without a reversal (or a vulnerable one), and even as a kind of reversal to avoid tick throws, although this would be a lucky case most of times.
Chun Li's air arsenal is something to remark. Her j.LK and j.MK have very good priority and can be used for feints, combos, crossups and throw loops. Same for the j.HP which has a great hitbox and is excellent as a combo starter. Her Head Stomp is efficient as a poke move but also as anti-body attacks (when timed right) and even as a ghetto hopkick (something that wouldn't be in Street Fighter until Super, when Guile's sobat kick is buffed to have a real use), although of course the problem is landing afterwards. And since Chun Li is able to do high jumps and crossups, don't be ashamed to abuse the corner bugs for an easy free dizzy. As always, avoid repetitive patterns and trick your opponent about your sequences.
Close combat is the most effective (unique?) strategy for Chun Li simply because she doesn't have any means to get closer to an opponent. Her only option is just walk up and try to reduce the opponent's playfield, poking with s.MP or cr.MK and sometimes suprising the adversary with a crossup jump. This can be very difficult, according to the opponent and according the life lead. Once you knockdown your foe, a good trick is to get closer and apply a succession of Flipping Neck Breakers. If timed right, it becomes a safe crossup attack and can fool most enemies into guessing which direction to block. And when blocked, you have an array of options like throwing, poking cr.MK+throwing, st.LP+throwing, etc. They can call you cheap as much as they want, but you don't have many other options.
The Spinning Bird Kick is a powerful move on paper, but it must be used very carefully since it's easy to counter and leaves Chun Li wide open (literally :P) to punishment. The move is invincible (and harmless) on the first frames and it may be good for evading corner traps, airborne enemies and pass-through fireballs, the LK variant is the most recommended. If it manages to hit, it does insane dizzy, which will make enemies who aren't aware easy to dizzy, and make aware enemies skittish of throwing out moves that could be countered (which then let's you walk up throw them :D).
Match-Ups
Chun Li's match-ups according the "official" SF2CE Tier List:
- against Ryu: 3
- against Ken: 3
- against Chun Li: 5
- against E. Honda: 4
- against Zangief: 4
- against Blanka: 3
- against Dhalsim: 6
- against Guile: 2
- against Balrog: 6
- against Vega: 5
- against Sagat: 6
- against M. Bison: 4
Vs. Ryu
1. Don't jump unwisely. 2. DON'T Jump towards him. 3. NEVER JUMP WITHOUT A REASON! Ryu's Shoryuken counters all your jump-in attempts easily, and it punishes HARD. You want to keep him poking on the ground instead. Use lots of forward kicks, standing or crouching, they're fast and it's hard to react to, especially good because they're low pokes in a game with few mids. You love strong lows right!?! These pokes will also hit Ryu out of his Hadouken startup, or trade if you're too late. Use your st.HK and st.HP if you're feeling confident for this purpose too, it is a big risk, but the high stun and damage (high damage at least for Chun) is useful. Even outside of stuffing Hadouken, the lower hitbox doesn't shift for st.MK and st.LK making them a good poke as you'll avoid his forcefield duck short. Speaking of which, if the Ryu ever starts panic spamming duck short predictably, use cr.HP to hit him out of it, it takes a bit of precision like Boxer knocking Blanka out of electricity, but it's doable. If you ever jump-in successfully with a jumping kick, spam out the Lightning Legs so that you can either chip him a tiny bit, or beat his reversal attempt. Another good way to counter his Hadouken is the roundhouse sweep. Time your attack just as he starts the motion. You will both get hit but he will be knocked down while you won't, giving you both a bit of distance, this is good at roundstart. Finally, Ryu is easier to safejump than Ken due to his 4f startup DP, so if you're feeling confident in yourself and you know the timing, try safe jumping him with a variety of normals (or Neckbreaker). You could try jumping at him from full screen or just a bit away from full screen, and it'll be hard for him to DP you out the air, he doesn't have as much reach as Ken does. Try tick-throwing Ryu with your close LP, it's great for that purpose and he might not react in time. Mix up your timing, even try faking a tick throw to bait out his DP. Then when he whiffs the reversal, punish with a throw. Predictively jumping in against Ryu's Hadouken to counter it from the air is very difficult.
Air Slam can be used in two very effective ways against Ryu.
1- When your opponent jumps in from a distance wait for them to start to decline then jump toward them and use the strong button right after you have left the ground.
2- If your opponent jumps over you at close range wait until they are right above you the jump straight up and come right up into them, use the strong button for an easy air slam. (it takes time to get the muscle memory for this, but it's worth it.)
Vs. Ken
1. Don't jump. 2. DON'T Jump towards him. 3. NEVER JUMP WITHOUT A REASON! If you dare to attack him from the air, Ken will CRUSH YOU!!! Worse still, Ken's Shoryuken starts up in 1f (safejumping is IMPOSSIBLE) and makes psychic DPing Chun Li's moves easier as well, and also has insane horizontal reach meaning that ONLY A BACKWARDS JUMP WOULD BE SAFE (and if you start it from far enough). Unless you know he can't counter your jump-in (or if the opponent isn't very good at DPing on reaction), NEVER JUMP IN on him recklessly. Thankfully, his slower Hadouken startup means that it's even easier to react to, use your normals to hit him out of it just like you would with Ryu's. The roundstart cr.RH trick is even easier on him because of this. Feel free to take the risk stuffing it with st.FP and st.HK. You want to play a strong ground game, while also making sure he can't jump-in. Jump and throw out a backwards dj/nj.MK/nj.HK when he tries to jump forward and attack you, maybe even jump forward and air slam him, because his dj.HP will stuff any antiair you have on the ground due to its awesome priority.
Vs. E.Honda
Your forward foot sweep is your main poke against Honda.
Being an air attacking character Honda's invincible headbutt can create problems. There is however a simple way around it. Jump in so that you fall through the back of him. As you fall through execute your jumping combo, this will knock him out of his super air defense for you are attacking from behind. Also any time he uses a fierce flying headbutt simply jump straight up and then throw him.
Vs. Chun Li
The key to fighting Chun is to neutralize your opponents ability to throw. This can be done by walking under them when they jump over you and simple hit the fierce button, the computer will turn you around automatically. Another good way to out throw her is to walk under and throw in the same direction you are already walking in, this saves you the time of trying to switch directions and throw. Finally if your opponent uses a lot of Chun's new neck kick, wait until she starts to flip over you then jump straight up and air slam her. (vega can also do this)
Vs. Blanka
Use lots of jab punches to keep his ball at bay. When attacking time your jumps so your foot (jab is best) barely hits him or he will fierce punch you out of the air. After your jab kick hits (even if he blocks) use the lighting kick to take off some energy. Your head stomp attack is best against Blanka for it will hit him out of anything. When you plan on using this move don't do it to soon our he can jump up and strike you. Finally when you use lots of head stomps your opponent may start blocking them. Don't worry you can still head stomp them out of a block. What you do is jump in and wait, you will start to fall through them, then right before you hit the ground head stomp, then hit the button again, and again. if you time it right you will staircase up your opponents body hitting them three or four times. A good way counter his jump attacks and get an almost guaranteed throw is to walk under him and as he goes over but before the computer turns you around use the flip kick (forward kick button), this will flip you backwards and land you right behind Blanka, then simply throw. Most players will be surprised by this to say the least. This can also be done to other characters but it works best on Blanka.
Vs. Zangief
A matchup that is winnable, but one mistake will cost you the round. Try to stay as ground based as possible when fighting Zangief. Your forward kicks and roundhouse kicks are you best attacks. When jumping in try to hit him in the middle top of his head otherwise he may airplane punch you out of whatever you use. A good attack to use is jump in roundhouse him in the head, whether he blocks or not keep hitting LK until the lightning feet appear, these will chip him out and prevent him from SPDing you during the startup. If tries to jump-in on you, react with st.MK, st.LP, or st.HK. st.MK is especially useful, it beats most of Zangief's jump-ins and starts fast enough that you can do it on reaction. nj.LK and nj.MK are very hard moves for him to deal with, as it beats all of his moves on the ground. nj.HK is also very hard for him to contest on the ground. You need to be airtight with all of this though. If you mess up, Zangief can get you in an inescapable SPD loop until you die, just like he can with Boxer. What keeps it winnable unlike for Boxer is that your normals are much better than Boxer's.
Vs. Guile
A really bad matchup, probably her worst besides the Shotos, Guile can just turtle passively waiting for you to make a move (or Sonic Boom you and force a jump) as you have no projectile in CE, and when you do jump, he can just flashkick your jump-ins. The biggest pain point, is that while Guile's got an amazing cr.MK and other awesome normals, you have cr.MK, a great normal, but nothing like the st.MP she has in ST (and Guile also got some nerfs on his most important moves in ST). Your ground normals do very little damage too, while his do more. cr.MK can be beat cleanly with cr.RH and cr.LK, provided it's timed right or you are in the right range. If you're man enough to fight with him, you could even go with a walk-up throw. cr.RH is preferable, the knockdown lets you get the chance to actually get towards him where he's in bigger danger. Jumping in on Sonic Booms is very tough due to the recovery being so short that unless he does it after you jump, even if you guess right he'll just block your attack or even counter with something like cl.MK. Obviously, you want him to block. From the right distance you can jump at him pretty safely after he throws a Sonic Boom. If you're at the max range for Chun's dj.MK, you can jump at Guile and he won't really be able to answer with anything, so he'll be forced to block it standing, meaning no Flash Kick... meaning you can start getting stuff going. After he blocks that dj.MK, you want to walk in and make him guess between a throw or a low move (preferably cr.MK). If you throw, meaty cr.forward to cr.Fierce can be useful. But if you guess wrong, flash kick will take a ton of your life. You basically never want to jump in on Guile, unless you see him throw a Sonic Boom. Headstomp can hit him out of many moves, but he can respond to it with his own jumping normals afterwards. You can try to interrupt his Sonic Boom startup by poking with st.MP or cr.RH, but it's a risky gamble. The best place to have Guile is in the corner, as when you have him cornered (especially in the opposite corner where you can abuse the corner bug), his flash kick can no longer work properly if you jump in with dj.MK/dj.LK. If you get a clean knockdown, go for the Neckbreaker! This is a very bad position for Guile to be in, especially if your opponent's not familiar with Chun's Neckbreaker nonsense. You can do a meaty Neckbreaker such that even if Guile reverses with a Flash Kick, Chun will be able to block in time, but if Guile doesn't reverse, he'll be forced to block, and then she gets a guessing game. Also, Chun can use it in a way that it crosses up, so he also has to know which way to block, which can be pretty hard. If you do the D/F+RH from point-blank range, it will cross-up. Otherwise, it's not a cross-up.
Vs. Dhalsim
Constant non stop attack is best against this yoga master. Your jump in jab kick is one of your best attacks especially when followed by the lighting kick. Beware if you use it to much he may start sliding on you and tripping you as you hit the ground. To get out of this you can either wait until your very close to the ground before you strike or more reliably head stomp. Also if you are to close for him to have time to throw a fireball execute a helicopter kick, he will have no choice but to duck. (if you use short ones you can lightning kick him after you land). st.MP hits a crouching Dhalsim, which is very important for this matchup as once you're close using it against him, he has no easy way to deal with it.
Vs. Boxer
CR.HK will knock him out of almost everything including his charging normals. Be careful of jumping in to much against a defensive Balrog because he can charging uppercut you almost all the time. All in all play him as you would Zangief. Also your neck kick is very hard for him to get out of.
Vs. Claw
Fight him much as you would another Chun. Watch out for his fake range and when you jump in try to land on his forward shoulder(anything further and you'll be stabbed, anything closer an he may walk under and throw you.) Pay close attention when he starts a wall attack if he tries to go off the wall behind you jump up and intercept him with an airslam. Don't use the neck kick to often for he can air throw you out of it.
Throws- the key to executing Chun's unrivaled ability to throw is timing the button. Wait until you are just about to land then hit the button and push the joystick back towards your opponent at the same time, time your button just as the joystick makes contact with the side of the joystick hole rarely will you lose.
Vs. Sagat
Like Dhalsim a constant attack is best against Sagat.
Your head stomp will knock him out of anything as will most of you other attacks if you time them right. An experienced and aggressive Chun Li shouldn't have much trouble with Sagat.
Your crouch Forward and Roundhouse are nice punishers against High shots, and the stomp for the Low ones,jump in attack only when you are in a medium distance and he shots you,Tiger Uppercut is the main risk if not.
Vs. Dictador
If you want to avenge your father,start the round with a jumping attack or throw him if the uses the Stomp and then play defensive against him, if you can for his air attacks almost always overpower yours. Chun Li only can be defeated easily with a Psycho Crusher wis spam.(She can S.B. Kick him through a fast on but this doesn't always work). Use lighting kicks after you attack to take as much extra damage as possible. And if he Psycho Crush you into a corner and jumps to avoid being thrown.
Scicross Kicks must be block and then punished with fast standing jab or strong,Air throw is useful against his Stomp,if you jumps try to attack with Roundhouse or Forward and if it blocked do a crouching Roundhouse to keep distance of him,and then block any of his special.
You can only do this if you jump in just as they start to stand up from being knocked down. You must time your jump so that as you come down your attack (a fierce punch) strikes them in the top of the head just as soon as he is graphically half way up. In other words you hit him in the top of the head just as he starts to STAND back up (make sure you wait for him to start to stand or your attack may go throw him and he will throw you). Use the standing fierce punch to knock him out of the DP and then follow it with a ducking strong punch, and a ducking forward sweep.
YES this will knock him out of a DP if you get the timing right and he is going for one..........!
